

Page 1

User Manual
- 1 -
4-PORT
NETWORK USB HUB
User Manual
Page 2

User Manual
- 2 -
Copyright Notice
Copyright Incorporated 2009. All rights reserved.
Disclaimer
Incorporated shall not be liable for technical or editorial errors or omissions contained
herein; nor for incidental or consequential damages resulting from furnishing this
material, or the performance or use of this product.
Incorporated reserves the right to change product specifications without notice.
Information in this document may change without notice.
Trademarks
Microsoft, Windows XP and VISTA are registered trademarks of the Microsoft
Corporation. All other brand and product names mentioned herein may be registered
trademarks of their respective owners.
Customers should ensure that their use of this product does not infringe upon any
patent rights. Trademarks mentioned in this publication are sued for identification
purposes only and are properties of their respective companies.
Page 3

User Manual
- 3 -
Table of Content
Introduction ..................................................................................................................................... 4
Features ......................................................................................................................... .................. 4
Specification …….………………………………………………………………………………5
Installation............................................................................................................................. .......... 6
Running Program ............................................................................................................................ 7
Main Dialog Box ..................................................................................................................... 8
Status of USB Server Hub and Devices ........................................... ... .................................... 9
Accessing a Device ....................................................................................................................... 14
Server Configuration ................................................................ ..... ... ..... ...... ..... ... ..... ..... ... ............. 16
Configuration with Web-based UI .............................................................. .......................... 17
Configuration with the Utility .................................................. ............................................. 25
Polling Interval .............................................................................................................................. 29
Language ............................................................................................................................. .......... 31
Search .................................................................................................................................. .......... 32
View .............................................................................................................................................. 33
Device Details ..................................................................................................................... .......... 35
Help -> About ............... ... ................................... .................................................................. ........ 37
Technical Support ............................................................................................................... .......... 38
Network Printer Wizard Quick Guide………………………………………….………………..38
Page 4

User Manual
- 4 -
Introduction
The revolutionary USB Server Hub utilizes technology that streamlines and enhances
functionalities between USB devices and multiple PCs. Current solutions from other
companies provide minimum functionalities at high costs. They use significant amounts
of resources and effort to achieve the required features, whereas the USB Server Hub
utilizes significantly less resources for more features. Most solutions allow printer-only
peripheral devices. However, USB Server Hub allows you to use a multifunction combo
device, such as a printer-scanner or printer-fax all-in-one! Another added benefit is that
you can connect multiple printers/scanners/faxes to the USB Server Hub. These are just
some of the features that make our product one of the standards today. The USB
Server application provides a user friendly interface between you and the USB Server
Hub, enabling you to monitor, manage and use the convenient and powerful functions
provided by USB Server Hub.
Features
The USB SERVER HUB is based on a high-performance processor architecture
allows you to share 4 USB devices among users on your network no matter what
you connected with wire or wireless router. It features four high-speed USB 2.0 ports
for simultaneous connection to the devices an RJ-45 port for connecting to a LAN. It
can support USB devices including multi-function printers, scanners, hard drives and
flash media readers. Installation and operation is quick and easy via a user friendly
application software utility.
Networking printer server sharing.
Controls USB 4 ports via user friendly application software.
Monitors USB devices status via application software.
Matrix USB ports sharing connection by multi-users.
Live device status monitoring via both application software or web browser.
Manages printing jobs by printer name instead of IP address.
Embedded USB 2.0 host controller and transceiver, totally compliance with
USB 1.1 / USB 2.0 (Hi-Speed) specification.
Embedded Ethernet 802.3/3u transceiver, compliant with 100BASE-TX and
10BASE-T PMD level standards.
Supports DHCP, configures IP Address automatically.
Supports LED indicators for USB devices connected and power-on.
Comply with Windows XP / VISTA.
Page 5

User Manual
- 5 -
Specifications
Specification
Model Number
Devices Connection 4 x USB 2.0 Ports
Host connection 1 x RJ 45
Connection Type Cable for Cat.5/ 5e / 6
Compliance with USB version USB 1.0 / 1.1 / 2.0
Ethernet Compliance
100BASE-TX and 10BASE-T PMD level standards
IP Address Setting Support DHCP ( Auto )
Max. Extend Distance 100 meter
LED Indicators USB x 4 Blue LED / Power x 1 Blue LED
Power Consumed 500 mA
Power Source External Power Adaptor DC 5V
System Requirement ( Suggestion )
XP System:
CPU: PIII 1.0 GHz equivalent or better
Memory: 512MB or more
VISTA System:
CPU: P4 3.0 GHz equivalent or better
Memory: 1GB or more.
Page 6
User Manual
- 6 -
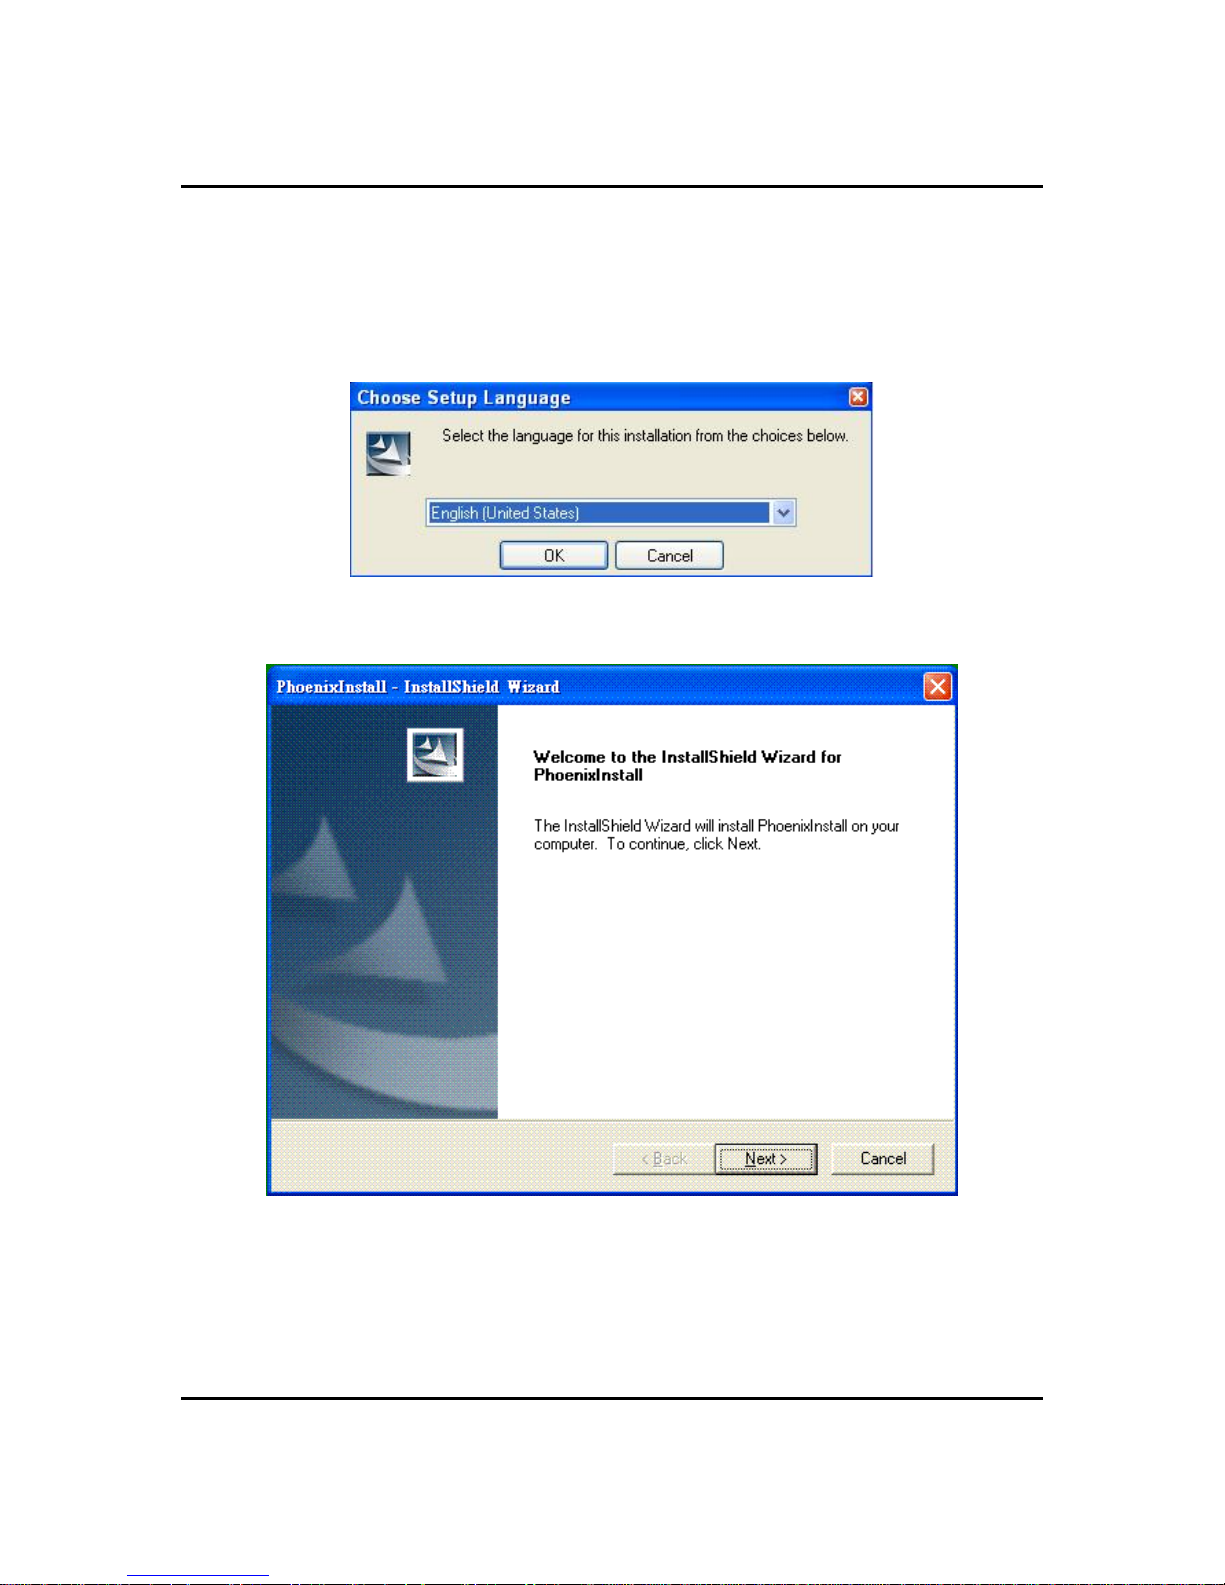
Installation
To install the USB Server Hub program, please double click the USB Server Hub setup
file. A dialog box should pop up to prompt you to choose desired installing language.
There are two choices: English and Traditional Chinese.
After choosing the language, click on OK. The InstallationShield Wizard will start
automatically.
Please follow the instructions of the wizard to complete the installation process.
Please reboot the system as requested by the installer when the process ends,
otherwise the software might not work properly.
Page 7
User Manual
- 7 -
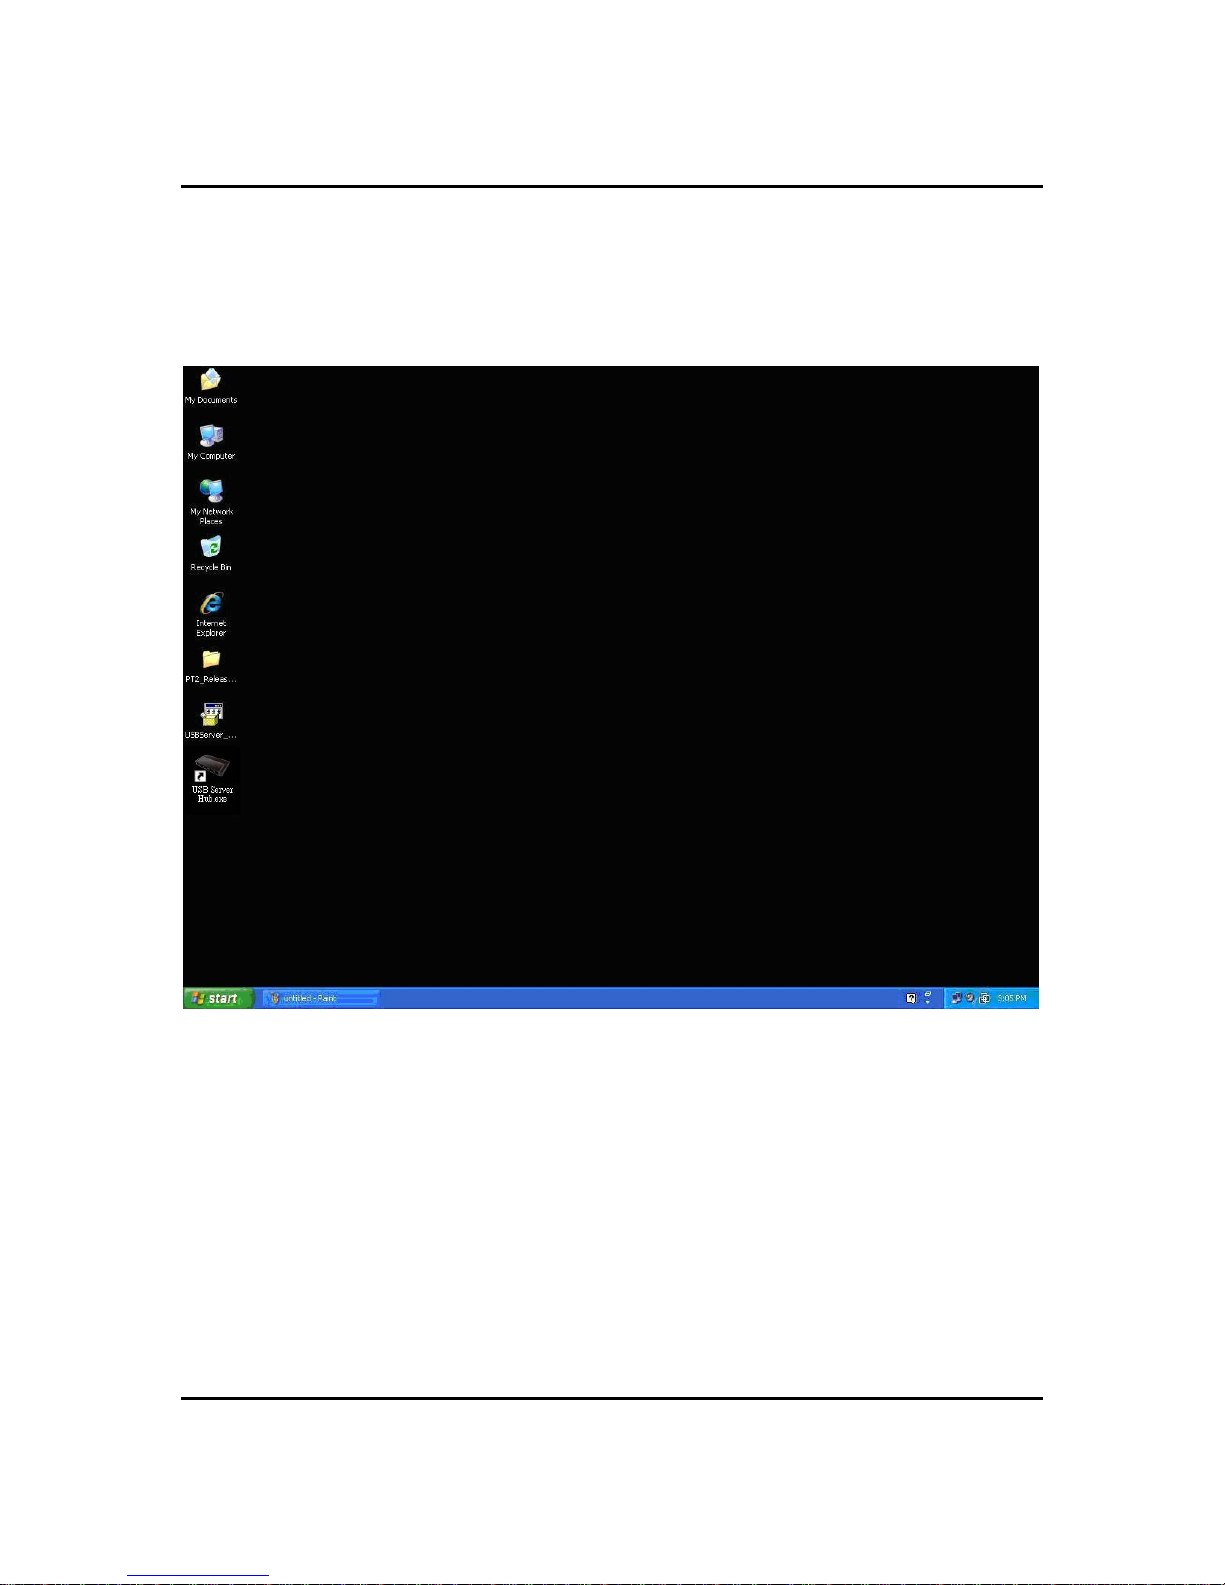
Running Program
To start the USB Server Hub program, please double click the shortcut icon of the USB
Server Hub on the Desktop.
This brings up the main dialog.
Page 8

User Manual
- 8 -
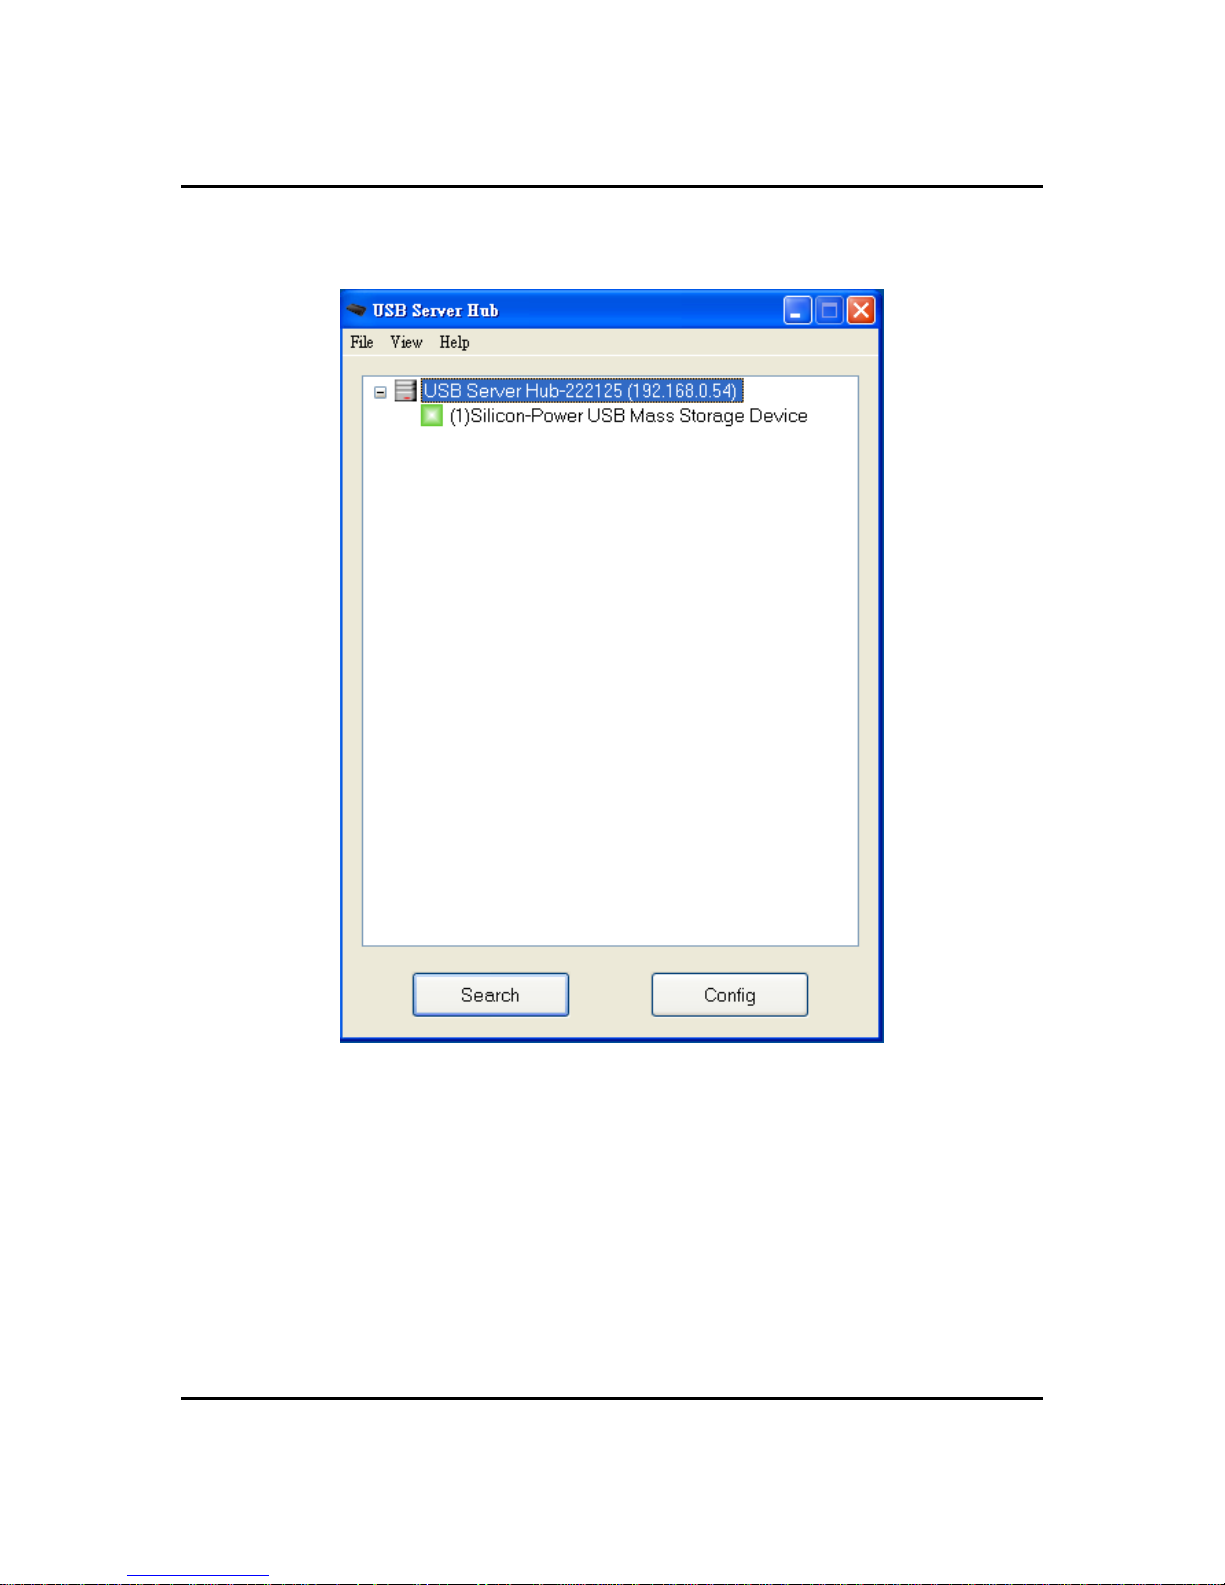
Main Dialog Box
The main dialog box of USB Server Hub is shown above. This is what you would see at
program start up. It is consisted of a Control Menu (File, View and Help), a tree view, a
Search button to get the current status of all USB Servers and devices on the network,
and a button that toggles between “Config.” and “Connect” depending on the node you
select on the tree view. It toggles to “Config.” when a server is selected on the tree view
and to “Connect” when a device is selected. The tree view displays the all the USB
Servers and devices your PC has access to.
Page 9

User Manual
- 9 -
Note: You will be allowed to set an alias name for each of the servers on for easy
recognition. The alias name with its IP address will be displayed on the tree view.
The way to set alias name will be described in the “Config.” section below.
Status of USB Servers and Devices
The tree view also tells you the status of all the USB Servers and devices that are
accessible to you. Each of USB Server is either accessible or inaccessible. An
inaccessible server is either disconnected from the network, powered off or suffers other
technical difficulties that prevent it from being accessed by your PC. Inaccessible server
will not show up on the tree view.
However, the devices have several kinds of demonstrated status:
Page 10
User Manual
- 10 -
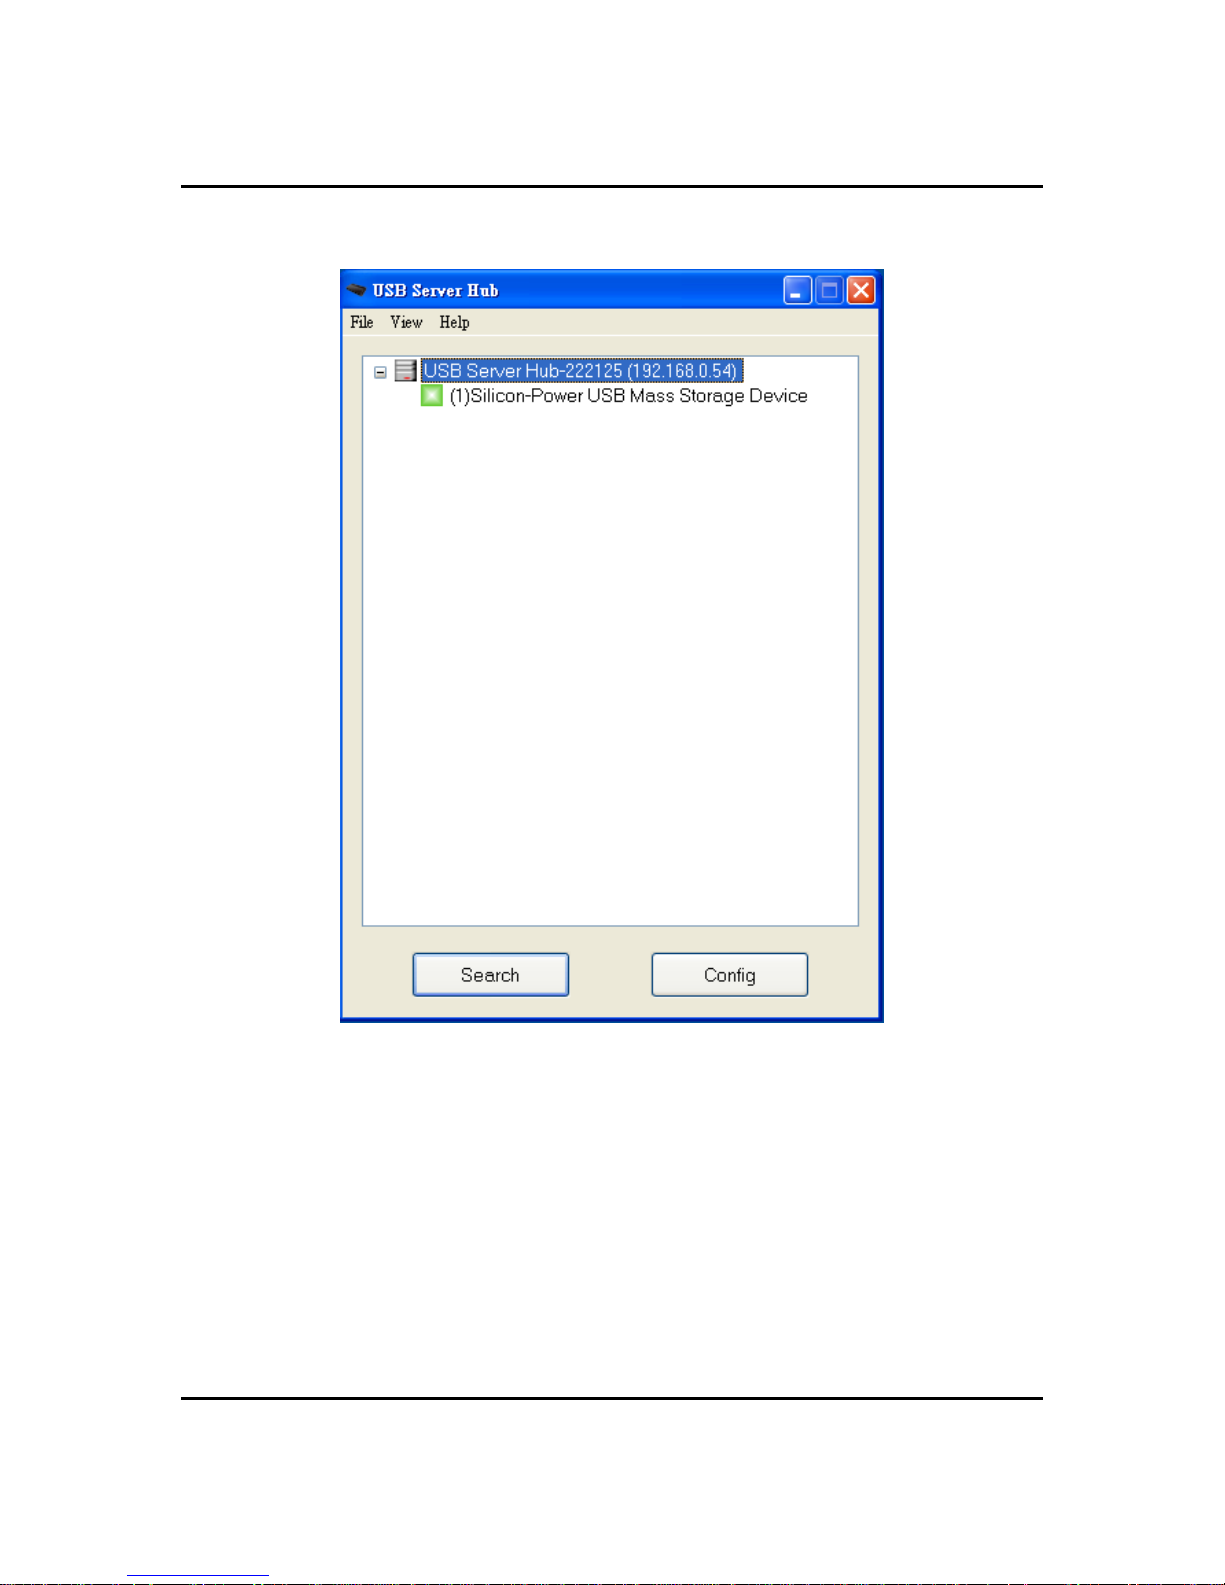
Ready
Each status is represented by an icon of different color. A device with “Ready” status is
indicated by a square Green icon as shown in the picture above. This green icon
indicates that the device is unoccupied and ready to be connected.
Page 11
User Manual
- 11 -
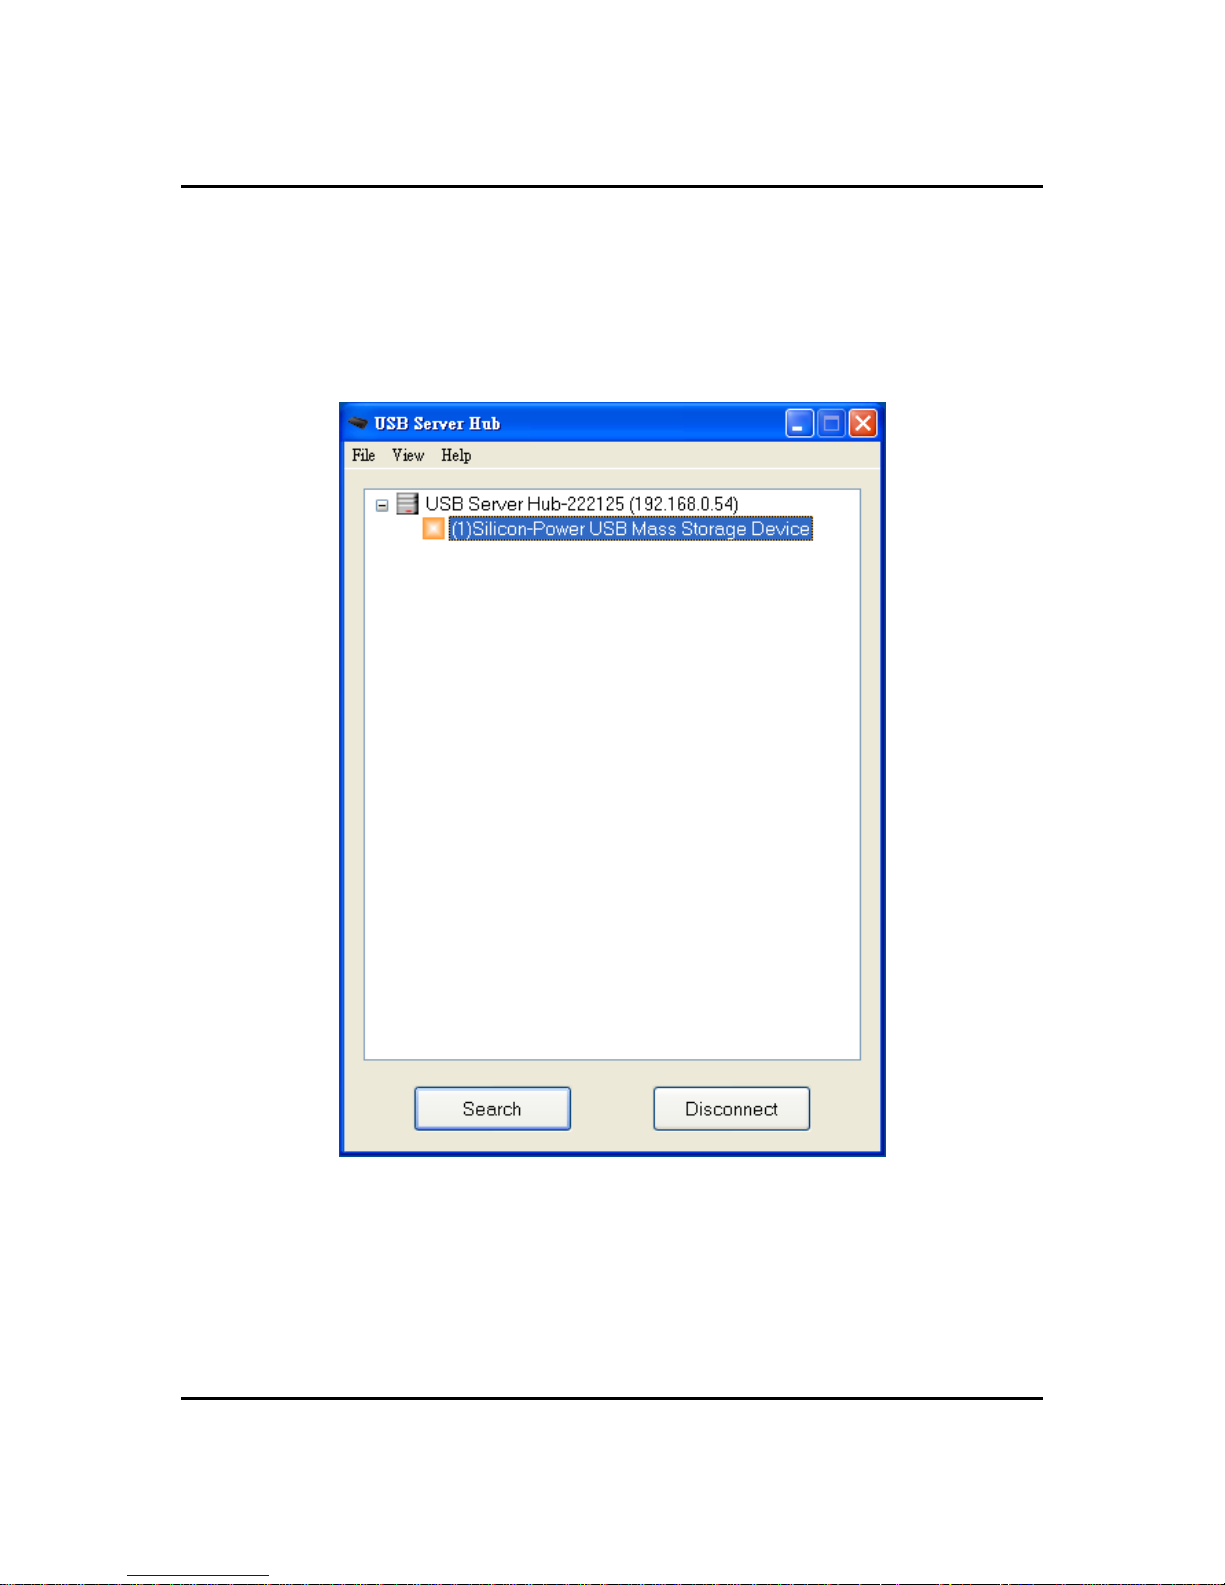
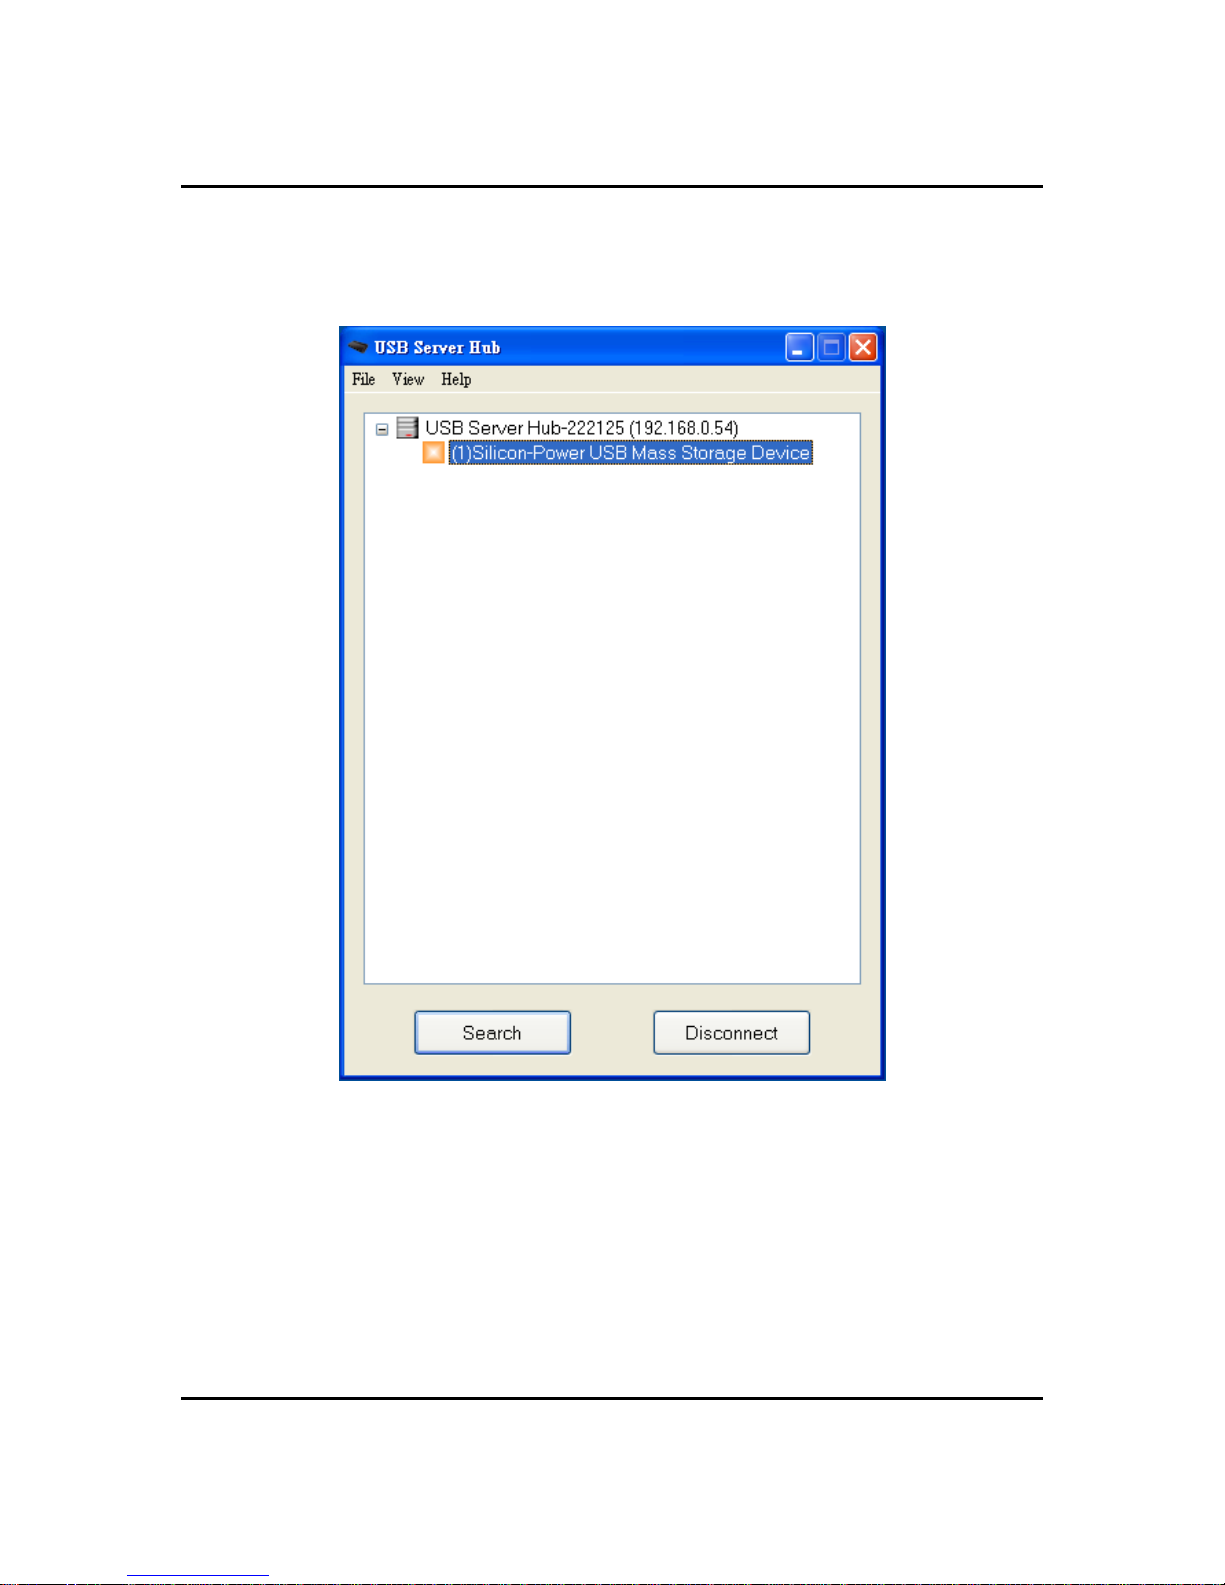
Occupied by Yourself
When you are “Connected” to a device, the green icon turns into an Orange icon to
signify the establishment of the connection.
Page 12
User Manual
- 12 -
Occupied By Other User
The Red icon indicates the device is occupied by another user and you can not
connect to that device at the moment.
Page 13

User Manual
- 13 -
: Device on Different Segment
Blue icon indicates that the server’s IP address is on a different network segment as
from yours. You can NOT connect to a device attached to such server.
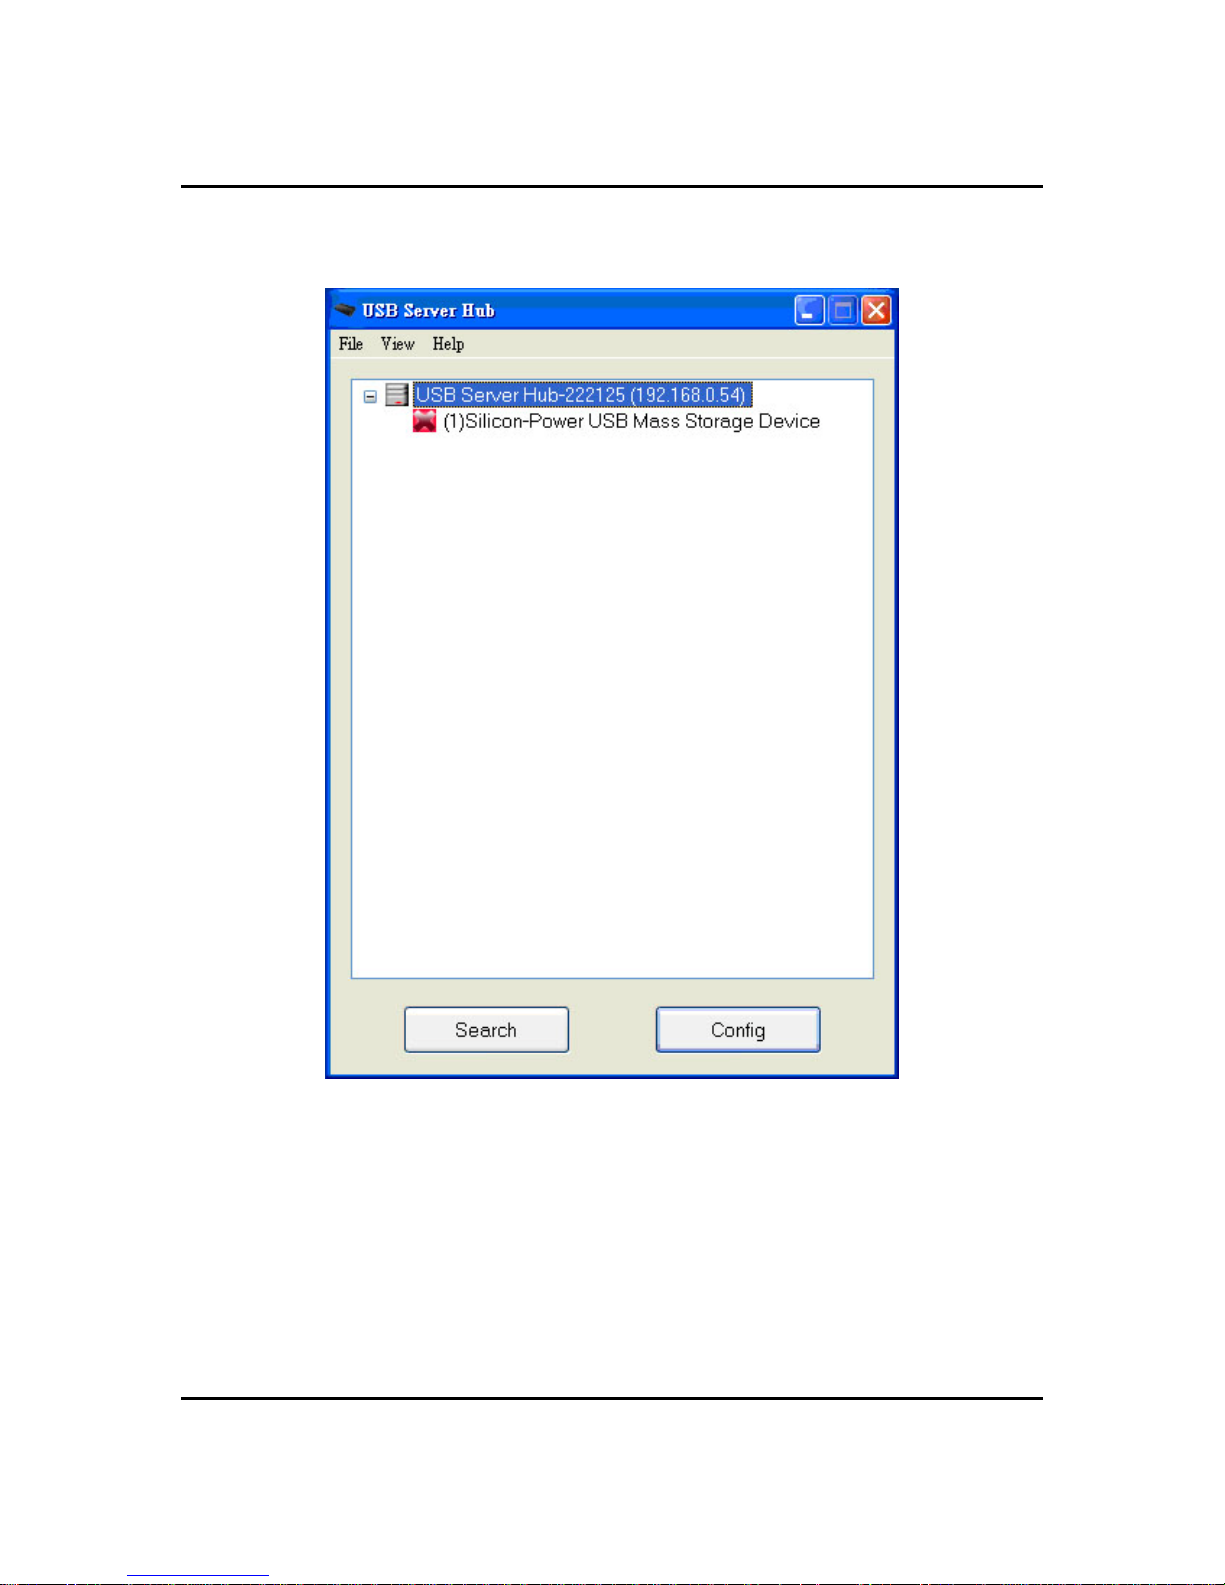
: Unsupported Device
Some of the devices are not supported by USB server Hub. Such device will be
identified by a red X icon. Of course, connecting to an unsupported device is not
allowed.
: Self Occupied with Error
When an error happens on the device you are connected to, you will see a small
exclamation mark appears at the right lower corner of the icon as show above. This
problem could be that the device is a printer and it is out of ink or out of paper.
: Occupied by Others with Error
When you see this red-with-exclamation icon, it signifies that a problem occurs on the
device that is occupied by another user.
: Free with Error
A green icon with exclamation mark indicates that this device is not connected by
anyone but does have some type of problem such as out of ink.
Of course, any problem indicated by the exclamation mark would prevent the
device from working properly. Please resolve the problem before you continue
using the device.
Page 14
User Manual
- 14 -
Accessing a Device
To connect to a USB device, please select it on the tree view and click on “Connect”
button or double-click on it. This process might take a few seconds up to a minute,
depending on the complexity of the device.
Once connected, you can use the USB device as if it is connected to your PC
directly with a USB cable.
Page 15
User Manual
- 15 -
If you select a connected device on the UI, you can see that the Connect button is
changed to Disconnect:
Clicking on the button disconnects you from the selected device. Once you see the icon
turns green, the device has been disconnected and other users will then be able to
connect to it.
Page 16

User Manual
- 16 -
Server Configuration
We allow the users to configure the settings of the USB Servers via the web-based UI.
Select the target server on the tree view and then click on the “Config.” button or right
click on the server and select “Config” option on menu to bring up this configuration UI.
Page 17

User Manual
- 17 -
Configuration with Web-based UI
Your default web browser will pop up and take you into the web-based configuration UI
of the server.
Page 18

User Manual
- 18 -
This is the main page of the configuration UI. You can see the important information
about the USB Server and the device(s) connected to it. The 6 links at the left-hand side
each represents a function. Clicking on “Device Status” brings you back to this page,
and the 5 other links take you to pages with different functions.
Network Information/Setting
Page 19

User Manual
- 19 -
This page displays the current network setting of the server and provides links to the
pages where you can perform special actions. You can change the network setting
according to your need. However, please note that if you would like to give this
server a static IP, please disable the DHCP option. Once you are done, please click
on the “Submit” button and reboot the server.
NOTE: A Server with busy device(s) connected is prohibited to be configured to prevent
interruption of any on-going tasks.
Page 20

User Manual
- 20 -
Server Reset
Clicking on this link takes you the page show below:
Page 21

User Manual
- 21 -
With the “Reset Server” button you can reboot the server. However, if there is a
password, you must enter it for this function to work. Password is by default blank. So,
unless a password is explicitly set, you do not have to enter anything for the reset
function to work.
Factory Default
Clicking on this link takes you the page where you can restore the server’s settings back
to default:
Page 22

User Manual
- 22 -
Again, the password is not necessary if no password is set. Just leave the field empty
and click on the “Factory Default” button to restore the factory default settings.
Page 23

User Manual
- 23 -
Update Firmware
This link takes to the page where you will be able to upload the latest firmware for the
server:
Please first click on the “Browse” button to browse to the firmware you would like to
upload and then click on the “Submit” button to update the firmware. You do not need to
Page 24

User Manual
- 24 -
provide a password for this operation if there is not password set. Please just leave it
blank.
Change Password
Clicking on this link takes you to the password update page below:
Page 25

User Manual
- 25 -
To change the password, you must enter current password, input new password and reinput new password for confirmation and then click on “Submit”. If you are setting the
password for the first time, you don’t have to provide current password.
Configuration with the Utility
Another way to configure the server is via the configuration dialog of PB2. To bring up
the configuration dialog, please RIGHT-CLICK on the server you would like to configure,
And select the “Setting” option. If a protective password has been set, this option brings
up the following configuration dialog.
Page 26

User Manual
- 26 -
You might be prompted to enter password if a password has been set. If not, you will
immediately see the above dialog.
Set Sever Name and IP Address: these fields allow you set the server name and IP
address settings. If you are changing IP address, please make sure you know what you
are doing.
NOTE: You can apply this function to a server under different network segment.
Page 27

User Manual
- 27 -
Backup Firmware: this function is a fail-save mechanism for the Update Firmware
function.
Use the Browse button to choose where you want to save the backup file. Click on
Submit to start. You can backup the current firmware of your server and save it on your
PC in case you updated the latest firmware and want to revert back for some reasons.
Update Firmware: update firmware with this function.
Use the Browse button to choose the firmware to update. Click on Submit to start.
Change Password: Simply enter the new password and enter it again for confirmation.
Click on Submit to change.
Page 28

User Manual
- 28 -
Reset Server
This button reboots the server. Please note that this function will not work if the server
you attempt to reset has a device connected to it and the device is occupied by a user.
Page 29

User Manual
- 29 -
Polling Interval
The USB Server Hub program periodically polls your network to find out the status of
all the connected servers and devices. Any change on the status of servers and devices
will be updated to the tree view in the main dialog box. The default setting is that the
program would perform this polling every 30 seconds. To change this polling interval,
click on the File -> Settings -> Polling Interval option on the control menu:
Then you should see this dialog box pops up:
Page 30

User Manual
- 30 -
As indicated on this dialog box, you must input a minimum of 20 seconds. Set it to 0 to
disable this function. Click on Submit to allow the new interval to take effect.
Page 31

User Manual
- 31 -
Language
USB Server Hub now supports two languages: English and Traditional Chinese. To
toggle between the languages, please go to File -> Settings -> Languages option and
select the desired language.
Simply select the desired language to change the UI’s displaying language.
Page 32

User Manual
- 32 -
Search
When you are in need of knowing the status of all the servers and devices immediately,
use the Search function:
Clicking on the “Search” button triggers the program to immediately poll the network for
the status of all the servers and devices. The result will be updated to the tree view.
Page 33

User Manual
- 33 -
View
The tree view in the main dialog has two display modes: “Servers and Devices” mode
and “Devices Only” mode. The default setting is “Devices Only” mode. You can toggle
between these two display modes with the View option on the control menu:
Servers and Devices view
Page 34

User Manual
- 34 -
Devices Only view
Page 35

User Manual
- 35 -
Device Details
When you right click on a device on the tree view, a menu will pop up:
When you select the “Details” options, some detailed information about the selected
server/device respectively will be displayed in another pop-up dialog box.
Page 36

User Manual
- 36 -
Page 37

User Manual
- 37 -
Help -> About
About option brings up a dialog box with legal and other relative information displayed:
Page 38

User Manual
- 38 -
Technical Support
If you have any questions that the Troubleshooting section failed to address, please visit
your dealer for further help. We have Technical Support working non-stop in order to
provide the best support we can for our customers.
Page 39

User Manual
- 39 -
Network Printer Wizard Quick Guide
Printer Setup on Windows XP/VISTA
EST provides a straight forward and easy-to-use utility that helps you to set up USB
printers connects to EST’s LPR printer server as network printers, Network Printer
Wizard. This utility reduces the dozens of steps in setting up network printer via
Windows build-in printer setup program to a few point-and-clicks with the mouse. Users
no longer need to deal with the confusing IP setting, queue name entering and port
configuration.
Network Printer Wizard Installation
To start the installation, please double click on the installer:
Page 40

User Manual
- 40 -
Wait for the installer to run:
Select the installation language and click on OK:
Page 41

User Manual
- 41 -
Click on Finish to exit installer once installation completes:
Page 42

User Manual
- 42 -
The installer creates a shortcut on the Desktop for you:
Page 43

User Manual
- 43 -
Printers Set up
1. Now we can start setting up your printer. Please click on the Launch Network Printer
Wizard icon created on the desktop.
Page 44

User Manual
- 44 -
2. Please click on Next to continue when you see this welcome dialog box.
Page 45

User Manual
- 45 -
3. Please select the printer you would like to setup on this list and then Click on Next.
The number of printers you see on this list depends on the number of printers that
are connected to your network. If you only have one printer on the network, you see
only one printer on this list. If you don’t see any printers, please make sure your
printers and LPR Printer Server is correctly powered on and connected to the
network.
Page 46

User Manual
- 46 -
4. On the next dialog box, please select the driver form the list if it’s there, and then
click on the Next button and go to step 7. Else, read on.
If you can’t find the target printer’s driver on the list, please insert the disk containing
the printer’s driver, click on Have Disk… button then go to step 5.
Page 47

User Manual
- 47 -
5. You must browse to the folder that contains the driver for your printer and click on
OPEN to use it:
6. Then, select the driver from the list again and then click on the Next button. If you
didn’t select the correct driver, here is the chance for you to verify. Please click on
Have Disk again to re-select.
Page 48

User Manual
- 48 -
7. Once you have selected the correct driver from the list, please click on Finish button.
The wizard might take a minute to setup the network printer for you.
Page 49

User Manual
- 49 -
Page 50

User Manual
- 50 -
8. After the printer has been setup correctly, you can see it under Control Panel >
Printers:
Page 51

User Manual
- 51 -
Now you can print any document using the printer you just setup:
If you have more than one printer set up, please make sure you have selected the
correct printer to print.
NOTE: REMEMBER, THIS SETUP IS A ONE-TIME THING. YOU DO NOT HAVE TO
RUN THIS PROCESS EVERY TIME YOU WANT TO PRINT. HOWEVER, OF
COURSE, IF YOU REMOVE THE NETWORK PRINTER WIZARD PROGRAM, YOUR
PRINTER SETUP WILL NO LONGER WORK.
Page 52

User Manual
- 52 -
Remove the Printer Setting
To remove the printer setup, please go to the Control Panel > Printers dialog box and
remove the printer entry from it.
Simply Delete this icon by pressing Del key on your keyboard. Then it will be removed
from the list of usable printers when you print document.
Page 53

User Manual
- 53 -
Remove the Program
To remove the Network Printer Wizard program, please go to the Control Panel > Add
or Remove Programs (Programs and Features on Windows VISTA)
Window XP
Page 54

User Manual
- 54 -
Windows VISTA
Then select to remove the program
Then follow the instructions of the installer complete the removing process:
Page 55

User Manual
- 55 -
PLEASE NOTE: Once you remove this problem, you will no longer be able to print
using the printers you setup with Network Printer Wizard
Page 56

User Manual
- 56 -
Disclaimer
Information in this document is subject to change without notice. The manufacturer does
not make any representations or warranties (implied or otherwise) regarding the
accuracy and completeness of this document and shall in no event be liable for any loss
of profit or any other commercial damage, including but not limited to special, incidental,
consequential, or other damages.
No part of this document may be reproduced or transmitted in any form by any means,
electronic or mechanical, including photocopying, recording or information recording
and retrieval systems without the express written permission of the manufacturer.
All brand names and product names used in this document are trademarks, or
registered trademarks of their respective holders.
FCC Statement
This device generates and uses radio frequency and may cause interference to radio
and television reception if not installed and used properly. This has been tested and
found to comply with the limits of a Class B computing device in accordance with the
specifications in Part 15 of the FCC Rules. These specifications are designed to provide
reasonable protection against such interference in a residential installation. However,
there is no guarantee that interference will not occur in a particular installation. If this
device does cause harmful interference to radio or television reception, which can be
determined by plugging the device in and out, the user can try to correct the
interference by one or more of the following measures:
Reorient or relocate the receiving antenna.
Increase the separation between the device and receiver.
Connect the computer into an outlet on a circuit different from that to which the
receiver is connected.
Consult the dealer or an experienced radio/TV technician for help.
 Loading...