

Page 1
Deutsch
User Manual
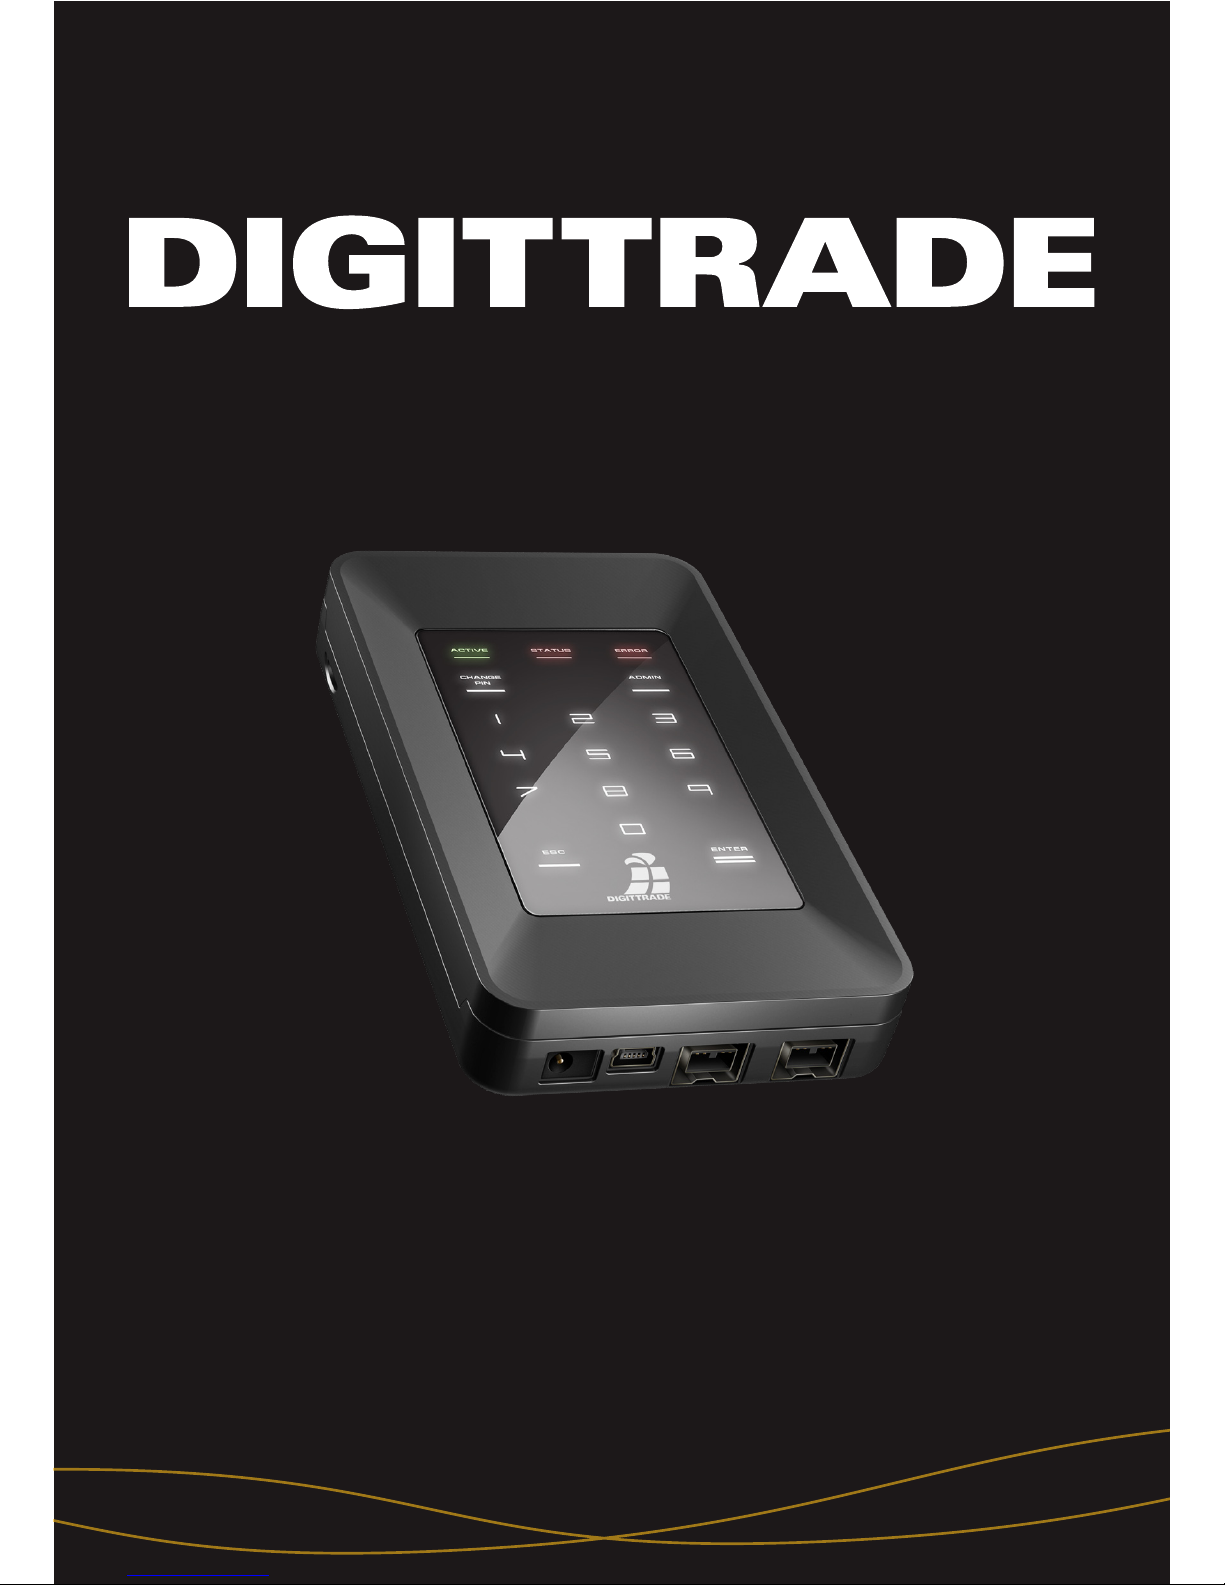
High Security HDD
HS128 / HS256
Certied by The National Institute of Standards and Technology of the United States of America (NIST)
Page 2

2
Page 3
English
3
Contents
About the DIGITTRADE HIGH SECURITY HDD 4
The Benets of DIGITTRADE HIGH SECURITY HDD 5
How to connect DIGITTRADE HIGH SECURITY HDD 6
Connection to USB 1.1 Port 7
Connection to USB 2.0 Port 7
Connection to FireWire 8
Switching-On 9
Two-Factor Authentication 10
Inserting the Smart Card 10
PIN Entry 11
Changing the PIN 12
Administrator PIN 13
Changing the Administrator PIN 13
Partitioning / Formatting using Windows 14
Partitioning / Formatting using MAC OS X 18
Partitioning / Formatting using Linux 20
The Correct File System 23
Technical Specications 24
FAQ - Frequently Asked Questions 25
Data Security and Disclaimer 27
Storage of Smart Card 27
Scope of Delivery 27
WEEE Statement 28
PLEASE READ AND FOLLOW THE INSTRUCTIONS
PROVIDED IN THIS USER MANUAL CAREFULLY.
FAILURE TO DO SO MAY RESULT IN DAMAGE
TO THE DIGITTTRADE HIGH SECURITY HDD AND
CONNECTED DEVICES.
Page 4
English
4
The DIGITTRADE HIGH SECURITY HDD ( HS128 / 256) is currently the
best solution to save data at a high standard of security and mobility.
Thanks to the full disk hardware encryption according to the AES standard
and the two-factor authentication, the DIGITTRADE HIGH SECURITY
HDD combines the benets of mobile data media with highest security
standard for data privacy.
The hardware-based encryption module, integrated in the security
enclosure performs a full disk encryption. It encrypts every byte and
every sector that is written on the HDD according to AES standard
(128/ 256 bit).
About the DIGITTRADE HIGH SECURITY HDD
The DIGITTRADE HIGH SECURITY HDD encrypts additionally to all stored
data even temporary les as well as areas that would normally not be
noticed by encryption software.
The AES key is on the Smart Card. In case of loss or theft it is not possible
to read out the AES key neither from the enclosure nor from the HDD.
The DIGITTRADE HIGH SECURITY HDD provides best possible protection
besides the hardware based encryption by a two-factor authentication.
Page 5

English
5
The two-factor authentication works according to the
“Having and Knowing Method”:
Factor 1 (Having): veries, if the user has a Smart Card with the correct
AES key.
Factor 2 (Knowing): veries, if the user knows the correct 8-digit PIN and
consequently is authorized to use this Smart Card.
The Smart Card will be locked forever and disabled automatically if the
8-digit PIN was entered wrongly 8 times. Data stored on the Smart Card
will be destroyed irrevocably.
The embedded 2.5” SATA hard drive makes the mobile data safe small and
handy. Thanks to data transfer and power supply using USB or FireWire
and the hard ware encryption it is possible to use this storage medium
independent of an operating system or platform.
- maximum protection and mobility for all stored data
- two-factor authentication using Smart Card and PIN (8-digit)
- AES hardware cipher engine ( 128/256 bits)
- full disk encryption: every byte and sector is encrypted
- maximum protection against unauthorized access
- portable 2,5” enclosure
- operating system independent
- bus interface USB 1.1 / 2.0 and FireWire
- no performance degradations of reading and writing speed
The benets of DIGITTRADE HIGH SECURITY HDD
Page 6
English
6
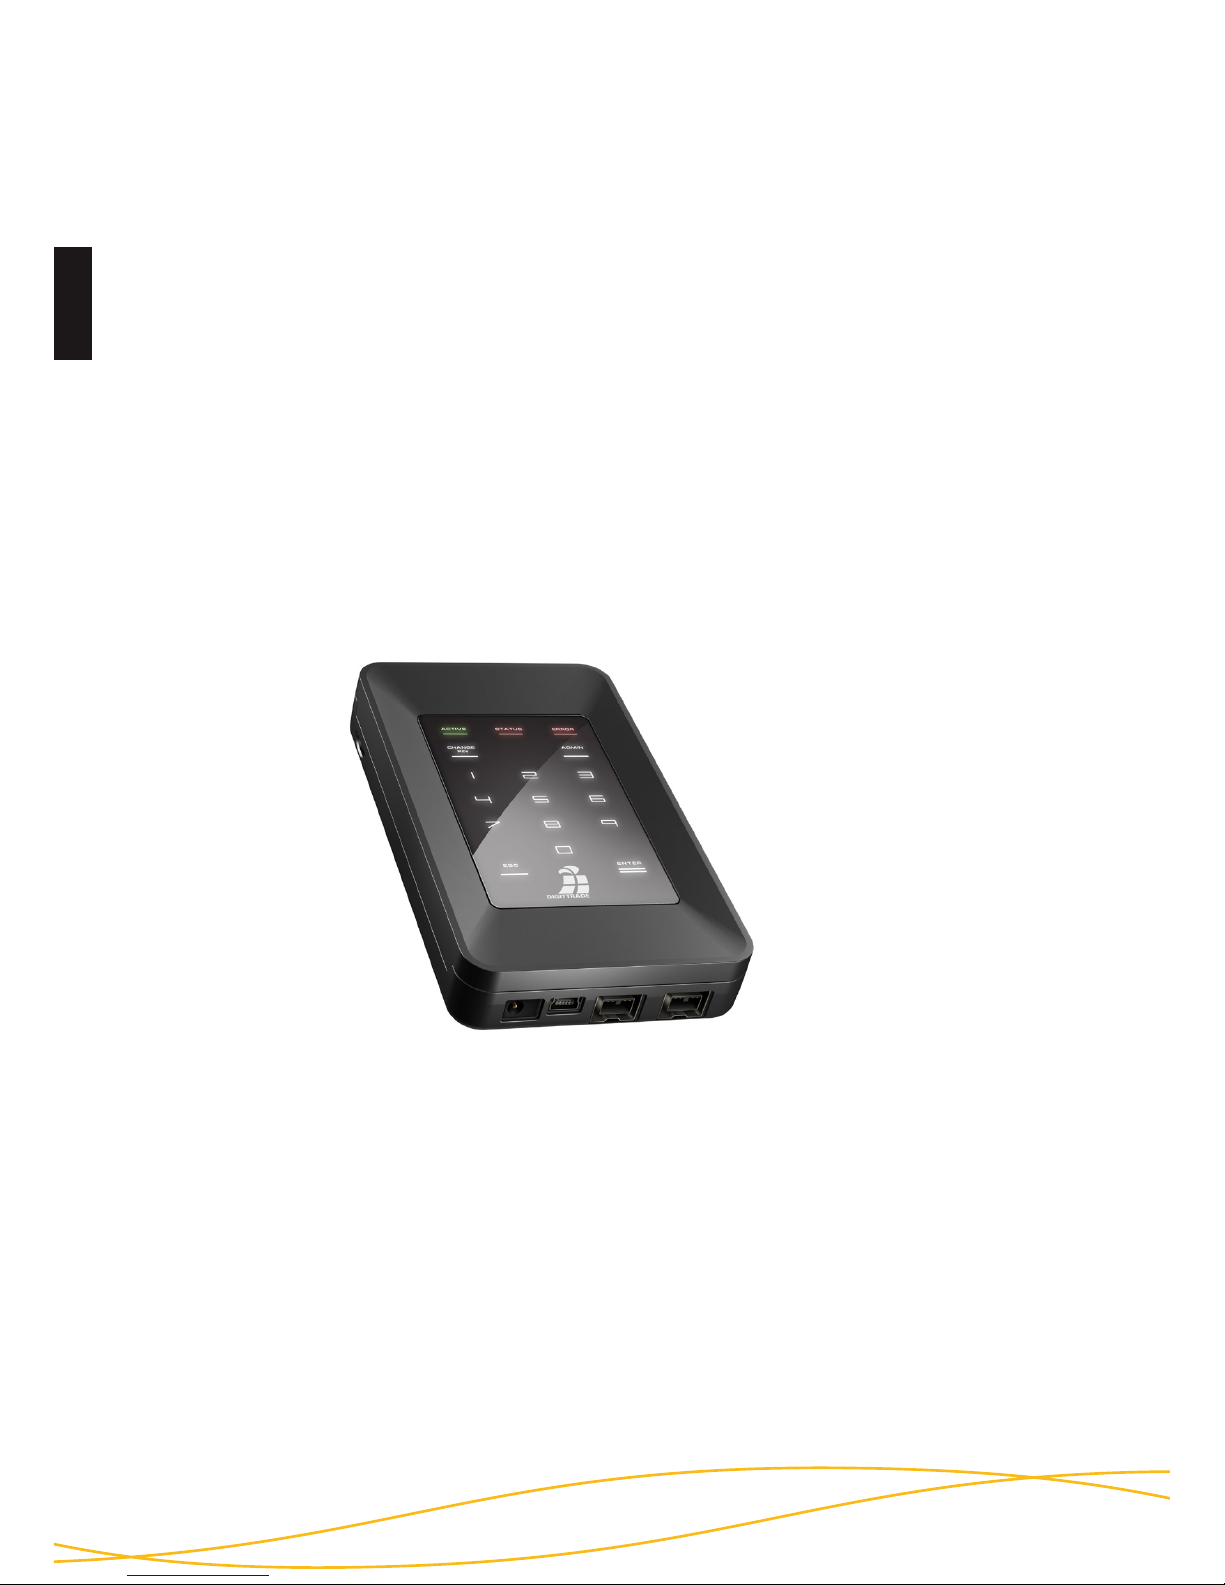
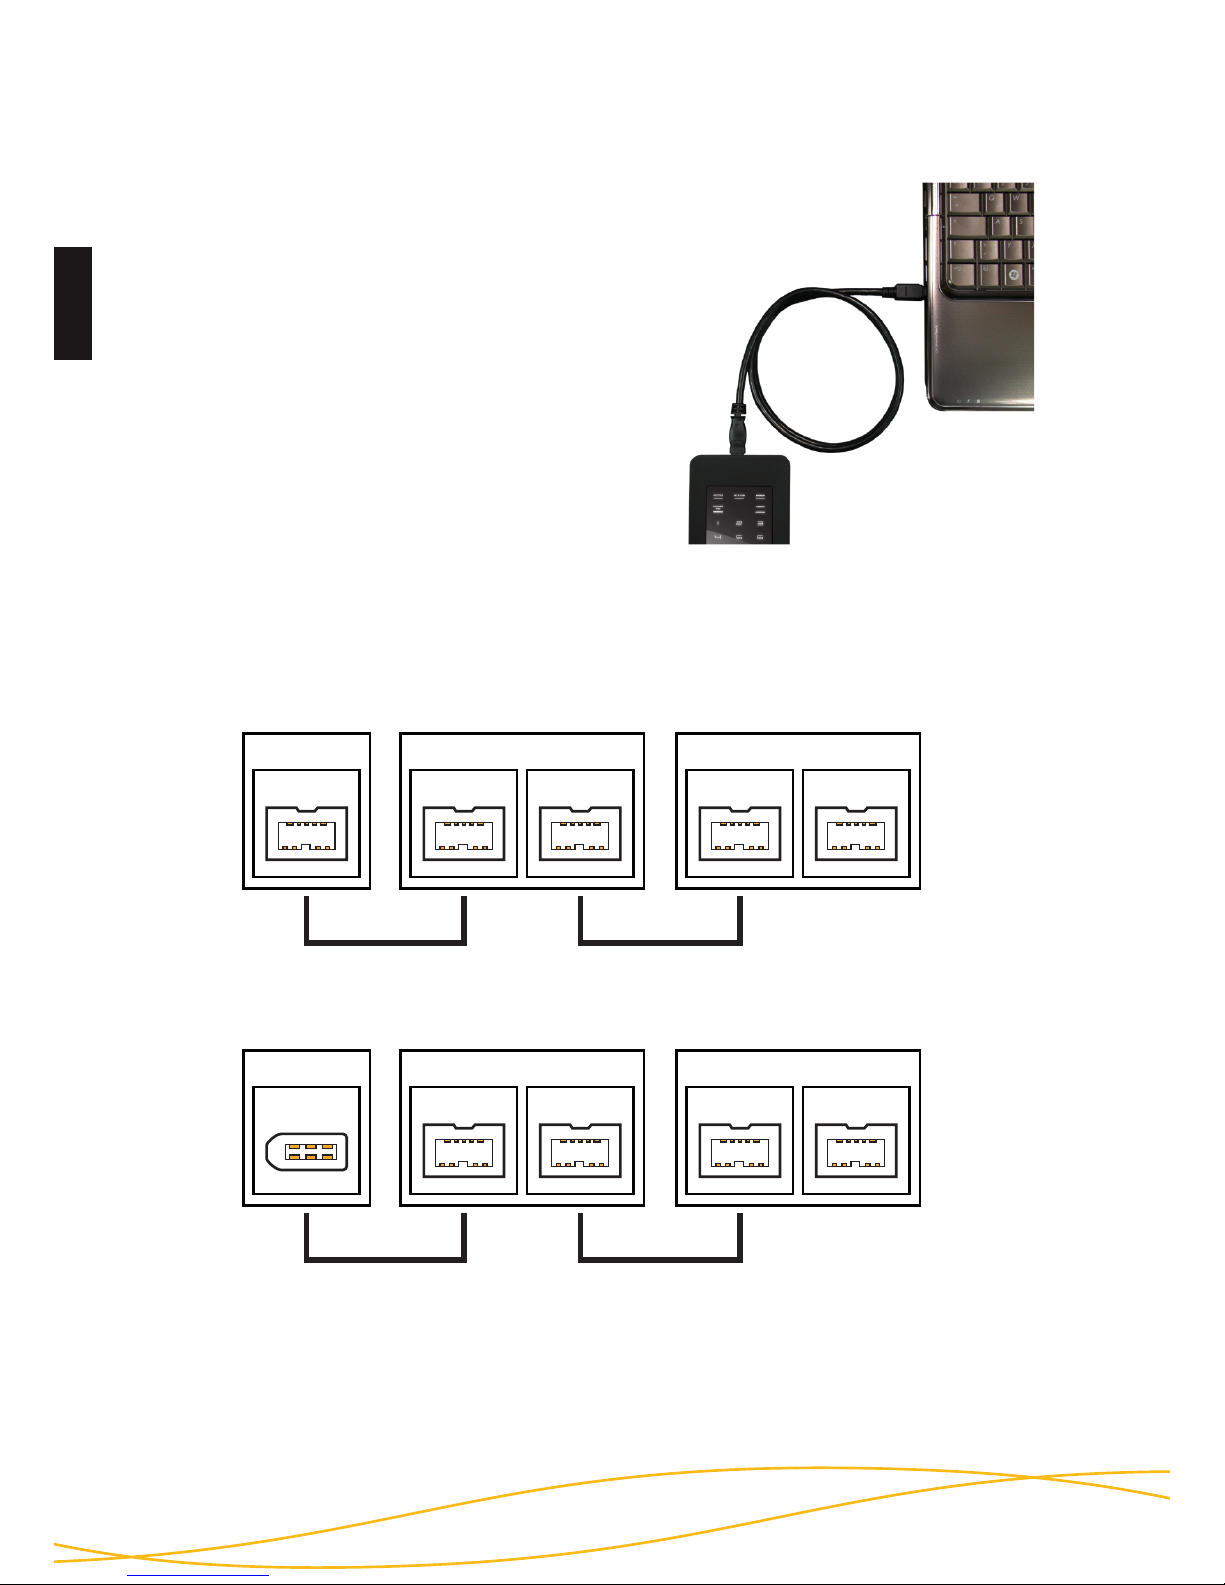
It is possible to connect the DIGITTRADE HIGH SECURITY HS128/256
either using USB or FireWire to the computer.
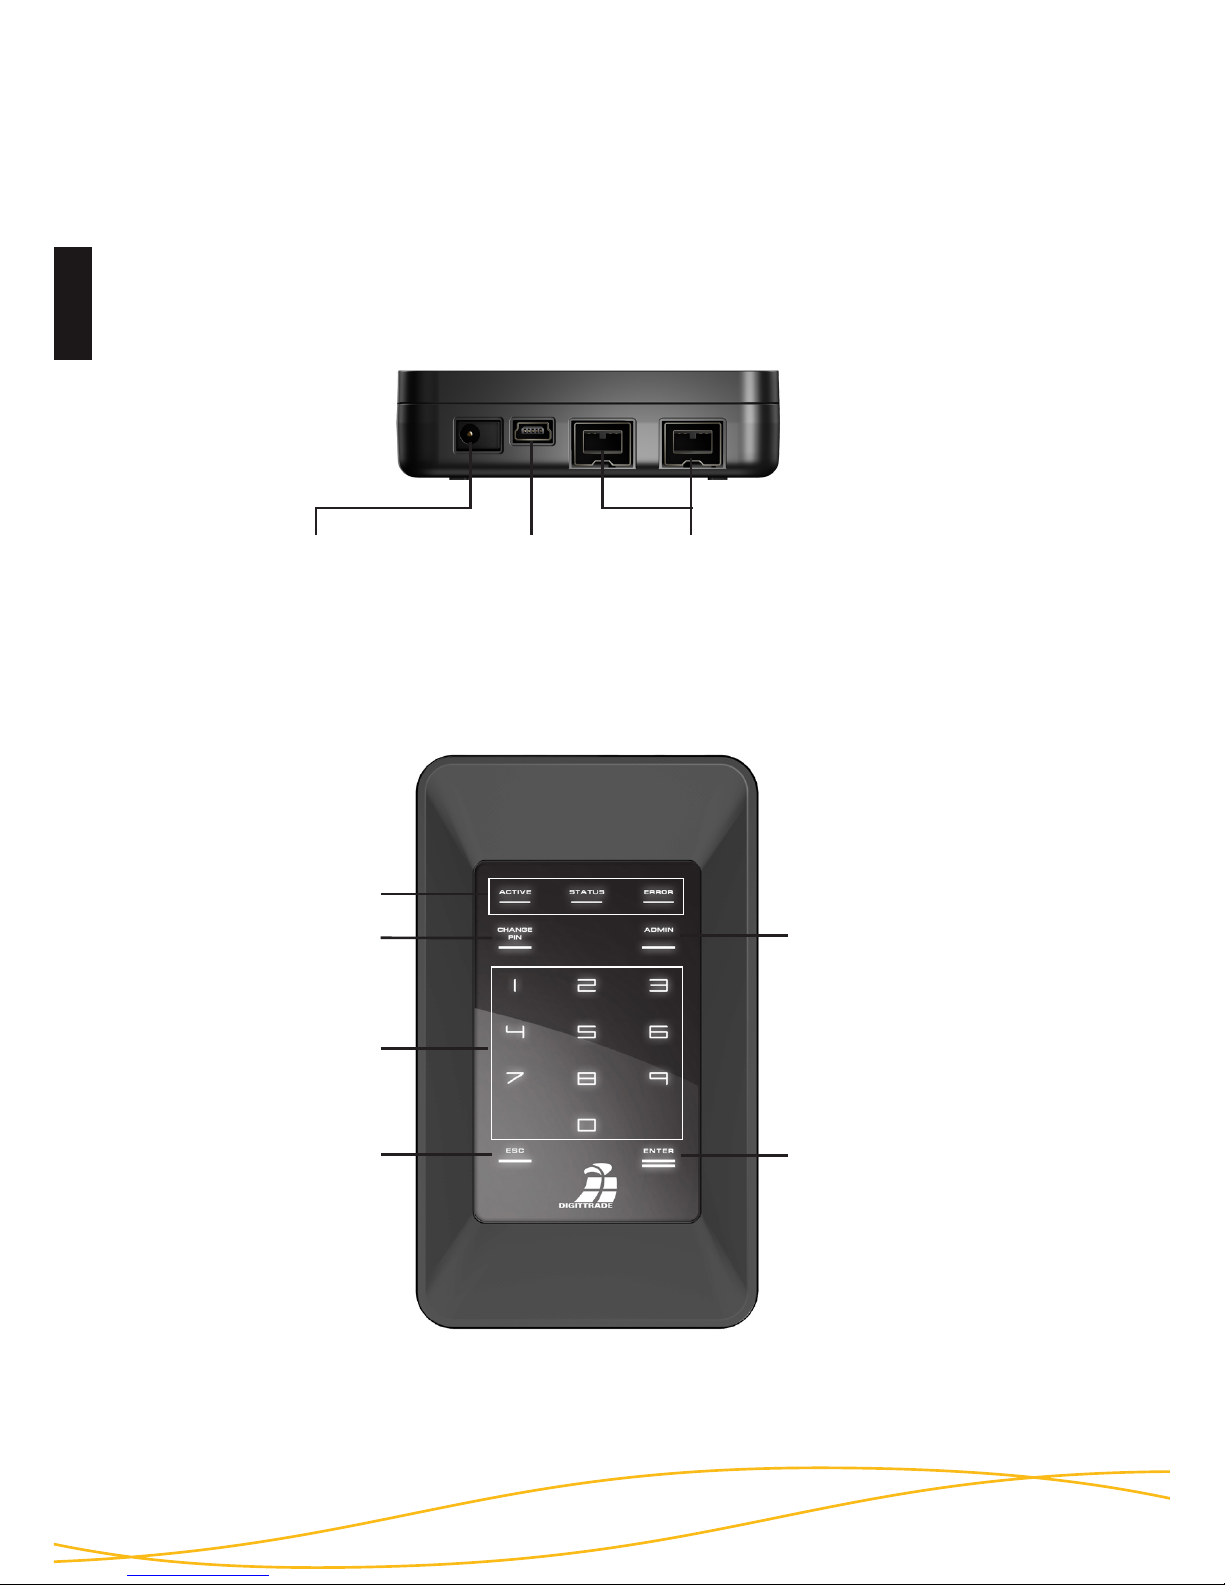
How to connect DIGITTRADE HIGH SECURITY HDD
DC Power Jack Mini-USB
plug
FireWire 400/800
(9-Pin)
STATUS LED
“CHANGE PIN”
button
Keypad
“ESC” button
“ENTER” button
“ADMIN” button
Page 7
English
7
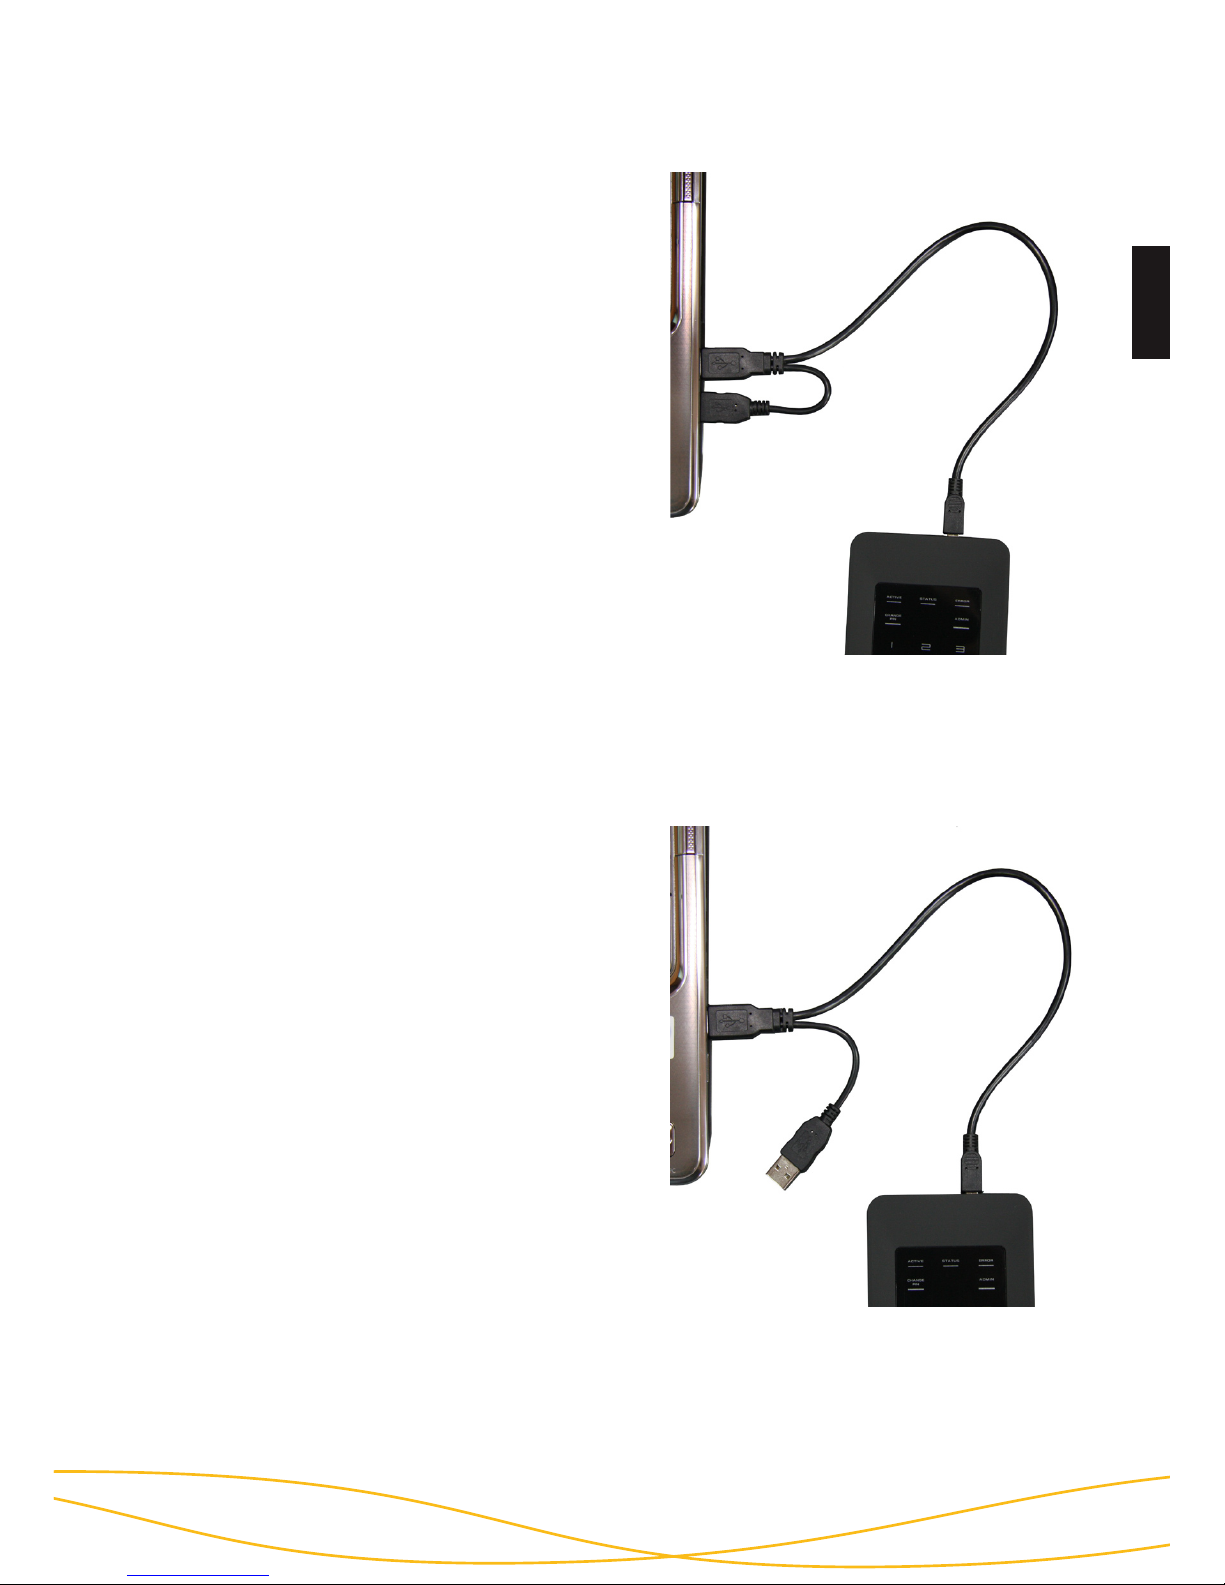
Connect the DIGITTRADE HIGH
SECURITY HDD to your PC or laptop using the USB cable included in
delivery. Please use therefore the Aplug as shown on the picture.
Not only the data will be transmitted
through the USB cable but also the
HDD will be energized.
Please make sure that the HDD is
connected at all times directly to the
USB plug of the PC or laptop.
Connection to USB 2.0 Port
B
A
Connect the DIGITTRADE HIGH
SECURITY HDD to your PC or laptop
using the USB cable included in delivery.
Please note that the A- and B- plugs
have to be connected rst with the
PC or Laptop as shown on the picture before connecting the USB cable to the HDD.
Connection to USB 1.1 Port
A
B
Note: Do not use the DIGITTRADE HIGH SECURITY HDD via a buspowered USB hub or USB extension cable.
Page 8
English
8
Connect the DIGITTRADE HIGH
SECURITY HDD to your PC or laptop
using a FireWire cable. For using
FireWire 400/800, please ensure that you
have a 9 pin FireWire cable and connect
it to the computer´s FireWire port.
A suitable FireWire cable is available on
www.digittrade.de.
Two FireWire ports are available on
DIGITTRADE HIGH SECURITY HDD to
allow daisy chaining of two or more hard drives. To daisy chain, simply
refer to the following conguration.
Connection to FireWire
Note: FireWire ports at a computer could be 9, 6 or 4 pin. Please use the
correct FireWire cable for your computer. If you are connecting to computer
via a 4 to 9 pin cable, you will need to ensure that you have an additional
powersupply for the DIGITTRADE HIGH SECURITY FESTPLATTE. (See P. 37)
Computer
FireWire 400
DIGITTRADE HS128 / HS256
FireWire
Port 1
FireWire
Port 2
DIGITTRADE HS128 / HS256
FireWire
Port 1
FireWire
Port 2
6 to 9 pin cable 9 to 9 pin cable
Computer
FireWire 800
DIGITTRADE HS128 / HS256
FireWire
Port 1
FireWire
Port 2
DIGITTRADE HS128 / HS256
FireWire
Port 1
FireWire
Port 2
9 to 9 pin cable 9 to 9 pin cable
Page 9
English
9
The DIGITTRADE HIGH SECURITY HDD is powered by the USB or FireWire
bus. It is not neccessary to use an additional power supply. In case your
used connecter cannot provide enough power it is possible to use an
additional power supply.
If the HS128/256 is connected correctly to the computer the LED
“ACTIVE”, “STATUS” and “ERROR” ash once.
The hard disk is now ready for use, but still needs to get unlocked. For this
you need one of the provided Smart Cards and the PIN.
This hard drive is protected by the two-factor authentication to avoid
unauthorized access.
Note: Please use only original accessories in combination with DIGITTRADE
HIGH SECURITY HDD.
Switching-On
Page 10
English
10
The DIGITTRADE HIGH SECURITY HDD functions with a two-factor
authentication process to avoid unauthorized access to the HDD and data
stored on it.
With this process the authorization of the user will be veried to exclude
misuse. The vercation works with two factors according to the “Having
and Knowing Method”:
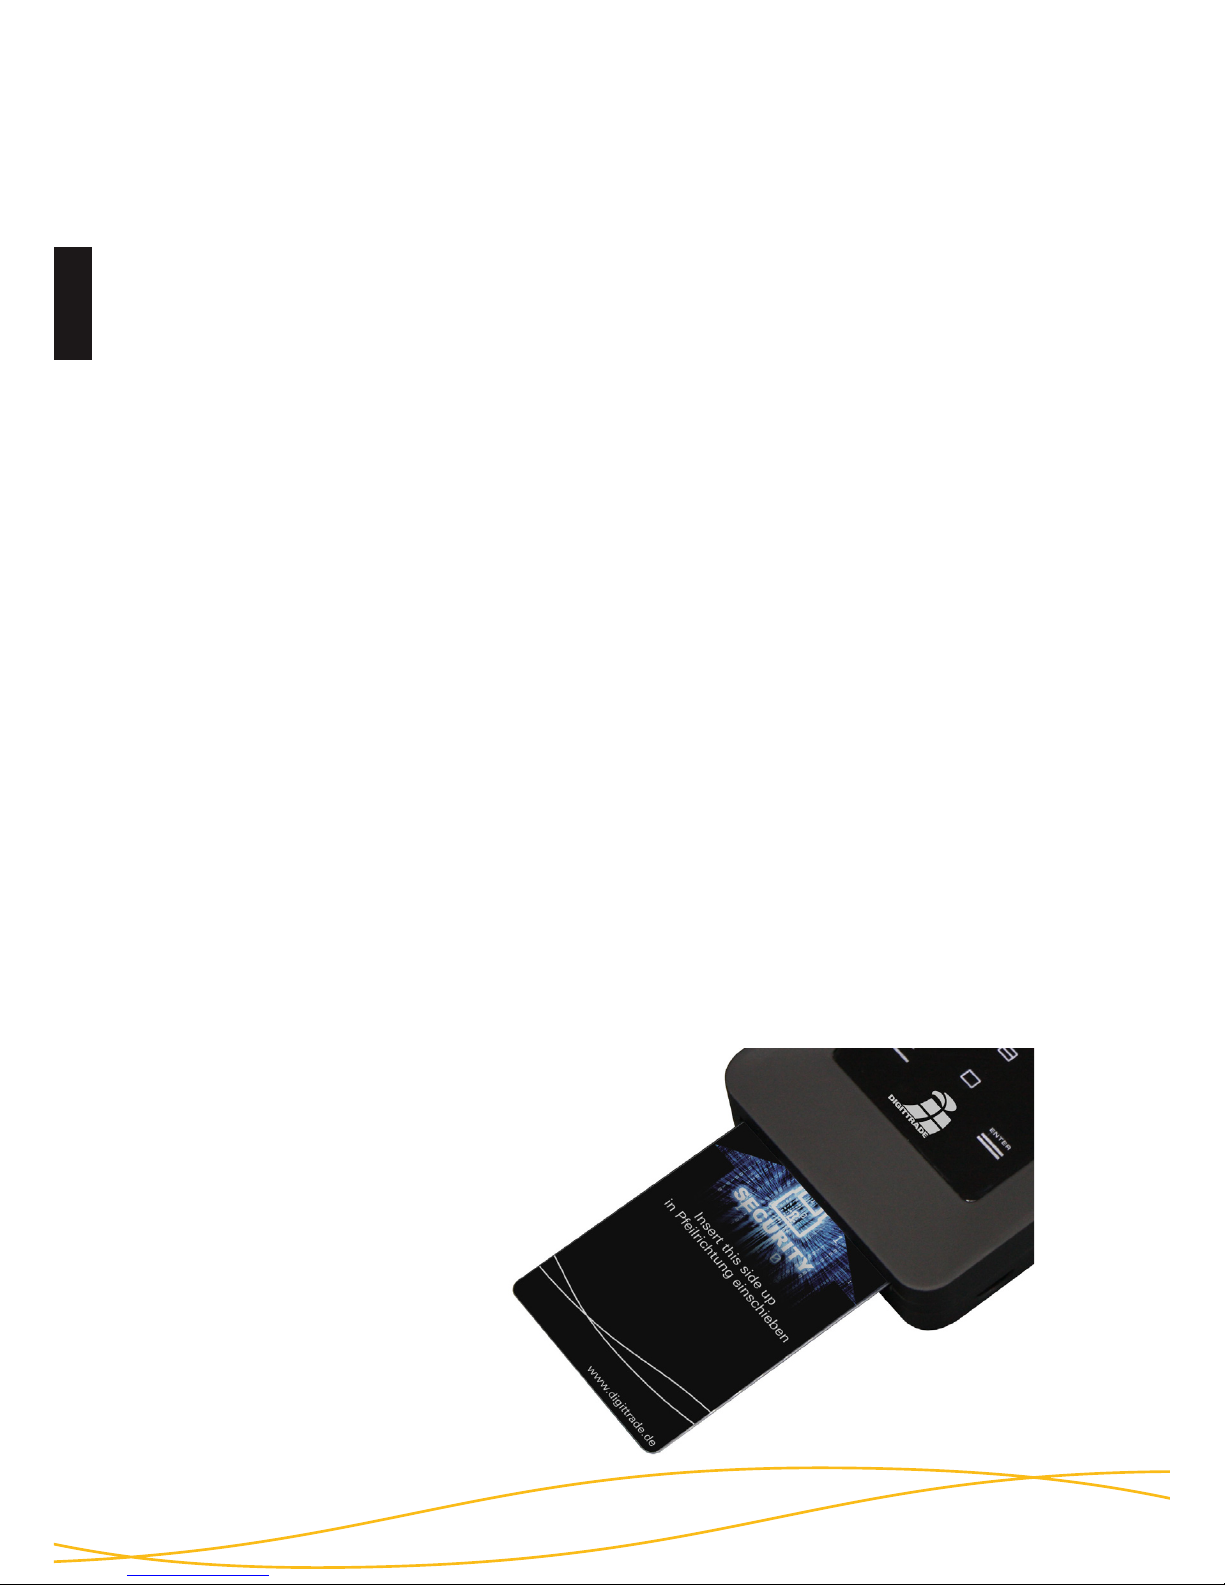
Factor 1 (Having): veries if the user has a Smart Card with the correct
AES key. This vercation takes place by inserting the Smart Card into the
HDD enclosure. Two Smart Cards are included in delivery.
Factor 2 (Knowing): veries if the user knows the correct 8-digit PIN and
consequently is authorized to use this Smart Card. This vercation takes
place by the PIN entry. After activating the DIGITTRADE HIGH SECURITY
HDD successfully it needs to be unblocked for use.
Therefore insert the Smart Card into the Smart Card Slot in direction of
arrow.
If a valid Smart Card is inserted, the “STATUS” ashes once. Afterwards
the keypad is lighted and ready for PIN entry.
If an invalid Smart Card is inserted the “ERROR” LED ashes.
Two-Factor Authentication
Inserting the Smart Card
Page 11

English
11
After you have activated the DIGITTRADE HIGH SECURITY HDD successfully and inserted a valid Smart Card the keypad will be lighted and the
HDD is ready for PIN entry.
Now you can enter the 8-digit PIN.
The preset factory PIN is “1-2-3-4-5-6-7-8”, after you entered the PIN,
press the “Enter” button.
PIN Entry
Note: To guarantee a maximum security it is obligatory to change the
standard PIN (see page 39). Additionally it is advisable to use different PINs
for the two different Smart Cards.
After successful PIN entry the DIGITTRADE HIGH SECURITY HDD will be
identied by the system as a removable medium and the lighting of the
keypad disappears.
The access is enabled and the Smart Card can be removed.
If a wrong PIN was entered, the “ERROR” LED ashes. Press the “ESC”
button to restart the PIN entry.
Note: After PIN was entered eight times incorrectly, the Smart Card will be
irrevocably locked and cannot be used anymore.
Page 12

English
12
Follow these steps to change the PIN of your Smart Card :
1) Insert the Smart Card into DIGITTRADE HIGH SECURITY HDD
(see page 37).
2) Press the “CHANGE PIN” button and afterwards the “1” button.
3) Conrm the entry with “ENTER”. The “STATUS” LED will ash four
times.
4) Enter the current 8-digit PIN and press “ENTER” to conrm the entry.
5) Enter the new 8-digit PIN and press again “ENTER” for conrmation .
6) Enter the new conrmed 8-digit PIN again and press “ENTER”.
After a successful PIN change, the Status -LED will ash four times and
you will hear two beeps. The DIGITTRADE HIGH SECURITY HDD will be
identied by the system as a removable medium and the lighting of the
keypad disappears.
The access is enabled and the Smart Card can be removed.
If the PIN change was not sucessful, the “ERROR” LED will ash. Press
the “ESC” button and start again with the rst step of the PIN change.
Changing the PIN
Note: The DIGITTRADE HIGH SECURITY HDD only accepts 8-digit PINs.
Page 13

English
13
The administrator PIN is required only to initialize new Smart Cards for
the DIGITTRADE HIGH SECURITY HDD. This feature is neccessary if both
Smart Cards got lost or are defective.
If new Smart Cards are initialized, all data stored on it will be destroyed
because the hard disk needs to be formatted with process.
The preset factory PIN is “1-2-3-4-5-6-7-8”.
For security reasons it is obligatory to change this PIN to avoid data loss or
unauthorized interactions.
For further information regarding the initialization of new Smart Cards
please feel free to contact us by telephone +49 345 / 2317353 or e-mail
beratung@digittrade.de.
Changing Administrator PIN
Follow these steps to change your administrator PIN:
1) Insert Smart Card into DIGITTRADE HIGH SECURITY HDD.
2) Press the “CHANGE PIN” button and afterwards “0”.
3) Conrm your entry with “ENTER”.
4) Type in the current 8-digit administrator PIN and press “Enter” to
conrm the entry. The “STATUS” LED will ash twice.
5) Enter the new 8-digit administrator PIN and press “ENTER”.
6) For conrmation enter your new 8-digit administrator PIN again and
press “ENTER”.
7) If the change of administrator PIN was successfull the “STATUS” LED
will ash three times and you will hear two beeps.
8) The Smart Card can be removed now.
If the PIN change was not sucessful, the “ERROR” LED will ash. Press
the “ESC” button and start again with the rst step of the PIN change.
Administrator PIN
Page 14

English
14
Please follow the instructions to customise the le system, partition size
and number of partitions.
- Go to “control panel” and double click on “Administrative Tools”.
- Open the “Computer Management” and choose “Disk Management”.
- Choose with your mouse the external HDD and open the context menu
using the right mouse button.
- choose the menu item “Formatting” to format the hard disk
Note: All data will be deleted irrevocably and cannot be restored after
formatting.
Partitioning / Formatting using Windows
Page 15

English
15
To partition the HDD choose the item “Shrink Volume”.
- Type in the desired memory capacity (in MB).
- An unassigned eld will be shown in the administration display.
- Mark this unassigned eld with the mouse and open the context menu
with the right mouse button and choose the item “New Simple
Volume”.
The partitioning assist will appear.
- Click on “Next”.
Page 16

English
16
- Type in the desired size of the partition in MB and click on “Next”.
- Choose a drive letter for the partition.
- Click on “Next”.
Page 17

English
17
- Choose the desired le system, the type of formatting and click on
“Next”.
- The partitioning will be nished now, conrm this action by clicking on
“Finish”.
Note: The newly partitioned eld will be formatted now. After the
formatting is completed the new partition will be automatically identied
by the system.
Page 18

English
18
Please follow the instructions to customise the le system, partition size
and number of partitions.
- Select “Utilities” from “Applications”.
- Choose “Disk Utility”.
Partitioning / Formatting using MAC OS X
Page 19

English
19
- Choose from the left drive overview the external HDD.
- Choose from the main index the option “Partition”.
- In this menu you can change partition sizes, delete partitions or create
new partitions.
Page 20

English
20
It is possible to divide the hard drive in several partitions. The instruction
below is described on the base of YaST and Suse Linux. This procedure is
similar under other Linux distributions.
- First open YaST. If necessary, you will need to authenticate yourself.
- Choose from the left side “System” and from the right eld
“Partitioner”.
- For security reasons a window will open and you will be asked whether
you are familiar with the partitioning. Conrm this with “Yes”.
- The volume table of your system will appear.
- Now you can choose the desired volume, partition it or edit or delete
already existing partitions.
- To delete the standard NTFS partition please click on it and afterwards
on “Delete”.
Partitioning / Formatting using Linux
Page 21

English
21
- You will be asked whether you really want to delete the partition. Make
sure you have chosen the correct partition and conrm with a click on “Yes”.
Note: If you delete the partition, you will delete irrevocably all les stored
on it.
- To create a new partition in the free space of your volume click on “Create”.
- Choose a volume to create the new partition.
- You will be asked which type of partition you want to create. It is
recommended to use “Primary Partition”.
- In this window you congure all features of the partition. You can choose
between different le systems and sizes and if necessary you can
congure a mountingpoint for Linux. Conrm your conguration with
“OK”.
Page 22

English
22
- Formatting works similarly. Choose the desired partition and click
on “Edit”.
- Tick on “Formatting” and choose the adequate le system. Conrm your
congurations with “OK”.
- Click on “Apply” to operate your modications.
- All modications will be shown in a new window. Make sure all the
modications are correct and conrm the congurations by clicking on
“Apply”.
Note: If you are not sure which le system or partition size to choose, we
recommend taking the automatically entered values.
Page 23

English
23
- In the table below you can see the compatibility between operating
systems and le systems.
R - reading W - writing X - no compatibility
With additional programs it could be possible to write on le systems, on
which it usually is not possible.
The DIGITTRADE Security Hard Dive is at the time of delivery already
preformatted in the NTFS le system. In the table above you can see the
compatibility of NTFS to your operating system. Should NTFS not be
suitable to your operating system, you will have to format the HDD again
(see chapter: “Partitioning / formatting”, p. 41).
For windows users we recommend using NTFS. For Mac OS X is HFS+ the
most powerful le system and for Linux you should use EXT3. Naturally,
it is also possible to format the DIGITTRADE HIGH SECURITY HDD with
every other le system. This does not affect the security features.
If you want to use the hard drive using different operating systems,
we recommend to use the FAT32 le system, since it can be read and
written by almost every operating system. However, it will cause
reductions in the maximum le size and partition size. Furthermore there
will be performance differences.
The Correct File System
NTFS FAT32 HFS+ EXT3
Win 98 X R, W X X
Win NT, 2000,
ME, XP, Vista
R, W R, W X X
Mac OS X R R, W R, W X
Linux R R, W X R, W
Page 24

English
24
Interface: S-ATA 150
Capacity: 120 GB - 1000 GB
Spindle Speed: 5400 - 7200 RPM
Data Transfer Rate: USB 1.1 max 12 Mbps
USB 2.0 max 480 Mbps
FireWire 400 max 400 Mbps
FireWire 800 max 800 Mbps
Access Time: 12 ms
Buffer Memory: 8192 KB
Smart Card: certied to ISO-7816
Supported Encryption: 128 / 256 bit
NIST certied AES hardware cipher engine
Computers and HDD manufacturers convertdifferently from Byte
to KByte, MByte and GByte. HDD manufacturers calculate in the
metric system (1 KByte = 103 Byte = 1000 Byte) and computers use due to
their construction the dual system (1 KByte = 210 Byte = 1024 Byte). The
outcomes of this are the following differences in the representation of the
memory capacity.
Only HDDs of leading manufacturers of pro prietary goods are assembled.
Technical Specications
HDD Manufacturer True Capacity
120 GB 111.76 GB
160 GB 149.01 GB
250 GB 232.83 GB
320 GB 298.02 GB
500 GB 465.66 GB
1000 GB 931.32 GB
Page 25

English
25
If any problems occure with your DIGITTRADE HIGH SECURITY HDD
please read the following checklist to nd a solution.
If further technical support is required, please feel free to contact our
support team.
Problem Symptom Solution
The keypad is inactive
keypad light is turned off Ensure that the USB
connector is rmly connected to your computer’s USB port. If you are
using Firewire, ensure
that the Firewire connector is rmly connected to
the computer’s Firewire
port.
“ERROR” LED lights up Ensure that a valid card
is inserted, and that the
card orientation is correct by inserting the card
with the contacts facing
down.
Authentication fails
“ERROR” LED lights up An incorrect PIN was
entered. Press the “ESC”
button to restart PIN
entry (max. 8 trials).
The drive cannot be
identied
no icon for the device is
shown on the computer
Ensure that the
HS128/256 is not connected to a bus-powered
USB hub or a USB
extension cable. Please
use the delivered USB-Ycable.
missing partition or
le system cannot be
detected
Please refer Chapter
“Partitioning / Formatting”, p. 41 et seqq.
FAQ - Frequently Asked Questions
Page 26

English
26
Problem Symptom Solution
The drive cannot be
identied
the wrong USB-cable is
used
Please use the delivered
USB-Y-cable and connect
the A- and B-plug to
your computer.
The drive is performaing very slowly
connection using USB Please ensure your HS
128 / 256 is connected
to a USB 2.0 bus
interface.
the wrong USB-cable is
used
Please use the delivered
USB-Y-cable and connect
the A- and B-plug to
your computer.
wrong connection to the
computer
Ensure the USB and
FireWire cable is connected to your computer.
the HS128/256 is
plugged in an USB hub
Connect the HS 128/256
directly to your computer.
other USB devices are
connected to the same
port
Disconnect any other
USB devices and see if
performance improves.
Page 27

English
27
Data Security and Dsiclaimer
We recommend to store continuously the data saved on the DIGITTRADE
HIGH SECURITY HDD on other storage media. This will protect you against
a total data loss. The DIGITTRADE GmbH is not liable for data loss and
thereby emerging costs and damages.
Storage of Smart Card
The DIGITTRADE HIGH SECURITY HDD is delivered with 2 Smart Cards.
The access to the enclosure is granted only with these Smart Cards.
If a defect or a loss occurs, please contact us immediately. A new Smart
Card can be provided with costs after sending back the HS128/256
including the other valid Smart Card.
If you lose both of the Smart Cards or both are defective there is no way
to get access to the HDD and all data stored on it. To use the DIGITTRADE
HIGH SECURITY HDD please send it back to our support team and tell us
your administrator PIN. We can provide you a new pair of Smart Cards
with costs. These contain a new AES key. With the initialization of the
Smart Cards the HDD will be formatted and all data stored on it will be
irrevocably deleted.
Note: Please keep your administrator PIN in safe custody. Without this PIN
it is not possible to initialize new Smart Cards and hence to use the HDD.
Scope of Delivery
- DIGITTRADE HIGH SECURITY HDD
- 2 Smart Cards
- USB-Y-Cable
- User Manual
- CD
- Hardcover Case
- Certicate of Ownership
Page 28

English
28
According to the EC directive, waste electrical and electronic equipment
(WEEE) must not be disposed as municipal wastes.
To avoid the spread of the contained fabric components in your
environment and to save natural resources we would like to ask you to
hand this product after its economic life time only to a collecting point for
WEEE in your area.
Thanks to these measures, materials of your product can be reused
environmentally friendly.
© 2009 DIGITTRADE GmbH
Deutsch
Dieses Handbuch ist urheberrechtlich geschützt und darf nicht (auch nicht
teilweise) ohne schriftliche Zustimmung der DIGITTRADE GmbH kopiert
werden.
English
This user manual is protected by copyright. No part of this material may be
reproduced, transcribed, used or disclosed to any third party in any form or
by any means, without the written permission of the DIGITTRADE GmbH.
WEEE Statement
Page 29

29
Ihre Notizen / Your Notes
Page 30

30
Ihre Notizen / Your Notes
Page 31

Page 32

 Loading...