

Page 1
HDMI 300m UTP Extender Series
ET-HST1300 HDMI 300m UTP Extender Transmitter 1-port
ET-HSR1300 HDMI 300m UTP Extender Receiver 1-port
ET-HST4300 HDMI 300m UTP Extender Transmitter 4-port
Page 2

ET-HST/R1300 Set
Transmitter Unit x 1
Receiver Unit x 1
Locking DC 5V 2A Power Adapter x 1
AC Power Cord x 2
Quick Installation Guide x 1
ET-HSR1300
Receiver Unit x 1
Locking DC 5V 2A Power Adapter x 1
AC Power Cord x 1
Quick Installation Guide x 1
ET-HST4300
Transmitter Unit x 1
Locking DC 5V 2A Power Adapter x 1
AC Power Cord x 1
Quick Installation Guide x 1
Page 3
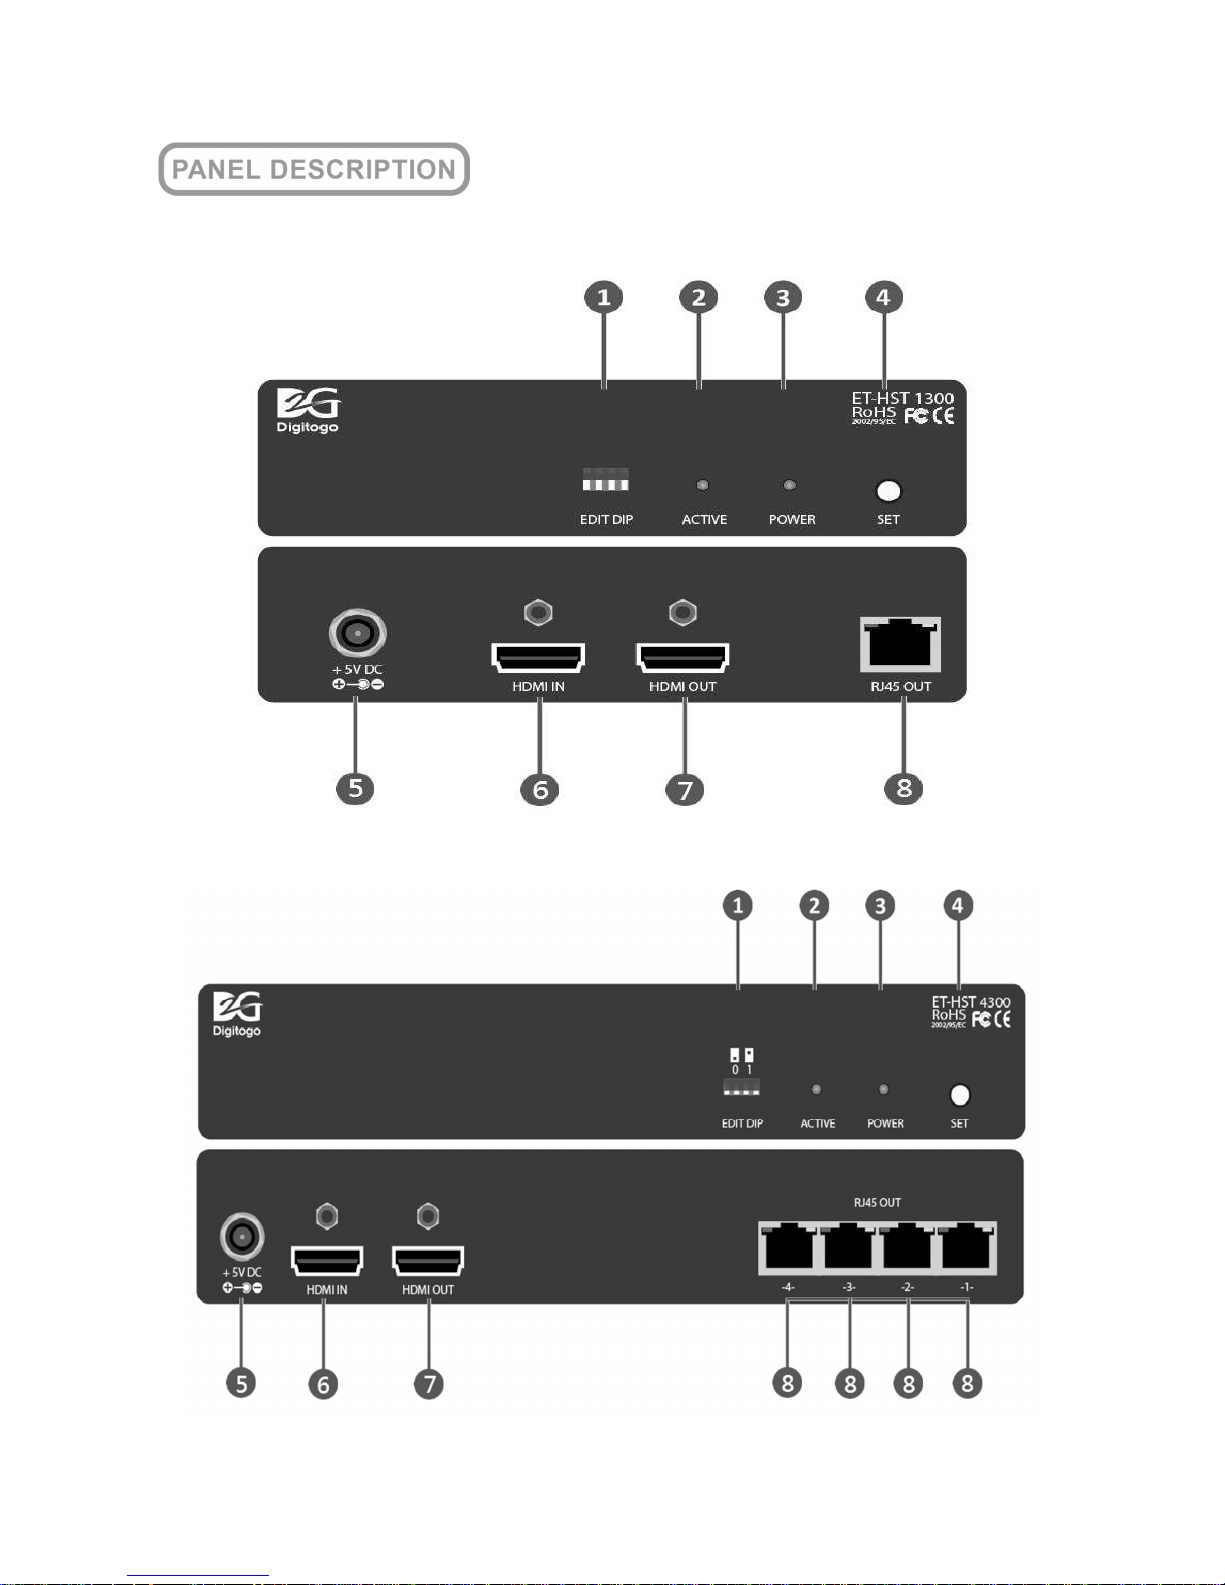
ET-HST1300 HDMI 300m UTP Extender Transmitter 1-port
ET-HST4300 HDMI 300m UTP Extender Transmitter 4-port
Page 4
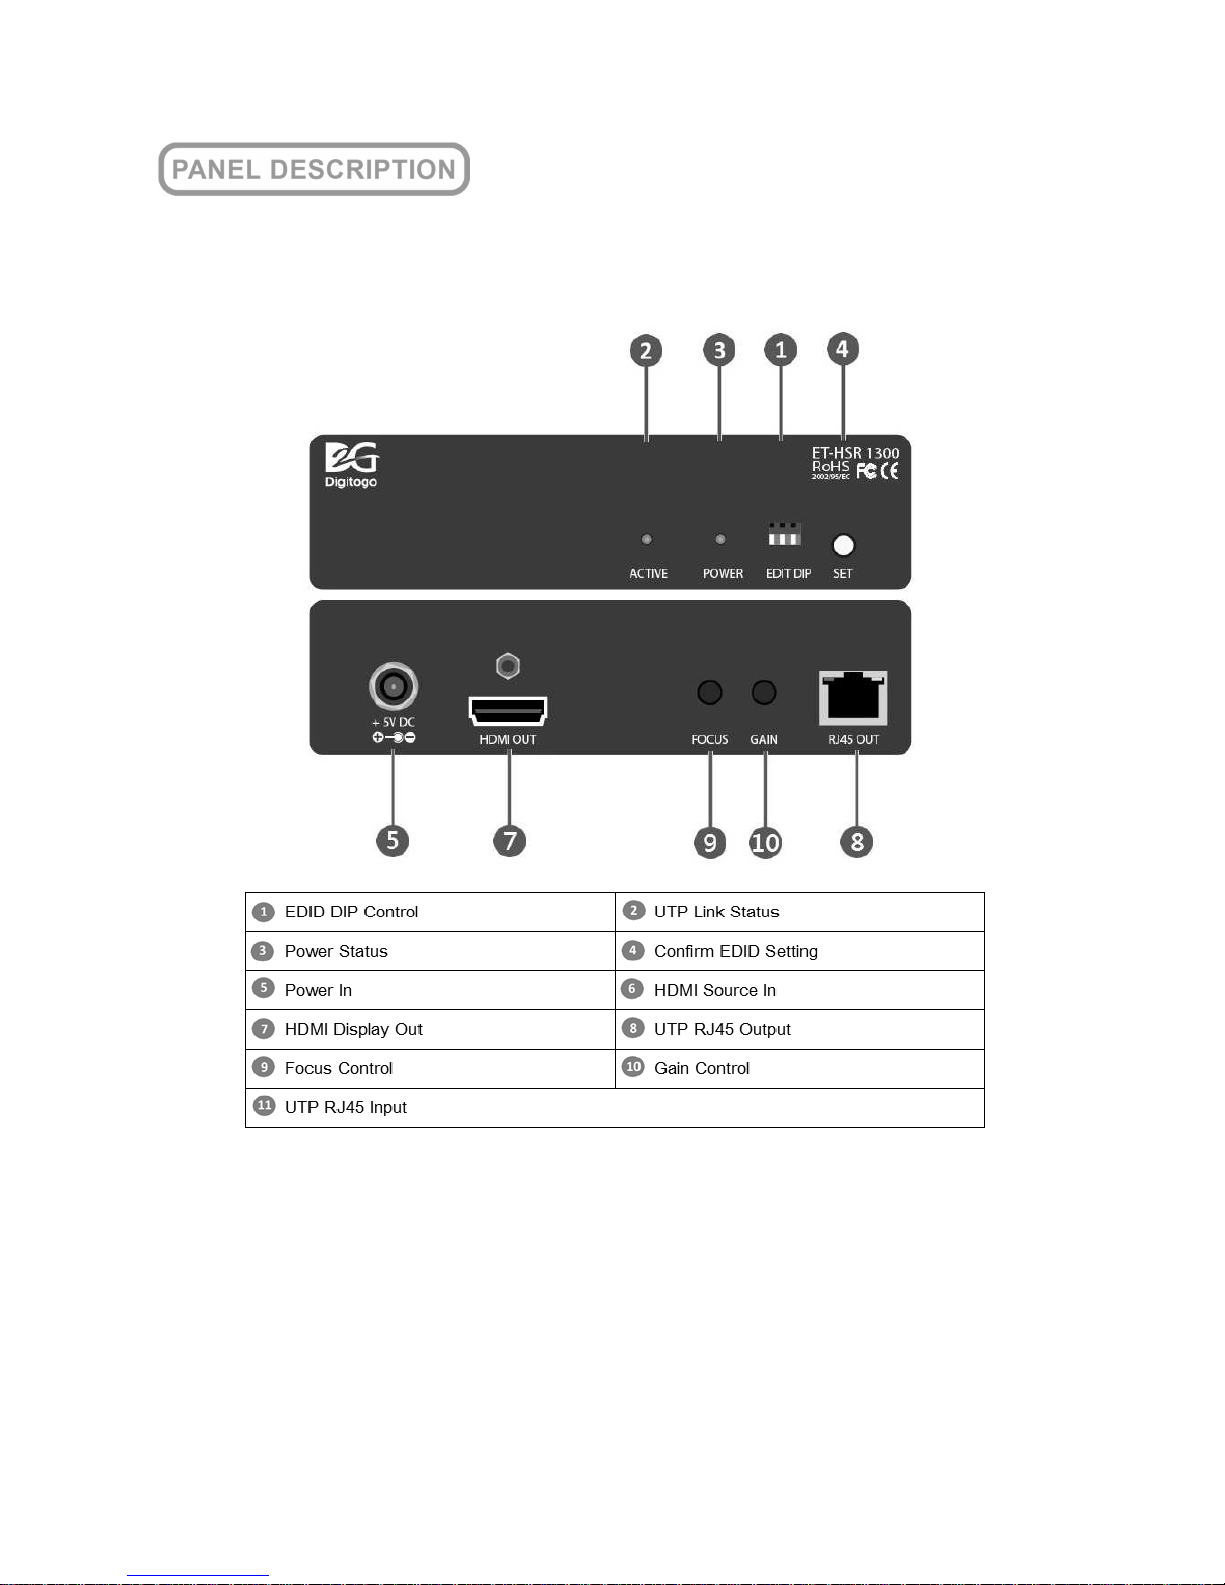
ET-HSR1300 HDMI 300m UTP Extender Receiver 1-port
Page 5
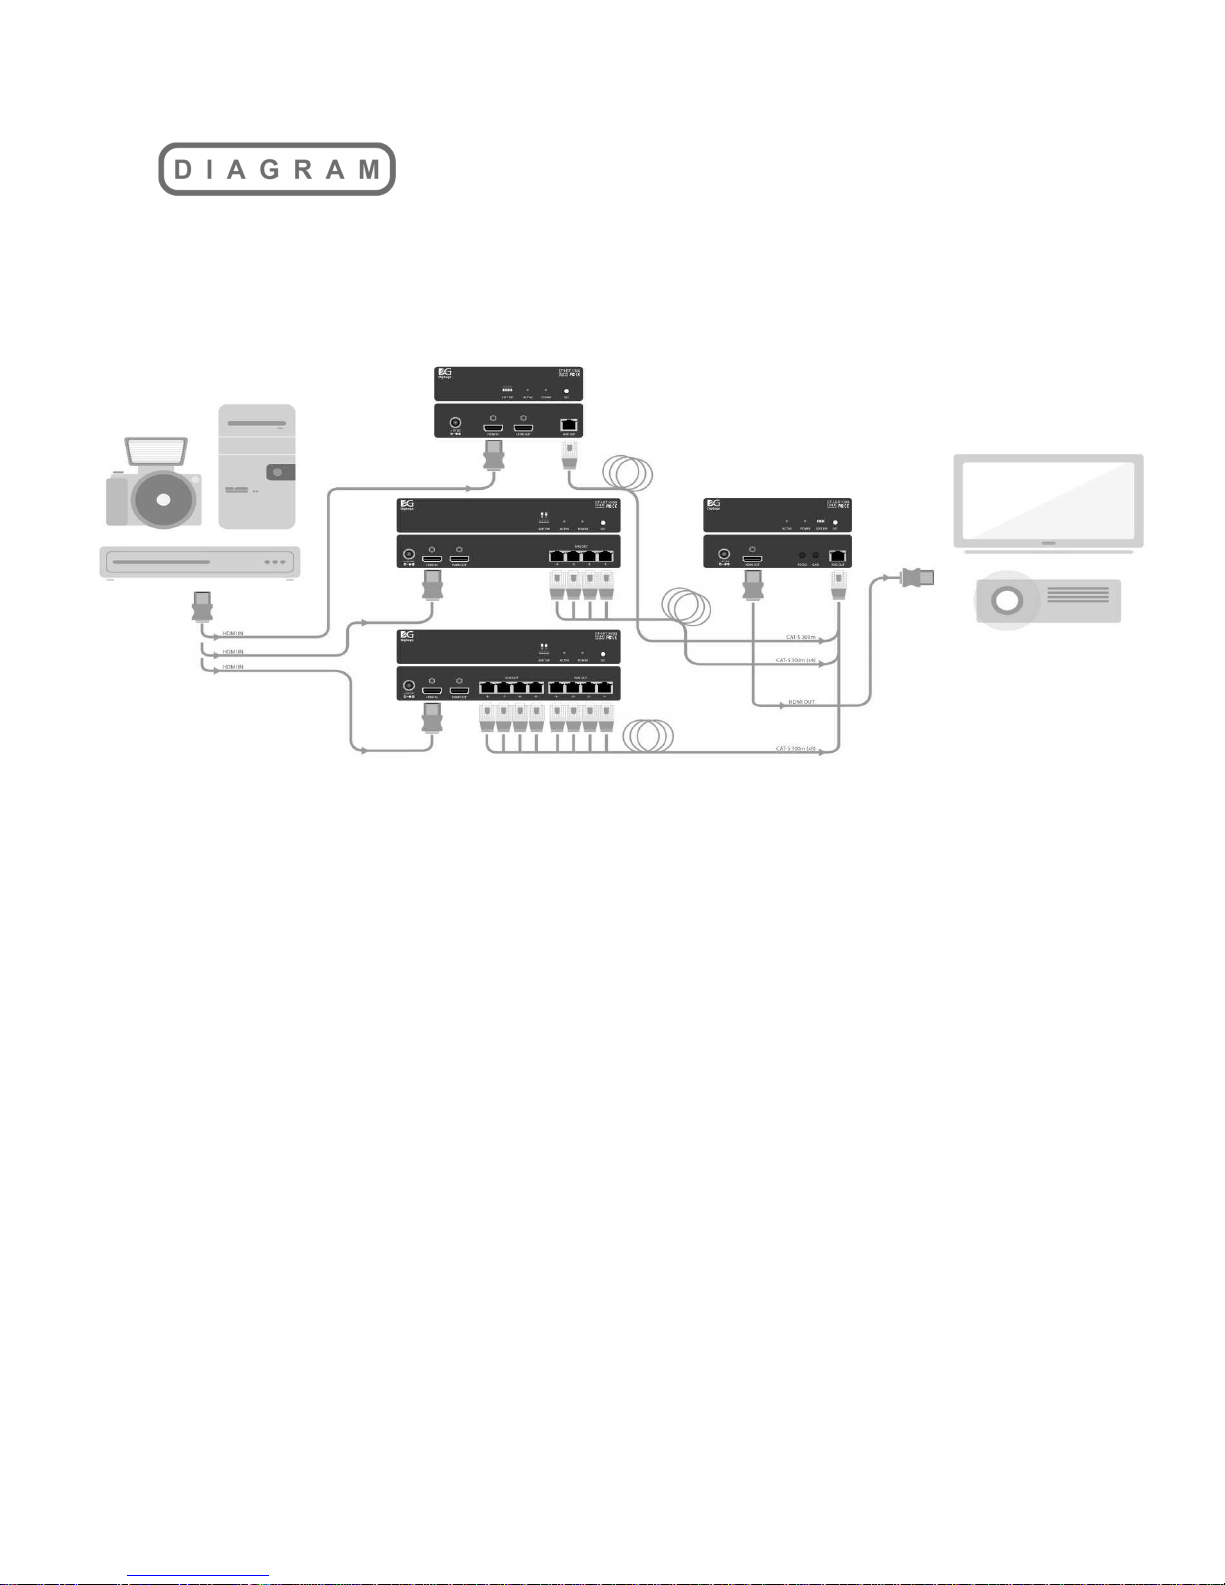
1. Attach HDMI cables from video source to Transmitter and from
Receiver(s) to display(s).
2. Attach Ethernet cables connecting between Transmitter and
Receiver(s).
3. Connect and power on Transmitter and Receiver(s). Do not
switch on displays until resolution settings made.
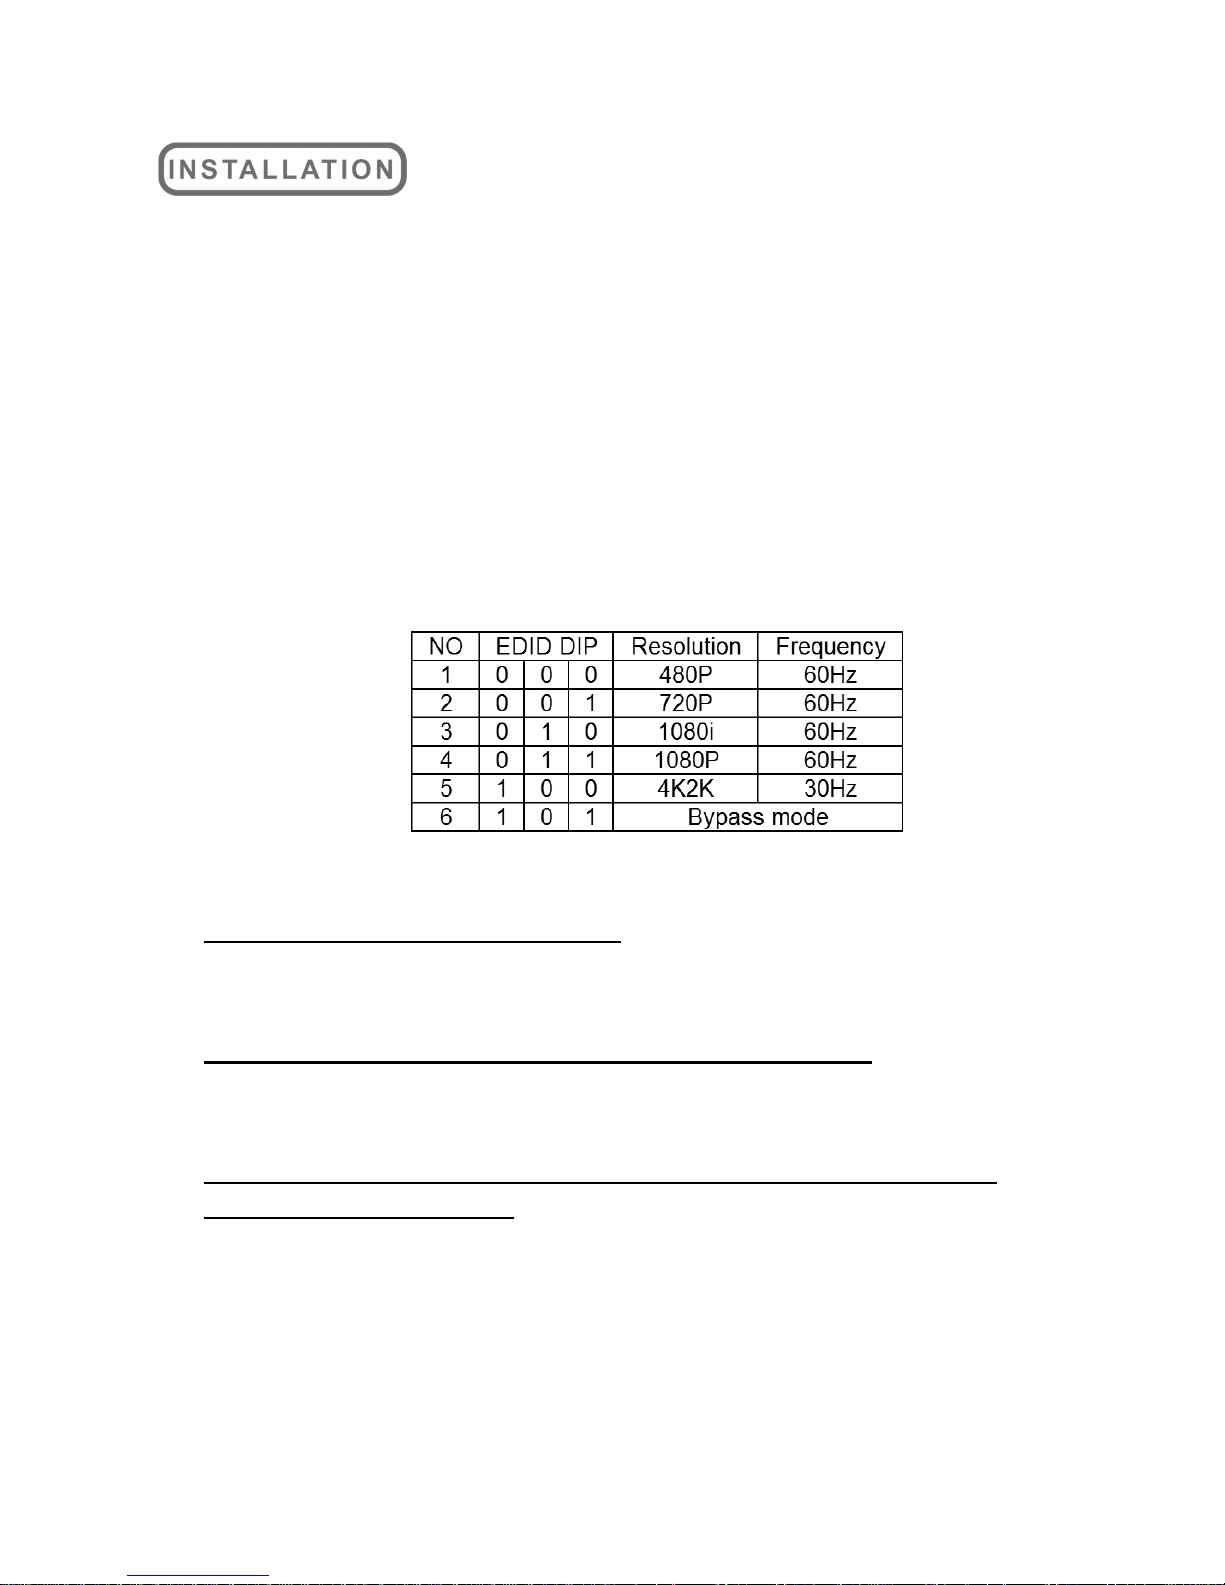
4. Define resolution of monitor(s) attached to Receiver
Select desired resolution from one of the option from table
below. Adjust “EDID DIP” switch, refer to table below. “0”
represents switch down. “1” represents switch up.
After DIP Switch set, press “SET” button to register setting.
NOTE: Receiver factory default setting is Bypass mode. All
monitors receive the same resolution setting as Transmitter
setting. (Go to Step 5 for Transmitter EDID setting).
NOTE: Transmitter and Receiver at factory default- all attaching
monitors at both Transmitter and Receiver receive 1080p 60Hz
video.
NOTE: Receiver sets Bypass mode, Transmitter sets Read
LOCAL OUTPUT EDID- Transmitter automatically reads EDID
from attached monitor and feeds the same setting to all monitors
attached to Receiver. When no local monitor directly connected
to Transmitter, EDID will be undetectable and may result
display error
.
Page 6
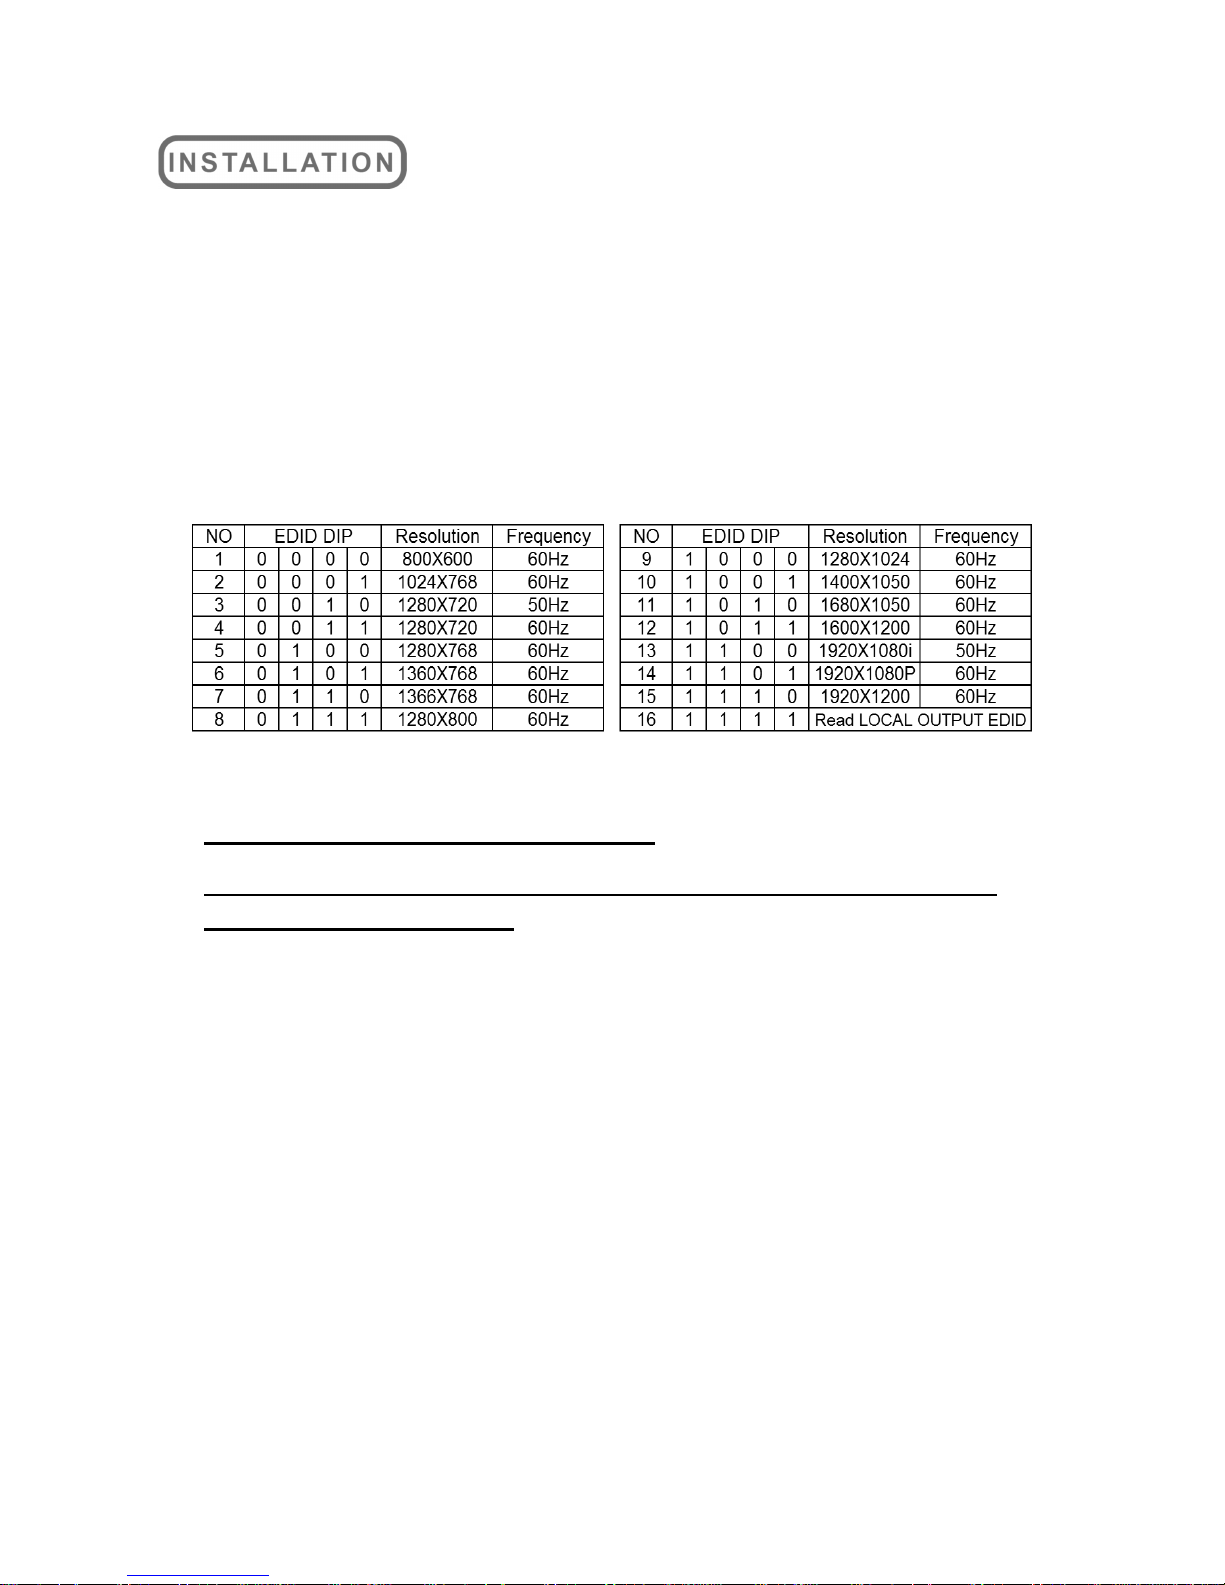
5. Define display resolution of the monitor attached directly to
Transmitter. If local display not required at Transmitter, skip this
step.
If display do not show desirably, or specific resolution required,
define setting as below-
Select desired resolution from one of the option from table
below. Adjust “EDID DIP” switch, refer to table below. “0”
represents switch down. “1” represents switch up.
After DIP Switch set, press “SET” button to register setting.
NOTE: Transmitter factory default setting is 1080p 60Hz video.
NOTE: Receiver sets Bypass mode, Transmitter sets Read
LOCAL OUTPUT EDID- Transmitter automatically reads EDID
from attached monitor and feeds the same setting to all monitors
attached to Receiver. When no local monitor directly connected
to Transmitter, EDID will be undetectable and may result
display error.
6. Power on connected devices on Transmitter side- local monitor
(if any) and video source.
7. Power on all monitors attached to Receiver.
8. Use “Focus” and “Gain” knobs to fine tune monitor’s picture
quality.
Page 7
 Loading...