

DigitalZone HDMI 412L, HDMI 408L, HDMI 416L, HDMI 404L User Manual
Important Safety Instructions
1. Read these instructions.
2. Keep these instructions.
3. Heed all warnings.
4. Follow all instructions.
5. Do not use this apparatus near water.
6. Clean only with dry cloth.
7. Do not block any ventilation openings, Install in accordance with the
manufacturer’s instructions.
8. Do not install near any heat sour ces such as radiators, heat registers, stoves, or
other apparatus (including amplifiers) that produce heat.
9. Do not defeat the safety purpose of the polarized or grounding-type plug, A
polarized plug has two blades with one wider than the other. A grounding type plug
has two blades and a third grounding pro ng. The wide blade or the third prong are
provided for your safety, If the provided plug does not fit into your outlet, consult an
electrician for replacement of the obsolete outlet.
10. Protect the power cord from being walked on or pinched particularly at p lugs,
convenience receptacles, and the point where they exit from the apparatus .
11. Only us e attachments/ accessories specified by the manufacturer.
12. Use only with the cart, stand, tripod, bracket, or table
specified by the manufacturer, or sold with the apparatus. When
a cart is used. Use caution when moving the cart/ap paratus
combination to avoid injury from tip-ov e r.
13. Unplug this apparatus during lighting storms or when
unused for long periods of time
14. Refer all servicing to qualified service personnel. Servicing
is required when the apparatus has been damaged in any way, such as powersupply cord or plug is damaged, liqui d has been spilled or objects have fallen into
the apparatus, the apparatus has been ex posed to rain or moisture, does not
operate normally, or has been dropped.
3
WARNING
TO REDUCE THE RISK OF FIRE OR ELECTRIC SHOCK, DO NOT EXPOSE THIS
PROCUCT TO RAIN OR MOISTURE. DO NOT INSERT ANY METALLIC OBJECT
THROUGH THE VENTILATION GRILLS OR OTHER OPENNINGS ON THE
EQUIPMENT.
Apparatus shall not be exposed to dri pping or splashing and that no objects filled with
liquids, such as vases, shall be placed on the apparatus
CAUTION
EXPLANATION OF GRAPHICAL SYMBOLS
The lightning flash with arrowhead symbol, within an equilateral triangle, is
intended to alert the user to the pres ence of “dangerous voltage” within
the product’s enclosure that may be of sufficient magnit ude to constitute a
risk of electric shock to persons.
The exclamation point within an equilateral triangle is intended to alert the
user to the presence of important operating and maintenance (servicing)
instructions in the literature accompanying the product.
ClassⅠ construction
An apparatus with CLASSⅠ construction shall be connected to a M AI NS socket outlet
with a protective earthing connection.
Battery
Batteries(battery pack or batteries inst alled) shall not be exposed to excessive heat
such as sunshine, fire or the like.
4
Disconnection Device
Disconnect the main plug from the apparatus, if it’s defected. And please call a repair
man in your location.
When used outside of the U.S., it may be used HAR
code with fittings of an approved agency is employed.
CAUTION
These servicing instructions are for use by qualified service personnel only. To reduce the
risk of electric shock do not perform any servicing other than that contained in the
operating instructions unless you are qualified to do so
Apparatus shall not be exposed to dri pping or splashing and no o bjects filled
with liquids, such as vases, shall not be placed on the apparatus.
Where the MAIN plug or an appliance coupler is used as the disconnect device,
The disconnect device shall remai n readily operable.
User’s Manual
5
FCC Information (for U.S.A)
Note: This equipment has been tested and found to comply with the limits for a Class A digital
device, pursuant to part 15 of the FCC Ru les. These limits are designed to pr ovide reasonable
protection against harmful interfe rence when the equipment is operated in a commercial
environment.
This equipment generates, uses, and can radiate radio frequency energy and, if not installed
and used in accordance with the instruction manual, may cause harmful interf erence to radio
communications. Operation of this equipment in a residential area is likely to cause harmful
interference in which case the user will be required to correct the interference at his own
expense.
Changes or modifications not expressly approved by the party responsible for compliance
could void the user's authority to operate the equipment under FCC rules.
NOTE ON RECYCLING (for EUROPE)
This product’s packaging materia ls are recyclable and can be reused.
Please dispose of any materials in acc ordance with the local recycling
regulations.
When discarding the unit, comply with local rules or regulations.
Batteries should never be thrown away or incinerated but disposed of in
accordance with the local regulations concerning chemical waste.
This product and the accessories packed together constitute the
applicable product according to the WEEE directive except batteries
NEXD HDMI Splitter
6
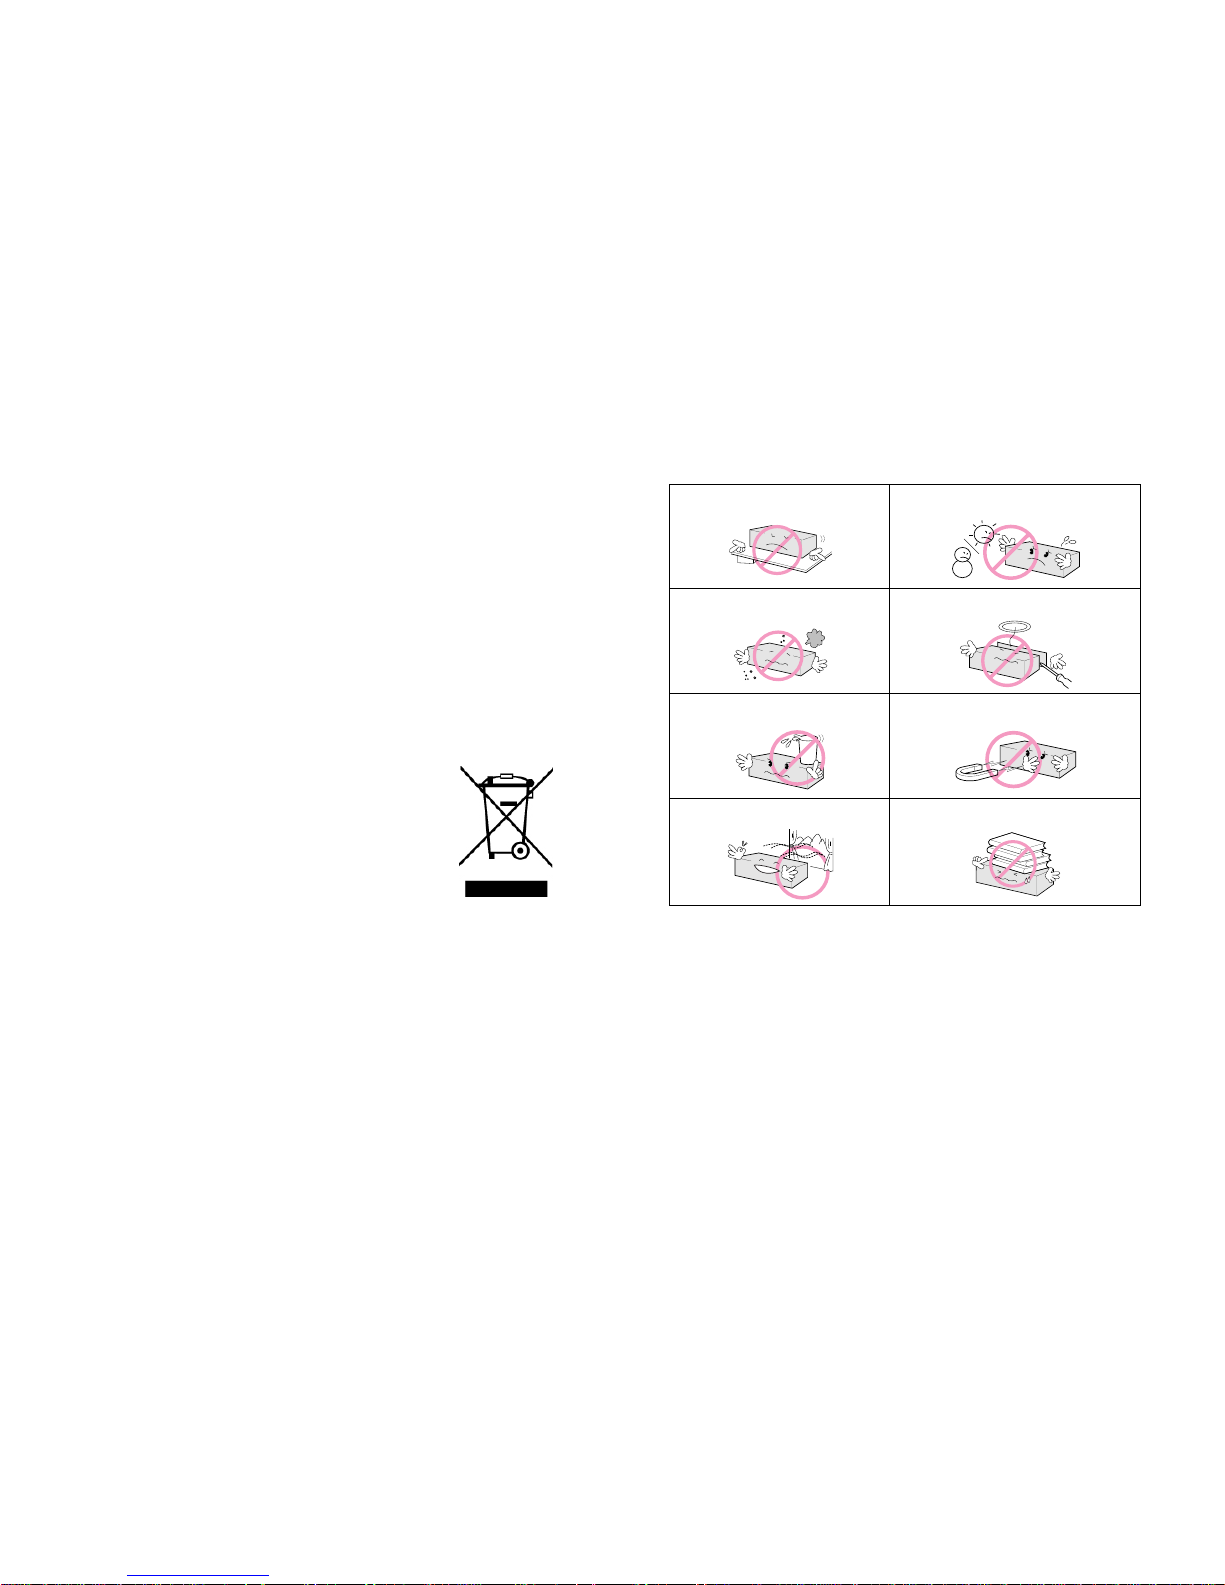
안전을 위한 주의사항
신체적 위험이나 재산상의 피 해를 막기 위한 내용으로 반드시 지켜 주시기 바랍니다.
평평한 곳에 설치해주세요.
햇빛이 직접 비치거나 추운 곳에서 사용하지 마세요.
먼지나 물 등이 들어가지 않도록 하세요.
분해하거나 수리, 개조하지 마세요.
제품 위에 물컵 등을 얹어 놓지 마세요.
진동이 심한 곳이나 자석류가 있는 곳에서 멀리 놓아주세요.
통풍이 잘 되는 곳에 놓아주세요.
제품 위에 물건을 올려 놓지 마세요.
© Copyright 2011, ㈜디지털존. All rights reserved.
- 사용설명서의 내용 중 일부 또는 전부를 무단 복제하는 것은 금지되어 있습니다.
- 제품의 사양은 기능 향상을 위하여 예고 없이 변경될 수 있습니다.
- 디지털존 로고와 NEXD 는 ㈜디지털존의 등록상표입니다.
- 기타 명칭이나 상표는 각 소유자의 등록상표입니다.
- 이 기기는 업무용(A 급)으로 전자파적합등록을 한 기기이오니 판매자 또는 사용자는
이 점을 주의하시기 바라며, 가정외의 지역에서 사용하는 것을 목적으로 합니다.
- A/S 접수: 02-6330-2343

User’s Manual
7
Contents
안전을 위한 주의사항 ······························································································· 6
목차 ······················································ ······································································ 7
각 부분의 이름 ·········································································································· 8
제품 구성물 ··················································· ·························································· 10
리모컨 버튼의 이름과 기능···················································································· 11
리모컨 건전지 삽입하기 ························································································· 11
연결하기 ··················································································································· 12
NEXD HDMI Splitter 사용법············································································· ······· 13
문제해결하기 ············································ ···································· ··························· 14
CEC, USB (펌웨어 업그레이드) & RS-232 (외부 컨트롤) ····································· 14
EDID Emulation Mode 선택 방법 ··········································································· 15
1. Dynamic mode ····································· ····················· ···················· ················· 15
2. Static mode ························································································ ············ 16
제품 규격 ················································································································· 17
Important Safety Instruction ··················································································· 19
Control & Connection options ·················································································· 20
Packages and accessories ······ ·············································································· 22
Remote control Unit ··························· ···································································· 23
Insert battery ············································································································ 23
Connection ··············································································································· 24
How to use NEXD HDMI Splitter ············································································· 25
Troubleshooting for no power ·················································································· 25
CEC, USB (Firmware upgrade) & RS-232 (Remote Control) ······························ 25
How to use EDID Emulation Mode ········································································ ·· 26
Dynamic mode ····································································································· 26
Static mode ·········································································································· 27
Specification·················································································· ···················· ······· 28
Chinese ·················································································································· 29
Japanese ········· ························· ···················· ···················· ····················· ················· 35
NEXD HDMI Splitter
8
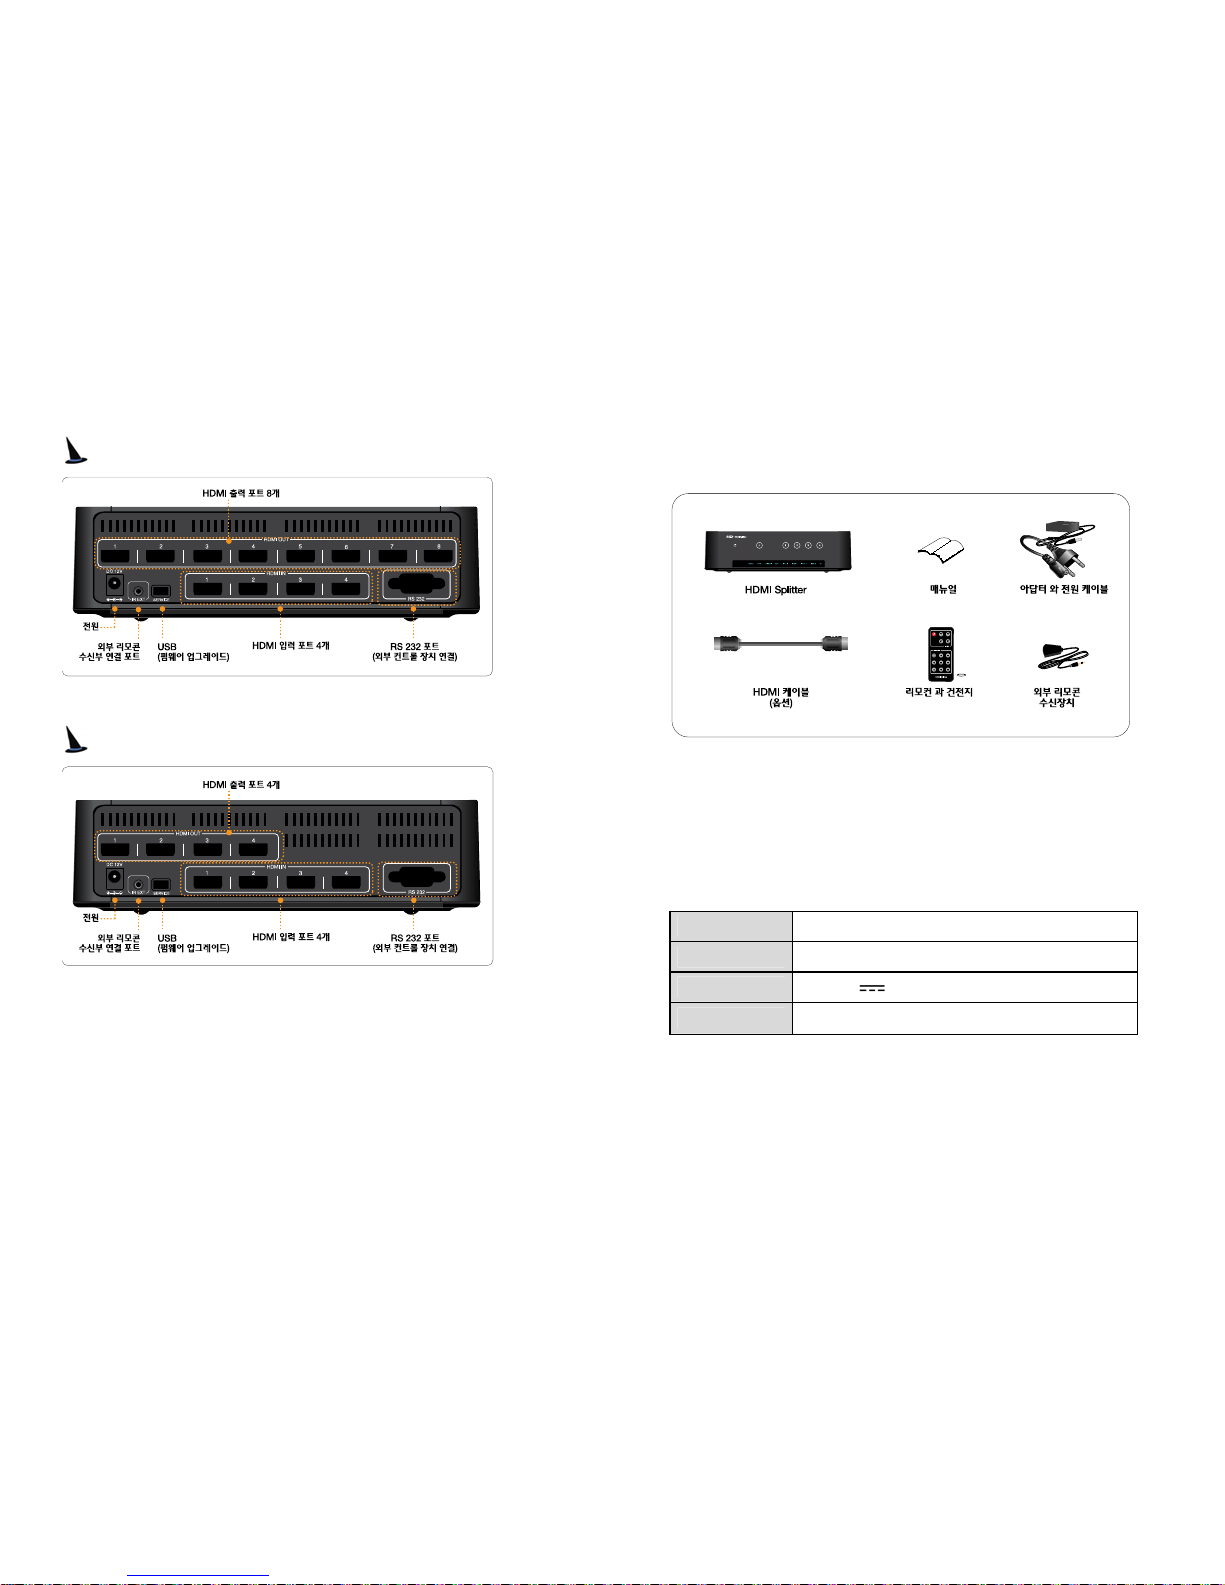
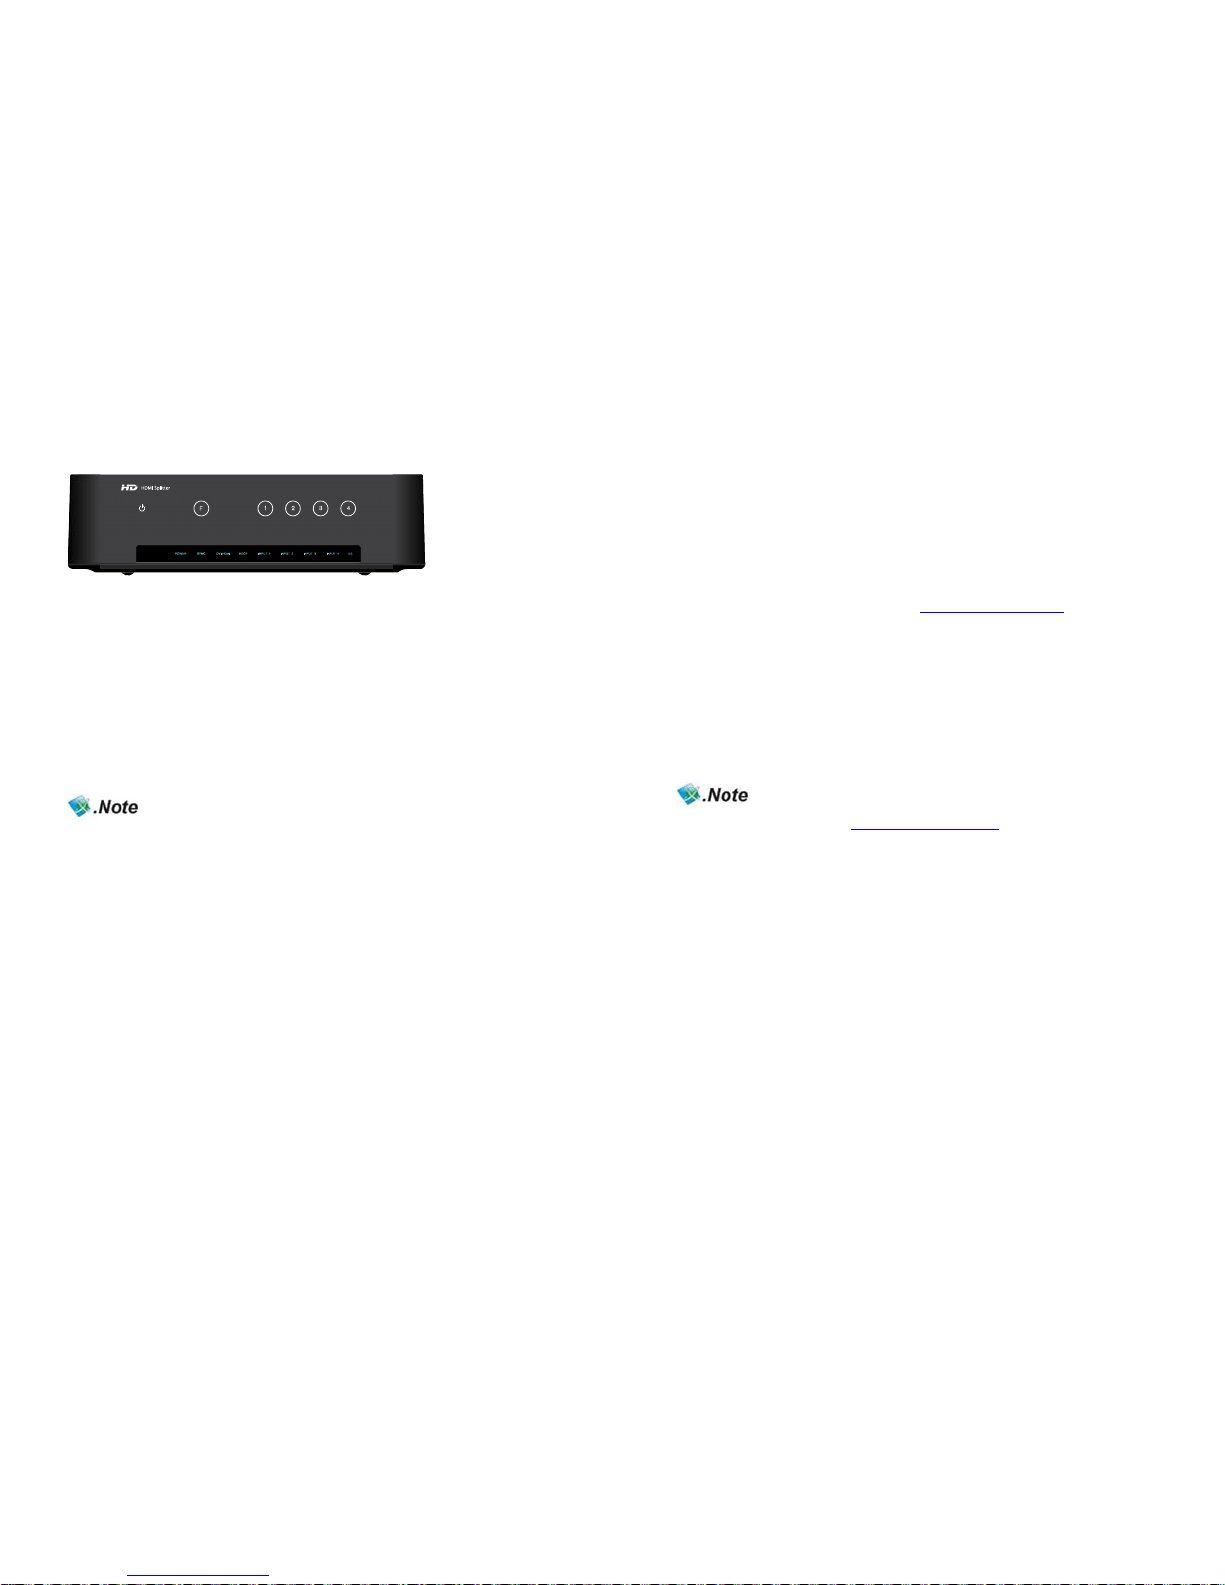
각 부분의 이름
앞면
뒷면 (416L)
뒷면 (412L)
User’s Manual
9
뒷면 (408L)
뒷면 (404L)
NEXD HDMI Splitter
1
0
제품 구성물
사용 전에 내용물이 빠짐없이 들어있는지 확인하세요.
※ 제품구성은 사전에 공지 없이 변경될 수 있습니다.
※ 구성물 이외에 추가 물품은 별도로 구매 하시려면 제조사 또는 구매처에 문의 하시 기
바랍니다. (전화 02-6330-2338)
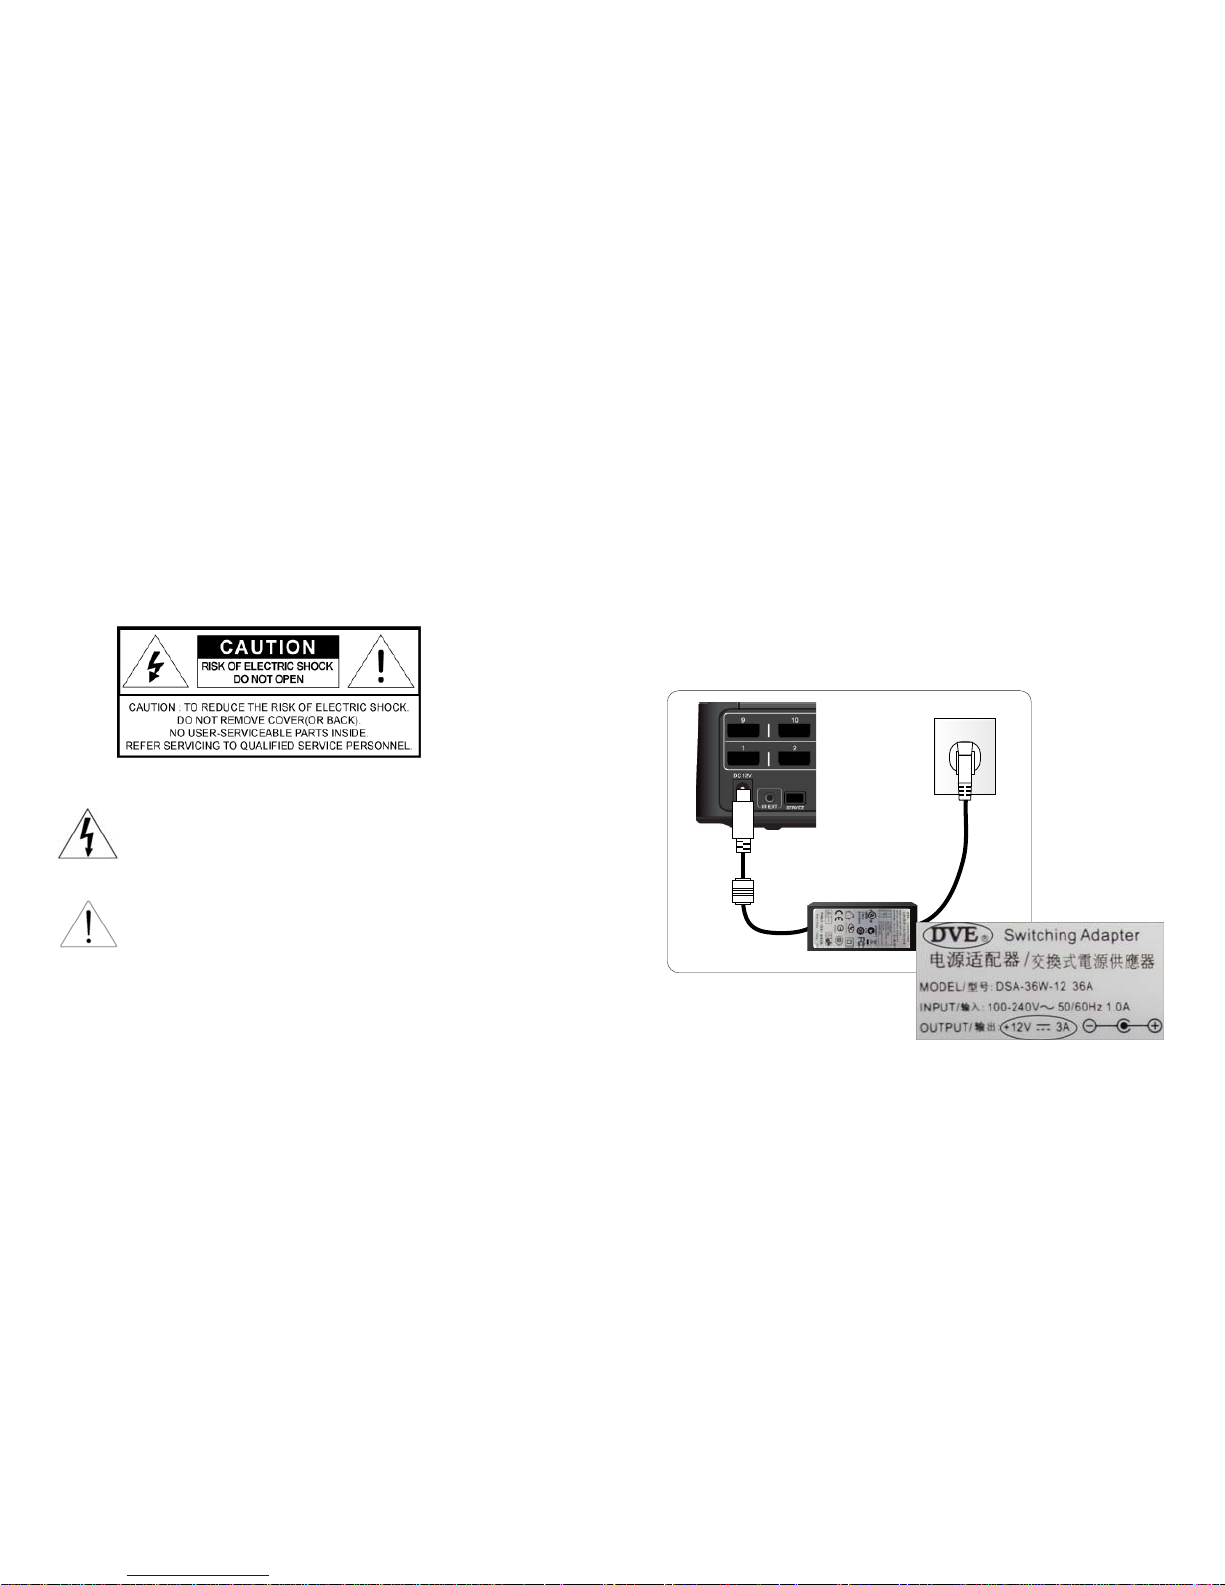
※ Adaptor Specification
Model DSA-36W-12 36A
Input AC 100-240V, 50/60Hz, 1.0A
Output DC 12V 3A
Manufacturer Dee Van Enterpri se Co., Ltd
User’s Manual
11
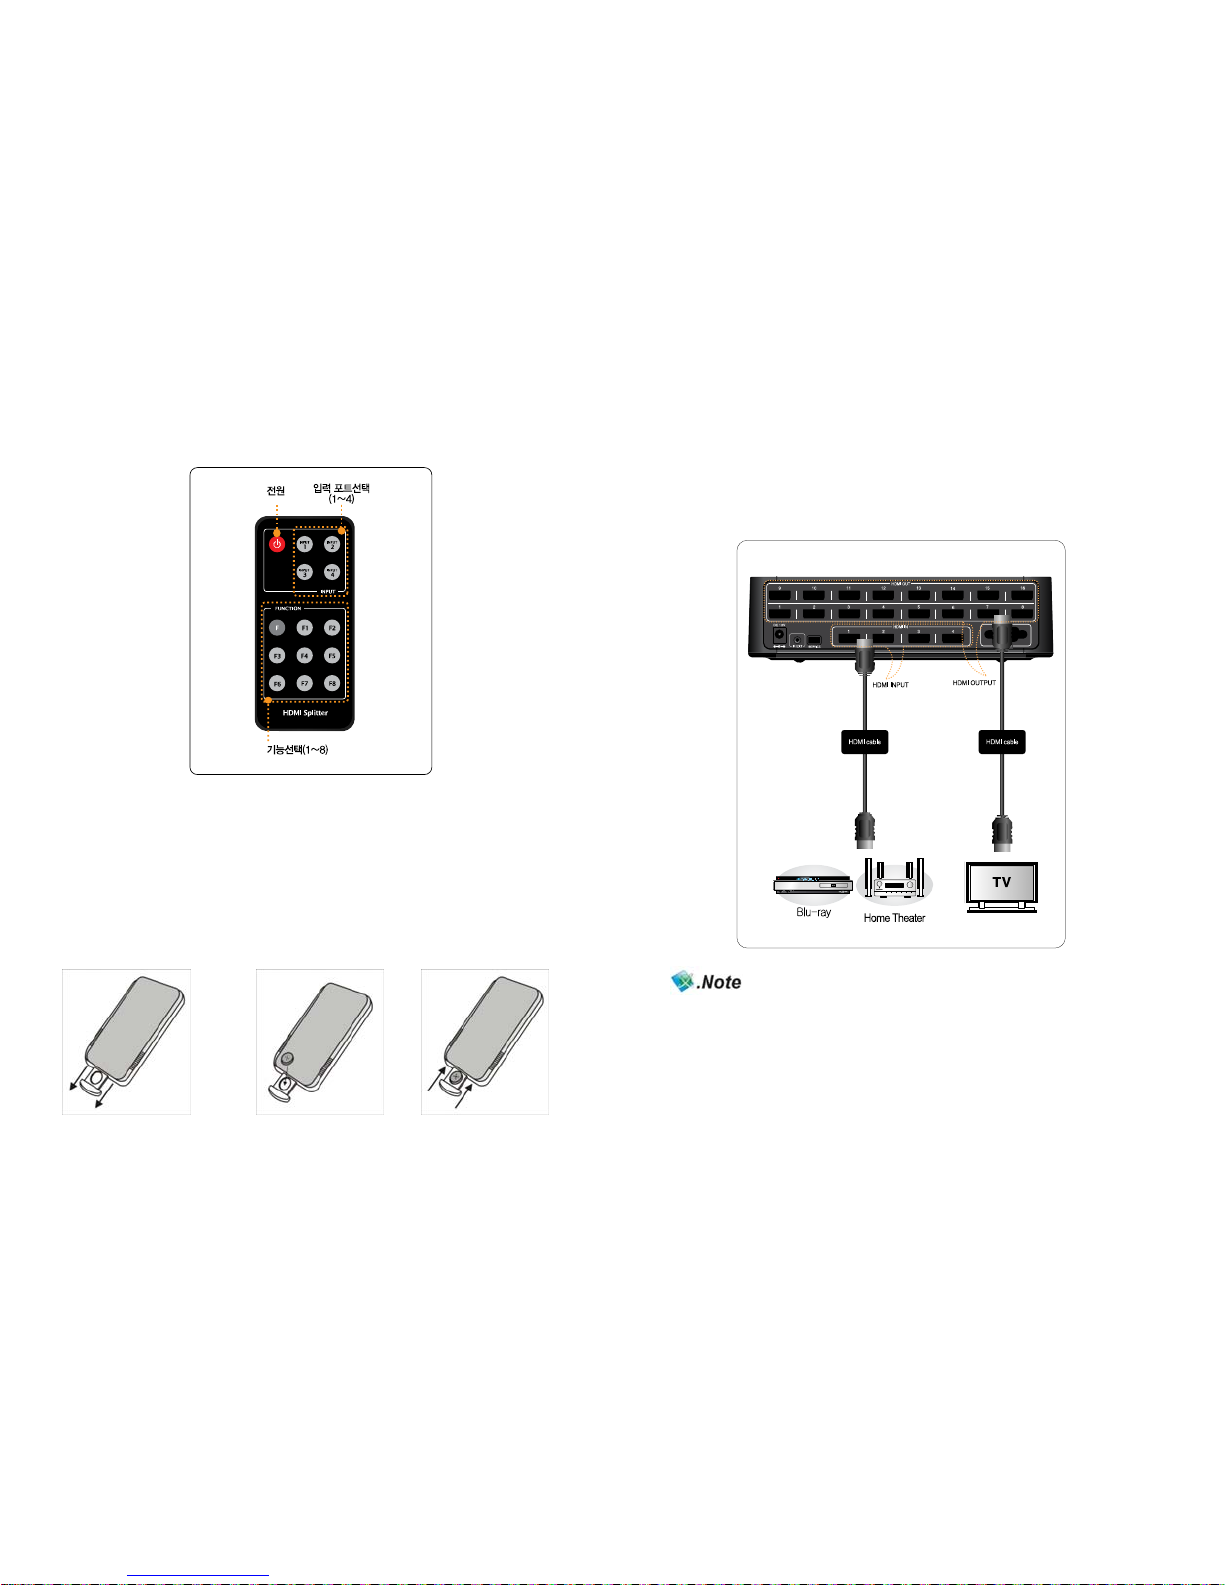
리모컨 버튼의 이름과 기능
※ 리모컨은 본체에서 3~5M 거리에 좌우상하 60도에서 작동합니다
※ 본체와 리모컨의 거리가 멀거나 다른 물체에 가려 사용이 불가능 할 경우 외부 리모컨
수신부를 이용하여 작동 시킬 수 있습니다.
- “외부 리모 컨 수신부” 삽입전에는 본체의 전원을 꺼 주세요.
리모컨 건전지 삽입하기
1. 건전지 삽입부를 당겨 뺍니다. 2. "+"극이 위로 향하게 삽입하세요. 3. 삽입부를 밀어
넣으세요.
NEXD HDMI Splitter
1
2
연결하기
HD MI 케이블로 연결하는 방법입니다.
(ex. 입력: Blu-ray Player, HD Stream Generator, 출력: PDP, LCD TV)
※ 1080p/50~60Hz 이상의 해상도, 720p/1080i/50~60Hz/Deep Color,
720p/1080i/1080p/100~120Hz(High Refresh Rate) 를 지원하기 위해서는 High
sp ee d HD MI C ab le (V er si on 1 .3 )을 반드시 사용하시기 바랍니다.
※ 영상의 분배를 위해 별도의 케이블이 필요하시면 제조사 또는 구매처 에 문 의하시기
바랍니다.
User’s Manual
13
NEXD HDMI Splitter 사용법
1. N EX D S pl itt er 의 전원 스위치를 켭니다.
2. 사용 하려는 영상입력기기( Bl u- ra y Pl ay er o r HD S et -t op b ox, e tc .) 의 전원을
켭니다.
3. 디스플레이 기기( LC D TV , PD P TV et c) 의 전원을 켭니다.
4. 사용 하려는 영상출력 기기와 연결된 입력 번호를 선택합니다.
NE XD H DM I Sp li tt er 전면부의 “I np ut 1~ In pu t4 ” 버튼을 누르면 됩니다.
HD(1080p)급의 고화질 영상 출력장비(Blu-ray Player, HD set-top box)를 연결하여
사용하는 경우 O ut pu t 단자와 연결된 디스플레이 기기는 H D급 고화질 T V의 H D급
입력 단자 이어야 합니다.
NEXD HDMI Splitter
1
4
문제해결하기
1. N EX D HD MI 전면부의 LE D 가 켜 져 있는지 확인 하시기 바랍니다.
2. N EX D HD MI 와 연결된 기기들의 전원 케이블이 제대로 연결되어 있는지 확인
합니다. 좀 더 자세한 사항은 ww w. di gi ta lz on e. co .k r 에서 확인 하시기 바랍니다.
CEC, USB
(펌웨어 업그레이드) & RS-232 (외부 컨트롤)
1. CEC : CEC 기능의 자세한 사항은 www.digitalzone.co.kr
에서 확인하시기 바랍니다.
2. USB : 펌웨어 업그레이드가 있다면, USB 를 통하여 손쉽게
업그레이드가 가능합니다.
3. RS-232 : 당사의 컨트롤 프로토콜이 제공하는 시리얼 포트를
통해 외부 컨트롤이 가능합니다.
SDK 는 당사 홈페이지 www.digitalzone.co.kr
을 통해 출시될
예정입니다. 다운로드와 사용법에 대한 좀 더 자세한 정보를
원하시면 www.digitalzone.co.kr 을 확인해 주시기 바랍니다.
 Loading...