

DigitalZone HDMI 208L, HDMI 204L, HDMI 416L, HDMI 408L, HDMI 412L User Manual
...

Important Safety Instructions
1. Read these instructions.
2. Keep these instructions.
3. Heed all warnings.
4. Follow all instructions.
5. Do not use this apparatus near water.
6. Clean only with dry cloth.
7. Do not block any ventilation openings, Install in accordance with the
manufacturer’s instructions.
8. Do not install near any heat sources such as radiators, heat registers, stoves, or
other apparatus (including amplifiers) that produce heat.
9. Do not defeat the safety purpose of the polarized or grounding-type plug, A
polarized plug has two blades with one wider than the other. A grounding type plug
has two blades and a third grounding prong. The wide blade or the third prong are
provided for your safety, If the provided plug does not fit into your outlet, consult an
electrician for replacement of the obsolete outlet.
10. Protect the power cord from being walked on or pinched particularly at plugs,
convenience receptacles, and the point where they exit from the apparatus.
11. Only use attachments/ accessories specified by the manufacturer.
12. Use only with the cart, stand, tripod, bracket, or table
specified by the manufacturer, or sold with the apparatus. When
a cart is used. Use caution when moving the cart/apparatus
combination to avoid injury from tip-over.
13. Unplug this apparatus during lighting storms or when
unused for long periods of time
14. Refer all servicing to qualified service personnel. Servicing
is required when the apparatus has been damaged in any way, such as powersupply cord or plug is damaged, liquid has been spilled or objects have fallen into
the apparatus, the apparatus has been exposed to rain or moisture, does not
operate normally, or has been dropped.
3
WARNING
TO REDUCE THE RISK OF FIRE OR ELECTRIC SHOCK, DO NOT EXPOSE THIS
PROCUCT TO RAIN OR MOISTURE. DO NOT INSERT ANY METALLIC OBJECT
THROUGH THE VENTILATION GRILLS OR OTHER OPENNINGS ON THE
EQUIPMENT.
Apparatus shall not be exposed to dripping or splashing and that no objects filled with
liquids, such as vases, shall be placed on the apparatus
CAUTION
EXPLANATION OF GRAPHICAL SYMBOLS
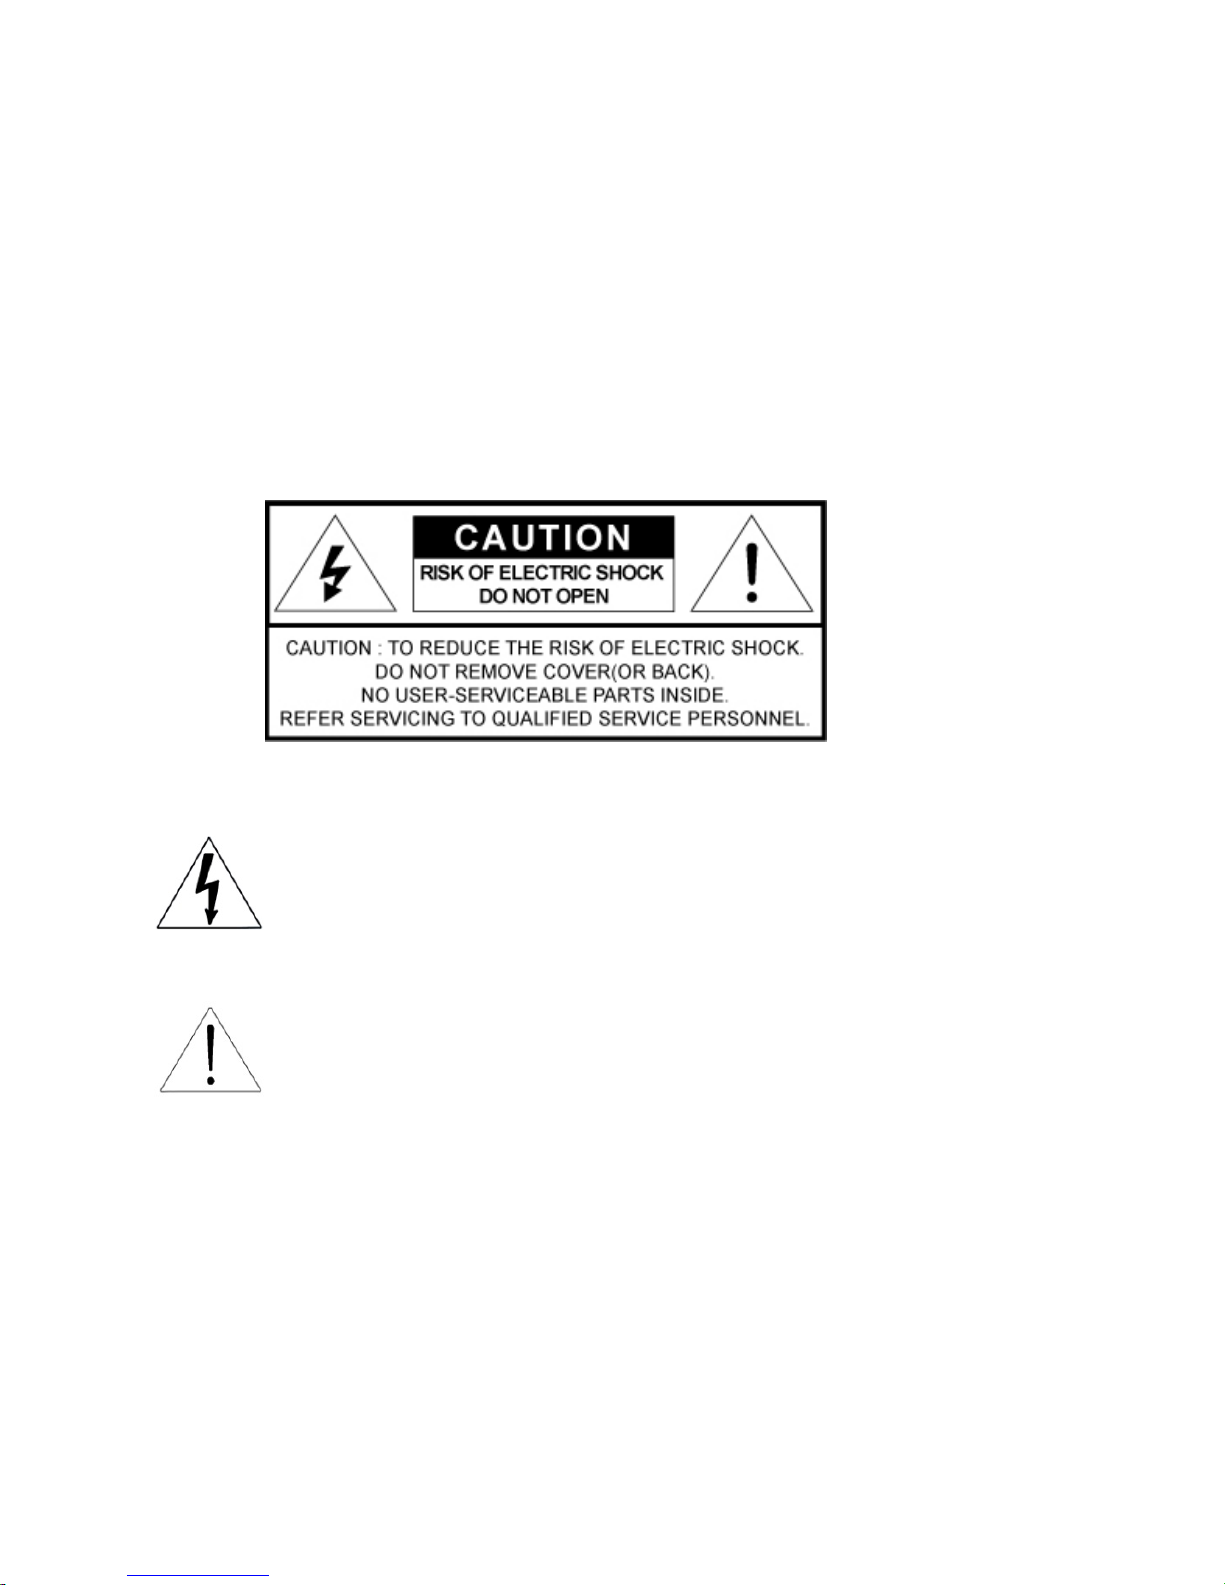
The lightning flash with arrowhead symbol, within an equilateral triangle, is
intended to alert the user to the presence of “dangerous voltage” within
the product’s enclosure that may be of sufficient magnitude to constitute a
risk of electric shock to persons.
The exclamation point within an equilateral triangle is intended to alert the
user to the presence of important operating and maintenance (servicing)
instructions in the literature accompanying the product.
ClassⅠ construction
An apparatus with CLASSⅠ construction shall be connected to a MAINS socket outlet
with a protective earthing connection.
Battery
Batteries(battery pack or batteries installed) shall not be exposed to excessive heat
such as sunshine, fire or the like.

4
Disconnection Device
Disconnect the main plug from the apparatus, if it’s defected. And please call a repair
man in your location.
When used outside of the U.S., it may be used HAR
code with fittings of an approved agency is employed.
CAUTION
These servicing instructions are for use
by qualified service personnel only. To reduce the risk of electric shock do not
perform any servicing other than that contained in the operating instructions unless
you are qualified to do so.
Apparatus shall not be exposed to dripping or splashing and no objects filled
with liquids, such as vases, shall not be placed on the apparatus.
Where the MAIN plug or an appliance coupler is used as the disconnect device,
The disconnect device shall remain readily operable.
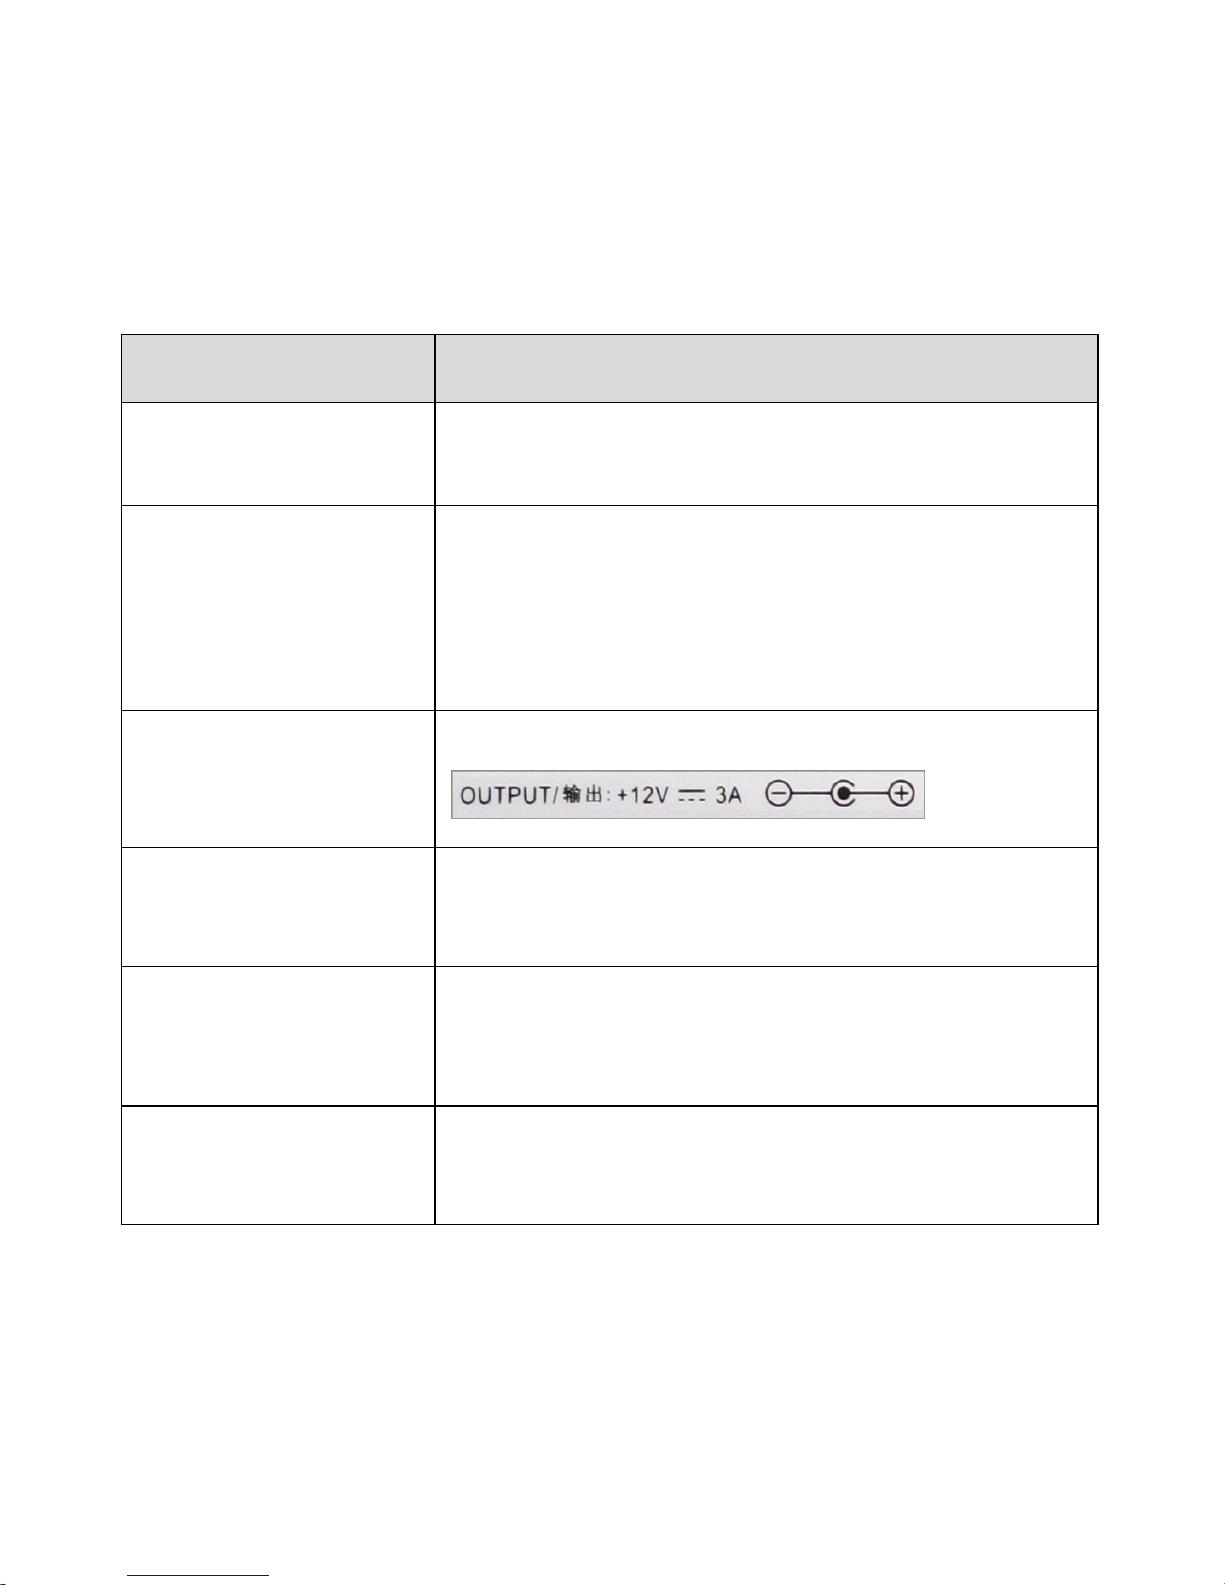
※ DigitalZone will not be responsible
for any problems caused by using
any other adopter we don't provide.
User’s Manual
5
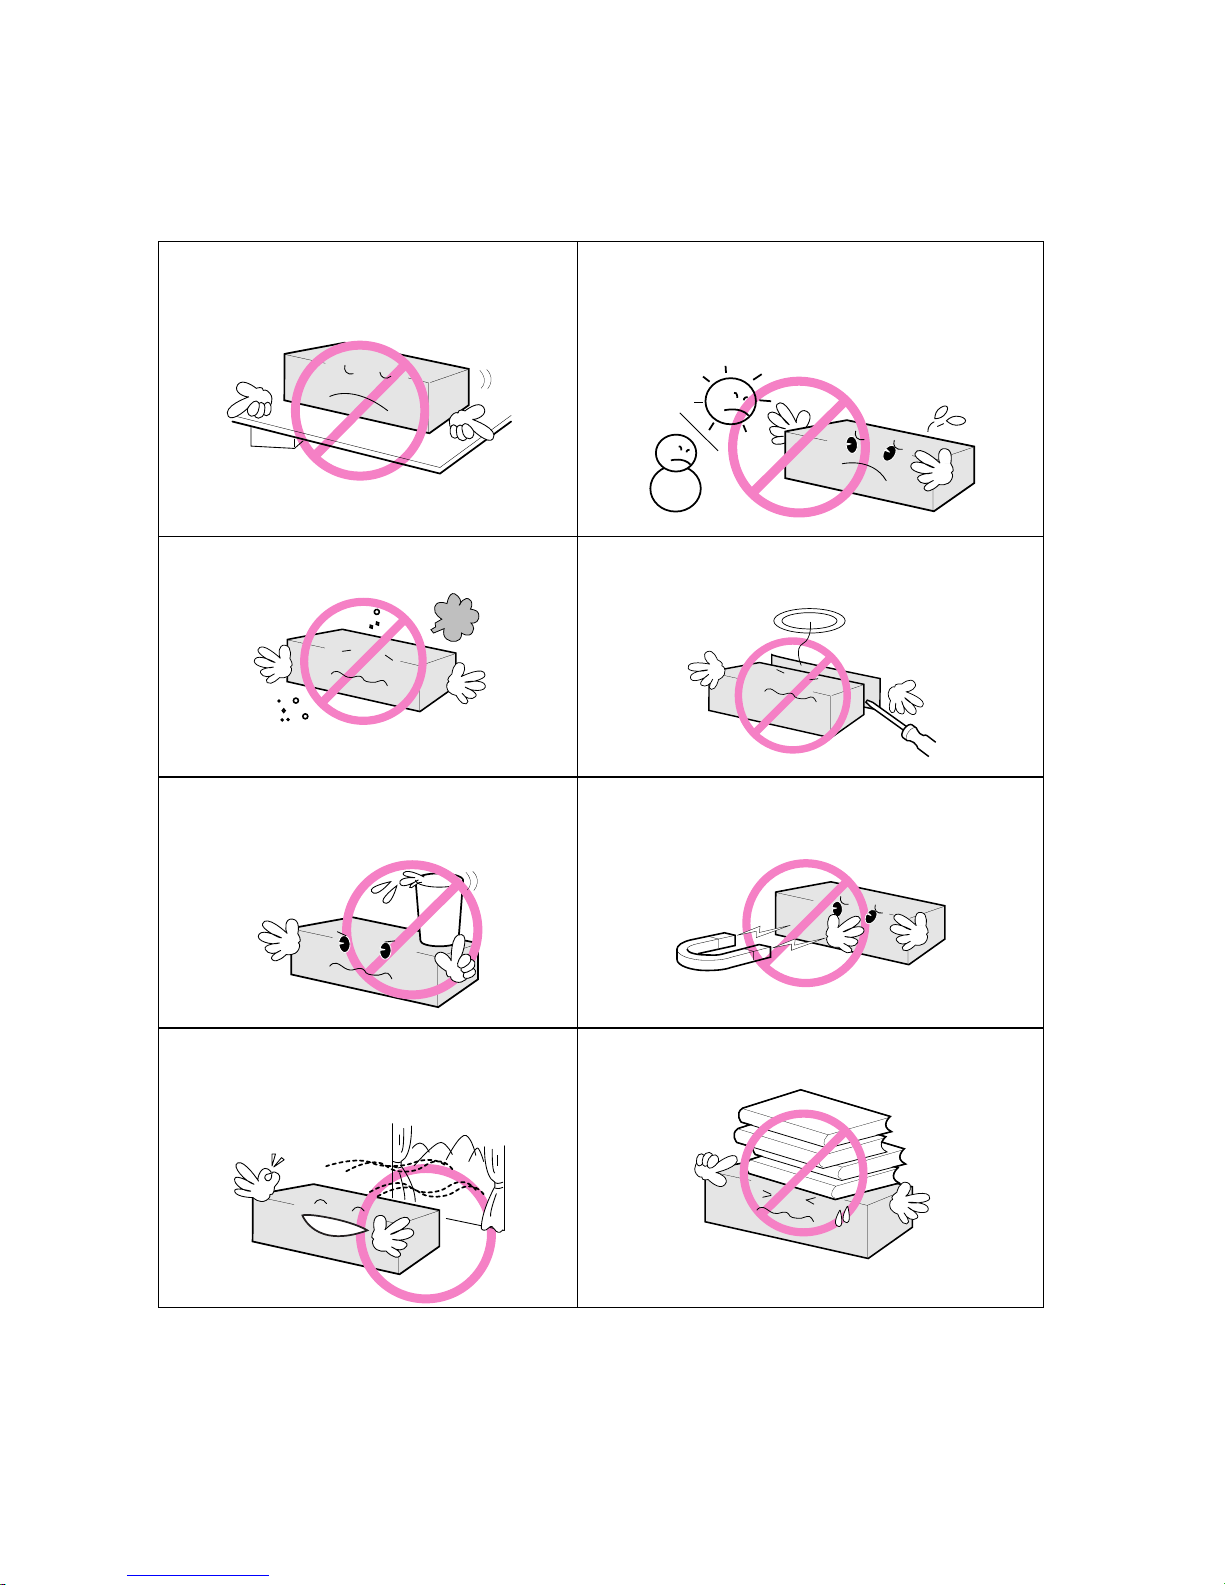
Important safety instructions
Please read following recommended safety instructions carefully.
Do not place this product on an uneven
surface.
Do not install on a surface where exposed to
direct sunlight, near heating .equipment or
heavy cold area.
Prevent water or dust from the product.
Do not attempt to repair this product yourself.
Do not place glass contained of liquid
on the product.
Do not install this product near
any magnetic source.
Place the product at proper ventilation
area.
Do not place heavy items on the product.
© Copyright 2011, DigitalZone Co., Ltd. All rights reserved.
Read these operating instructions carefully before using the product.
Follow the safety instructions on the unit and the safety precautions listed in the manual.
Keep this manual handy for future reference.

NEXD HDMI Splitter
6
Contents
Important Safety Instruction ··················································································· 5
Contents ·················································································································· 6
Control & Connection options ·················································································· 7
Packages and accessories ···················································································· 8
Remote control Unit ······························································································· 9
Insert battery ············································································································ 9
Connection ············································································································· 10
How to use NEXD HDMI Splitter ············································································ 11
Troubleshooting for no power ················································································ 11
CEC, USB (Firmware upgrade) & RS-232 (Remote Control) ································· 11
How to use EDID Emulation Mode ········································································ 12
Dynamic mode ··································································································· 12
Static mode ········································································································ 13
Troubleshooting Guide for Splitters ······································································· 14
Specification ·········································································································· 15
Troubleshooting for no power ················································································ 16
French ·················································································································· 17
Spanish ················································································································ 24
German ················································································································ 31
Italian ··················································································································· 38
Dutch ···················································································································· 45
Russian ················································································································ 52
Polish ··················································································································· 55
Portugal ················································································································ 66
Arabic ··················································································································· 73
User’s Manual
7
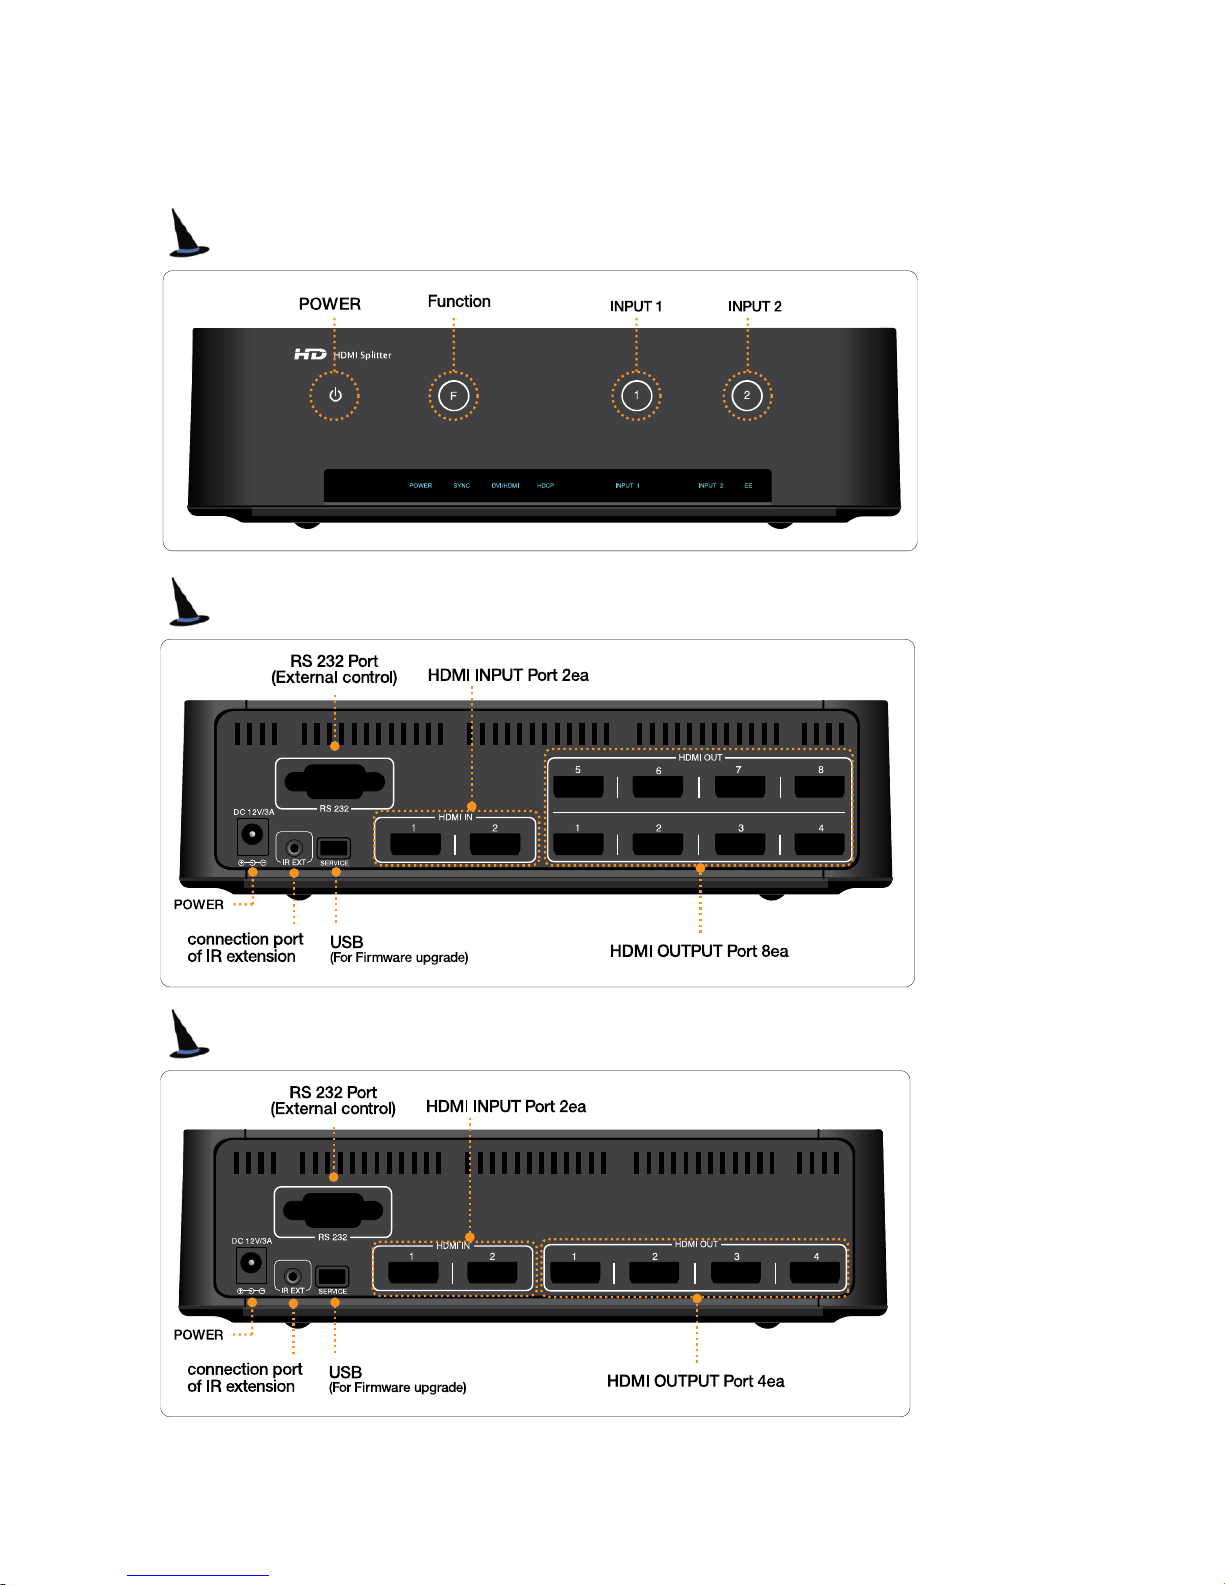
Controls & Connection Options
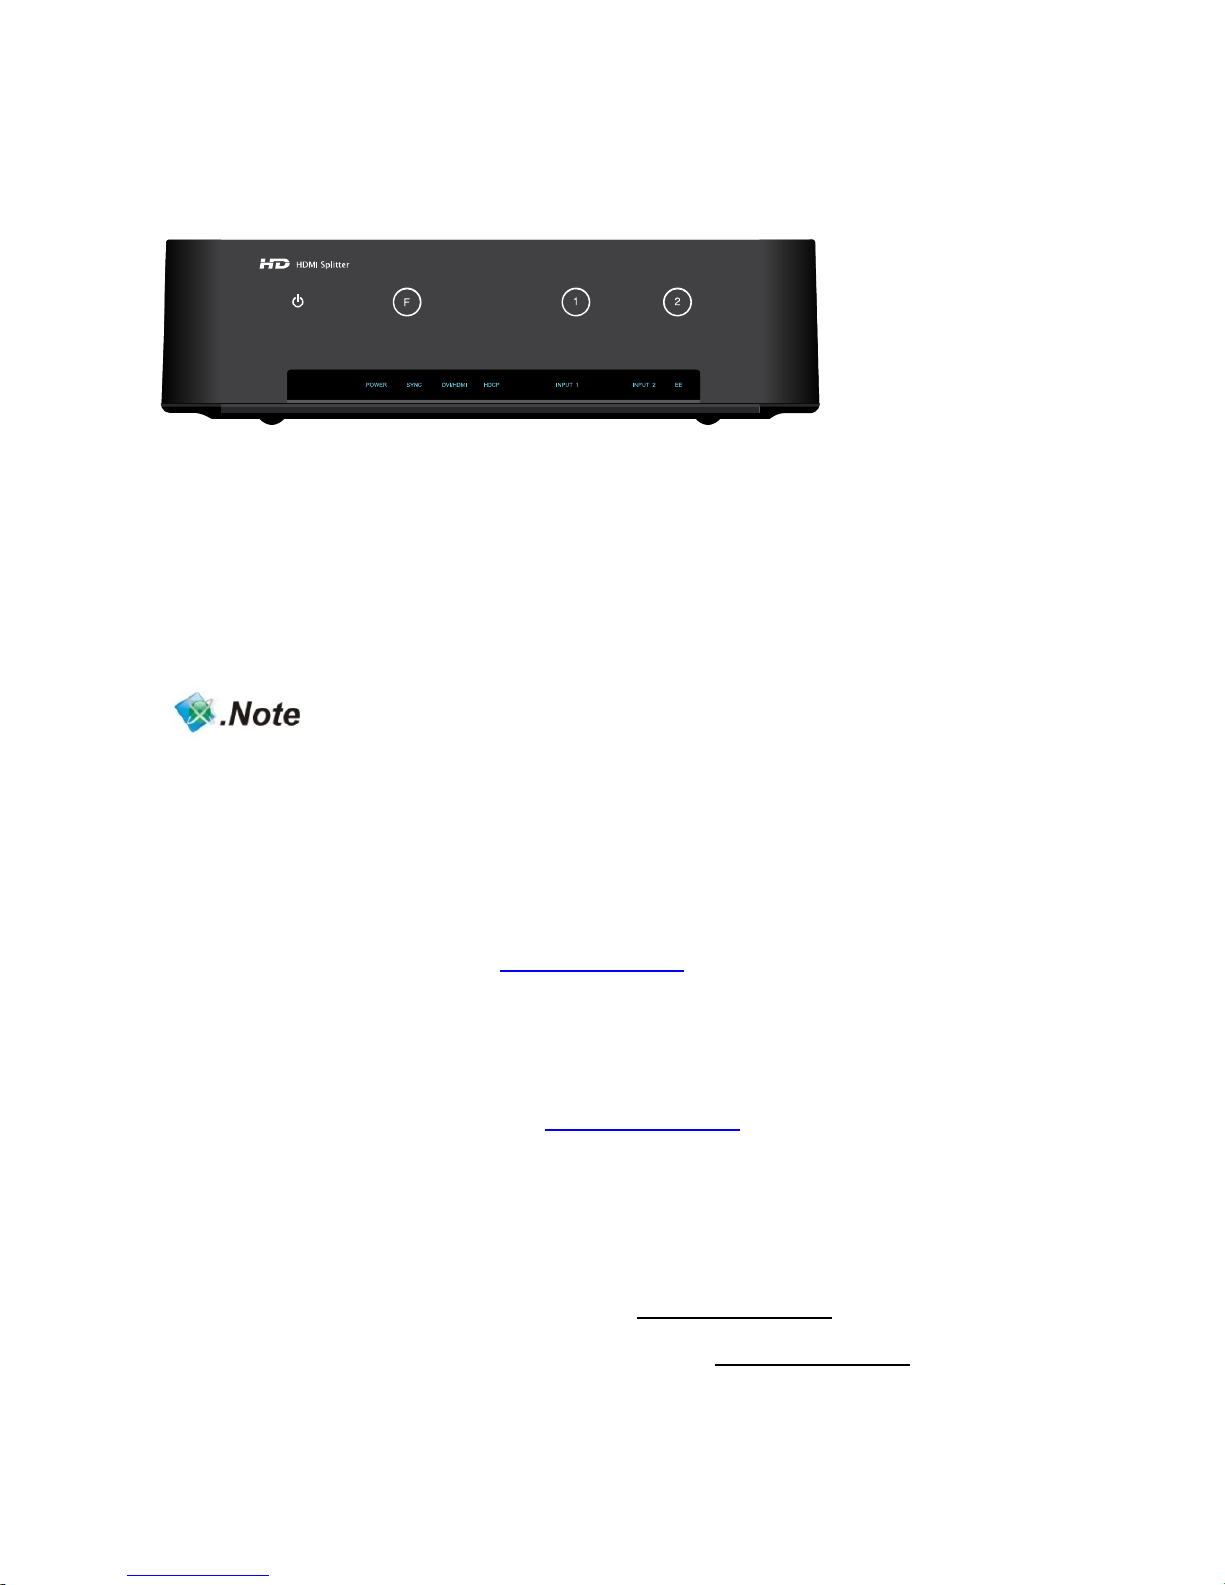
Front
Rear (208L)
Rear (204L)
NEXD HDMI Splitter
8
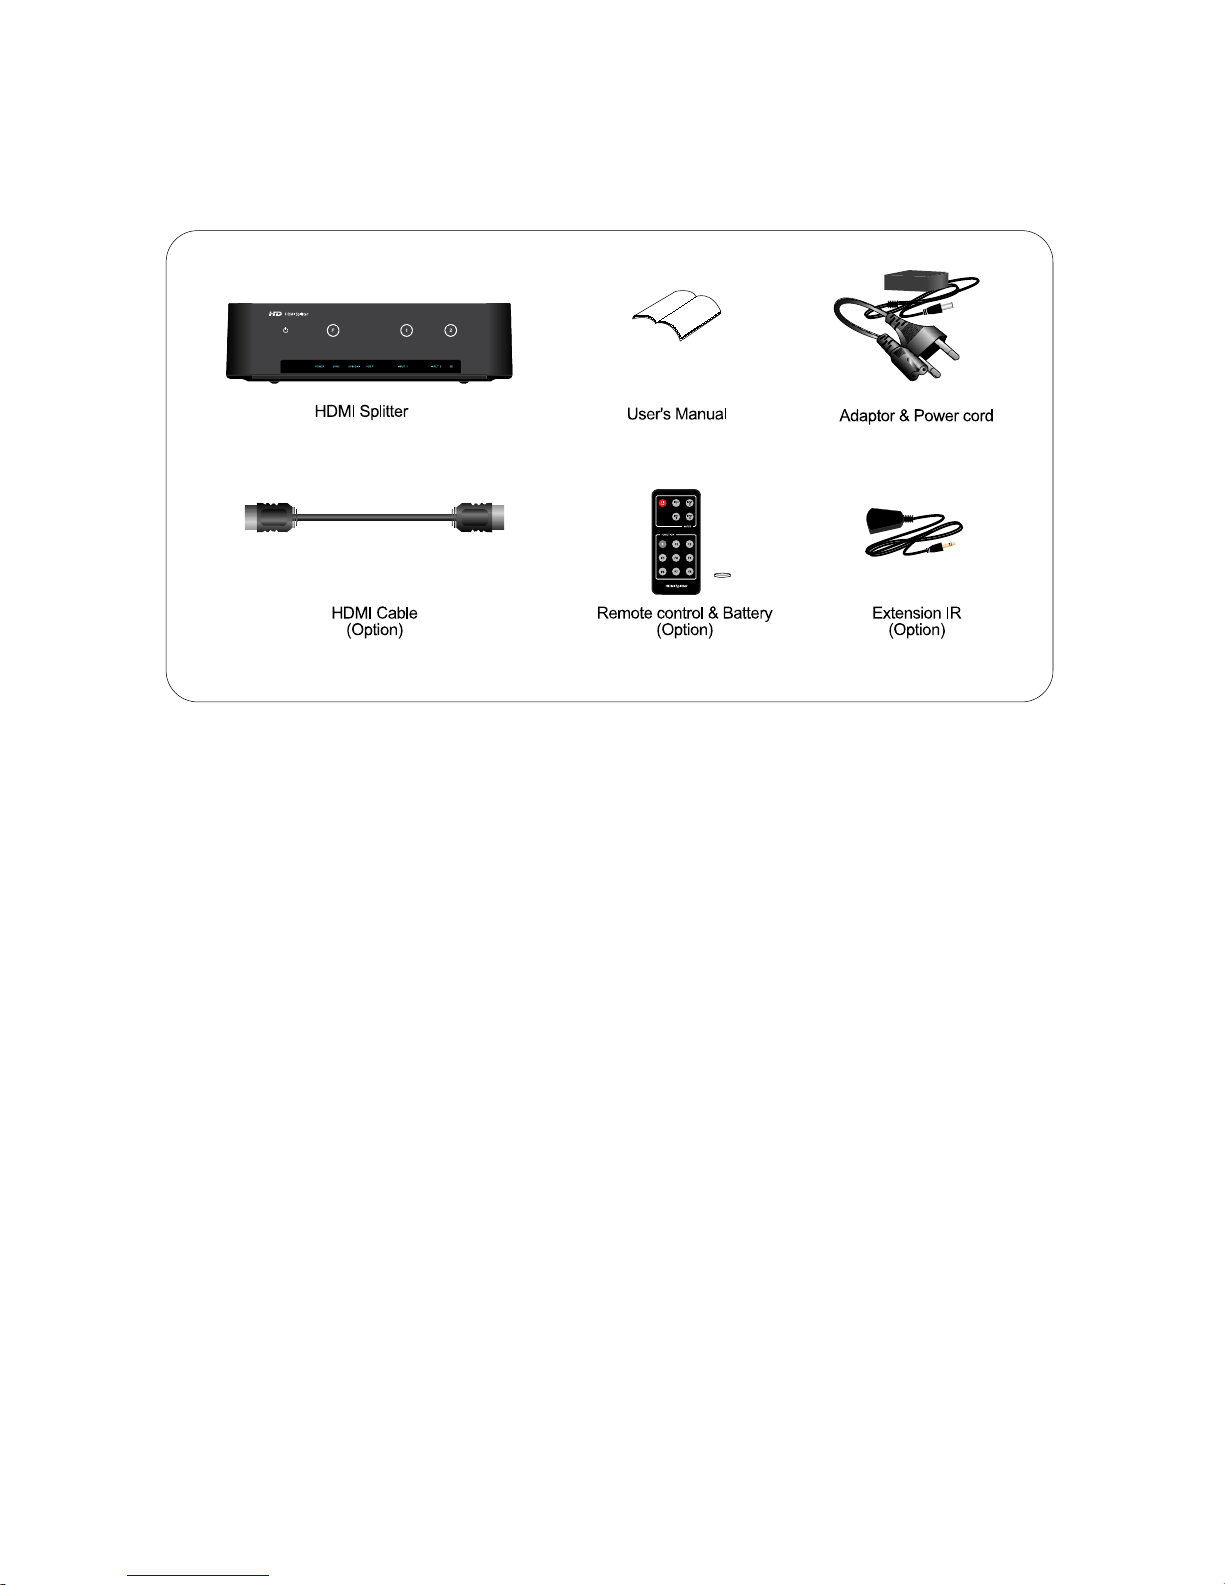
Packages and accessories
.
※ Contents are subject to change without prior notice.
※Distributors and users should keep in mind that the device is for commercial
use (Grade A), which acquired EMC (Electronicmagnetic Capability), and it is
intended to be used in areas, except for a domestic purpose.
※ DigitalZone will not be responsible for any problems caused by using any
other adopter we don't provide.
※ Additional accessories should be purchased separately.
※ HDMI cable is optional accessories.
User’s Manual
9
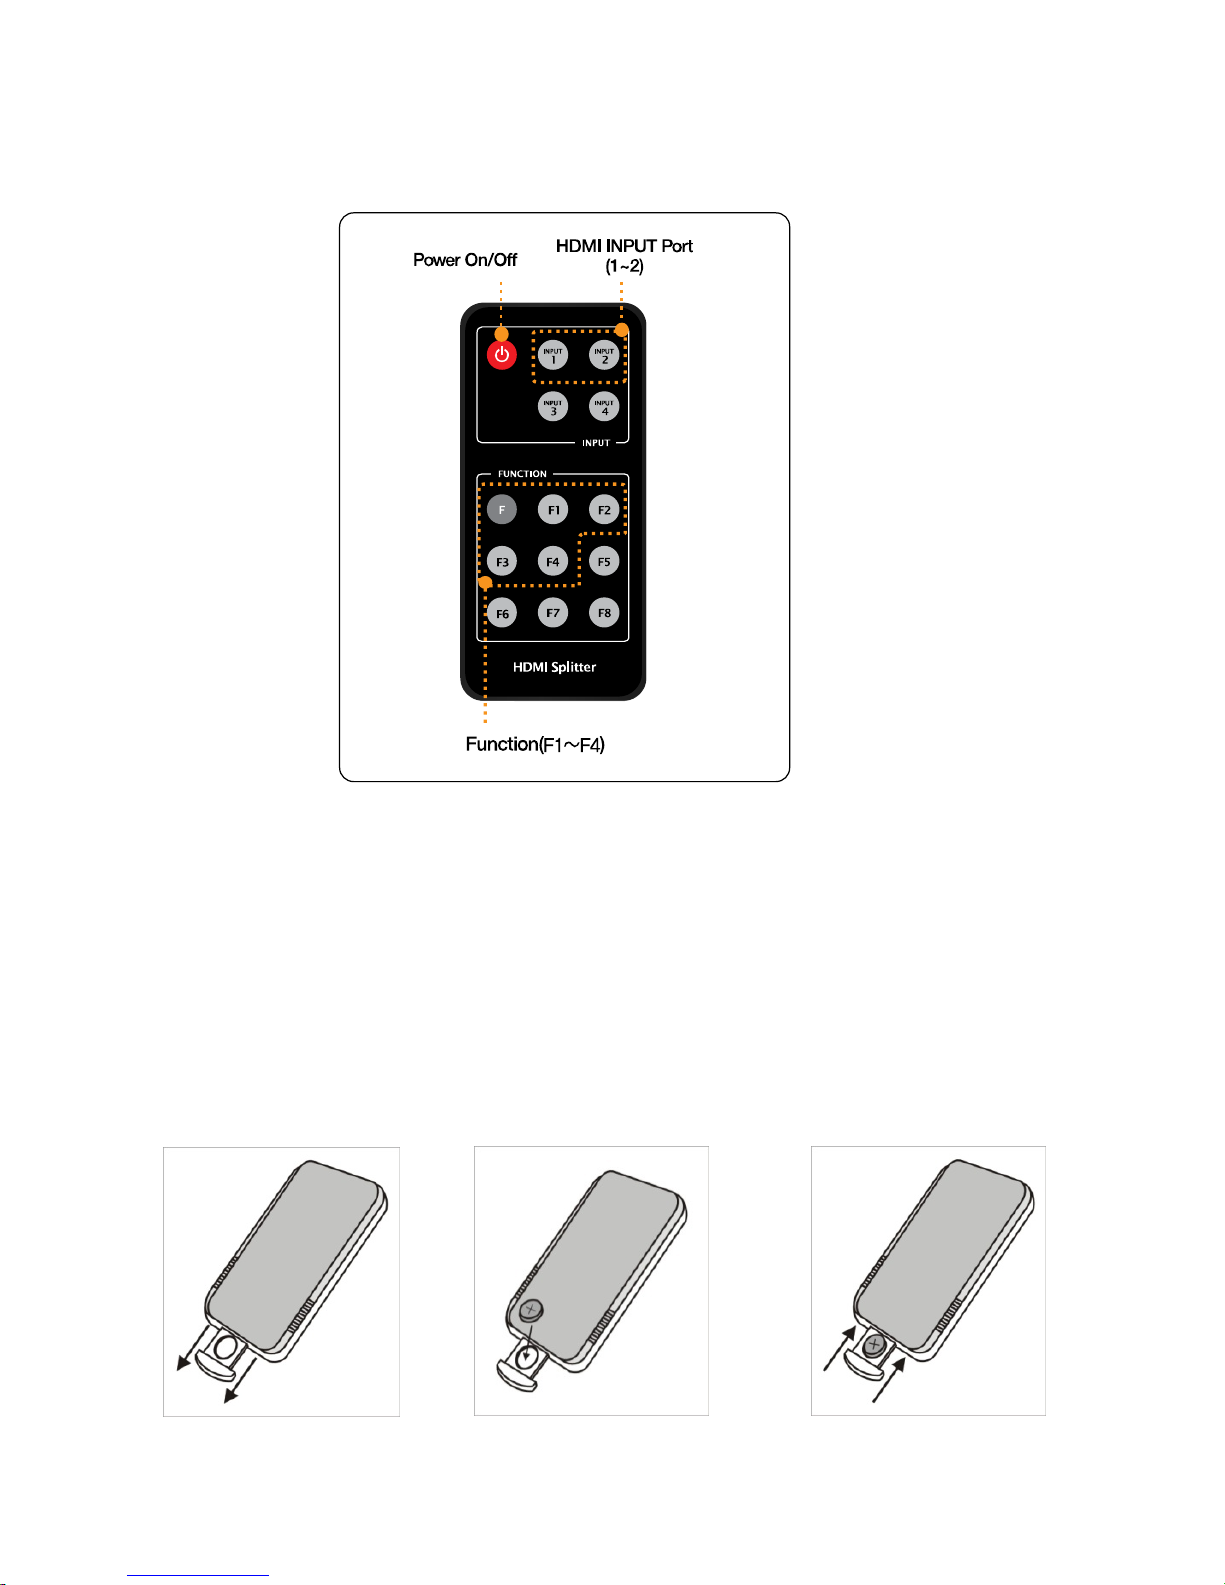
Remote Control Unit
※
It’s possible to use a remote controller within 3~5m, 60 degree of angle scope.
※
You can use an extension receiver for a remote controller if it’s far away from the system.
The receiver in the system will not work when the extension reciever is connected.
- Turn the unit off before connecting the extension reciever.
Insert battery
1. Pull out the insert part. 2. Insert battery after checking. 3. Push in the insert part.
“+” polarity
NEXD HDMI Splitter
1
0
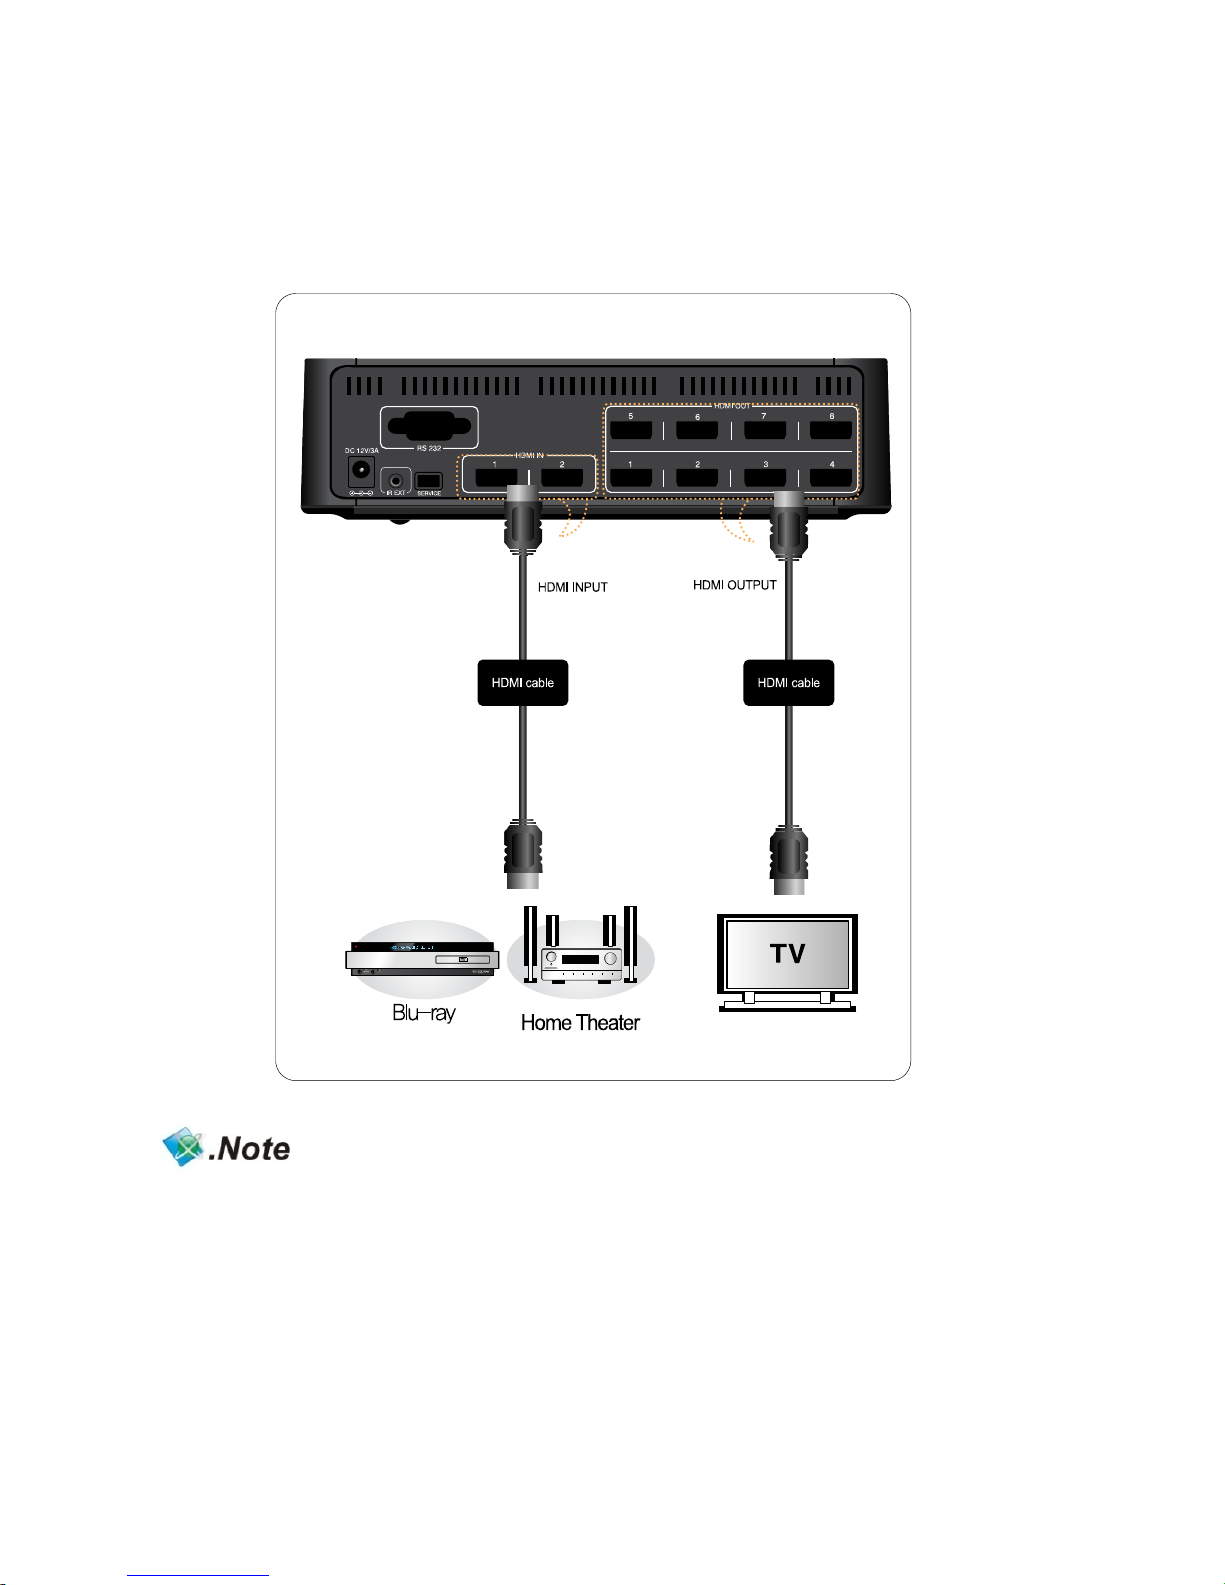
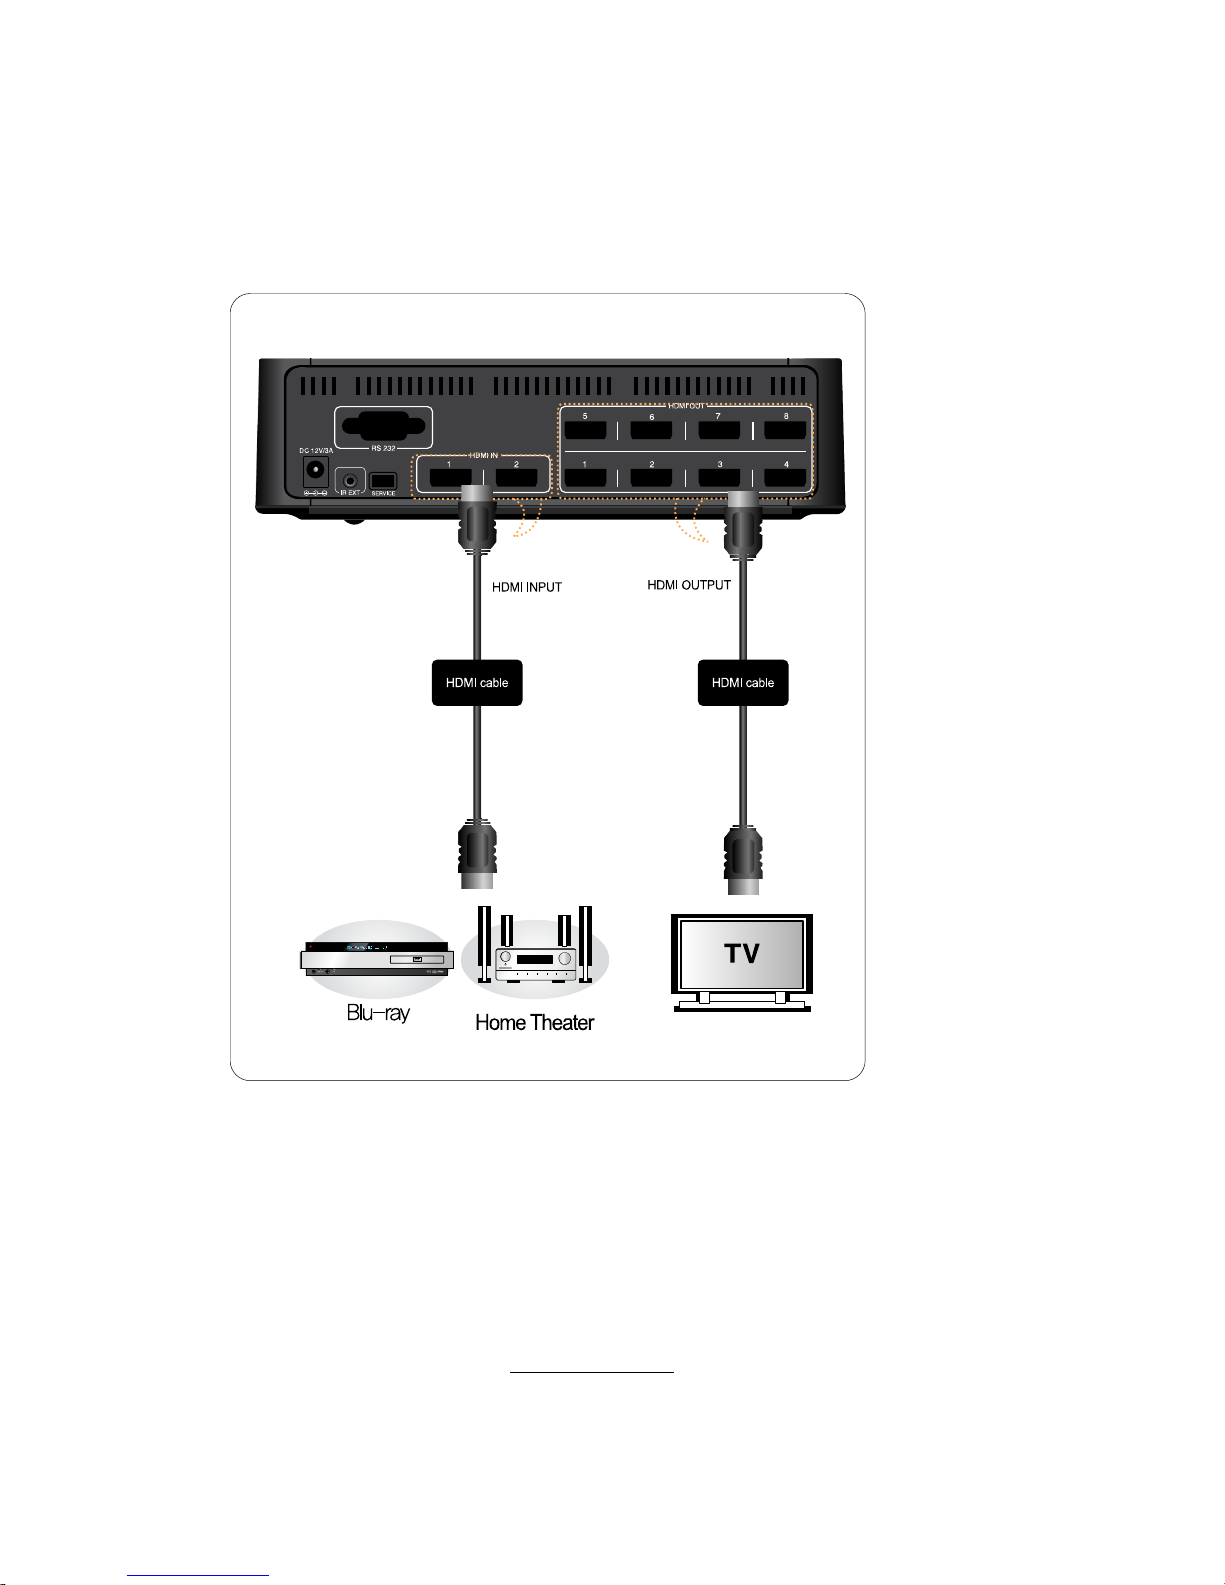
Connection
How to connect devices with splitter
(- Input: Blu-ray Player, HD Stream Generator -Output: PDP, LCD TV)
※ You must use High Speed HDMI cable supporting HDMI 1.3 if you like to use Deep Color,
High refresh rate and resolution above 1080p50~60hz.
(720p/1080i/50~60Hz/Deep Color, 720p/1080i/1080p/100~120Hz High Refresh Rate)
※ Please ask manufacturer or store you purchased, if you need additional HDMI cables
for more connection.
User’s Manual
11
How to use NEXD HDMI Splitter
1. Power ON NEXD HDMI splitter.
2. Power on source players to use such as Blu-ray Player or HD Set-top box, etc
3. Power on display devices
4. Choose one of the input no. for the source player to use.
It’s possible to select the input number by touching the number button in the front
panel or by pressing the button in the remote control unit.
You must connect Full HD TV to use HD player supporting 1080p
( Blu-ray player, HD set top box)
Troubleshooting for no power
- Check if LED light on the front is turned on.
- Make sure the power cord connectors on both ends are firmly attached.
Please refer to the webpage, www.dzonei.com
for more detailed information
for the troubleshooting
CEC, USB (Firmware upgrade) & RS-232 (Remote Control)
1. CEC : Refer to the webpage, www.dzonei.com for the information
of CEC function.
2. USB : You can upgrade firmware by USB easily when new firmware
is released.
3. RS-232 : RS-232 is capable of external control via serial port provided
control protocol by DigitalZone.
4. Remark: The SDK will be released in www.dzonei.com
.
Please check more detailed information in www.dzonei.com
regarding download and how to use.
NEXD HDMI Splitter
1
2
How to use EDID Emulation Mode
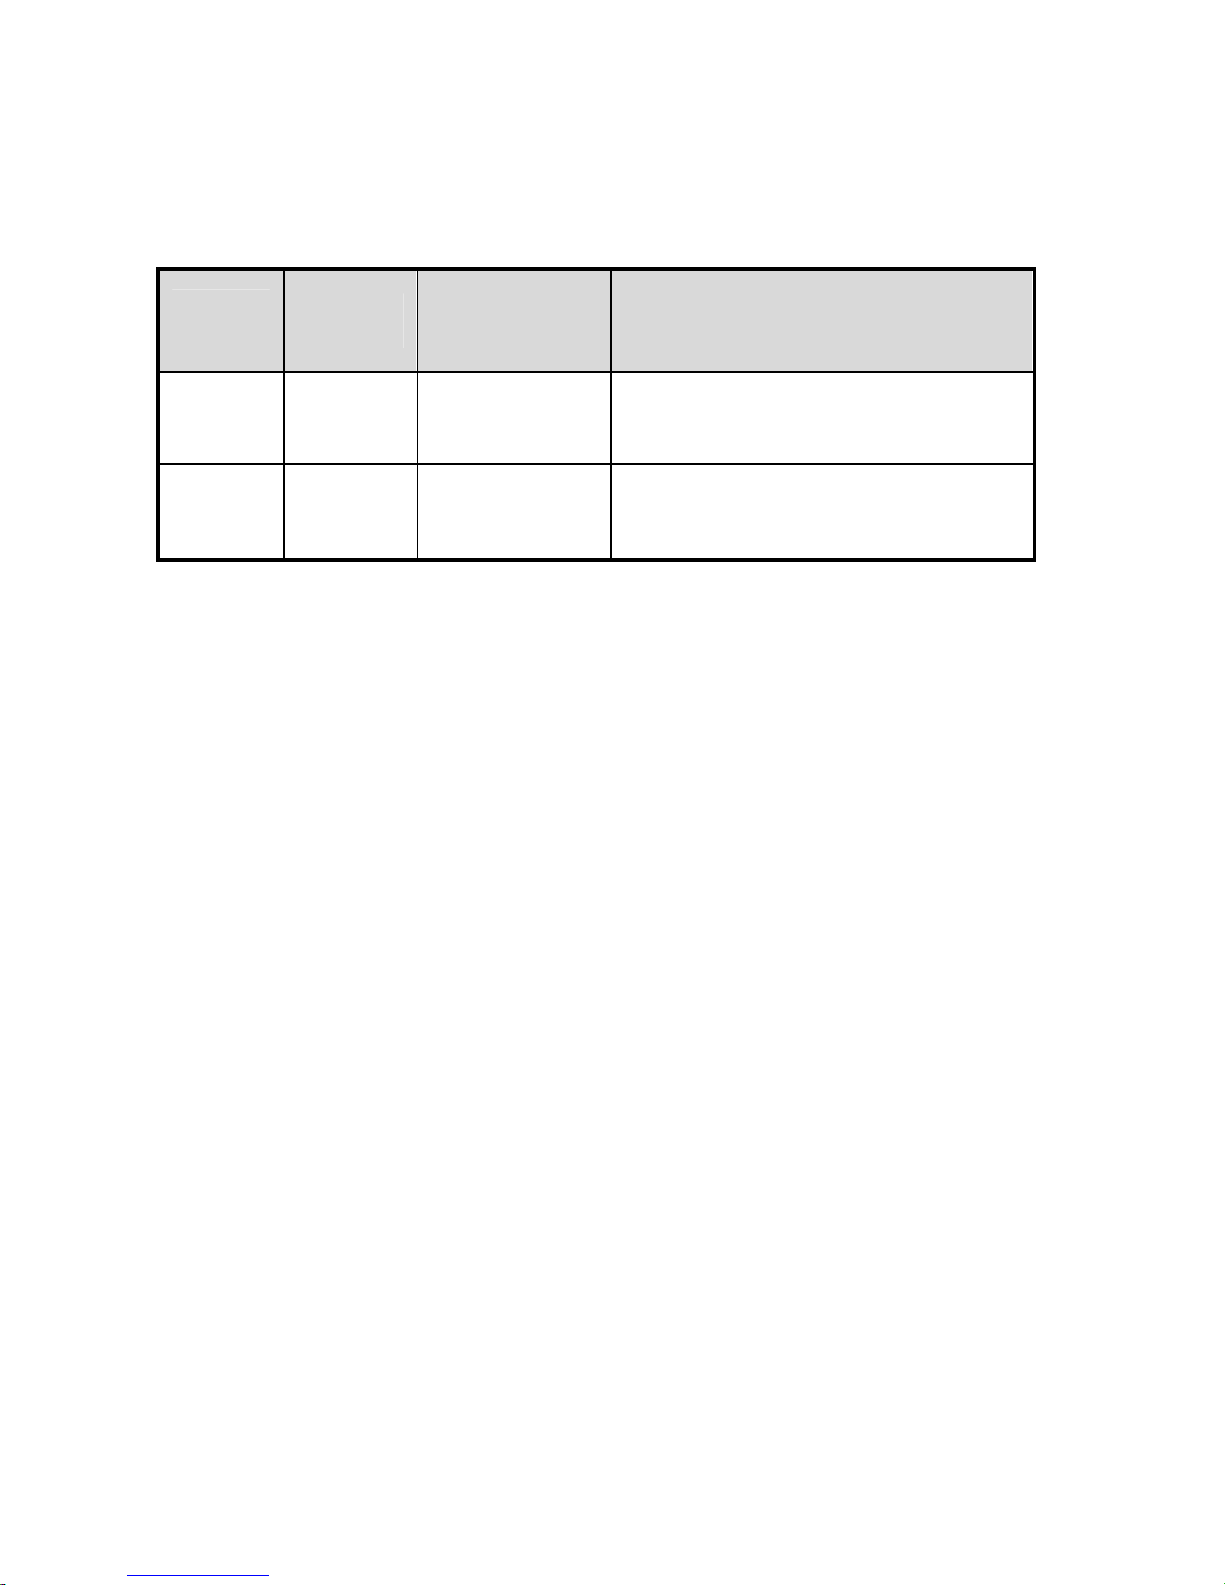
1. Dynamic mode
Function
Number
Mode
Summary
Description
F1 Normal
Safety
configuration
Intersection of all those display
devices
F2 Copy 1st HDMI Port
Follow EDID information of the display
device connected 1
st
HDMI output.
How to set Dynamic mode.
1. Keep touching “F” key on front over 2sec.
2. All LEDs of input1~2 are blinking after pre-registered mode LED blinking.
3. Select No. 1~2.
4. No.1->F1 No.2->F2
5. Selected LED function Number (input1~input2) is blinking and be set. .
User’s Manual
1
3
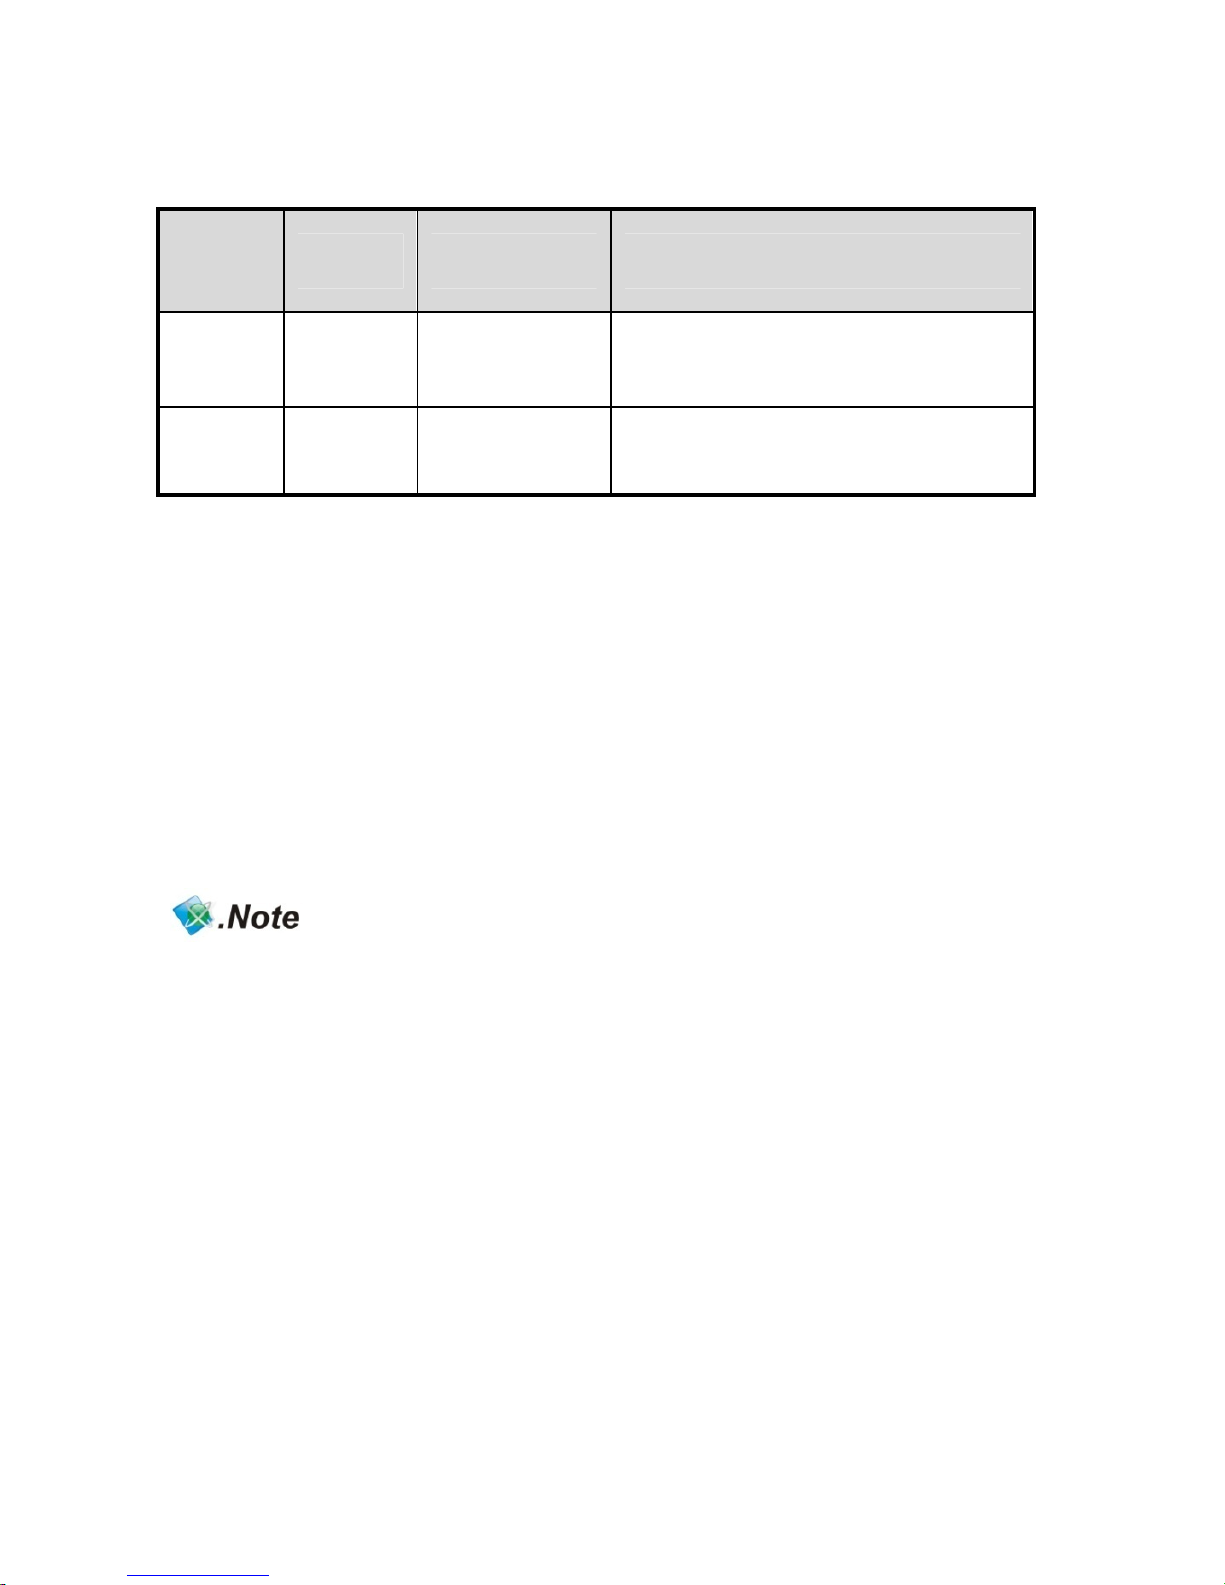
2. Static mode
Function
Number
Mode
Summary
Description
F3 1080i Force 1080i
Audio : 2Ch, PCM
Video : 1080i/50,60Hz
F4 1080p Force 1080p
Audio : 2Ch, PCM
Video : 1080p/50,60Hz
How to set Static mode.
1. Double-click “F” key.
2. All LEDs of input1~2 are blinking after pre-registered mode LED blinking.
3. Select No. 1~2.
4. No.1->F3 No.2->F4
5. Selected LED function Number (input1~input2) is blinking and be set. .
- When above functions are selected, “EE” LED will be ON except F1.
- In case of using remote control, select F1~F4 after pressing "F" key.
NEXD HDMI Splitter
1
4
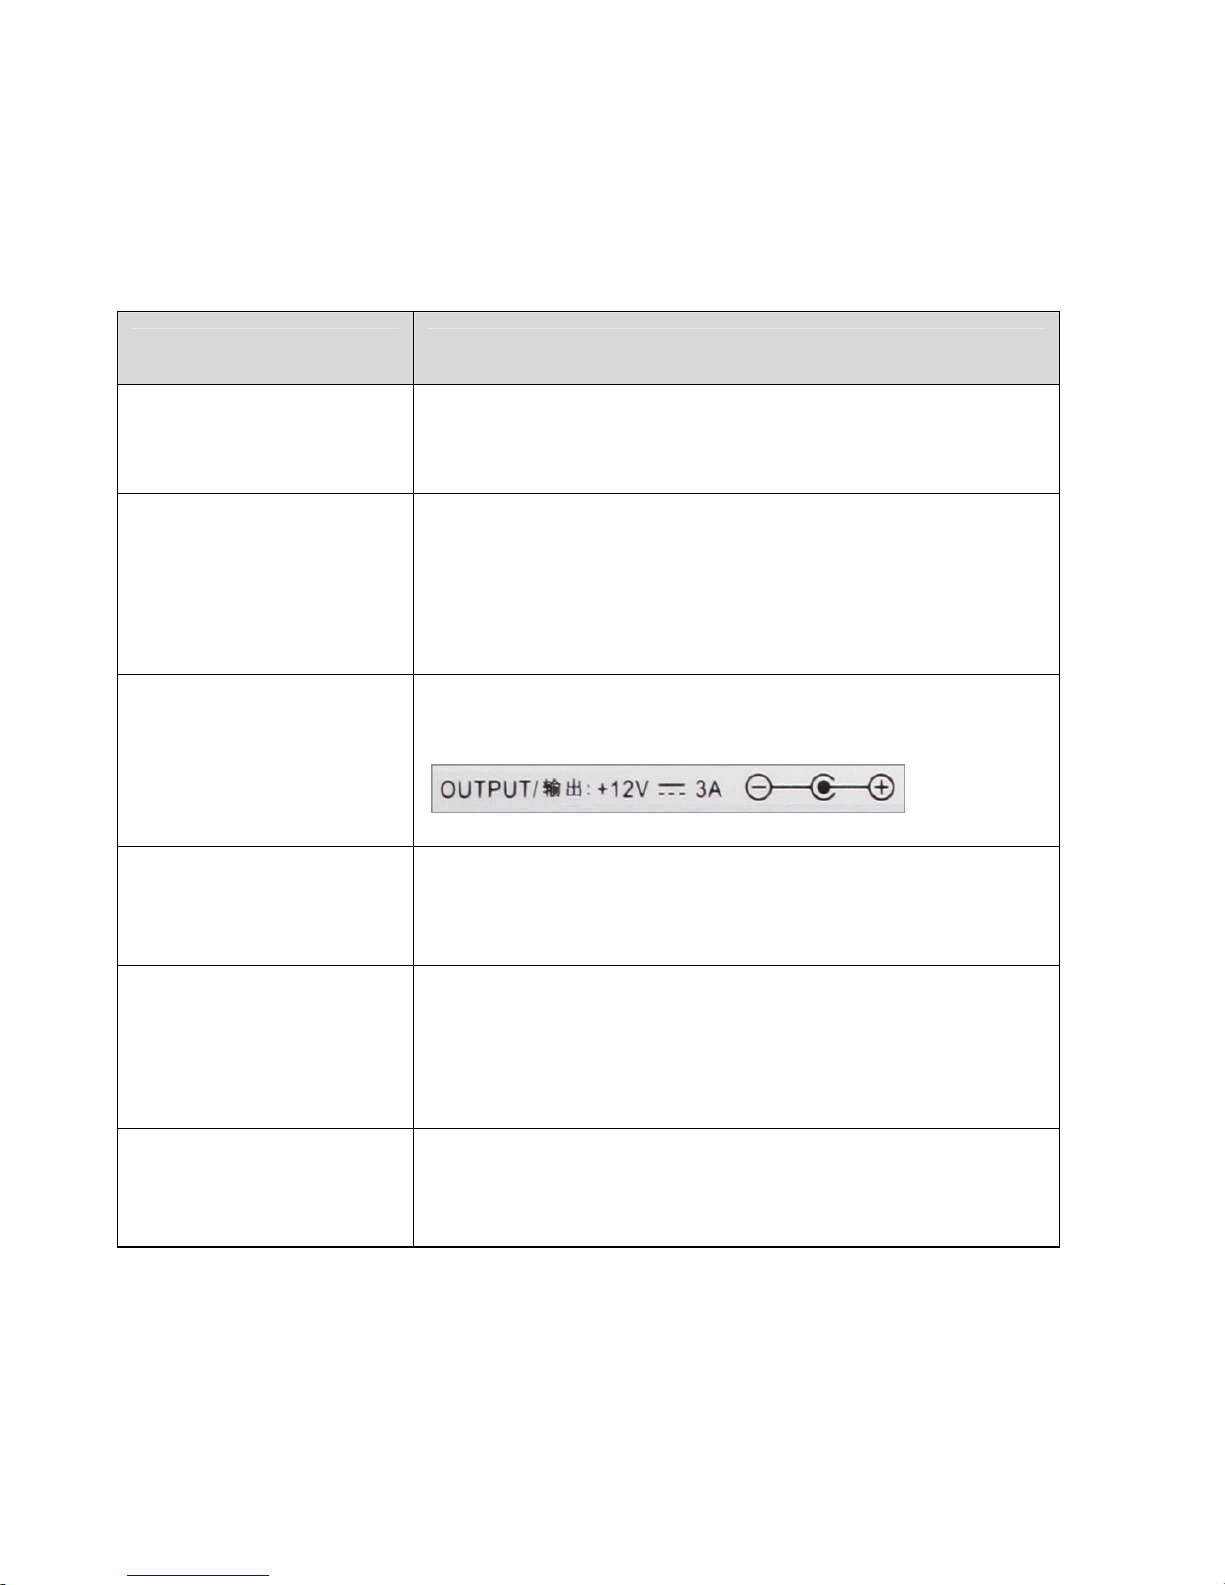
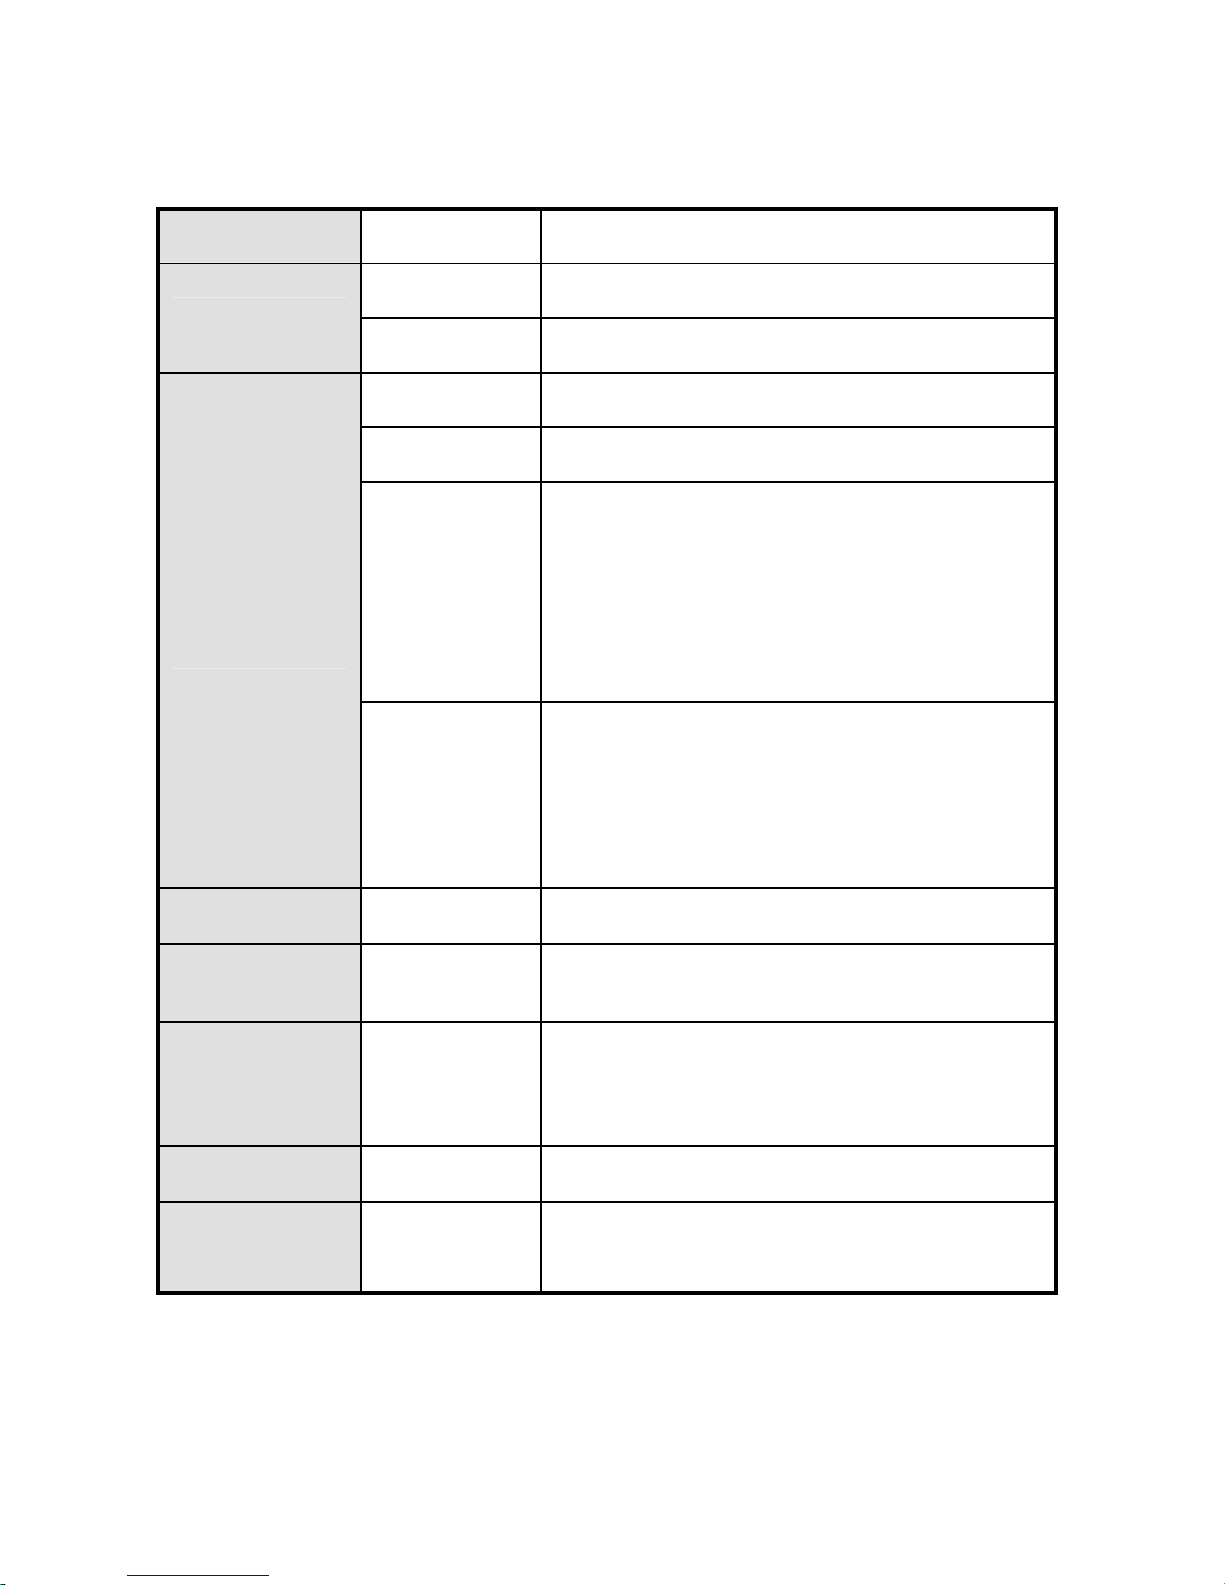
Troubleshooting Guide for Splitters
- Please check the following before contacting the Customer Center for service.
Status: When the TV screen does not show anything or is blinking
Check List Measures
Is the product connected to
the HDMI Cable properly?
1) Connect the product to the cable correctly.
2) Replace the cable and connect the new one.
Is the LED for “POWER,
SYNC, DVI/HDMI, INPUT,
EE LED” on the front blinking
or off?
1) Check if the power adapter is connected properly.
2) Press the “Power” button on the front.
3) Check if the AC power is connected properly.
4) Replace the adapter.
Is the adapter enclosed with
the product supplied by
DIGITALZONE?
1) Use an adapter supplied by DIGITALZONE only.
Are the video source
equipments (Generator and
Blu-Ray) turned on?
1) Directly connect the video source equipments (Generator and
Blu-Ray) to the TV to see if they work normally.
Has the Input number been
selected properly?
1) Select “Input1” for one video source.
2) If “Input2” is selected, press the “Input2” button on the front.
Are you displaying the Full
HD TV and the HD TV
together?
1) Please change the resolution of source player(HD stream
generator or Blu-ray player) to lower resolution.
2) Please change F Mode of HDMI splitter to “F1”.
When※ additionally connecting or removing a TV to or from a splitter, the TV screen may blink for a
few seconds and then become normal due to the initialization of EDID. (This is not an error but a
normal operation.)
User’s Manual
1
5
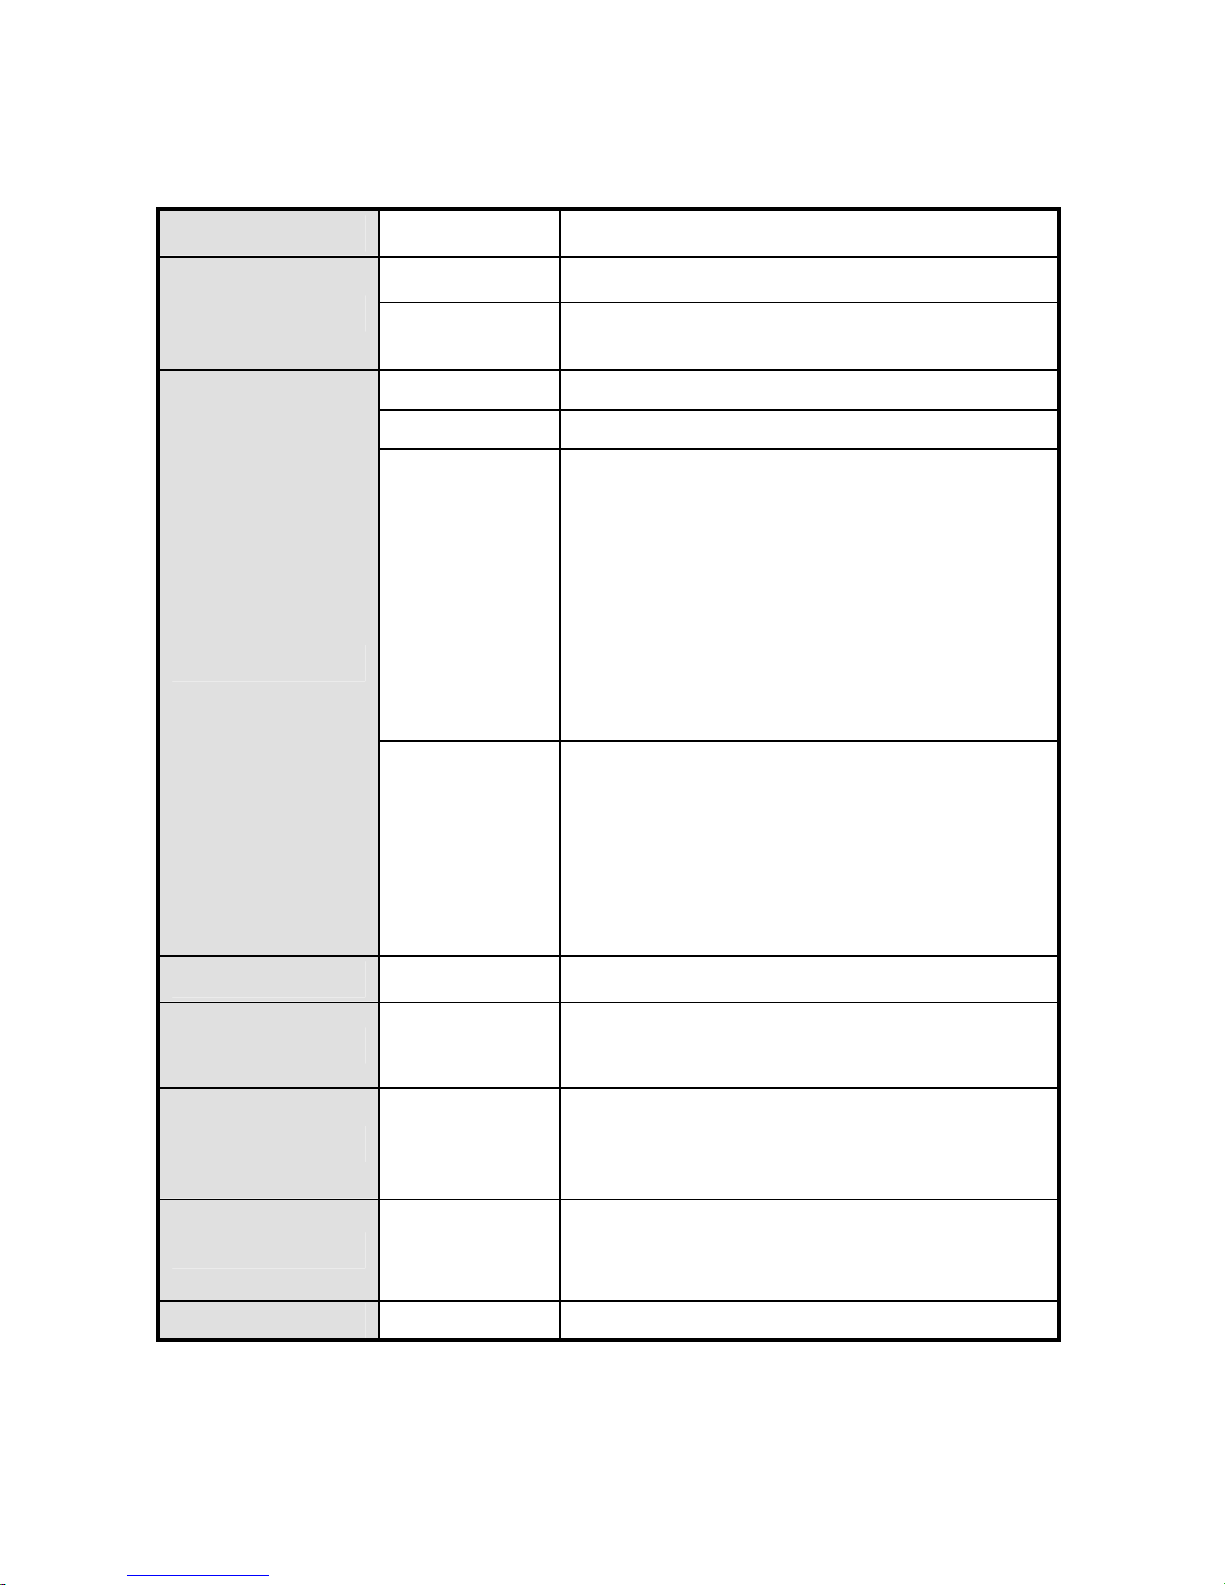
Specification
Input 2EA HDMI Type A
Output
8EA Default (Model: HDMI 208L)
4EA Optional (Model: HDMI 204L)
User Interface
Remote Control IR (Option)
RS232 Remote PC/ Device
LED
POWER : On / Off
SYNC : Indication of valid input signal
HDMI: Input signal is HDMI or DVI
HDCP: HDCP being used
EE : EDID Emulation being used.
Buttons
Touch sensors
POWER
Selectable Input 1 ~ input 2
Selectable function F1~F4
Power +12V/ 3A DC Jack
Firmware Upgrade Yes Mini-USB B type connector
HDMI Version 1.3
Deep Color
Higher refresh rate (~120hz)
Colorimetry RGB / YCbCr / xvYCC
CEC Yes Auto switching
EDID Emulation EDID Emulation mode supporting

NEXD HDMI Splitter
1
6
Troubleshooting for no power
- Check if LED light on the front is turned on.
- Make sure the power cord connectors on both ends are firmly attached.
Please refer to the webpage, www.dzonei.com
for more detailed information
for the troubleshooting

User’s Manual
1
7
French

NEXD HDMI Splitter
1
8
Comment utiliser le NEXD HDMI Splitter
1. Connecter les câbles entre lecteurs de source et dispositifs d’affichage avec le NEXD HDMI
Splitter.
2. Activer les dispositifs d’affichage.
3. Activer le NEXD HDMI Splitter.
4. Activer les lecteurs de sources tels que le lecteur Blu-ray ou HD Set-top box (adjoint de
poste de télévision), etc.
5. Sélectionner un des numéros d’entrée pour le lecteur de source à utiliser.
Il est impossible de sélectionner le numéro d’entrée en appuyant sur le bouton numéro qui se
trouve sur le panel de devant ou en appuyant sur le bouton de la télécommande.
Note:
※ Vous devez connecter le téléviseur Full-HD pou utiliser un lecteur supportant le 1080p.
※ Vous devez utiiser le câble HDMI Haut Debit qui supporte le HDMI 1.3 si vous voulez
utiliser les Coloris vif, le taux de rafraîchissement élevé et les résolutions au-dessus de
1080p50~60hz. (720p/1080i/50~60Hz/ Coloris vif, 720p/1080i/1080p/100~120Hz , taux de
rafraîchissement élevé)
Résolution des problèmes d’alimentation
- Vérifier que la LED d’alimentation sur la façade est allumée.
- S’assurer que les câbles d’alimentation sont bien connectés de part et d’autre.
- Veuillez vous référer à la page Web, www.dzonei.com
pour plus d’informations
détaillées sur la résolution des problèmes
CEC, USB (Mise à niveau du Micrologiciel)
& RS-232 (télécommande)
1. CEC: Consulter le site www.dzonei.com pour avoir des informations sur la fonction du CEC.
2. USB: Vous pouvez mettre à niveau le micrologiciel facilement par USB quand un nouveau
micrologiciel est disponible.
3. RS-232: Vous pouvez contrôler le RS-232 de l’extérieur à travers les ports séries qui gèrent
le protocole de contrôle par DigitalZone.
4. Remarque: Le SDK sera disponible sur www.dzonei.com
. Veuillez vérifier pour plus
d’informations détaillées sur le site www.dzonei.com
concernant le téléchargement et
comment l’utiliser.

User’s Manual
1
9
Comment utiliser le mode d’Emulation EDID
1. Mode Dynamique
Numéro de
Fonction
Mode
Résumé
Description
F1 Normal
configuration
par défaut
Intersection de tous les écrans
F2 Copie 1er Port HDMI
Suit l’information EDID de l’écran connecté à
la 1ère sortie HDMI
Comment configurer le mode Dynamique.
1. Appuyer sur la touche frontale “F” plus de 2 secondes.
2. toutes les LEDs d’entrée 1~2 clignotent dès que les LEDs du mode de pré
enregistrement clignotent.
3. Sélectionner le No. 1~2.
4. No.1->F1 No.2->F2
5. La fonction LED sélectionnée (entrée 1~entrée 2) clignote et est configurée.

NEXD HDMI Splitter
2
0
2. Mode Statique
Numéro de
Fonction
Mode
Résumé
Description
F3 1080i Force 1080i
Audio : 2Ch, PCM
Video : 1080i/50,60Hz
F4 1080p Force 1080p
Audio : 2Ch, PCM
Video : 1080p/50,60Hz
Comment configurer le mode Statique.
1. Double-cliquer sur la touche “F”.
2. toutes les LEDs d’entrée 1~2 clignotent dès que les LEDs du mode de pré
enregistrement clignotent.
3. Sélectionner le No. 1~2.
4. No.1->F3 No.2->F4
5. La fonction LED sélectionnée (entrée 1~entrée 2) clignote et est configurée.
** NOTE:
- Lorsque les fonctions ci-dessus sont sélectionnées, la LED “EE” sera allumée, sauf F1.
- Avec la télécommande, sélectionner F1~F4 après avoir appuyé sur la touche "F".
** NOTE:
Les distributeurs et les utilisateurs doivent garder à l'esprit que le dispositif est à usage
commercial (Grade A), qui a acquis EMC (Electronicmagnetic Capability), et il est
destiné à être utilisé dans les régions, sauf à des fins domestiques.
User’s Manual
21
Connection
(- Entree: Blu-Ray Player, HD Stream Generator -Sortie: PDP, LCD TV)
Dépannage au cas de manque de puissance
- Vérifier si la LED qui se trouve devant est allumée.
- Vérifier si les connecteurs du cordon d’alimentation sur les deux côtés sont fermement
attachés.
Veuillez vous rendre sur le site www.dzonei.com
pour plus d’informations détaillées
concernant le dépannage.
NEXD HDMI Splitter
2
2
Guide de dépannage pour les séparateurs voix-données
- Veuillez vérifier ce qui suit avant de contacter le centre de services pour toute réparation.
Statut : lorsque l'écran TV n'affiche rien ou clignote
Liste de choses à vérifier Mesures
Le produit est-il bien connecté
au câble HDMI ?
1) Connectez-bien le câble
2) Remplacez-le câble par un neuf et connectez-le.
Le voyant LED pour POWER,
SYNC, DVI/HDMI, INPUT, EE
LED, clignote-t-il ou est-il
éteint ?
1) Vérifiez que l'adaptateur est bien connecté.
2) Appuyez sur le bouton "Power" (Alimentation) à l'avant
3) Vérifiez que l'alimentation CA est bien connecté.
4) remplacez l'adaptateur.
L'adaptateur est-il fourni avec
le produit fourni par
DIGITALZONE ?
1) Utilisez l'adaptateur fourni par DIGITALZONE uniquement.
Les matériaux de sources
vidéos (Générateur et Blu-Ray)
sont-ils allumés ?
1) Connectez directement les matériaux de sources vidéos
(Générateur et Blu-Ray) à la TV pour voir s'ils fonctionnement
normalement.
Le numéro d'entrée a-t-il bien
été sélectionné ?
1) Sélectionnez "Input 1" (Entrée 1) pour une source vidéo.
2) Si "Input 2" (Entrée 2) est sélectionné, appuyez sur le bouton
"Input2" (Entrée2), à l'avant.
Affichez-vous la Full HD et la
HD en même temps ?
1) S'il vous plaît changer la résolution de lecteur source (générateur
de flux HD ou un lecteur Blu-ray) à une résolution inférieure.
2) S'il vous plaît F Changement de mode de splitter HDMI à "F1".
※ Lorsque vous connectez ou supprimez la connexion d'une télévision au/du séparateurs voix-données,
l'écran de la TV peut clignoter quelques secondes avant de revenir à la normale. Cela est dû à
l'initialisation de l'EDID. (Il ne s'agit pas d'un dysfonctionnement mais d'une opération normale.)
User’s Manual
2
3
Spécification NEXD HDMI Splitter
Entrée
2 pi èces HDMI Type A
Sortie
8 pi èces Par défaut (Model: HDMI 208L)
4 pi èces Facultatif (Model: HDMI 204L)
Interface
d’utilisateur
Télécommande IR
RS232 Télécommande PC/ Dispositif
LED
PUISSANCE: Activé / Désactivé
SYNC: Indication des signaux d’entrée valuable
HDMI: Le signal d’entrée est HDMI ou DVI
HDCP: HDCP est en cours d’utilisation
EE : Emulation EDID en marche.
Boutons
Capteurs tactile
PUISSANCE
Entrée sélectionnable 1 ~ 2
Fonction Sélectionnable F1~F4
Puissance +12V/ 3A Câble DC
Mise à niveau le
micrologiciel
Oui Connecteur type B Mini-USB
Version HDMI 1.3
Coloris vif
Taux de rafraîchissement plus élevé (~120hz)
Colorimétrie RVB/ YCbCr / xvYCC
CEC Oui Commutation automatique
d’émulation EDID Compatible avec le mode d’émulation EDID

NEXD HDMI Splitter
2
4
Spanish
 Loading...