

Digital Watchdog MegaPix DWC-MB45DiA, MEGAPIX DWC-MV85DiA, MegaPix DWC-MB421TIR Quick Start Manual
Page 1
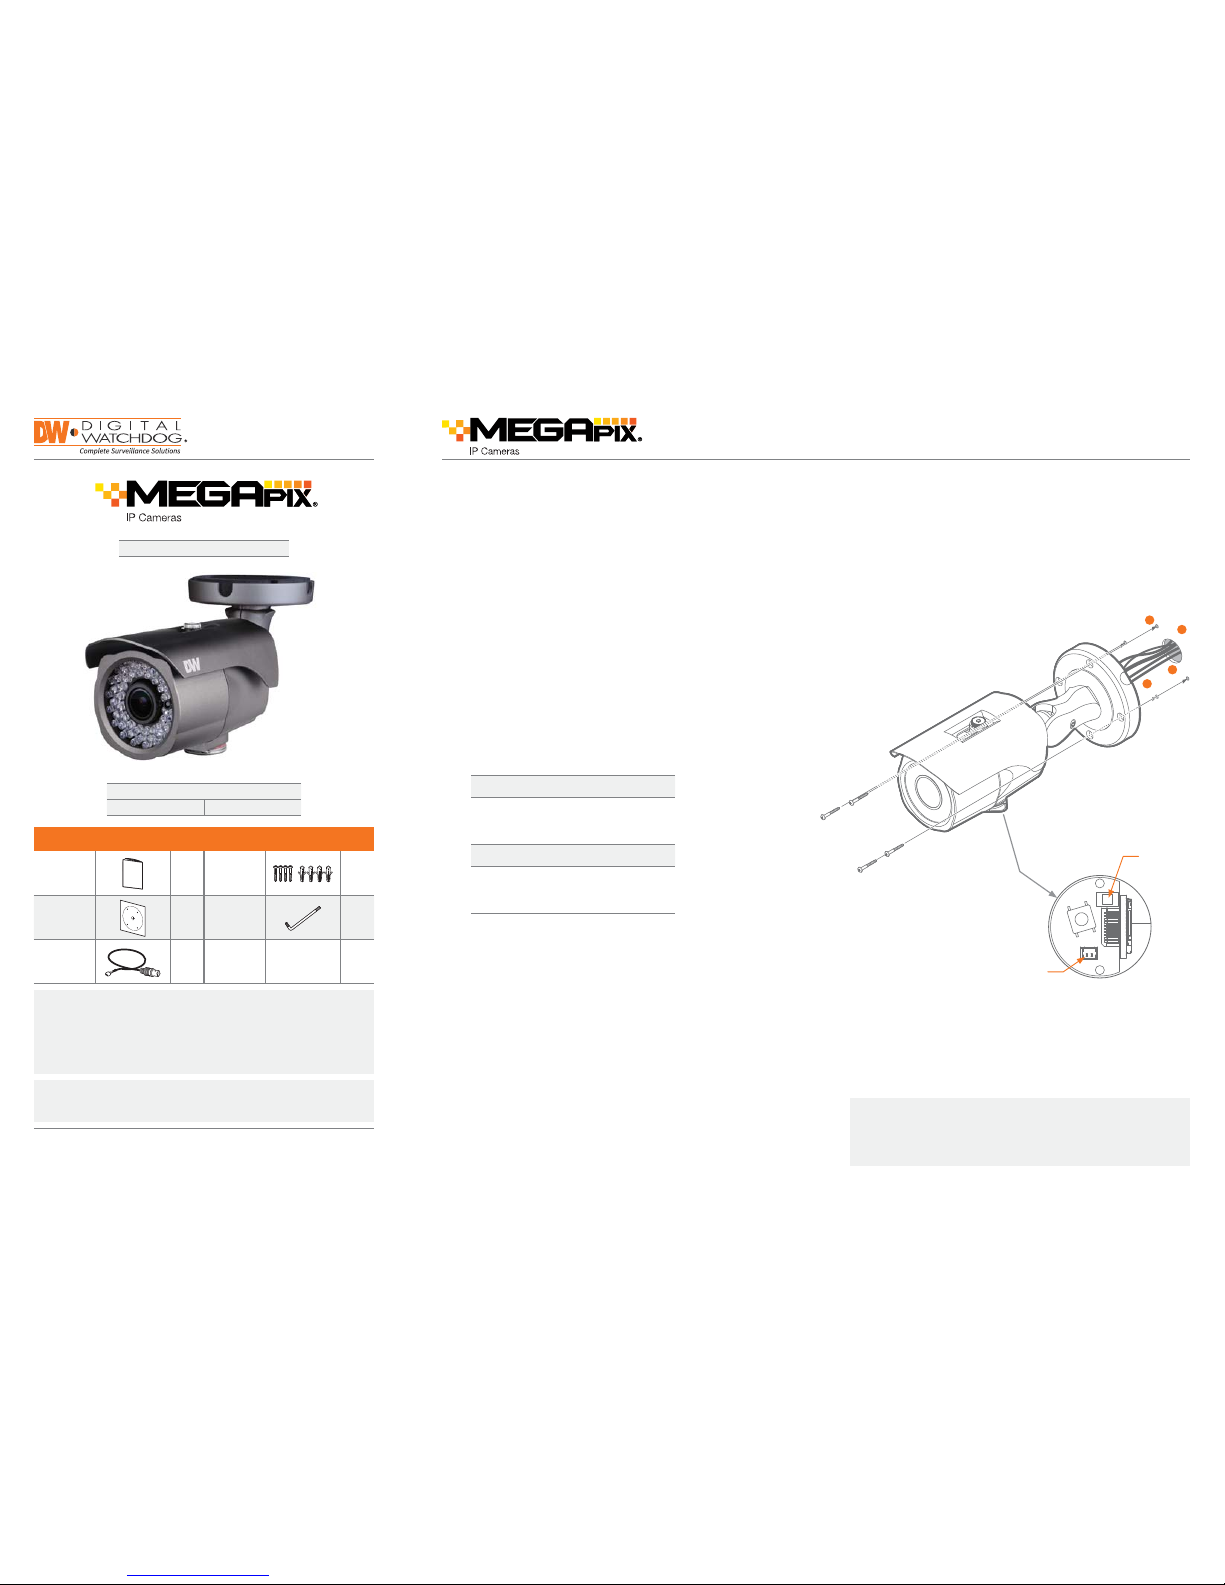
STEP 1 – PREPARING TO MOUNT THE CAMERA STEP 3 – INSTALLING THE CAMERA
STEP 2 – CABLING THE CAMERA TO EXTERNAL DEVICES
1. The mounting sur face must bear ve times the weigh t of your camera.
2. Do not let the ca bles get caught in improper pla ces or the electric line cover
to be damaged. Th is may cause a breakdown or re.
3. Using the m ounting template sheet or the camera its elf, mark and drill the
necessar y holes in the wall or ceiling.
5. Loose n the pan and tilt screws at the base of the camera’s bracket to adju st
the camera’s view and pos ition.
4. Pass the wires through and make all necessary connections.
a. NET WORK CONNECTIONS – If you are using a PoE S witch, connect the
camera using a n Ethernet cable for both data and power.
b. NET WORK CONNECTIONS – If you are using a n on-PoE switch, connect
the camera to the switch us ing an Ethernet cable for data transmi ssion
and use a power adapte r to power the camer a.
Power Requiremen ts
DC 12V
PoE IEEE 802.3af / PoE Cla ss 3
Power Consumption
LED On: 9.4W, 783mA
LED Off: 5.1W, 425mA
Tel: +1 (866) 446-3595 / (813) 888-9555
Technical Support Hours:
9:00AM – 8:00PM EST, Monday thru Fr iday
digital-watchdog.com
Resetting the camera: To reset the camera, use the tip of a pap er clip
or a pencil and pre ss the reset button. Pressing the bu tton for ve (5)
seconds will i nitiate a camera-wide reset of all the s ettings, including
network settings.
DWC-MB45DiA
WHAT’S IN THE BOX
QSG Manual 1 Set
Screw &
Plastic Anc hor
– 4pcs
1 Set
Template
Sheet
1 Set Torx Wrench 1 Set
Test Video
Cable
1 Set
1
2
4
3
Test Vide o
Output
Reset Button
NOTE: Download Al l Your Support Materia ls and Tools in One Place
1. Go to: http://www.digital-watchdog.com/support-download/
2. Search your pr oduct by entering the p art number in the ‘Search by Product’ search
bar. Results for applicab le part numbers w ill populate automat ically based on the
part numb er you enter.
3. Click ‘Search’. All supported mate rials, including m anuals, Quick Sta rt Guides
(QSG), softwar e and rmware will appe ar in the results.
Quick Start GuideQuick Start Guide
Attention : This document is inte nded to serve as a qui ck reference for ini tial
set-up. It is re commended that th e user read the entir e instruction ma nual for
complete and proper installation and usage.
Default Login Information
Username: admin Password: admin
Page 2
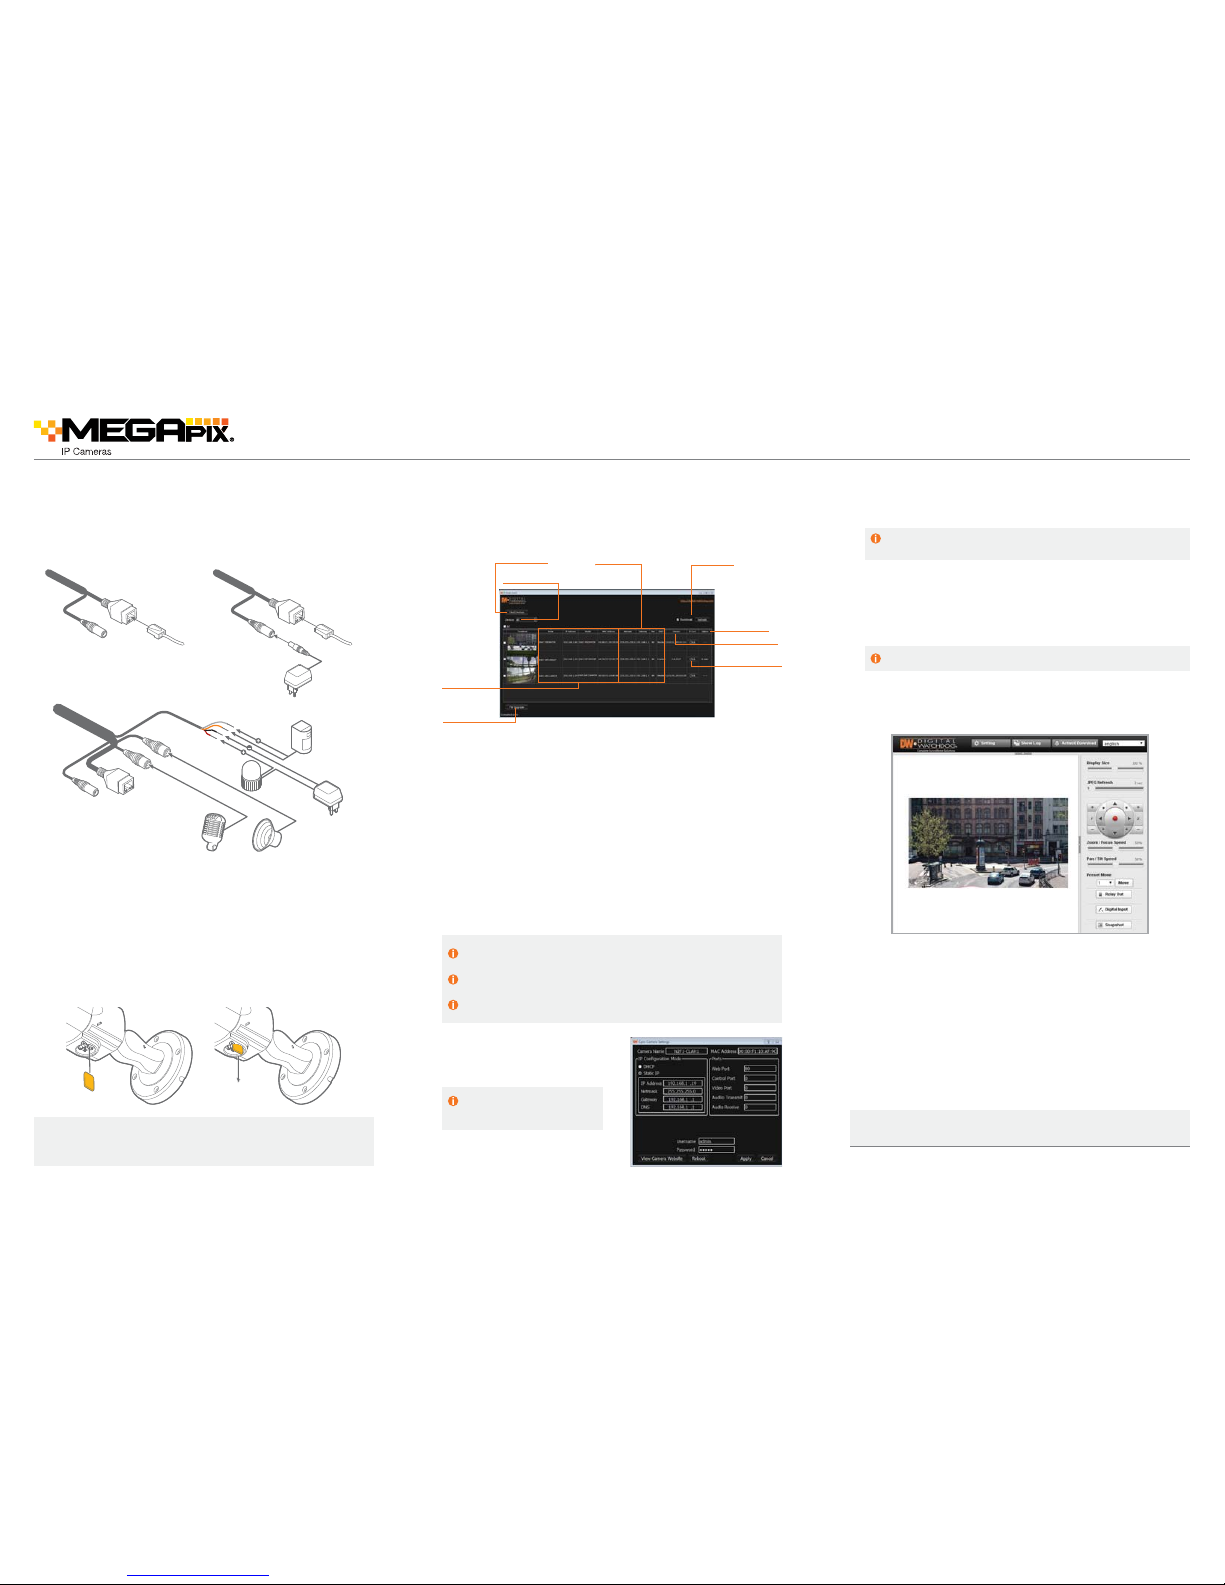
STEP 4 – CABLING
STEP 5 – MANAGING THE SD CARD
Use the diagram be low to properly connect power, network, au dio, alarm and
sensors to the came ra.
1. To install the ca mera’s SD Card, locate the SD ca rd slot in the bottom of
the camera by unsc rewing the con cap.
2. Inser t class 10 SD/SDHC/SDXC card into the SD card slot by pressi ng
the SD card until clicks.
3. To remove the SD card, pres s the card inward until it clicks to release fro m
the card slot than pull o ut from the slot.
Using a PoE-E nabled Switch Using a Non- PoE Switch
NOTE: Maximum SD Ca rd size supported: 64GB.
When inser ting the SD card into the card slot, the SD card’s
contacts shoul d be facing upward, as shown in the diagram.
POWER
(DC 12V only)
ETHERNET
CABLE
ETHERNET
CABLE
AUDIO IN AUDIO OUT
ALARM OUT
ALARM IN
Quick Start Guide
NOTE: Please see the full product ma nual for web viewer setup,
functions and camera settings options.
6. The ca mera’s default net work
information is:
STEP 6 – DW IP FINDER
™
Use the DW IP Finder™ software to sca n the network and d etect all MEGA pix®
cameras, set the c amera’s network set tings or access the camera’s web client.
Rev Date: 1/17
Copyright © D igital Watchdog. A ll rights reser ved.
Specica tions and pricing a re subject to chang e without notice.
STEP 7 – WEB VIEWER
Select DHC P if the internet servi ce is dynamic IP. This will allow the ca mera to
receive its IP a ddress from the DHCP se rver.
Select STATIC to manuall y enter the camera’s IP addres s, subnet mask,
Gateway and DNS info rmation.
Contact your n etwork administrator fo r more information.
7. To view the camera’s web viewer, click on ‘View Ca mera Website’.
8. To save the changes ma de to the camera’s settings, input the ID and PW of
the camera for authe ntication and click ‘Save’.
9. If the c amera needs to be rebooted after the s ettings were changed, press
the ‘Reboot’ but ton. The camer a will cycle power and will appear b ack in the
search results once the reboot is complete.
‘Port Forwa rding’ has to be set in your netwo rk’s router for external acc ess
to the camera.
Default ID / PW : ad min / admin
Network Setup
1. Go to: http://www.digital-watchdog.com
2. Search fo r ‘IP Finder’ on the qui ck search bar at the top of the page.
3. The lates t IP Finder software will appe ar in the search results. Click on the
link to download the l e to your computer.
4. The s oftware will scan your netwo rk for all supported camera s and display
the results in the tab le. Allow up to 5 seconds for the IP Finder to nd th e
camera on the network.
5. Sele ct a camera from the list by double- clicking on the camera’s image
or clicking on th e ‘Click’ butto n under the IP Co nf. column. The ca mera’s
network inform ation will appear. If necessary, you can ad just the camera’s
network type.
Once the camer a’s network settings h ave been setup properly, you can access
the camera’s web viewer usin g the DW IP Finder
™
. To open the camera’s web
viewer:
1. Find the camera using the DW IP Fi nder
™
.
2. Double-click on the camera’s view in the results table.
3. Press the ‘ View Camera Website.’ The camera’s web viewer will o pen up in
your default web brow ser.
4. Enter the c amera’s username and password (default ar e admin / admin).
5. If you are ac cessing the camera for the rst time, in stall the ActiveX les in
order to view vide o from the camera.
Search for Cameras
Camera’s
Network Settings
View Camera’s
Thumbnail View
Camera’s Firmware
Camera Uptime
Open Camera’s IP
Conguration Screen
Filter Search Results
Camera Name,
Model, IP Address,
and MAC Address
Firmware Upgrade
Default TCP/IP information
• IP: DHCP
 Loading...