

Page 1
BACKING UP FOOTAGE ON A VMAX™ SYSTEM
Step 1.
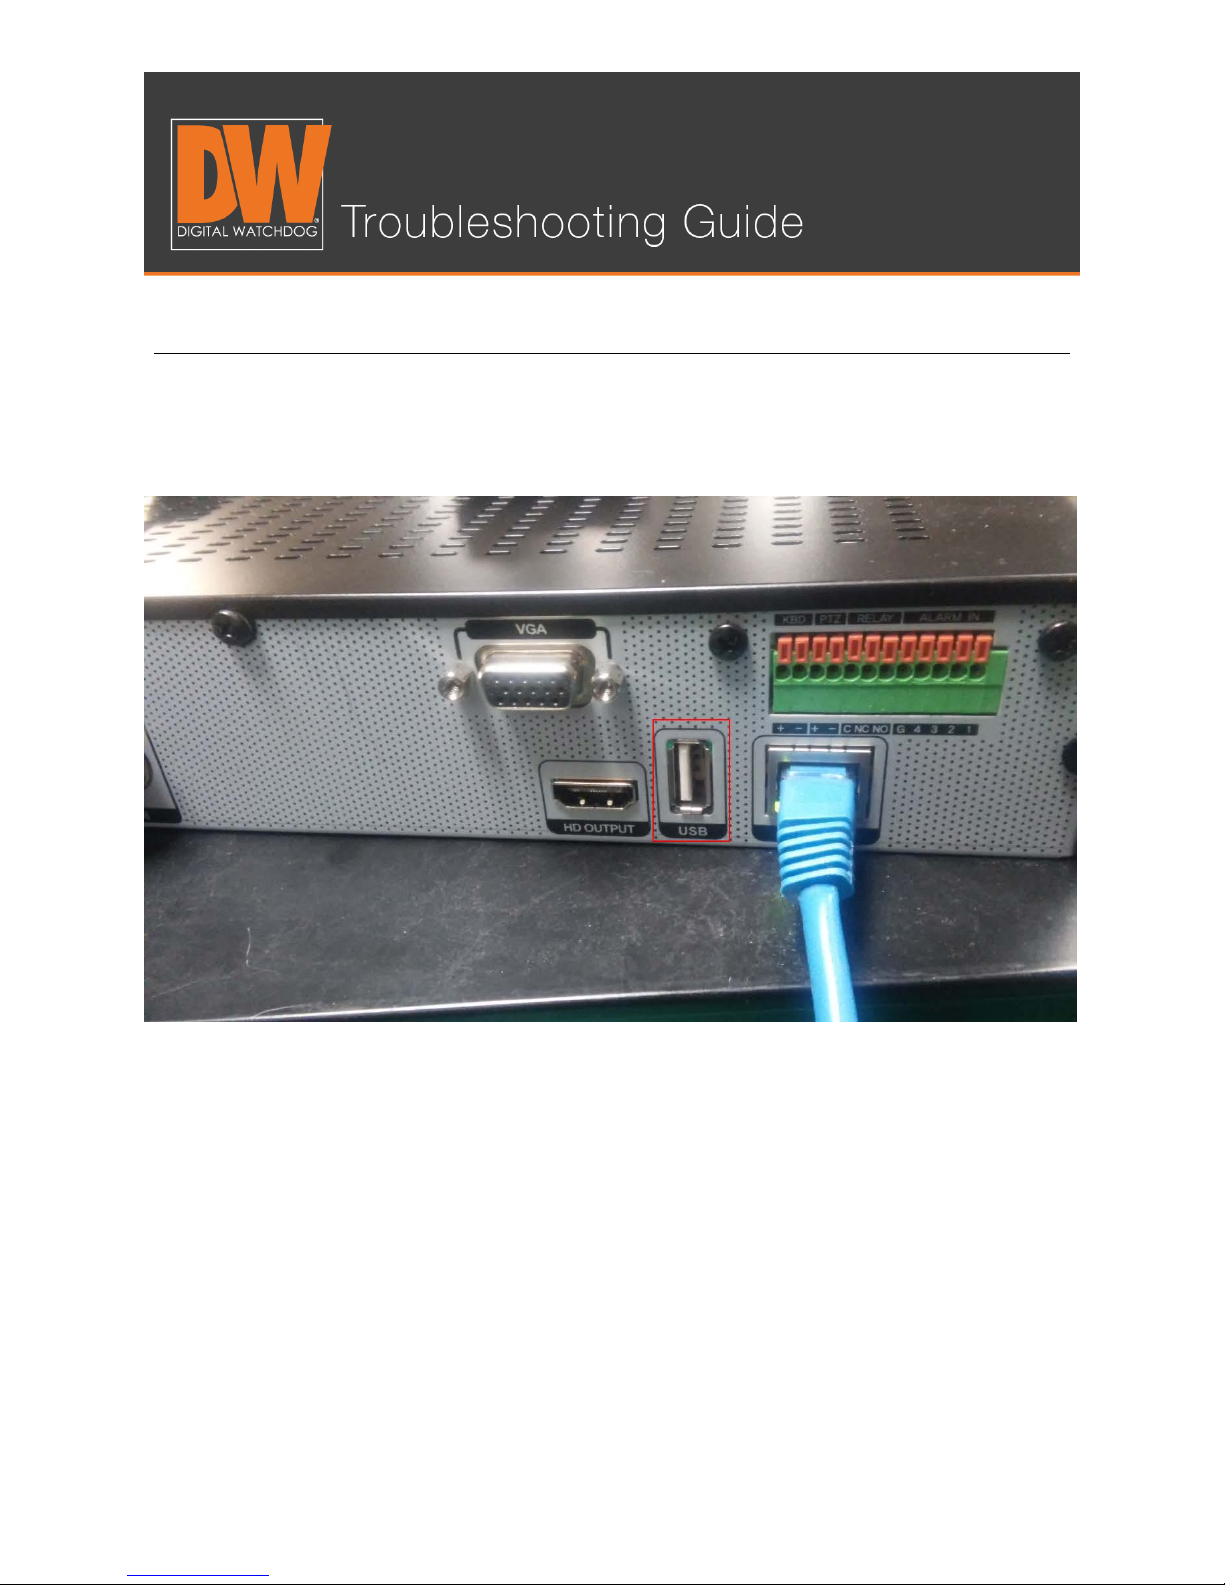
Make sure your mouse is plugged in the back. This will make the upcoming steps easier.
Page 2
BACKING UP FOOTAGE ON A VMAX™ SYSTEM
Step 2.
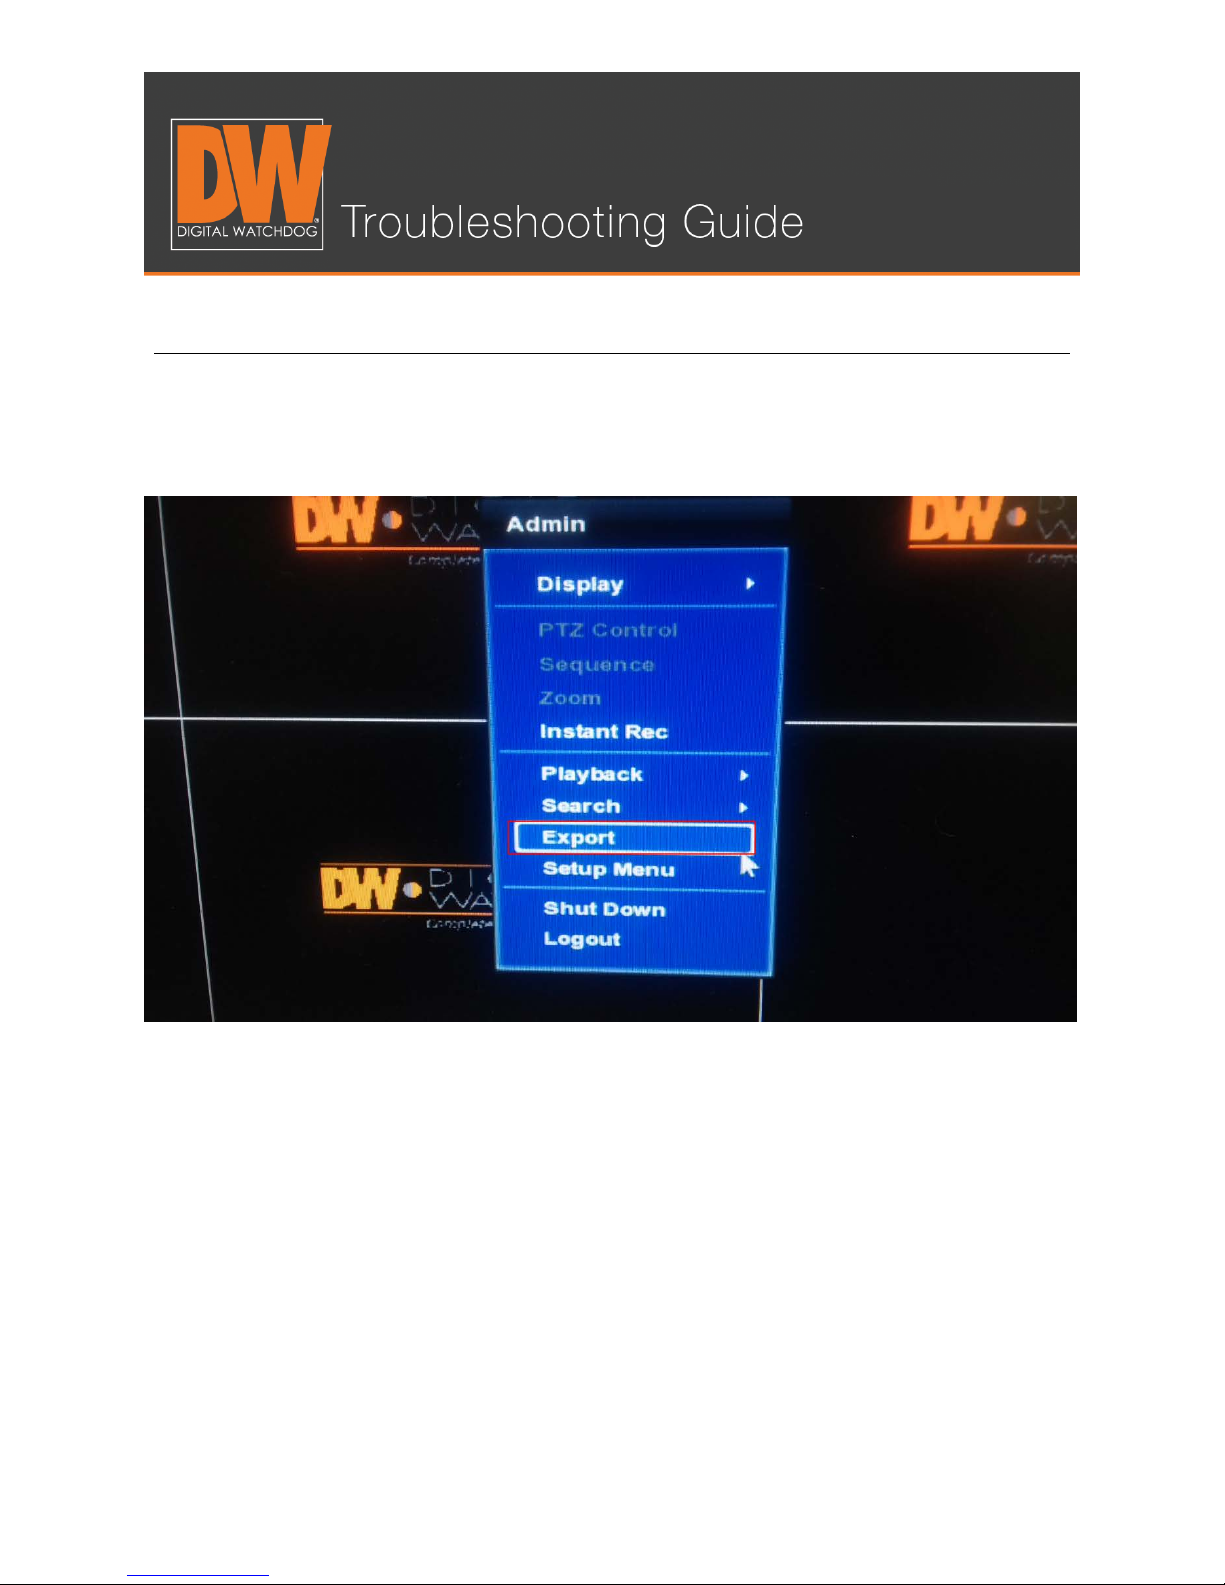
Right click and select “Export” or “Backup” (depending on your model).
Page 3
BACKING UP FOOTAGE ON A VMAX™ SYSTEM
Step 3.
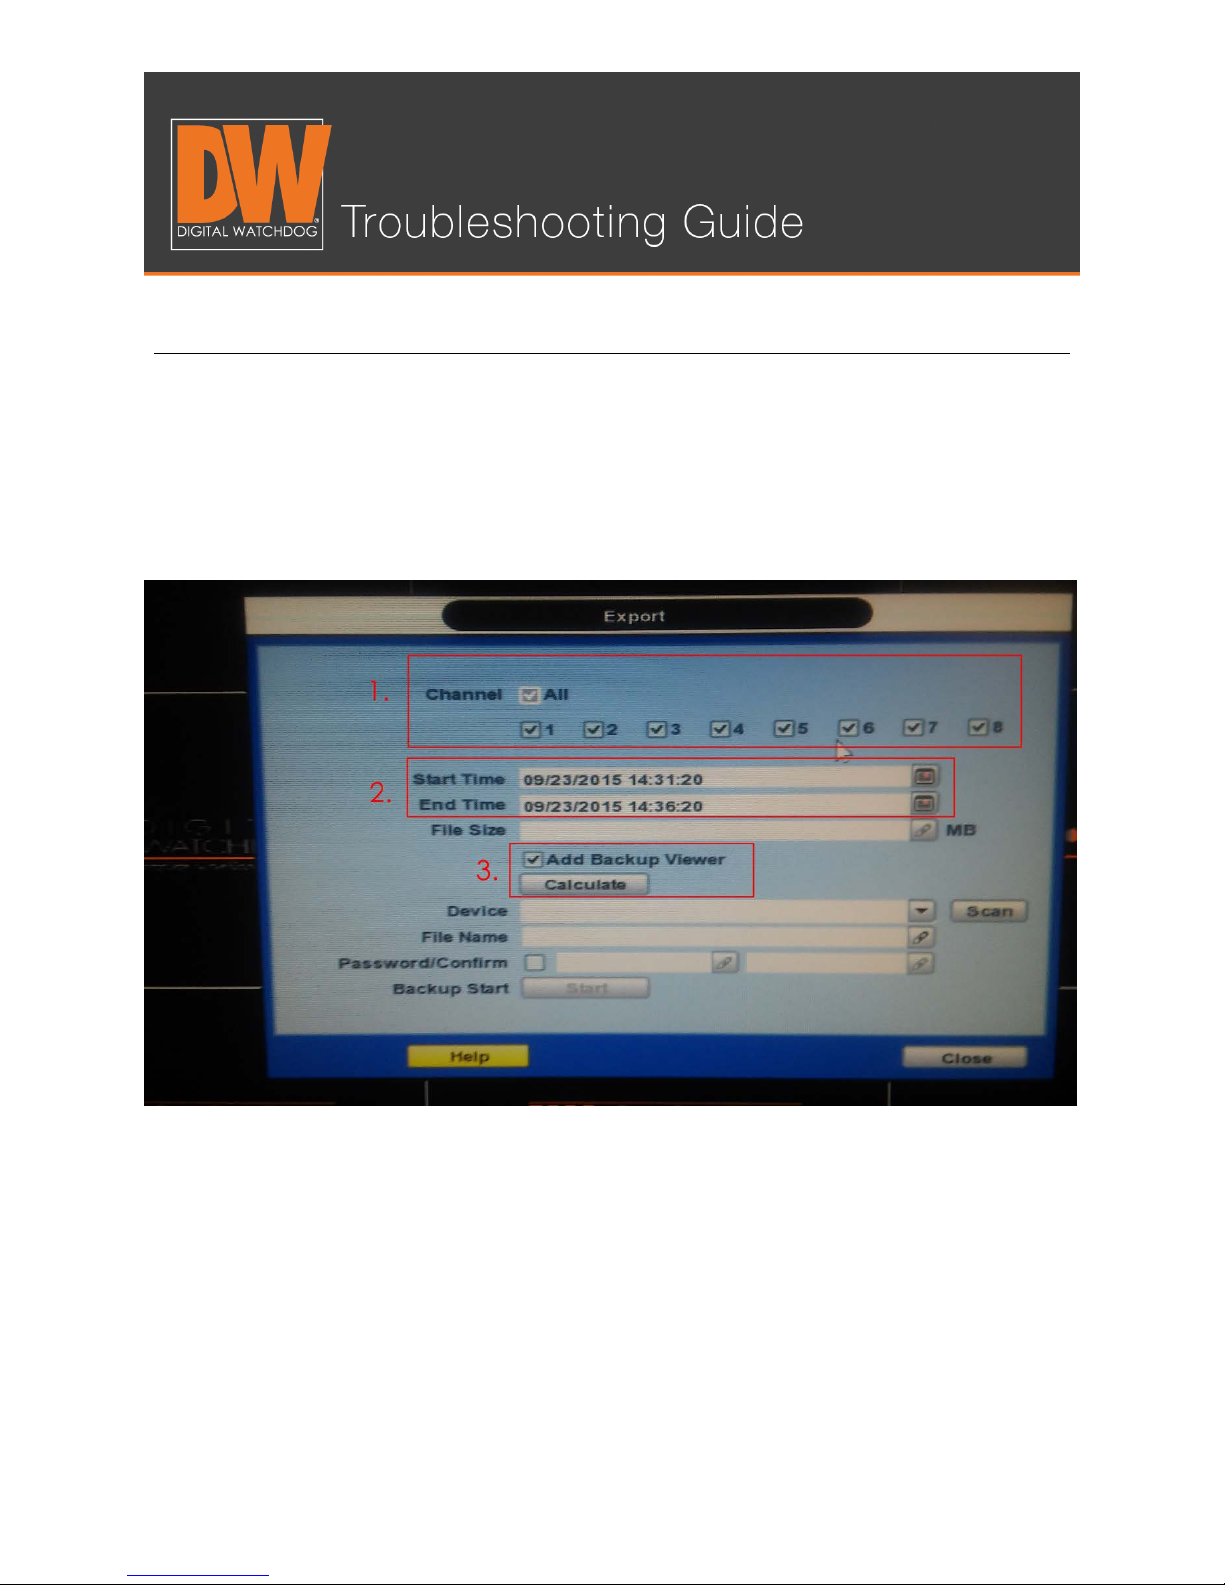
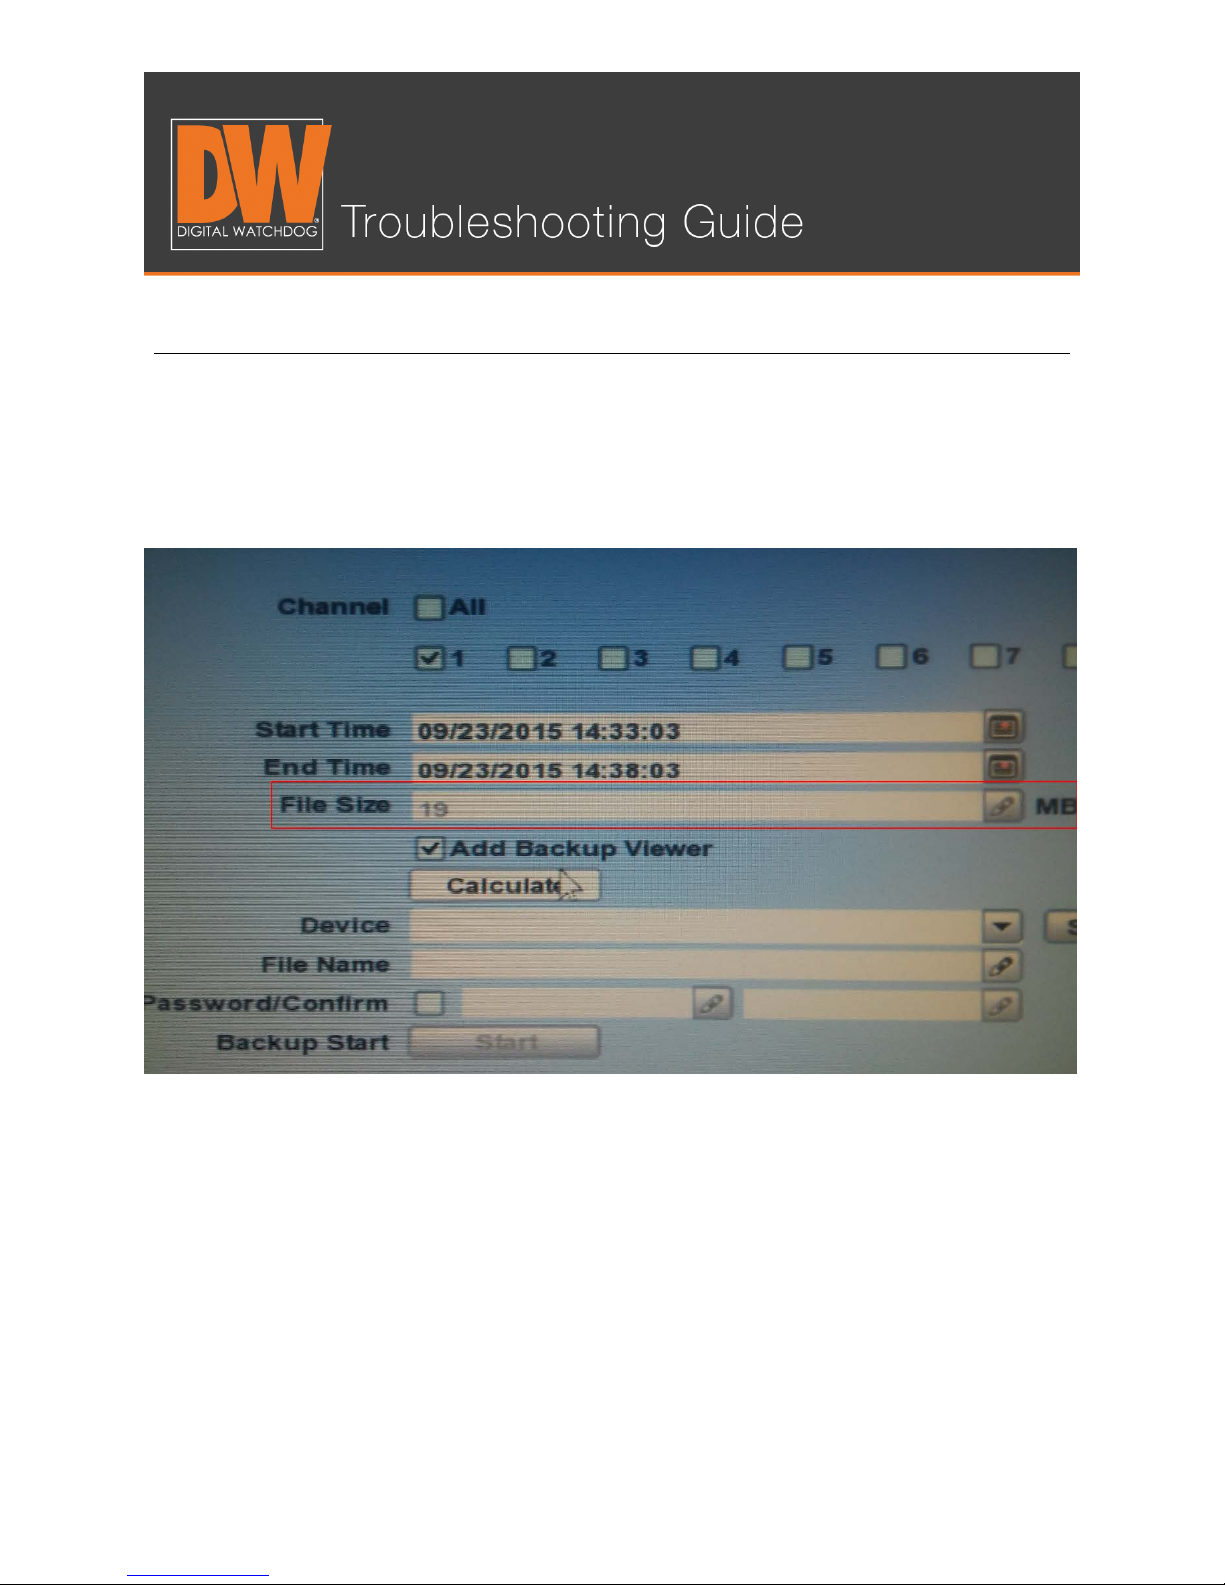
1. Select the channels you wish to backup.
2. Select the start time and end time.
3. Checkmark “Add Backup Viewer” and press “Calculate.”
Page 4
BACKING UP FOOTAGE ON A VMAX™ SYSTEM
Step 4.
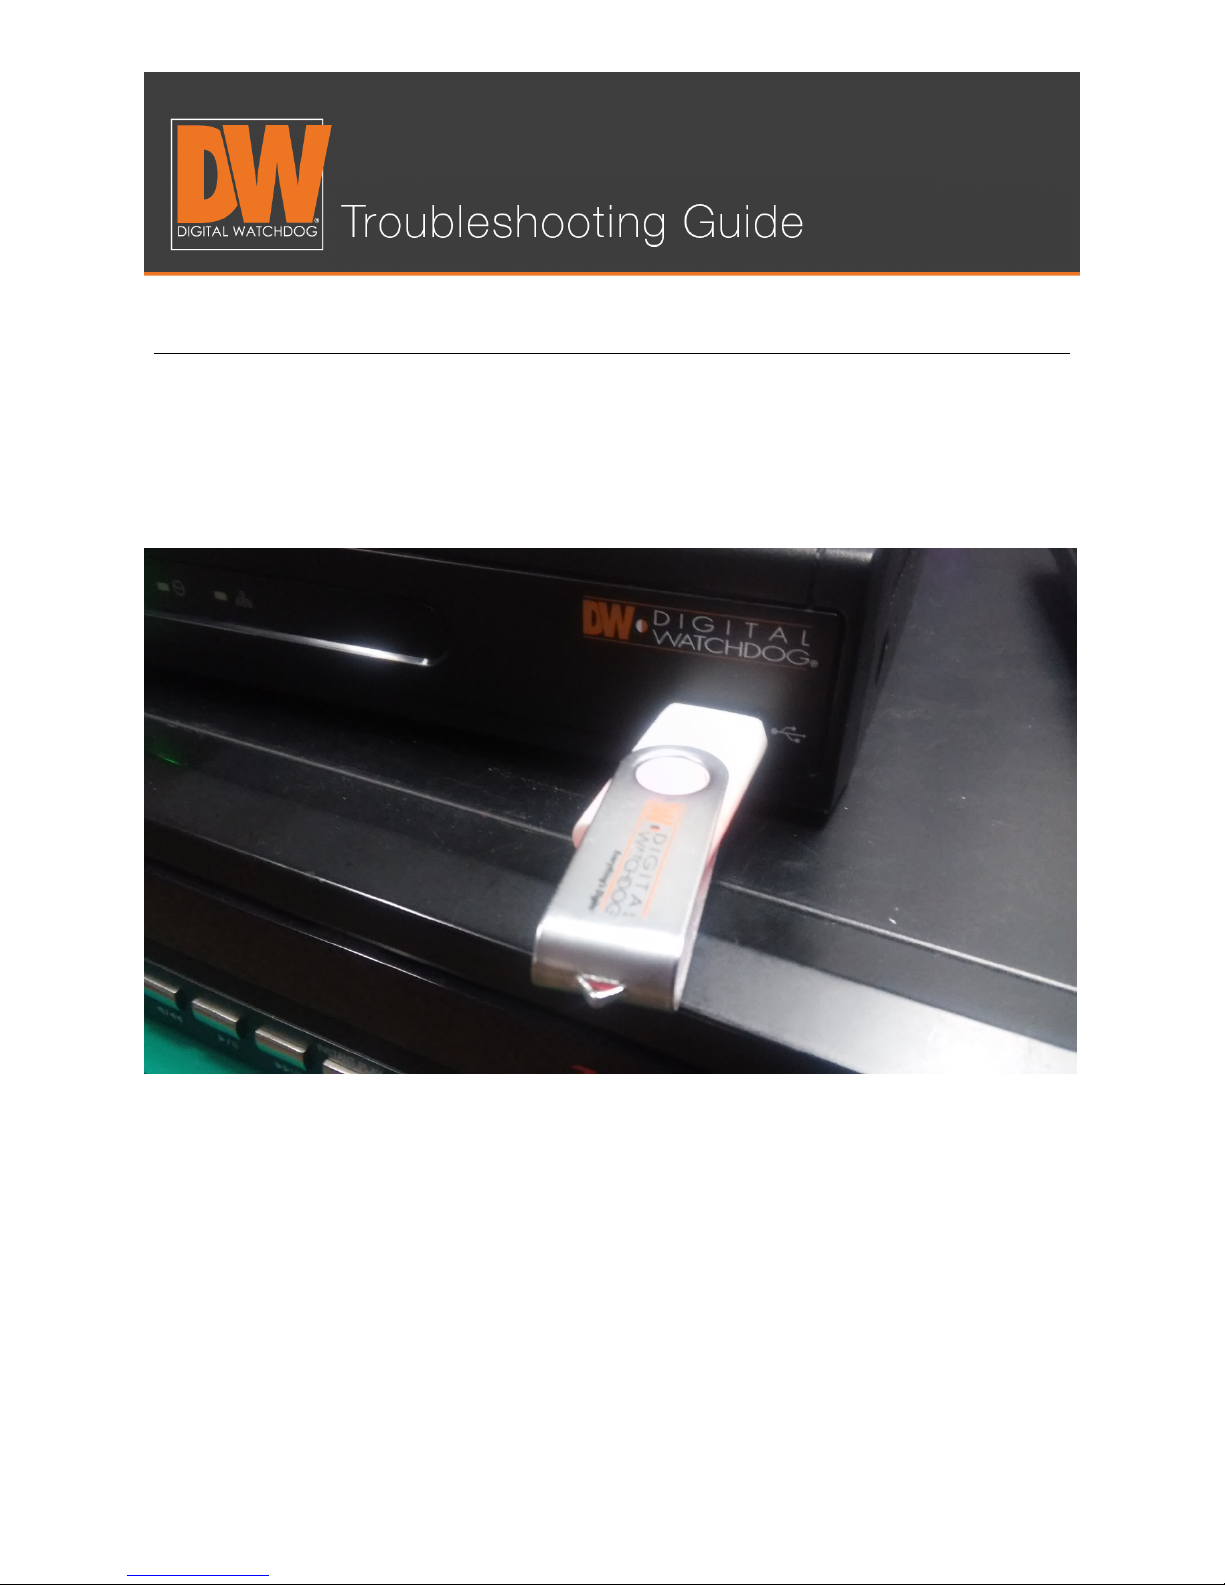
Plug a USB thumb drive into the front of the DVR (this is why we have the mouse plugged
in the back!). Make note that your USB thumb drive needs to be formatted in Fat or Fat32
for the DVR to be able to read it.
Page 5
BACKING UP FOOTAGE ON A VMAX™ SYSTEM
Step 5.
You will notice that after you pressed “Calculate” your file size auto-populated with
information. This is how much storage space your file will take. The DVR will back up a
maximum of up to 32GB at a time.
Page 6
BACKING UP FOOTAGE ON A VMAX™ SYSTEM
Step 6.
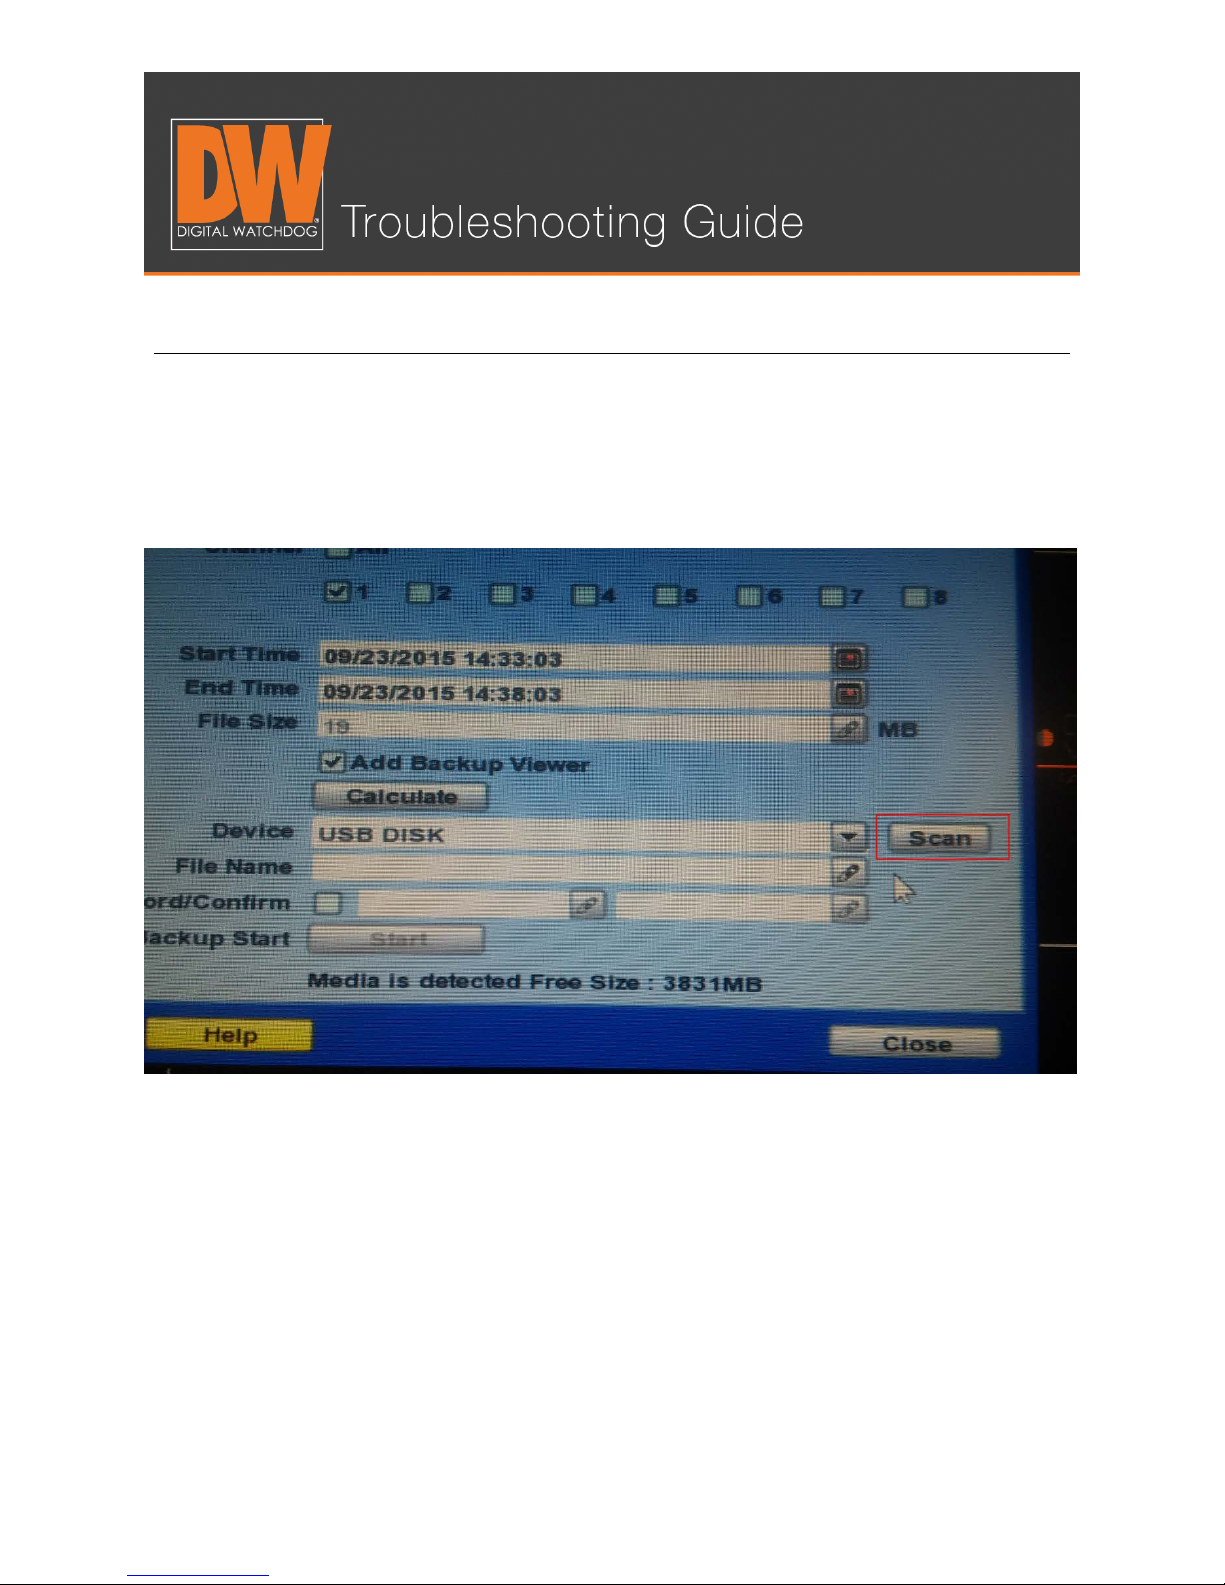
Press “Scan” to allow the DVR to detect your thumb drive. It will display the name of your
thumb drive on the left and display how much free space is available on the thumb drive at
the bottom of the page.
Page 7
BACKING UP FOOTAGE ON A VMAX™ SYSTEM
Step 7.
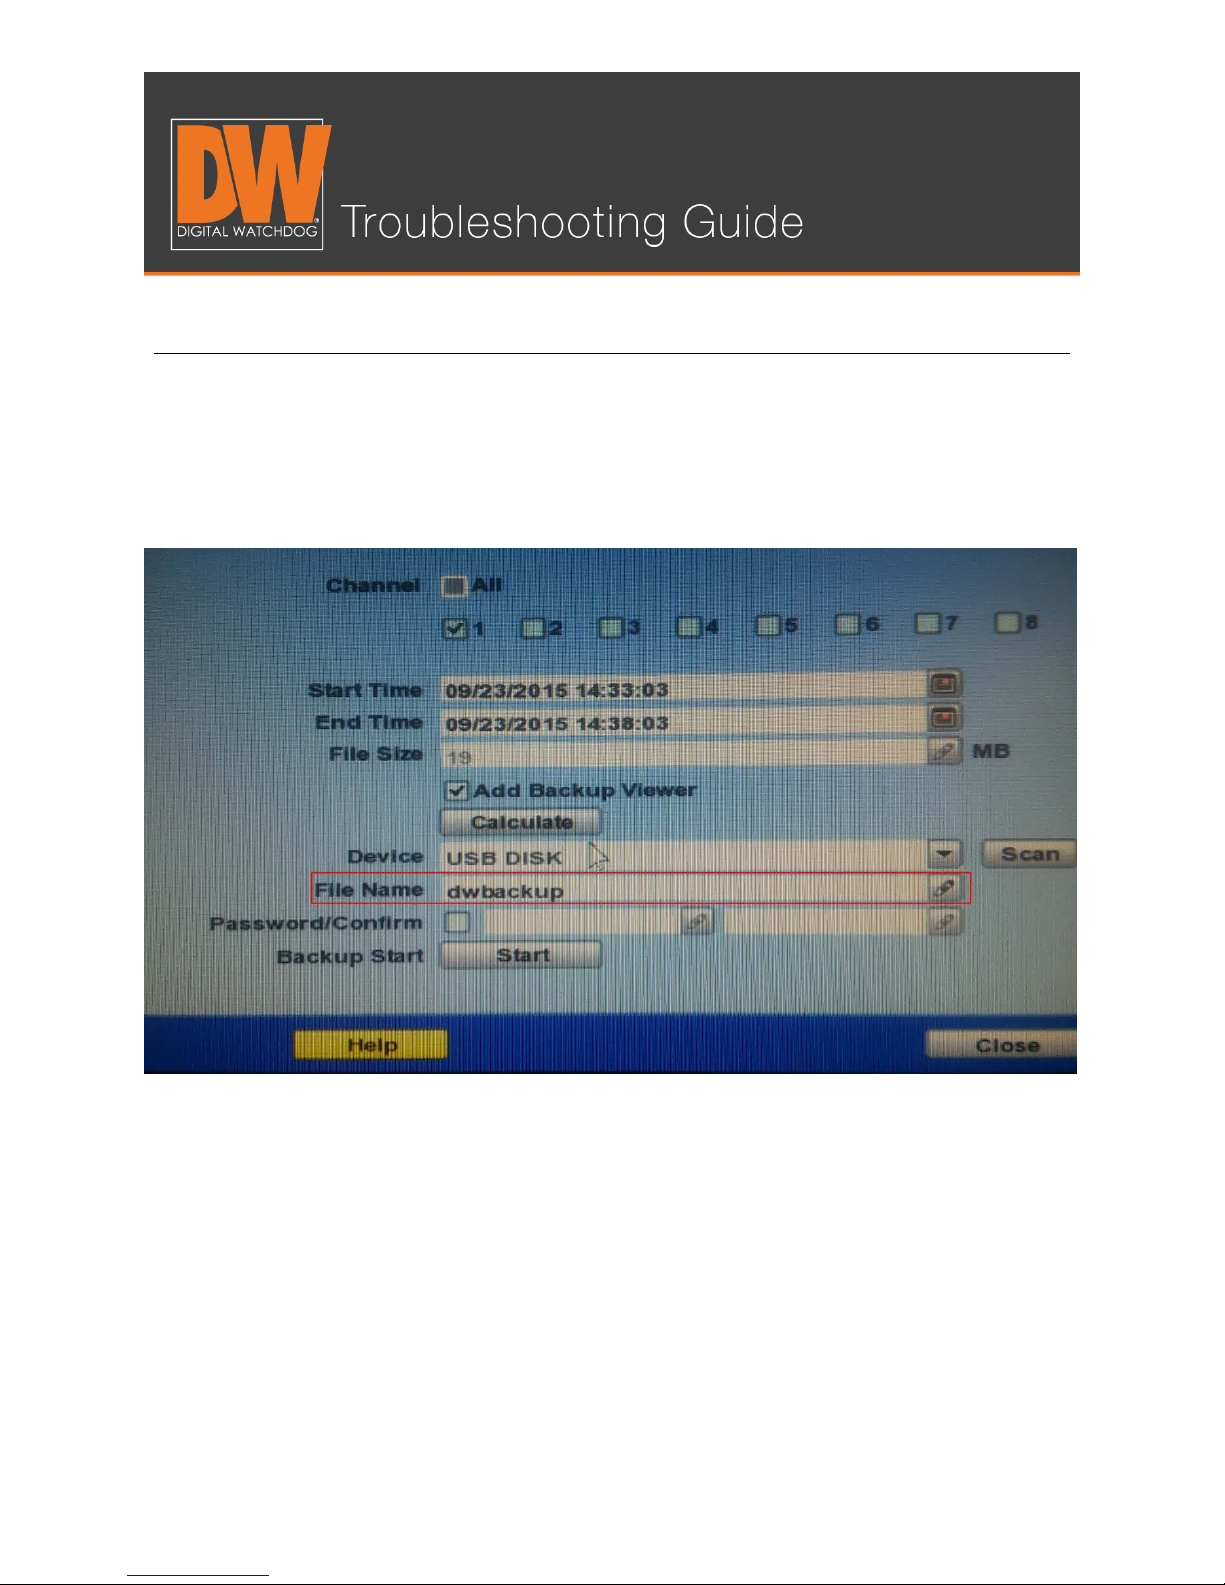
Give your file a name. The DVR will not allow you to save without assigning a name for it to
be filed under. (Optional: You can also give the file a password for protection, but it is not
required. Press the “Start” button after you’ve named the file.
Page 8

BACKING UP FOOTAGE ON A VMAX™ SYSTEM
Step 8.
Allow your backup to complete. The length of time to back up depends on the size of the
file you are backing up. The next photo illustrates the different stages of the backup. After
the file completes the backup, press “OK.”
Page 9
BACKING UP FOOTAGE ON A VMAX™ SYSTEM
Step 9.
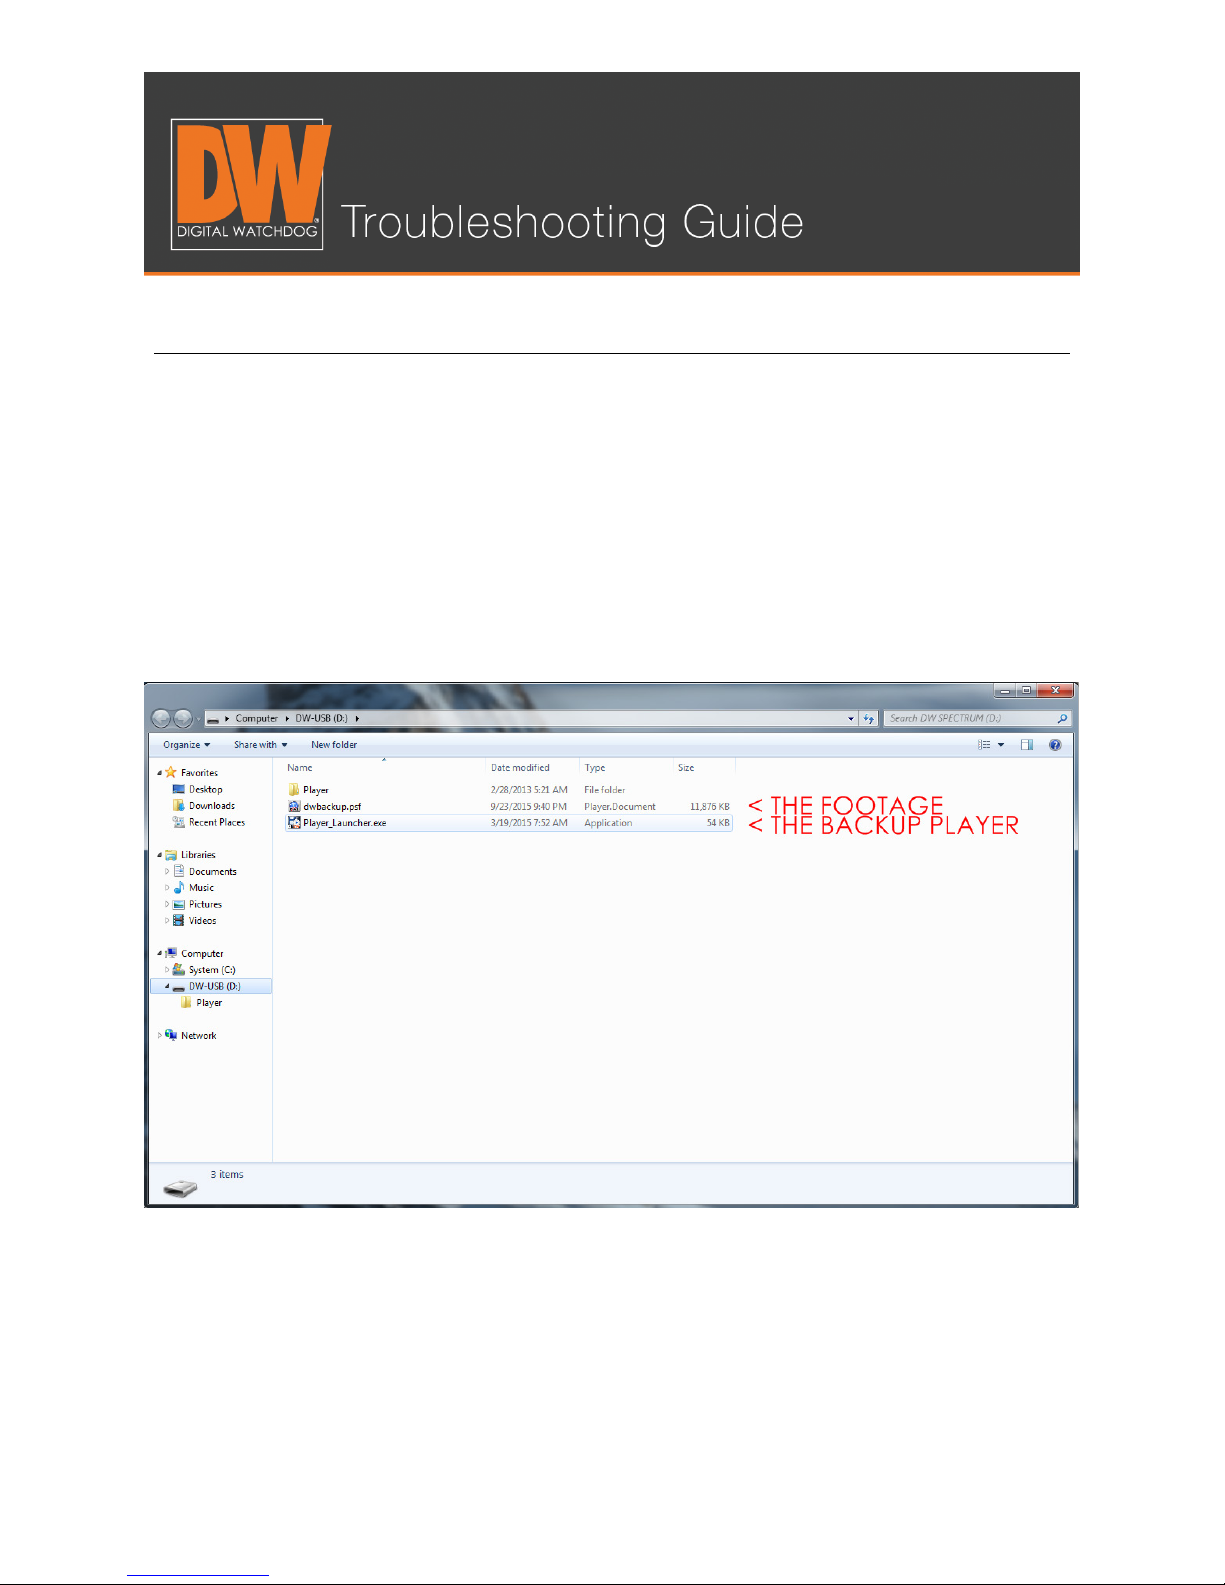
Plug your USB thumb drive into a Windows® computer. Open the USB thumb drive and
you will see;
• The player folder
• The file you backed up (it will end in “.psf)
• The actual player
Double click the player icon and it will open the backup player.
Page 10
BACKING UP FOOTAGE ON A VMAX™ SYSTEM
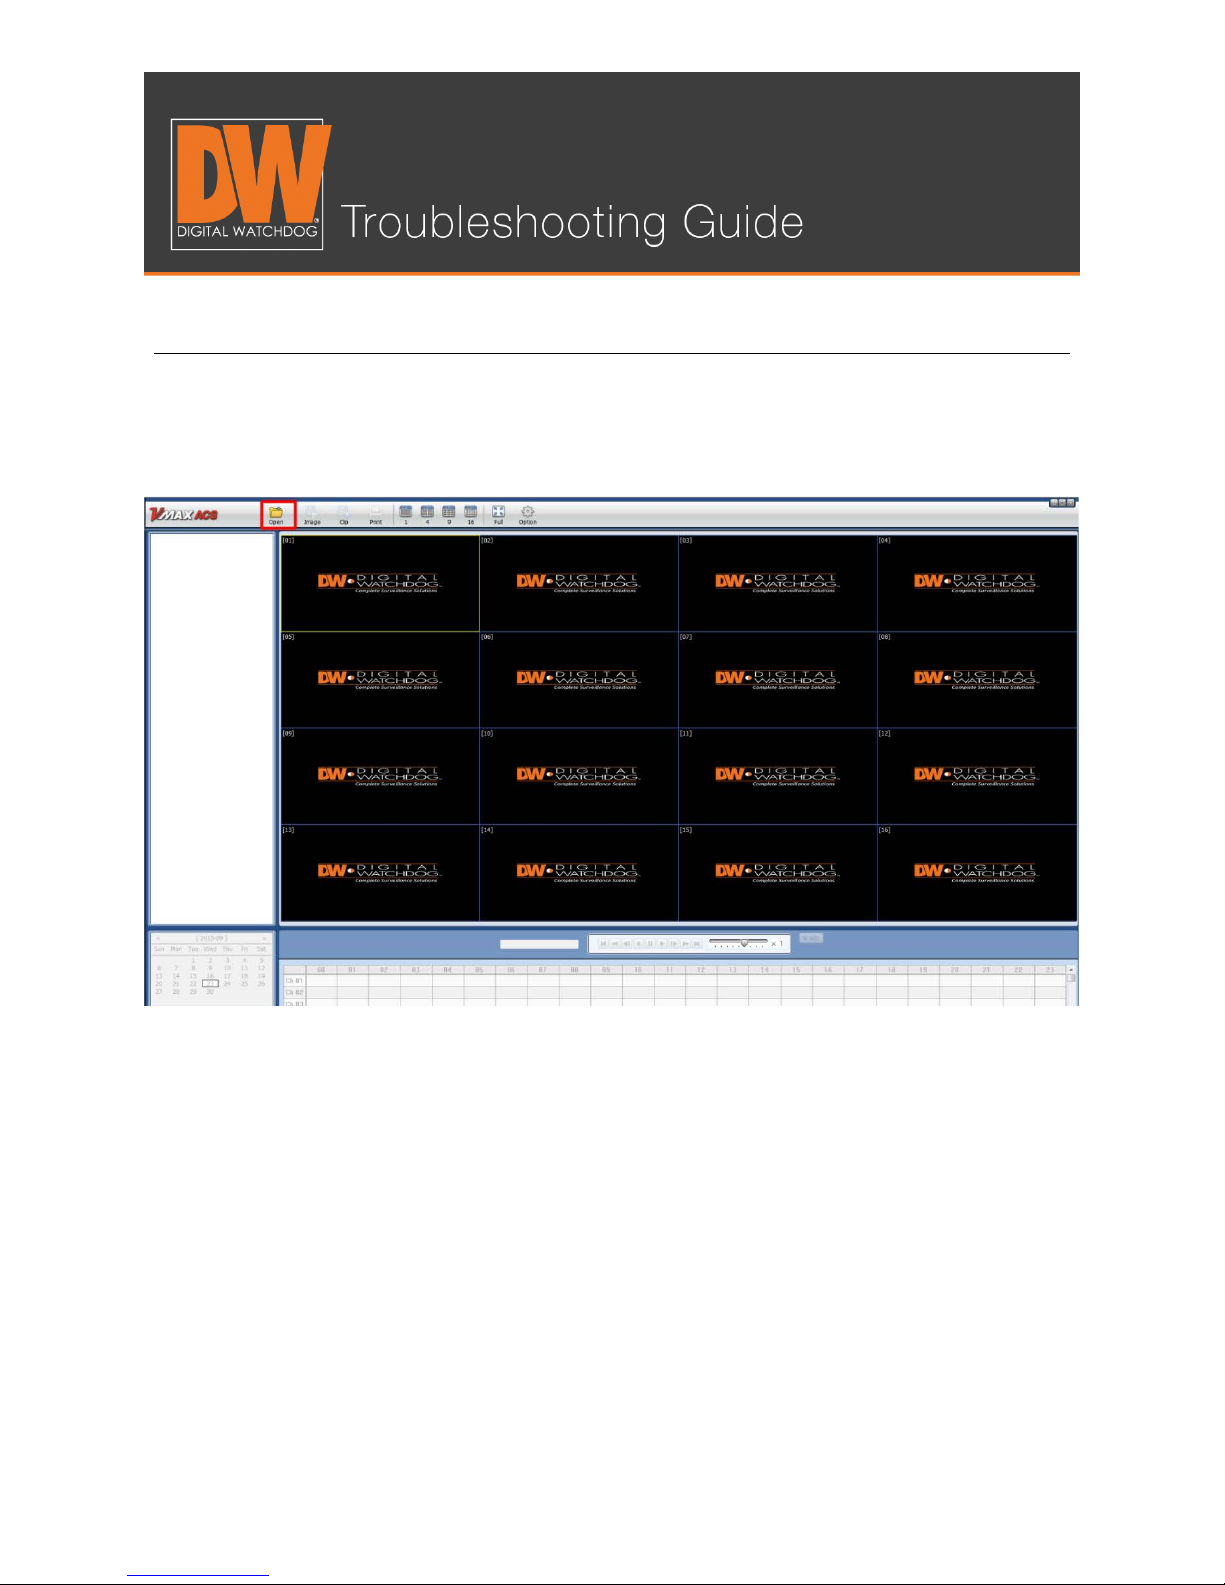
Step 10.
Click on the folder in the top left of the player.
Page 11
BACKING UP FOOTAGE ON A VMAX™ SYSTEM
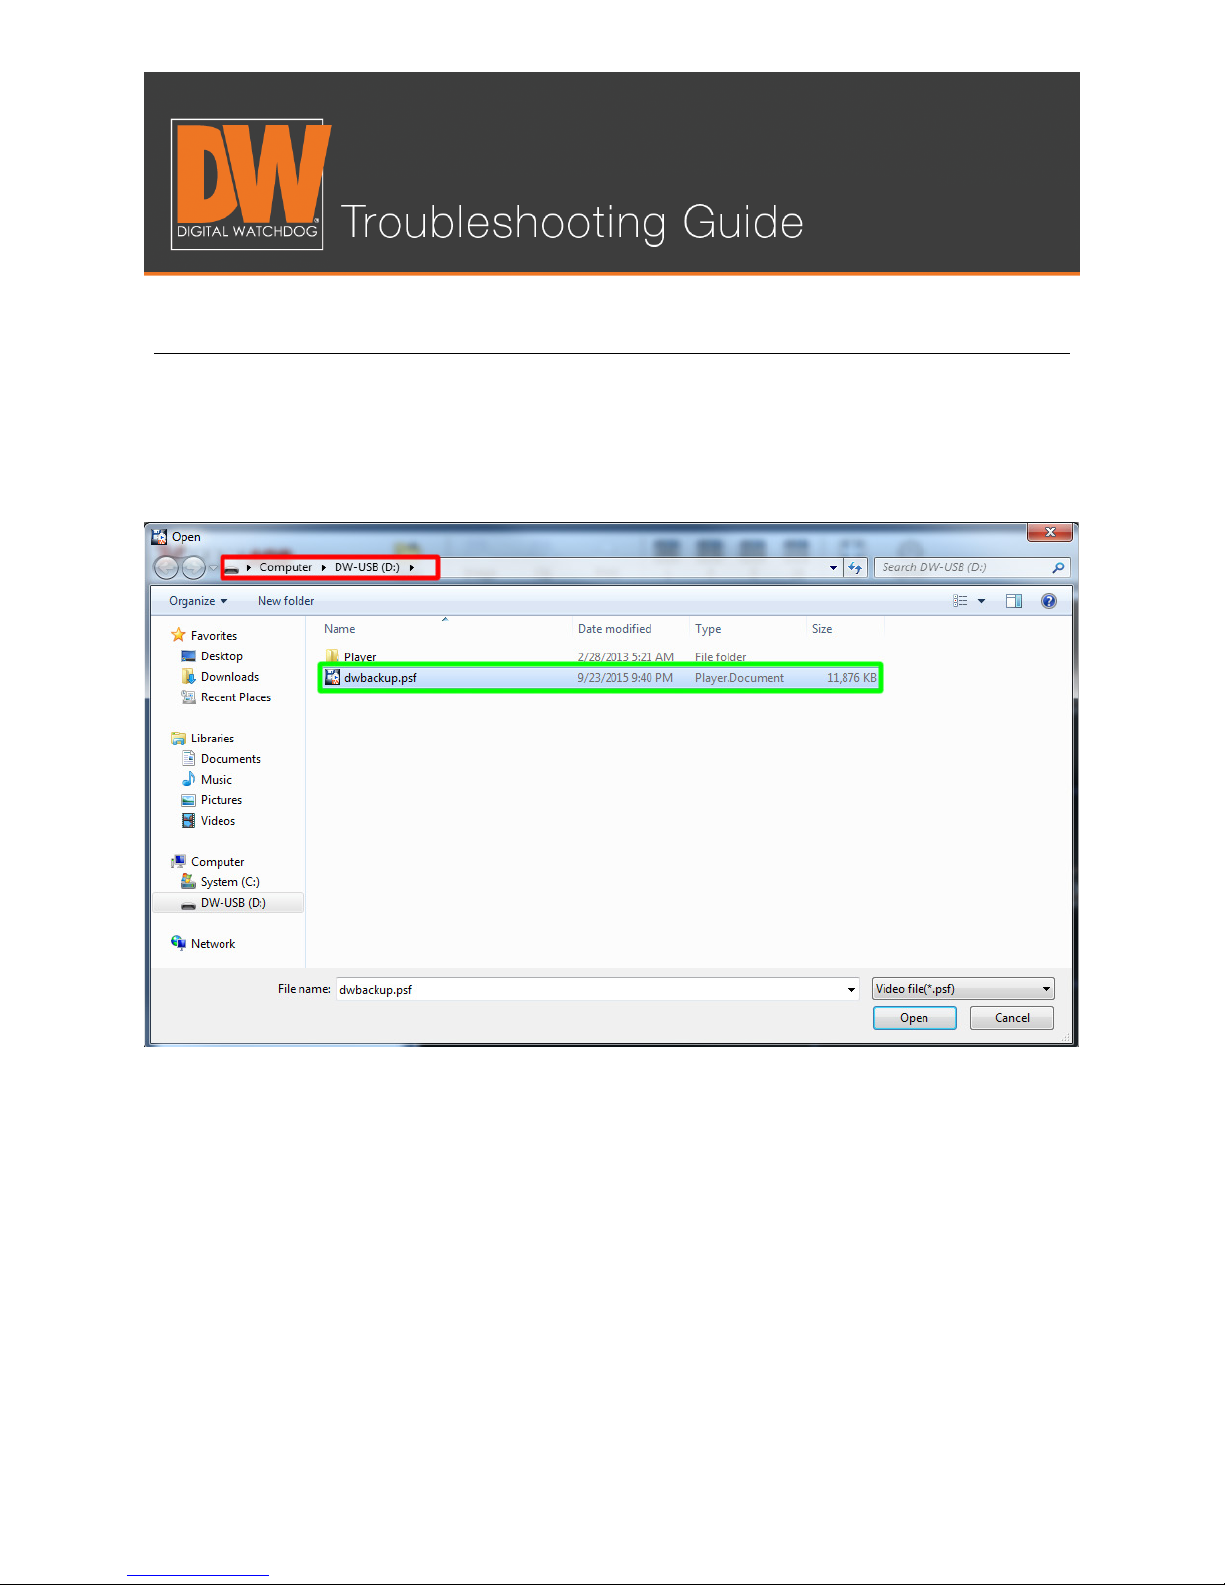
Step 11.
Select the file from your USB. If you backed up multiple files, you can select which one to
view from this screen. Press “Open” after you’ve made your selection.
Page 12
BACKING UP FOOTAGE ON A VMAX™ SYSTEM
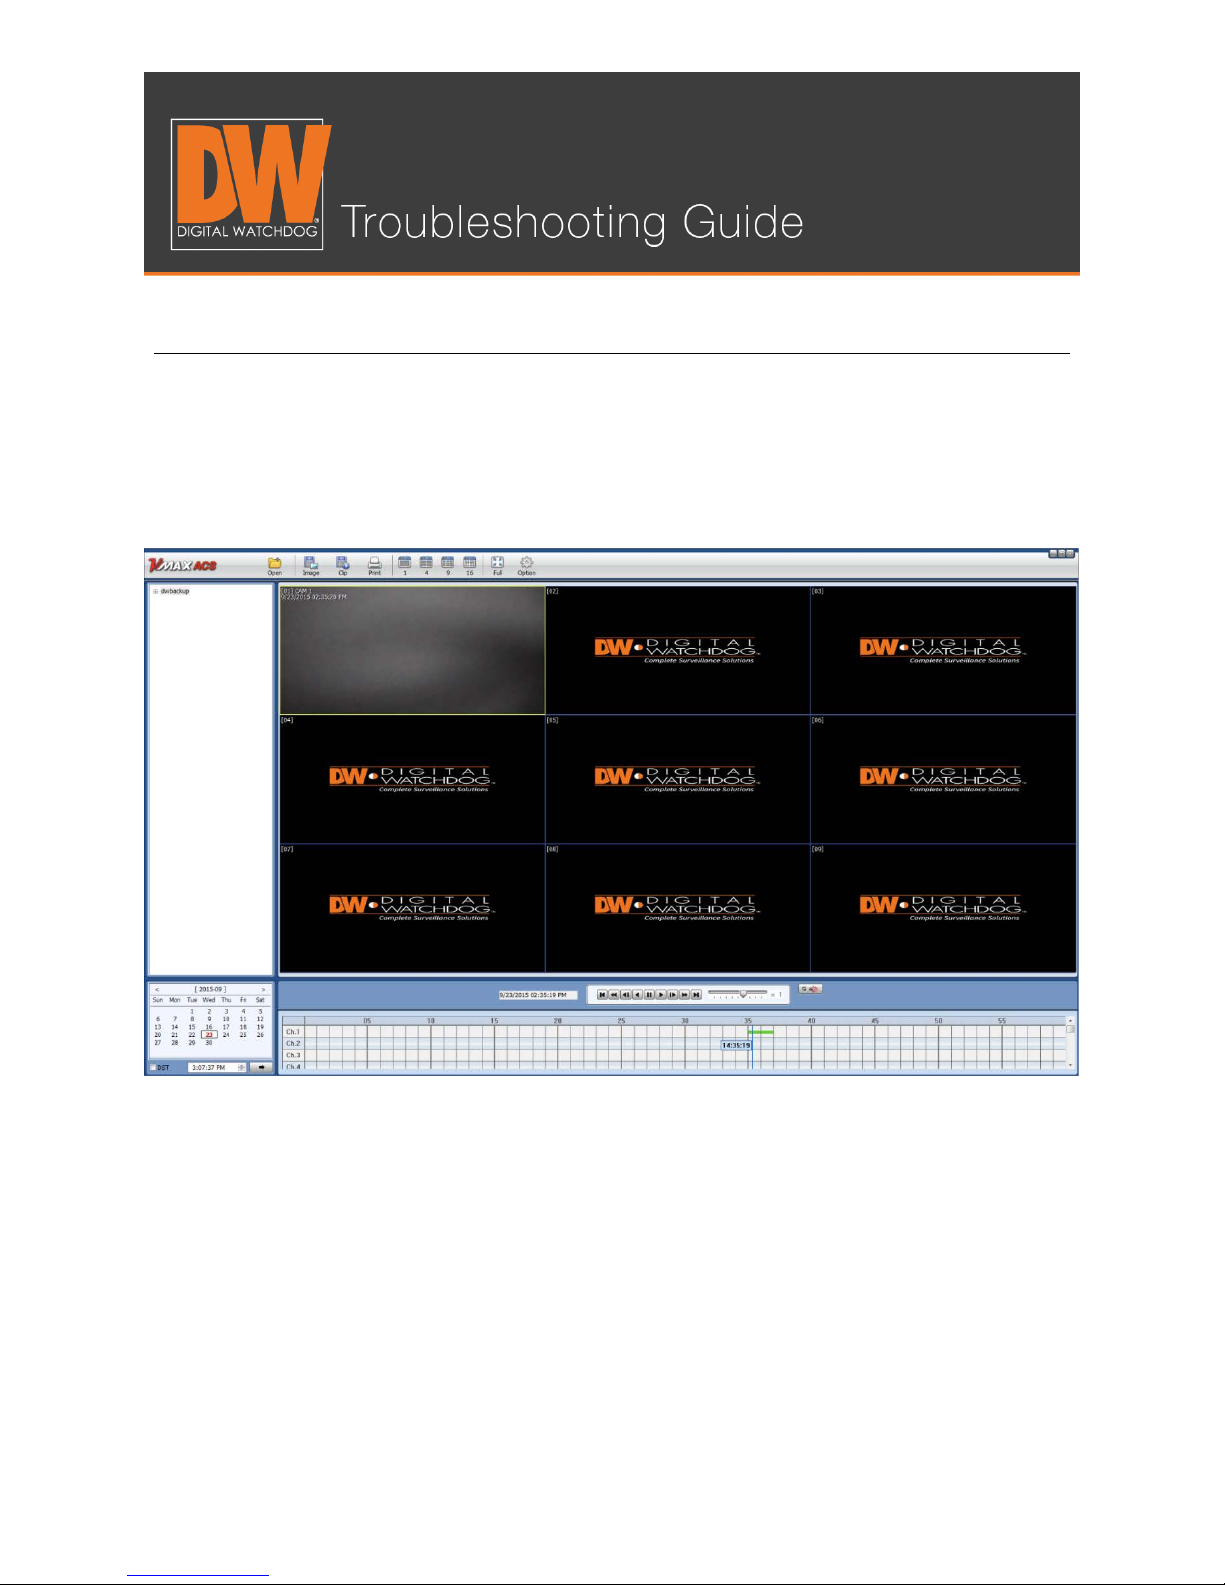
Step 12.
Your file will play immediately after selection. You will notice the time stamp, the
appropriate camera on the appropriate channel, and easy to use navigation on the bottom
of the screen to find specific times and incidents!
Page 13

BACKING UP FOOTAGE ON A VMAX™ SYSTEM
Additional Notes
• Your start time and end time must have footage at the exact time.
• External hard drives can work, but are not recommended.
• If you forget to add a backup player, our free Pivot™ software includes a player that
will play your file.
• The backup is only viewable on Windows machines. Mac® computers will need to
rely on the “clip” function on their Mac ACS software.
• The file will only back up in the .psf format. This allows for ease when navigating
through your footage on the player.
Follow this link for our free Pivot™ software. You can also back up from the Pivot software.
This is explained in the Pivot manual.
Page 14

NETWORK SETUP FOR THE VMAX™ SYSTEMS
This guide offers basic step-by-step instructions to set up your Digital Watchdog® DVR to
be viewed anywhere!
Step 1.
Go to NETWORK > Network on the Setup menu.
Page 15

NETWORK SETUP FOR THE VMAX™ SYSTEMS
Step 2.
Change the Network Type from “Static” to “Dynamic.”
Page 16

NETWORK SETUP FOR THE VMAX™ SYSTEMS
Step 3.
Press the “IP Detect” button and wait for the DVR to find a new IP Address.
Page 17

NETWORK SETUP FOR THE VMAX™ SYSTEMS
Step 4.
After the new IP Address is detected, set the Type back to “Static” and save your settings.
Your DVR is now set up on the local network!
You can now use this new local IP Address to connect to your DVR on our mobile phone
application or computer software while you remain on the same network as the DVR!
Page 18

NETWORK SETUP FOR THE VMAX™ SYSTEMS
Setting Up a DDNS
Step 5.
Select NETWORK > Network > DDNS on the Setup menu.
Page 19

NETWORK SETUP FOR THE VMAX™ SYSTEMS
Step 6.
Checkmark “Use DDNS” so the page can be edited.
Page 20

NETWORK SETUP FOR THE VMAX™ SYSTEMS
Step 7.
Select either “dwddns” or “dwddns2” as your DDNS server. These are free DDNS
servers that we provide for your convenience.
Page 21

NETWORK SETUP FOR THE VMAX™ SYSTEMS
Step 8.
Press the pencil icon next to “Host Name” and enter the name you would like your DVR to
have. The DDNS will accept alphanumeric characters only. No spaces or special
characters. After you create your name, press “Confirm.”
Page 22

NETWORK SETUP FOR THE VMAX™ SYSTEMS
Step 9.
Press the request “Start” button on the page to register your DDNS.
Page 23

NETWORK SETUP FOR THE VMAX™ SYSTEMS
Step 10.
If the request returns “DDNS Success,” save. Congratulations! Your DDNS address is now
registered! It will be found as “(hostname).(ddnsserver)”.
You have now created your remote address!
This address will allow you to connect on your mobile phone application or computer
software from a remote location.
For this address to work, you now need to allow Port Forwarding on your router.
Page 24

NETWORK SETUP FOR THE VMAX™ SYSTEMS
Setting Up Port Forwarding
Step 11.
To set up Port Forwarding, you will need to access your router’s user interface on a
computer. This can usually be found by entering the gateway found under the network
page on the DVR. In our example, we’re using “192.168.1.1”
Step 12.
Go to a computer on the same network. Type the gateway into the address bar of any
web browser (Internet Explorer, Chrome, Safari, etc.) And press “Enter.”
Page 25

NETWORK SETUP FOR THE VMAX™ SYSTEMS
Step 13.
This should display a prompt asking for your router’s log in information. This information is
found most commonly on the actual routing device. (Note: This is not your Wi-Fi
information.)
Page 26

NETWORK SETUP FOR THE VMAX™ SYSTEMS
Step 14.
Depending on the router, the next step can be found in different places. In this case, we
want to select “Applications and Gaming.” (Also known as Pinholes, Port Forwarding,
Single Port, etc.)
Page 27

NETWORK SETUP FOR THE VMAX™ SYSTEMS
Step 15.
Fill in the requested information. The port number should be the same number you have
under the DVR’s network page. In our example, we are using 80. The address used is the
DVR’s IP Address that we received from the IP Detect. Ours is 192.168.1.190. Make sure the
rule you’ve created is enabled. Save the setting.
Page 28

NETWORK SETUP FOR THE VMAX™ SYSTEMS
Step 16.
Double check your work at http://canyouseeme.org. If you test your port number and it
comes back successful, you are done!
Page 29

NETWORK SETUP FOR THE VMAX™ SYSTEMS
Additional Notes
• Your DVR’s local IP Address will only work when you are on the same network. This
means your phone or computer is connected to the same Internet.
• Your DDNS that you created generally only works when you are
network as the DVR.
• Some routers and Internet service providers do not allow the use of port 80. If this
is the case, simply change the port number on the network page to something else
and forward that port instead.
• If the DDNS address fails to register, try a different name or another DDNS server.
• The DDNS name you create will be going to a server. This means that the name
you want to use may be taken. It is recommended to make your DDNS name
unique to avoid any issues with registration. Refrain from host names like “DVR,”
“digitalwatchdog,” “myhome” or anything else that might be commonly used. A
common creation method is a favorite food and special year (ex. Papaya1978). This
will reduce the likelihood of someone else having the same name that you would
like to use.
This is a basic guideline. Not every router will look like this one, nor will they all have Port
Forwarding enabled the same way. If you still have issues getting your ports forwarded,
your Internet service provider has the means to do this for you.
off
the same
Page 30

UPGRADING YOUR DVR’S FIRMWARE
Upgrading your unit’s firmware is a vital part of keeping your DVR healthy and in optimal
working order. Firmware can improve your unit’s functionality, add features and even
resolve some issues. These are instructions for upgrading your firmware from the DVR.
Step 1.
Log in to your unit. Right-click and select “Setup Menu.”
Page 31

UPGRADING YOUR DVR’S FIRMWARE
Step 2.
Select “SYSTEM > System Info.”
Page 32

UPGRADING YOUR DVR’S FIRMWARE
Step 3.
You will find the firmware version you currently use about halfway down the page. Press
“Upgrade.”
The next steps will be broken down into two methods:
“A” Will refer to the FTP (network method).
“B” Will refer to the USB method.
Page 33

UPGRADING YOUR DVR’S FIRMWARE
Step 4A (FTP).
There are two methods to upgrade the firmware; over the network (FTP) and with a thumb
drive (USB). We will first go over the FTP method. By default, the unit will be on FTP. All of
the default information should be correct. Simply press the “check” button.
Page 34

UPGRADING YOUR DVR’S FIRMWARE
Step 5A.
Your DVR should find the newest version. It will either say “New Version” or “Current
Version is Up to Date.” Press the confirmation button.
Page 35

UPGRADING YOUR DVR’S FIRMWARE
Step 6A.
Wait. You will see the bottom display information about the progress.
Page 36

UPGRADING YOUR DVR’S FIRMWARE
Step 4B. (USB)
Download the current firmware from our website. You can find your model, then select the
“Software” tab, where we will have the most up to date versions available. Download the
file and copy it to a thumb drive.
Step 5B.
Plug the USB stick in the front of the unit. Change the method to USB. You will notice that
the FTP information is not being used. This is normal.
Page 37

UPGRADING YOUR DVR’S FIRMWARE
Step 6B.
Press “Scan.” You will notice the USB is found instantly, the newest version will display,
and a start button appears at the bottom. Press “Start.”
Page 38

UPGRADING YOUR DVR’S FIRMWARE
Step 7.
Both methods will end in the same way; waiting for the upgrade to finish. Both methods
will take anywhere from 3-5 minutes. The next screen shows the progress of the upgrades
installing. After installation, the DVR will power cycle on its own.
Page 39

UPGRADING YOUR DVR’S FIRMWARE
Step 8.
Once the unit is up and operational, go back to “SYSTEM > System Info” to double check
that the upgrade was applied. You should see the most up to date version number!
Page 40

UPGRADING YOUR DVR’S FIRMWARE
Additional Notes
• The FTP method requires the DVR to have a stable network connection. If this
method should fail for you, it is recommended to use the USB method instead.
• Firmware is constantly being worked on to ensure your DVR is in good shape. It is
recommended to check at least once a month for new firmware.
• Your USB needs to be formatted in either “Fat” or “Fat32” to work.
• When you save the firmware to a thumb drive, make sure it is in the root folder. If
the firmware is not in the root folder, the DVR will be unable to find the file.
• Do not remove the thumb drive until the unit reboots from the installation. Doing so
too early can cause the firmware upgrade to fail.
Check out the collection of security & surveillance products we offer.
 Loading...