

Page 1

GS3060
GSM-GPRS INTERFACE
INSTALLATION
MANUAL
WARNING: This manual contains information on limitations regarding product use and
function and information on the limitations as to liability of the manufacturer.
Page 2

Page 3

Table of Contents
INTRODUCTION .............................................................................................. 1
Features .......................................................................................................... 1
Technical Specifications ................................................................................. 1
Ratings ........................................................................................................... 1
Description ..................................................................................................... 2
IDENTIFICATION OF PARTS .......................................................................... 3
INSTALLING THE GS3060............................................................................... 4
CONNECTING THE GS3060 ........................................................................... 5
STATUS LEDS ................................................................................................. 5
OPERATING PRINCIPLES .............................................................................. 6
Simulated Land Line Mode ............................................................................. 6
PTM (Panel Transmission Monitoring) ............................................................. 6
GPRS Sequence ............................................................................................. 7
Inputs .............................................................................................................. 7
Contact ID Mode ............................................................................................ 7
Outputs ........................................................................................................... 8
Activating the Outputs .................................................................................... 8
Contact ID....................................................................................................... 8
"C-24 REMOTE" PROGRAMMING .................................................................. 8
GS3060 WIRING DIAGRAMS .......................................................................... 9
Page 4

INTRODUCTION
The GS3060 is a backup wireless communicator that sends alarm system information to a System
III or System II receiver through a GSM/GPRS wireless network. For use with listed compatible
control units as indicated in the control unit manufacturer's installation instructions.
Features
• Compatible with any listed panel that supports 4 or 10-digit Contact ID
• Simulates land line
• Switches automatically to GSM network in the event land line tr
• GSM Signal Indicator
• 4 programmable outputs
• Houses 12V - 1.2 Ah battery
• Case Tamper Output
• Land-line Overvoltage Protection
• Dual-Band GSM Radio
• 4 Programmable Inputs
• GPRS/Internet communication with Sur-Gard System III / II
• PTM Feature 4 phone numbers programmable for Contact ID Dialer
Technical Specifications
The input voltage to the GS3060
Listed power supply rated for the application (external power-limited source).
can be drawn from the Control Panel or provided by an external UL
Ratings
Power Supply RatingsPower Supply Ratings
Power Supply Ratings
Power Supply RatingsPower Supply Ratings
Input Voltage:............................................................................................ 9 - 14V
Current: .............................. 120mA* (JP3 - OFF and internal battery required) or 500mA* (JP3 ON)
* Plus any current drawn from the GS3060 AUX+ terminal
Battery: ......................................................................... sealed, rechargeable type, rated 12V/1.2Ah
Recharging current: ................................................................................................................... 50mA
CurCur
rr
ent consumptionent consumption
Cur
r
ent consumption
CurCur
rr
ent consumptionent consumption
Standby current: ...................................................................................................................... 120mA
Alarm (Transmitting) current: ................................................................................................... 450mA
PGM outputs: ....................................................................................... 4, open collector, rated 50mA
Operating frequency: ................................................................................................... 850/1900MHz
Antenna Gain: ........................................................................................................................... 2.0dBi
EnvirEnvir
onmental specificationsonmental specifications
Envir
onmental specifications
EnvirEnvir
onmental specificationsonmental specifications
Operating temperature: .................................................................................. 0°C-49°C (32°F-120°F)
Humidity: ................................................................................. 93%RH Maximum (Non-Condensing)
Mechanical specificationsMechanical specifications
Mechanical specifications
Mechanical specificationsMechanical specifications
Metal enclosure, painted; dimensions: ...................... 138mm x 224mm x 55mm / 5.4” x 8.8” x 2.2”
Weight (without battery): ................................................................................................. 900g / 3.2 oz
Internal Event Buffer (communications): ................................................... 256 Events (not viewable)
Maximum loop resistance of line between the device connected in series on T1/R1: ........... 1Kohm
This equipment GS3060 is fixed and shall be installed by Service Persons only (Service Person is defined as a person
having the appropriate technical training and experience necessary to be aware of hazar ds to which that person may
be exposed in performing a task and of measures to minimize the risks to that person or other persons). It shall be
installed and used within an environment that provides the pollution degr ee max 2, over voltages category II, in nonhazardous, indoor locations only. This manual shall be used with the Installation Manual of the alarm contr ol panel.
All instructions specified within that manual must be observed.
ouble (line down)
DC (13.8VDC typical)
1
Page 5

Description
This GS3060 manages transmissions to a central station and can simulate the land line in the event
of trouble (land line down) or even substitute the land line completely in areas where the GSM
service is provided and a land line is not available.
The GS3060 has the capability of communicating alarm signals via the GPRS data network. The
capability enables a fast reliable path to central stations equipped with a Sur-Gard System III or
System II receiver. By connecting a GS3060 to a control panel's standard PSTN interface, telephone
based Contact ID signals are decoded and seamlessly routed through the GPRS network to any of the
compatible receiver options. When configured accordingly, the GS3060, upon line failure, instead of
using GPRS, can also connect the call on the GSM voice channels call based on the panel dialed
number.
The performance of the GS3060 depends greatly on GSM Network coverage, therefore, it should
not be mounted without first performing placement tests to determine the best location for reception
(minimum one green LED is ON). Optional antenna kits are available.
The GS3060 requires enrollment with CONNECT 24 to operate. Dealer application forms and
additional information on the CONNECT 24 Voice Response Unit (VRU) and web user-interface
can be found at www.connect24.com or at the following telephone numbers:
USA 1-888-251-7458USA 1-888-251-7458
USA 1-888-251-7458
USA 1-888-251-7458USA 1-888-251-7458
For UL Residential Fire and Burglary installations, the GS3060 is listed as a primary (sole)
communication means or as a back-up when used in conjunction with a POTS line (dialler).
For UL Commercial Burglary installations, the GS3060 is listed for supplementary (back-up) use in
conjunction with a POTS line (dialler).
For ULC Commercial Fire Monitoring installations the GS3060 is listed as a passive communication
system when used in conjunction with a POTS line (dialler).
For ULC Commercial Burglary installations the GS3060 is listed as a passive communication system
with communication line security level P2 when used in conjunction with a POTS line (dialler).
For ULC Residential Fire and Burglary installations the GS3060 is listed as a primary (sole)
communication means or as a back-up when used in conjunction with a POTS line (dialler).
CANADA 1-888-955-5583CANADA 1-888-955-5583
CANADA 1-888-955-5583
CANADA 1-888-955-5583CANADA 1-888-955-5583
2
Page 6

IDENTIFICATION OF PARTS
M
M
The numbers in square brackets
below) described in this section.
[[
]]
[
] in this manual refer to the main parts of the GS3060 (see Fig.1
[[
]]
1
15
18
5
17
3 2 6
4 4
LOCK
OPEN
JP3
10
8
9
5 1
9 6
11
1
TIP3RNG
LE LI - O1
4T15R12
TAMPER
COM
PGM38PGM2
AUX+
PGM47PGM16COM
M
M
O2 O3 O4
+OC
AS
L1 L2 L3 L4 +12V -
12 13
9
11
16Z217Z315Z114
10
12
19 20
18
+ 12V -
Z4
tie wrap
14
13
16
GS3060
All circuits are classified for UL installations as Power Limited/Class II Power Limited except for the battery leads which are not power limited. Do not route any wiring over circuit boards. Maintain at least 1”
(25.4mm) separation. A minimum 1/4” (6.4mm) separation must be maintained at all points between
Power Limited wiring and all other Non-Power Limited wiring. Route wires as indicated in the diagram.
4
PAR T S
1
2
3
GSM Antenna Mounting Hardware
4
5
6
7
8
JP3 Current Limitation Jumper (refer to ratings section)
9
Programming Jumper (Do not short these pins)
10
11
12
13
14
15
16
17
18
Metal Casing
GSM Antenna
Anchor Screw Holes (3mm)
Connector for GSM Antenna
SIM Card
Status LEDs (see page 5)
RS-232 Connector
Tamper Switch
Terminal Blocks
Battery Leads
Cable Entry
Earth Ground Wire
12V-1.2Ah Battery
GSM Radio Module
SIM Card Holder
JP3
OFF ON
Figure 1 - Parts
3
Page 7

INSTALLING THE GS3060
CONNECT 24 Enrollment Information
Only authorized dealers can enroll a GS3060 with CONNECT 24. Dealer application forms and
additional information on the CONNECT 24 Voice Response Unit can be found at the CONNECT 24
web site
NOTE: Steps 1 and 2 should be completed before powering the GS3060 unit.
STEP 1 - Activate Your SIM Card
Your SIM card must be activated with Connect 24 prior to use. Please call the Voice Response
Unit (VRU) at least 24 hours prior to installation at 1-866-910-3865.
STEP 2 - Initialize the GS3060 with Connect 24
Call the VRU at the toll-free number. Follow the voice prompts and enter in your profile number,
installer ID number, installer PIN number and central station number. Ensure all information is available
before calling the VRU. All this information can be found in your VRU Enrollment Package.
STEP 3 - Determine Best Signal Location
1. Remove the screw and the front cover [1].
2. Fit the antenna [2] (ensure that the bolt [3] is fastened tightly).
3. Using the connector [5], connect the GSM Module [17]. Ensure the connector is secure.
NOTE: Before inserting or removing the SIM card, please ensure the unit is powered down.
4. Power up the GS3060 and check signal strength.
5. Power down the GS3060 by removing the DC power source and battery leads.
STEP 4 - Connect the GS3060
1. Using the cabinet, mark the 4 screw locations then drill the anchor screw holes.
NOTE: Check for cable conduits and water pipes before drilling.
2. Using anchor screws (not included), mount the cabinet to the wall.
3. Run the cables, then pull them through the cable entry [14] or the knockouts provided.
4. Complete the connections on the terminal board [12].
5. Using the 4 screws, reattach the front cover [1] securely to the cabinet.
NOTE: Please refer to Figure 2 at the end of this manual for wiring diagram.
wwwwww
.connect24.com.connect24.com
www
.connect24.com. Please contact CONNECT 24 at the number below for assistance:
wwwwww
.connect24.com.connect24.com
USA 1-888-251-7458USA 1-888-251-7458
USA 1-888-251-7458
USA 1-888-251-7458USA 1-888-251-7458
• Connect battery to the RED and BLK battery leads.
• Connect DC Power source to +/- 12V terminals.
• Allow unit to power up
• The green LEDs will indicate the signal strength. The bottom green LED must be ON for the
location to be acceptable. Please refer to the “Status LEDs” section for more information.
CANADA 1-888-955-5583CANADA 1-888-955-5583
CANADA 1-888-955-5583
CANADA 1-888-955-5583CANADA 1-888-955-5583
Ensure power and Telco circuit connections are made only after the cabinet has been secured to the building or structure
and has been connected to the protective earth ground
be found in the “Connecting the GS3060” section.
. Descriptions of the terminals can
4
Page 8

CONNECTING THE GS3060
(1) Ear(1) Ear
th Grth Gr
(1) Ear
(1) Ear(1) Ear
This terminal must be connected to the Mains Earth, in order to comply with the Telecommunications
Network Safety Standards (Overvoltage Protection Requirements).
TIP (2) / RNG (3) ExterTIP (2) / RNG (3) Exter
TIP (2) / RNG (3) Exter
TIP (2) / RNG (3) ExterTIP (2) / RNG (3) Exter
These terminals must be connected directly to the incoming telephone line .
T1 (4) / R1 (5) InterT1 (4) / R1 (5) Inter
T1 (4) / R1 (5) Inter
T1 (4) / R1 (5) InterT1 (4) / R1 (5) Inter
These terminals must be connected to the TIP and RING of the control panel.
COM(6,14) CommonCOM(6,14) Common
COM(6,14) Common
COM(6,14) CommonCOM(6,14) Common
This terminal is connected internally to Power Ground.
PGM1 (7), PGM2 (8), PGM3 (9), PGM4 (10) PrPGM1 (7), PGM2 (8), PGM3 (9), PGM4 (10) Pr
PGM1 (7), PGM2 (8), PGM3 (9), PGM4 (10) Pr
PGM1 (7), PGM2 (8), PGM3 (9), PGM4 (10) PrPGM1 (7), PGM2 (8), PGM3 (9), PGM4 (10) Pr
These outputs can be activated by programmed events, refer to “Activating the Outputs” for details.
The maximum current sink of each output must not exceed 50mA.
AUX+ (11) AuxiliarAUX+ (11) Auxiliar
AUX+ (11) Auxiliar
AUX+ (11) AuxiliarAUX+ (11) Auxiliar
+12V Output, 200mA PTC Protected.
the power supplythe power supply
the power supply
the power supplythe power supply
draw on the host panel or power supplydraw on the host panel or power supply
draw on the host panel or power supply
draw on the host panel or power supplydraw on the host panel or power supply
this output.this output.
this output.
this output.this output.
TT
amper (12-13)amper (12-13)
T
amper (12-13)
TT
amper (12-13)amper (12-13)
These terminals are connected in series to the Tamper microswitch [
the cabinet is properly closed, and will open when the front cover is removed.
Z1-Z4 (15-16-17-18) PrZ1-Z4 (15-16-17-18) Pr
Z1-Z4 (15-16-17-18) Pr
Z1-Z4 (15-16-17-18) PrZ1-Z4 (15-16-17-18) Pr
These terminals can be set up to trigger events. Refer to “Inputs” section for details.
12V (19), COM (20) Device Power Supply12V (19), COM (20) Device Power Supply
12V (19), COM (20) Device Power Supply
12V (19), COM (20) Device Power Supply12V (19), COM (20) Device Power Supply
These terminals must be connected to a rated power supply.
Once the connections are completed, connect the Red and Black wires [
Jumper JP3Jumper JP3
Jumper JP3
Jumper JP3Jumper JP3
JP3 ON - JP3 ON -
JP3 ON - Full power comes from the host panel or external power supply. Supply must be capable
JP3 ON - JP3 ON of up to 700mA, the GS3060 battery must NOT be connected.
JP3 OFF - CurJP3 OFF - Cur
JP3 OFF - Cur
JP3 OFF - CurJP3 OFF - Cur
must be capable of 120mA plus any current drawn from AUX+ terminal. GS3060 battery must be
installed for proper operation. The Power Supply must have a minimum voltage of 13.5 to ensure sufficient
battery charge.
NOTE: When disposing of batteries, follow the instructions and and precautions printed on
the batteries, and contact your municipal offices for information on the disposal of used
batteries.
oundound
th Gr
ound
th Grth Gr
oundound
nal telephone linenal telephone line
nal telephone line
nal telephone linenal telephone line
nal telephone linenal telephone line
nal telephone line
nal telephone linenal telephone line
ogrammable open-collector outputsogrammable open-collector outputs
ogrammable open-collector outputs
ogrammable open-collector outputsogrammable open-collector outputs
y 12V Outputy 12V Output
y 12V Output
y 12V Outputy 12V Output
. This needs to be added to the GS3060 cur. This needs to be added to the GS3060 cur
. This needs to be added to the GS3060 cur
. This needs to be added to the GS3060 cur. This needs to be added to the GS3060 cur
ogrammable Inputsogrammable Inputs
ogrammable Inputs
ogrammable Inputsogrammable Inputs
rr
ent Limiting Mode. ent Limiting Mode.
r
ent Limiting Mode. Host panel or external supply provides standby current. Supply
rr
ent Limiting Mode. ent Limiting Mode.
NOTE: Cur NOTE: Cur
NOTE: Cur
NOTE: Cur NOTE: Cur
rr
ent drawn frent drawn fr
r
ent drawn fr
rr
ent drawn frent drawn fr
. Jumper JP3 does not limit the cur. Jumper JP3 does not limit the cur
. Jumper JP3 does not limit the cur
. Jumper JP3 does not limit the cur. Jumper JP3 does not limit the cur
om this terom this ter
om this ter
om this terom this ter
rr
ent when deterent when deter
r
ent when deter
rr
ent when deterent when deter
1111
11]. They will be closed when
1111
minal is dirminal is dir
minal is dir
minal is dirminal is dir
mining the totalmining the total
mining the total
mining the totalmining the total
rr
ent available onent available on
r
ent available on
rr
ent available onent available on
1313
13] to a 12V, 1.2Ah battery.
1313
ectly frectly fr
ectly fr
ectly frectly fr
omom
om
omom
STATUS LEDS
The GS3060 interface has 4 status LEDs.
NOTE: The top two LEDs will blink during the Initializing and Programming phases.
The following section describes the Control panel status LEDs.
RED — This LED is Normally OFF, it will blink in the event of trouble. This LED will switch ON
within 3 minutes in the event of GSM Module [
(NO SERVICE). If this LED blinks, the following list will indicate the specific trouble based on the
number of blinks, by priority. On power-up, the GS3060 will check for trouble conditions to be
restored in the order listed below. It will indicate the status of the highest priority, unrestored
trouble condition with the corresponding number of flashes of the RED LED.
Once the highest priority trouble condition has been cleared, the next highest priority trouble condition
will be displayed.
1 flash1 flash
1 flash - Battery Trouble
1 flash1 flash
2 flashes2 flashes
2 flashes - Radio/SIM Failure
2 flashes2 flashes
3 flashes3 flashes
3 flashes - GSM Network Problem
3 flashes3 flashes
(Battery absent or battery with low voltage output)
(Battery absent or check SIM Card connection)
(SIM not active, poor signal strength, antenna not
connected)
1717
17] trouble, or when the GSM Network is unavailable
1717
5
Page 9

4 flashes4 flashes
4 flashes - Insufficient Signal Strength
4 flashes4 flashes
5 flashes5 flashes
5 flashes - Connect 24 Configuration SMS Failure
5 flashes5 flashes
(Poor location)
(Improper VRU programming. Once the
configuration is ready, remove power for 2-3 seconds to allow the unit to restart and request
again.)
6 flashes6 flashes
6 flashes - Receiver Not Available
6 flashes6 flashes
7 flashes7 flashes
7 flashes - Power Supply Trouble
7 flashes7 flashes
OfOf
ff
Of
f - No Troubles
OfOf
ff
YELLOW
line trouble). This LED can also blink quickly once (GPRS TX) or twice (GPRS RX).
GREEN (Top)
when the other GREEN LED is ON.
GREEN
unavailable
LED is
— This LED will switch
—
When this LED is
(Bottom) (Bottom)
(Bottom) — If this LED is
(Bottom) (Bottom)
(NO SER(NO SER
(NO SER
(NO SER(NO SER
ONON
ON, the
ONON
VICE)VICE)
VICE). This LED will
VICE)VICE)
GS3060GS3060
GS3060 will be able to communicate to the GSM network.
GS3060GS3060
(Improper VRU programming, receiver absent)
(DC power supply absent)
ON ON
ON when the interface switches to the GSM Network (due to land
ON ON
ONON
ON, the reception is optimal. This LED will switch ON only
ONON
OFFOFF
OFF and the RED LED is ON, the GSM Network service is
OFFOFF
Blink Blink
Blink when the GSM Network reception is bad. If this
Blink Blink
OPERATING PRINCIPLES
Simulated Land Line Mode
The simulated land line provides the alarm control panel (with dialler interface) with a backup line in
the event of PSTN line trouble. If the voltage on the land line terminals (
for a period of between 10 to 45 seconds (depending on the device connected to the
terminals), the GS3060 will switch the connected telephone device to the GSM Network for
approximately 30 to 40 seconds. At the end of this interval, it will check the land line:
if the land line has been r if the land line has been r
•
if the land line has been r
if the land line has been r if the land line has been r
if the land line is still downif the land line is still down
•
if the land line is still down, it will continue to simulate the land line until it is restored. The
if the land line is still downif the land line is still down
GS3060 will not switch during ongoing calls
estorestor
eded
estor
ed, it will switch the connected device back to the land line;
estorestor
eded
NOTE: When the land line is down, the GS3060 will provide a dial tone to any device connected
to T1 and R1, including any telephones on the premises. However, the premise phones will not
be able to dial out over the GS3060.
PTM (Panel Transmission Monitoring)
The GS3060 can also monitor the panel’s attempt to communicate. If it determines the panel is
having difficulty it will switch the line to the GSM network. This feature is only active when the
GS3060 is configured as a backup communicator. This feature is in addition to the regular line
voltage detection.
The GS3060 will monitor the phone line for four consecutive failed attempts within a 12 minute
window. A failed attempt is considered when line seizure occurs with dialing, but no Contact ID
kiss-off is detected from the receiver.
Once this condition is met the GS3060 will connect the panel to the GSM network to communicate
the events. Once the GS3060 switches the line it will stay in this mode until the panel hangs up. On
the next event the GS3060 will restart the error detection sequence before switching.
The GS3060 will perform this sequence on ANY phone number that is detected on the line. Specific
central station phone numbers can be programmed into the GS3060 if desired. Up to four, 20-digit
numbers can be added to your installer profile at Connect 24. If programmed, the GS3060 will only
look for Contact ID kiss-off after these numbers are dialed. A TLM trouble (PGM output activation
and/or reporting code if applicable) will also be activated and/or transmitted when the PTM is
activated. The restoral will be sent at the end of the call.
TIP/RNGTIP/RNG
TIP/RNG) drops below 4V
TIP/RNGTIP/RNG
T1/R1T1/R1
T1/R1
T1/R1T1/R1
6
Page 10

GPRS Sequence
• When alarm is triggered, the Control Panel goes off-hook
• The GS3060 will assert dial tone
• Control Panel dials the number of the central station. Ensure the alarm panel inserts a minimum 1-
second pause, or has dial tone search enabled before dialing the number
• The GS3060 detects the DTMF dialing and stops dial tone
NOTE: The GS3060 is unable to decode pulse dialing.
• The GS3060 will send the required Contact ID dual tone handshake to the panel
• After receiving the handshake, panel transmits alarm message in Contact ID format
• The GS3060 decodes and transforms Contact ID digits into the IP packet and sends it to the Central
Station Receiver over the GPRS network
• The receiver acknowledges the alarm and sends command to the GS3060 to generate the
corresponding 1400Hz kiss-off signal for 800ms minimum
• After the GS3060 generates kiss-off, the panel goes on-hook if no more alarms need to be sent,
or it can send the next alarm
Inputs
The GS3060 has 4 inputs that can be used to trigger specific communications. These events will
transmit using Contact ID format with Inputs 1-4 reporting as [991] to [994] respectively. Default
settings are:
INPUT 1- FIRE INPUT 3 - BURGLARY
INPUT 2 - PANIC ALARM INPUT 4 - SYSTEM TROUBLE
These inputs are normally open and will activate when a short condition is detected between the
terminal and the COM. Refer to the GS3060 Wiring Diagram (Figure 2) at the back of this manual.
NOTE: These inputs communicate using Contact ID format.
NOTE: For UL/ULC installations, connections between alarm panel outputs and GS3060 inputs
shall be run in mechanical protective conduits. To reduce interference with the antenna, it is
recommended that the metal conduit is not connected to the knock-outs on the top of the
cabinet.
7
Page 11

Outputs
The GS3060 has 4 programmable outputs to activate in response to the associated events. Refer to
the GS3060 Wiring Diagram (Figure 2) at the back of this manual.
Activating the Outputs
The GS3060 has 4 open collector outputs capable of a maximum of 50mA. Internal events on the
GS3060 can trigger the outputs to turn on an LED or activate an input on the host panel. The default
settings are as follows:
OUTPUT 1 - Land Line TOUTPUT 1 - Land Line T
OUTPUT 1 - Land Line T
OUTPUT 1 - Land Line TOUTPUT 1 - Land Line T
Output is normally high and will switch to ground when the telephone line is down.
OUTPUT 2 - GSM Model or Network TOUTPUT 2 - GSM Model or Network T
OUTPUT 2 - GSM Model or Network T
OUTPUT 2 - GSM Model or Network TOUTPUT 2 - GSM Model or Network T
Output is normally high and will switch to ground when the GS3060 can’t connect or communicate
to the GSM network.
OUTPUT 3 - Power Supply or BatterOUTPUT 3 - Power Supply or Batter
OUTPUT 3 - Power Supply or Batter
OUTPUT 3 - Power Supply or BatterOUTPUT 3 - Power Supply or Batter
Output is normally high and will switch to ground when there is a problem with the power source.
OUTPUT 4 - General Module TOUTPUT 4 - General Module T
OUTPUT 4 - General Module T
OUTPUT 4 - General Module TOUTPUT 4 - General Module T
Output is normally low and will switch to high when a GSM Trouble, Power Supply/Battery Trouble
and/or a Failure to Communicate (FTC) Trouble is detected.
NOTE: Once an output has been activated automatically, it will not restore its state until all
the causes of activation are cleared.
rr
oubleouble
r
ouble
rr
oubleouble
rr
oubleouble
r
ouble
rr
oubleouble
y Ty T
y T
y Ty T
rr
oubleouble
r
ouble
rr
oubleouble
rr
oubleouble
r
ouble
rr
oubleouble
Contact ID
Events Description
Event Codes
Input 1 activation: ......................................................................................E110 FIRE ZONE 001 991
Input 1 Restoral: ....................................................................................... R110 FIRE ZONE 001 991
Input 2 activation: ......................................................................... E120 Panic Alarm ZONE 002 992
Input 2 Restoral: ........................................................................... R120 Panic Alarm ZONE 002 992
Input 3 activation: ............................................................................... E130 Burglary ZONE 003 993
Input 3 Restoral: ................................................................................. R130 Burglary ZONE 003 993
Input 4 activation: .................................................................... E300 System Trouble ZONE 004 994
Input 4 Restoral: ...................................................................... R300 System Trouble ZONE 004 994
PSTN Line down: ...................................................................................... E351 TELCO 1 FAULT 000
PSTN Line Restoral: ................................................................................. R351 TELCO 1 FAULT 000
12V INPUT LOSS: ............................................................................. E337 EXP. MOD. DC LOSS 000
12V INPUT RESTORAL: ................................................................... R337 EXP. MOD. DC LOSS 000
LOW BATTERY ALERT: .................................................................... E338 EXP. MOD. LOW BAT 000
LOW BATTERY RESTORAL: ............................................................ R338 EXP. MOD. LOW BAT 000
PERIODIC REPORT: ......................................................................... E603 Periodic RF Xmission 000
GSM UNIT ACTIVATION: .............................................................. R552 Radio Xmitter Disabled 000
GSM INTERNAL BUFFER FULL: ............................................... E624 EVENT LOG OVERFLOW 000
FTC RESTORAL: ................................................................. R354 FAILURE TO COMMUNICATE 000
"C-24 REMOTE" PROGRAMMING
The inputs, outputs and other features can be remotely programmed through Connect-24 (C-24) for
fast and convenient installation through the world wide web.
NOTE: This programming option has not been investigated by UL.
8
Page 12

T
I
P
R I N
G
GS3060 WIRING DIAGRAMS
Battery not required
if JP3 is ON
12V
19 20
L4
18
L3
17
L2
16
L1
WARNING!
HIGH VOLTAGE. DISCONNECT AC
15
PRIOR TO SERVICING
14
POWER & TELEPHONE LINES
AS
12 13
11
+OC
10
9
8
GS3060
7
O1 O2 O3 O4
6
20
+ 12V -
18 19
Z4
17
Z3
Z2
15 16
Z1
14
COM
13
12
TAMPER
AUX+
11
PGM4
10
PGM3
PGM2
PGM1
COM
BATTERY
1K5
External
12V / 1.2Ah
Sealed Rechargeable
Typical battery charge: 30-50 mA
Recommended Model: DSC BD 1.2-12
optional
use of PGM
output (See
Programming)
RM-1
Relay
Powe r
Supply
/ *700mA (max)
*Refer to Jumper 3 section
for current rating
DC
9-14V
}
to dry contact outputs
Inputs to be connected
from alarm control panel
Tamper
(24h type zone)
for GS3060 troubles supervision
Connect relay contacts to a zone
input on the alarm control panel
Output
5
R1
5
LI
4
T1
4 1
3
36 789
RNG
This Connectio ni s necessar y
LE
2
TIP
2
R I N
I
T
G
P
Dialler Interface
Alarm Control Panel with
(Supports Contact ID format)
1
RJ-45
electrical installation
Bolt
Cabinet
Connection
Telephone Line
the connection to PSTN)
(Use No. 26 AWG wires for
All circuits are classified for UL installations as Power Limited/Class II Power Limited except for the battery leads which are not power limited. Do not route
any wiring over circuit boards. Maintain at least 1” (25.4mm) separation. A minimum 1/4” (6.4mm) separation must be maintained at all points between
Power Limited wiring and all other Non-Power Limited wiring. Route wires as indicated in the diagram.
WARNING: Incorrect connections may result in PTC failure or improper operation. Inspect wiring and ensure connections are correct before applying power
Fig. 2 - Wiring Diagram
GROUND
CONNECTION
Tighten nut to break paint &
make good connection to
the cabinet.
Ground wire
Earth-ground
Nut
Nut
Lock washer
Lock washer
from building
Star washer
9
Page 13

GS3060 WIRING DIAGRAMS
NOTES:
1. Program the Control Panel’s input
Zone/Point as 24h “Supervisory” type
with the keypad only annunciation
when activated.
2. A supervision relay, DSC model
RM-2 can be used, as indicated in
Fig. 4 in order to provide supervision
of the control panel (for total power
loss) when the GS3060 is powered
+ -
Aux Power
CONTROL PANEL
- +
ZONE
(See Note 1)
TERMINALS
by a Separate Power Supply.
When the GS3060 is powered by the
control panel the relay is not required
since a loss of voltage at the power
input terminals on the GS3060 will
generate a trouble signal transmission
to the monitoring station.
3. Output 4 on the GS3060 must be
set as “Active High”.
N
G
D
V
2
D
1
+
C
Incoming
Phone line
Handset
CONTROL PANEL
BROWN (T)
GRAY (R)
RJ-31X
Auxiliary
Power Supply
Supervision
Relay
DSC RM-2 Relay
RING
TIP
RI
TI
RED (R)
GREEN (T)
(Optional)
(used to power the
GND
GS3060 Radio)
V
2
D
1
+
20
C
+ 12V -
19
18
17
1614
See Note 2
NC
C
NO
15
13
TAMPER COM Z1 Z2 Z3 Z4
12
1110
AUX+
97
EOL
Panel
Control
Resistor
See Note 3
PGM
8
12 34
6
COM
GS3060
Fig. 4 - Optional Power Supply And Supervision Wiring Diagram
GS3060
RI
TI
RING
TIP
5
4
321
RNG
TIP T1 R1
10
Fig. 3 - Telephone Connection
Page 14

Page 15
FCC COMPLIANCE STATEMENT
CAUTION: Changes or modifications not expressly approved by Digital
Security Controls could void your authority to use this equipment. This
equipment generates and uses radio frequency energy and if not installed
and used properly, in strict accordance with the manufacturer's instructions,
may cause interference to radio and television reception. It has been type
tested and found to comply with the limits for Class B device in accordance
with the specifications in Subpart "B" of Part 15 of FCC Rules, which are
designed to provide reasonable protection against such interference in any
residential installation. However, there is no guarantee that interference
will not occur in a particular installation. If this equipment does cause
interference to television or radio reception, which can be determined by
turning the equipment off and on, the user is encouraged to try to correct
the interference by one or more of the following measures:
• Re-orient the receiving antenna
• Relocate the alarm control with respect to the receiver
• Move the alarm control away from the receiver
• Connect the alarm control into a different outlet so that alarm control and
receiver are on different circuits.
If necessary, the user should consult the dealer or an experienced radio/
television technician for additional suggestions. The user may find the
following booklet prepared by the FCC helpful: "How to Identify and
Resolve Radio/Television Interference Problems". This booklet is available
from the U.S. Government Printing Office, Washington, D.C. 20402, S tock
# 004-000-00345-4.
IMPORTANT INFORMATION
This equipment complies with Part 68 of the FCC Rules. On the side of this
equipment is a label that contains, among other information, the FCC
registration number and ringer equivalence number (REN) for this
equipment. If requested, this number must be provided to the Telephone
Company.
GS3060 Product Identifier US: F53MO00BGS3060
REN: 0.0B
USOC Jack:RJ-31X
Telephone Connection Requirements
A plug and jack used to connect this equipment to the premises wiring and
telephone network must comply with the applicable FCC Part 68 rules and
requirements adopted by the ACT A. A compliant telephone cord and modular
plug is provided with this product. It is designed to be connected to a
compatible modular jack that is also compliant. See installation instructions
for details.
Ringer Equivalence Number (REN)
The REN is used to determine the number of devices that may be connected
to a telephone line. Excessive RENs on a telephone line may result in the
devices not ringing in response to an incoming call.
In most but not all areas, the sum of RENs should not exceed five (5.0). To
be certain of the number of devices that may be connected to a line, as
determined by the total RENs, contact the local Telephone Company. For
products approved after July 23, 2001, the REN for this product is part of
the product identifier that has the format. US: AAAEQ##TXXXX. The digits
represented by ## are the REN without a decimal point (e.g., 03 is a REN of
0.3). For earlier products, the REN is separately shown on the label.
Incidence of Harm
If this equipment GS3060 causes harm to the telephone network, the
telephone company will notify you in advance that temporary discontinuance
of service may be required. But if advance notice is not practical, the
Telephone Company will notify the customer as soon as possible. Also,
you will be advised of your right to file a complaint with the FCC if you
believe it is necessary.
Changes in Telephone Company Equipment or Facilities
The Telephone Company may make changes in its facilities, equipment,
operations or procedures that could affect the operation of the equipment.
If this happens the Telephone Company will provide advance notice in
order for you to make necessary modifications to maintain uninterrupted
service.
Equipment Maintenance Facility
If trouble is experienced with this equipment for repair or warranty
information, please contact the facility indicated below. If the equipment is
causing harm to the telephone network, the Telephone Company may request
that you disconnect the equipment until the problem is solved. This
equipment is of a type that is not intended to be repaired by the end user.
DSC c/o APL Logistics, 757 Douglas Hill Rd., Lithia Springs, GA 30122
Additional Information
Connection to party line service is subject to state tariffs. Contact the state
public utility commission, public service commission or corporation
commission for information.
Alarm dialling equipment must be able to seize the telephone line and place
a call in an emergency situation. It must be able to do this even if other
equipment (telephone, answering system, computer modem, etc.) already
has the telephone line in use. To do so, alarm dialling equipment must be
connected to a properly installed RJ-31X jack that is electrically in series
with and ahead of all other equipment attached to the same telephone line.
Proper installation is depicted in the figure below. If you have any questions
concerning these instructions, you should consult your telephone company
or a qualified installer about installing the RJ-31X jack and alarm dialling
equipment for you.
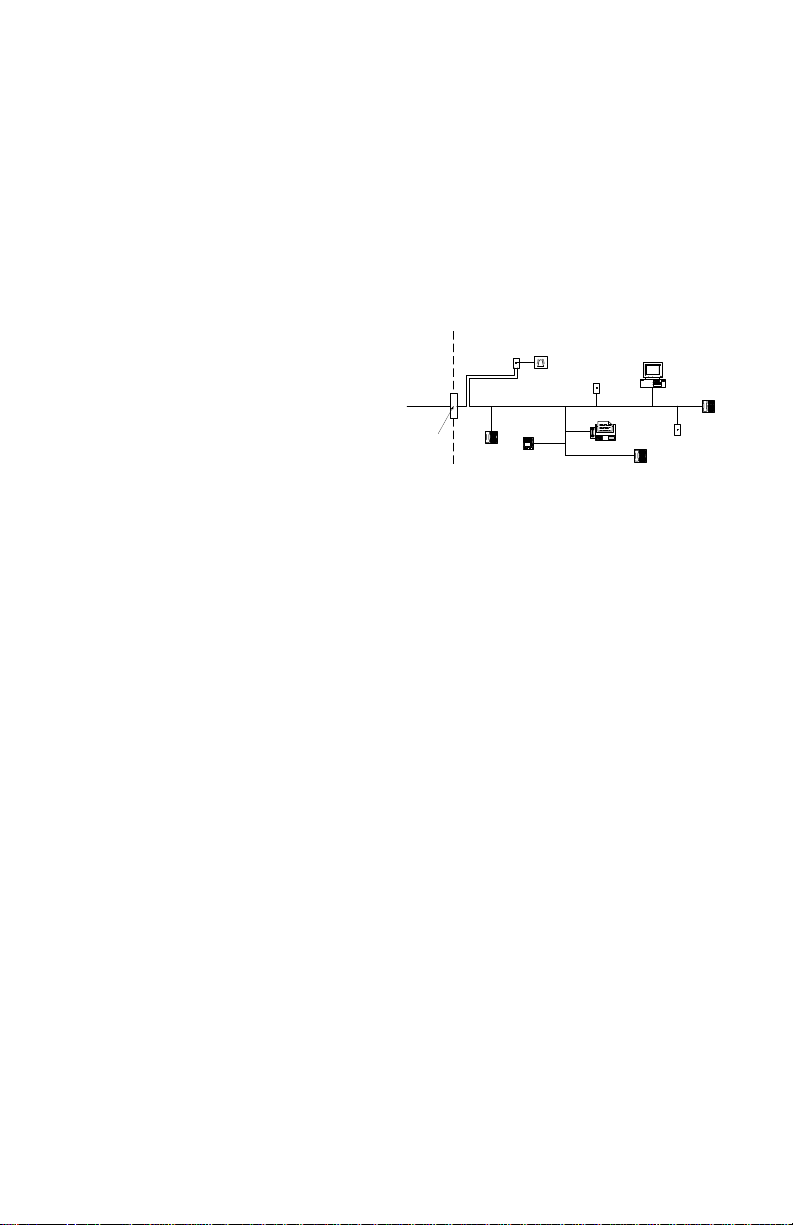
Customer Premises Equipment and Wiring
Network
Service
Provider's
Facilities
Telephone
Line
Network
Demarcation
Point
Industry Canada Compliance Statement
This Equipment meets the applicable Industry Canada Terminal Equipment
Technical Specifications. This is confirmed by the registration number . The
abbreviation, IC, before the registration number signifies that registration
was performed based on a Declaration of Conformity indicating that Industry
Canada technical specifications were met. It does not imply that that Industry
Canada approved the equipment. The Ringer Equivalence Number (REN)
for this terminal equipment is 0.0. The REN assigned to each terminal
equipment provides an indication of the maximum number of terminals
allowed to be connected to a telephone interface. The termination on an
interface may consist of any combination of devices subject only to the
requirement that the sum of the Ringer Equivalence Numbers of all devices
does not exceed 5.
Cet équipement est conforme aux spécifications techniques applicables aux
équipements terminaux d'Industrie Canada. Ceci est confirmé par le numéro
d'enregistrement. L'abréviation IC précédant le numéro d'enregistrement
signifie que l'enregistrement a été effectué sur la base de la Déclaration de
conformité indiquant que le produit est conforme aux spécifications
techniques d'Industrie Canada. Ceci n'implique pas que le produit ait été
approuvé par Industrie Canada.
Le nombre équivalent de sonneries (REN) de cet appareil terminal est 0.0. Le
REN attribué à chaque équipement terminal fournit une indication sur le nombre
maximum de terminaux pouvant être connectés sur une interface téléphonique.
La terminaison sur une interface peut constituer en n'importe quelle combinaison
d'appareils, à la condition seulement que la somme des Nombres équivalents de
sonneries de tous les appareils ne soit pas supérieure à 5.
This Class B digital apparatus meets all requirements of the Canadian
interference-causing equipment regulations. Cet appareil numérique de la
Classe B respecte toutes les exigences de règlement sur le matériel brouilleur
du Canada.
The term “IC:” before the radio certification number only signifies that
Industry Canada technical specifications were met.
Telephone
RJ-31X
Jack
Alarm Dialing
Equipment
Answering
System
Unused
RJ-11 Jack
Fax Machine
Telephone
Computer
Unused
RJ-11 Jack
Telephone
W ARNING: To satisfy FCC RF exposure requirements for mobile transmitting devices, a separation distance of
20cm or more must be maintained between the antenna of this device and persons during device operation.
Page 16

©2007 Digital Security Controls
Printed in Canada
29007442R001
 Loading...