

Digital ID View 5700 Series, VAX Series Quick Start Manual

QUICK START GUIDE
5700 Series
&
VAX Series
PC Linux Embedded DVR

Unpack the DVR then connect the cameras, mouse, network cable (if used) and monitor.
Connect the power cord.
The DVR will normally power up when the power cord is connected, if not, power
the unit on with the switch above the power cord – it will take approximately 1½ to
2 minutes for the DVR to complete the full boot cycle.
When fully booted, you will obtain the live view screen seen below and the DVR will be
recording. Most functions are disabled until you login.
If you move the mouse cursor over the Digital ID View logo
showing the product information which includes DVR firmware version, release date,
CPU, and clock speed.
When the cursor is positioned over the HD symbol
provide the hard drive size and usage (the DVR will overwrite the oldest data – circular
recording).
And, with the cursor over the computer network symbol
address (DCHP - obtain an IP address automatically - is on by default and if the network
cable is plugged in and connected to a switch or router, the DVR will acquire an address).
This address can then be used to access the DVR remotely (see the section on remote
access).
, a window will appear
in the upper right corner, it will
, it will show the current IP
1
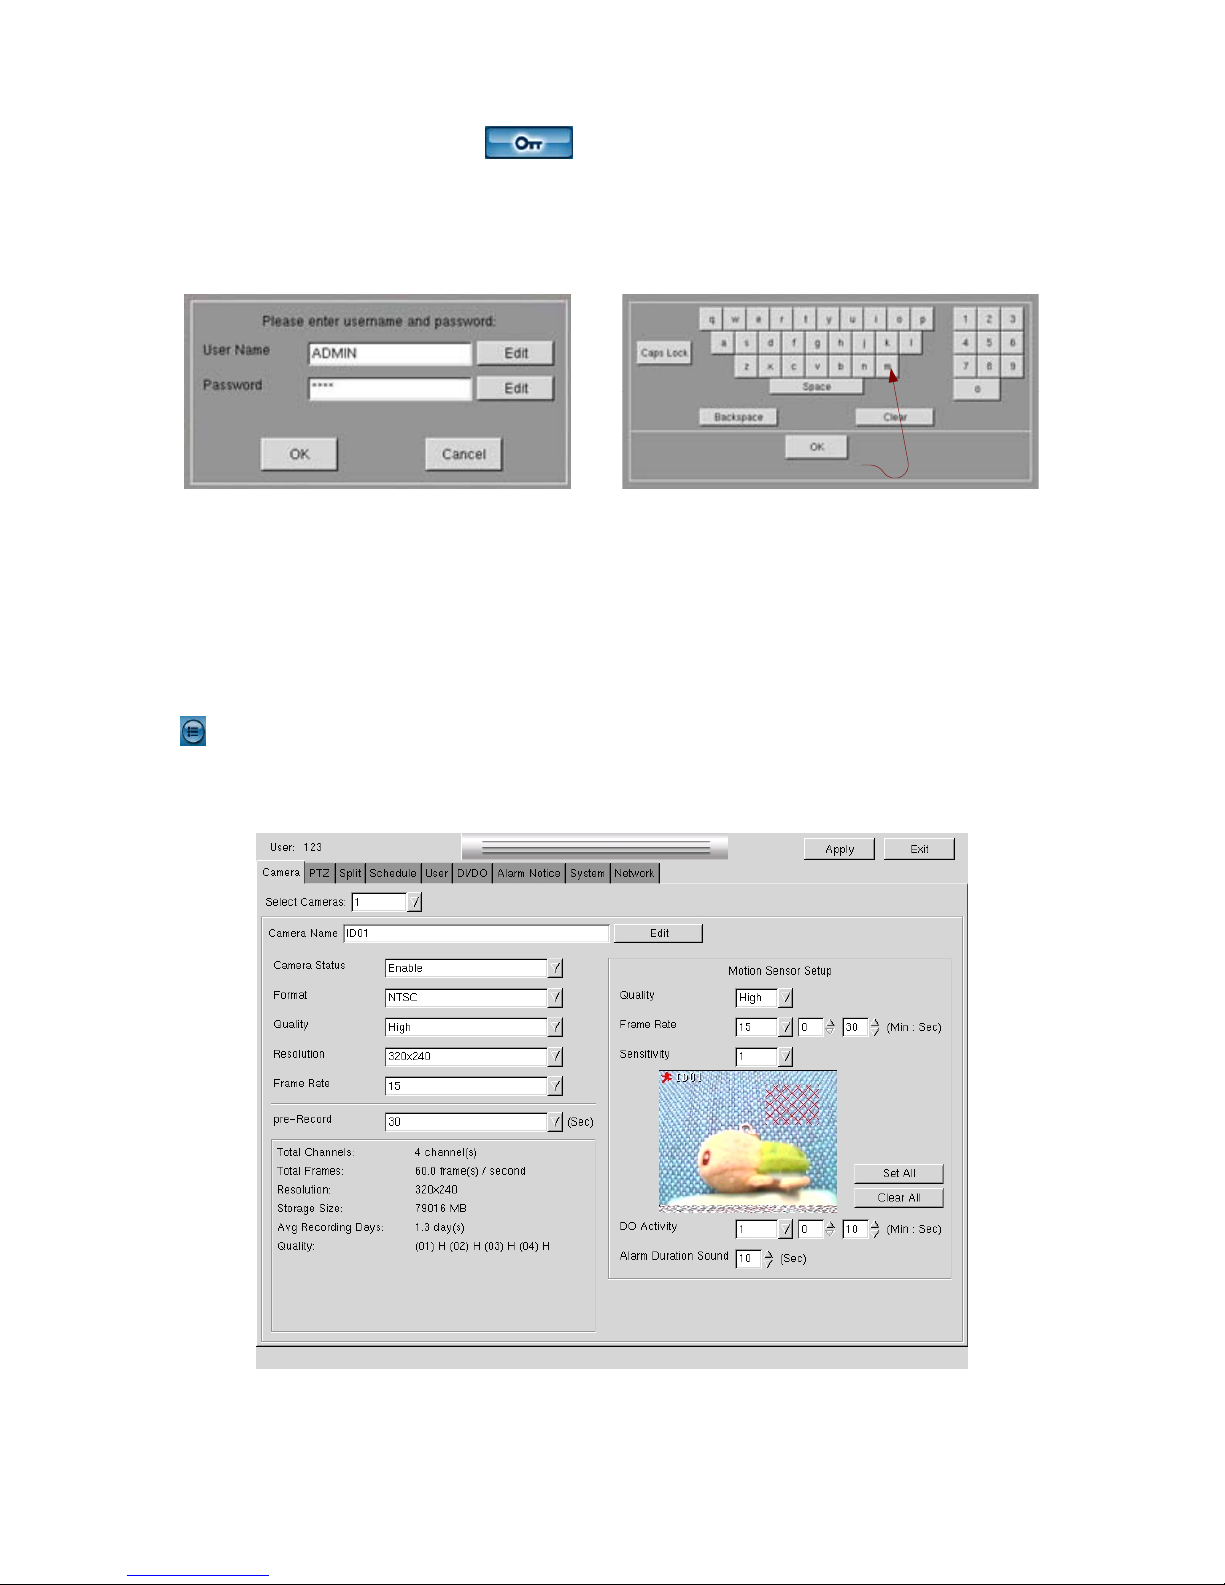
By clicking on the key button
in upper right corner, the login screen will
appear as seen below. Login using the factory defaults:
User Name: ADMIN
Password: 0000
1. Using the mouse click on the Edit button and a virtual keyboard will appear – use
the mouse to type in the User Name (the user login is case sensitive – for the
default User Name make sure the caps key is on) and click OK.
2. Follow the same procedure for the Password.
3. Click OK on the login window.
If the unit was just powered up the menu will appear, otherwise, click on the menu button
to access the menu from the live screen view.
Below is a view of the menu. It has multiple tabs – one for the setup of each function.
For detailed configuration setup please refer to the user manual.
2

Network setup
If the DCHP is turned on (default) the DVR will acquire an IP address automatically. If
not, then go to the Network tab in the menu:
You can set the Network Status to ‘Obtain an IP address automatically’ or as in the above
example, enter the IP, NetMask, GateWay and, if used, the DNS. The areas on this page
have default settings – see the manual for more detailed information.
3
 Loading...