

Integration Manual with Vera 3 / Lite UI7
Foscam FI8910W
CATALOGUE NO: DHS-CAM-IN-FOS-910WH
Specifications are subject to change without further notice
The information in this document is subject to change without notice.
Digital Home Systems Pty Ltd (DHS) does not make any representations or warranties (implied or otherwise) regarding the accuracy and
completeness of this document and shall in no event be liable for any
loss of profit or any damage, including but not limited to special,
incidental, consequential, or other damage.
TRADEMARKS
Z-Wave and Z-Wave Plus are registered trademarks of Sigma Designs
and its subsidiaries in the United States and other countries. Other
trademarks and registered trademarks are the property of their re-
spective owners or companies.
DHS One (1) Year Limited Warranty
Digital Home Systems Pty Ltd warrants this DHS branded hardware
product against defects in materials and workmanship under normal
use for period of one (1) year from the date of retails purchase by the
original end user purchaser (‘Warranty Period’).
Terms and conditions
To see complete terms and conditions browse to http://
www.digitalhomesystems.com.au/documentation/
DHS_Terms_and_conditions.pdf
caera_full_screen,camera_archive_snapshot,
camera_up,camera_down,camera_left,
camera_right,camera_preset
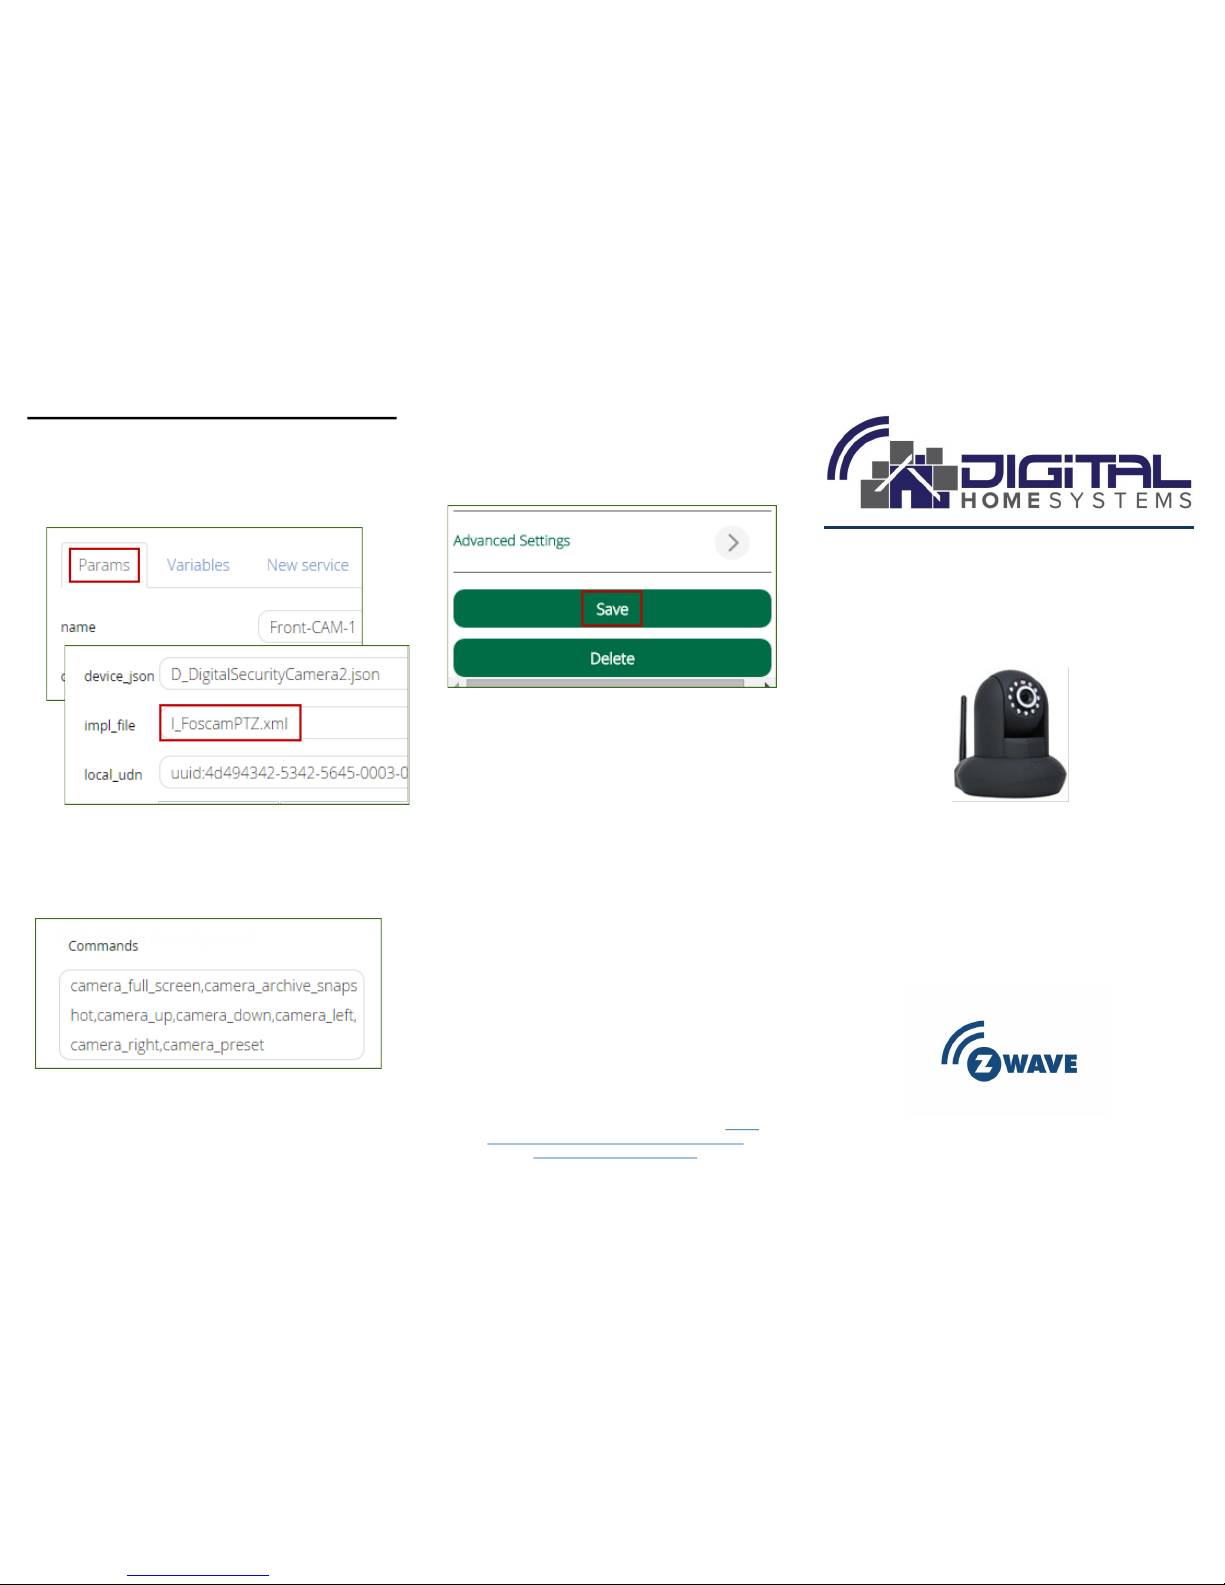
4 Modifying Advanced Settings
Click on the camera “Settings” and select “Advanced
Settings” at the bottom of the page.
In the Camera parameters tab view, type
“I_FoscamPTZ.xml” (without the quotes) in impl_file
section.
Switch to the “Variables” tab and add extra command
onto the “Commands” window.
Change “ReversePan” and “ReverseTilt” from 0 to 1.
Click on the “Back” button to return to the “Settings”
screen.
Save your settings.
Its takes a minute for Vera to go through its settings.
Camera “Live” view should have a navigation arrow and
pre-set buttons.
1 Installing Foscam Plugin
Setup the camera in your home network, before you
can include the camera in Vera.
By default camera pre-sets and motion detection are
disabled on FI8910W camera. You have to enable and test
them before integrating with your Vera controller. Login
into Foscam Management interface for camera and enable
these options.
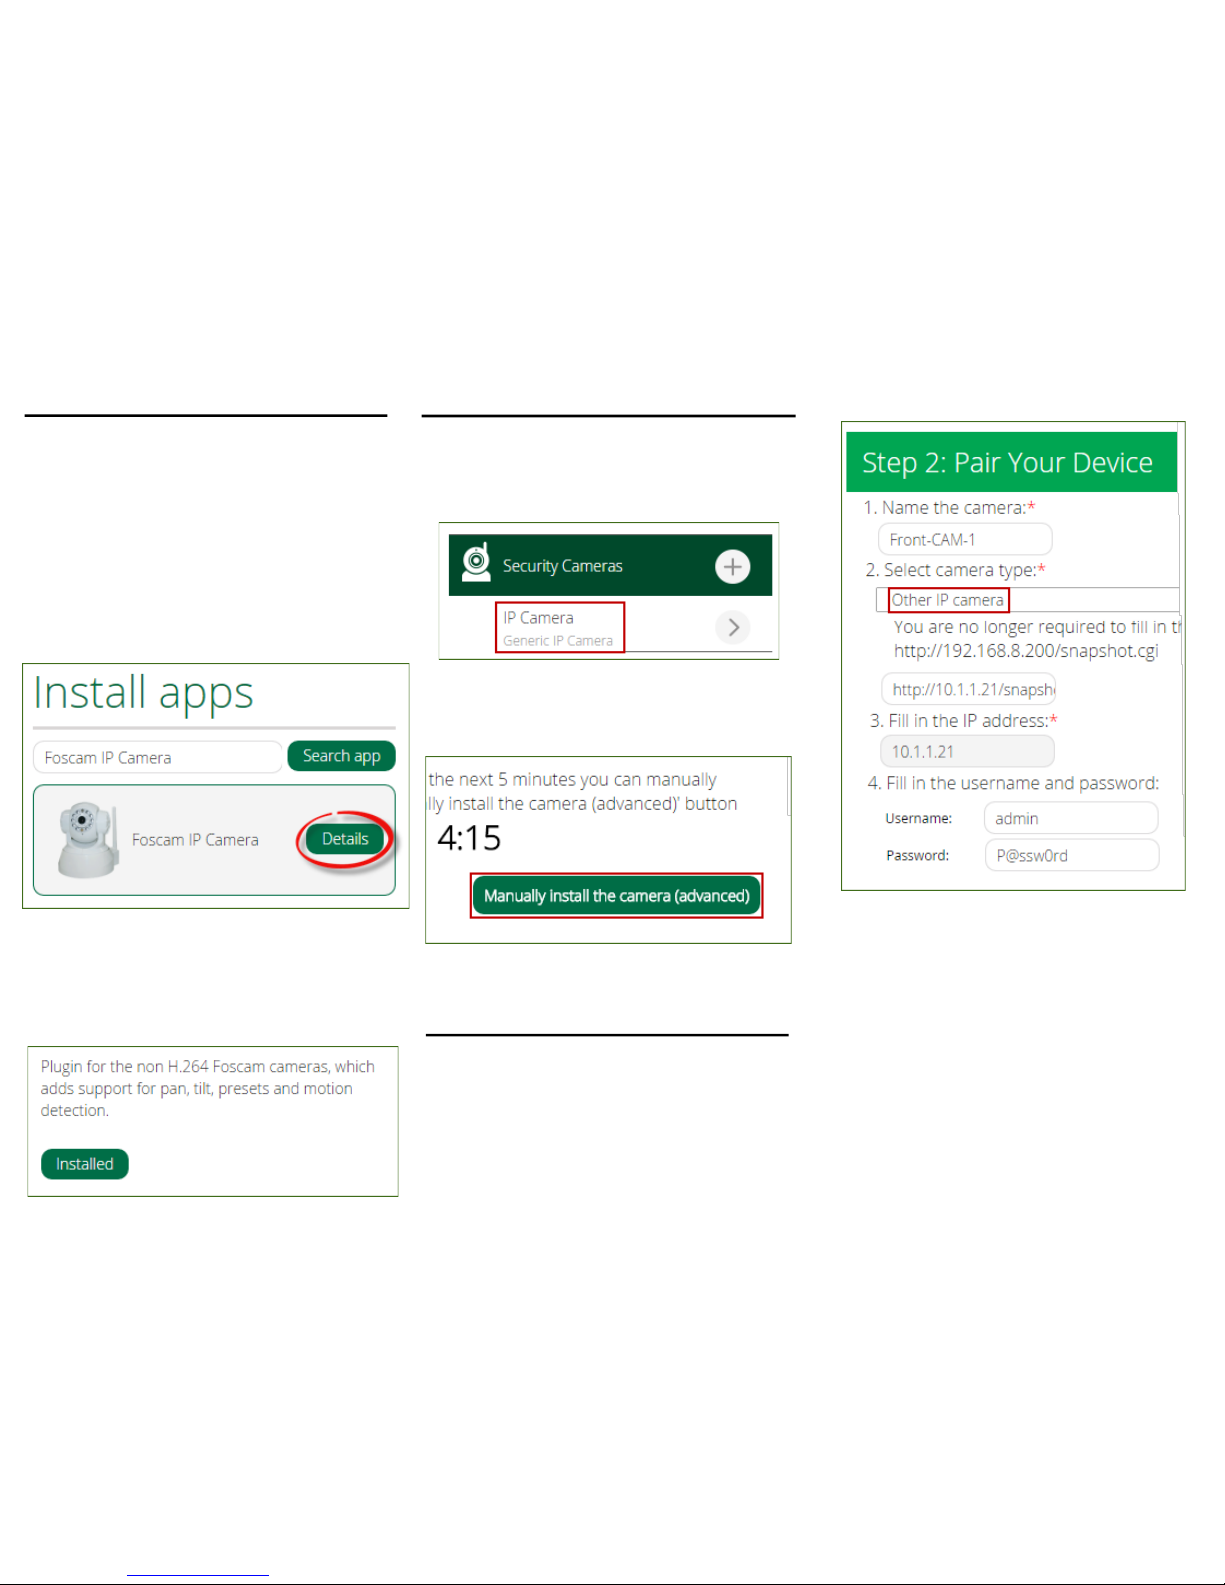
Download and install Foscam plugin. Login into your
Vera controller and search for “Foscam IP Camera” in
Apps --> Install apps --> Search app.
Choose Foscam IP Camera from the list and click
“Details”
Confirm that you have selected non H.264 Foscam
camera plugin version 2.6 and click on “install”. After
downloading and a few minutes of setup configurations
you should see a message saying “it’s now safe to exit
this screen”. Click on “Exit”.
You should now have Foscam IP Camera plugin in-
stalled under the “My apps” section.
2 Adding Foscam to Vera
Foscam IP Camera has to be added manually as generic IP camera. Go to:
Devices --> Additional Devices --> Security Cameras --> IP Camera (Generic IP Camera).
Automated option will not detect Foscam IP camera.
You need to go through a few “Next” buttons until you
reach the screen with “Manually Install the camera
(advanced)”.
TIP:
You could also add your camera through the
Camera section
.
3 Pairing Foscam Camera
Name your camera. Fill in the username and password.
Choose “Other IP Camera” from Choose “Other IP Cam-
era” from the “select camera type” list.
Paste the full URL which returns a JPG snapshot.
http://<your camera ip address>/snapshot.cgi?
user=<your userid>&pwd=<yourpassword>
To fill out IP address (the section is graded out) you
need to click on “List Network Devices” button (down below
the screen). Vera will scan active IP devices in your net-
work. Find your camera IP address and click on “add” to
add that IP.
TIP:
If you can’t find the IP address of your camera, try to
re-boot it
You can choose a “Room” now (if you have any) or later.
You will notice that long “Next” button on the bottom of
the page is selectable now. Click on it to go the next step.
“Authentication required” window pops up. Click on
“Cancel” and “Next” even if the image is not displayed cor-
rectly.
 Loading...