

Digital Equipment VRC21-Hx Installation And Operating Information
VRC21-HxMulti-Scanning
DigitalControlColorMonitor
InstallationandOperating
Information
Order Number: EK–VRC21–HX. B01
Important Warnings Inside

January 1994
The information in this document is subject to change without notice and should not
be construed as a commitment by Digital Equipment Corporation.
Restricted Rights: Use, duplication, or disclosure by the U.S. Government is subject
to restrictions as set forth in subparagraph (c) (1) (ii) of the Rights in Technical Data
and Computer Software clause at DFARS 252.227-7013.
FCC ID: A09-VRC21
Note: This equipment has been tested and found to comply with the limits for
a Class B digital device, pursuant to Part 15 of the FCC rules. These limits
are designed to provide reasonable protection against harmful interference in a
residential installation. Any changes or modifications made to this equipment may
void the user’s authority to operate this equipment.
This equipment generates, uses, and can radiate radio frequency energy and, if
not installed and used in accordance with the instructions, may cause harmful
interference to radio and television reception; however, there is no guarantee that
interference will not occur in a particular installation. If this equipment does cause
harmful interference to radio or television reception, which can be determined by
turning the equipment off and on, the user is encouraged to try to correct the
interference by one or more of the following measures:
Re-orient or relocate the receiving antenna.
Increase the separation between the equipment and the receiver.
Connect the equipment to an outlet on a circuit different from that to which
the receiver is connected.
Consult the dealer or an experienced radio/TV technician for help.
The video input to this device is through the 5 BNC connectors located at the rear of
the device. The optional 15-pin D sub-miniature connector at the rear of the device
is not a supported option and shall not be connected to any cable at the same time
as the 5 BNC connectors are connected to cables, as this will cause video quality
degradation, and may cause increased levels of radio frequency interference.
There are no user serviceable parts inside. Do not attempt to modify
this equipment. If modified, your authority to operate this equipment
might be voided by the FCC.
Canadian Department of Communications (DOC) Statement
This digital apparatus does not exceed the Class B limits for radio noise emissions
from digital apparatus as set out in the radio interference regulations of the Canadian
Department of Communications.
DEC and the DIGITAL logo are trademarks of Digital Equipment Corporation. The
Energy Star emblem does not represent EPA endorsement of any product or service.
Copyright © Digital Equipment Corporation 1994.
All rights reserved.
Printed in Japan.
This document was prepared using VAX DOCUMENT Version 2.1.

Contents
About This Guide . . . . . . . . . . . . . . . . . . . . . . . . . . . . . . v
1 Installation
1.1 Monitor Installation . . . . . . . . . . . . . . . . . . . . . 1–1
1.2 Turn On Power to Monitor . . . . . . . . . . . . . . . . 1–3
2 Servicing
2.1 Cleaning the Monitor . . . . . . . . . . . . . . . . . . . . 2–1
2.2 Maintenance and Troubleshooting . . . . . . . . . . 2–1
2.2.1 Identifying and Correcting Problems . . . . . 2–1
2.2.2 Troubleshooting Table . . . . . . . . . . . . . . . . 2–2
2.3 Adjustment Mode . . . . . . . . . . . . . . . . . . . . . . . 2–4
2.3.1 Adjustment Codes . . . . . . . . . . . . . . . . . . . 2–4
2.3.2 Horizontal position (phase) control . . . . . . . 2–5
2.3.3 Horizontal size control . . . . . . . . . . . . . . . . 2–5
2.3.4 Vertical position control . . . . . . . . . . . . . . . 2–5
2.3.5 Vertical size control . . . . . . . . . . . . . . . . . . 2–5
2.3.6 Color 1 . . . . . . . . . . . . . . . . . . . . . . . . . . . . 2–5
2.3.7 Color 2 . . . . . . . . . . . . . . . . . . . . . . . . . . . . 2–5
2.3.8 Color 3 control . . . . . . . . . . . . . . . . . . . . . . 2–6
2.3.9 Color 3 (Green gain) control . . . . . . . . . . . . 2–6
2.3.10 Color 3 (Blue gain) control . . . . . . . . . . . . . 2–6
2.3.11 Color 3 (Red gain) control . . . . . . . . . . . . . 2–6
2.3.12 Rotation control . . . . . . . . . . . . . . . . . . . . . 2–6
2.3.13 PCC-Amp-Fine control . . . . . . . . . . . . . . . . 2–6
2.3.14 PCC-Amp control . . . . . . . . . . . . . . . . . . . . 2–6
iii

2.3.15 PCC-Phase control . . . . . . . . . . . . . . . . . . . 2–7
2.3.16 Key-Balance control . . . . . . . . . . . . . . . . . . 2–7
2.3.17 Pin-Balance control . . . . . . . . . . . . . . . . . . 2–7
2.4 Servicing the Monitor . . . . . . . . . . . . . . . . . . . 2–7
2.4.1 DECmailer . . . . . . . . . . . . . . . . . . . . . . . . . 2–8
2.4.2 Carry-In Service . . . . . . . . . . . . . . . . . . . . . 2–8
2.4.3 Monitor Disposal . . . . . . . . . . . . . . . . . . . . 2–8
3 Specifications
3.1 Monitor Specifications . . . . . . . . . . . . . . . . . . . 3–1
3.2 Scanning Modes . . . . . . . . . . . . . . . . . . . . . . . . 3–2
3.3 Monitor Power Management System . . . . . . . . 3–3
3.4 Environment . . . . . . . . . . . . . . . . . . . . . . . . . . 3–4
Figures
1–1 VRC21-Hx Color Monitor (Rear View) . . . . 1–2
1–2 VRC21-Hx Color Monitor (Front View) . . . 1–3
2–1 Adjustment Controls . . . . . . . . . . . . . . . . . 2–4
Tables
1 Recommendations for Proper Setup and
Use . . . . . . . . . . . . . . . . . . . . . . . . . . . . . . . viii
1–1 User Controls and Functions . . . . . . . . . . . 1–3
2–1 Identifying and Correcting Problems . . . . . 2–2
3–1 Factory Pre-set Resolution and Frequencies
. . . . . . . . . . . . . . . . . . . . . . . . . . . . . . . . . . 3–2
iv
About This Guide
Overview
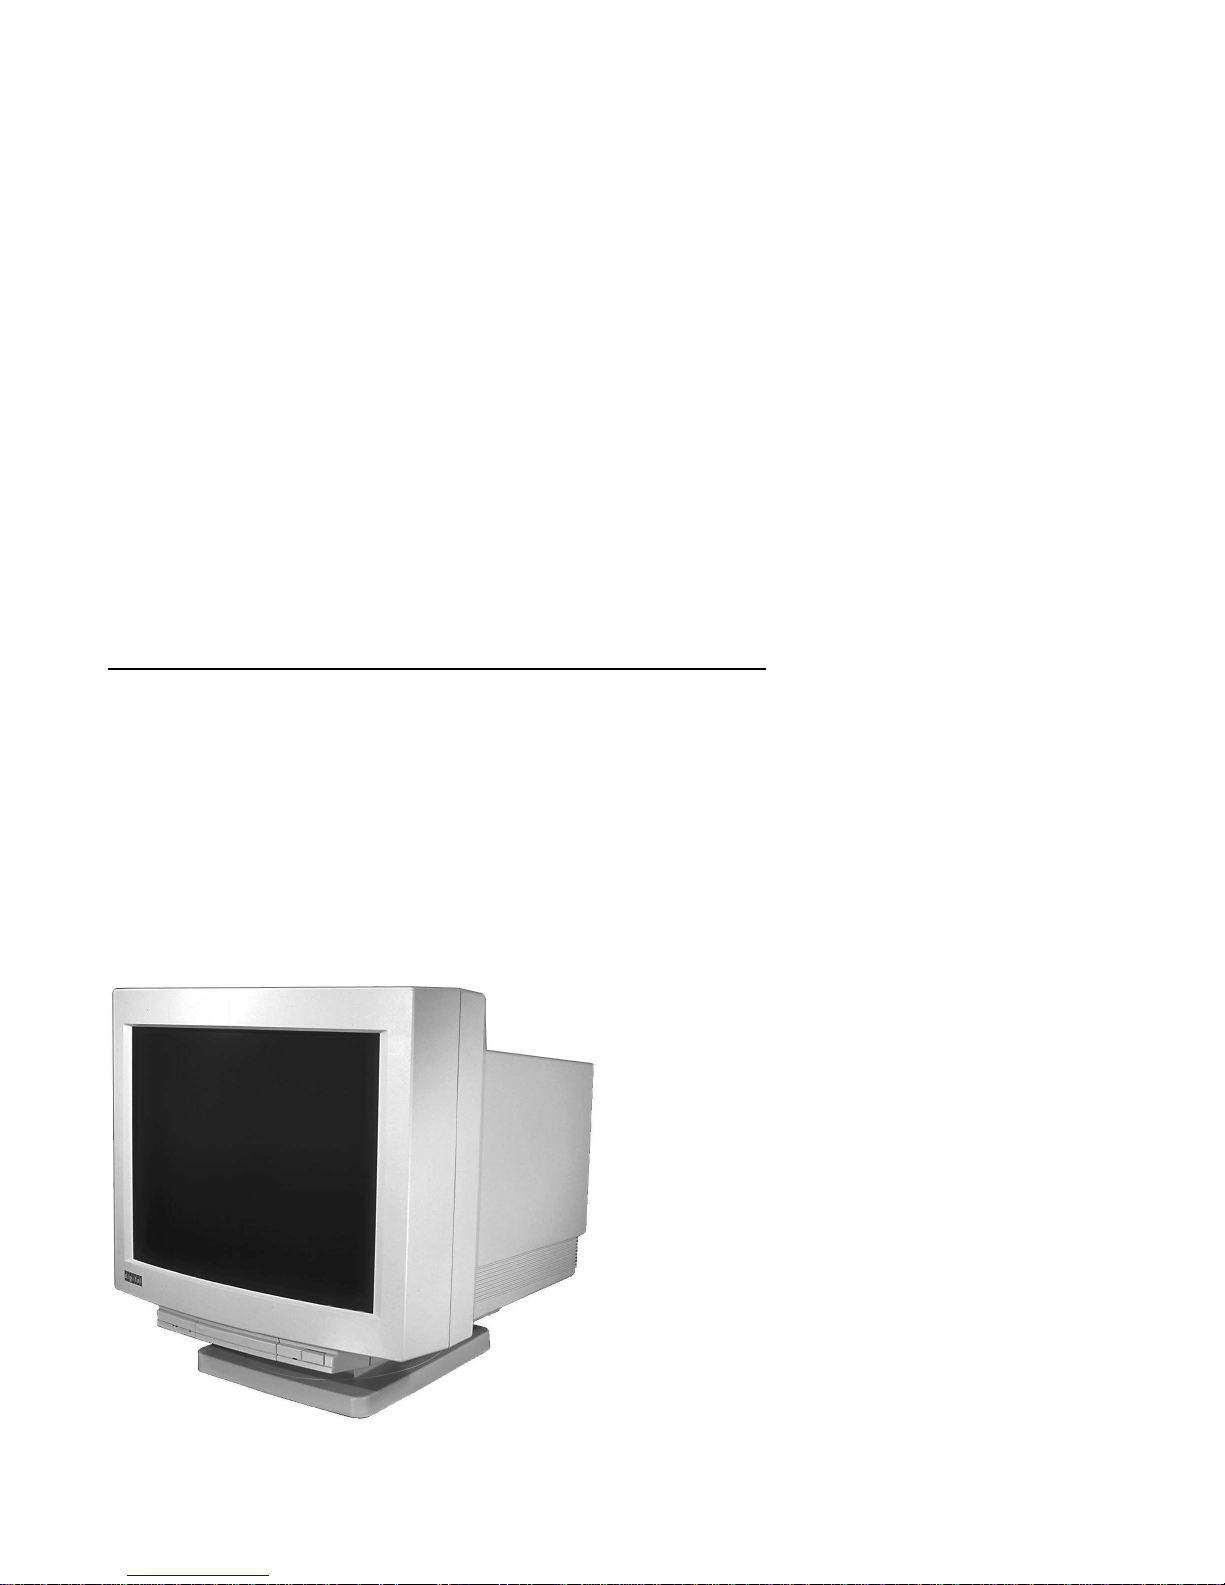
The VRC21-Hx Color Display Monitor is a 21-inch intelligent,
microprocessor based monitor with multiscanning and digitalcontrolled color graphics. The monitor is compatible with most
red-green-blue (RGB) display standards and color video cards. The
digital-controlled multiscanning allows the monitor to operate with
precision regardless of its input power frequency.
DSG-000801
v

The monitor is well-suited for windowing environments. Within the
its memory, you can store pre-programmed screen display standards,
as well as your selection of display colors from an unlimited palette.
The monitor also has a power management system, which a personal
computer can control to reduce the monitor’s output power levels
while not in use, thus saving energy. This power management system
exceeds the U.S. Environmental Protection Agency (EPA) Energy Star
requirements for saving energy.
Audience
This guide is intended for users who wish to install the color monitor.
This guide describes how to connect cables and clean the monitor.
Conventions
The following conventions are used in this document:
Convention Meaning
Note Provides general information.
Caution Provides information to prevent damage to equipment.
Warning Provides information to prevent injury.
vi

Environment
Note
This product has been designed and manufactured to minimize
the impact to the environment. The packaging is recyclable
and the monitor can be returned for proper disposal.
Before You Start
A small flat-blade screwdriver may be needed to install the
communication cable.
Proper Setup and Use
Important Information
Certain recent scientific literature suggests that poor posture, work
habits, or office equipment setup may cause injuries. Other literature
suggests that there is no cause and effect. Because the safety of
our users is a great concern, it is important to take the precautions
described in Table 1.
vii
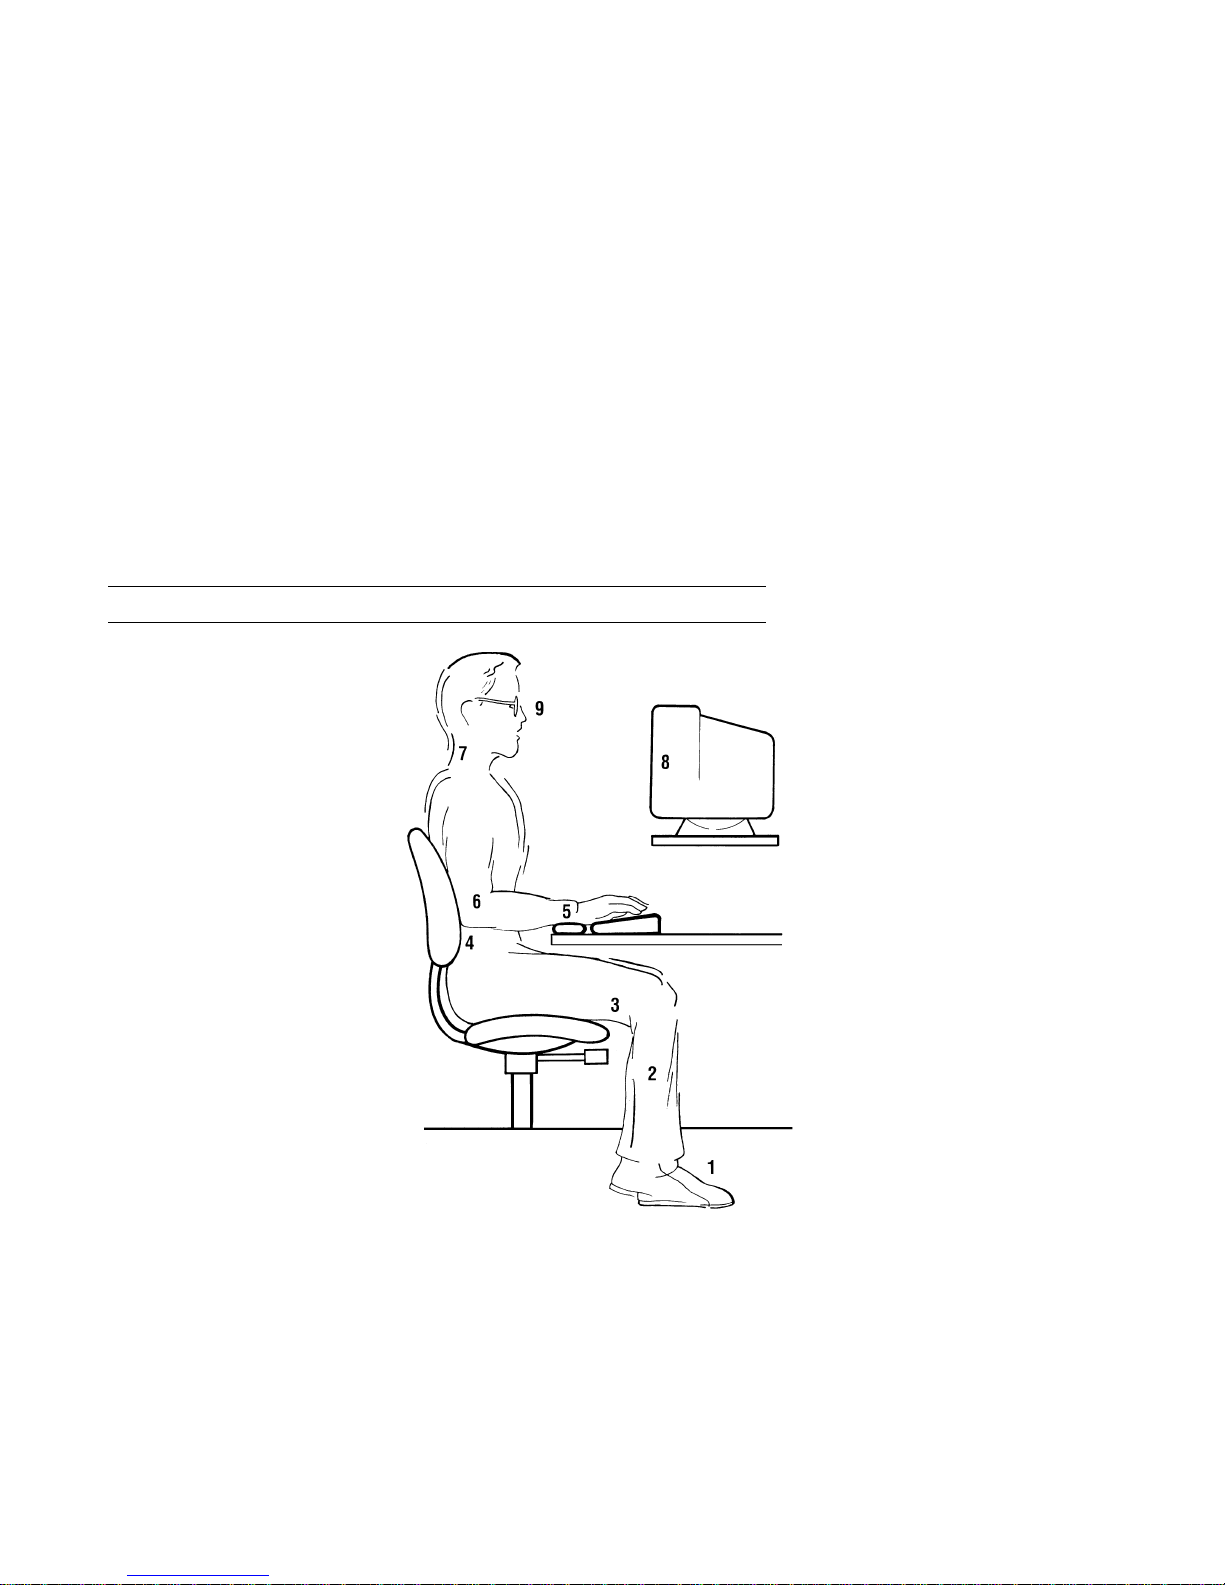
Table 1 Recommendations for Proper Setup and Use
Adjust So that . . .
Chair 1 Feet are flat on the
floor or footrest if
needed.
2 Legs are vertical
forming a right
angle to the floor.
3 Your weight is off
your thighs and
are in a horizontal
position. Keep the
back of your knees
away from the
seat so you do not
compress the area
behind them, which
could restrict the
blood flow.
4 Your upper body is
erect and your
lower back is
supported with
a backrest.
Keyboard 5 Your wrists are
straight and do
not flex more than
15°. They may
be supported but
should not rest on
sharp edges.
MA–0069–93.IL
viii
(continued on next page)

Table 1 (Cont.) Recommendations for Proper Setup and Use
Adjust So that . . .
Arms 6 Your upper arms are straight down at your sides, and
Head 7 Your neck is not strained. Your head should incline
Monitor 8 Your eye level is at the correct distance for proper vision.
Eyes 9 You avoid eyes fatigue, which can be caused by glare, image
Work
Breaks
Lighting You avoid direct lighting or sunlight on the screen, which
Noise You keep background noise at a minimum. Background
Temperature The room is 20°C to 23 °C (68°F to 74°F)
elbows are close to your sides and support your arm weight.
Forearms should be at a 70° to 90° angle.
downward, but no more than 15° to 20°.
quality, uncomfortable furniture, eye height, and uncorrected
vision. If you cannot read the screen at different distances,
you may need special glasses. Relax your eyes periodically
by looking at distant objects.
You take periodic work breaks. Morning, lunch, and
afternoon breaks meet most recommendations. Take
advantage of work breaks to move around and do other
movements.
causes glare and reflections. This monitor screen has an
antiglare treatment to reduce glare. Place lighting behind
or to the side of your work area, and distribute the lighting
evenly on your work area. Adjust the brightness and the
contrast controls as needed.
noise above 65 dBA is tiring. Sound-absorbing materials,
such as curtains, carpeting, and acoustic tile, can help
reduce background noise.
Humidity The air is 30% to 70% relative humidity.
Ventilation There is adequate air ventilation for equipment operation
and to avoid fatigue.
(continued on next page)
ix
 Loading...