

Digital Equipment Prioris Series Installation Manual
nstallation
I
Prioris
TM
erver
S
WITH Se rverWORKSTM QUICK L AUNCH
BRIGCVR.PM5 1/17/97, 3:11 PM2

hank ou
T
Y
... for purchasing a Digital Prioris server.
The Prioris family represents
Digital’s continued commitment to
Uncompromising Quality, backed by
award-winning Customer Service and Support.
The following procedures will help you easily
set up your server’s hardware and software.
ServerWORKS Quick Launch
ServerWORKS Quick Launch delivers unparalleled
achievement in streamlining the installation and
configuration of hardware components and network
operating system software on Digital’s Prioris
of servers. Quick Launch combines an intuitive interface and versatile, time saving features to produce a
consistent and accurate installation optimi zed for
Digital’s extremely powerful and highly acclaimed
Prioris servers.
In addition to its automated yet extensible method
of express installa t ions for Network Operating
Systems, Quick Launch provides a comprehensive
archive of server documentation, troubleshooting
assistance, and indispensable configuration utilities;
all on one bootable CD.
TM
line
Before you Begin
Select a suitable ar ea for as s embl y an d use. En su re that
your workspace:
■ Is located next to el ectrical outlets and a telephone jack
■ Is free from excessi ve heat , dust , and direc t s un li ght
■ Allows at least 7 inches of clearance on all sides for
proper air flow
See “Technical Specifications” in your System Reference
manual for temperature and humidity information.
If you do not wish to install the server yourself, contact
Digital Cus to mer Ser vi ce. For a no mi nal fee, a Cus t om er
Service Technician can install the server for you.
Prioris Servers2
3
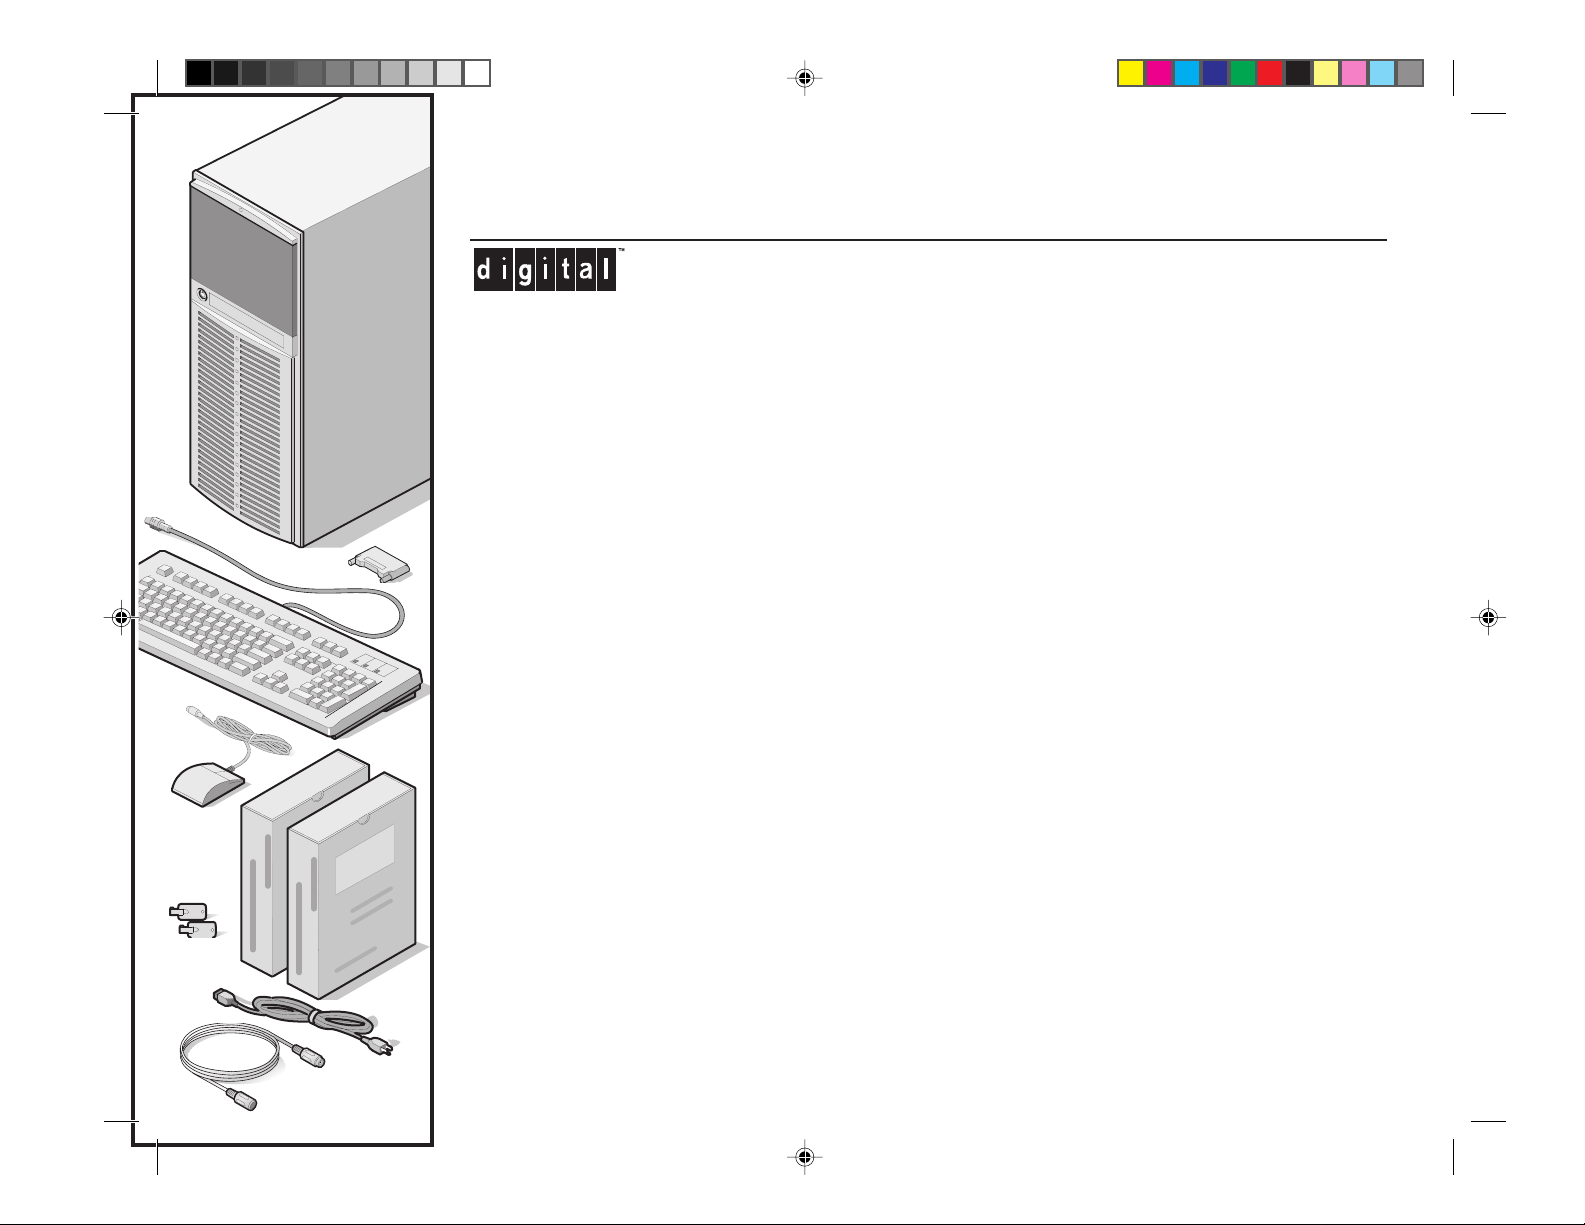
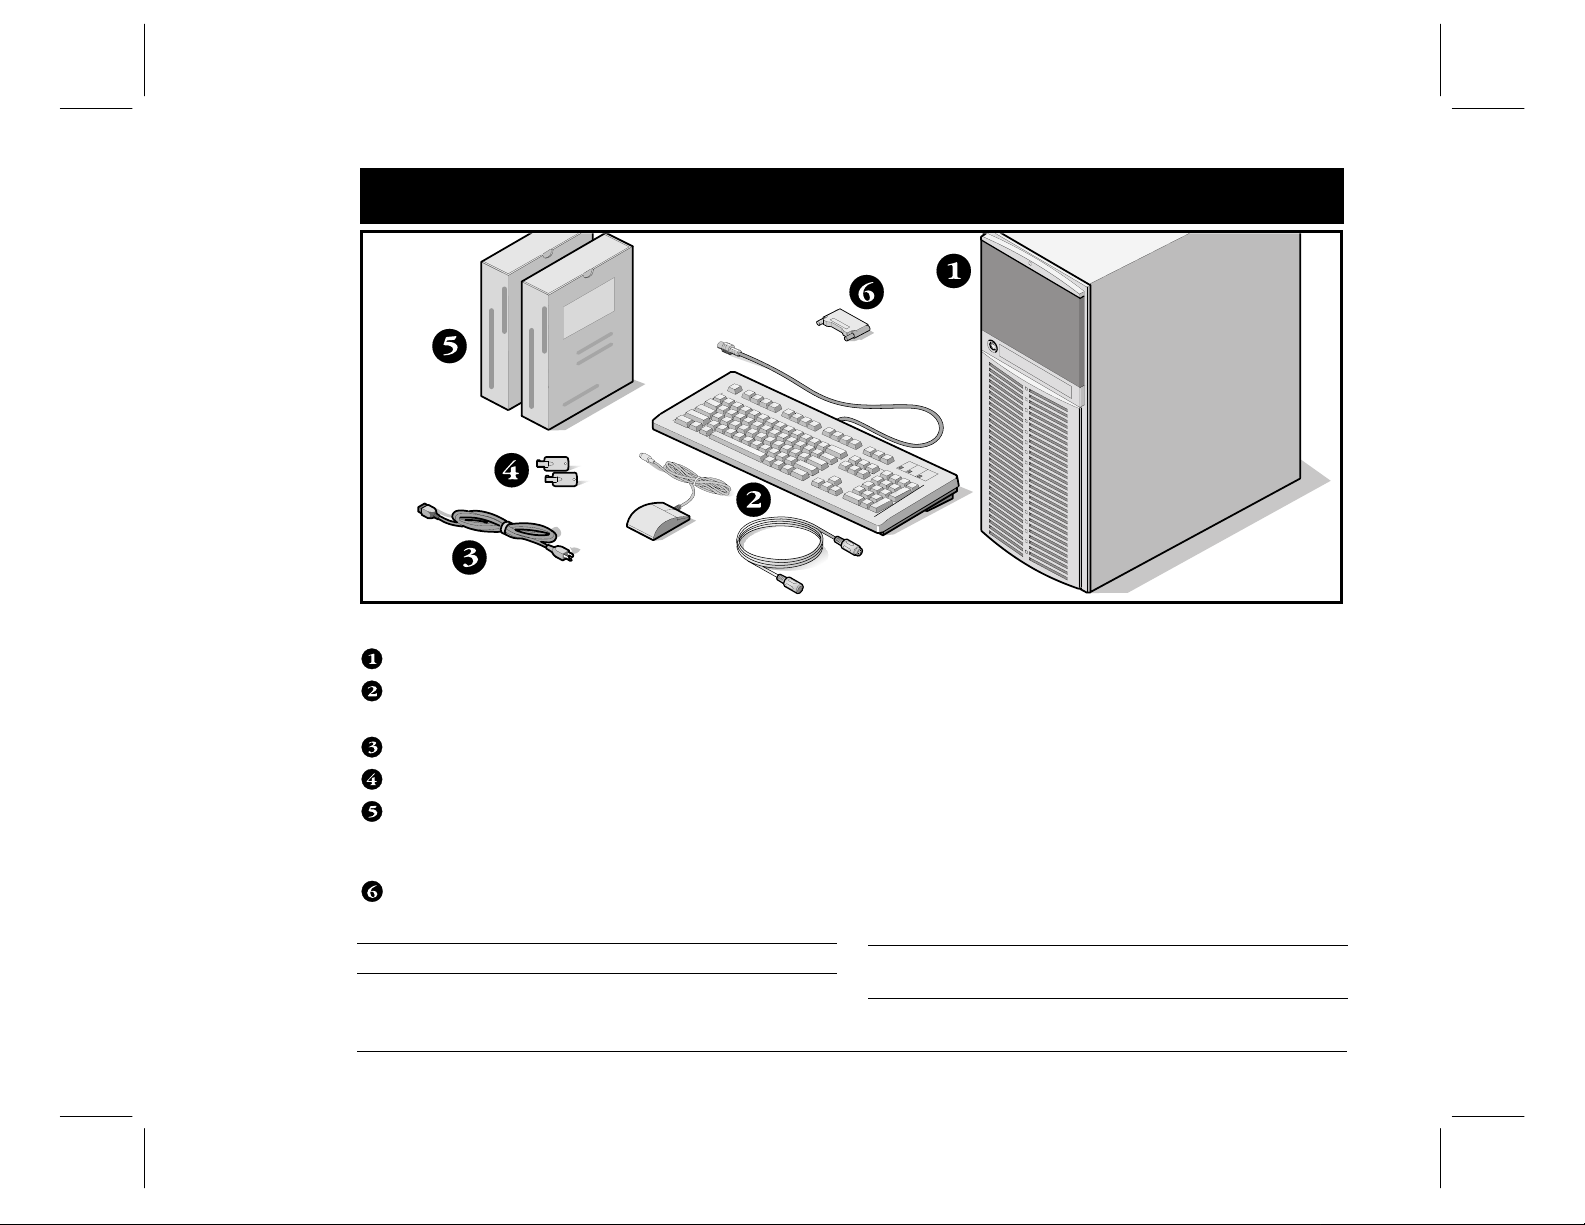
Check the parts
1
Unpack and identify your server’s components.
Prioris server
Country kit including keyboard, keyboard extension
cable and mouse (ordered s eparat ely )
Power cord
Server keys
Server software and documentation kits including
printed manuals and the Quick Launch CD-ROM with
on-line documentation
Terminator
NOTE
Monitor must be ordered separately.
Server Installation
The ServerWORKS software kit includes:
■ ServerWORKS Quick Launch: ServerWORKS Quick
Launch CD-ROM disk and Referen ce G ui de.
■ ServerWORKS Manager: ServerWORKS Manager soft-
ware and documentation. (ServerWORKS Manager is
available only as an Option for Prioris XLe 6000
Series Servers.)
The Prioris Server documentation kit includes:
■ This Install ati on G u ide, Sy st em Refer enc e man ual ,
Documentation Overview, Options Manuals, Warranty
and Service Information, and Registration Card.
NOTE
On-Line Documentation is also contained on the Quick
Launch CD-ROM.
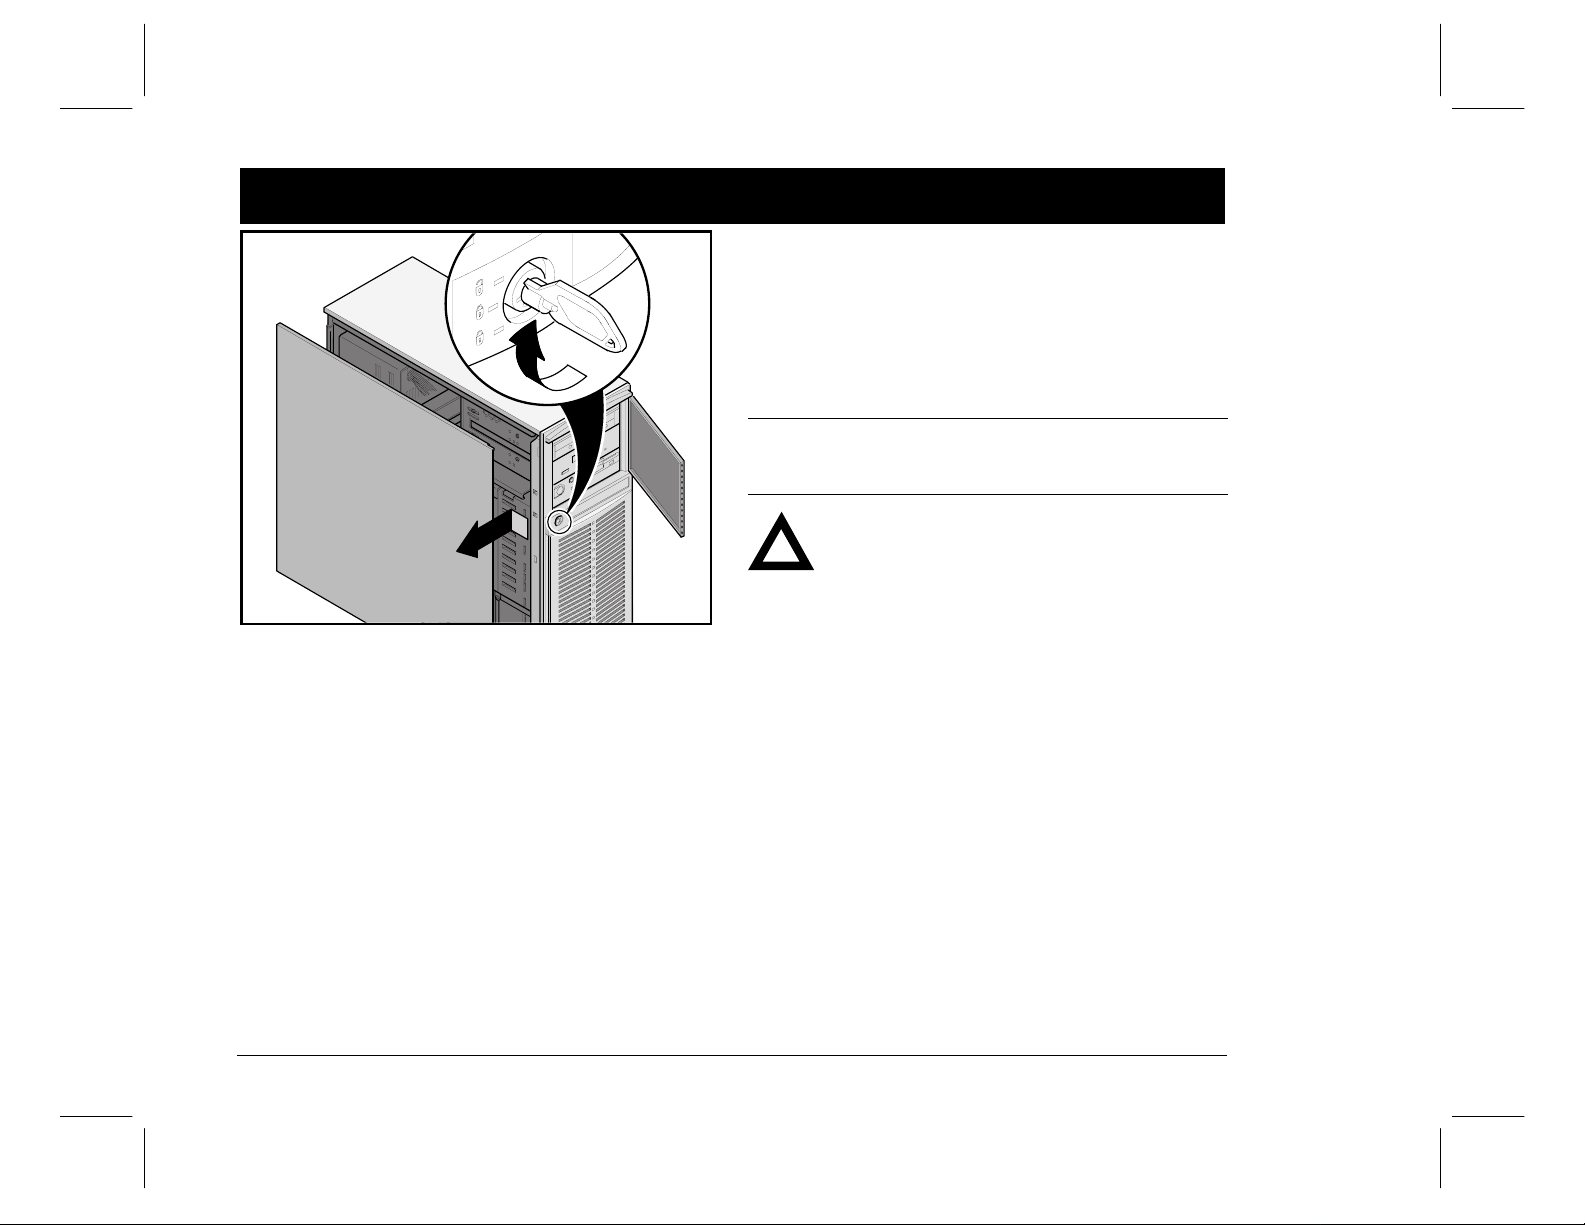
Install any internal opti ons
2
If you plan to use Quick Launch to install your Network
Operating System, your server must meet the following
minimum requirements to proceed with the server installation:
■ 16 MB of RAM
■ SVGA monitor
■ 540 MB minimum hard disk drive
■ Two or three button mouse
■ CD-ROM drive attached to the bootable SCSI controller
■ Keyboard
If you have options to install, install them now.
1. Unlock door
2. Remove side panel
3. Install options
NOTE
ISA cards should be installed after you run the System
Configuration Utility in Step 6 or 7 since the SCU will list
IRQs already used.
CAUTION
Before touching any circuit board or component,
wear an anti-static wrist strap, properly grounded
to the server chassis, or touch the metal frame to
discharge any static electricity.
Refer to the follo w in g ch apt ers i n th e Sys t em Refer ence
manual for detailed information.
■ Server Software and Utilities
■ Server Components
■ Installing Additional Memory
■ Installing Dis k an d Tape Dri ves
■ Installing Expansion Boards
■ Connecting SCSI Adapters
Also, refer to t he docu men tat io n th at cam e w i th t he op ti on
kit for specific installation instructions.
Prioris Servers4
5
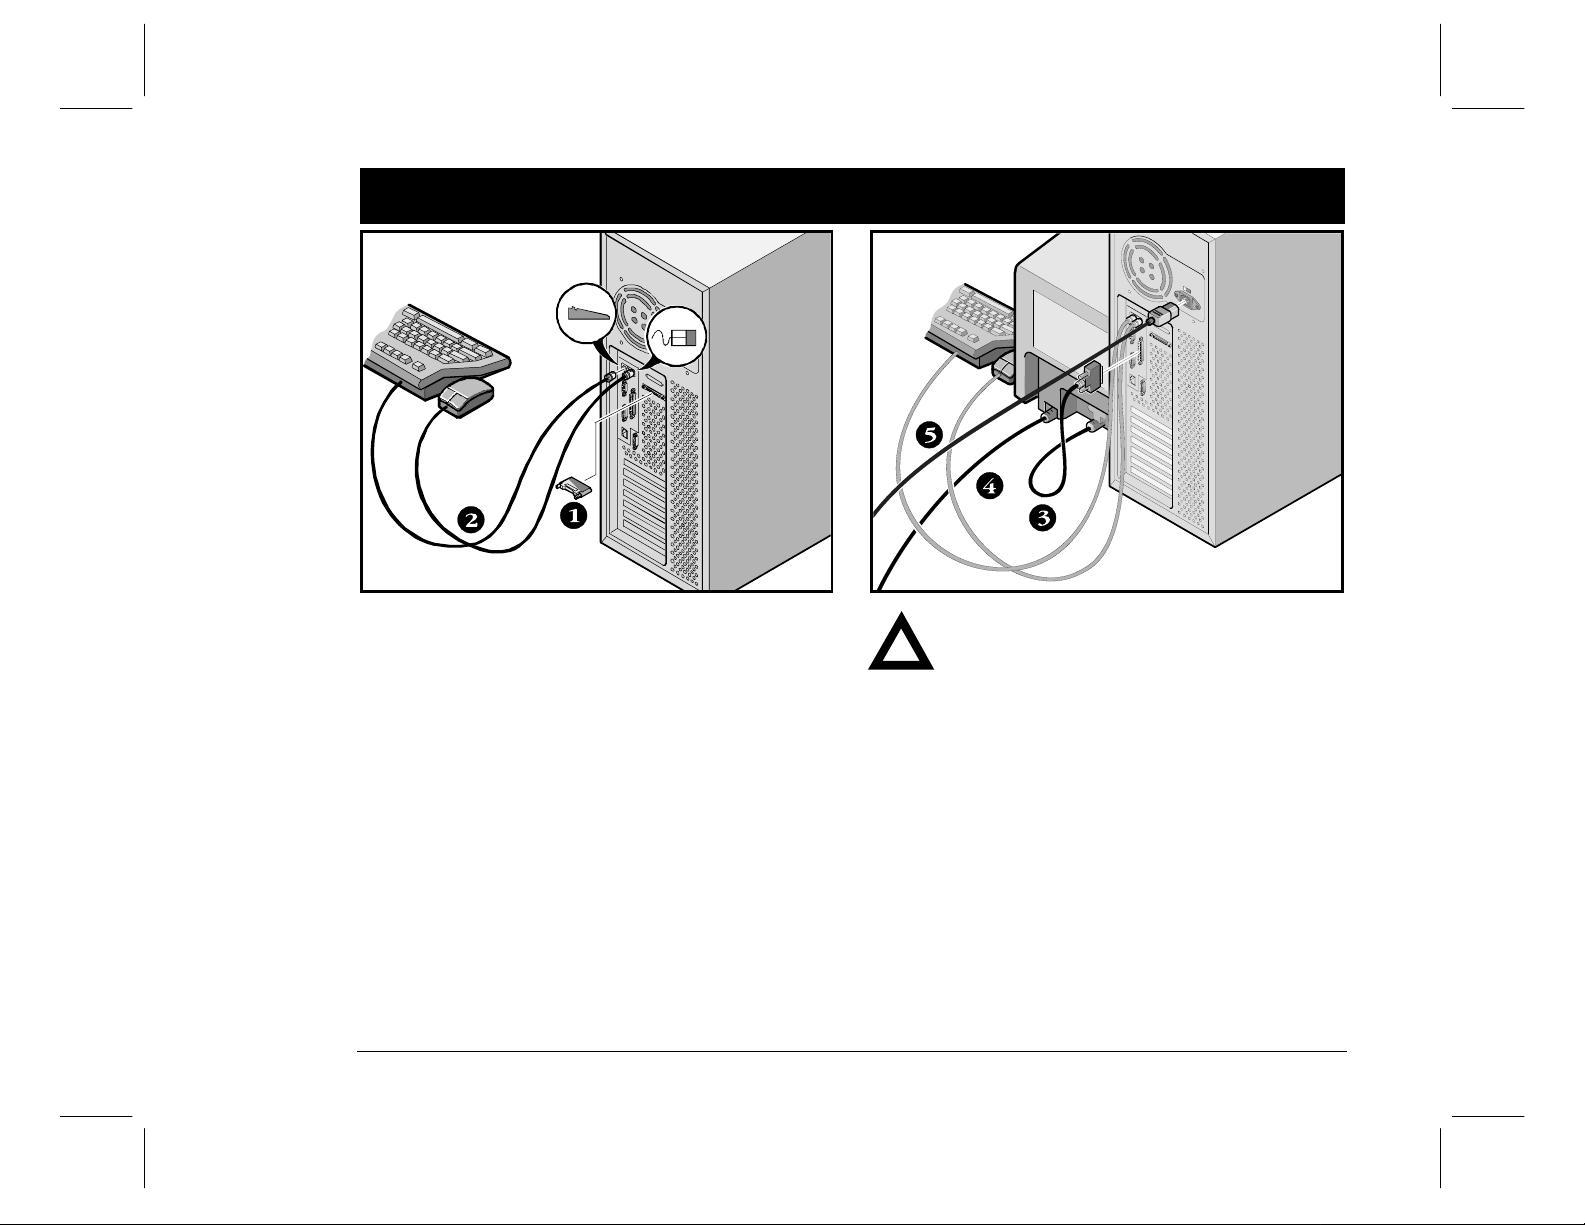
Conne ct the cables, termin ator, and power cord
3
1. Connect the terminator at the back of the server.
2. Connect the mouse and keyboard cables into the cor-
responding connectors at the back of the server.
3. Place your monitor near your server. Connect the
monitor signal cable to the back of the monitor and
then connect it to the matching connector at the back
of your server. Note that some monitors have cables
permanently attached.
4. Connect the monitor power cord to the back of the
monitor, then to a wall outlet.
5. Connect the server power cord to the server, then to a
wall outlet.
Server Installation
CAUTION
Do not attempt to modify or use an external
100 Vac (Japan only) or 115 Vac power cord for
240 Vac input power. Modifying either cord can
cause severe equipment damage.
The voltage selection switch must match the
voltage supplied by your power outlet. In North
America, 115 volts is common. In other countries,
230 volts is common. Ensure that the voltage
selection switch is set to the right voltage. If it is
not set correctly, you can damage your server.
 Loading...