

Digital Equipment Prioris HX 6000 Installation Manual
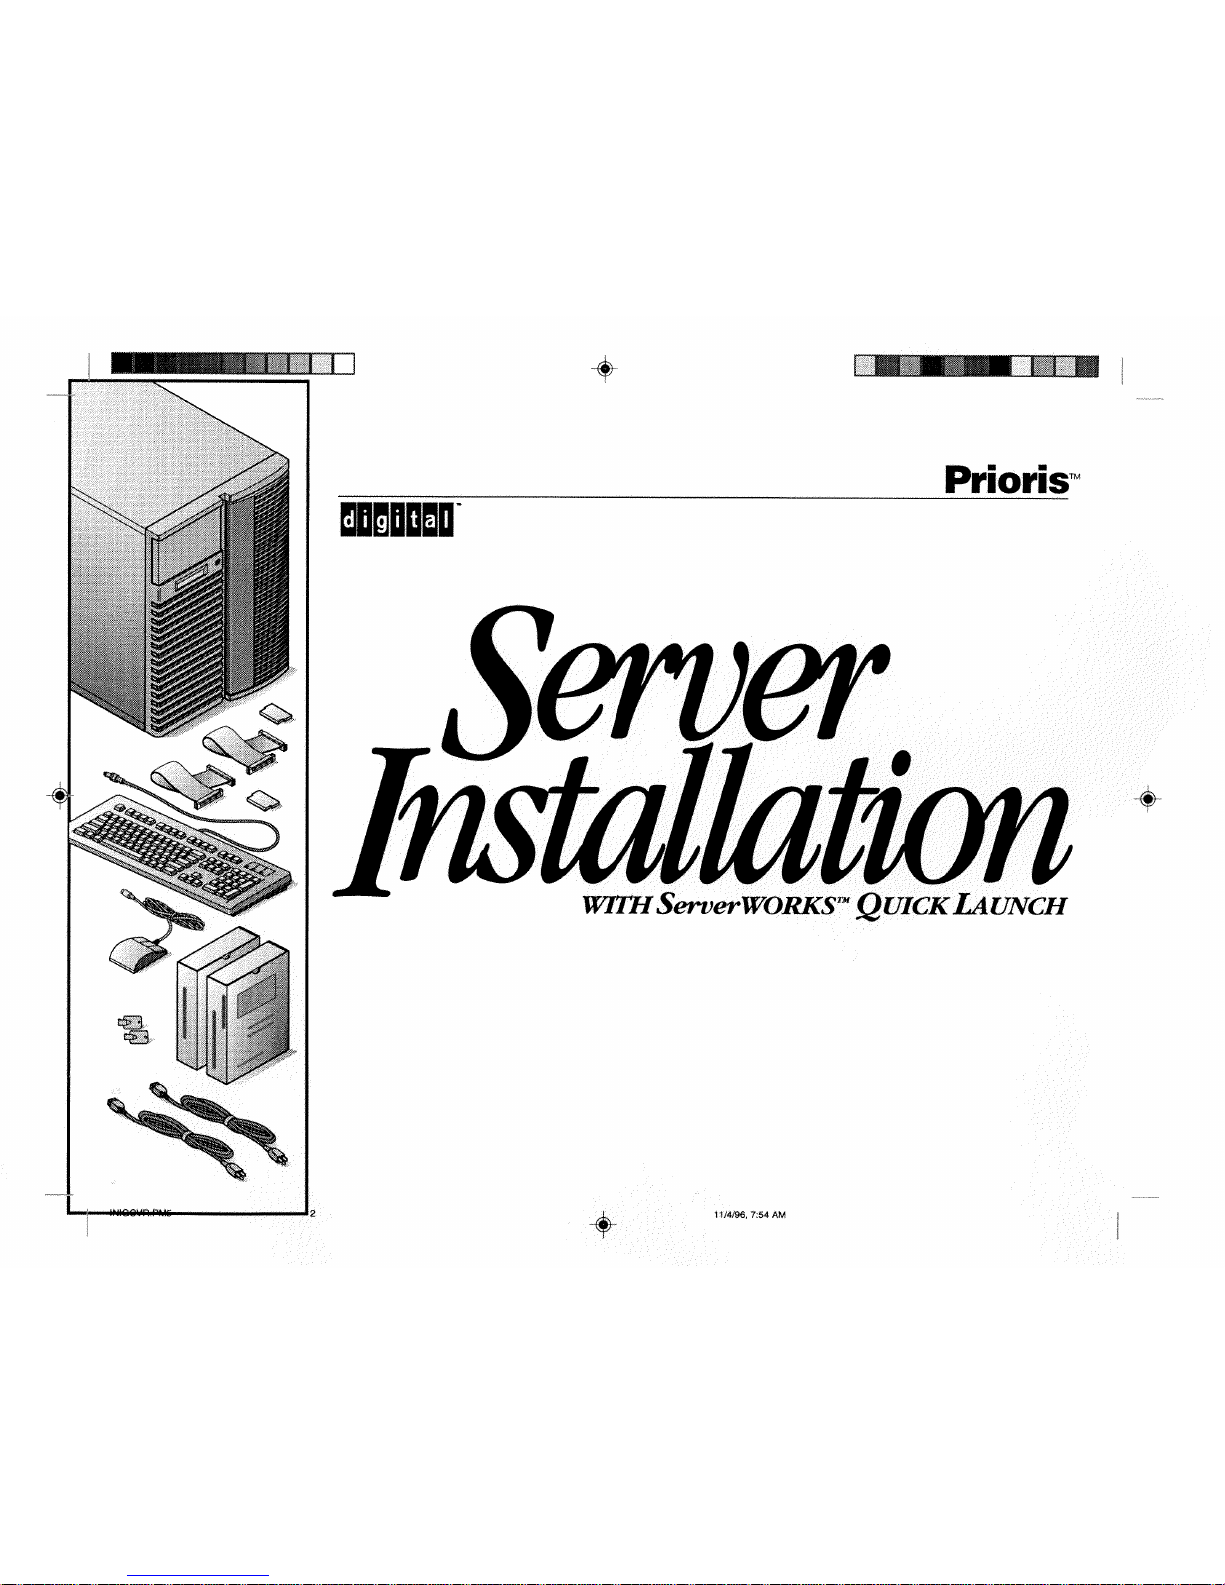
Prioris Servers2
hank ou
... for purchasing a Digital Prioris server.
The Prioris family represents
Digital’s continued commitment to
Uncompromising Quality, backed by
award-winning Customer Service and Support.
The following procedures will help you easily
set up your server’s hardware and software.
Before you Begin
Select a suitable area for as sem bl y an d use. Ens ur e that
your workspace:
■ Is located next to electrical outlets and a telephone
jack
■ Is free from excessive heat, dust, and dir ect s un l ig ht
■ Allows at least 7 inches of clearance on all sides for
proper air flow
See “Technical Specifications” in your System Reference
manual for temperature and humidity information.
If you do not wish to install the server yourself, contact
Digital Customer Service. A Customer Service Technician
can install the server for you.
WARNING
Use extreme care when unpacking your server.
Due to its weight, two people are required to
unpack it. Failure to use two people might violate
certain safety regulations and can result in severe
personal injury or equipment damage.
Y
T
ServerWORKS Quick Launch
ServerWORKS Quick Launch delivers unparalleled
achievement in streamlining the installation and
configuration of hardware components and network
operating system software on Digital’s Prioris
TM
line
of servers. Quick Launch combines an intuitive interface and versatile, time saving features to produce a
consistent and accurate installation optimized for
Digital’s extremely powerful and highly acclaimed
Prioris servers.
In addition to its automated yet extensible method
of express installations for Network Operating Systems, Quick Launch provides a comprehensive archive of server documentation, troubleshooting assistance, and indispensable configuration utilities; all
on one bootable CD!
Installation Guide
3
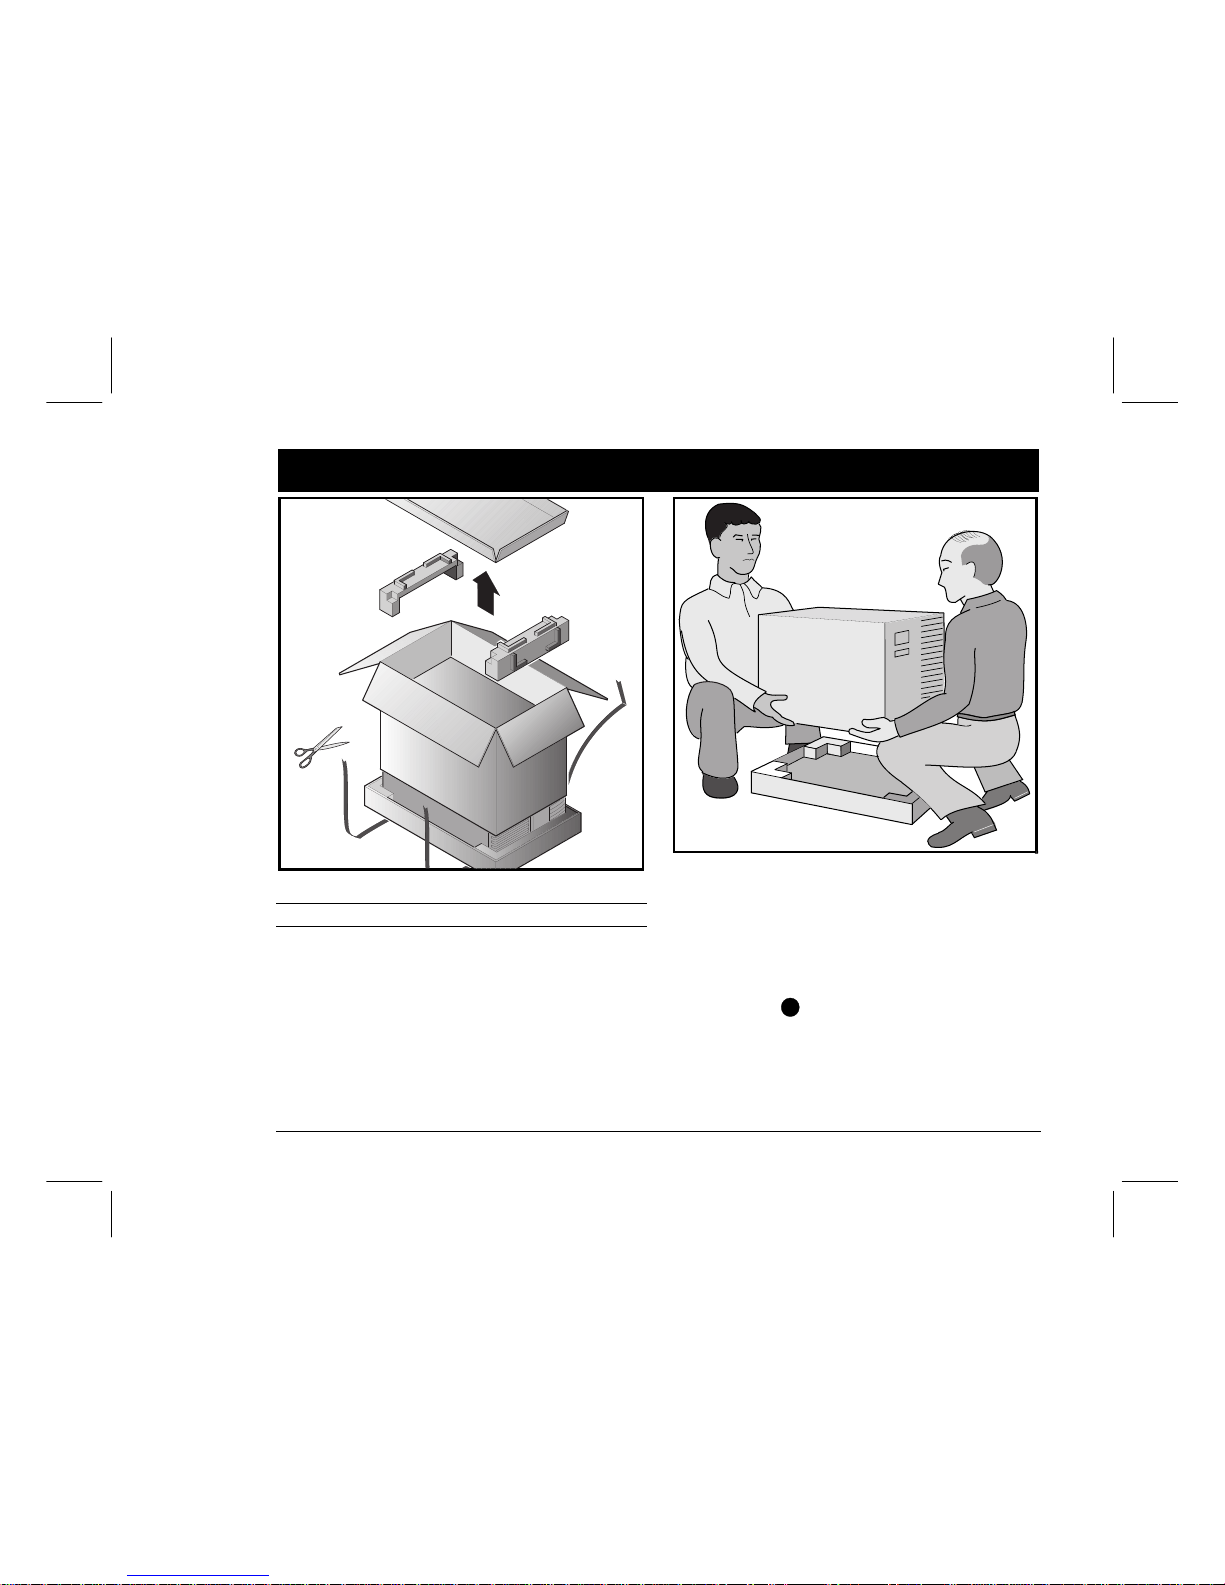
Unpack your server
NOTE
Servers are heavy. Do not lift this equipment alone.
Unpack your server following the diagrams on the box
top. Use a mechanical aid or get someone to help you lift
it from the carton base.
■ Test the weight of the server to make sure its comforta-
bly within your lifting capabilities.
■ Know where you’re going to set it down before you lift.
■ Roll the server on its wheels rather than carry it.
■ Get close to the server, wit h feet ap ar t for st able fo ot in g.
■ Squat down, knees bent, back straight.
■ Get a firm grip, lift with your legs, keep back straight.
■ Avoid twisting your upper body. Move your feet to turn.
■ Lower gently using leg muscles to squat, back straight.
■ Roll the server into place and lock the brake as shown
in Step 3, Note
A
.
After your server has been unpacked, please recycle the
packing materials or dispose of them properly.
1
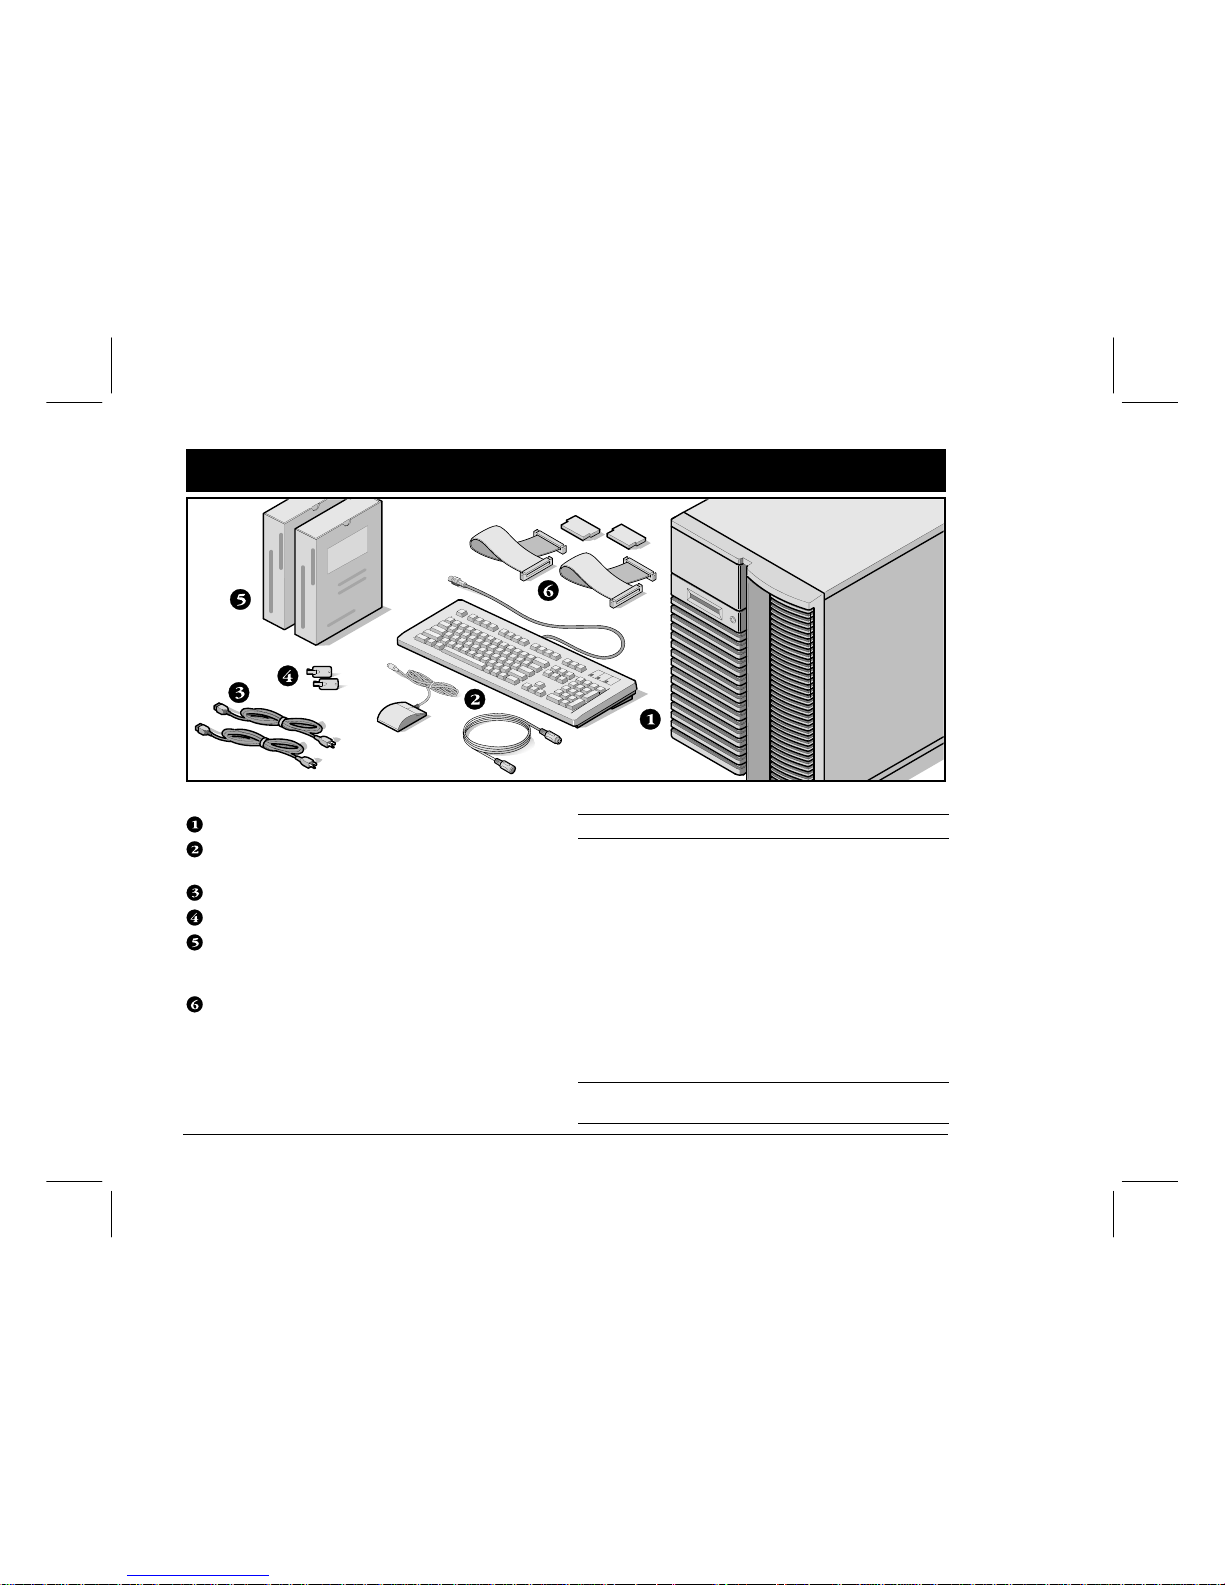
Prioris Servers4
C heck the parts
Unpack and identify your server’s components.
Prioris server
Country kit including keyboard, keyboard extension
cable and mouse (ordered separat ely )
Up to 3 power cords
Server keys
Server software and documentation kits including
printed manuals and the Quick Launch CD-ROM with
on-line documentation
SCSI cable and terminator (in some configurations,
you may have up to three loose cables in addition to
the cables already installed.)
NOTE
Monitor must be ordered separately.
The ServerWORKS software kit includes:
■ ServerWORKS Quick Launch: ServerWORKS Quick
Launch CD-ROM disk and Reference G ui de.
■ ServerWORKS Manager: ServerWORKS Manager soft-
ware and documentation.
The Prioris Server documentation kit includes:
■ This Installation Gu ide, Sy s tem Referen ce m anu al,
Documentation Overview, Options Manuals, Warranty
and Service Information, Diagnostic User’s Guide and
Registration Card.
NOTE
On-Line Documentation is also contained on the Quick
Launch CD-ROM.
2
Installation Guide
5
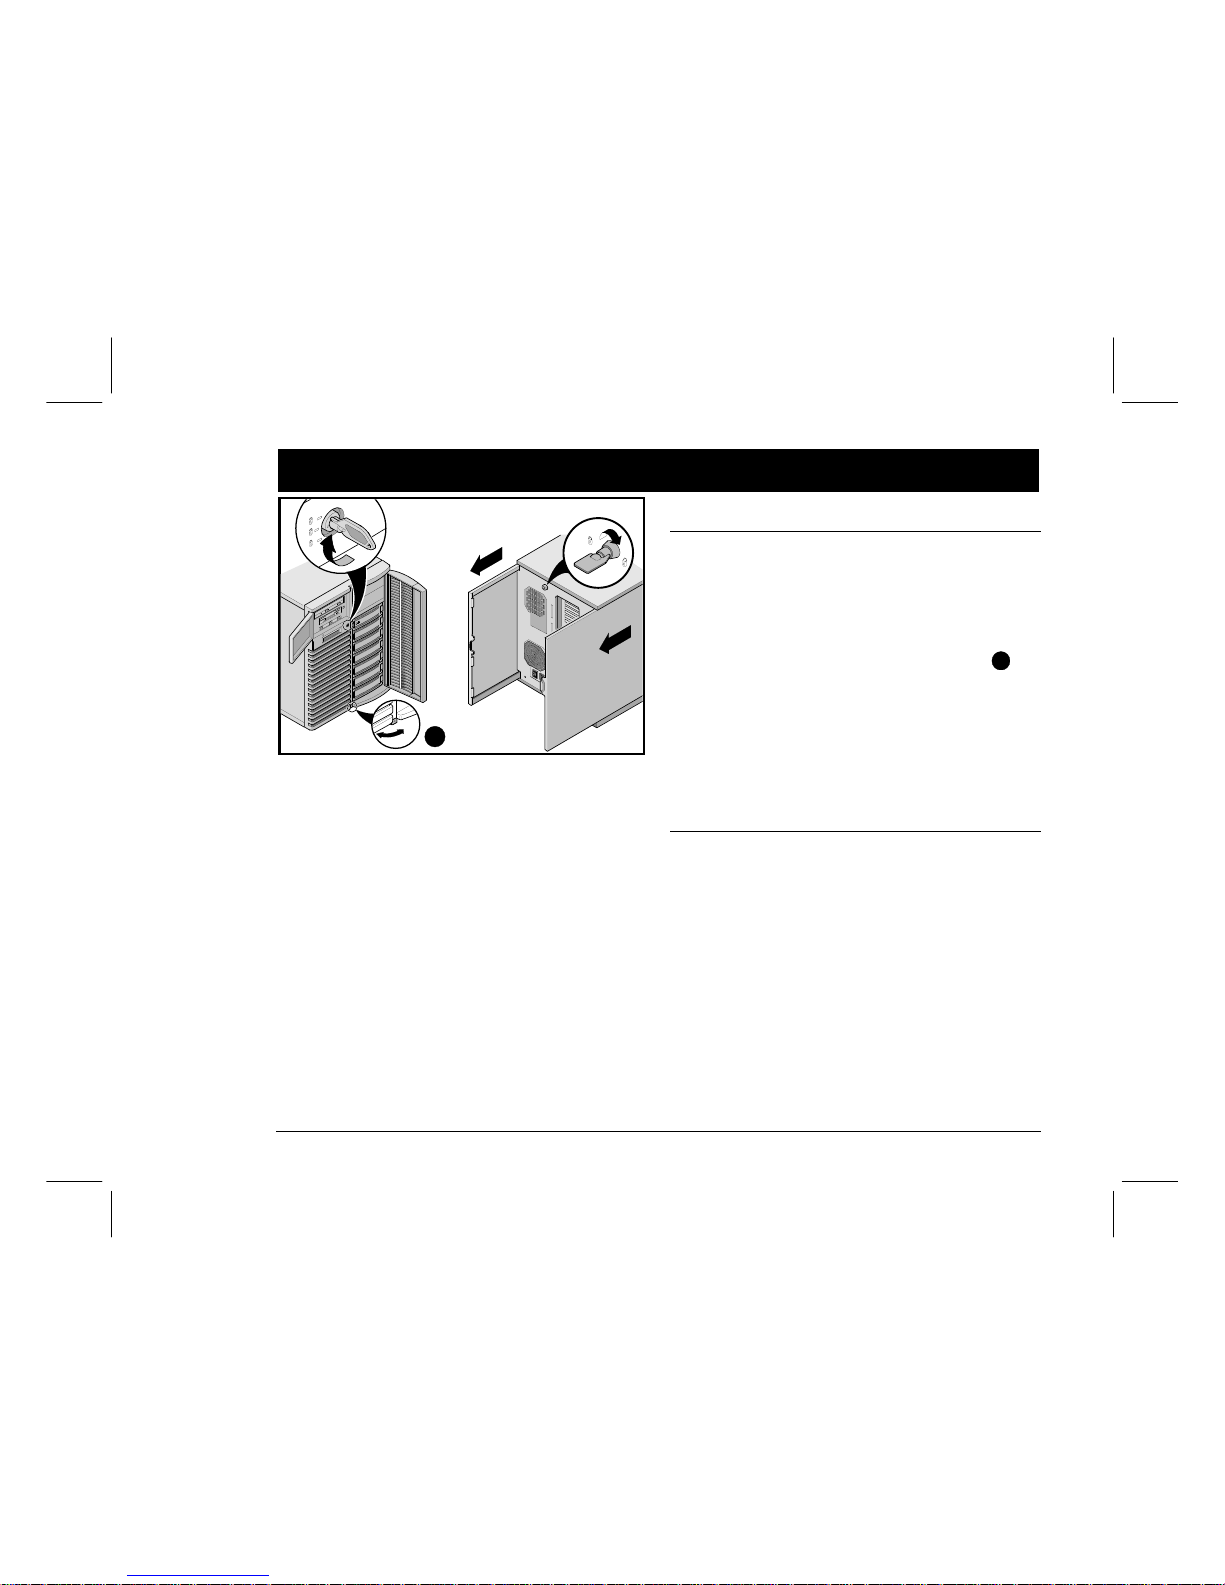
Install any i nternal opti ons
If you have options to install, install them now.
1. Unlock doors
2. Unlock side panels
3. Remove side panels
4. Install options
Refer to the follow in g ch apt ers in th e Sys tem Refer ence
manual for detailed information.
■ Server Utilities
■ Upgrading Your Server’s CPU Module
■ Installing Additional Memory
■ Installing Optional Disk and Tape Drives
■ Connecting SCSI and RAID Adapters
Also, refer to the docu men tat io n th at cam e w i th t he op ti on
kit for specific installation instructions.
NOTES
Removing the side panels activates the power interlock
switches. These switches turn off power to your server.
You might injure yourself or damage the server if you
attempt to override or bypass these switches. Always replace the side panels before you turn on power to the
server.
Use the brake located at the bottom of your server
A
to
lock your server in place.
ISA cards should be installed after you run the System
Configuration Utility in Step 7 or 8 since the SCU will list
IRQs already used.
Before touching any circuit board or component, wear
an anti-static wrist strap, properly grounded to the server
chassis, or touch the metal frame to discharge any static
electricity.
If you plan to use Quick Launch to install your Network
Operating System, your server must meet the following
minimum r equi rem ent s t o p ro ceed wi th the s erv er i ns tal l ation:
■ 16 MB of RAM
■ SVGA monitor
■ 540 MB minimum hard disk drive
■ Network card
■ Two or three button mouse
■ CD-ROM drive attached to the bootable SCSI controller
■ Keyboard
3
A
 Loading...