

Digital Equipment Prioris Series Manual
S
Prioris
TM
erver
I
nstallation
WITH ServerWORKSTM QUICK LAUNCH

hank ou
T
Y
... for purchasing a Digital Prioris server.
The Prioris family represents
Digital’s continued commitment to
Uncompromising Quality, backed by
award-winning Customer Service and Support.
The following procedures will help you easily set up
your server’s hardware and software.
ServerWORKS Quick Launch
ServerWORKS
leled achievement in streamlining the installation
and configuration of hardware components and
network operating system software on Digital’s
TM
Prioris
an intuitive interface and versatile, time saving
features to produce a consistent and accurate installation optimized for Digital’s extremely powerful
and highly acclaimed Prioris servers.
In addition to its automated yet extensible method
of express installations for Network Operating
Systems, Quick Launch provides a comprehensive archive of server documentation, troubleshooting assistance, and indispensable configuration utilities; all on one bootable CD!
line of servers. Quick Launch combines
Quick La unch
delivers unparal-
Before you Begin
Select a suitable area for assembly and use.
Ensure that your workspace:
■
Is located next to electrical outlets and a telephone
jack
■
Is free from excessive heat, dust, and direct sunlight
■
Allows at least 7 inches of clearance on all sides for
proper air flow
See “Technical Specifications” in your User’s Guide for
temperature and humidity information.
If you do not wish to install the server yourself, contact
Digital Customer Service. A Customer Service Technician can install the server for you.
Priori s Servers2
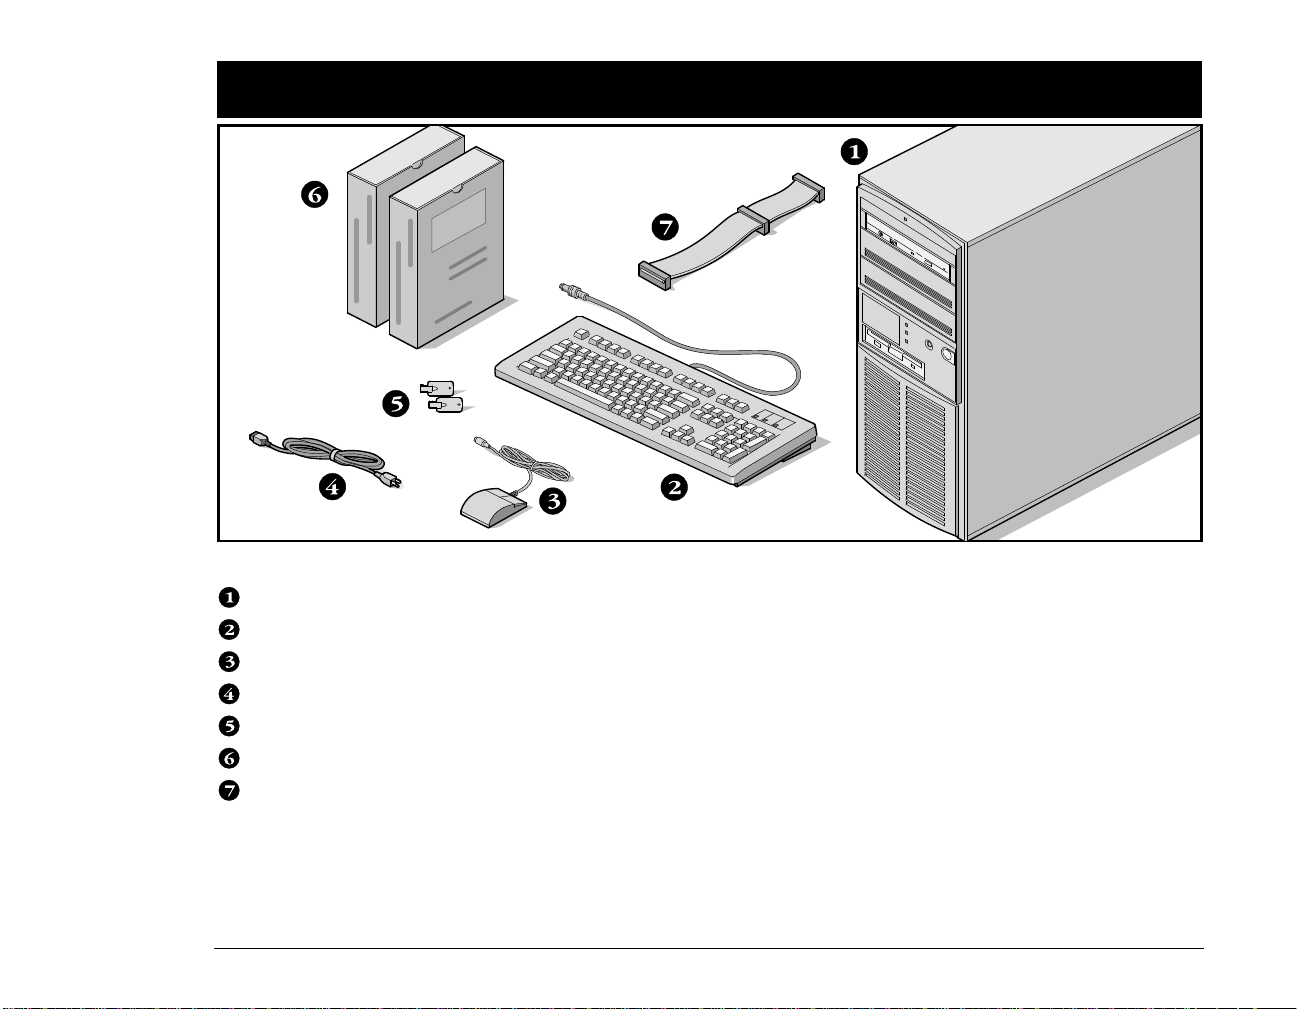
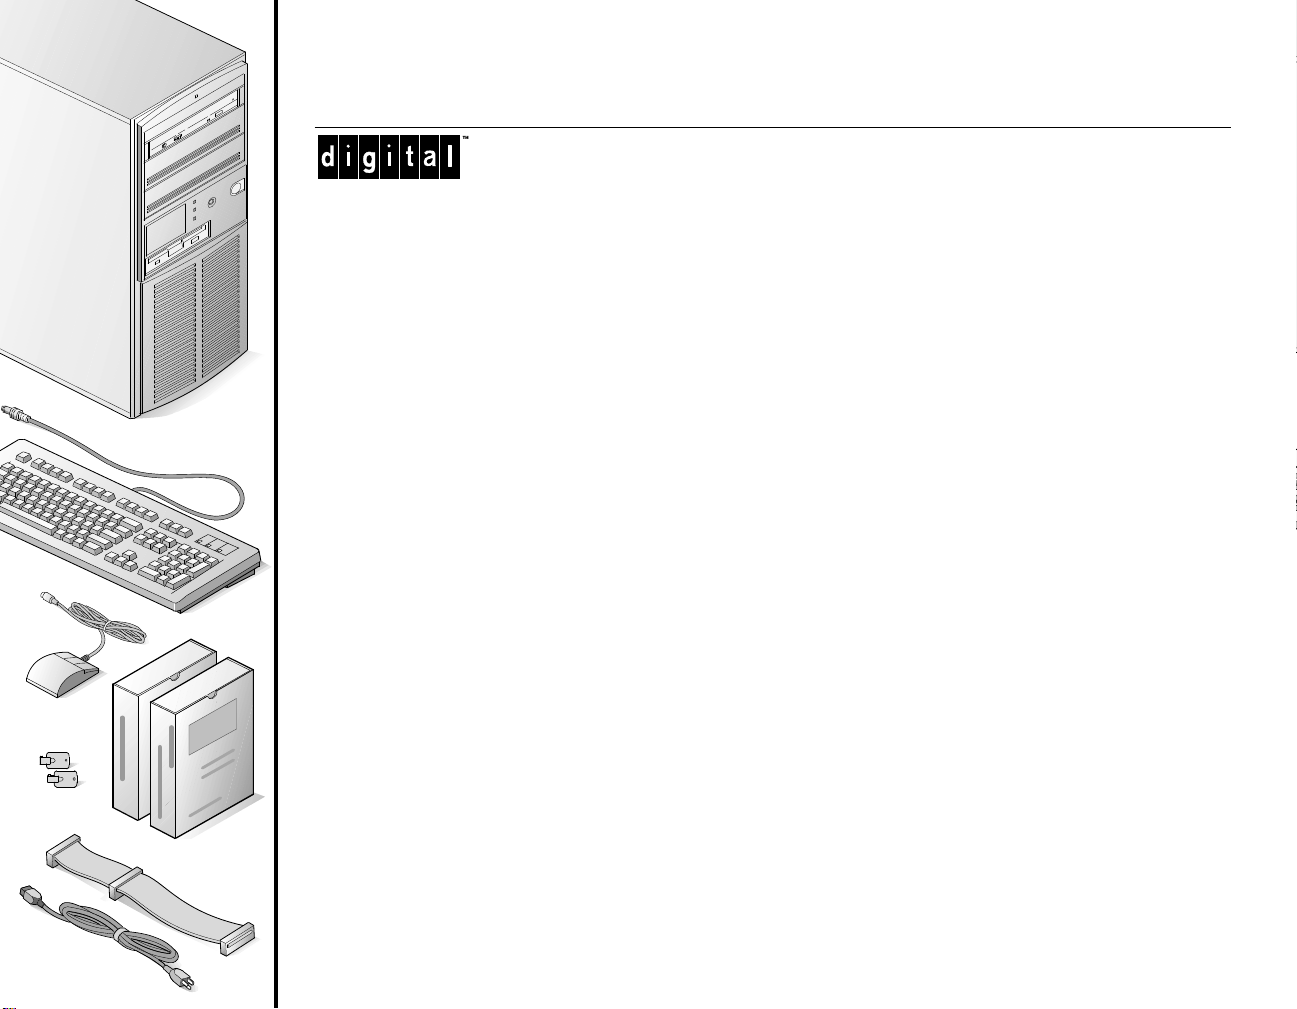
Unpack your server and check the parts
1
Unpack and identify your server’s components.
Prioris server
Keyboard
Mouse
Power cord
Server ke ys
Server software and documentation kits
IDE connector cable
The ServerWORKS software kit includes:
■
ServerWORKS Quick Launch kit: ServerWORKS
Quick Launch CD-ROM disk and Reference Guide.
■
ServerWORKS Manager kit: ServerWORKS Manager software and documentation.
The Prioris Server documentation kit includes:
■
This Installation Guide, User’s Guide, Documentation Overview, Options Manuals, Warranty and
Service Information, Diagnostic User’s Guide, and
Registration Card.
Installation Gu ide 3
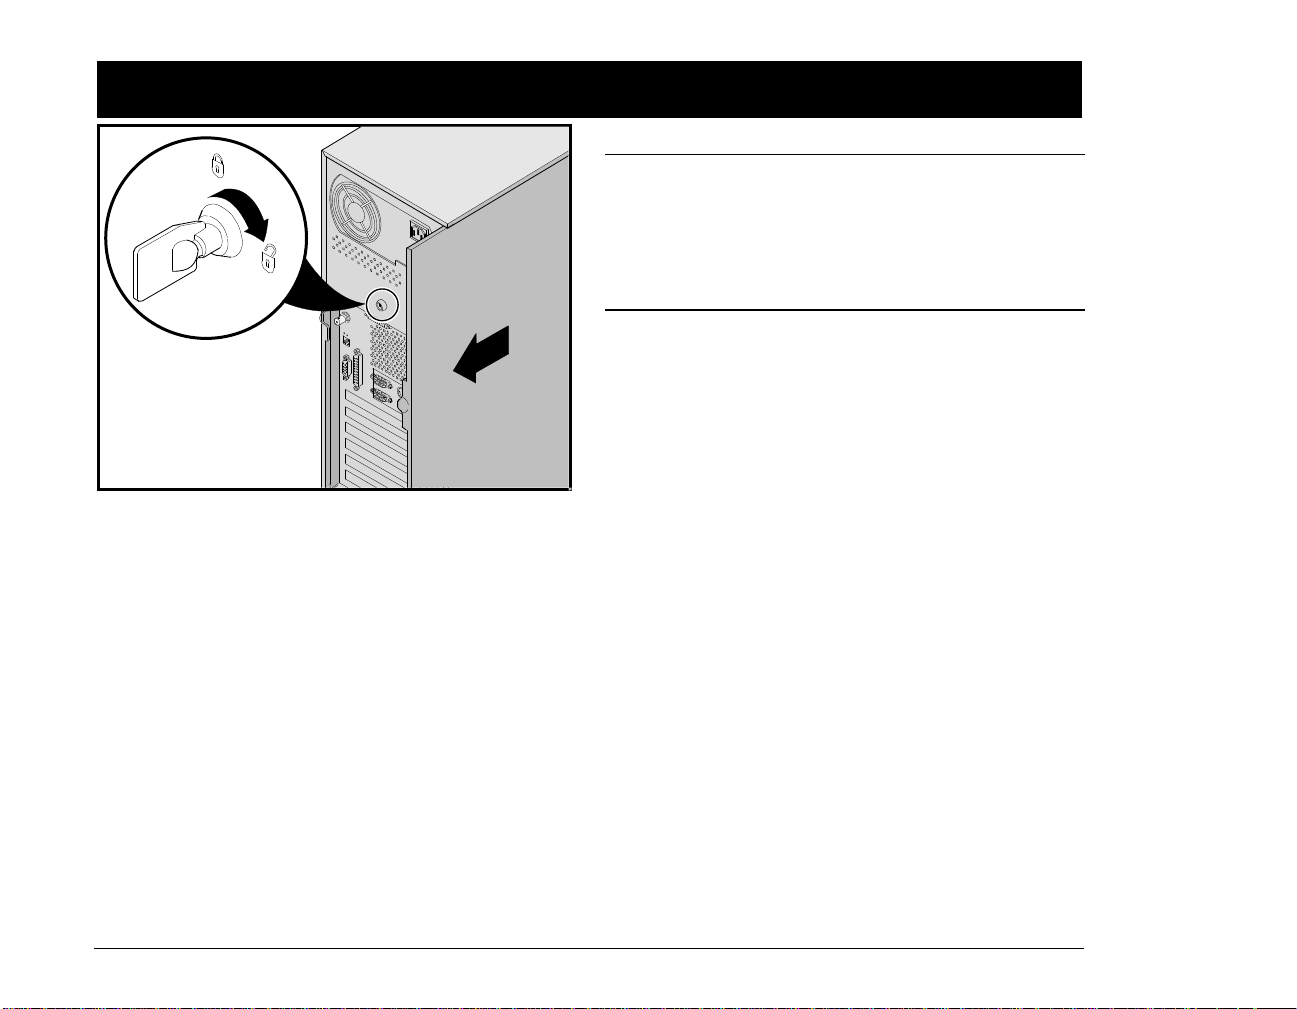
Install any internal options
2
If you have options to install, install them now.
1.
Unlock side panel
2.
Remove side panel
3.
Install options
Refer to these chapters in the User’s Guide for detailed
information on:
■
Expanding Y our Server
■
Server Utilities
Also, refer to the documentation that came with the option kit for specific installation instructions.
NOTES
ISA cards should be installed after you run the System
Configuration Utility (SCU) in Step 7 or 8.
Before touching any circuit board or component, wear
an anti-static wrist strap, properly grounded to the server
chassis, or touch the metal frame to discharge any static
electricity.
If your server was not pre-configured at the factory, you
need the following minimum requirements to proceed
with the server installation:
■
16 MB of RAM
■
SVGA monitor
■
540 MB minimum hard disk drive
■
Two or three button mouse
■
CD-ROM drive attached to the bootable SCSI controller
■
Keyboard
Prioris Servers4
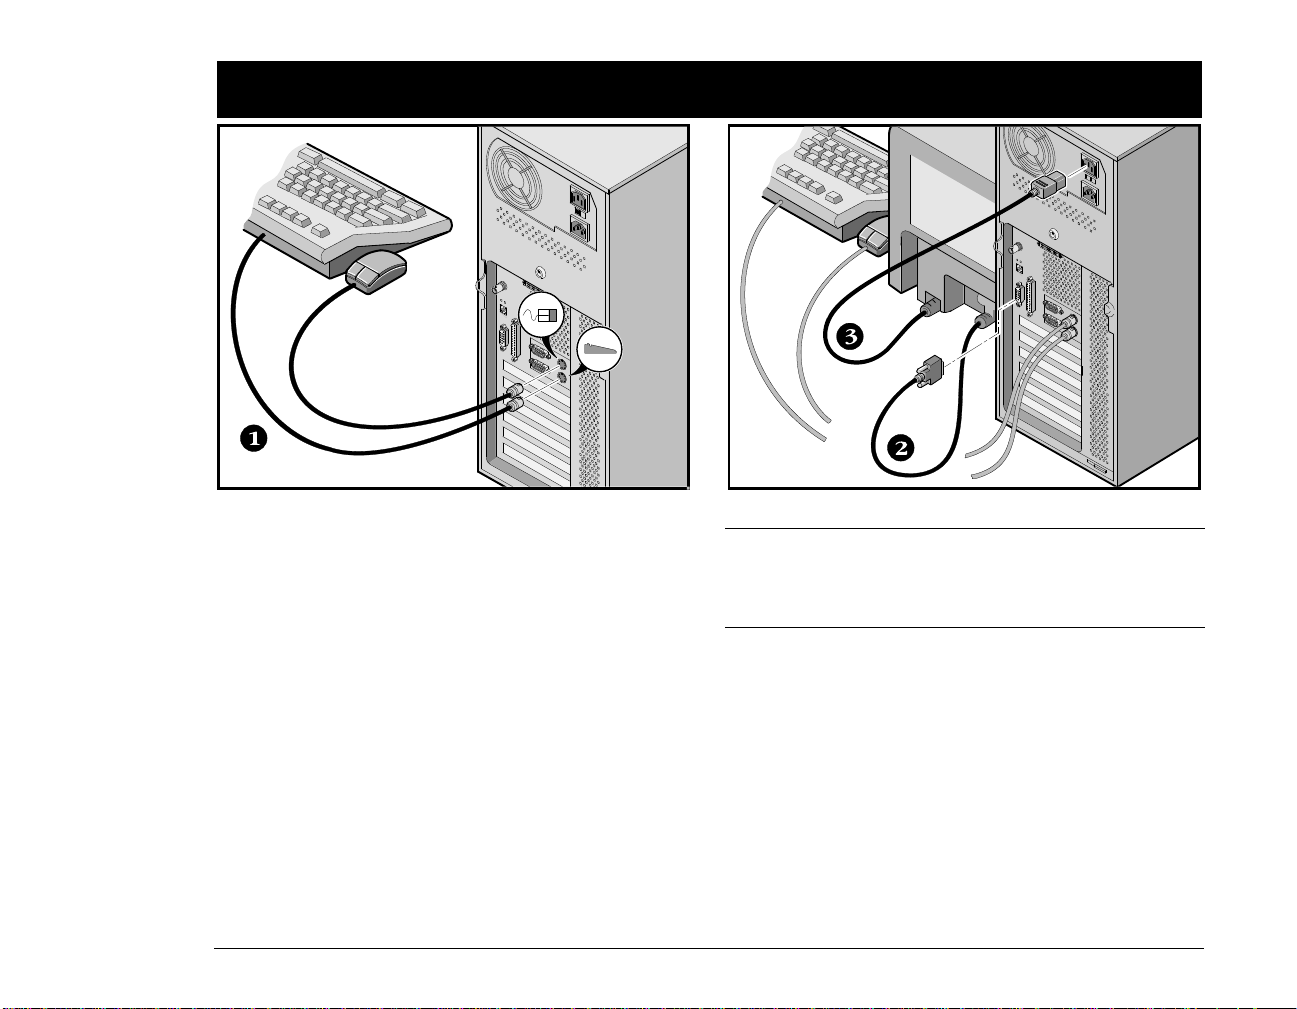
Connect the cables
3
1.
Connect the mouse and keyboard cables into the
corresponding connectors at the back of the server.
2.
Place your monitor near your server. Connect the
monitor signal cable to the back of the monitor and
then connect it to the matching connector at the back
of your server.
3.
Connect the monitor power cord to the back of the
monitor and then connect it to the matching connector at the back of your server or into a wall outlet.
Installation Gu ide 5
NOTE
Some large screen monitors (17-inch diagonal and over)
require more power than the server’s auxiliary ac outlet
can supply. These monitors will have power cords that
must be connected directly into a wall outlet.
 Loading...