

Digital Dream epsilon 2.1 User Manual
Users Manual
1

Camera
Overview
Flash
Front View Rear View
Viewfinder
Top View
Mode Selection switch
Shutter
Microphone
Macro switch
Power On/Off
Side View
TV out
Display On/Off
Mode
Set/Flash
Automatic picture mode
Manual picture mode
USB
Mode selection
Select/Zoom/
Self timer/
Speaker
Playback mode
Video Mode
Audio mode
Webcam mode
2
Inserting the
Batteries
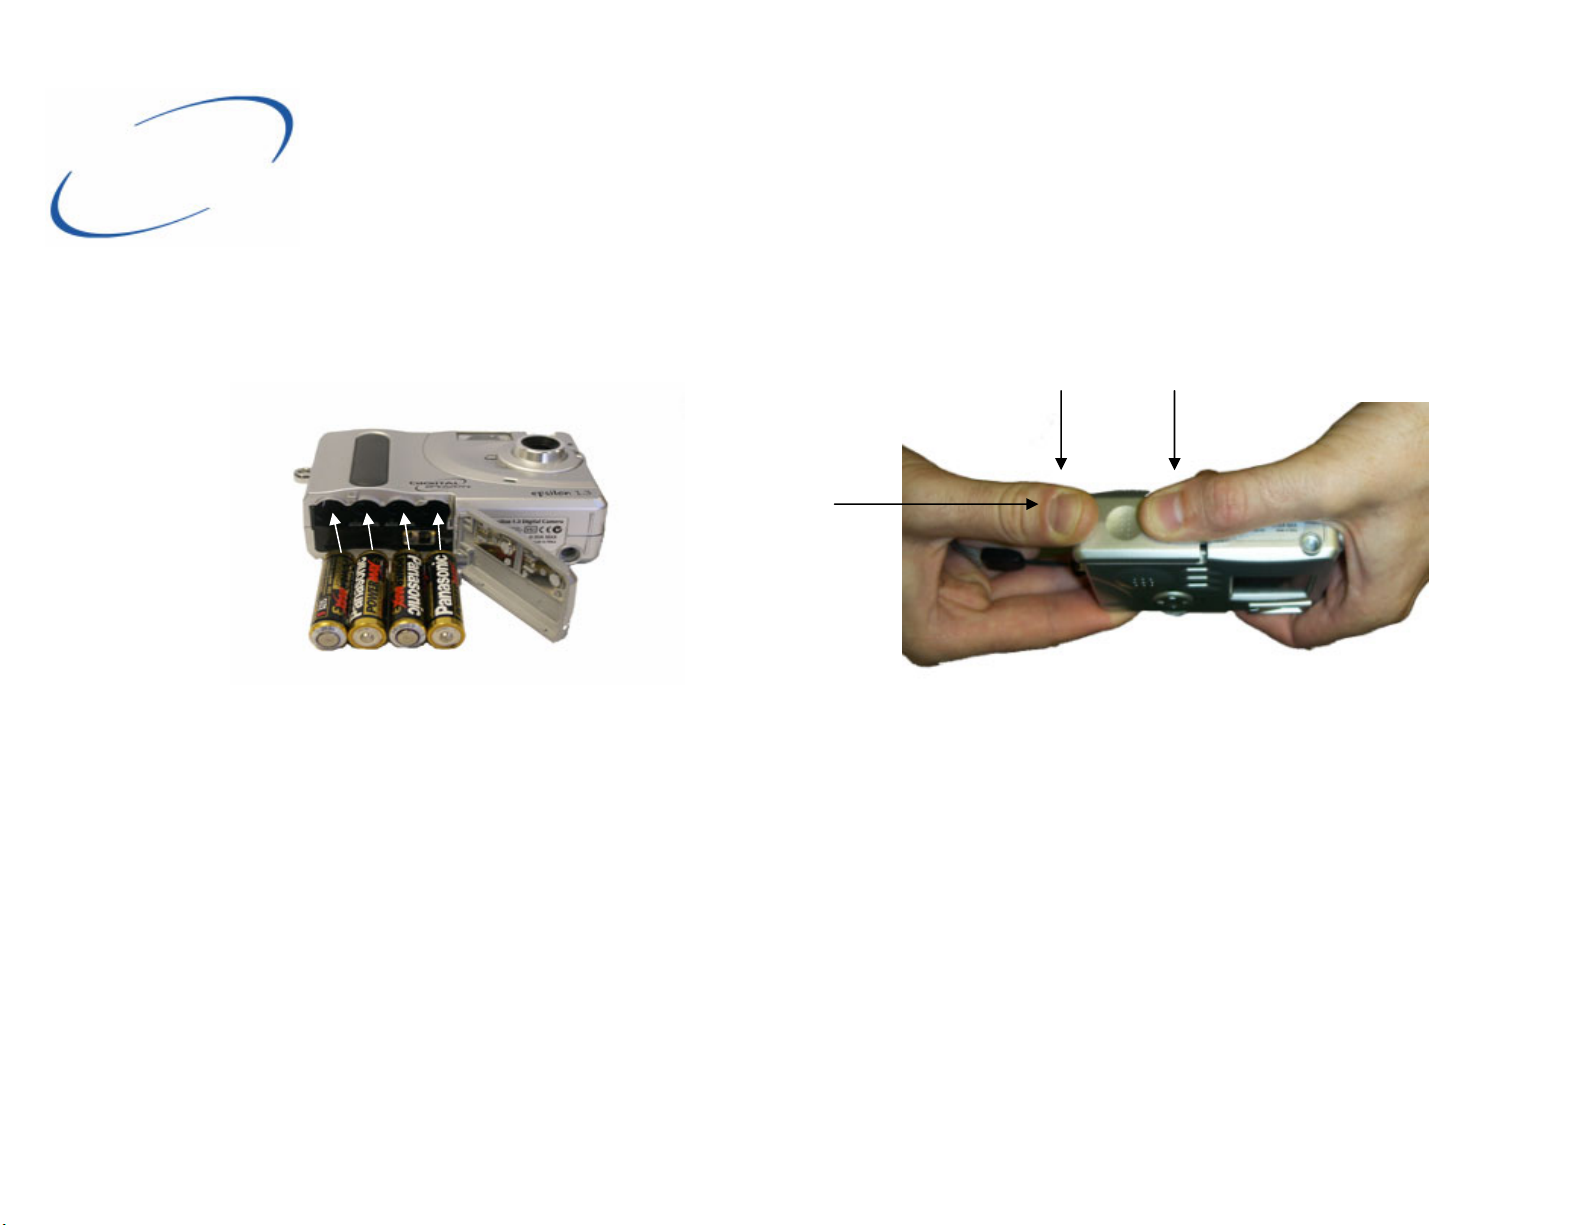
Your camera comes with 4 x AAA high performance alkaline batteries. It is recommended that you use high
performance alkaline batteries in your epsilon 2.1 digital camera. It is possible to use
rechargeable batteries but these may have a shorter life especially if you use Ni-CD rather than Ni-Mh.
1
2
— + — +
Slide open the battery compartment and insert the batteries as
illustrated.
Caution: Only use size AAA alkaline batteries. Batteries may leak or explode if handled improperly. Remove batteries (and memory card) from the camera if you are
going to store the camera for extended periods of time. Ensure the camera is turned off before inserting or removing batteries. Do not disassemble batteries. Do not
expose batteries to flames or excessive heat. Do not immerse batteries in or expose to water. Discontinue use immediately if you notice any changes in the battery
such as discoloration, deformation or leakage.
Push down on the battery door with both thumbs (1)
and slide the door inward while pushing down (2)
3

Inserting
SD Memory
You can use SD to increase the amount of storage capacity of your epsilon 2.1 camera.
The card can vary in capacity from16MB upwards, a 16MB card can hold up to 102 images.
To insert the SD (Secure Digital) card into the camera open the battery door on the bottom of the
camera. Slide the SD into the slot as illustrated.
To insert the SD card into the camera press
down on to the card until it clicks. Close the
To eject the SD card press down to
release it and then pull it out.
battery door as illustrated on the previous page.
Note: When not being used please store the SD card in the protective sleeve provided. Do not touch the gold contacts on the card or immerse in liquid. If the card becomes dirty, rub gently with a clean soft cloth and do not use solvents or abrasive materials as this will damage
the card.
4
Setting up the
Camera
1. Switch the epsilon 2.1 on by holding down the Power On/Off switch for a second.
2. Turn the mode selection switch so that the is lined up with red spot next to the power On/Off button.
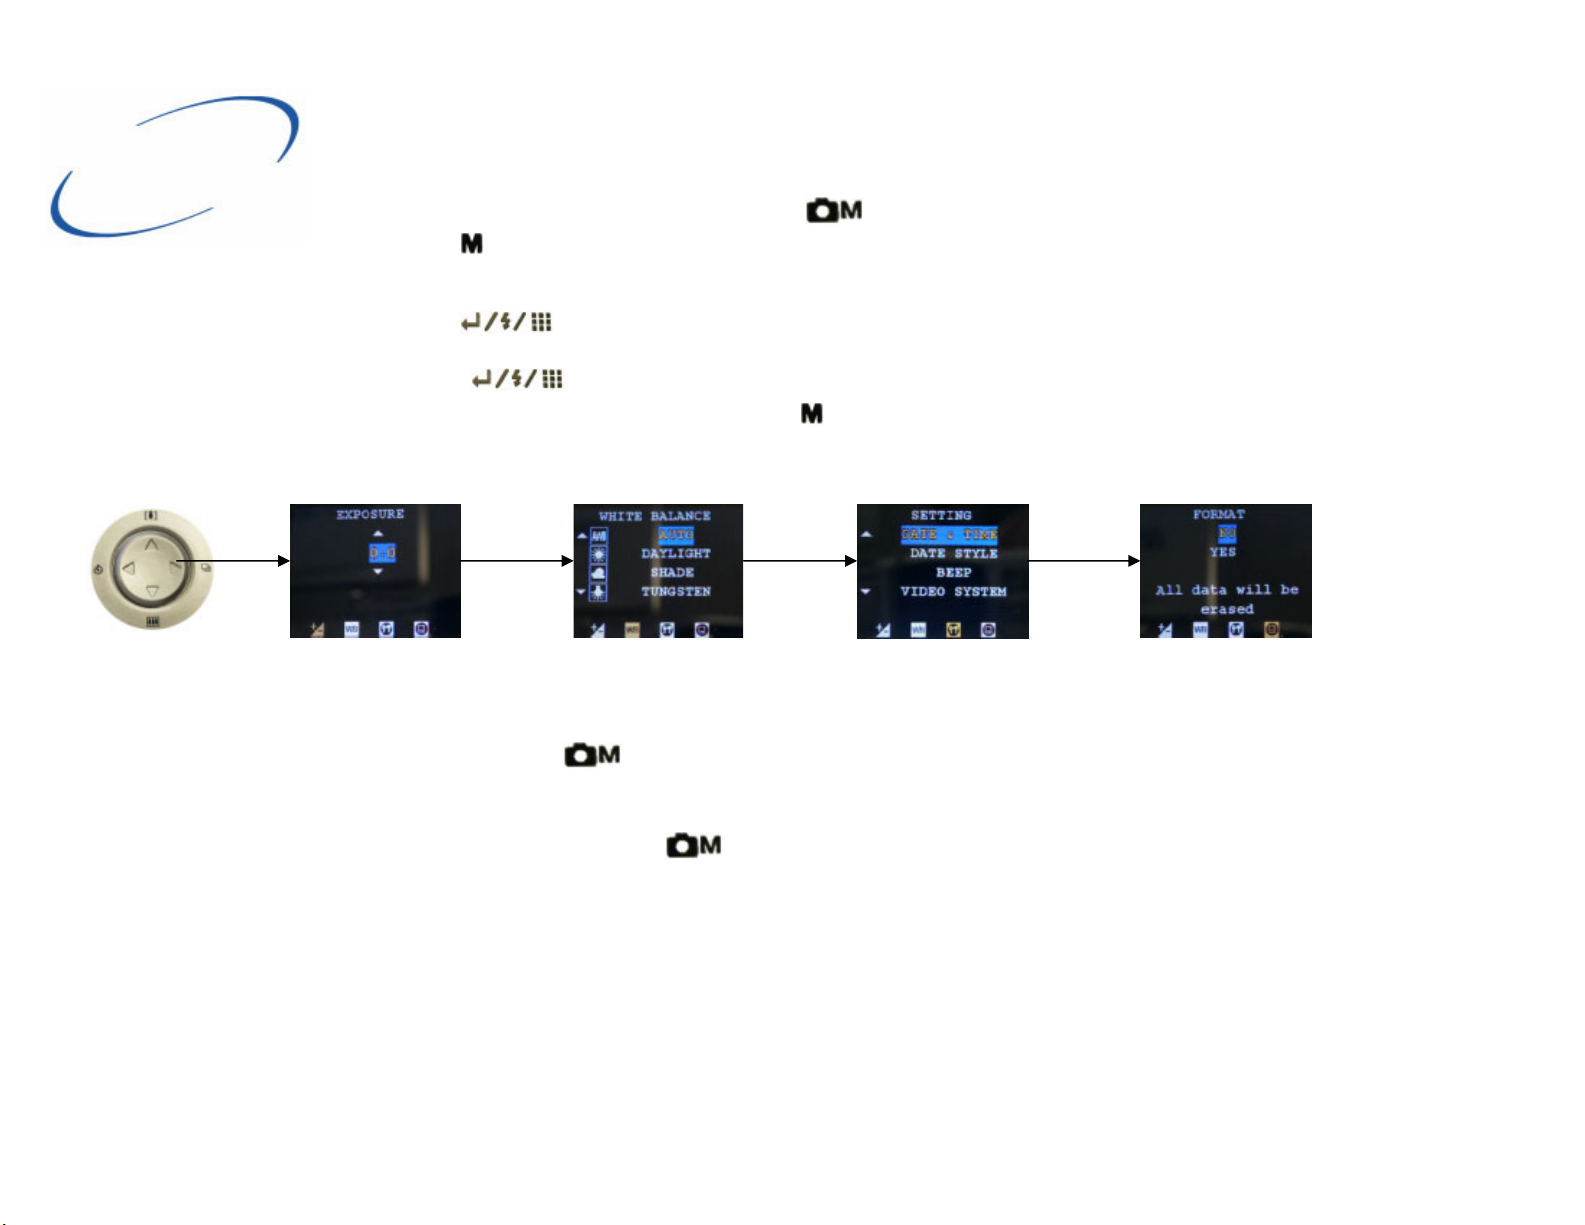
3. Press the (Mode) button on the camera and then the 4 way controller right until the “setting” mode is
displayed.
4. Use the 4 way controller up and down to cycle through the options.
5. Press the (Set) button to enter that option.
6. Use the 4 way controller to change the option.
7. Press the (set) button to save the option that you have changed.
8. To exit the mode settings simply press the (mode) button at any time.
4 way controller Exposure White balance Settings Format
Exposure
Use this option to set the camera’s exposure for Manual picture taking only.
White Balance
Use this option to adjust the light balance of the camera in Manual mode only. Select the appropriate light source from
the list. The options are:
Auto
Daylight
Shade
Tungsten
Flourescent.
Format
To clear the entire contents of the SD card or internal memory select “yes” and click on the set button to confirm.
5

Settings
Date and time: Set the date and time by moving the 4 way controller left/right
for the day/month/year/hour/minute, Move up/down to change and press Set to
confirm.
Date style: Choose the type of date/time style you prefer moving up and down
with the 4 way controller and then press Set to confirm.
Beep: You may select to have the camera sounds On or Off, press the Set button to confirm.
Video System: This is to set the type of output from the camera on your TV. For
Europe set “PAL” otherwise the images will appear black and white on your TV.
Image size: Select the size of image you wish to take pictures at. The larger the
picture the less images can be stored on the camera.
Press Set to confirm your selection.
Quality: There are 2 choices of quality, “normal” or “fine”. Press Set to confirm
your selection.
Self Timer: select the amount of time delay you require for shooting a self
timed image. Use the up and down on the 4 way controller to move between
the choices.
Language: Select the appropriate language and press Set to select. Please note
that English is the default factory setting.
Power saving: To reduce battery drain you can use the power saving functions
of the camera. You can select for the camera to switch off automatically after 1
minute, 2 minute or not at all. Press Set to confirm your choice.
6
 Loading...