

Digital Check TellerScan TS240 Installation Manual
● Note: Digital Check does not provide the
required device drivers or scanning software.
Please contact your bank, IT department or
other solution provider for further assistance
with installing the driver or getting the scanning
software set up or installed.
Do not connect the USB cable from the scanner
to your PC before installing the drivers or the
scanning application / software.
www.digitalcheck.com
Rev 072512
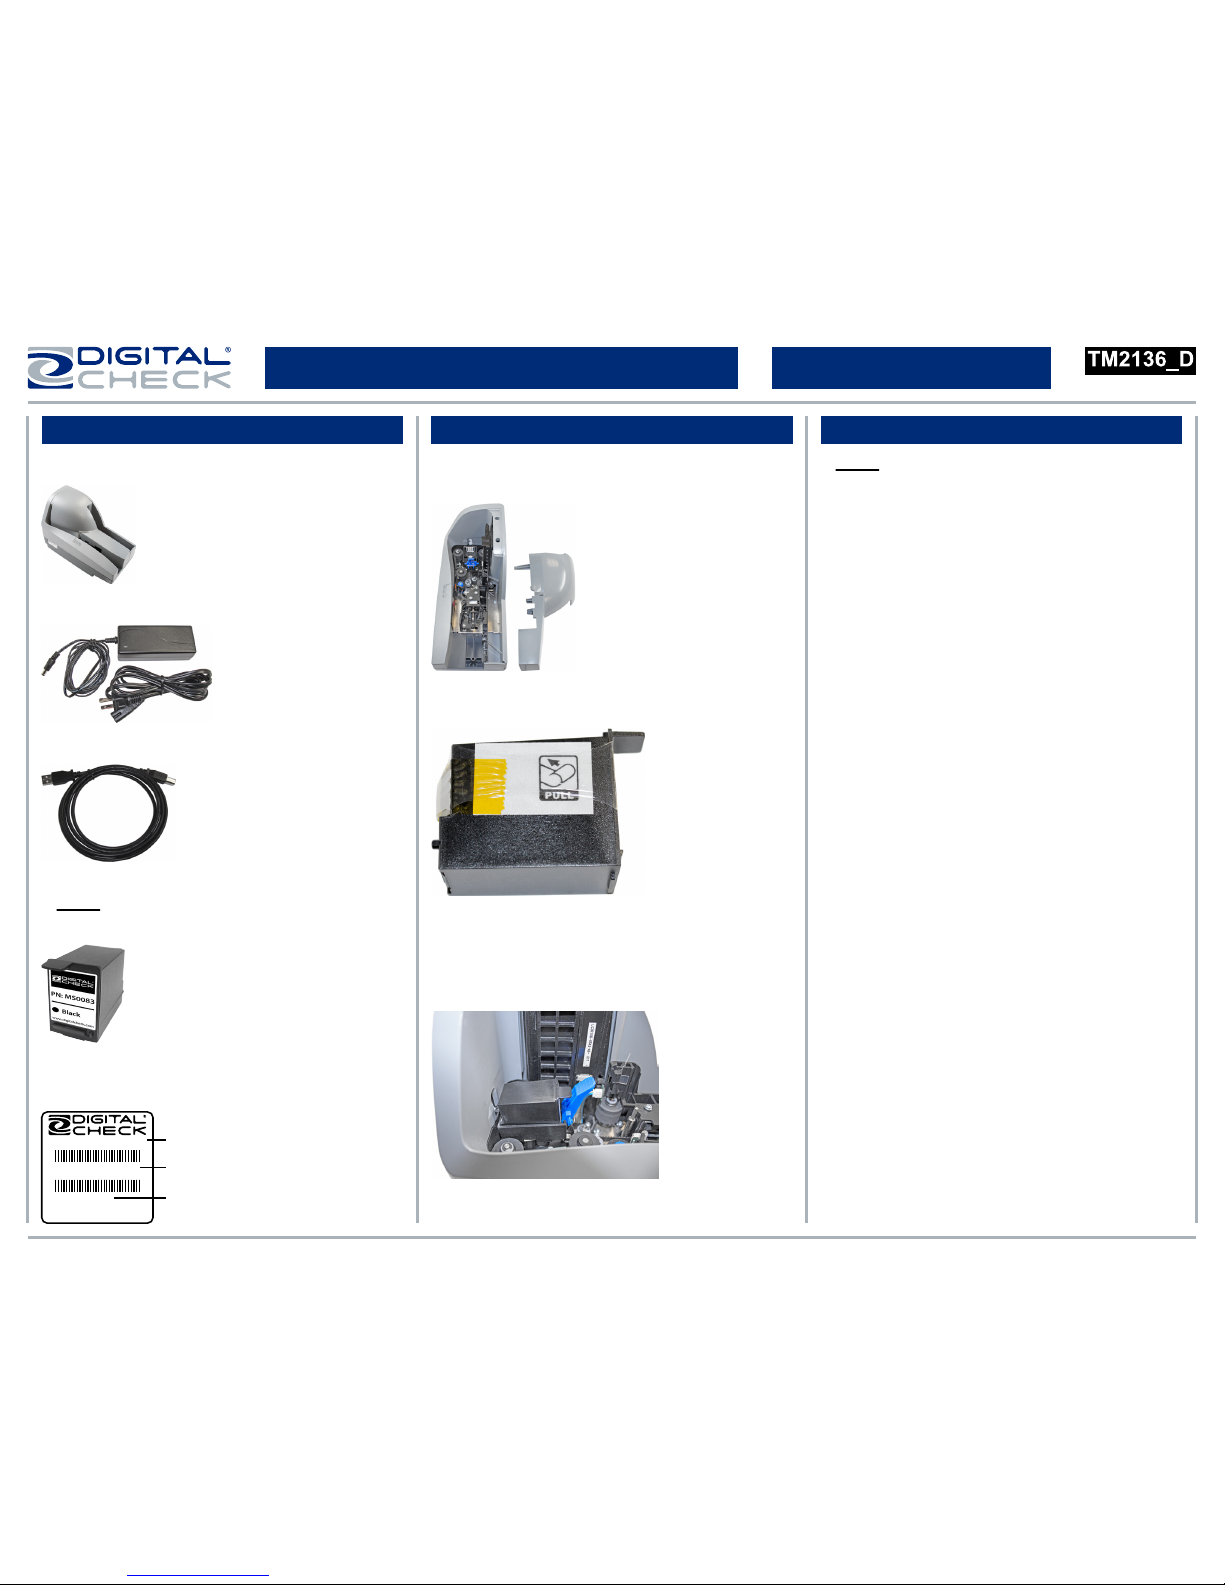
TellerScan® TS240 Easy Installation Guide
What’s Included Installing the Ink Cartridge Getting Started
▪ TellerScan TS240 scanner
● The label that is located on the bottom of the
scanner contains the exact model description.
● Open the ink cartridge package and remove
the protective seal.
● Insert the nozzle end of the cartridge into the
platform while keeping the end of the cartridge
tilted slightly upward. Push down on the rear of
the cartridge until it clicks twice and snaps
into position.
▪ USB 2.0 cable
▪ Power supply with electrical supply cord
▪ Ink cartridge
● Note: Only ‘Inkjet’ model scanners are
supplied with an ink cartridge.
● The cartridge should appear tilted at a slight
angle when it is fully seated. Reinstall cover.
MODEL: TellerScan 240 - 75 DPM
PN : 153000-02 Inkjet
SN : 707121234567
Scanner Speed
Optional Inkjet
Serial Number
● Remove the center cover by lifting it up
vertically.
● Turn off or disconnect other USB devices
such as USB printers or scanners. A mouse or
keyboard are okay to leave on or connected.
Note: This is only necessary when installing the
scanner driver or software the first time.
● When connecting the scanner, plug the power
supply into the scanner first, then into an outlet.
● Connect the USB cable to the PC after the
power cords and driver or software have been
successfully installed.
● Connect the scanner directly to an available
USB port on the PC.
● Place the scanner on level surface and 6-12
inches away from other electronic devices.
www.digitalcheck.com
Rev 072512
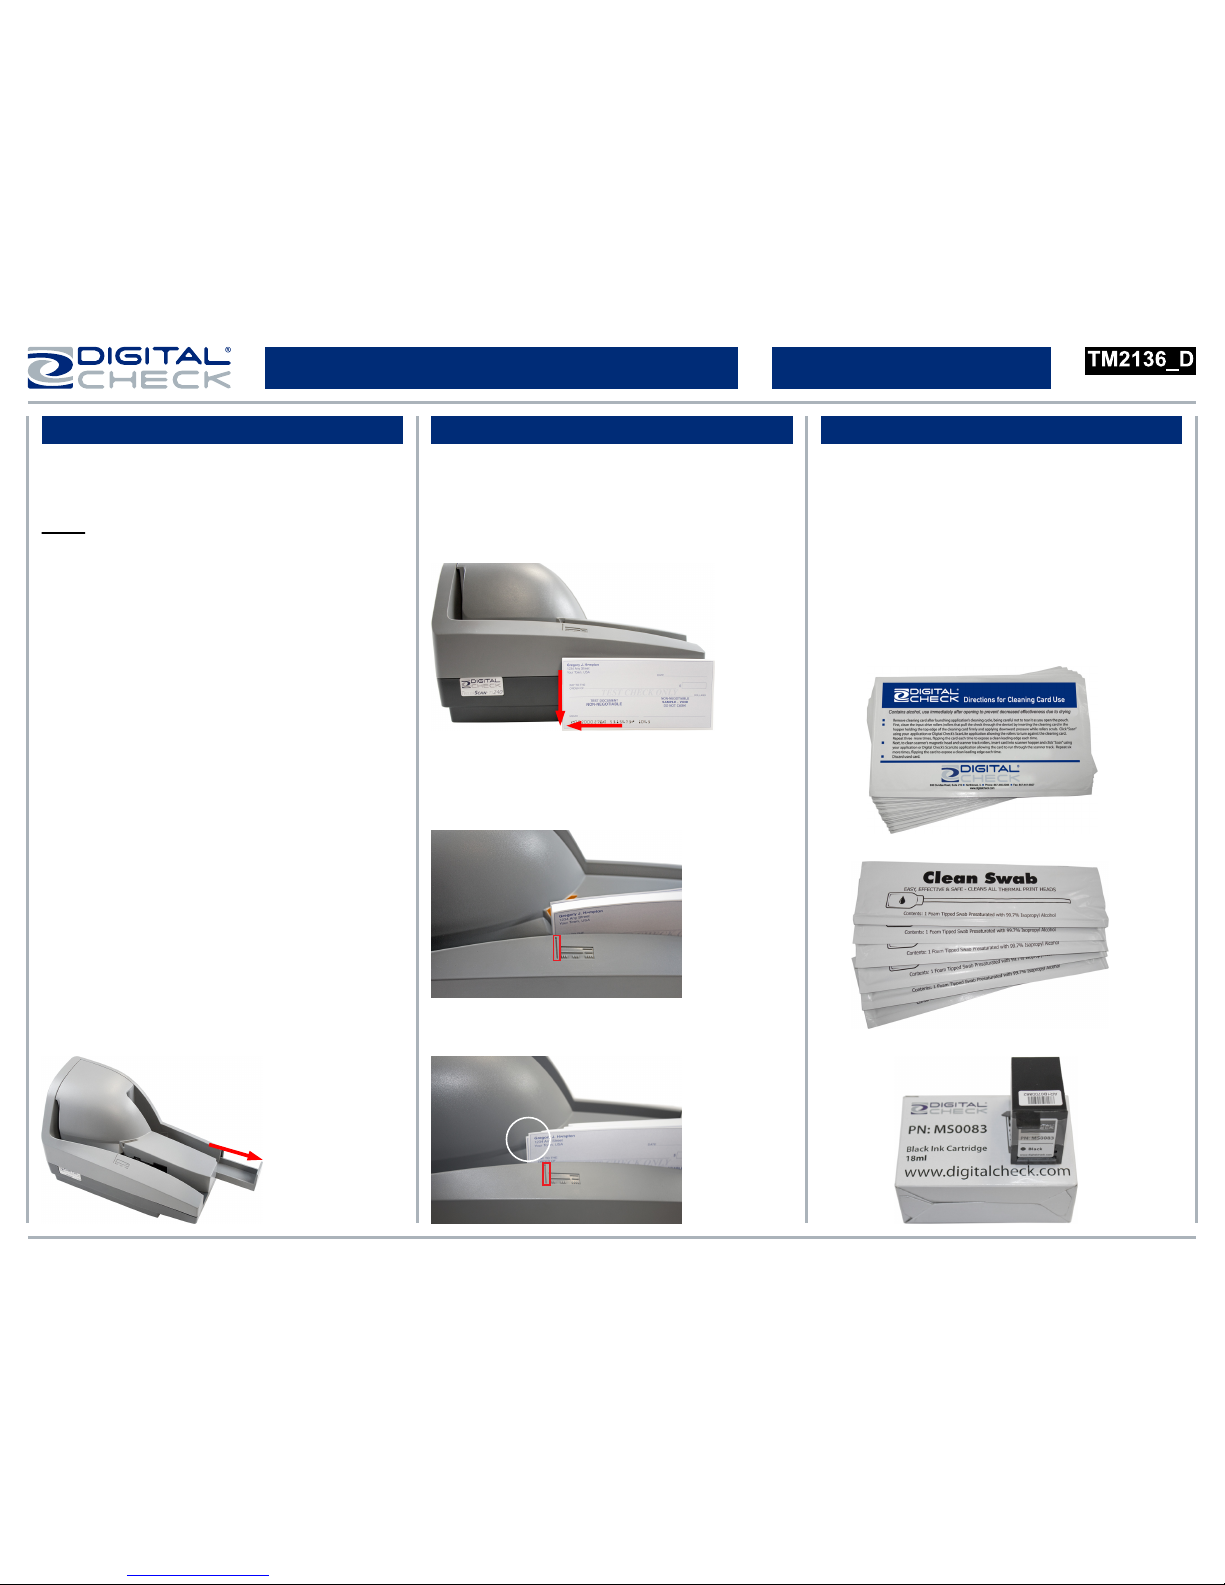
TellerScan® TS240 Easy Installation Guide
General Installation Tips Document Preparation Additional Information
● For detailed scanner information and tips for
performing routine maintenance, please see our
user manuals and training videos available at:
www.digitalcheck.com
● Scanner cleaning supplies and other
consumables and accessories can be
purchased directly from our online e-store.
● Align the leading and bottom edges of the
documents. Straighten any bent corners and
remove staples or paper clips on the items
before loading.
● Slide the item(s) up to the line on the body of
the scanner as indicated below. The status LED
light will turn ‘Orange’.
● Do not push or insert items past the line.
● Pull out the exit tray to accommodate larger
items such as business size checks.
 Loading...