

Digital Blue Show Pix, Disney Show Pix User Manual
Introduction
Share your memories with your new Show Pix viewer! Use the Show Pix software
to upload photos from your computer to your viewer. The software is Windows 2000,
ME, XP and Vista compatible.
Installing The Battery
The Show Pix viewer operates with one AAA battery (not included).
When it is connected to the computer, the viewer is powered by the USB.
Turning On/Off Power
1. Press and hold the Power button located on the side
of the viewer. Show Pix will beep twice, then power on.
2. If there are pictures loaded on the device, the first
picture will display.
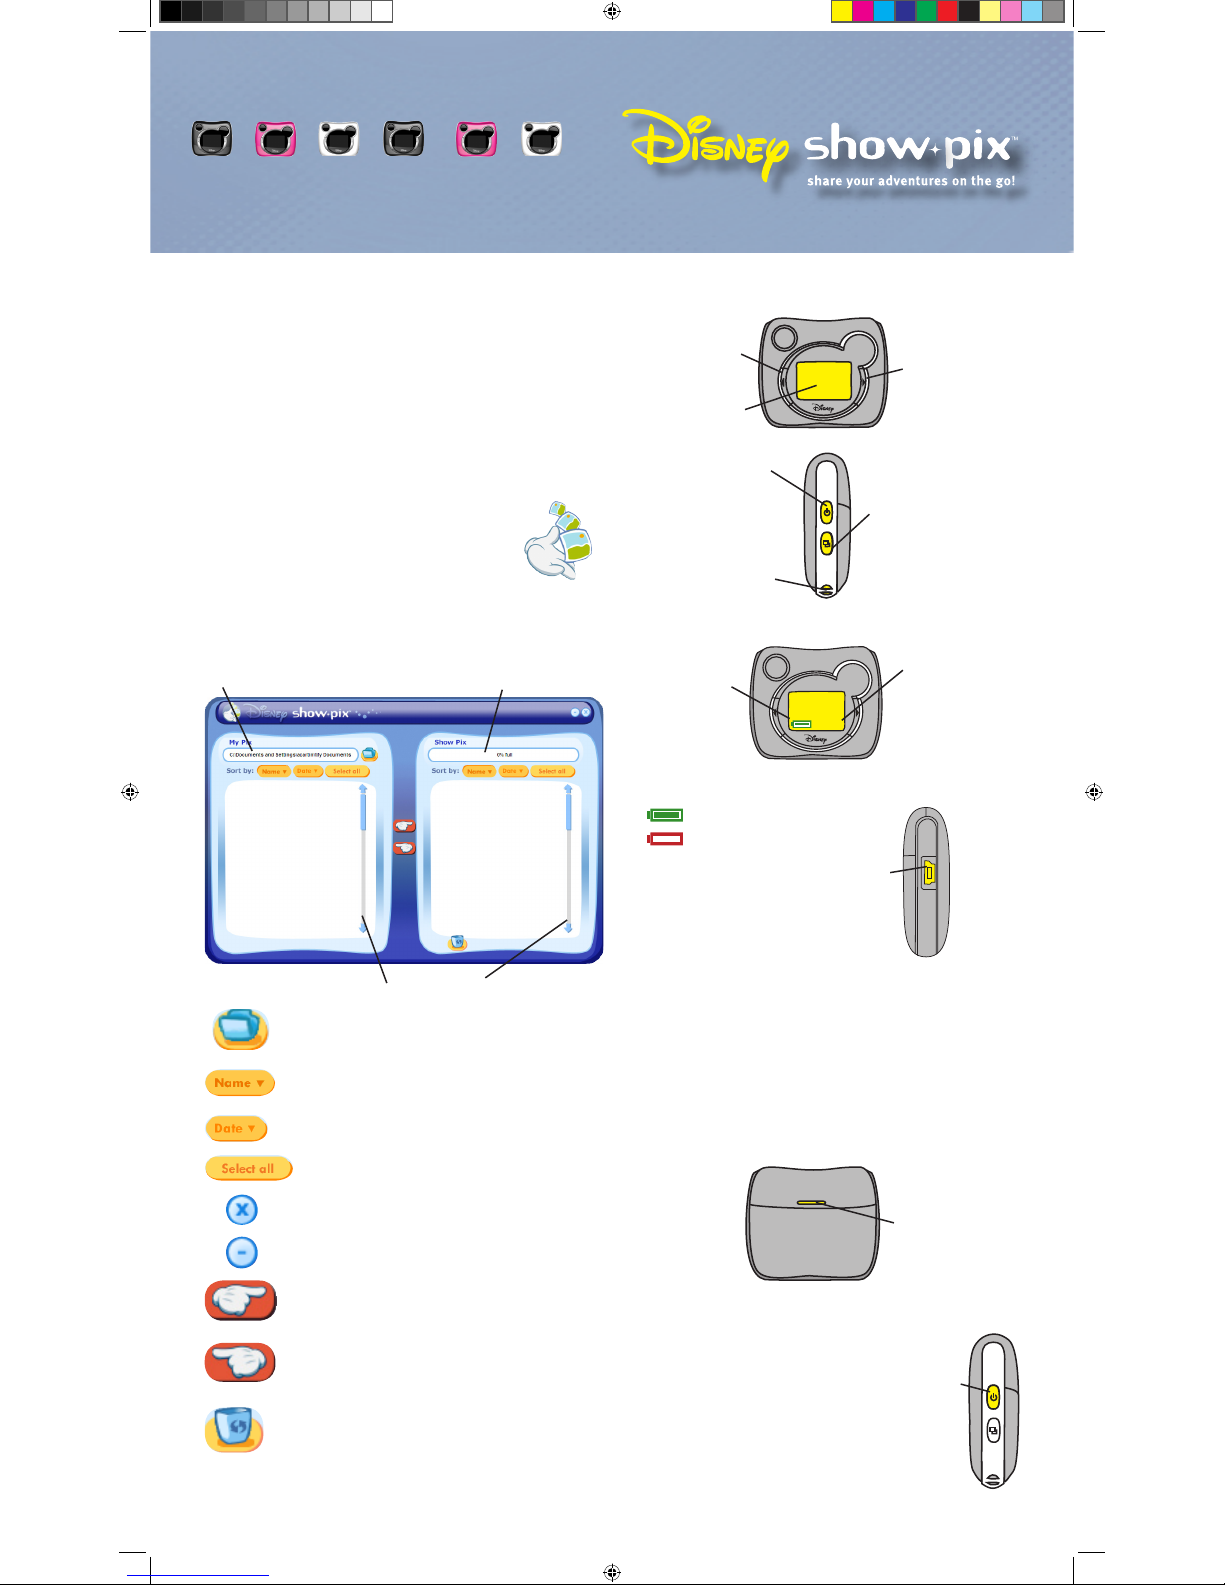
Show Pix Viewer Components
The Show Pix viewer allows you to upload and view photos on the go!
Battery door release-
Press this to open the
battery door.
1. Press the battery door release button.
2. Slide the battery door out.
3. Insert one AAA battery into the compartment. Use the polarity symbols (+/-)
to make sure the battery is positioned correctly.
4. Press the battery door down and slide it back into its closed position.
Note: To save battery power, the viewer will automatically
shut down after one minute of inactivity.
USB port- Plug
the USB cable
into the USB port
to connect the
viewer to your
computer.
Installing Show Pix Software
To upload pictures to the viewer, you will first need to install the software.
1. Insert the Show Pix software mini-CD into the CD/DVD drive on your computer.
2. If the installation process does not automatically start, go to the desktop and
double-click My Computer. Double-click the CD/DVD drive that contains the
Show Pix software. If this doesn’t start the installation program, click on the
CD/DVD drive then right-click and select Explore. Double-click setup.exe
and follow the instructions on the screen.
3. After you install the software, plug the viewer in to your computer.
Double-click on the Show Pix desktop icon to open the software
(if it is not already open). You are now ready to upload pictures!
Software Components
The Show Pix software enables you to upload photos from your computer to your
Show Pix viewer.
3. To turn the power off, press and hold the Power button.
The viewer will beep twice, then power off.
Memory bar-
Displays the amount of
memory available on your viewer.
Name button-
Sorts photos alphabetical by file name.
Date button-
Sorts photos by date.
Select all-
Selects all photos in the window.
Upload button-
Uploads pictures from your computer to the Show
Pix viewer.
Download button-
Downloads pictures from the Show Pix viewer
to your computer.
Trash can-
Use the trash can to delete photos on your viewer.
Close application-
Closes the software.
Minimize application-
Minimizes the software.
Browse window-
Displays folder
directories on your computer.
Note:
You can only delete photos from the Show Pix window.
You are not able to delete photos from the My Pix window.
Scroll bars-
Scrolls through photos in
My Pix and Show Pix windows.
My Pix window
Allows you to see
pictures on your
computer.
Show Pix window
Allows you to see
pictures on your
viewer.
Auto Slide
Show button-
Continuously
scrolls through
photos on the
LCD screen.
Power button-
Use to power
the viewer on
and off.
Keychain loop-
Hooks the keychain
(included) to the viewer.
Forward button-
Navigates to the
next photo stored
in Show Pix
memory.
Backward button-
Navigates to the
previous photo stored
in Show Pix memory.
Display screen-
Displays your photos.
6/23
Power button-
Turns the viewer
on and off.
Browse-
Shows the location of directories from which you can upload
photos. The default directory is
My Pictures
.
Image counter-
The left number on
the image counter
shows the number
of the picture you
are viewing. The
number on the right
displays the total
number of pictures
stored in memory.
Battery icon-
Appears on the
bottom left part of
the screen. Once
the battery is
empty, Show Pix
will beep 3 times
and power off.
Battery is full.
Battery is low.
ShowPix.QSG.Final.indd 1 12/1/06 10:31:55 AM
3. Click on “Browse for photos” folder button. Choose the folder
where your photos are stored. You can upload .jpeg, .bmp, .gif
and .png files. To select a different folder, click on the “Browse for
photos” button and select the folder in the window you want to use.
4. Press the “Ok” button to view pictures in the My Pix window.
5.
Your photos will be displayed as thumbnails.
*Press the “Name” button to arrange your photos by name.
*Press the “Date” button to arrange your photos by date.
*
To view a larger version of the thumbnail, double-click it.
6. Select the photos you want to upload to your Show Pix viewer.
You will notice the selected pictures are highlighted.
*
To select a single photo, click on the picture you want to choose.
*
To select multiple photos, press Ctrl and left-click on each of the
photos you want to select.
*
Press “Select All” to choose all the photos in the folder.
7. Press the Upload button to upload pictures from
your computer to your Show Pix viewer. The uploaded
pictures will display in the right hand window.
8. When your pictures are finished uploading, close the software application.
9. Now you are ready to show off your pictures! Disconnect the Show Pix viewer from
your computer and have some fun!
Uploading Pictures
Show Pix can hold up to 50 of your favorite photos!
To upload pictures:
1. Connect the viewer to your computer using the USB port and cable.
2. Make sure the Show Pix software is installed on your computer.
(see Installing Show Pix software) Double-click on the
Show Pix desktop icon to open the software.
Downloading Pictures
(continued)
4. In the software, select the photos you want to download.
You will notice selected
photos are highlighted.
*
To select a single picture, click on the photo you want to choose.
*
To select multiple pictures, press Ctrl and left-click on each of the
photos you have chosen.
*
Press “Select All” to choose all the photos in the folder.
5. Select the folder you want to download to. Your photos will save in
the folder that is displayed in the My Pix Browse window. To select a
different folder, click on the “Browse for photos” button and select the
folder in the window you want to use.
6. Press the Download button to download pictures from the Show Pix
viewer to your computer. Another option for downloading pictures
is to drag selected photos from the Show Pix window and drop
them in the My Pix window.
Viewing A Slide Show
The Show Pix Slide Show is a fun way to share all of your pictures automatically!
To view pictures in Slide Show:
1. Press and hold the Power button.
2. Press the Slide Show button and watch your
pictures display automatically!
3. To return to viewing pictures one at a time, press the Slide Show
button again. You can also press the Forward or Backward buttons
to exit out of Slide Show.
Viewing Pictures
To scroll through photos on the viewer:
1. Press and hold the Power button.
2. Press the Forward or Backward button to scroll through photos.
Downloading Pictures
You can download pictures from the Show Pix viewer and save them on your computer.
This feature allows you to share photos with your friends!
To download pictures to your computer:
1. Make sure the Show Pix software is installed on your computer.
(see Installing Show Pix software) Double-click on the
Show Pix desktop icon to open the software.
2. Connect the viewer to your computer. You will notice a dialog
box appear that reads “Show Pix is connected to computer”.
Click the “Ok” button to continue.
3. The Show Pix viewer will begin to load photos for display in the software. Notice
the progress bar tracking its progress. You will see all pictures from your
viewer displayed in the software window named “Show Pix”. Now you can
download pictures to your computer!
Deleting Pictures On The Show Pix Viewer
To delete photos from the Show Pix viewer:
1. First, select the picture(s) you want to delete.
Selected photos become highlighted.
*
To select a single picture, click on the photo you want to delete.
*
To select multiple pictures, press Ctrl and left-click on each of the photos
you want deleted.
*
Press “Select All” to choose all the photos in the folder.
2. Click on the trash can icon and you will be asked if you would
like to delete your photos. You can also delete pictures if you drag
them to the trash can.
Show Pix USB mode
When you connect the viewer to your computer,
it will go into USB mode. The display will show a
message saying “USB connected”. In this mode,
the buttons on your viewer will become inactive.
To exit USB mode, simply disconnect the viewer
from your computer.
Auto Slide Show
button- Scrolls through
all of your photos
automatically.
Disney Elements © Disney 2006. All Rights Reserved. All brands and product names mentioned are trademarked or
registered trademarks of their respective companies. Digital Blue ™ © 2006 Prime Entertainment, Inc. All Rights Reserved
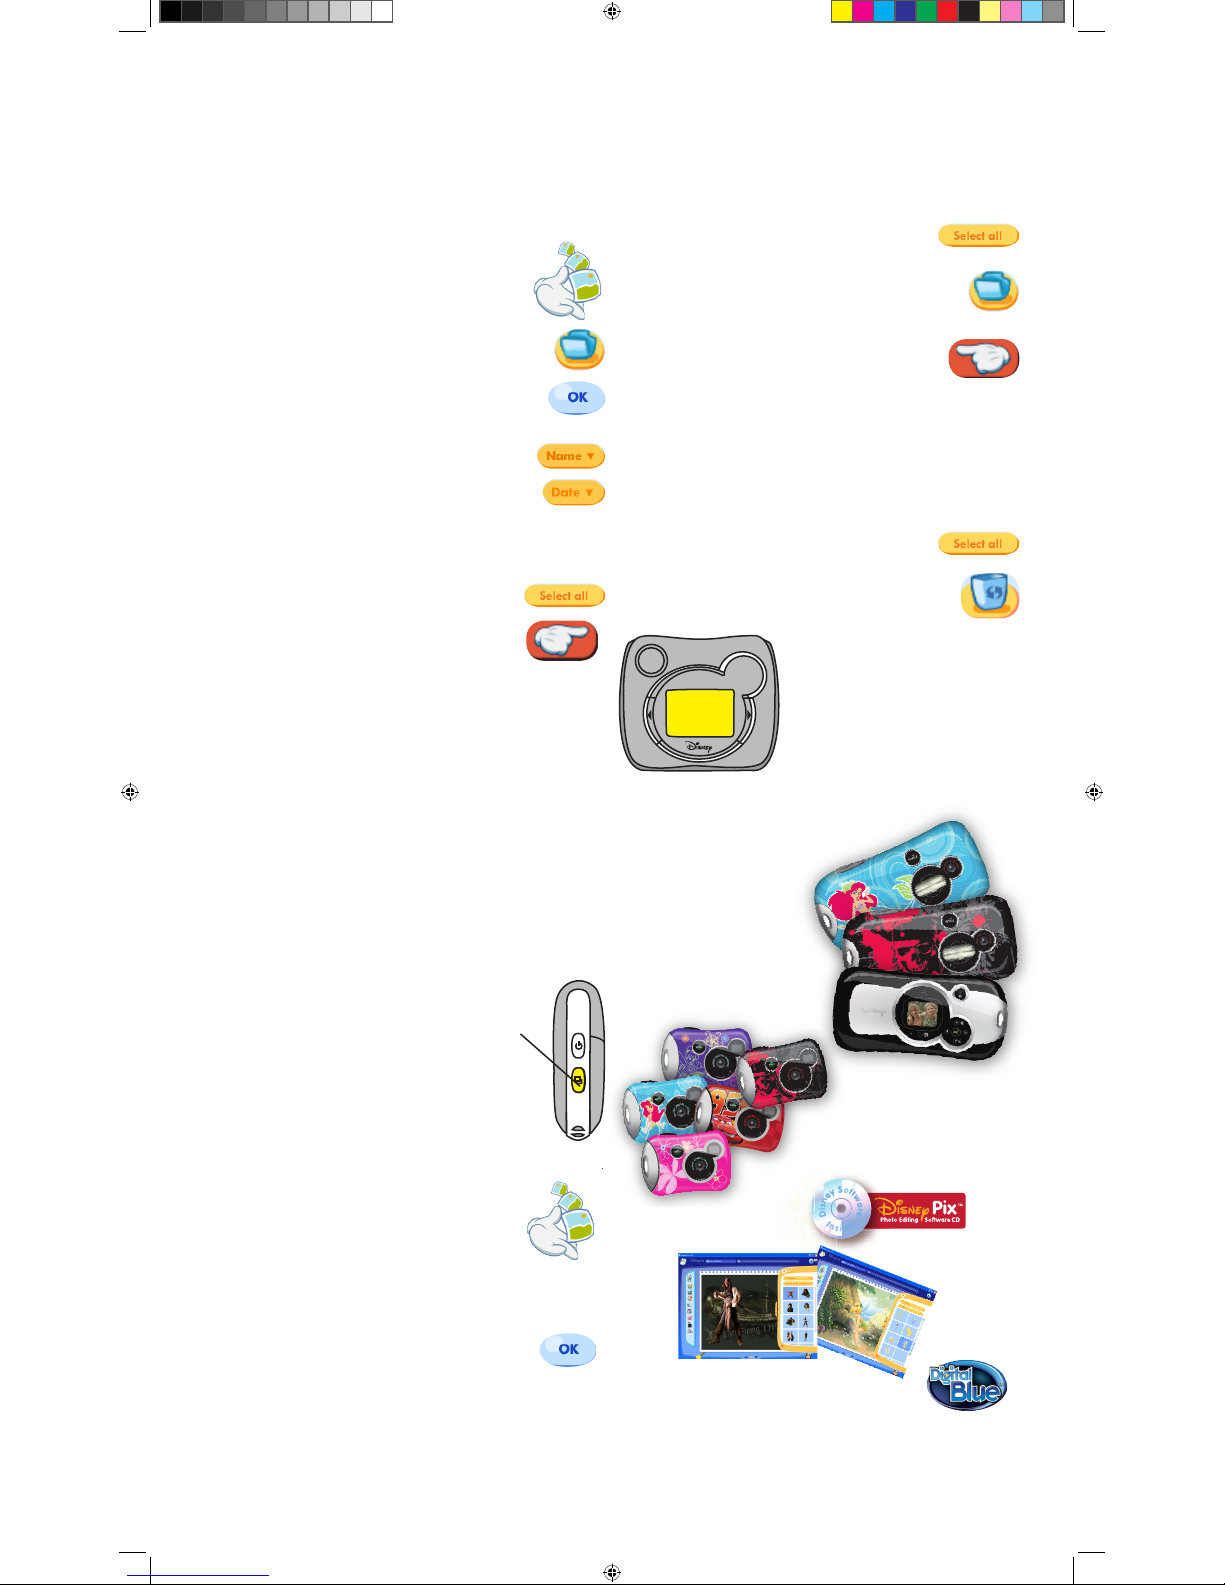
Disney Pix Click™
Disney Pix Click Micro™
USB
connected
Note: These photos will be a very low resolution and only good
for viewing on Show Pix.
Note:
You can also drag selected photos across the My Pix
window to the Show Pix window.
Get your own Disney camera now!
Available at your local retailer.
For additional product support visit our website at:
www.PlayDigitalBlue.com and select Customer Service.
If you are still having problems with this product, please contact
Customer Support at 888-800-0502
Note:
Your viewer will be in USB mode. In this mode,
the buttons on your viewer will become inactive.
All cameras come with
Note: Do not disconnect viewer when loading photos!
ShowPix.QSG.Final.indd 2 12/1/06 10:32:07 AM
 Loading...