

Digital Arts & Sciences IMAGEAXS 4 FOR WINDOWS User Manual

ImageAXS
4.0
ImageAXS
Version 4.0 for Windows
User’s Guide
1301 Marina Village Parkway
Alameda, California 94501
USA
(800) 449-6220 Sales • (510) 814-7200 Support
(510) 814-6100 Fax
http://www.dascorp.com

ImageAXS
™ 4.0
Windows
Copyright © 1991-1999 by Digital Arts & Sciences and its licensor(s). All rights reserved. Use of copyright notice does not imply publication or disclosure. No part of the contents of this document may be reproduced or transmitted in any form or by any means without the
written permission of Digital Arts & Sciences.
Some imaging technology provided under license from AccuSoft Corporation. Portions copyright 1996 AccuSoft Corporation. All rights
reserved.
Sample images distributed with ImageAXS and pictured in this manual are made available for non-commercial, personal use only. Copying
or redistribution in any manner for personal or corporate gain is not permitted. Commercial publication or exploitation of these files is
specifically prohibited.
Use of this document and ImageAXS is governed by a Software License Agreement that specifies their permitted and prohibited uses. This
document contains confidential and proprietary information constituting valuable trade secrets. This document (or any portion thereof)
may not be: (a) disclosed to third parties, (b) copied in any form, or (c) used for any unauthorized purpose.
ImageAXS is a trademark of Digital Arts & Sciences. All other company and product names are trademarks of their respective companies.
This technical data is provided with RESTRICTED RIGHTS. Use, duplication, or disclosure by the Government is subject to restrictions as
set forth in subparagraph (c) (1) (ii) of the Rights in Technical Data and Computer Software clause at DFARS 252.227-7013, and in subparagraphs (a) through (d) of the Commercial Computer - Restricted Rights clause at FAR 52.227-19, and in similar clauses in the NASA
FAR Supplement, when applicable. Contractor/Manufacturer is: Digital Arts & Sciences, 1301 Marina Village Parkway, Alameda, CA
94501.
This Software media is warranted to be free from defects in materials and workmanship for a period of 90 days from the date of shipment.
DIGITAL ARTS & SCIENCES, ITS LICENSOR(S), AGENTS AND DISTRIBUTORS MAKE NO WARRANTIES, EXPRESS OR IMPLIED,
INCLUDING WITHOUT LIMITATION THE IMPLIED WARRANTIES OF MERCHANTABILITY AND FITNESS FOR A PARTICULAR PURPOSE, REGARDING THE SOFTWARE. THEY DO NOT WARRANT, GUARANTEE OR MAKE ANY REPRESENTATIONS REGARDING
THE USE OR THE RESULTS OF THE USE OF THE SOFTWARE IN TERMS OF ITS CORRECTNESS, ACCURACY, RELIABILITY, CURRENTNESS OR OTHERWISE. THE ENTIRE RISK AS TO THE RESULTS AND PERFORMANCE OF THE SOFTWARE IS ASSUMED BY
YOU. BECAUSE THE EXCLUSION OF IMPLIED WARRANTIES IS NOT PERMITTED BY SOME JURISDICTIONS, THE ABOVE EXCLUSION MAY NOT APPLY TO YOU.
IN NO EVENT WILL DIGITAL ARTS & SCIENCES, ITS AGENTS, DISTRIBUTORS, LICENSOR(S), AND THEIR DIRECTORS, OFFICERS,
EMPLOYEES OR AGENTS (COLLECTIVELY DIGITAL ARTS & SCIENCES’ LICENSOR) BE LIABLE TO YOU FOR ANY CONSEQUENTIAL, INCIDENTAL OR INDIRECT DAMAGES (INCLUDING DAMGES FOR LOSS OF BUSINESS PROFITS, BUSINESS
INTERRUPTION, LOSS OF BUSINESS INFORMATION, AND THE LIKE) ARISING OUT OF THE USE OR INABILITY TO USE THE
SOFTWARE EVEN IF ANY ONE OR ALL HAVE BEEN ADVISED OF THE POSSIBILITY OF SUCH DAMAGES. BECAUSE SOME JUSRISDICTIONS DO NOT ALLOW THE EXCLUSION OR LIMITATION OF LIABILITY FOR CONSEQUENTIAL OR INCIDENTAL DAMAGES,
THE ABOVE LIMITATIONS MAY NOT APPLY TO YOU. Digital Arts & Sciences’, its licensors’, agents’, and distributors’ liability to you for
actual damages from any cause whatsoever, and regardless of the form of the action (whether in contract, tort (including negligence), product liabilty or otherwise), will be limited to $50.
The detailed terms of the Limited Warranty and Disclaimer, and Limitations of Liability are set forth in the Software License Agreement
enclosed with the Software.
Printed February, 1999
ii

Chapter 1 Installation and Startup
Installing ImageAXS 1-1
Starting ImageAXS 1-6
Opening the sample collection 1-6
Chapter 2 ImageAXS Basics
Collections 2-1
Records 2-2
Views 2-3
Toolbars 2-4
Standard toolbar 2-4
Edit toolbar 2-5
View toolbar 2-5
Record toolbar 2-5
Search toolbar 2-6
Zoom toolbar 2-7
Status Bar 2-10
Thumbnail icons 2-11
Refreshing volumes 2-12
File information 2-13
ImageAXS
4.0
C
Contents
Chapter 3 Collections
Creating a new collection 3-1
Setting preferences 3-3
Assigning field and thumbnail labels 3-3
System settings 3-5
Appearance 3-5
Behavior 3-7
Messages 3-7
Thumb Size 3-8
ImageAXS 4.0
iii

Contents
Creating records 3-9
The Select Thumbnail dialog box 3-12
Opening an existing collection 3-13
Viewing and editing collection information 3-14
Closing a collection 3-15
Chapter 4 Portfolios
Overview 4-1
Creating a new portfolio 4-3
Adding records to a portfolio 4-5
Dragging and dropping from collections into portfolios 4-5
Acquiring source files from within a portfolio 4-6
Removing records from a portfolio 4-7
Sorting records in a portfolio 4-8
Opening an existing portfolio 4-9
Closing a portfolio 4-10
Deleting a portfolio 4-11
Chapter 5 Views
Overview 5-1
Thumbnails View 5-2
Navigating 5-2
Text List View 5-4
Navigating 5-4
Configuring the Text List View 5-5
Info Sheet View 5-6
Navigating 5-6
Entering data 5-7
Saving a record 5-7
Keywords View 5-8
Navigating 5-8
Master Keyword List 5-8
Removing keywords from the Master Keyword List 5-9
Attaching keywords to a record 5-9
Removing keywords from a record 5-10
Source File View 5-11
Zooming in and out 5-12
iv

Contents
Scaling 5-13
Playing audio source files 5-13
Playing movie source files 5-14
Slide Show 5-15
Source File View toolbar options 5-16
Zoom toolbar 5-16
Chapter 6 Managing Records and Source Files
Selecting records 6-2
Creating blank records 6-3
Copying and pasting records 6-4
Copying source files 6-5
Moving source files 6-7
Deleting source files 6-8
Deleting records from a collection 6-9
Orienting thumbnails and image source files 6-10
Updating records 6-11
Updating multiple records 6-12
Renaming a source file 6-14
Source file information 6-15
Editing a source file 6-17
Navigating to a specific record 6-18
Counting words in a record or selection of records 6-19
Copying images to the clipboard 6-20
C
ImageAXS 4.0
v

Contents
Chapter 7 Keywords
Modifying keywords in the Master Keywords list 7-2
Attaching keywords to multiple records 7-3
Importing and exporting keywords 7-4
Exporting keywords 7-4
Importing keywords 7-4
Chapter 8 Searching and Sorting
Searching 8-2
Search results 8-4
Searching found records and selections of records 8-5
Keyword searching 8-6
The Advanced Keyword Search dialog box 8-8
Sorting 8-10
Chapter 9 Importing and Exporting Records
Importing CSV text formatted data 9-2
Importing ImageAXS2.x formatted data 9-3
Exporting CSV text formatted data 9-4
Chapter 10 Printing and Reports
Printing 10-2
The Print Preview window 10-4
Print Preview toolbar 10-4
The Page Setup dialog box 10-5
The Print Setup dialog box 10-7
Text List Reports 10-8
The Text List Report dialog box 10-9
The Custom Report dialog box 10-10
Fields 10-10
Fixed Text 10-12
Dimensions 10-13
Font/Size 10-14
Template 10-15
vi
Installation and Startup
/*
1
Installation and Startup
Chapter 1
ImageAXS
4.0
1
Chapter Topics
Installing ImageAXS
Installing ImageAXS 1-1
Starting ImageAXS 1-6
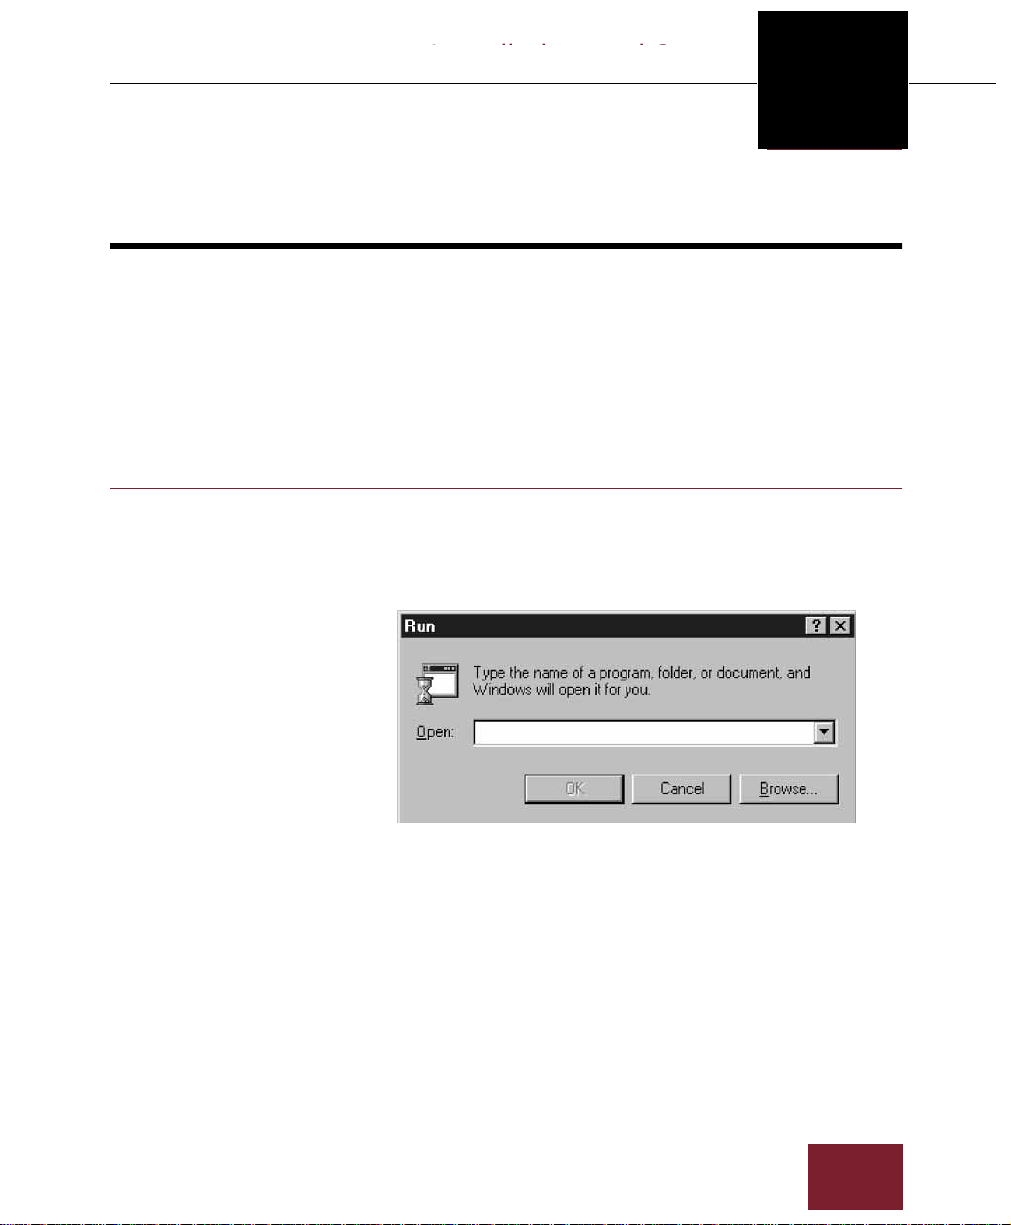
To install ImageAXS:
1. Insert the ImageAXS CD-ROM into your CD-ROM drive.
2. Choose Run from the Start menu.
Run dialog box
ImageAXS 4.0
1-1
Windows
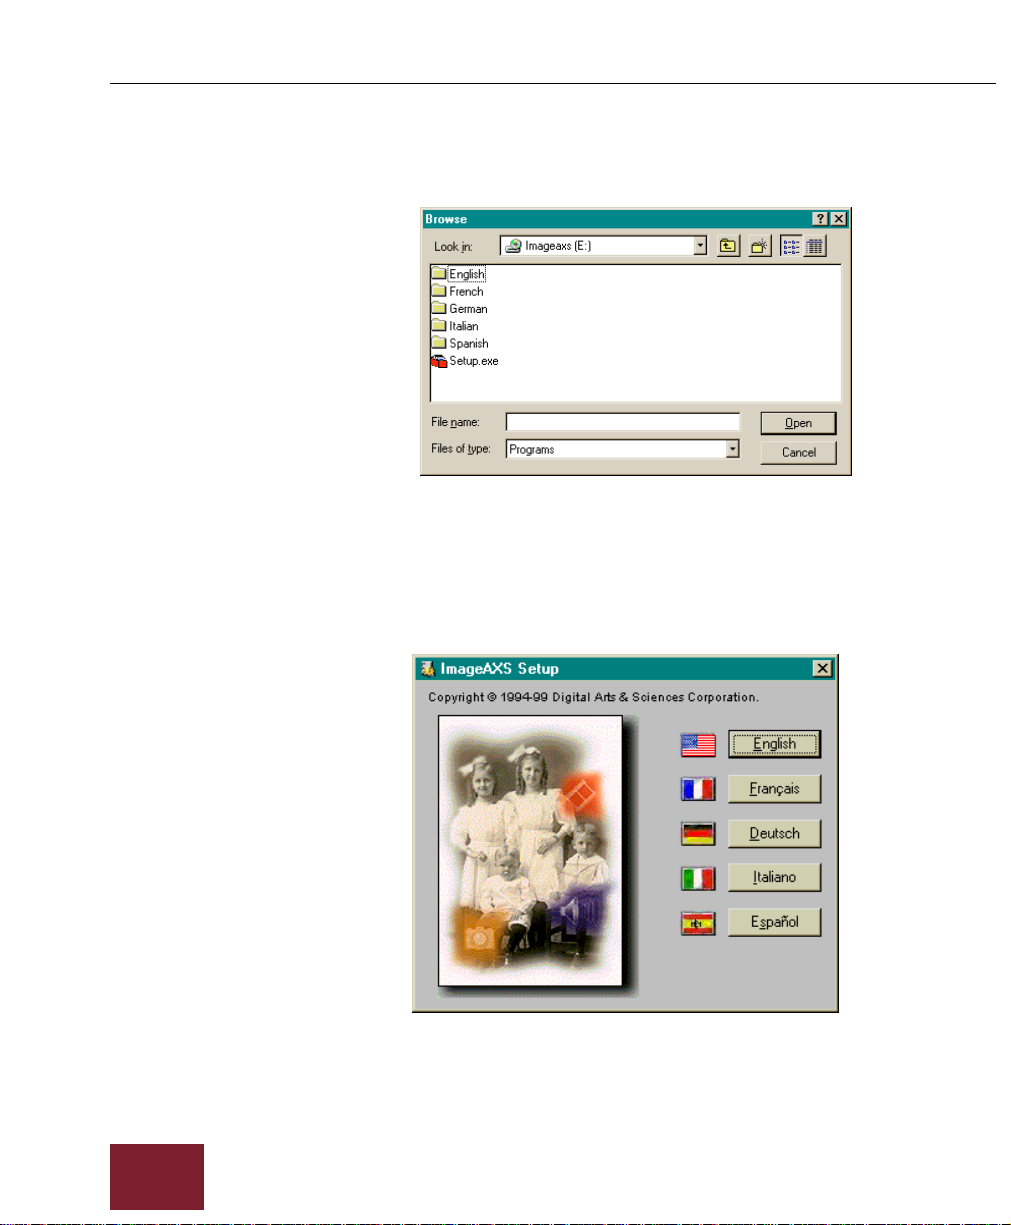
3. Click Browse.
Browse dialog box
4. Navigate to the drive containing the ImageAXS installation
CD-ROM and select the file SETUP.EXE. Click Open.
5. In the Run dialog box, click OK.
The first ImageAXS Setup dialog box will appear, asking
you to select a language.
1-2
6. Click on the name of your preferred language.
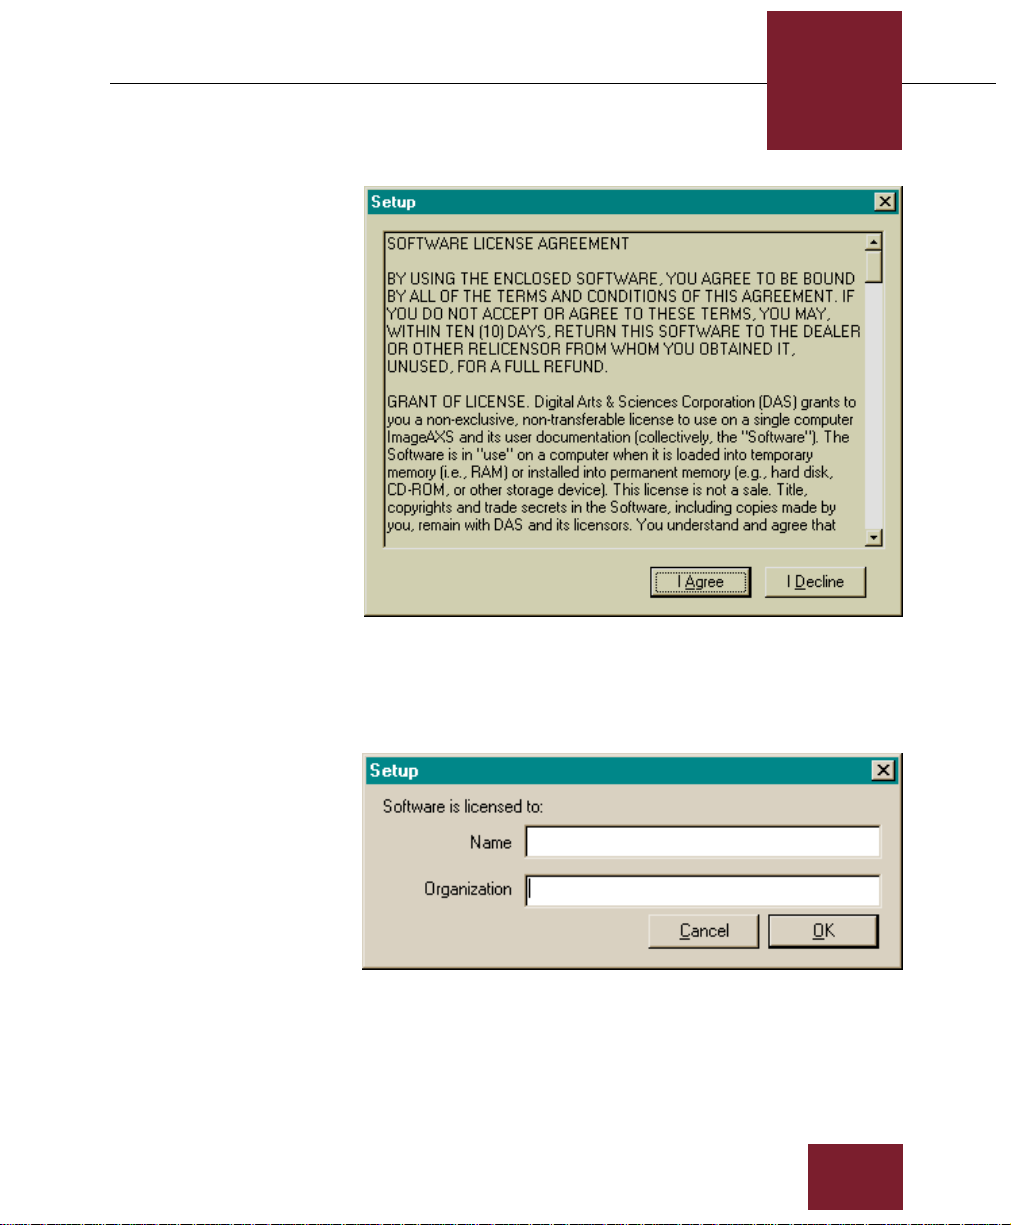
The License Agreement dialog box appears.
ImageAXS 4.0
Installation and Startup
1
License Agreement dialog box
7. Click I Agree to accept the license agreement. (If you click I
Decline, the installation process will be cancelled.)
The next dialog box will ask you to identify who is
licensing the software.
8. Enter your name and your company’s name (if any) and click
OK.
ImageAXS 4.0
1-3
Windows
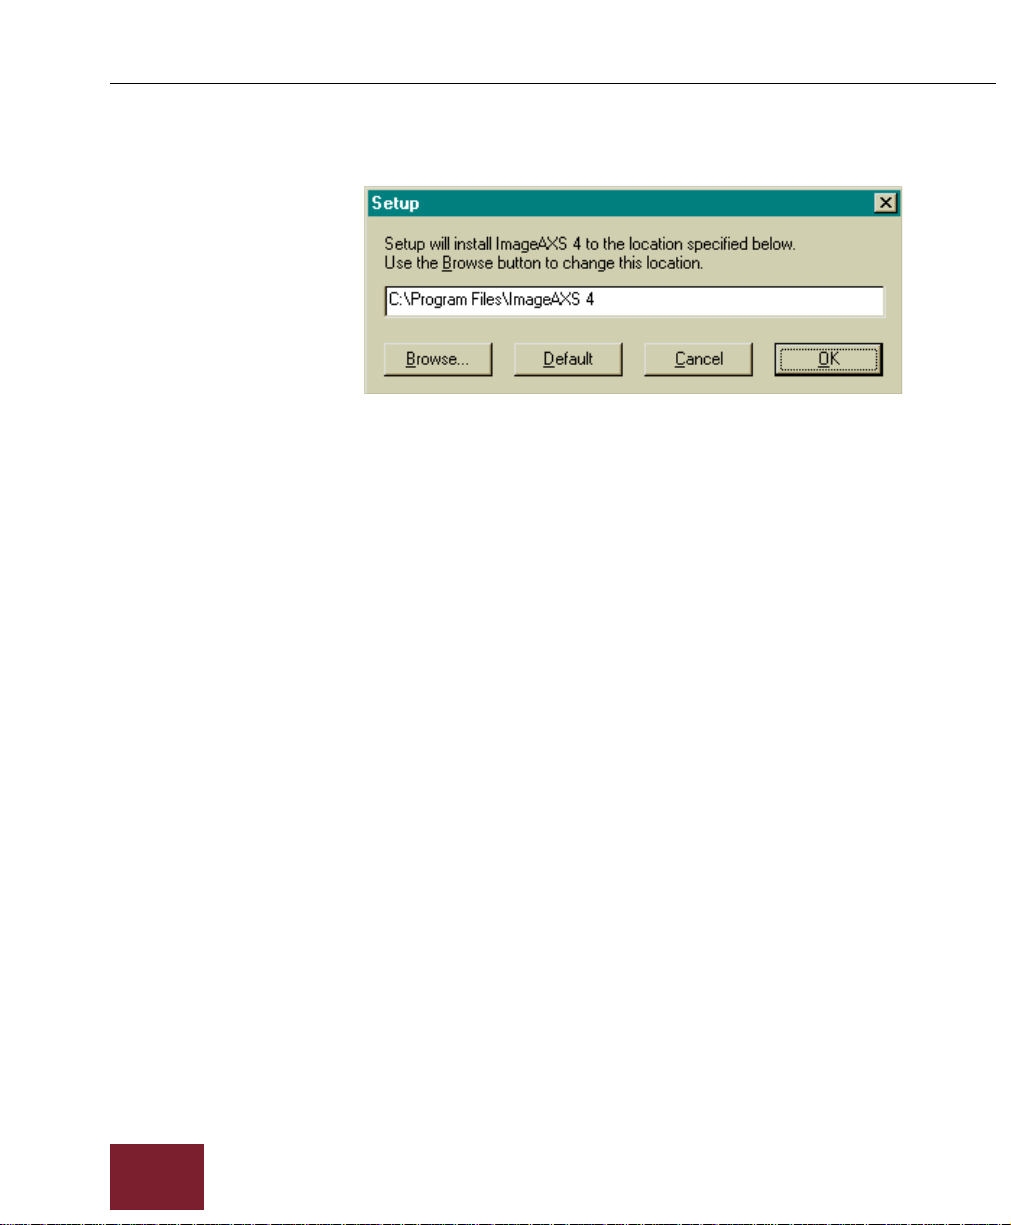
9. Select the folder into which you want to install ImageAXS.
The default is C:\Program Files\ImageAXS 4. To choose
an alternate folder, click Browse, navigate to the folder
you want, and click OK. After you have chosen a new
destination folder, the setup application will return you
to this dialog box.
10. Click OK.
The next dialog box displays the license agreement for
Microsoft Data Access, which ensures the proper
operation of the ImageAXS database engine.
1-4
11. Click Yes to begin installing Microsoft Data Access.
The first Data Access installation dialog box appears.
12. Click Continue.
A dialog box allowing you to select a Complete or
Custom installation appears.
13. Click Complete to install all of the Microsoft Data Access files.
After the files are installed, a dialog box ask if you want
to restart your computer now, or exit the setup and
restart the computer later.
14. Click Exit Setup.
A dialog box will remind you that you need to restart
your computer before using the installed Data Access
files.
15. Click OK.
A dialog box will ask if you want to read the ImageAXS
ReadMe.txt file.
ImageAXS 4.0

Installation and Startup
1
16. Click Yes to open the ReadMe.txt file, or No to skip this step.
As soon as you click either button, the installation
process will be complete.
17. Restart your computer.
ImageAXS 4.0
1-5

Windows
Starting ImageAXS
There are four ways you can start ImageAXS:
• Click the Start button and point to Programs. From the
Programs menu, click the ImageAXS 4 program icon.
• Double-click the ImageAXS program icon in Windows
Explorer.
• Double-click an ImageAXS collection file. ImageAXS
launches and the collection opens.
• ImageAXS has drag-and-drop capability. Drag and drop a
collection onto the ImageAXS icon to launch the program and
open the collection.
Opening the sample collection
When you open ImageAXS, you can click the Sample Collection
button in the program’s welcome screen to display the sample
collection. To open it after the program has been started, follow
the steps below.
To open the sample collection:
+ O).
1. Choose Open from the File menu (
CTRL
1-6
Open dialog box
ImageAXS 4.0

Installation and Startup
1
2. Locate the sample collection (SAMPLE.IAX) in the ImageAXS
program folder.
3. Select the sample collection and click Open.
The sample collection opens.
Use these same basic steps to open any other ImageAXS collection
(see “Opening an existing collection” on page 3-13).
Whenever you start ImageAXS, any collection (and portfolios, if
any) open the last time you quit the program is displayed
automatically.
ImageAXS 4.0
1-7

ImageAXS Basics
Chapter 2
ImageAXS
4.0
2
2
Chapter Topics
Collections
ImageAXS Basics
Collections 2-1
Records 2-2
Views 2-3
Toolbars 2-4
Status Bar 2-9
Thumbnail icons 2-10
File information 2-12
Collections are the data files created and read by ImageAXS. Each
is composed of individual records and pointers to the source files
associated with them. You can create and maintain as many
collections as you like, although you can only view one collection
at a time.
Note When you start up the application, ImageAXS will automatically
display the collection (if any, plus any por tfolios in the collection)
that was open when you quit the previous session.
ImageAXS 4.0
2-1

Windows
Records
Each collection or portfolio you create is made up of individual
records that describe source files. The process of creating a data
record for a source file is called
A thumbnail image of the source file and some basic data (such as
the file size, and when it was created) are included in the record
when you acquire the file. Y ou can add to each recor d by entering
data in text fields and attaching keywords.
acquiring
.
2-2
ImageAXS 4.0
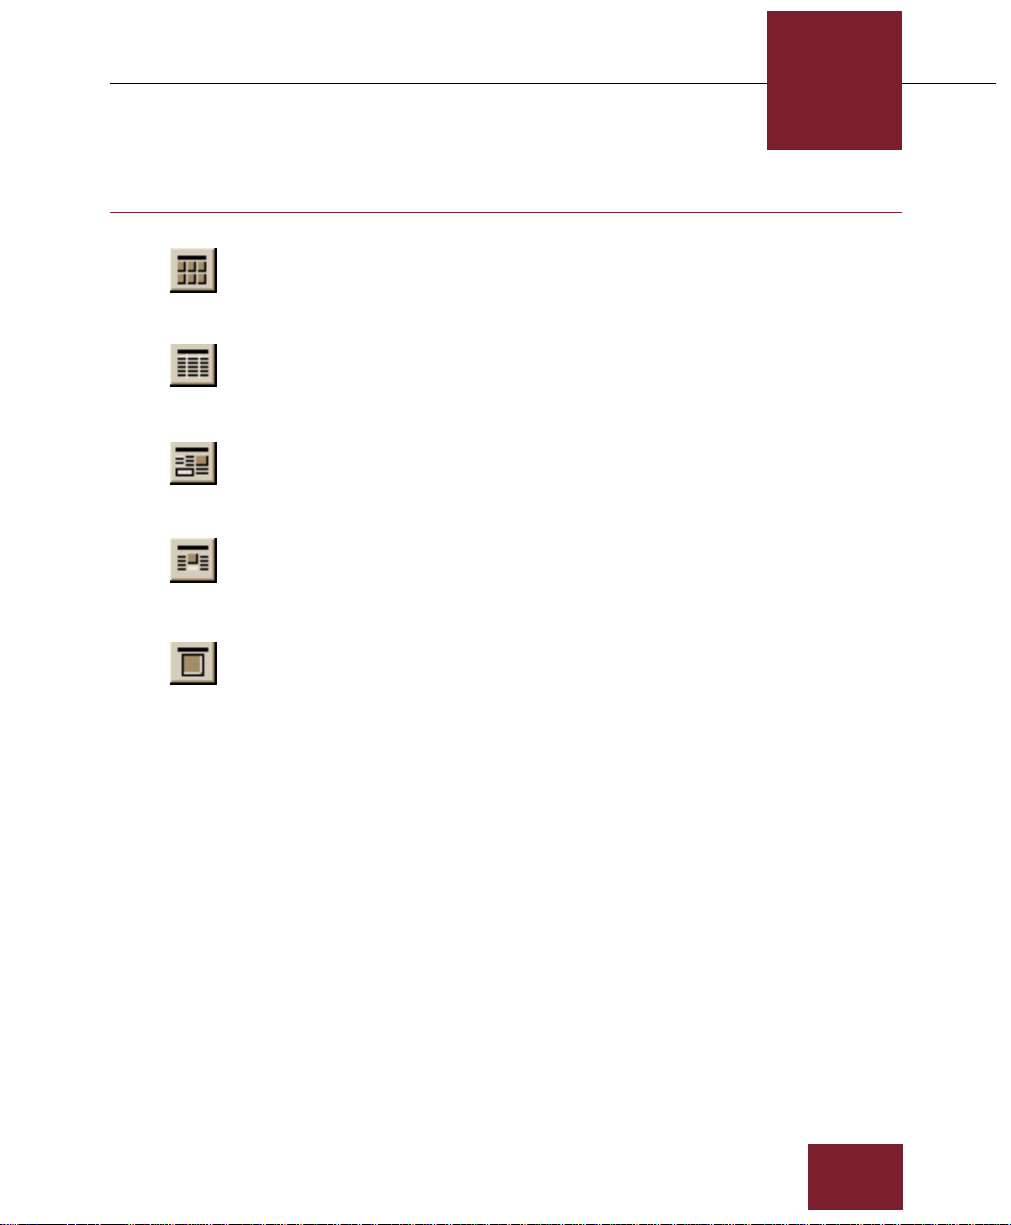
Views
Thumbnails View button
ImageAXS Basics
2
ImageAXS provides a number of different ways to look at the
records in your collections and portfolios. These are called views.
There are five different views in ImageAXS:
• Thumbnails View
• Text List View
Text List View button
Info Sheet View button
Keywords Vie w button
Source File View button
• Info Sheet View
• Keywords View
• Source File View
Y ou can open each of the views by clicking a button or choosing a
menu command. The Thumbnails View and Text List View
display multiple records at a time and the Info Sheet View,
Keywords View, and Source File View display one record at a time.
ImageAXS 4.0
2-3
Windows
Toolbars
As a default, the Toolbars appear across the top of the application
window, below the Menu bar. The Toolbars provide quick mouse
access to common commands used in ImageAXS, as well as
buttons for opening the Portfolios dialog box and for acquiring
source files.
Toolbars
To hide or show the Toolbars, select the Toolbar submenu from
the Tools menu. A checkmark appears next to each toolbar that is
visible; highlight a particular toolbar to turn it on or off.
Each toolbar can be resized or moved from its default position by
clicking and dragging it with your mouse.
2-4
Standard toolbar
New Collection
Displays the Create Collection dialog box.
Open Collection
Displays the Open dialog box.
Portfolios
Opens the Portfolios dialog box.
Print
Displays the Print dialog box.
Refresh Volumes
Activates the Refresh Volumes command.
System Settings
Opens the System Settings dialog box.
ImageAXS 4.0
ImageAXS Basics
2
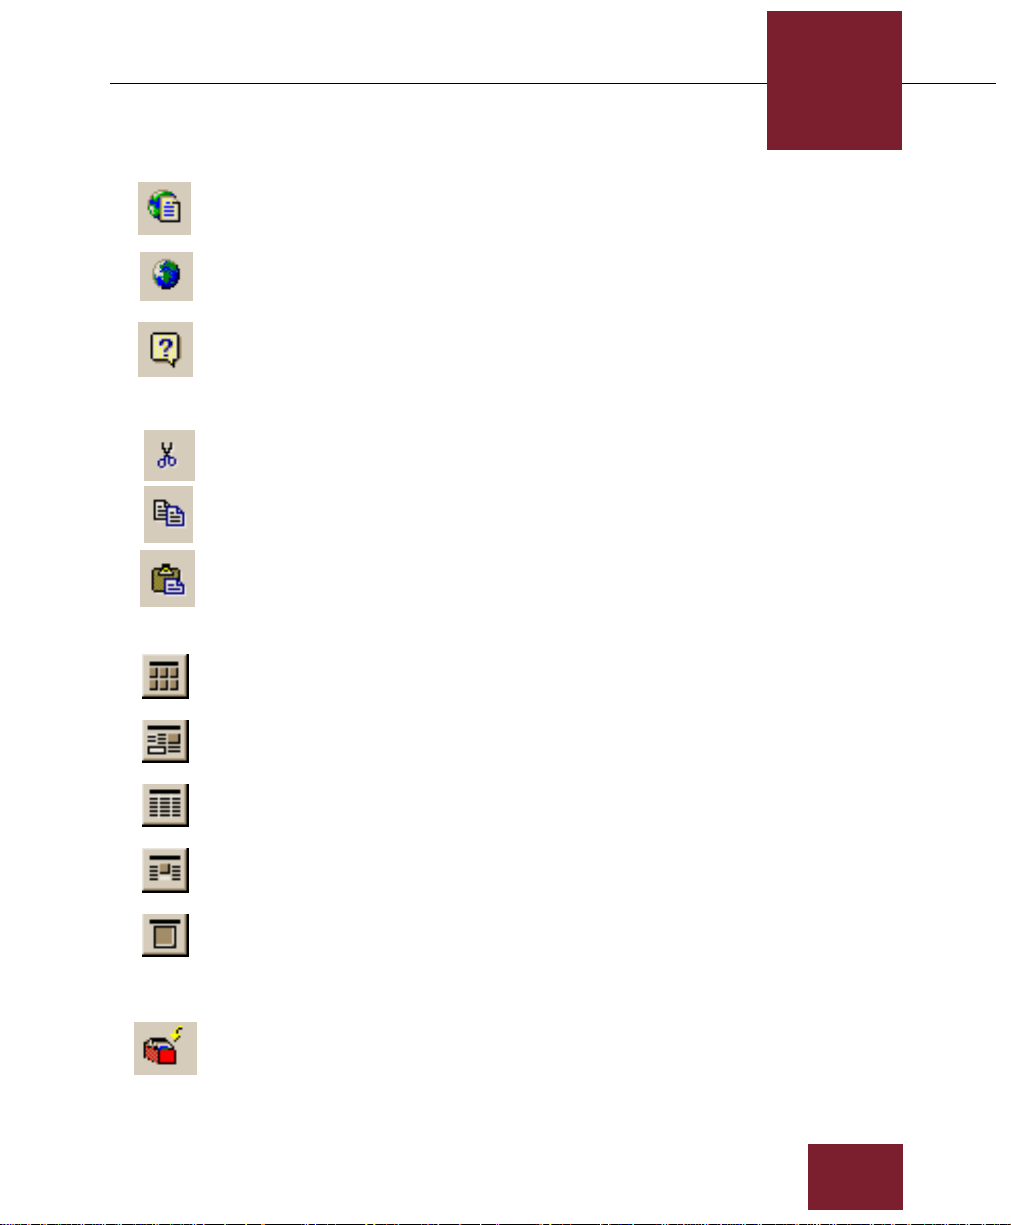
ImageAXS on the Web
Opens www.dascorp.com on your Web browser.
Language
Displays the Language dialog box.
Help
Opens the ImageAXS Help file.
Edit toolbar
Cut
Cuts selected text from the Info Sheet View to the Clipboard.
Copy
Copies selected text from the Info Sheet View to the Clipboard.
Paste
Pastes cut or copied text from the Clipboard.
View toolbar
Thumbnails View
Displays the records in the active window in the Thumbnails
View.
Info Sheet View
Displays selected records in the Info Sheet View.
Text List View
Displays the records in the active window in the Text List View.
Keywords View
Displays selected records in the Keywords View.
Source File View
Displays selected records in the Source File View.
Record toolbar
Acquire Files
Opens the Acquire Files dialog box.
ImageAXS 4.0
2-5
Windows
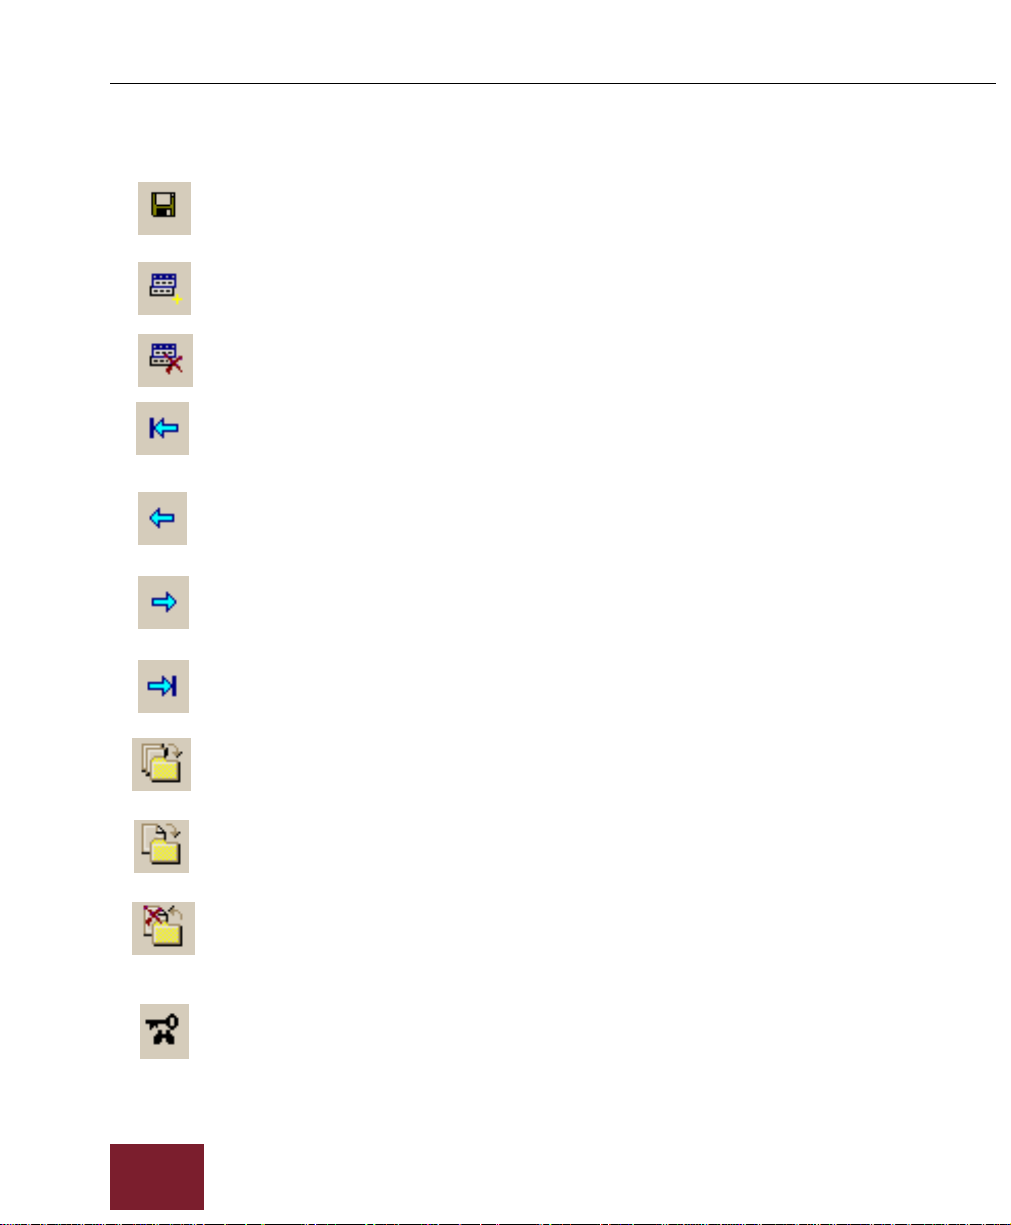
Save Record
Saves changes you have made to the current record (Info Sheet
View only).
New Record
Creates a blank record (i.e., a record without a source file).
Delete Record
Removes records from a collection.
First
Navigates to the first record or window of records in the active
view.
Previous
Navigates to the previous record or window of records in the
active view.
Next
Navigates to the next record or window of records in the active
view.
2-6
Last
Navigates to the last record or window of records in the active
view.
Copy Source File
Copies selected source files to another location on your hard drive
or network.
Move Source File
Moves source files from one place to another on your hard drive
or network.
Delete Source File
Removes source files from your hard drive or network.
Search toolbar
Keyword Search
Opens the Keyword Search dialog box.
ImageAXS 4.0
ImageAXS Basics
2
Search
Opens the Search dialog box.
Sort
Opens the Sort dialog box.
All
Initiates the Show All command (available only when a subset of
records appears in the active window).
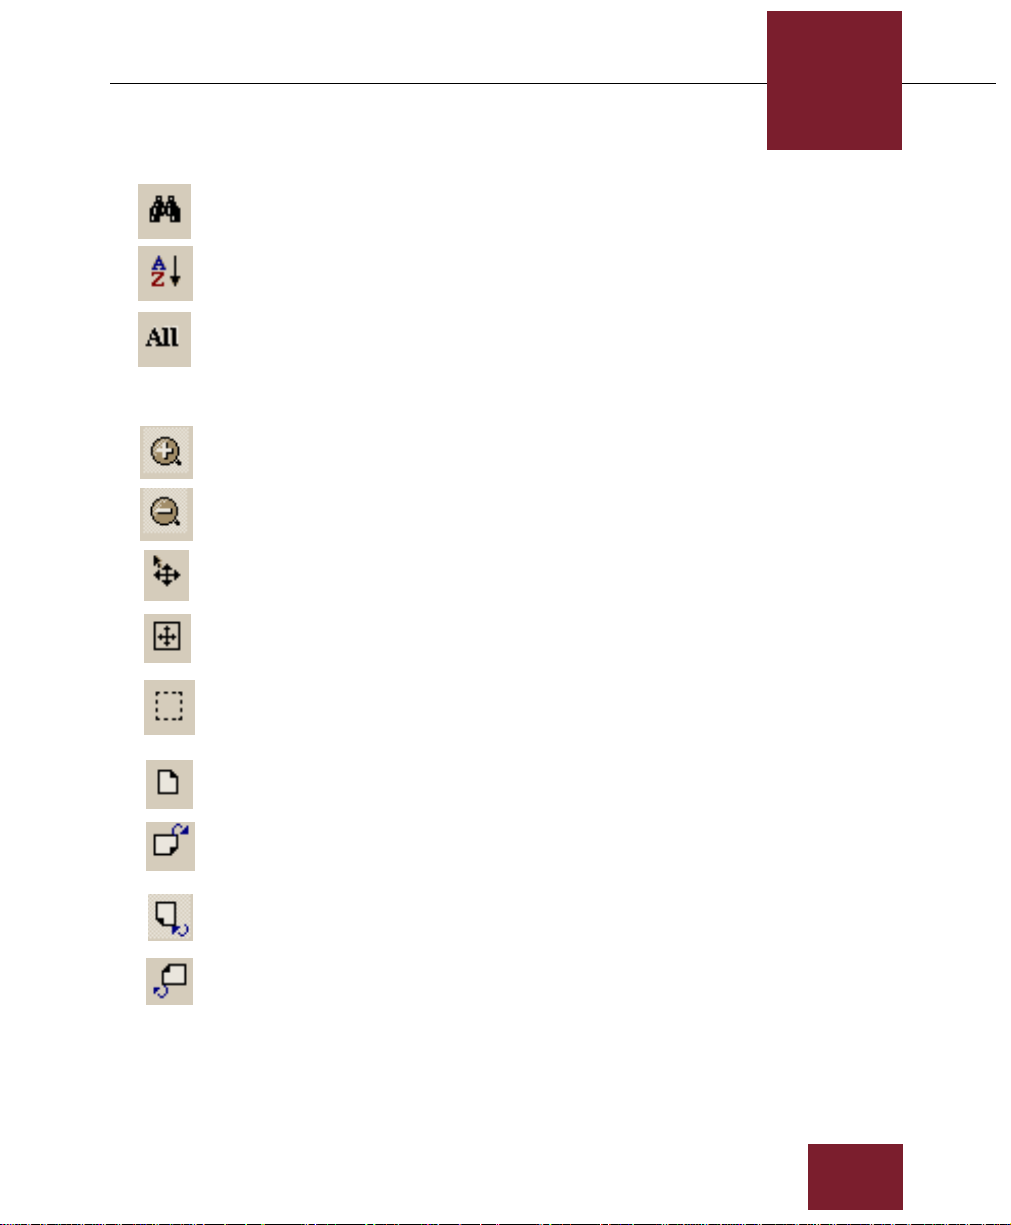
Zoom toolbar
Zoom In
Activates the Zoom In tool.
Zoom Out
Activates the Zoom Out tool.
Scroll
Activates the Scroll tool.
Best Fit
Optimizes the size of an image and window in the Source File
View, based on your monitor settings.
Crop Image
Activates the Crop tool; when active, the cursor becomes a
crosshair that lets you select the area you want to crop.
Rotate 0 Degrees
Rotates an image clockwise 0 degrees.
Rotate 90 Degrees
Rotates an image clockwise 90 degrees.
Rotate 180 Degrees
Rotates an image clockwise 180 degrees.
Rotate 270 Degrees
Rotates an image clockwise 270 degrees.
ImageAXS 4.0
2-7

Windows
2-8
ImageAXS 4.0

Status Bar
ImageAXS Basics
2
The Status Bar appears at the bottom of the application window.
The Status Bar displays messages to help you and the following
information:
• If you have CAPS LOCK on.
• If you have NUM LOCK on.
• Record number information
The number of records in the current data set and which
(if any) record you last selected.
To hide or show the Status Bar, choose Status Bar from the View
menu. A checkmark appears next to the command when the
Status Bar is visible.
Status Bar
ImageAXS 4.0
2-9
Windows
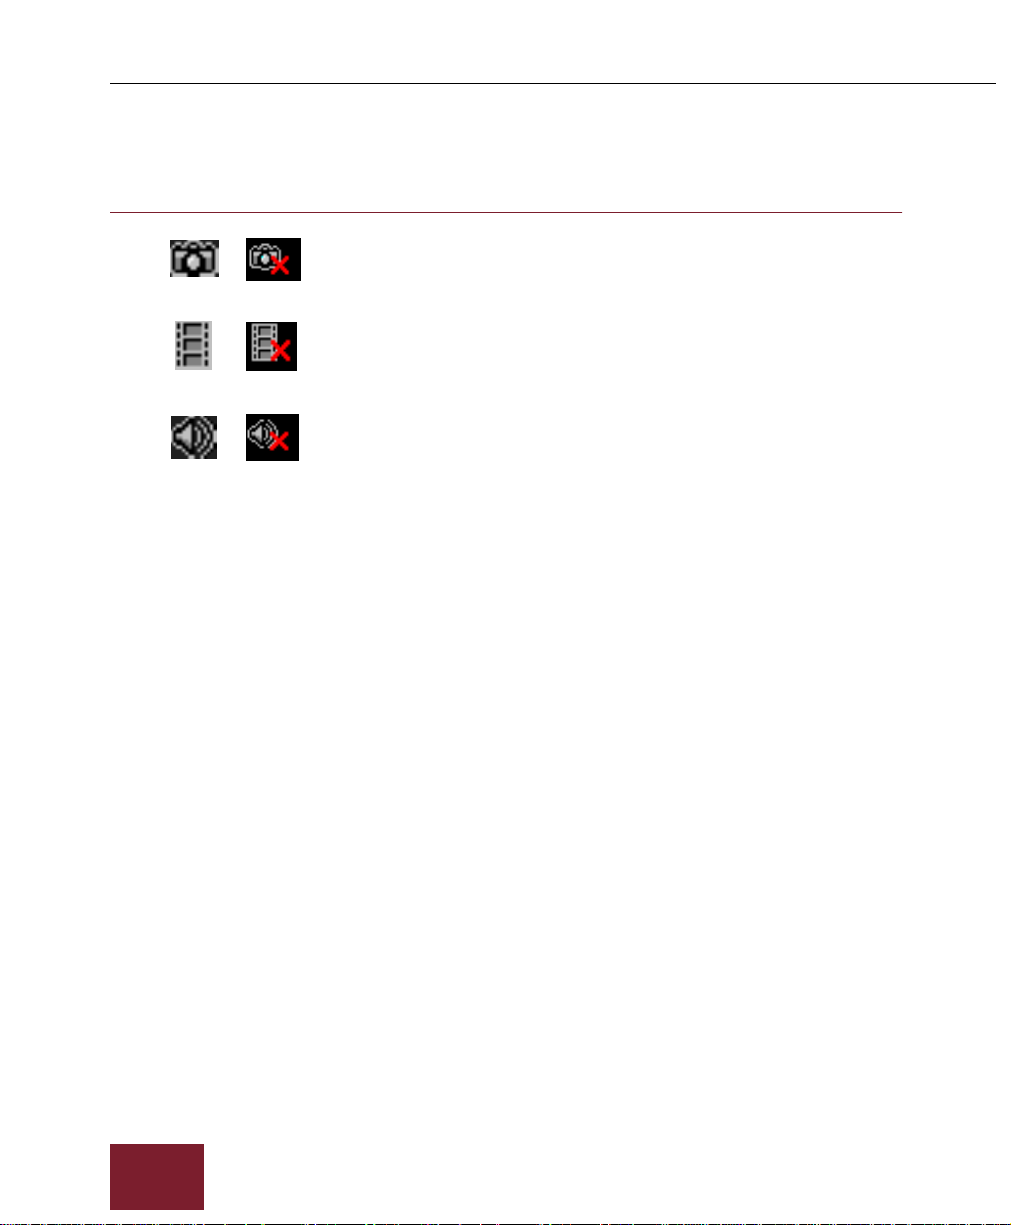
Thumbnail icons
Image thumbnail icons
In the Thumbnails View, an icon appears under the thumbnail of
each record. The thumbnail icon indicates the type of the source
file and whether or not the source file for that record is online.
The terms online and offline refer to whether ImageAXS is able to
locate the source file for a record.
Movie thumbnail icons
Audio thumbnail icons
If a thumbnail icon has a red “X” through it, the source file for that
record is offline. You cannot open the Source File View for records
that are offline; in addition, you cannot copy, move, rename, or
delete the source files for these records.
2-10
ImageAXS 4.0

ImageAXS Basics
2
Refreshing volumes
The Refresh Volumes command allows you to check that the
online/offline information on your screen is up to date. Each time
you change disks or mount or dismount a volume like a CD-ROM
or network volume, you should use the Refresh Volumes
command to update your information. To do this, choose Refresh
Volumes (F5) from the Tools menu.
ImageAXS 4.0
2-11

Windows
File information
File information is non-modifiable information about the source
file automatically entered when the file is acquired. To display file
information, select the record and choose the File Info command
(ALT+ENTER) from the Source File menu. The command is
available only if a single record is selected. In the Thumbnails
view, file information for a record can also be displayed by
double-clicking its Thumbnail icon.
2-12
File Information dialog box
ImageAXS 4.0

ImageAXS Basics
The File Information dialog box provides the following
information about the source file:
Name
File name.
Type
File type.
Size
File size on disk (in bytes).
Width
Image or movie file width in pixels.
Height
Image or movie file height in pixels.
Modified
Last modification date.
Volume
The name of the file’s storage volume.
2
Location
The file’s pathname.
ImageAXS 4.0
2-13
Chapter 3
Collections
ImageAXS
4.0
3
3
Chapter Topics Creating a new collection 3-1
Setting preferences 3-3
Creating records 3-9
Opening an existing collection 3-13
Viewing and editing collection information 3-14
Closing a collection 3-15
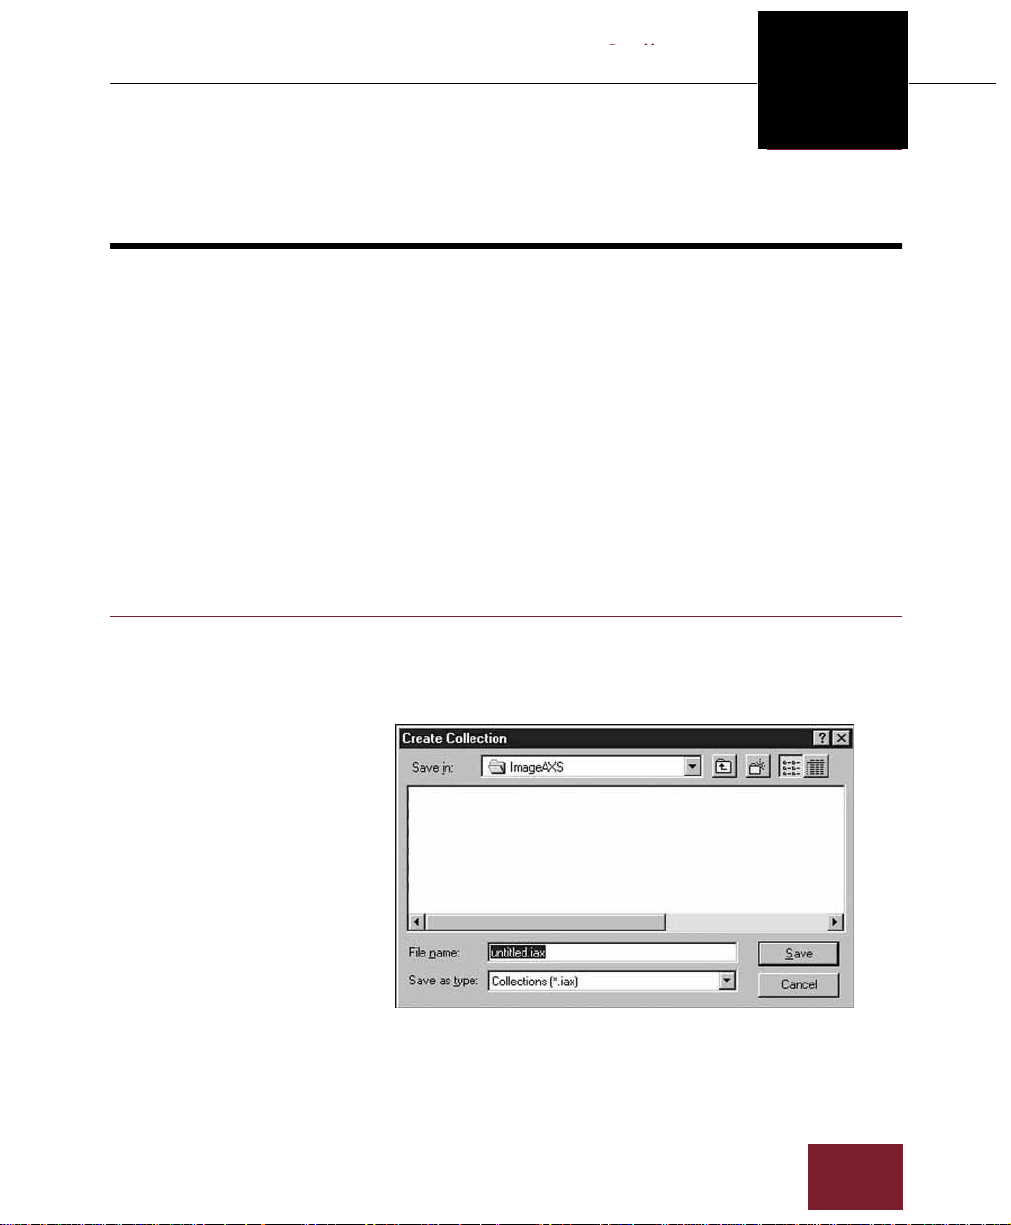
Creating a new collection
To create a new collection:
1. Choose New Collection from the File menu.
The Create Collection dialog box appears.
Collections
Create Collection dialog box
ImageAXS 4.0
3-1
Windows
2. Enter a name and location for the new collection to be saved.
3. Click Save.
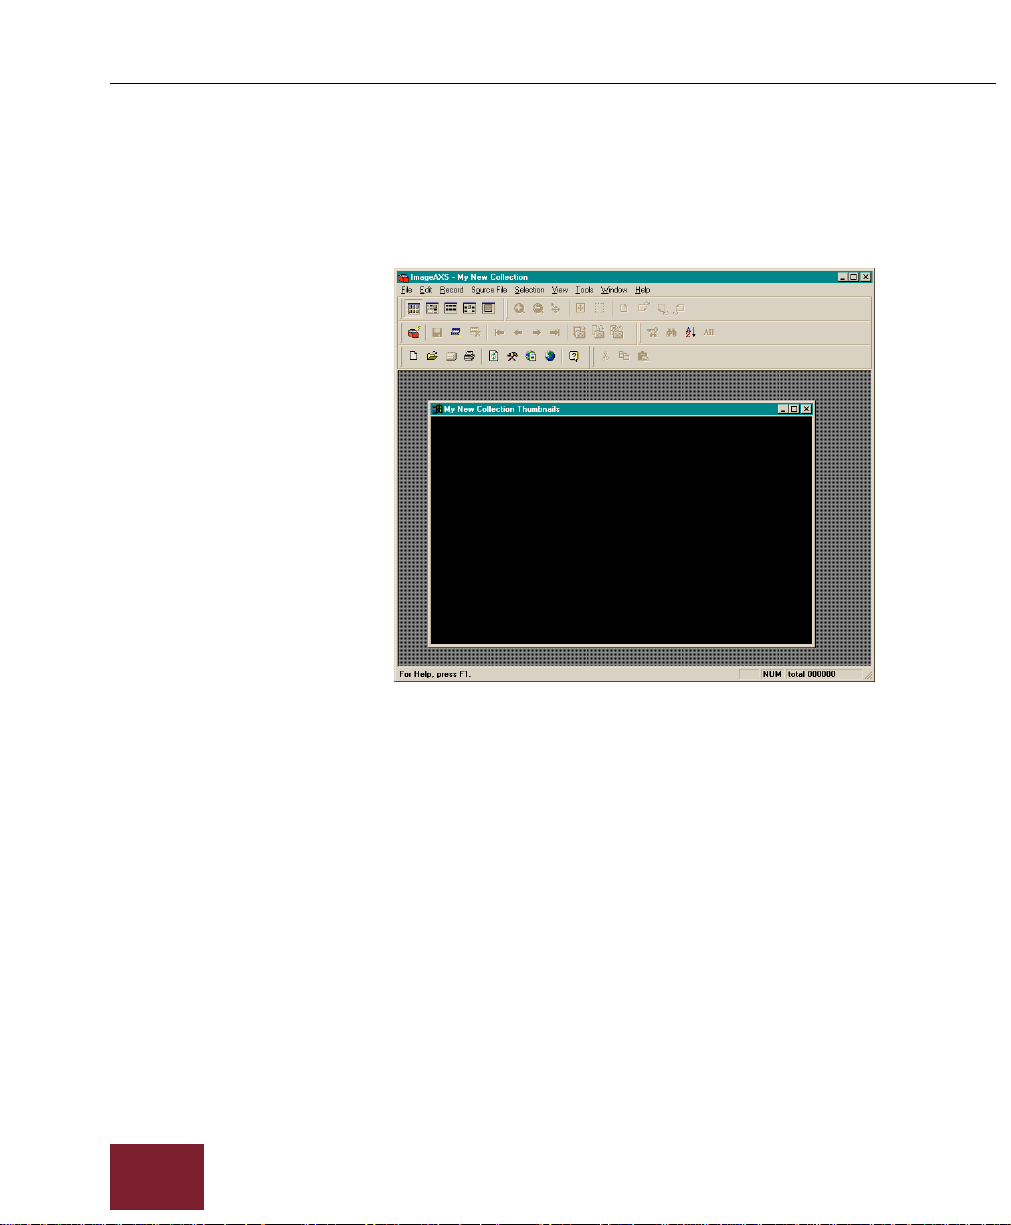
An empty collection window appears.
3-2
Empty collection window
ImageAXS 4.0
Setting preferences
Collections
3
Preferences allow you to customize ImageAXS. Preferences may
be set any time after a collection has been created.
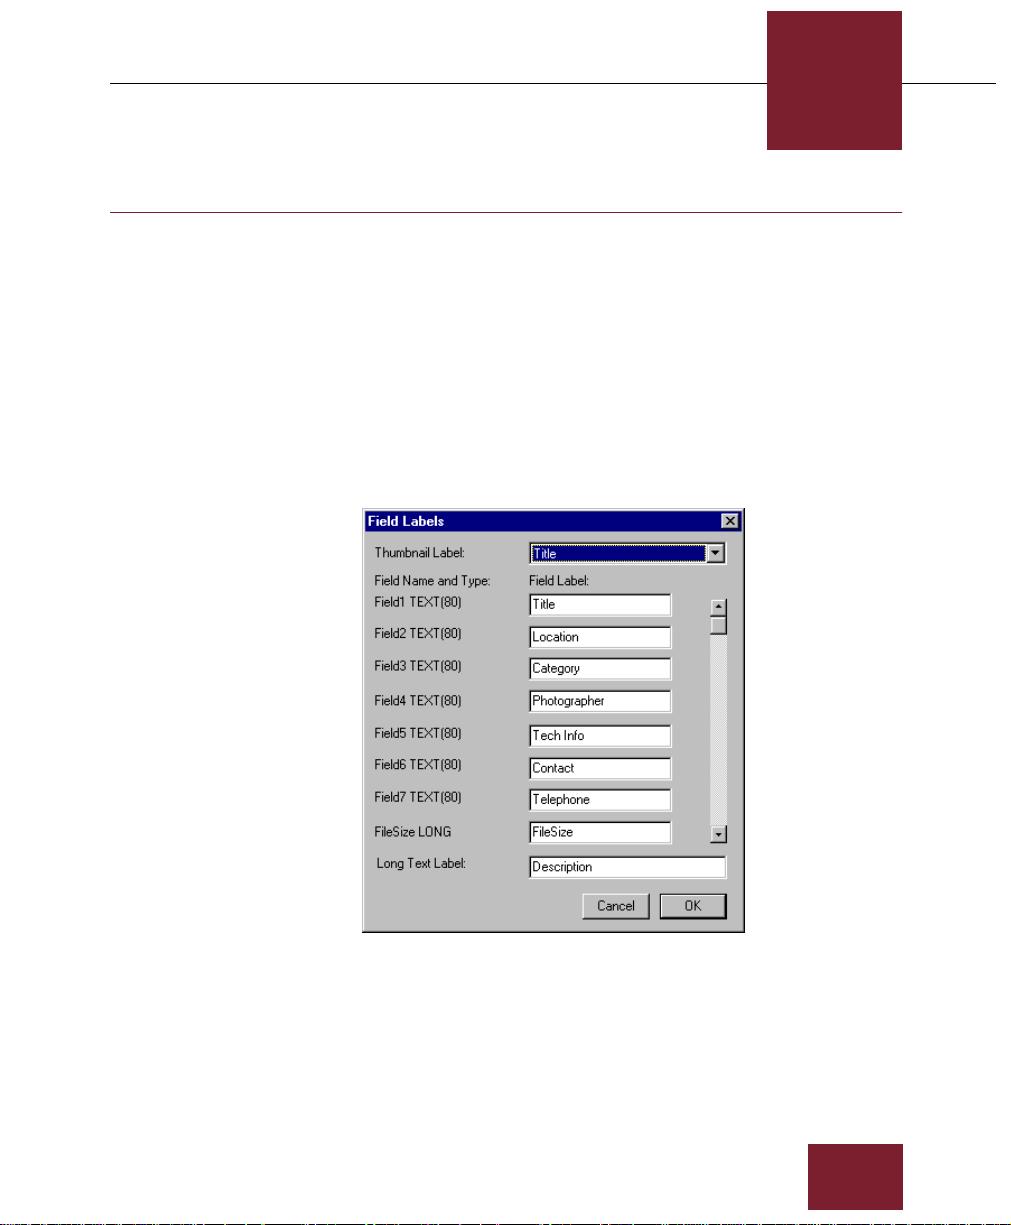
Assigning Field and Thumbnail Labels
ImageAXS records contain eight user-definable fields, each of
which can be assigned labels for easy identification. The Field
Labels command allows you to change the labels for your fields to
reflect the information they will contain.
To assign field labels:
1. Choose Field Labels from the Tools menu.
Field Labels dialog box
ImageAXS 4.0
3-3

Windows
2. Select the label you want to change and type in a new one.
3. In the Thumbnail Label pull-down menu, choose the field
whose information you want displayed underneath each
thumbnail.
Note Only the first 15 characters of the field you select appear if you are
viewing large thumbnails, fe wer if y ou are vie wing medium or small
thumbnails.
4. In the Long Text Label box, type your long text field label.
5. Click OK to save the changes you have made.
3-4
ImageAXS 4.0
 Loading...