

Digital Arts & Sciences IMAGEAXS 4 FOR MACINTOSH User Manual

MAGE
I
V
ERSION
ImageAXS
AXS
4.0
FOR
U
SER’S GUIDE
4.0
M
ACINTOSH
1301 Marina Village Parkway
Alameda, California 94501
USA
(800) 449-6220 Sales • (510) 814-7200 Support
(510) 814-6100 Fax
http://www.dascorp.com

ImageAXS
4.0
ImageAXS
™ 4.0
Macintosh
Copyright © 1991-1999 by Digital Arts & Sciences and its licensor(s). All rights reserved. Use of copyright notice does not imply publication or disclosure. No part of the contents of this document may be reproduced or transmitted in any form or by any means without the
written permission of Digital Arts & Sciences.
Sample images distributed with ImageAXS and pictured in this manual are made available for non-commercial, personal use only. Copying
or redistribution in any manner for personal or corporate gain is not permitted. Commercial publication or exploitation of these files is
specifically prohibited.
Use of this document and ImageAXS is governed by a Software License Agreement that specifies their permitted and prohibited uses. This
document contains confidential and proprietary information constituting valuable trade secrets. This document (or any portion thereof)
may not be: (a) disclosed to third parties, (b) copied in any form, or (c) used for any unauthorized purpose.
ImageAXS is a trademark of Digital Arts & Sciences. All other company and product names are trademarks of their respective companies.
This technical data is provided with RESTRICTED RIGHTS. Use, duplication, or disclosure by the Government is subject to restrictions as
set forth in subparagraph (c) (1) (ii) of the Rights in Technical Data and Computer Software clause at DFARS 252.227-7013, and in subparagraphs (a) through (d) of the Commercial Computer - Restricted Rights clause at FAR 52.227-19, and in similar clauses in the NASA
FAR Supplement, when applicable. Contractor/Manufacturer is: Digital Arts & Sciences, 1301 Marina Village Parkway, Alameda, CA
94501.
This Software media is warranted to be free from defects in materials and workmanship for a period of 90 days from the date of shipment.
DIGITAL ARTS & SCIENCES, ITS LICENSOR(S), AGENTS AND DISTRIBUTORS MAKE NO WARRANTIES, EXPRESS OR IMPLIED,
INCLUDING WITHOUT LIMITATION THE IMPLIED WARRANTIES OF MERCHANTABILITY AND FITNESS FOR A PARTICULAR PURPOSE, REGARDING THE SOFTWARE. THEY DO NOT WARRANT, GUARANTEE OR MAKE ANY REPRESENTATIONS REGARDING
THE USE OR THE RESULTS OF THE USE OF THE SOFTWARE IN TERMS OF ITS CORRECTNESS, ACCURACY, RELIABILITY, CURRENTNESS OR OTHERWISE. THE ENTIRE RISK AS TO THE RESULTS AND PERFORMANCE OF THE SOFTWARE IS ASSUMED BY
YOU. BECAUSE THE EXCLUSION OF IMPLIED WARRANTIES IS NOT PERMITTED BY SOME JURISDICTIONS, THE ABOVE EXCLUSION MAY NOT APPLY TO YOU.
IN NO EVENT WILL DIGITAL ARTS & SCIENCES, ITS AGENTS, DISTRIBUTORS, LICENSOR(S), AND THEIR DIRECTORS, OFFICERS,
EMPLOYEES OR AGENTS (COLLECTIVELY DIGITAL ARTS & SCIENCES’ LICENSOR) BE LIABLE TO YOU FOR ANY CONSEQUENTIAL, INCIDENTAL OR INDIRECT DAMAGES (INCLUDING DAMGES FOR LOSS OF BUSINESS PROFITS, BUSINESS
INTERRUPTION, LOSS OF BUSINESS INFORMATION, AND THE LIKE) ARISING OUT OF THE USE OR INABILITY TO USE THE
SOFTWARE EVEN IF ANY ONE OR ALL HAVE BEEN ADVISED OF THE POSSIBILITY OF SUCH DAMAGES. BECAUSE SOME JUSRISDICTIONS DO NOT ALLOW THE EXCLUSION OR LIMITATION OF LIABILITY FOR CONSEQUENTIAL OR INCIDENTAL DAMAGES,
THE ABOVE LIMITATIONS MAY NOT APPLY TO YOU. Digital Arts & Sciences’, its licensors’, agents’, and distributors’ liability to you for
actual damages from any cause whatsoever, and regardless of the form of the action (whether in contract, tort (including negligence), product liabilty or otherwise), will be limited to $50.
The detailed terms of the Limited Warranty and Disclaimer, and Limitations of Liability are set forth in the Software License Agreement
enclosed with the Software.
Printed February, 1999
ii

C
ONTENTS
C
HAPTER
1W
HAT
I
S
I
MAGE
What Is ImageAXS? 1-1
Key Concepts and Terms 1-1
Getting Help and Technical Support 1-4
AXS™?
ImageAXS
4.0
C
C
HAPTER
C
HAPTER
C
HAPTER
2G
3V
4V
ETTING
System Requirements 2-1
Installing ImageAXS 2-1
Starting ImageAXS 2-4
Where Do I Go From Here? 2-5
IEWING
Overview: What Is a Collection? 3-1
Opening and Closing Collections 3-1
Viewing a Collection 3-2
Viewing Thumbnails 3-7
Changing Thumbnails View Options 3-9
Viewing Text Field Data 3-12
Changing Text List View Options 3-14
IEWING
Selecting Records 4-1
Viewing Info Sheets 4-2
Viewing Source Files 4-5
Viewing Images 4-7
Playing Movies, Animated GIFs, or Sounds 4-10
Viewing 3D Files 4-11
Changing Source File View Options 4-11
S
TARTED
C
OLLECTIONS
R
ECORDS
AND
S
OURCE
F
ILES
I
MAGE
AXS 4.0 M
ACINTOSH
U
SER
’
G
S
UIDE
i

C
HAPTER
C
HAPTER
C
HAPTER
C
5C
6E
7U
REATING
Creating a New Collection 5-1
Overview: Adding Files to a Collection 5-2
Acquiring Individual Files 5-3
Acquiring All Files in a Folder 5-4
Acquiring From Removable Media 5-5
Acquiring From Digital Cameras or Scanners 5-8
Acquiring From a Video Source 5-10
Acquiring From an Audio Source 5-15
Acquiring From Adobe Photoshop 5-16
Changing Options for Acquiring Files 5-17
NTERING
How Do I Use Data Fields? 6-1
Entering Data in an Individual Record 6-1
Copying Data to Other Records 6-3
Importing a Text Data File 6-4
SING
How Do I Use Keywords? 7-1
Viewing and Managing Keywords 7-1
Importing Keywords From a Text File 7-5
Adding Keywords to Data Records 7-6
AND
IELD
F
EYWORDS
K
DDING
A
D
ATA
TO
TO
ESCRIBE
D
A
OLLECTION
C
F
ILES
I
MAGE
C
HAPTER
C
HAPTER
HAPTER
C
AXS 4.0 M
8C
9S
10 M
ACINTOSH
UIDE
P
ORTFOLIOS
S
AND
ATA RECORDS
D
REATING
What Is a Portfolio? 8-1
Creating a Portfolio 8-1
Saving and Renaming Portfolios 8-2
Managing Portfolios 8-3
Managing Records in a Portfolio 8-4
EARCHING
How Do I Search a Collection or Portfolio? 9-1
Keyword Searches 9-1
Searches Based on Field Data and/or Other Characteristics 9-2
Using And/Or in Complex Searches 9-4
Sorting Collections and Portfolios 9-5
ANAGING
Creating New Records 10-1
Deleting Records 10-1
Updating Records 10-3
U
’
G
SER
S
W
ORTING
C
ITHIN
C
OLLECTIONS
OLLECTIONS
ii

CHAPTER 11 MANAGING SOURCE FILES
Managing Source Files in ImageAXS 11-1
Editing Source Files 11-1
Selecting an Alternate Editing Application 11-3
Moving Source Files 11-4
Copying Source Files 11-4
Renaming a Source File 11-5
Deleting Source Files 11-6
CHAPTER 12 EXPORTING DATA TO OTHER FORMATS
Exporting Data Records 12-1
Exporting to a Text File 12-1
Exporting to a DAS File 12-3
Exporting to an ImageAXS 2.x File 12-4
CHAPTER 13 SLIDE SHOWS
Displaying Slide Shows 13-1
Changing Slide Show Options 13-2
C
CHAPTER 14 PRINTING
Printing ImageAXS Collections and Records 14-1
CHAPTER 15 SCRIPTING AND RECORDING
Scripting and Recording in ImageAXS 15-1
IMAGEAXS 4.0 MACINTOSH USER’S GUIDE
iii

CHAPTER 1
WHAT IS IMAGEAXS™?
1
WHAT IS IMAGEAXS™?
IN T
HIS CHAPTER
What Is ImageAXS? 1-1
Key Concepts and Terms 1-1
Getting Help and Technical Support 1-4
:
1
ImageAXS
4.0
1
WHAT IS
MAGEAXS?
I
KEY CONCEPTS
AND TERMS
ImageAXS lets you create visual databases to organize and manage
the image, movie, sound, and 3D files on your computer.
The documents it creates (called collections) combine text information
with thumbnail images of the original files, so you can see what
you’re describing, even if the files are on a CD-ROM, an Iomega Zip
disk, or a networked drive that isn’t currently connected to your
computer.
ImageAXS offers several ways for you to view, search, and organize
your collections. You can use ImageAXS to organize your files from
scratch, or by importing information to expand on a database you've
already created.
The basic elements of how ImageAXS works are defined briefly
below. Becoming familiar with these terms will help you learn the
program more quickly.
SOURCE FILES
A source file is any file on your computer (or a separate disk or
storage device) that is catalogued in ImageAXS.
The file is referred to as a source file because it is the source for the
data record created by ImageAXS.
IMAGEAXS 4.0 MACINTOSH USER’S GUIDE
1-1
WHAT IS IMAGEAXS™?
ACQUIRING
Acquiring is the act of making an ImageAXS data record for a source
file. To use ImageAXS to manage the files in a particular folder, for
example, you would acquire all of the files in that folder (see Chapter
5, “Creating and Adding to a Collection”).
COLLECTIONS
Collections are the documents created by ImageAXS. A collection
contains a data record for each source file that you acquir e (as well as
blank records, if you create any).
With ImageAXS, you can create and maintain as many different
collections as you want, although you can only view one collection at
a time.
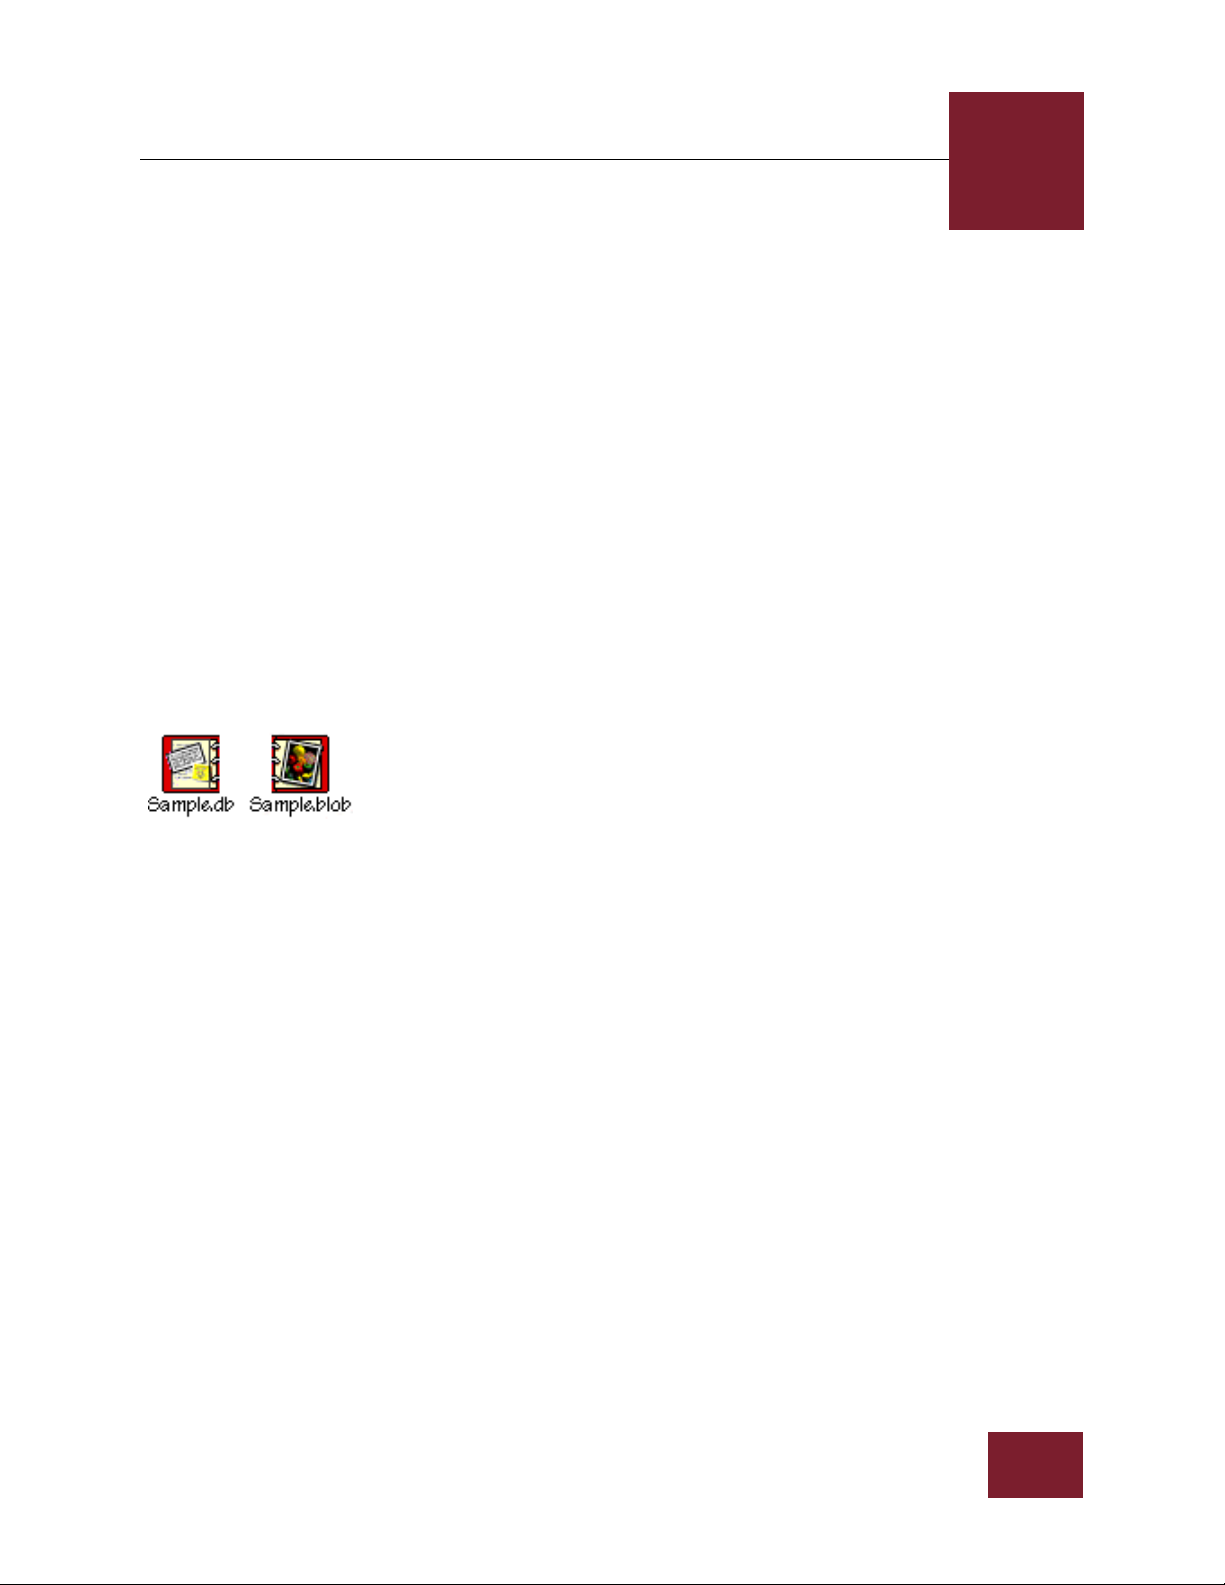
1
ImageAXS™
file icons
N
OTE
Although the records in ImageAXS collections describe your source files,
they do
collection without affecting the source files, and vice versa.
In the Finder , ImageAXS collections ar e repr esented by two files: one
with a “.db” extension (containing text information), and the other
with a “.blob” extension (containing thumbnail images). ImageAXS
cannot open a collection unless both of these files are in the same
folder. (To remind you to keep them together, the “.db” and “.blob”
file icons are two halves of an open notebook.)
not
contain the files themselves. You can move or delete the
PORTFOLIOS
Portfolios are subsets of collections — for example, a collection of
family photos might include separate portfolios for your children,
your parents, your brothers and/or sisters, your in-laws, and so on.
Placing records in a portfolio does not remove them from a
collection, and any record in a collection may belong to several
different portfolios.
You can create a portfolio automatically by searching a collection, or
manually by making a personal selection of records (for example,
your favorite photos or best works of 3D art).
RECORDS
An ImageAXS data record contains information about a source file.
A thumbnail image of the file and some basic data (such as the file
size, and when it was created) are included in the record when you
acquire the source file. You can add to each record by entering data
in text fields and attaching keywords.
IMAGEAXS 4.0 MACINTOSH USER’S GUIDE
1-2

WHAT IS IMAGEAXS™?
THUMBNAILS
A thumbnail is a smaller version (in both actual size and disk space
required) of an image. When you acquire an image, movie, or 3D
file, ImageAXS includes a thumbnail version of the file in the data
record.
KEYWORDS
Keywords are terms you choose that describe one or more source
files in a collection. They may describe the literal content of a file
(such as objects in a photo, or events in a video clip) or its subjective
aspects (for example, adjectives like beautiful or intense).
Unlike information in text fields, keywords do not have to conform
to a category that applies to every file in a collection. You simply add
them to the Keyword List for the collection, then attach them to one
or more records as you see fit.
Keywords are powerful search tools. If you add keywords
extensively across a collection, you'll be able to find almost unlimited
combinations of records instantly based on keyword searches.
1
VIEWS
Views ar e dif ferent ways of displaying information about a collection
and/or its records. ImageAXS offers four different views, including
two ways to look at all of the records in a collection:
• The Thumbnails View displays thumbnail images for each r ecor d
in a collection.
• The Text List View displays the text field data (in a row-andcolumn table format) for each record in a collection.
The other two views let you see information about individual
records that you select:
• The Info Sheet View displays the thumbnail, text data, and
keywords associated with a source file.
• The Source File View displays image or 3D files, or plays movie,
sound, or animated GIF files.
IMAGEAXS 4.0 MACINTOSH USER’S GUIDE
1-3

WHAT IS IMAGEAXS™?
Balloon Help
button
ImageAXS
Help button
1
GETTING HELP
AND TECHNICAL
UPPORT
S
Because Digital Arts & Sciences is committed to helping you get the
most out of ImageAXS, we have provided several different options to
assist you in learning how to use the program and resolving any
problems that you encounter.
BALLOON HELP
Virtually every menu item, button, and dialog box option in
ImageAXS includes Balloon Help, which provides a brief
explanation of what that item, button, or option does.
To see Balloon Help, click the Balloon Help button in any ImageAXS
window or choose Show Balloons from the Help menu, then point at
the item for which you want to see information.
IMAGEAXS HELP
ImageAXS also includes extensive Apple Guide–based online help,
with step-by-step instructions for accomplishing most of the tasks in
the program.
To open ImageAXS Help, click the Help button in any ImageAXS
window or choose ImageAXS Help from the Help menu.
N
OTE
IMAGEAXS MACINTOSH USER’S GUIDE
Use this manual for a broader narrative overview of how ImageAXS
works, and to see screen illustrations of the elements and features of
the program.
CUSTOMER SUPPORT
Digital Arts & Sciences provides technical support for ImageAXS
users on the Internet, as well as by fax, telephone, or regular mail.
For sales or upgrade information, product news, or answers to
frequently asked questions, visit the Digital Arts & Sciences website
at http://www.dascorp.com.
You can access the Digital Arts & Sciences website while using ImageAXS
by selecting ImageAXS on the Web from the Help menu.
For technical support via email, send your questions and comments
to support@dascorp.com. If you wish to fax your questions or
comments, call (510) 814-6100.
IMAGEAXS 4.0 MACINTOSH USER’S GUIDE
1-4

WHAT IS IMAGEAXS™?
Free telephone support is only available to customers who have
returned an ImageAXS registration card or registered over the
Internet (to do this, select Register ImageAXS from the Help menu).
If you are a registered ImageAXS user, call our customer support
department at (510) 814-7200 (press 1 at the main menu when the
phone is answered).
Telephone support for registered ImageAXS users is available
Monday through Friday between 9:00
1
A.M. and 5:00 P.M, Pacific time.
IMAGEAXS 4.0 MACINTOSH USER’S GUIDE
1-5

CHAPTER 2
GETTING STARTED
2
GETTING STARTED
IN T
HIS CHAPTER
System Requirements 2-1
Installing ImageAXS 2-1
Starting ImageAXS 2-4
Where Do I Go From Here? 2-5
ImageAXS
4.0
2
:
SYSTEM
EQUIREMENTS
R
INSTALLING
MAGEAXS
I
To use ImageAXS, your Macintosh must have the following
minimum characteristics:
• A CD-ROM drive (for installation only)
• 68030 or faster processor (Power Macintosh recommended)
• System 7.5 or more recent operating system
• 10 MB of RAM available (more if you will be managing large files
or collections)
• 20 MB of hard disk space available
You can install ImageAXS on your Macintosh in just a few minutes.
Follow these instructions:
STEP 1 Insert the ImageAXS CD-ROM into your CD-ROM drive.
A window showing the contents of the CD-ROM appears
on the desktop. (If this window does not appear, doubleclick the CD-ROM icon.)
STEP 2 Double-click the ImageAXS Installer icon in the disc contents
window.
The ImageAXS Installer window appears.
STEP 3 Click Continue.
STEP 4 Click Save or Print to save or print the ReadMe file, then click
IMAGEAXS 4.0 MACINTOSH USER’S GUIDE
The ImageAXS ReadMe file appears. This file contains
important information, so be sure to save or print it.
Continue.
The ImageAXS license agreement window appears.
2-1

GETTING STARTED
2
STEP 5 Read the license agreement, then click Agree.
The Easy Install dialog box appears.
NOTE
If you click Disagree, the installation process will be cancelled.
The Easy Install option installs the ImageAXS application, a sample
collection, various plug-ins and system extensions, folders
containing AppleScripts and Web page templates, and a ReadMe
document into a folder that you create later during the installation.
In addition, the Easy Install option installs QuickTime 3.0 in the
Extensions folder of the System Folder on your startup drive,
replacing any older version of QuickT ime you may have. (QuickT ime
will not be installed if you have a newer version on your system.)
STEP 6 Click Install to begin the Easy Install, or choose Custom Install
from the pop-up menu in the upper left corner of the dialog box
to select installation options.
If you click Install, skip to Step 7.
The Custom Install dialog box contains six options. Click the
checkbox next to an option to include it in the installation.
• Complete Installation
This option installs the ImageAXS application, along with
supporting system extensions, plug-ins.
• ImageAXS Only
This option installs the ImageAXS application without any of
the related files.
• Sample Collection and Images
This option installs a sample data file you can use to help
learn the basic features of ImageAXS before you create
collections of your own, as well as the sample image files on
which the collection is based.
• Navigation Services Module
This option installs a system extension that lets ImageAXS
use Mac OS Navigation Services dialog boxes for opening
and saving files on computers running a Mac OS 8.0 or 8.1
operating system.
Do not install Navigation Services Support if you are using
Mac OS 8.5 or a more recent operating system. .
N
OTE
IMAGEAXS 4.0 MACINTOSH USER’S GUIDE
The Navigation Services Support feature can only be installed as an option
in the Custom Install dialog box. It is not par t of the Easy Install files.
2-2

GETTING STARTED
2
• Contextual Menu Module
If your Macintosh has a PowerPC processor, this option
installs a system extension that includes an “Acquire in
ImageAXS” command in the contextual menus that appear
when you press and hold
documents or folders in the Finder (see Chapter 6, “Creating
and Adding to a Collection”).
STEP 7 Select the custom installation options you want, then click
Install.
A standard file dialog box appears, prompting you to
choose where you want to install the files you selected.
STEP 8 Choose a name and location for the folder containing your
ImageAXS files.
If you do not change the default settings, the installer
creates a folder named ImageAXS 4.0 on your startup disk.
STEP 9 Click Install to begin installing ImageAXS.
A progress window appears as the ImageAXS files you
selected are installed.
CTRL on your keyboard, then click
NOTE
OTE
N
To cancel the installation, press COMMAND-PERIOD (z-.) on your keyboard.
In the dialog box that appears, click Reinstall to return to the Easy install
window. Click Quit to close the installer application entirely.
A dialog box appears when the ImageAXS installation is
complete, prompting you to quit or install files again.
STEP 10 Click Quit.
If you chose to install the ImageAXS application and the
latest version of QuickTime on your computer is version 2.5
or earlier, the QuickTime 3.0 installation process will begin.
Use this same procedure to install optional files at a later time if you
do not include them when you first install ImageAXS.
INSTALLING PLUG-INS
Some of the files installed with ImageAXS are plug-ins that work
with other programs. These files need to be moved into other folders
on your Macintosh.
In the folder where you installed ImageAXS, each plug-in is stored in
a subfolder whose name tells you where to move the file.
In the Finder, open each ImageAXS subfolder and drag the plug-in inside it
to the appropriate folder. Do
folder; if you do, the plug-ins will not work properly.
not
drag the subfolders out of the ImageAXS
IMAGEAXS 4.0 MACINTOSH USER’S GUIDE
2-3

GETTING STARTED
ImageAXS™
application icon
2
• Drag into Photoshop Plug-ins ƒ
If you have Adobe Photoshop installed on your Macintosh (or
other image-editing applications that can use Photoshop
plug-ins), drag the IAXAcquire/Export file contained here
into the Plug-ins folder inside the Photoshop folder.
• Drag into Preferences, TWAIN
If you have software for capturing images from TWAINcompatible scanners installed on your Macintosh, drag the
Source Manager file contained here into the TWAIN folder
inside the Preferences folder of your System Folder.
• Drag into Quark XTension ƒ
If you have Quark XPress installed on your Macintosh, drag
the ImageAXS PictureDrop file contained here into the
XTension folder inside the Quark XPress folder.
STARTING
MAGEAXS
I
To start ImageAXS, open the folder in the Finder where you installed
the ImageAXS files, then double-click the ImageAXS application
icon.
If you are using ImageAXS for the first time, you will see an empty
window with the ImageAXS menu bar at the top of the screen. (If
you have used ImageAXS before, any collection that was open when
you last closed the program will automatically open.)
OPENING A COLLECTION
To start working with ImageAXS, you must open a collection.
If you have not created any collections (for example, if you are using
ImageAXS for the first time), you can either create a new collection
(see Chapter 5, “Creating and Adding to a Collection”) or open the
sample collection. Opening and viewing the sample collection is a
good way to learn the basic features of ImageAXS (see Chapter 3,
“Viewing Collections”).
To open the sample collection:
STEP 1 Choose Open Collection from the File menu (z-O).
A dialog box appears, prompting you to select a collection
to open.
IMAGEAXS 4.0 MACINTOSH USER’S GUIDE
2-4
GETTING STARTED
ImageAXS™
“.db” file icon
2
STEP 2 In the dialog box, locate the folder where you installed
ImageAXS.
STEP 3 Double-click the icon labeled Sample Collection.db.
You can recognize collections by the ImageAXS file icon
and/or the ".db" extension at the end of the file name.
You can also open the sample collection (or any other ImageAXS
collection) in the Finder by dragging and dropping the collection
icon on the ImageAXS application icon.
To open the sample collection (or any other ImageAXS collection) if
you have closed it recently, highlight Open Recent Collections in the
File menu, then select the collection from the submenu that appears.
WHERE DO I GO
ROM HERE?
F
If you have opened the sample collection, go on to Chapter 3
(“Viewing Collections”) and Chapter 4 (“Viewing Records and
Source Files”), which explain how to view collections, data records,
and source files.
If you want to get started using ImageAXS to organize and manage
your files, skip ahead to Chapter 5 (“Creating and Adding to a
Collection”). After creating a collection of your own, return to
Chapters 3 and 4 to learn about the different ways to look at your
new collection.
IMAGEAXS 4.0 MACINTOSH USER’S GUIDE
2-5

CHAPTER 3
VIEWING COLLECTIONS
3
VIEWING COLLECTIONS
IN T
HIS CHAPTER
Overview: What Is a Collection? 3-1
Overview: What Is a Collection? 3-1
Viewing a Collection 3-2
Viewing Thumbnails 3-7
Changing Thumbnails View Options 3-9
Viewing Text Field Data 3-12
Changing Text List View Options 3-14
:
ImageAXS
4.0
3
OVERVIEW:
HAT IS A
W
OLLECTION?
C
OPENING AND
LOSING
C
OLLECTIONS
C
N
OTE
Collections are the documents created by ImageAXS. They consist of
data records for each file on your computer that is associated with
the collection, plus a thumbnail image that represents each file.
With ImageAXS, you can create and maintain as many collections as
you want, although you can only view one collection at a time.
Although ImageAXS collections describe the files on your computer and
storage drives, they do
delete the collection without affecting the original files, and vice versa.
In the Finder , ImageAXS collections ar e r epr esented by two files: one
with a “.db” extension (containing text information), and the other
with a “.blob” extension (containing thumbnail images). If you want
to move or rename a collection, you must move or rename both files.
OPENING A COLLECTION
To open a collection that you have used recently, highlight Open
Recent Collections in the File menu, then select the collection from
the submenu that appears.
not
contain the files themselves. You can move or
IMAGEAXS 4.0 MACINTOSH USER’S GUIDE
3-1
VIEWING COLLECTIONS
ImageAXS
“.db” file icon
ImageAXS Help
Balloon Help
If the collection you want is not on the list, follow the steps below.
To open a collection:
STEP 1 Choose Open Collection from the File menu (z-O).
STEP 2 In the dialog box, locate and select a collection.
STEP 3 Double-click the collection name, or highlight it and click Open.
You can also open any ImageAXS collection in the Finder by
dragging and dropping the collection icon on the ImageAXS
application icon, or by double-clicking the collection icon.
3
A dialog box prompts you to select a collection to open.
You can recognize collections by the ImageAXS file icon
and/or the ".db" extension at the end of the file name.
VIEWING A
OLLECTION
C
N
OTE
If you have used ImageAXS before, the collection (if any) that was open
when you last quit the program will automatically open the next time you
start the progam.
CLOSING A COLLECTION
When you close a collection, all windows related to the collection
(including those for all records and portfolios, and the Keyword and
Portfolio Lists) will close automatically.
To close an open collection:
• With any window of the collection active, select Close Collection from
the File menu.
ImageAXS gives you two main ways to look at all of the records in a
collection — the Thumbnails View and the Text List View. These
views share many common elements, which are discussed below.
IMAGEAXS HELP AND BALLOON HELP
Each ImageAXS collection window has three buttons in the upper
right corner. Click the button on the far right to open ImageAXS
Help, an Apple Guide help file that provides step-by-step
instructions for accomplishing most of the tasks in the program.
Click the middle button to show Balloon Help, which provides a
brief explanation of virtually every menu item, button, and dialog
box option in ImageAXS. After opening Balloon Help, just point at
any item in a window to see information about that item. Click the
Balloon Help button again to turn Balloon Help off.
IMAGEAXS 4.0 MACINTOSH USER’S GUIDE
3-2
VIEWING COLLECTIONS
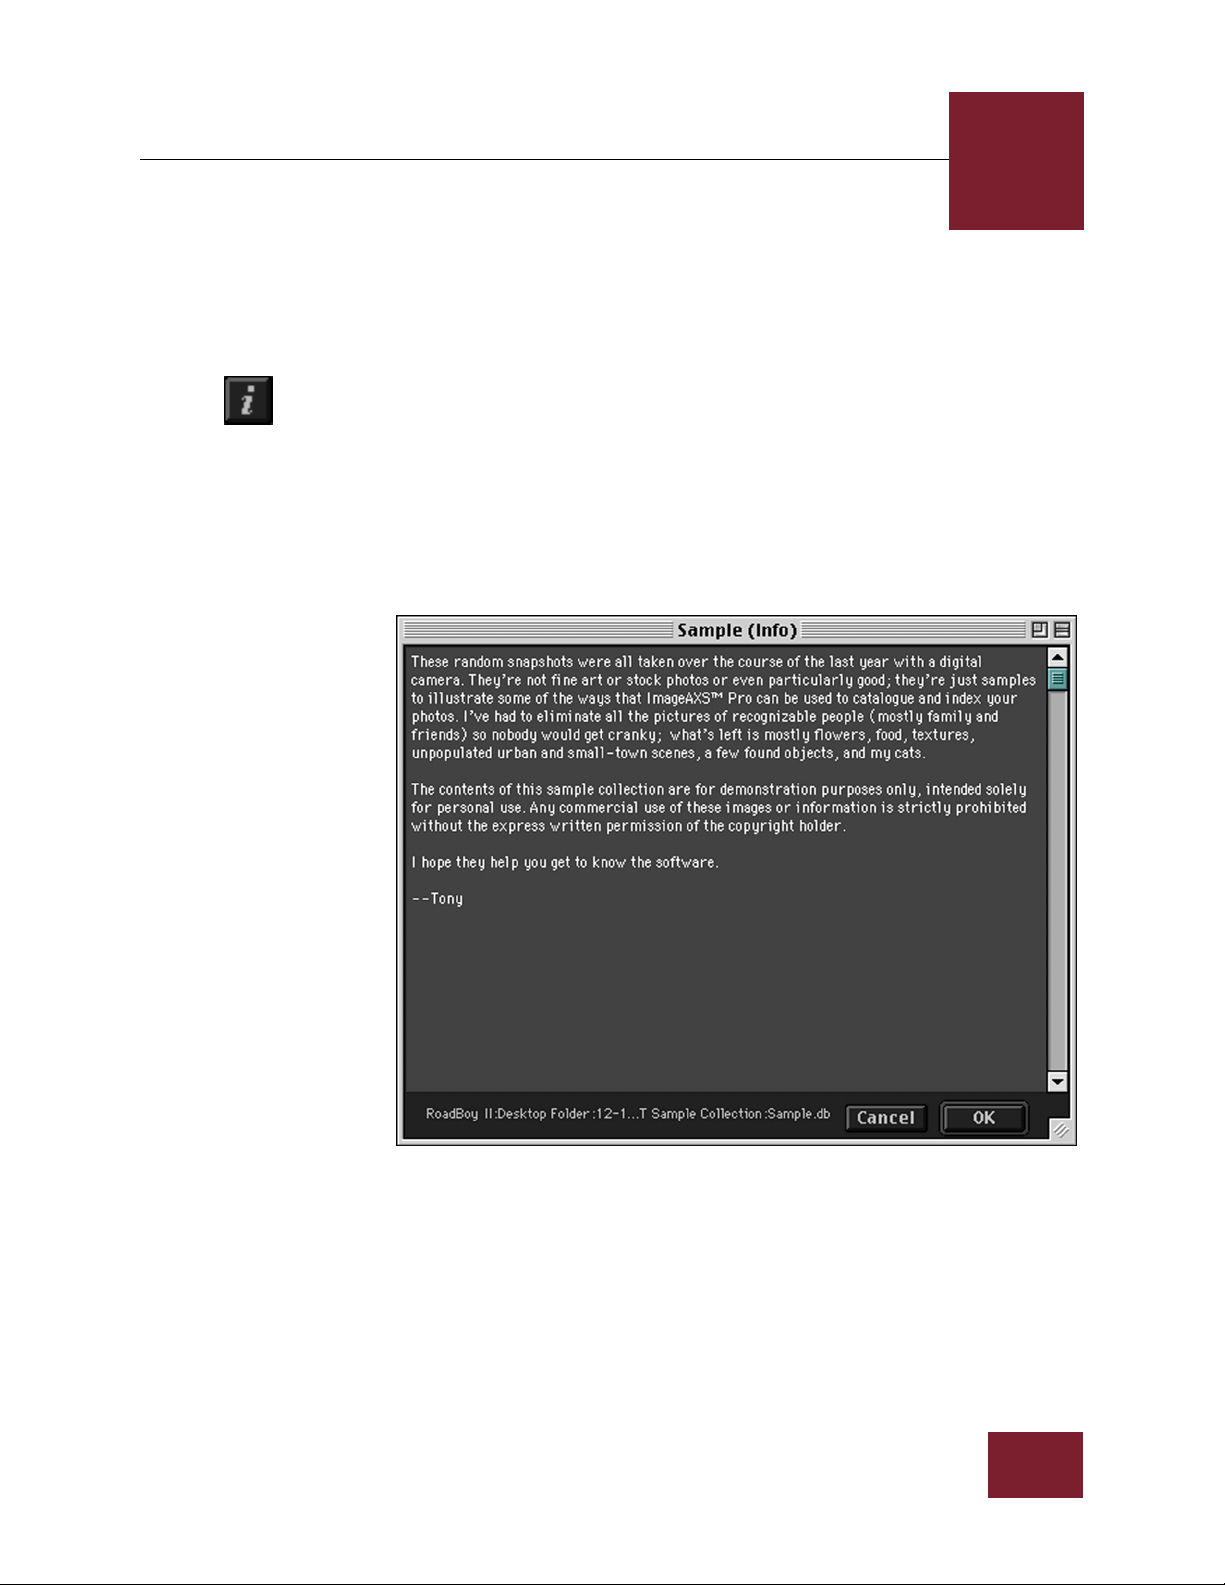
COLLECTION INFO
In the upper right corner of any ImageAXS collection window, click
the leftmost button to open the Collection Info dialog box.
3
Collection Info
N
OTE
If information has been entered in the Collection Info dialog box, the
Collection Info button will display a solid “i” symbol. An empty or outlined “i”
indicates that no information has been entered for the collection.
Use the Collection Info dialog box to enter general information (up to
32,000 characters) about your collection, or to edit information that
you have already entered. You can type this information, or paste
text that you have copied from another program.)
The lower left corner of the Collection Info dialog box displays where
the collection is located in the Finder.
Collection Info window
To save any changes you make and close the Collection Info dialog
box, click OK. To close the dialog box without saving your changes,
click Cancel.
IMAGEAXS 4.0 MACINTOSH USER’S GUIDE
3-3
VIEWING COLLECTIONS
Show/Hide Buttons
USING THE BUTTON PANEL
The button panel along the left side of ImageAXS collection
windows gives you quick access to the basic ways to view and
organize your collections.
To show or hide the button panel, do either of the following:
• Select Show Buttons (or Hide Buttons, if the button panel is
shown) from the View menu
• Click the Show/Hide Buttons icon on the upper left corner of
most ImageAXS windows.
Here is a brief summary of what each button in the button panel does
(from top to bottom):
T
HUMBNAILS VIEW
Displays the thumbnail images for all data records in the collection.
EXT LIST VIEW
T
Displays the field data for all data records in the collection.
3
NFO SHEET VIEW
I
Displays the thumbnail image, field data, and keywords for a
selected data record.
S
OURCE FILE VIEW
Opens a read-only version of the source file for a data record.
EYWORD LIST
K
Displays a list of keywords you have created to describe records in
the collection.
ORTFOLIO LIST
P
Displays a list of smaller groups of records that you have created
within the collection.
EARCH
S
Lets you find records that share field data, keywords, and/or other
characteristics.
S
ORT
Lets you reorder all records in the collection based on fields that you
select.
PEN SELECTION AS PORTFOLIO
O
Creates a new portfolio window containing the records you have
selected.
IMAGEAXS 4.0 MACINTOSH USER’S GUIDE
3-4
VIEWING COLLECTIONS
Image file icons
Sound file icons
Movie file icons
3D file icons
Document file icons
Application file icons
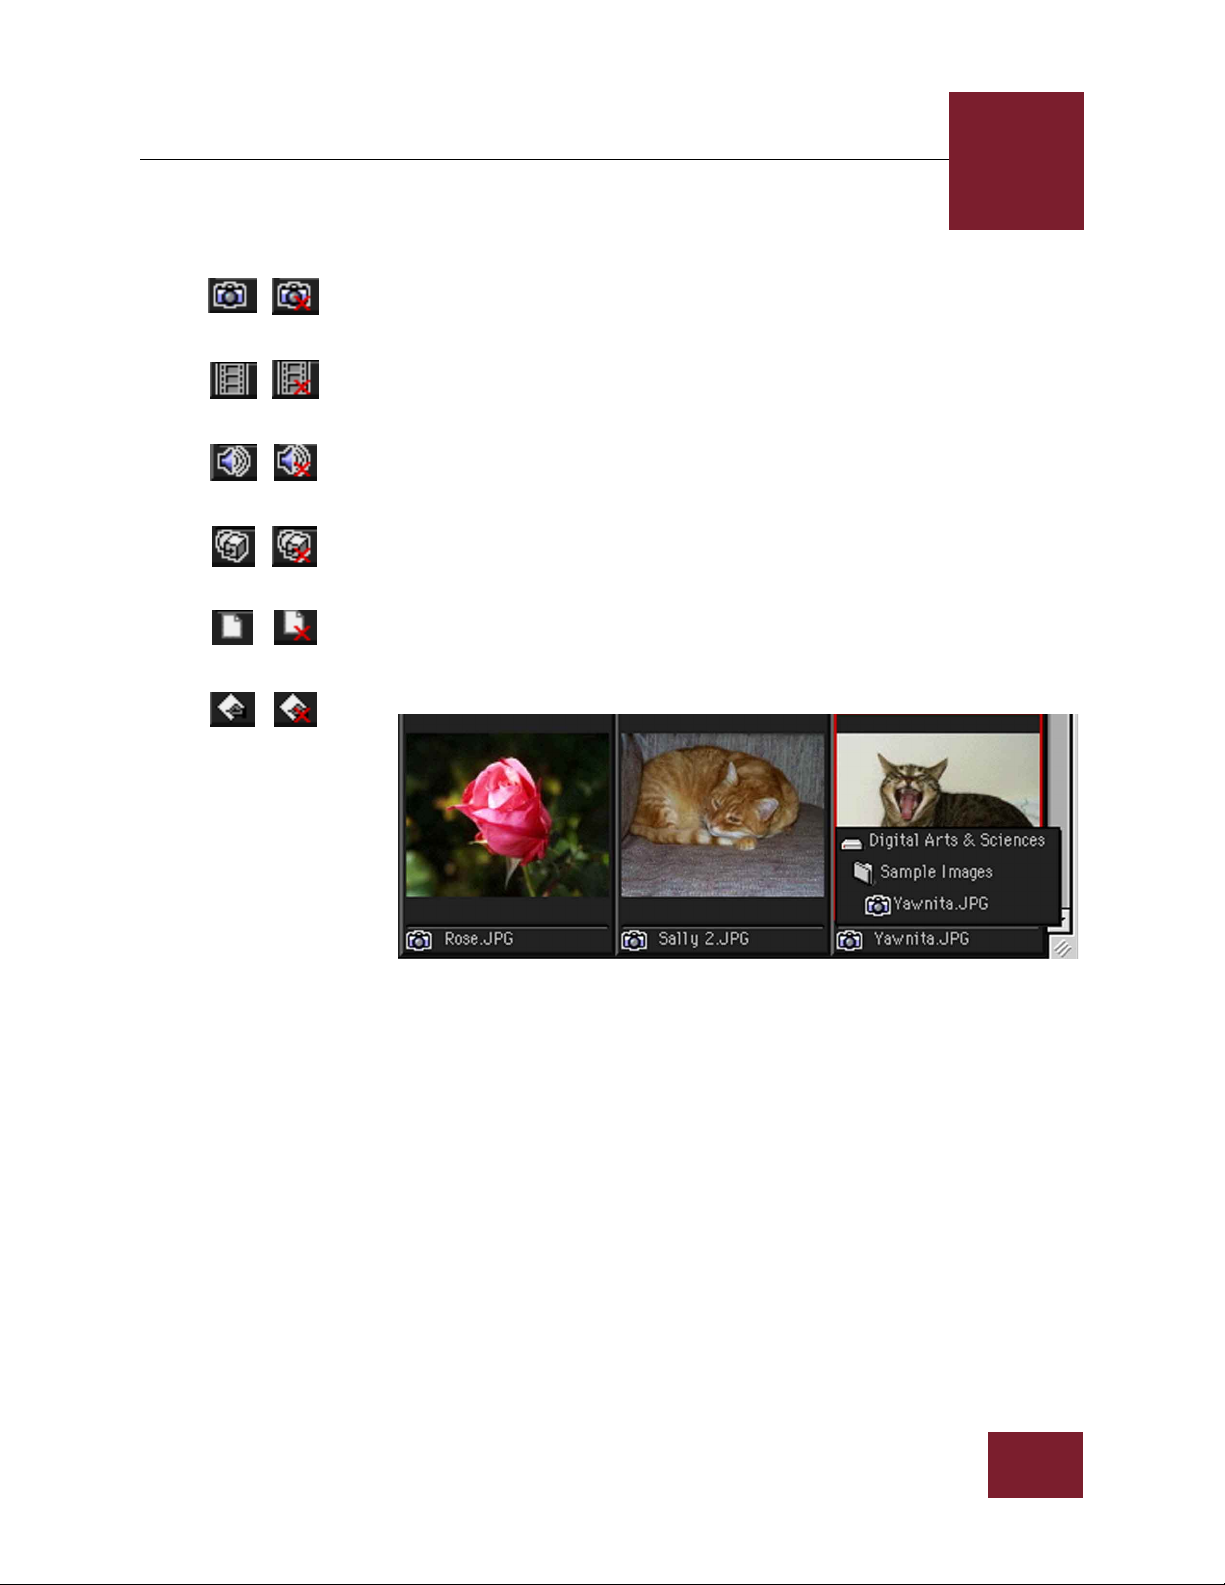
FILE TYPE ICONS
The file type icon for a data record indicates the type of the source file
and whether the source file is online. It appears to the left of the
thumbnail caption for each record in the Thumbnails V iew, and at the
left end of the data row for each record in the Text List View.
The terms online and offline refer to whether ImageAXS is able to find
the source file for a record. For example, a source file located on a
network drive that is not currently connected to your computer will
be offline in ImageAXS.
Offline source files are indicated by a red “X” through the file type
icon for the record. You cannot open the Source File View for records
that are offline; in addition, you cannot copy, move, rename, delete,
or edit the source files for these records. (For non-multimedia files,
you will not be able to open the source file from within ImageAXS.)
For information on updating the location of offline source files, see
“Updating Records” on page 10-3.
3
IMAGEAXS 4.0 MACINTOSH USER’S GUIDE
NOTE
File location pop-up window
Click the file type icon to display the Finder location of the source file in a
pop-up window. Select the file name from this pop-up window to open the
source file in its original application, or select a disk or folder name to open
that disk or folder in the Finder.
CHANGING THE BACKGROUND COLOR
ImageAXS offers a choice of backgrounds, either of which is applied
to all windows in the program. The default Dark Gray background,
with text and buttons in light gray, is often preferred for viewing
images. You may find the Light Gray background, with text and
buttons in black, more useful for reading text information.
Use the ImageAXS Preferences dialog box to change the background
color of all ImageAXS windows at any time.
3-5
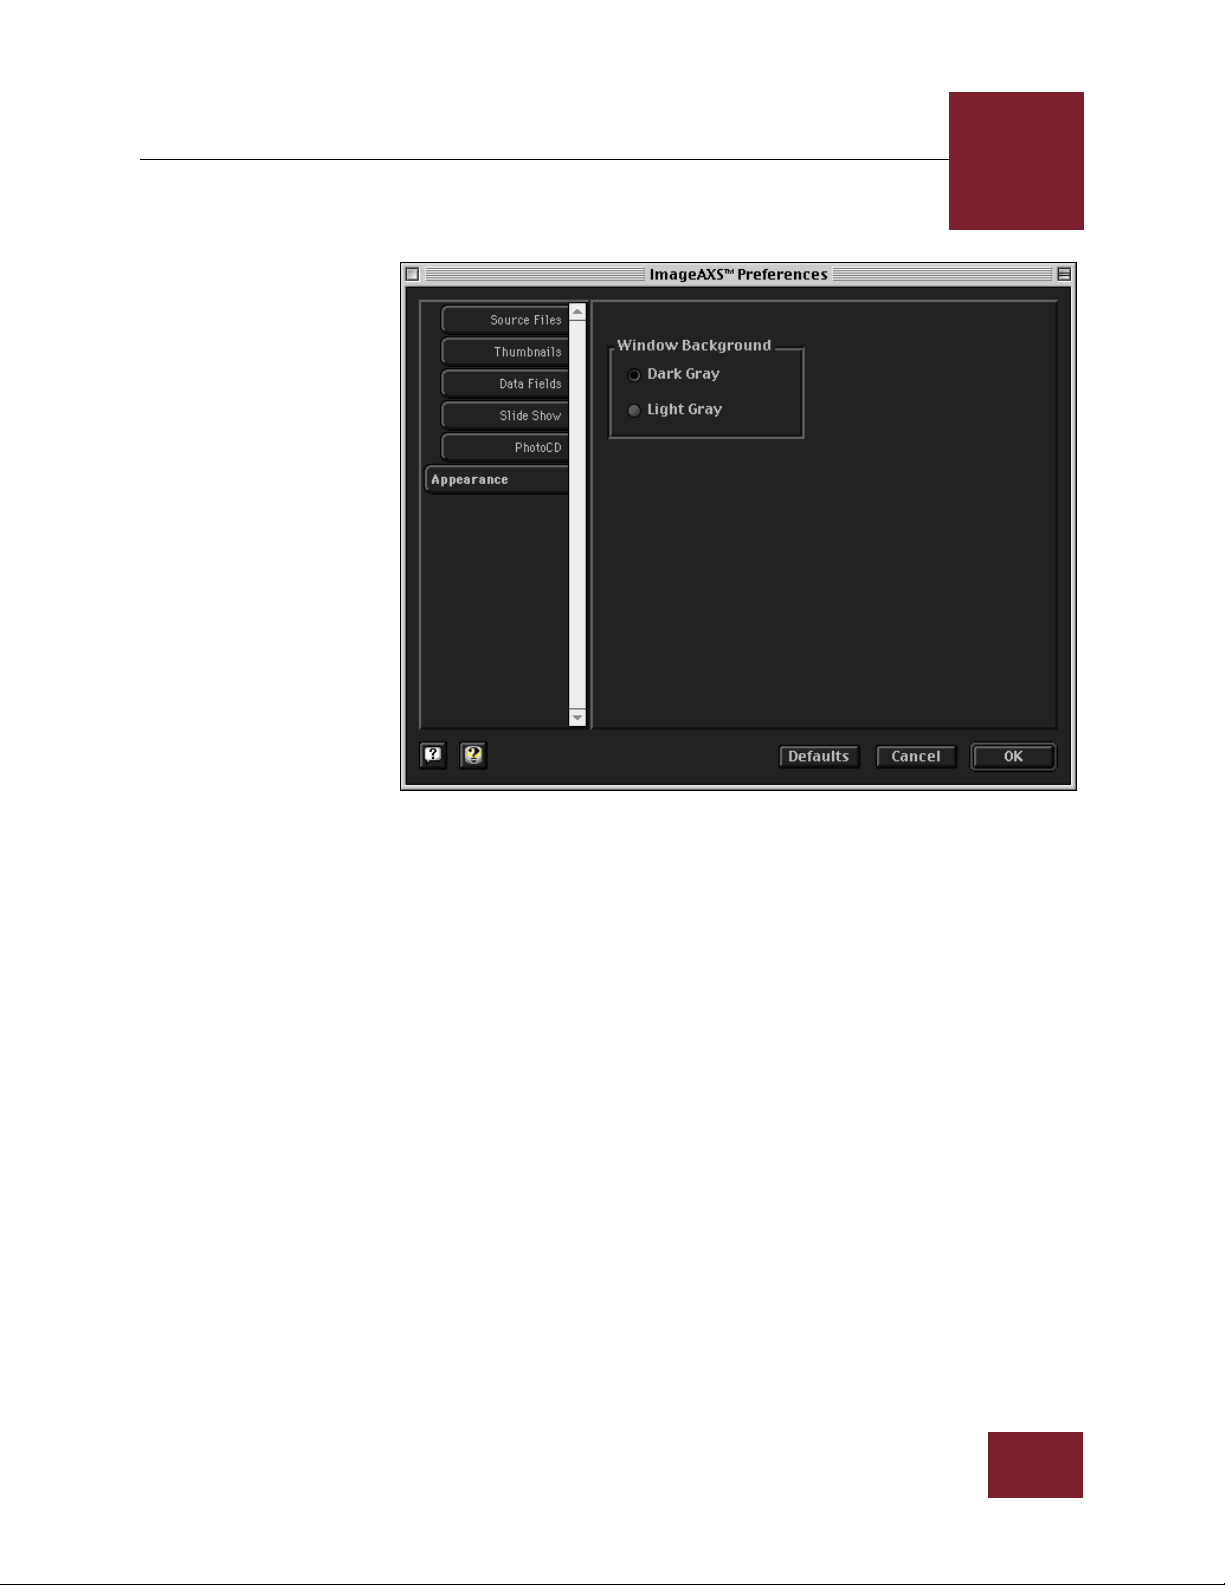
VIEWING COLLECTIONS
3
Appearance panel, ImageAXS Preferences dialog box
To change the background color of windows:
STEP 1 Select Preferences from the Edit menu (z-Shift-P).
The ImageAXS Preferences dialog box appears.
STEP 2 Click the Appearance tab on the left side of the ImageAXS
Preferences dialog box.
If the tab is pulled out past the others and the name is in
boldface type, it is already selected.
STEP 3 In the box labeled Window Backg round, click either Dark Gra y or
Light Gray.
STEP 4 Click OK to close the ImageAXS Preferences dialog box.
The background color of all ImageAXS windows changes to
match your selection.
IMAGEAXS 4.0 MACINTOSH USER’S GUIDE
3-6
VIEWING COLLECTIONS
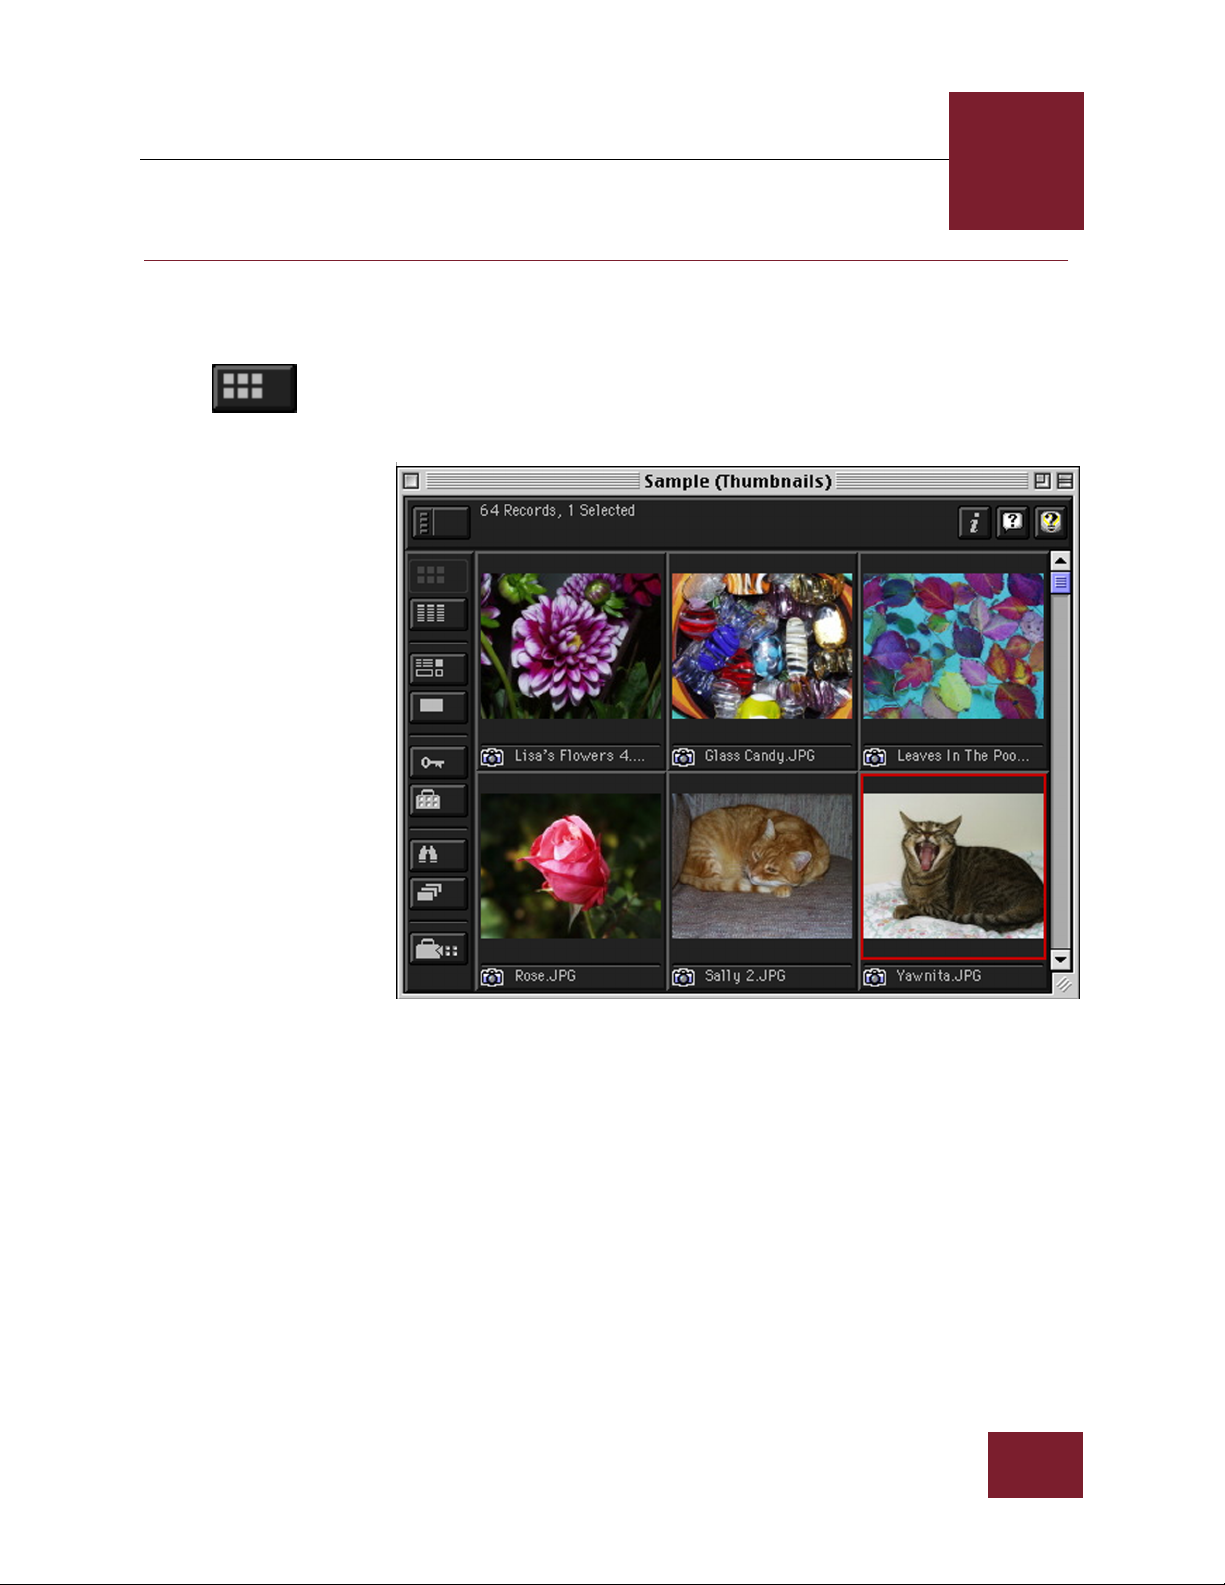
Thumbnails View
button
3
VIEWING
HUMBNAILS
T
The first window you see when you open any collection or portfolio
is the Thumbnails View for that collection or portfolio.
To display the Thumbnails View at any time, select Thumbnails from
the View menu, or click the Thumbnails View button in the button
panel. (If the view window is already open, ImageAXS brings it to
the front.)
IMAGEAXS 4.0 MACINTOSH USER’S GUIDE
Thumbnails View window
The Thumbnails View window includes the following elements:
• The title bar , which shows the name of the collection, followed by
the view (“Thumbnails”) in parentheses
• The number of records in the collection, and how many are
selected
• The Collection Info, Balloon Help, and ImageAXS Help buttons
(see “Viewing a Collection” on page 3-2)
• The button panel (see “Using the Button Panel” on page 3-4)
• Thumbnail images for each data record in the collection, with a
file type icon and a caption beneath each image
3-7
VIEWING COLLECTIONS
To show more (or fewer) thumbnails, resize the Thumbnails View by
dragging the lower right corner of the window, or change the display
size of the thumbnail images (see “Changing Thumbnails View
Options” on page 3-9).
Use the scrollbar to move back and forth among thumbnail images,
or do either of the following:
• Select First Record, Previous Record, Next Recor d, or Last Recor d
from the Record menu.
• Use any of the arrow keys (←, →, ↓, or ↑) on your keyboard.
The sections that follow explain how to use the thumbnail image, file
type icon, and thumbnail caption to get information about a data
record and the source file it represents.
THUMBNAIL IMAGES
When you acquire (in other words, make a data recor d for) an image
file, ImageAXS creates a smaller JPEG version of the image to be
displayed in the Thumbnails View. For movie or animated GIF files,
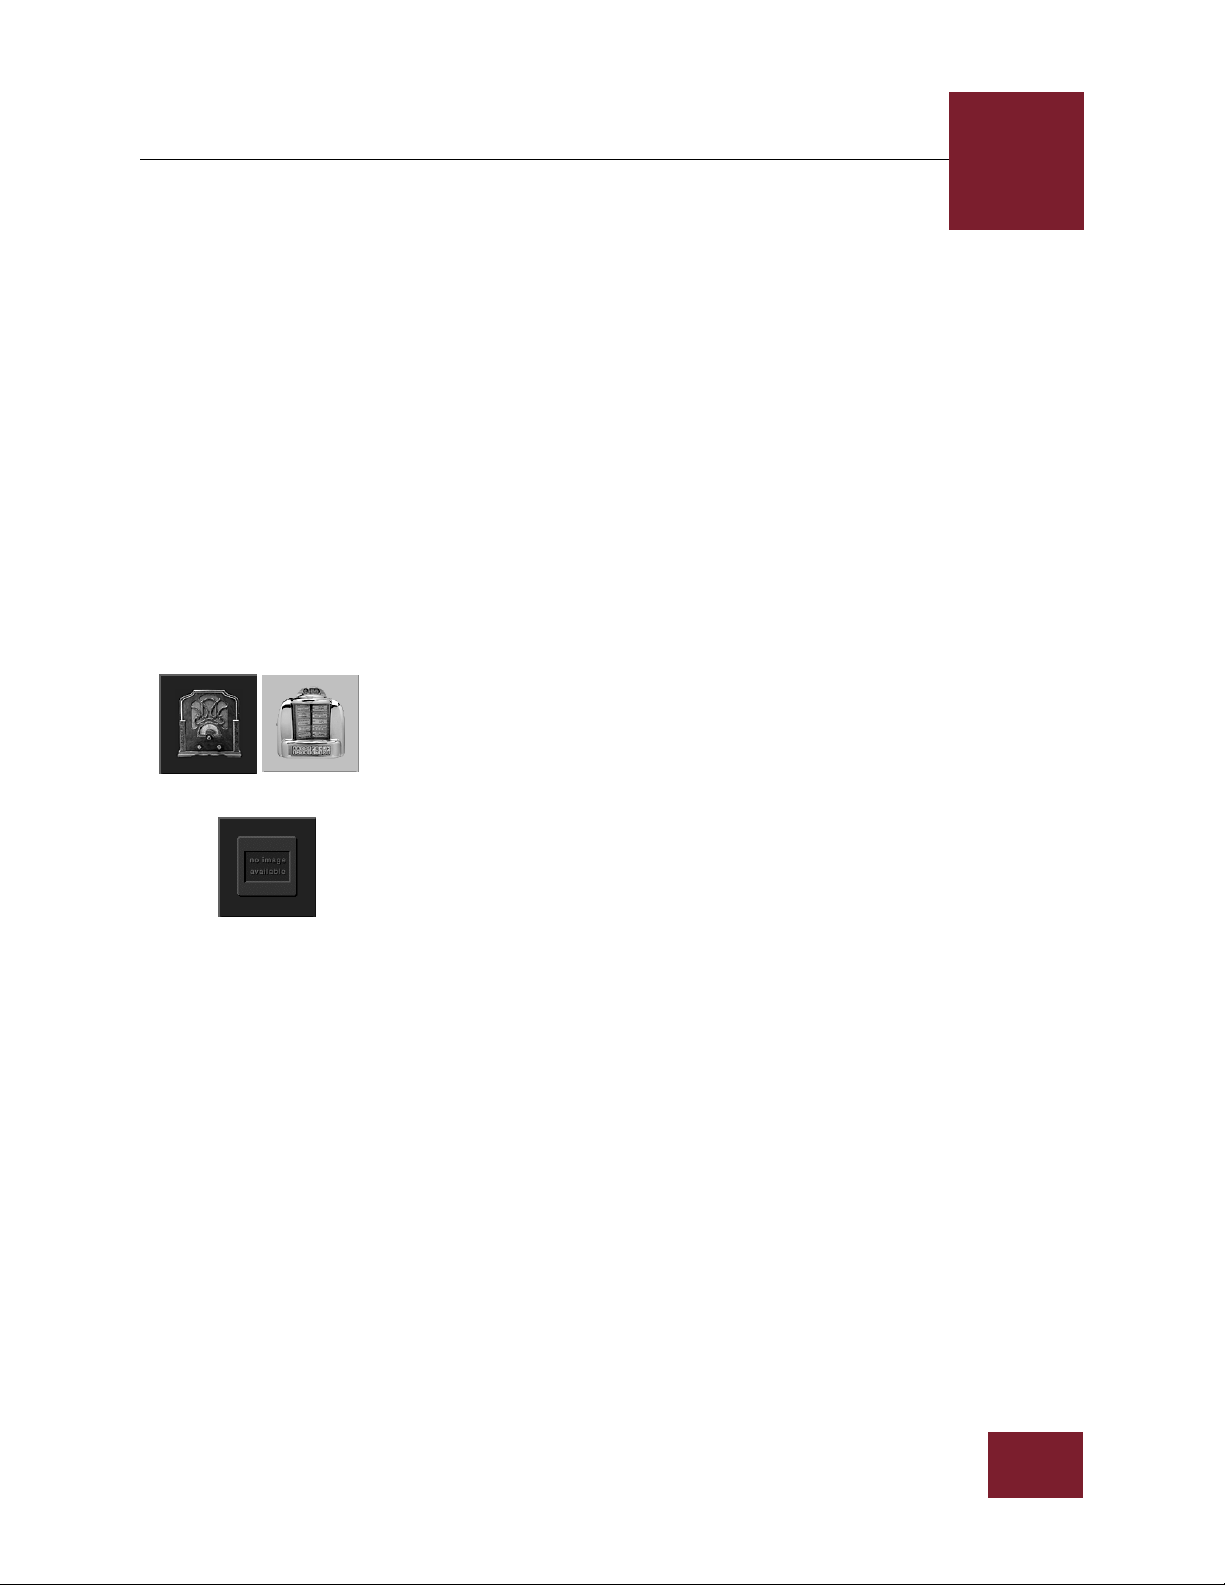
Sound file thumbnails
the thumbnail is created from the opening frame or image.
For digital sound files, a generic thumbnail is provided by
ImageAXS.
3
Generic thumbnail
N
OTE
If ImageAXS is unable to create a thumbnail of any type (or if no
source file is attached to a record), a generic “No Image Available”
thumbnail is displayed.
Double-click the thumbnail image to open the Source File Vie w f or an image,
movie, sound, or 3D file.
THUMBNAIL CAPTIONS
Each thumbnail image has a caption that represents the contents of
one of the fields in the data record. (The name of the source file is the
default choice.)
For information on how to select a different field to use as the caption
for thumbnail images, see “Changing Thumbnail Captions” on
page 3-12.
IMAGEAXS 4.0 MACINTOSH USER’S GUIDE
3-8
VIEWING COLLECTIONS
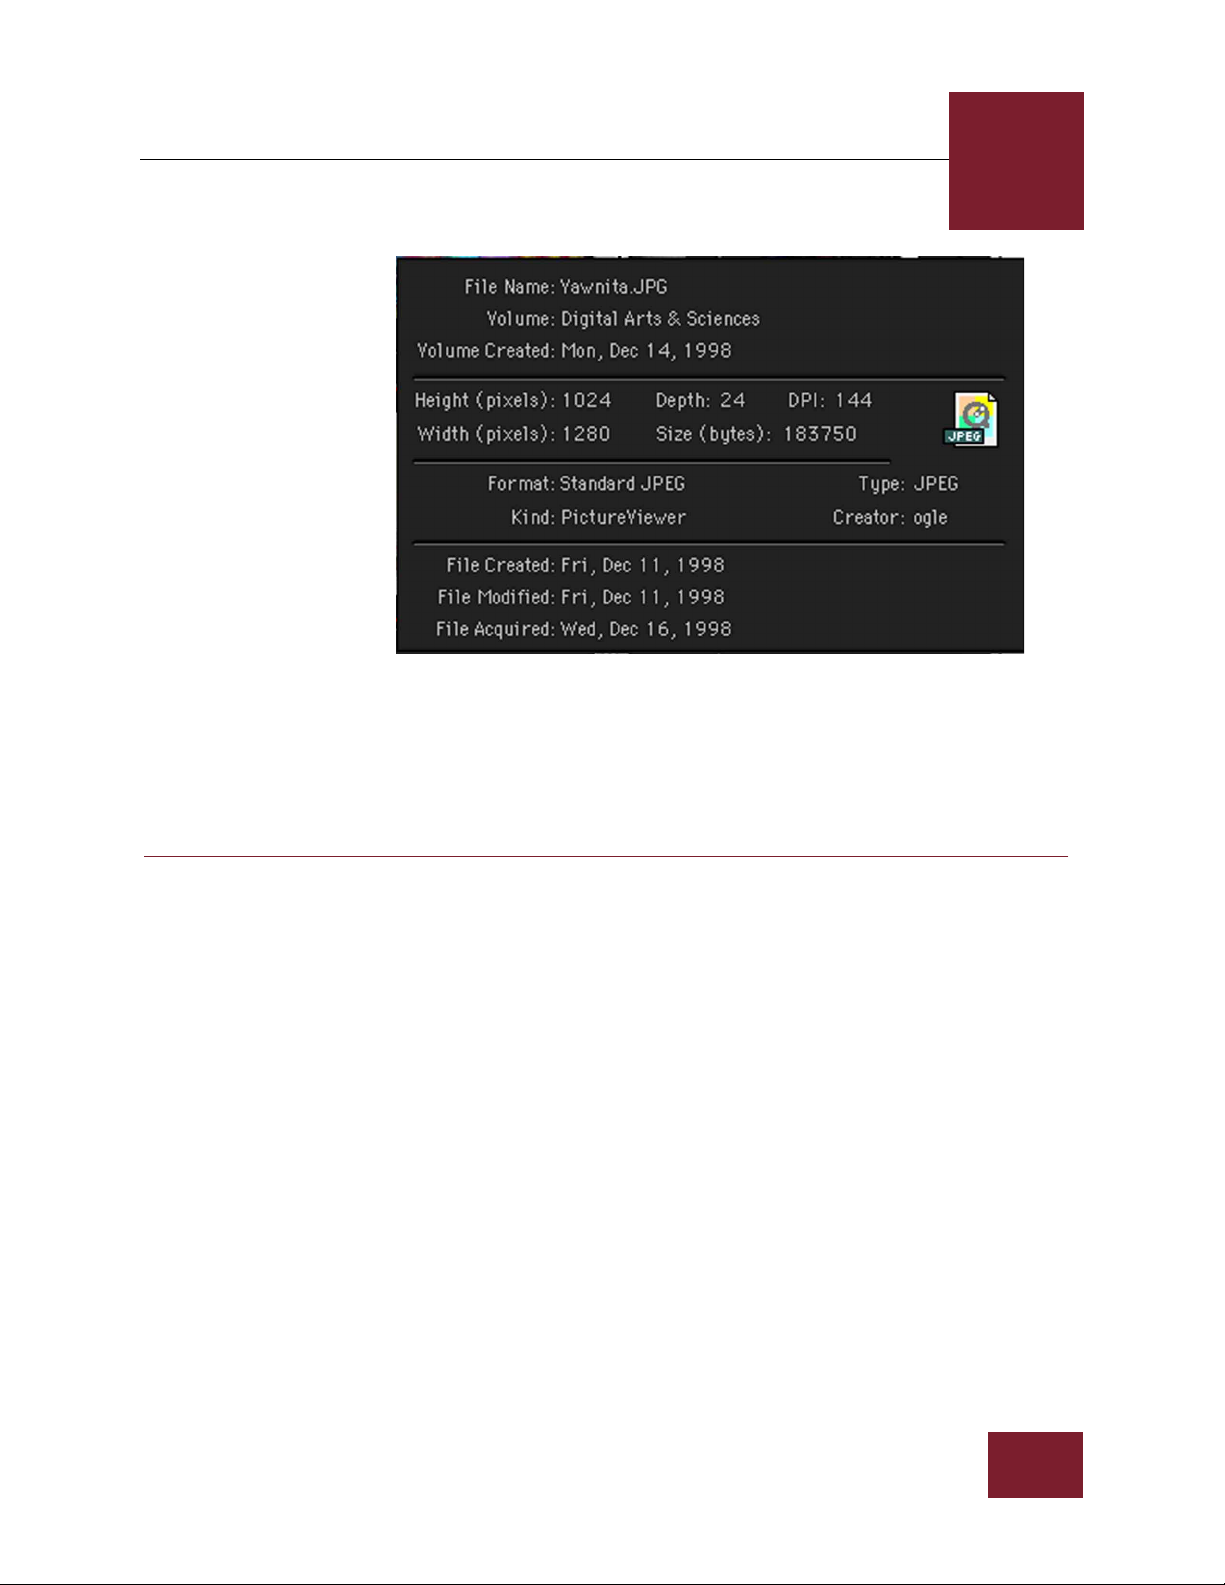
File Information pop-up window
3
NOTE
CHANGING
HUMBNAILS VIEW
T
PTIONS
O
Click the thumbnail caption for a record to displa y the File Inf ormation for the
source file in a pop-up window. (Click the window to close it.)
Triple-click the thumbnail caption to open the Info Sheet View for a data
record.
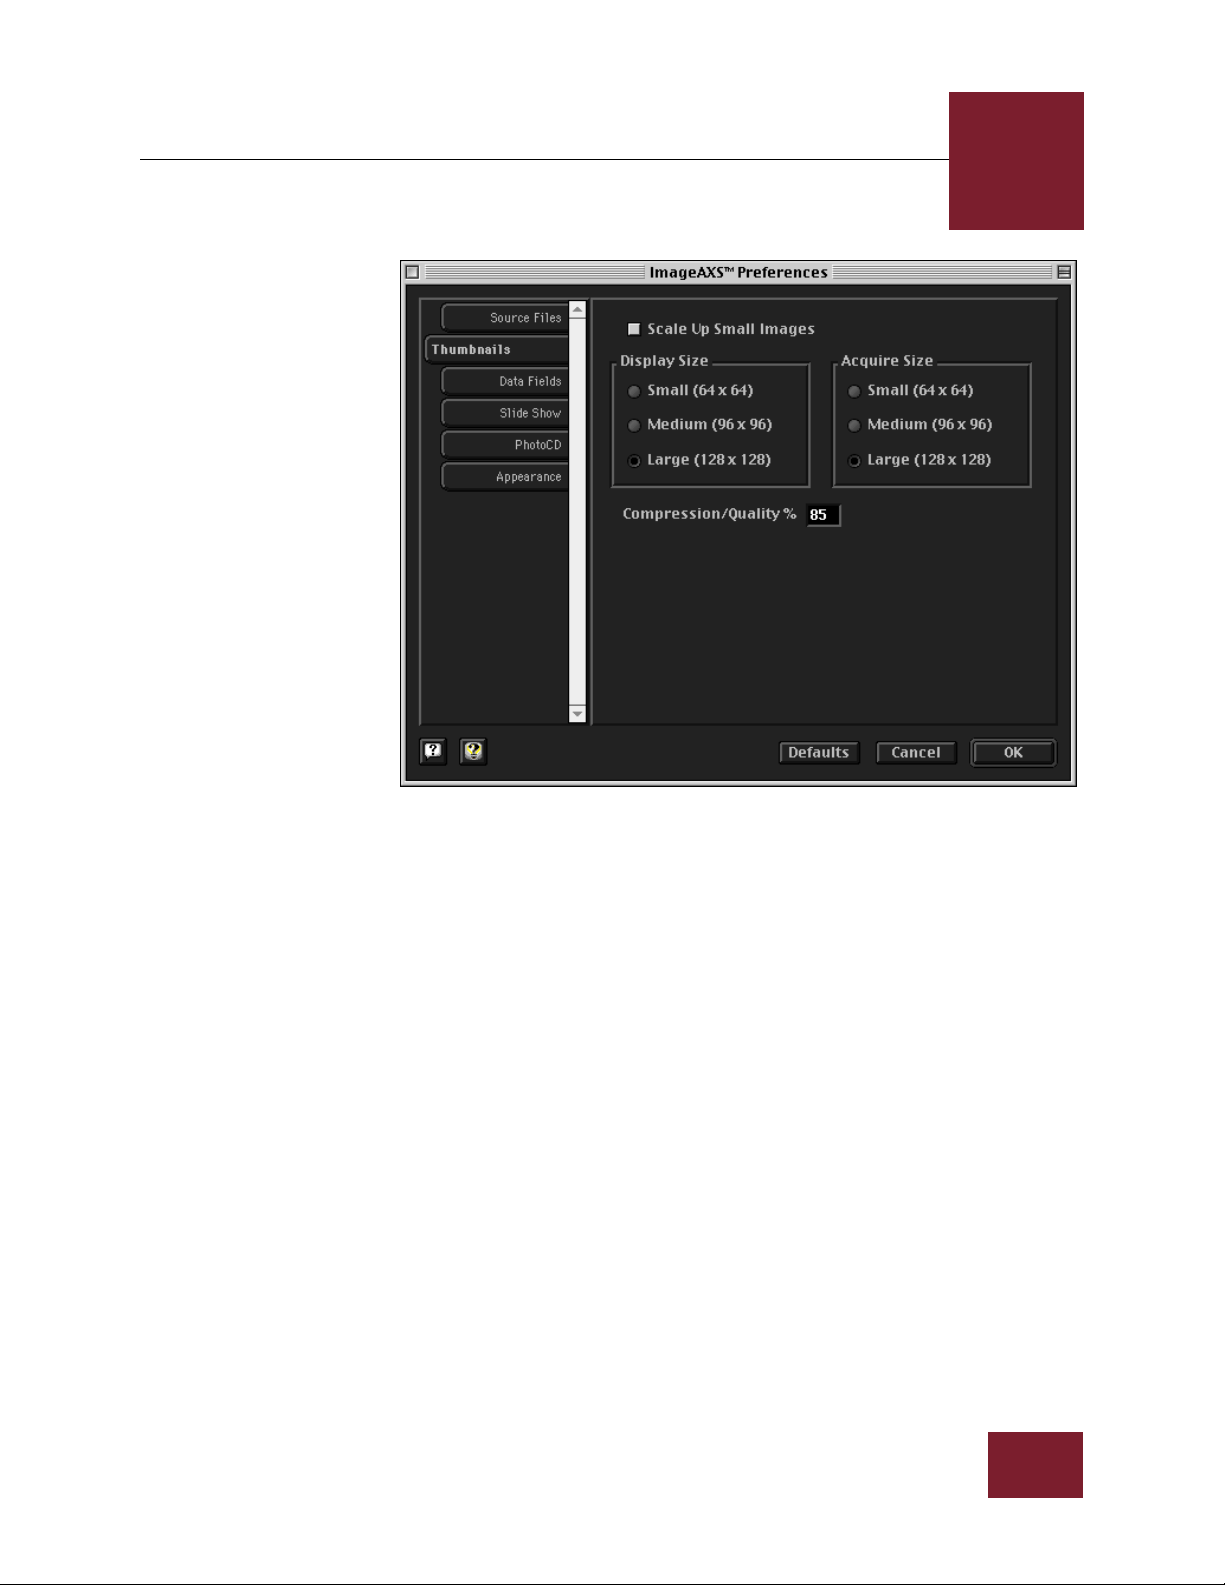
CHANGING THUMBNAIL IMAGE SIZE AND QUALITY
Use the Thumbnails panel of the ImageAXS Preferences dialog box to
change the display size and quality for thumbnail images in the
Thumbnails View.
To open the Thumbnails panel of the ImageAXS Preferences dialog box:
STEP 1 Select Preferences from the Edit menu (z-Shift-P).
The ImageAXS Preferences dialog box appears.
STEP 2 Click the Thumbnails tab on the left side of the dialog box.
If the tab is pulled out past the others and the name is in
boldface type, it is already selected.
IMAGEAXS 4.0 MACINTOSH USER’S GUIDE
3-9
VIEWING COLLECTIONS
3
Thumbnails panel, ImageAXS Preferences dialog box
With the Thumbnails panel of the ImageAXS Preferences dialog box
open, you can change thumbnail options as described below.
To change the default size of thumbnail images created when a source file is
acquired or updated:
STEP 1 In the box labeled Acquire Size, click the size you want for your
thumbnails.
The options are Small (64 x 64 pixels), Medium (96 x 96
pixels), or Large (128 x 128 pixels).
STEP 2 Click OK if you are finished making changes in the Preferences
dialog box.
If you choose to create thumbnails at the small or medium size,
remember that displaying them in a larger size (see below) greatly
reduces their quality.
To change the display size of thumbnail images in the Thumbnails View:
STEP 1 In the box labeled Display Size, click the size you want for your
thumbnails.
The options are Small (64 x 64 pixels), Medium (96 x 96
pixels), or Large (128 x 128 pixels).
IMAGEAXS 4.0 MACINTOSH USER’S GUIDE
3-10

VIEWING COLLECTIONS
STEP 2 Click OK if you are finished making changes in the Preferences
3
dialog box.
The thumbnail images will be displayed at the size you
selected.
NOTE
If you have a Power Macintosh, you can also change the display size by
holding down the CTRL key as y ou clic k a thumbnail image in the Thumbnails
View, then selecting an option (Small Thumbnails, Medium Thumbnails, or
Large Thumbnails) from the contextual menu that appears.
To change the display quality of thumbnail images in the Thumbnails View:
STEP 1 Type a number from 1 to 100 in the Compression/Quality % box,
then click OK.
High numbers result in better display quality for thumbnail
images, while low numbers result in more compressed
images and a smaller file size for your collection.
TEP 2 Click OK if you are finished making changes in the Preferences
S
dialog box.
To increase the display size of small thumbnails:
STEP 1 Click to put a check mark in the Scale Up Small Images
checkbox.
STEP 2 Click OK if you are finished making changes in the Preferences
dialog box.
Any thumbnail image smaller than the display size you
have selected (see above) will be scaled up to fill the
available thumbnail image area.
If you do not check the Scale Up Small Images box , the thumbnails
ImageAXS creates when you acquire or update small image files will
be no larger than the actual size of the source file.
CHANGING THUMBNAIL IMAGE ORIENTATION
In some cases, thumbnails created from image source files may
appear sideways or upside down (for example, if a digital camera
was turned sideways when a picture was taken).
Use the Orientation submenu in the Record menu to rotate
thumbnail images by 90, 180, or 270 degrees.
OTE
N
IMAGEAXS 4.0 MACINTOSH USER’S GUIDE
Changing the orientation of a thumbnail image does not affect the source file
in any way. The Source File View display for the image, however, will reflect
the changed orientation.
3-11

VIEWING COLLECTIONS
Text List View
button
To change the orientation of thumbnail images:
STEP 1 Select the thumbnail(s) you want to rotate.
STEP 2 Select 0°, 90°, 180°, or 270° from the Orientation submenu of
CHANGING THUMBNAIL CAPTIONS
Use the Field Labels dialog box to choose the captions for thumbnail
images in the Thumbnails View.
To change the thumbnail caption field:
STEP 1 Select Field Labels from the Edit menu.
STEP 2 Select a field name from the Thumbnails Label pull-down menu
STEP 3 Click OK.
3
the Record menu.
The thumbnail(s) are rotated to the right by the number of
degrees that you select.
in the Field Labels dialog box
The contents of the field you chose appear as the thumbnail
caption for each record in the collection.
VIEWING TEXT
IELD DATA
F
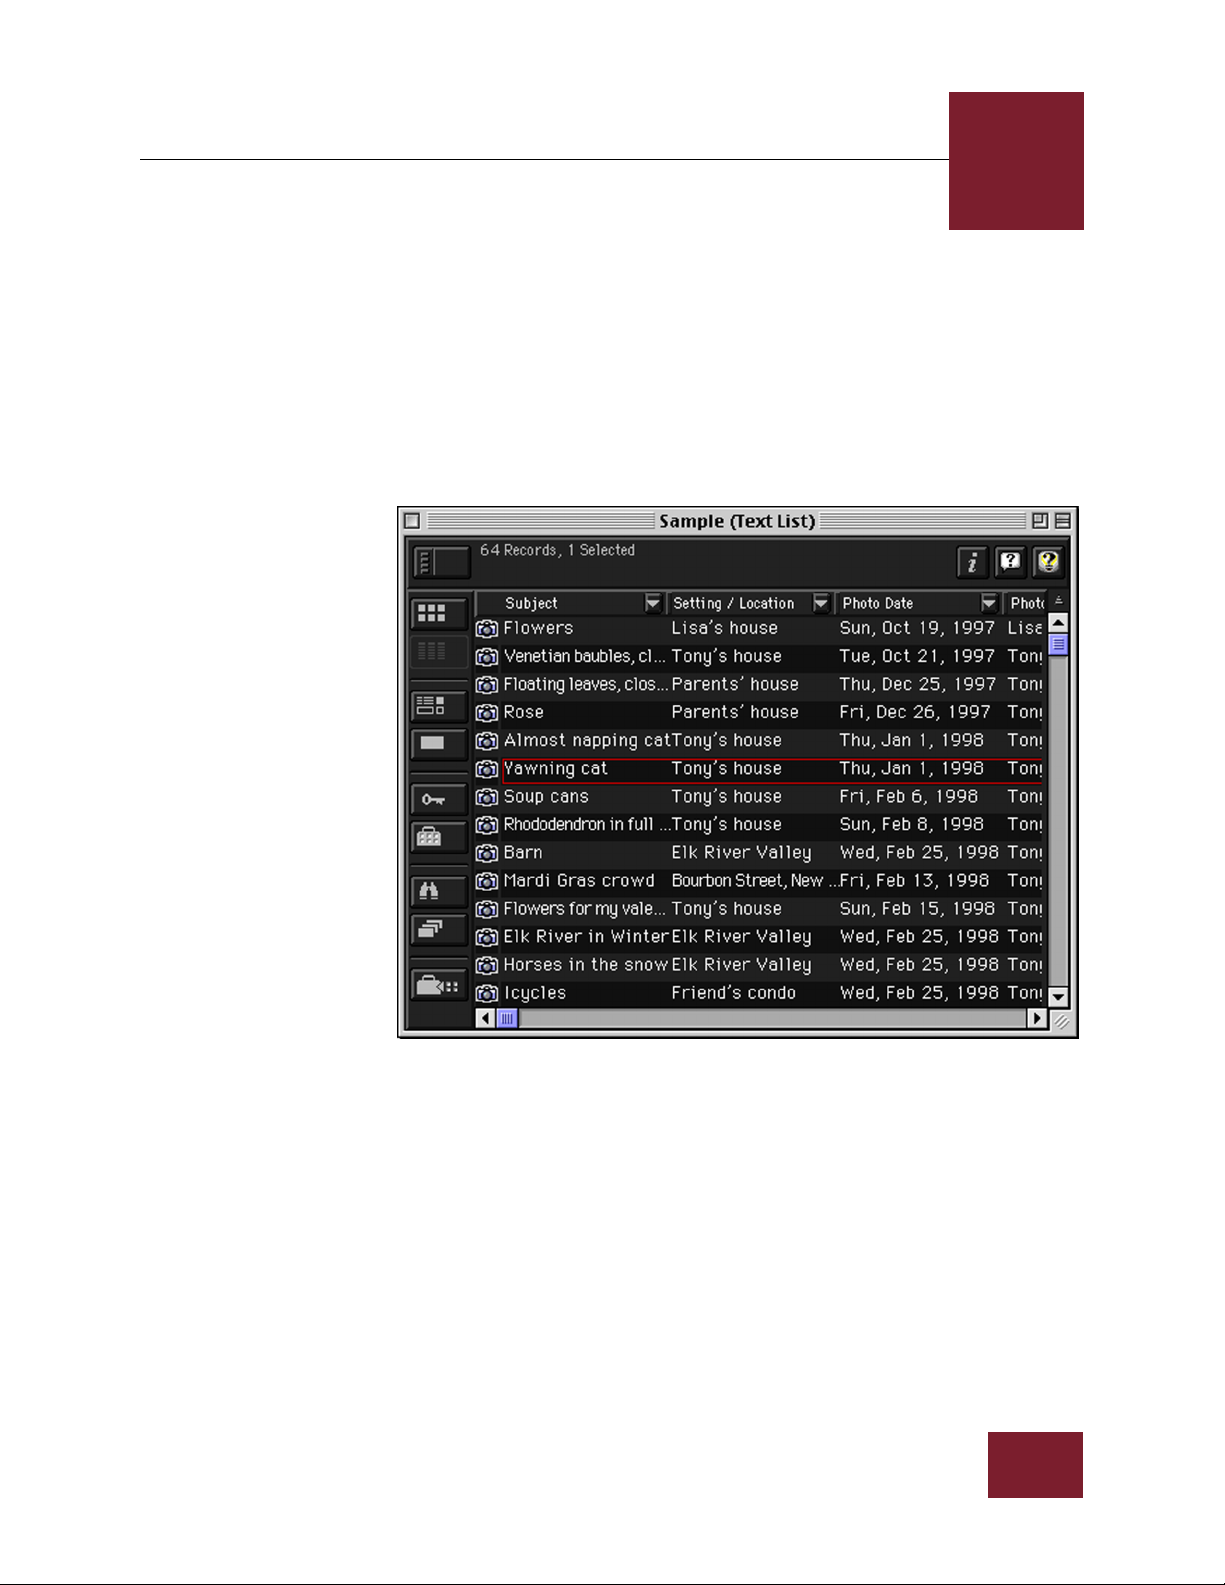
The Text List View displays all of the text field data for a collection or
portfolio. Some of this data is obtained automatically when you
make a data record for a file (see “Getting Information About the
Source File” on page 4-10); additional data can be entered in the Info
Sheet View for each record (see “Entering Data in an Individual
Record” on page 6-1).
To display the Text List View for a collection or portfolio, select Text
List from the View menu, or click the Text List View button in the
button panel.
Instead of thumbnail images and captions, the Text List View
displays record information in rows and columns — one row for
each record in the collection or portfolio, and one column for each
data field in the records. Aside from this, the Text List View contains
the same interface elements as the Thumbnails View:
• The title bar , which shows the name of the collection, followed by
the view (“Text List”) in parentheses
• The number of records in the collection, and how many are
selected
IMAGEAXS 4.0 MACINTOSH USER’S GUIDE
3-12
VIEWING COLLECTIONS
• Buttons for quick access to ImageAXS commands (see “Viewing a
Collection” on page 3-2)
• File type icons (at the left end of each data record) that you can
click for information about the location of the source file (see
“File Type Icons” on page 3-5)
3
N
OTE
Double-click the row for a data record to open the Info Sheet View for that
record. (In the Info Sheet View, you can modify the record by entering field
data and attaching keywords.)
Text List View window
The Text List View displays as many rows as fit into the window
vertically and as many columns as fit horizontally. To show more (or
fewer) rows and/or columns, resize the Text List View by dragging
the lower right corner of the window.
Use the scrollbars to move back and forth among rows and columns,
or move up and down among records by doing either of the
following:
• Select First Record, Previous Record, Next Recor d, or Last Recor d
from the Record menu.
• Use any of the arrow keys (←, →, ↓, or ↑) on your keyboard.
IMAGEAXS 4.0 MACINTOSH USER’S GUIDE
3-13
VIEWING COLLECTIONS
3
NOTE
CHANGING TEXT
IST VIEW
L
PTIONS
O
N
OTE
Scroll to the far right end of the data fields (using the horizontal scrollbar at
the bottom of the Te xt List View window) to see information about the source
file for each data record, such as the file size and when the file was created.
REORDERING DATA RECORDS
The top of each column in the Text List View lists the name of a data
field in the collection or portfolio. To sort all records in the Text List
View window by the contents of a particular field, just click the name
of the field to use in sorting your collection.
ImageAXS will immediately sort the collection in ascending order
based on the field you chose. To reverse this order, click the small
arrow icon above the scrollbar on the far right end of the Text List
View window (just below the ImageAXS Help button).
This method of sorting records is only temporary — the order is discarded
when you close the collection. (For instructions on how to sort records in an
order that will be saved, or how to sort by multiple fields in ascending or
descending order, see “Sorting Collections and Portfolios” on page 9-5.)
CHANGING THE WIDTH OF COLUMNS
You can drag the borders of columns in the Text List View to keep
lengthy data entries from being cut off.
To change the width of columns in the Text List View:
STEP 1 Move the pointer over the border (just to the right of the field
Column Resize tool
STEP 2 When you see the column resize tool, clic k and dr ag the column
REORDERING DATA FIELDS
At the top of any column in the Text List View, click the arrow next to
a field name to see a list of all fields in the collection or portfolio.
Choose a field from this pop-up menu to display the contents of that
field in the column you have selected.
OTE
N
IMAGEAXS 4.0 MACINTOSH USER’S GUIDE
After you do this, the contents of the field you choose still appear in their
original location — in other words, the contents of that field appear twice in
the Text List View, while the contents of the field you replaced do not appear
at all.
label) for the column whose width you want to change.
When it is directly over the border, the pointer will change
to a column resize tool (a double line, with arrows on either
side).
border to the desired width.
3-14

VIEWING COLLECTIONS
CHANGING FIELD LABELS
Use the Field Labels dialog box to change the names of fields. (These
changes will be reflected in both the Text List View and the Info Sheet
View.)
To change the names of fields:
STEP 1 Select Field Labels from the Edit menu.
STEP 2 Type your desired changes in any of the text entry boxes under
STEP 3 When you are finished making changes, click OK to close the
DATE/TIME FIELD OPTIONS
Use the Data Fields panel of the ImageAXS Preferences dialog box to
change the format of Date/Time fields.
3
The Field Labels dialog box appears.
the heading Field Label.
Field Labels dialog box.
To open the Data Fields panel of the ImageAXS Preferences dialog box:
STEP 1 Select Preferences from the Edit menu (z-Shift-P).
The ImageAXS Preferences dialog box appears.
STEP 2 Click the Data Fields tab on the left side of the dialog box.
If the tab is pulled out past the others and the name is in
boldface type, it is already selected.
IMAGEAXS 4.0 MACINTOSH USER’S GUIDE
3-15
 Loading...