

Digital Arts & Sciences IMAGEAXS PRO 4.1 FOR MACINTOSH, IMAGEAXS 4.1 FOR MACINTOSH User Manual
ImageAXS
for Macintosh
User’s Guide

Caere Corporation
100 Cooper Court
Los Gatos, California
95032-7603 USA
www.caere.com
Caere GmbH
Innere Wiener Strasse 5
81667 München, Germany
Caere UK Information Centre
Caere UK Information Centre
3 Catherine Place
Westminster, London SWIE 6DX
Caere France
72, rue Baratte-Cholet
94100 Saint-Maur, France
Please Note
In order to use this application, you should know how to work in the Macintosh
environment. Please refer to Macintosh documentation if you have questions
about how to use menu commands, dialog boxes, scroll bars, and so on.
ImageAXS and ImageAXS Professional for Macintosh
Ver s i o n 4 . 1
Copyright© 1999 by Caere Corporation. All rights reserved.
The Caere logo and Caere
are registered trademarks of Caere Corporation.
ImageAXS, ImageAXS Professional, and e-ZCard are registered trademarks of
Digital Arts & Sciences.
QuickTime™ and the QuickTime logo are trademarks used
under license. QuickTime is registered in the U.S. and other
countries.
All other trademarks are the property of their respective companies.
800-1330-030A
ii

Table of Contents
Welcome
About ImageAXS and ImageAXS Professional....... 1
About This User’s Guide....... 1
Chapter 1 What Is ImageAXS?
What Is ImageAXS?....... 3
Key Concepts and Terms....... 4
Getting Help and Technical Support....... 7
Chapter 2 Getting Started
System Requirements....... 8
Installing ImageAXS....... 9
Starting ImageAXS....... 11
Where Do I Go From Here?....... 12
Chapter 3 Viewing Collections
Opening and Closing Collections....... 13
Viewing Collections....... 15
Thumbnails View....... 19
Text List View....... 22
Changing Text List View Options....... 24
Displaying Slide Shows....... 26
iii

Chapter 4 Viewing Records and Source Files
Selecting Records....... 28
Viewing Info Sheets....... 30
Viewing Source Files....... 34
Viewing Images....... 36
Playing Movies, Animated GIFs, or Sounds....... 40
Viewing 3D Files....... 41
Changing Source File View Options....... 41
Chapter 5 Creating a New Collection
Creating a New Collection....... 43
Choosing a Collection Format (Professional Version Only).......
44
Editing Collection Formats (Professional Version Only)....... 46
Chapter 6 Adding Your Files to a Collection
Overview: Adding Files to a Collection....... 50
Acquiring Individual Files....... 52
Acquiring All Files in a Folder....... 53
Acquiring From Digital Cameras or Scanners....... 54
Acquiring from Adobe Photoshop....... 56
Acquiring from Other Sources....... 58
Changing Options for Acquiring Files....... 59
iv
Chapter 7 Entering Field Data
How Do I Use Data Fields?....... 61
Entering Data in an Individual Record....... 62
Copying Data to Other Records (Standard Version Only).......
63
Entering Data in Multiple Records (Professional Version
Only)....... 65
Importing a Text Data File....... 66

Chapter 8 Using Keywords to Describe Files
How Do I Use Keywords?....... 74
Viewing and Managing Keywords....... 75
Creating Keyword Families (Professional Version Only)....... 79
Importing Keywords From a Text File....... 81
Adding Keywords to Data Records....... 83
Chapter 9 Creating Portfolios Within Collections
What Is a Portfolio?....... 86
Creating a Portfolio....... 87
Saving and Renaming Portfolios....... 88
Managing Portfolios....... 89
Managing Records in a Portfolio....... 91
Chapter 10 Searching and Sorting Collections
How Do I Search a Collection or Portfolio?....... 94
Keyword Searches....... 94
Searches Based on Field Data and Other Characteristics....... 96
Using And/Or in Complex Searches....... 98
Sorting Collections and Portfolios....... 100
v

Chapter 11 Managing Records and Source Files
Creating New Records....... 102
Copying Records (Professional Version Only)....... 103
Deleting Records....... 106
Updating Records....... 107
Managing Source Files....... 109
Editing Source Files....... 110
Selecting an Alternate Editing Application....... 111
Moving Source Files....... 111
Copying Source Files....... 112
Renaming a Source File....... 113
Deleting Source Files....... 114
Chapter 12 Creating Web Pages
(
Professional version only
Creating Web Pages in ImageAXS....... 116
Choosing Page Types....... 119
Thumbnails Page Options....... 121
Full View Page Options....... 124
Adding Headers and Footers to Web Pages....... 126
Editing ImageAXS Web Page Templates....... 128
)
vi
Chapter 13 Creating e-ZCards
(
Professional version only
What Is an e-ZCard?....... 132
Creating an e-ZCard....... 133
Image Options....... 135
Caption and Title Options....... 137
Text Descriptions of e-ZCards....... 139
)

Chapter 14 Exporting Data to Other Formats
Exporting Data Records....... 140
Exporting to a Text File (Standard Version Only)....... 140
Exporting to a Character-Delimited Text File (Professional
Version Only)....... 142
Exporting to a CSV Text File (Professional Version Only).......
145
Exporting to Other Versions of ImageAXS....... 146
Chapter 15 Printing
Printing ImageAXS Collections and Records....... 148
Chapter 16 Scripting and Recording
Scripting and Recording in ImageAXS....... 151
vii

viii

1
Welcome to ImageAXS, and thank you for using our
software!
About ImageAXS and ImageAXS Professional
ImageAXS is an easy-to-use visual database that creates
thumbnail snapshots of your images (and other media) and
keeps track of where the media are stored.
ImageAXS Professional has all the features of ImageAXS, as
well as more powerful, professional-level capabilities, such
as the ability to create HTML pages and standalone image
viewers.
About This User’s Guide
Welcome
Note
This User’s Guide is designed to be used with both
ImageAXS and ImageAXS Professional. All references to
ImageAXS apply to both products unless otherwise noted.
For example, certain features are only available with
ImageAXS Professional. These features, and other
differences, are noted by the phrase Professional version only.
For best results when viewing and printing this
strongly recommended that you use Adobe Acrobat Reader 4.0 or
later.
User’s Guide
, it is
1

About This User’s Guide
2 Welcome

Chapter 1
What Is ImageAXS?
Chapter Topics
What Is ImageAXS?
What Is ImageAXS?
Key Concepts and Terms
Getting Help and Technical Support
ImageAXS lets you create visual databases to organize and
manage the files on your computer — especially image,
movie, sound, and 3D files.
The database files it creates (called collections) combine text
information with thumbnail images of the original files, so
you can see what you’re describing, even if the files are on a
CD-ROM, an Iomega Zip disk, or a networked drive that
isn’t currently connected to your computer.
ImageAXS offers several ways for you to view, search, and
organize your collections. You can use ImageAXS to
organize your files from scratch, or by importing
information to expand on a database you've already
created.
The Professional version of ImageAXS provides you with a
variety of ways to share your multimedia files with others,
including Web pages and mini-brochures (called e-ZCards)
that can be opened without the help of any other program
and are small enough to send by e-mail.
3

Key Concepts and Terms
Key Concepts and Terms
The basic elements of how ImageAXS works are defined
briefly below. Becoming familiar with these terms will help
you learn the program more quickly.
Source Files
A source file is any file on your computer (or a separate disk
or storage device) that is catalogued in ImageAXS.
The file is referred to as a source file because it is the source
for the data record created by ImageAXS.
Acquiring
Acquiring is the act of making an ImageAXS data record for
a source file. To use ImageAXS to manage the files in a
particular folder, for example, you would acquire all of the
files in that folder (see Chapter 6, “Adding Your Files to a
Collection”).
Collections
Collections are the documents created by ImageAXS. A
collection contains a data record for each source file that
you acquire (as well as blank records, if you create any).
With ImageAXS, you can create and maintain as many
different collections as you want. With ImageAXS
Professional, you can also open more than one collection at
a time.
Note Although the records in ImageAXS collections describe
your source files, they do not contain the files themselves.
You can move or delete the collection without affecting the
source files, and vice versa.
4 Chapter 1
Key Concepts and Terms
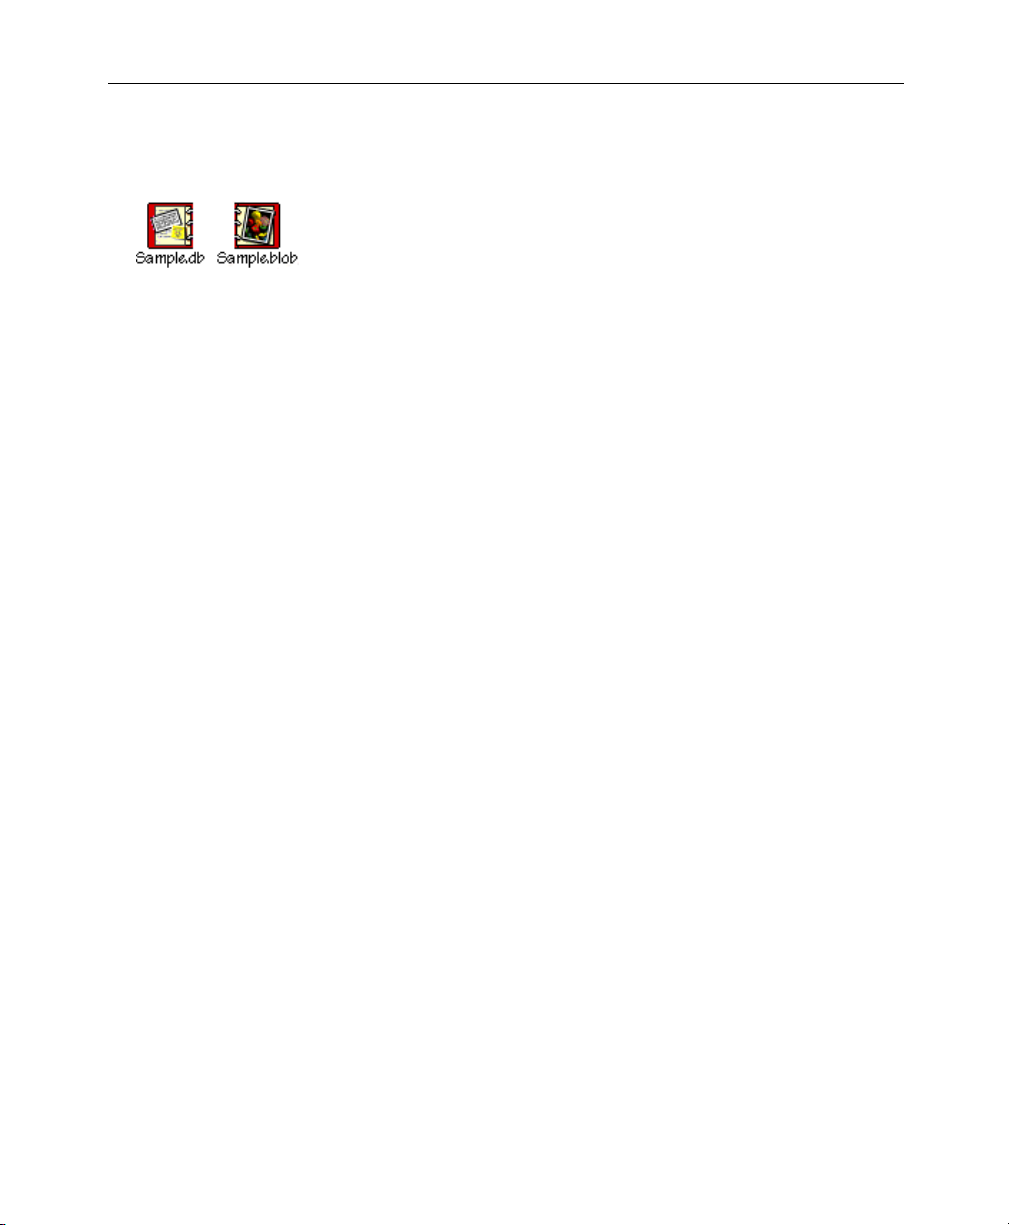
In the Finder, ImageAXS collections are represented by two
files: one with a “.db” extension (containing text
information), and the other with a “.blob” extension
(containing thumbnail images). ImageAXS cannot open a
collection unless both of these files are in the same folder.
(To remind you to keep them together, the “.db” and “.blob”
file icons are two halves of an open notebook.)
Portfolios
Portfolios are subsets of collections — for example, a
collection of family photos might include separate
portfolios for your children, your parents, and so on.
Placing records in a portfolio does not remove them from a
collection, and any record in a collection may belong to
several different portfolios.
You can create a portfolio automatically by searching a
collection, or manually by making a personal selection of
records (for example, your favorite photos or best works of
3D art).
Records
An ImageAXS data record contains information about a
source file. A thumbnail image of the file and some basic
data (such as the file size, and when it was created) are
included in the record when you acquire the source file.
You can add to each record by entering data in text fields
and attaching keywords.
Thumbnails
A thumbnail is a smaller version (in both actual size and
disk space required) of an image. When you acquire an
image, movie, or 3D file, ImageAXS includes a thumbnail
version of the file in the data record.
What Is ImageAXS? 5

Key Concepts and Terms
Keywords
Keywords are terms you choose that describe one or more
source files in a collection. They may describe the literal
content of a file (such as objects in a photo, or events in a
video clip) or its subjective aspects (for example, adjectives
like beautiful or intense).
Keywords are powerful search tools. If you add keywords
extensively across a collection, you'll be able to find almost
unlimited combinations of records instantly based on
keyword searches.
ImageAXS Professional lets you organize keywords into
hierarchies (or families) so that one keyword may contain
several related keywords. For example, the keyword
“United States” might have child keywords for each of the
50 states; attaching a keyword for one of the states (such as
“California”) to a data record would attach the “United
States” keyword as well.
Views
Views are different ways to display information about a
collection and its records. ImageAXS offers four views. Two
of these views let you see all of the records in a collection:
• The Thumbnails View displays thumbnail images for
each record in a collection.
• The Text List View displays the text field data (in a rowand-column table format) for each record in a collection.
The other two views let you see information about
individual records that you select:
• The Info Sheet View displays the thumbnail, text data,
and keywords associated with a source file.
• The Source File View displays image or 3D files, or
plays movie, sound, or animated GIF files.
6 Chapter 1
Getting Help and Technical Support
Balloon Help
Virtually every menu item, button, and dialog box option in
ImageAXS includes Balloon Help, which provides a brief
explanation of what that item does.
To see Balloon Help, click the Balloon Help button in any
ImageAXS window or choose Show Balloons from the Help
menu, then point at the item for which you want to see
information.
ImageAXS Help
ImageAXS also includes extensive Apple Guide–based
online help, with step-by-step instructions for
accomplishing most of the tasks in the program.
To open ImageAXS Help, click the Help button in any
ImageAXS window or choose ImageAXS Help from the Help
menu.
Getting Help and Technical Support
ImageAXS Macintosh User’s Guide
Use this manual for an overview of how ImageAXS works,
and to see screen illustrations of the elements and features
of the program.
Customer Support
For technical support, sales or upgrade information,
product news, or answers to frequently asked questions,
visit the Caere website at http://www.caere.com. You can
also reach Product Support by telephone; a list of numbers
can be found in the Caere Product Support document on
your ImageAXS CD.
What Is ImageAXS? 7

Getting Help and Technical Support
8 Chapter 1

Chapter 2
Getting Started
Chapter Topics
System Requirements
System Requirements
Installing ImageAXS
Starting ImageAXS
Where Do I Go From Here?
To use ImageAXS, your Macintosh must have the following
minimum characteristics:
• A CD-ROM drive (for installation only)
• 68030 or faster processor (Power Macintosh
recommended)
• System 7.5 or more recent operating system
• 10 MB of RAM available (more if you will be managing
large files or collections)
• 20 MB of hard disk space available
9

Installing ImageAXS
Installing ImageAXS
You can install ImageAXS on your Macintosh in just a few
minutes by following these instructions:
1. Insert the ImageAXS CD-ROM into your CD-ROM drive.
A window showing the contents of the CD-ROM
appears on the desktop. (If this window does not
appear, double-click the CD-ROM icon.)
2. Double-click the ImageAXS Installer icon in the disc
contents window.
The ImageAXS Installer window appears.
3. Click Continue.
The ImageAXS ReadMe file appears. This file
contains important information about ImageAXS.
4. Read the ReadMe file, then click Continue.
The ImageAXS license agreement window appears.
5. Read the license agreement, then click Agree.
The Easy Install dialog box appears.
Note If you click Disagree, the installation process will be
cancelled.
The Easy Install option installs the ImageAXS application, a
sample collection, various plug-ins and system extensions,
folders containing AppleScripts and Web page templates,
and a ReadMe document into a folder that you create later
during the installation.
In addition, the Easy Install option installs QuickTime 4.0 in
the Extensions folder of the System Folder on your startup
drive, replacing any older version of QuickTime you may
have. (QuickTime will not be installed if you have a newer
version on your system.)
10 Chapter 2

Installing ImageAXS
6. Click Install to begin the Easy Install, or choose Custom
Install from the pop-up menu in the upper left corner of
the dialog box to select installation options.
7. If you chose Custom Install, select the custom
installation options you want. When you are finished,
click Install.
A standard file dialog box appears, prompting you
to choose where you want to install the files you
selected.
8. Choose a name and location for the folder containing
your ImageAXS files.
If you do not change the default settings, the
installer creates a folder named ImageAXS on your
startup disk.
9. Click Install to begin installing ImageAXS.
A progress window appears as the ImageAXS files
you selected are installed.
Note To cancel the installation, press
COMMAND-PERIOD
(!-.) on
your keyboard. In the dialog box that appears, click Reinstall
to return to the Easy install window. Click Quit to close the
installer application entirely.
A dialog box appears when the ImageAXS
installation is complete, prompting you to quit or
install files again.
10. Click Quit.
Use this same procedure to install optional files at a later
time if you do not include them when you first install
ImageAXS.
Getting Started 11

Starting ImageAXS
Starting ImageAXS
To start ImageAXS, open the folder in the Finder where you
installed the ImageAXS files, then double-click the
ImageAXS application icon.
If you are using ImageAXS for the first time, you will see an
empty window with the ImageAXS menu bar at the top of
the screen. (If you have used ImageAXS before, any
collections that were open when you last closed the
program will automatically open.)
Opening a Collection
To start working with ImageAXS, you must open a
collection.
If you have not created any collections (for example, if you
are using ImageAXS for the first time), you can either create
a new collection or open the sample collection. Opening
and viewing the sample collection is a good way to learn
the basic features of ImageAXS.
To open the sample collection:
1. Choose Open Collection from the File menu (!-O).
A dialog box appears, prompting you to select a
collection to open.
2. In the dialog box, locate the folder where you installed
ImageAXS.
3. Double-click the icon labeled Sample Collection.db.
You can recognize collections by the ImageAXS file
icon or the ".db" extension at the end of the file
name.
12 Chapter 2

You can also open the sample collection (or any other
ImageAXS collection) in the Finder by dragging and
dropping the collection icon on the ImageAXS application
icon.
To open the sample collection (or any other ImageAXS
collection) if you have closed it recently, highlight Open
Recent Collections in the File menu, then select the collection
from the submenu that appears.
Where Do I Go From Here?
If you have opened the sample collection, go on to Chapter
3 (“Viewing Collections”) and Chapter 4 (“Viewing Records
and Source Files”), which explain how to view collections,
data records, and source files.
If you want to get started using ImageAXS to organize and
manage your files, skip ahead to Chapter 5 (“Creating a
New Collection”). After creating a collection of your own,
return to Chapters 3 and 4 to learn about the different ways
to look at your new collection.
Where Do I Go From Here?
Getting Started 13

Chapter 3
Viewing Collections
Chapter Topics
Opening and Closing Collections
Viewing Collections
Thumbnails View
Tex t Li s t Vi e w
Changing Text List View Options
Viewing Slide Shows
Opening and Closing Collections
Collections are the documents created by ImageAXS. They
consist of data records for each file on your computer that is
associated with the collection, plus a thumbnail image that
represents each file.
With ImageAXS, you can create and maintain as many
collections as you want. The ImageAXS Professional version
also allows you to open multiple collections at the same
time.
Note Although ImageAXS collections describe the files on your
computer and storage drives, they do not contain the files
themselves. You can move or delete the collection without
affecting the original files, and vice versa.
14

Opening and Closing Collections
In the Finder, ImageAXS collections are represented by two
files: one with a “.db” extension (containing text
information), and the other with a “.blob” extension
(containing thumbnail images). If you want to move or
rename a collection, you must move or rename both files.
Opening a Collection
To open a collection that you have used recently, highlight
Open Recent Collections in the File menu, then select the
collection from the submenu that appears.
If the collection you want is not on the list, follow the steps
below.
To open a collection:
1. Choose Open Collection from the File menu (!-O).
A dialog box prompts you to select a collection to
open.
2. In the dialog box, locate and select a collection.
You can recognize collections by the ImageAXS file
icon or the ".db" extension at the end of the file
name.
3. Double-click the collection name, or highlight it and
click Open.
You can also open any ImageAXS collection in the Finder by
dragging and dropping the collection icon on the ImageAXS
application icon.
Note If you have used ImageAXS before, any collections that
were open when you last quit the program will
automatically open the next time you start the progam.
Viewing Collections 15

Viewing Collections
Viewing Collections
Closing a Collection
When you close a collection, all windows related to the
collection (including those for all records and portfolios,
and the Keyword and Portfolio Lists) will close
automatically.
To close an open collection:
• With any window of the collection active, select Close
Collection from the File menu.
ImageAXS gives you two main ways to look at all of the
records in a collection — the Thumbnails View and the Text
List View. These views share many common elements,
which are discussed below.
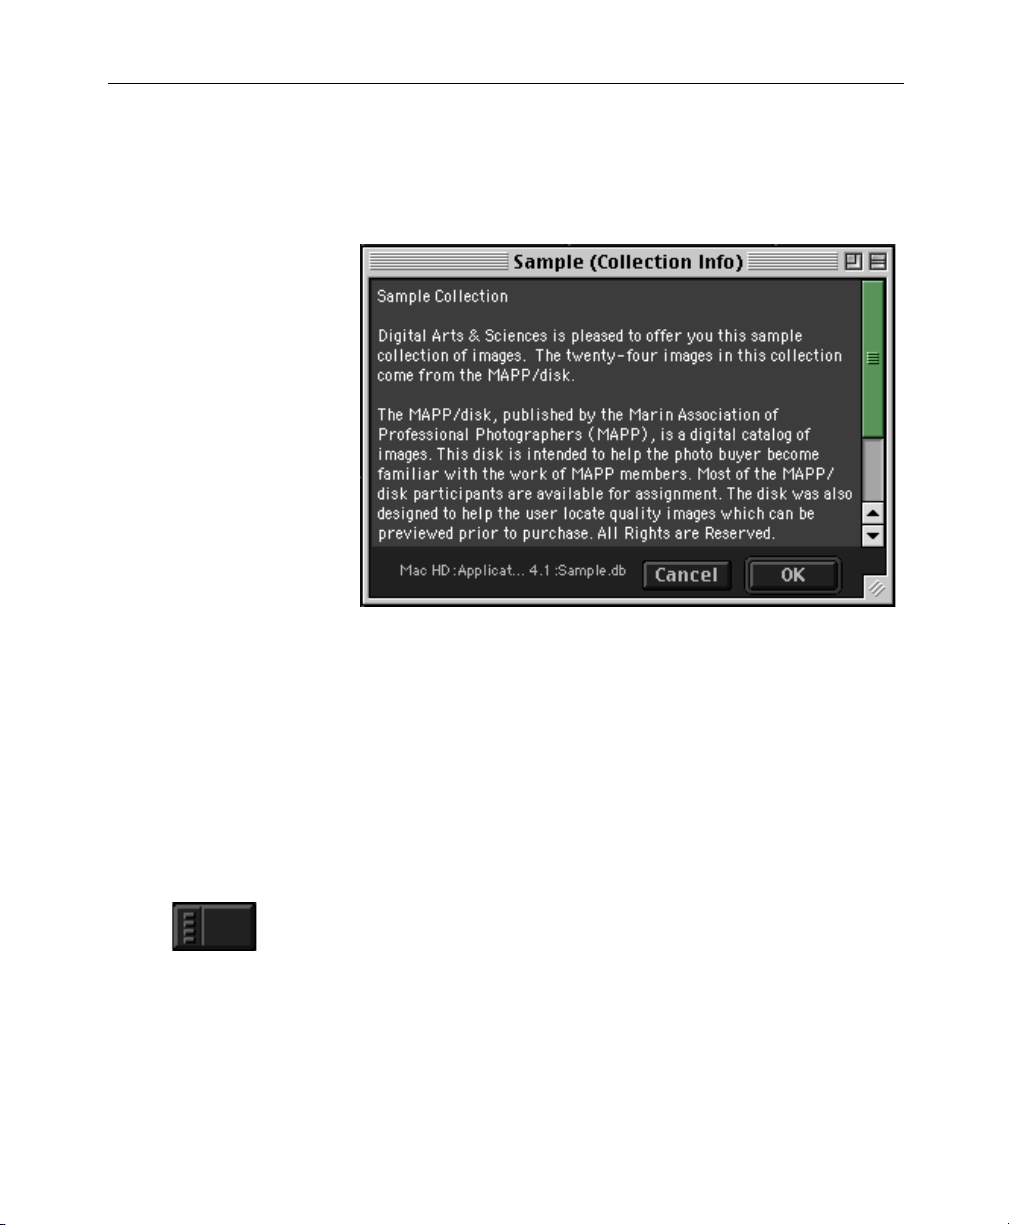
Collection Info
In the upper right corner of any ImageAXS collection
window, click the leftmost button to open the Collection
Info dialog box.
Note If information has been entered in the Collection Info dialog
box, the Collection Info button will display a solid “i”
symbol. An empty or outlined “i” indicates that no
information has been entered for the current collection.
Use the Collection Info dialog box to enter general
information (up to 32,000 characters) about your collection,
or to edit information that you have already entered. You
can type this information, or paste text that you have copied
from another program.)
16 Chapter 3
Viewing Collections
The lower left corner of the Collection Info dialog box
displays where the collection is located in the Finder.
To save any changes you make and close the Collection Info
dialog box, click OK. To close the dialog box without saving
your changes, click Cancel.
Using the Button Panel
The button panel along the left side of ImageAXS collection
windows gives you quick access to the basic ways to view
and organize your collections.
To show or hide the button panel, do either of the following:
• Select Show Buttons (or Hide Buttons, if the button panel
is shown) from the View menu.
• Click the Show/Hide Buttons icon on the upper left
corner of most ImageAXS windows.
Viewing Collections 17
Viewing Collections
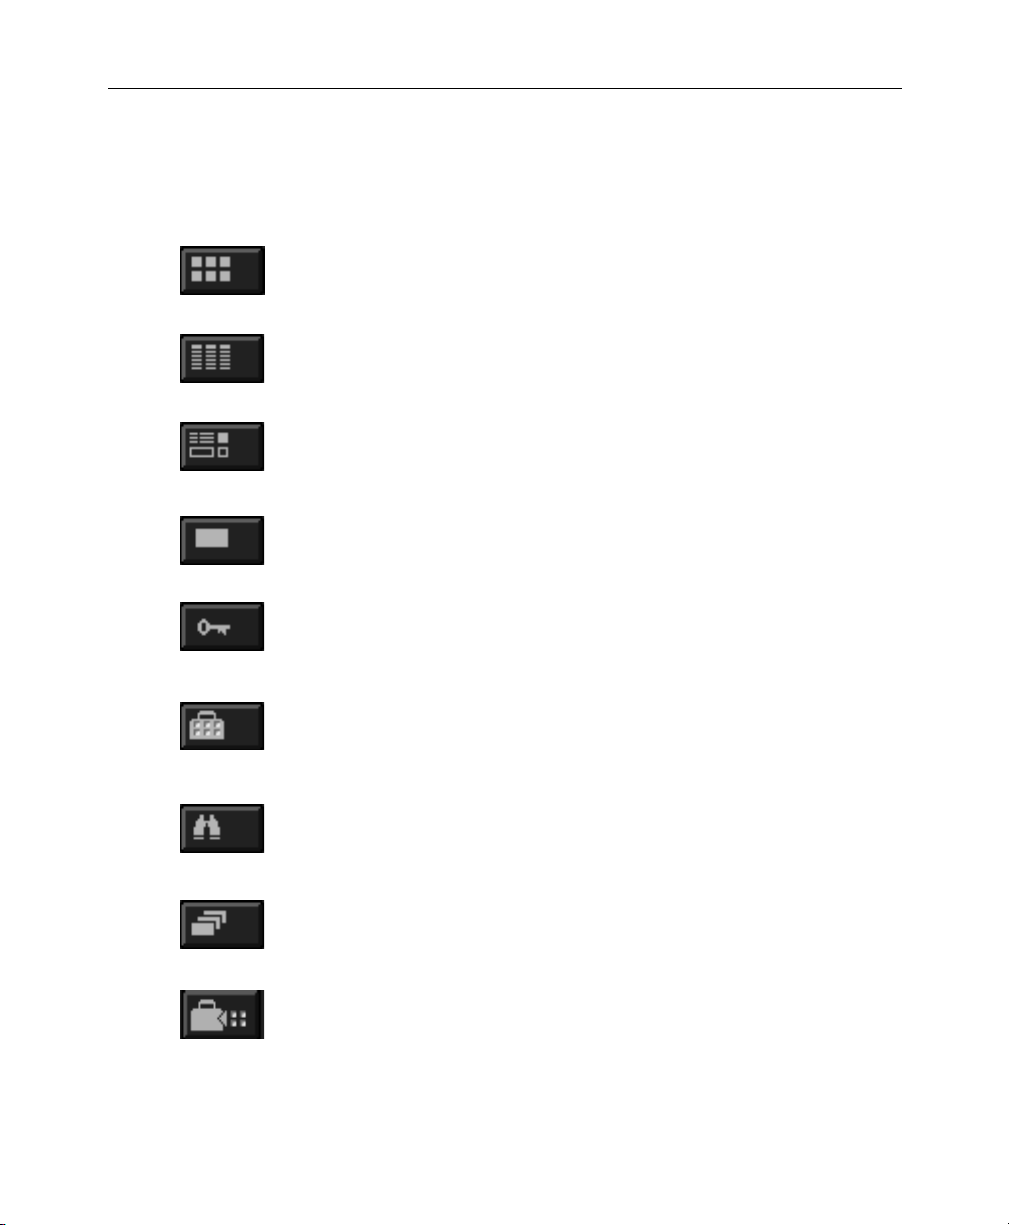
Here is a brief summary of what each button in the button
panel does (from top to bottom):
Thumbnails View
Displays the thumbnail images for all data records in the
collection.
Text List View
Displays the field data for all data records in the collection.
Info Sheet View
Displays the thumbnail image, field data, and keywords for
a selected data record.
Source File View
Opens a read-only version of the source file for a data
record.
Keyword List
Displays a list of keywords you have created to describe
records in the collection.
Portfolio List
Displays a list of smaller groups of records that you have
created within the collection.
Search
Lets you find records that share field data, keywords, and/
or other characteristics.
Sort
Lets you reorder all records in the collection based on fields
that you select.
Open Selection as Portfolio
Creates a new portfolio window containing the records you
have selected.
18 Chapter 3
Viewing Collections
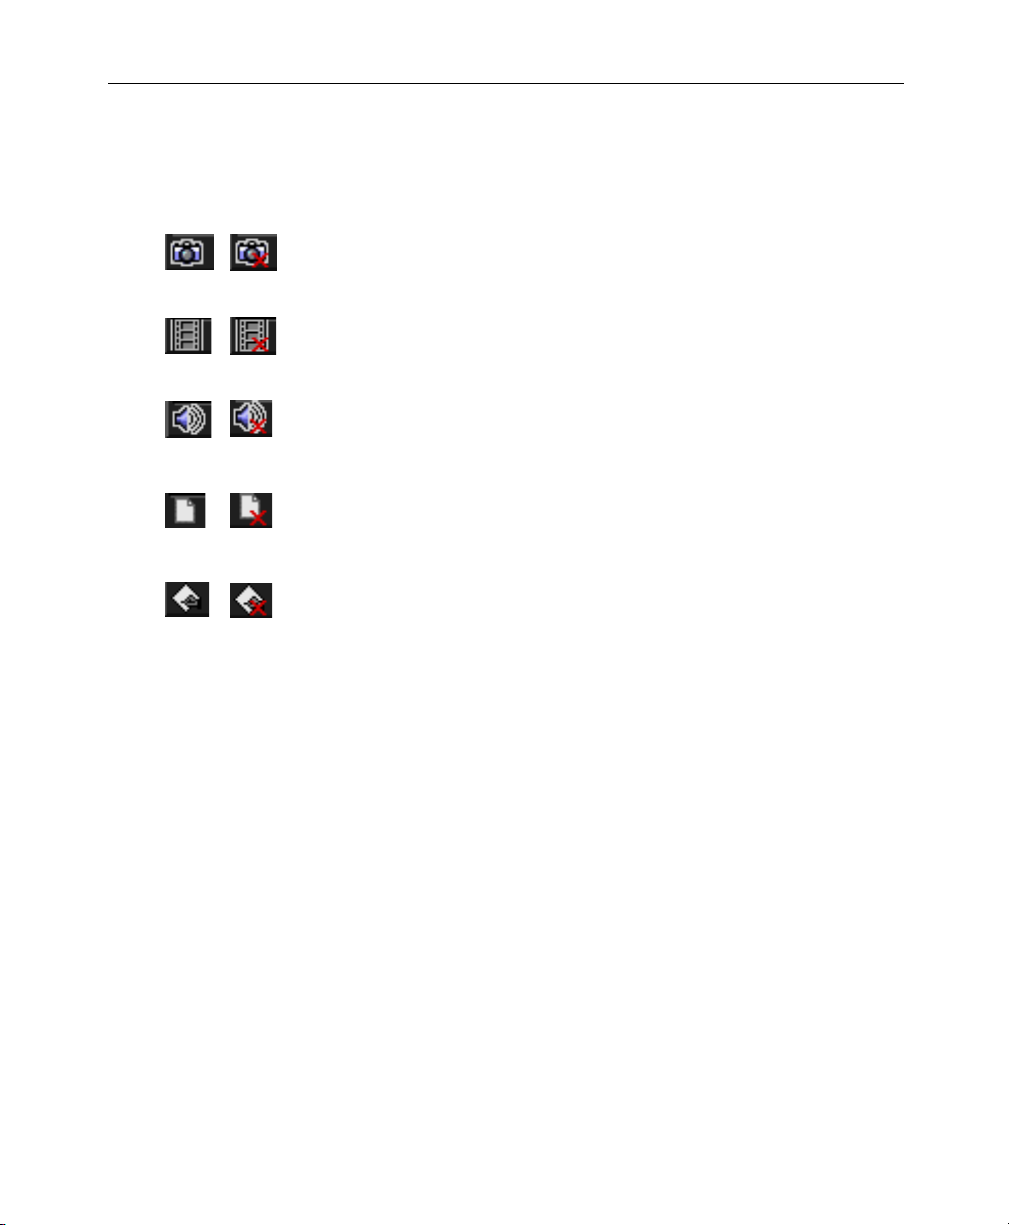
File Type Icons
The file type icon for a data record indicates the type of the
source file and whether or not the source file is online. It
appears to the left of the thumbnail caption in the
Thumbnails View, and at the left end of the data row in the
Tex t L i st Vi e w.
The terms online and offline refer to whether or not
ImageAXS can find the source file. For example, a source
file on a network drive that is not connected to your
computer will be offline in ImageAXS.
Offline source files are indicated by a red “X” through the
file type icon. If a record is offline, you cannot open it in
Source File View, and you cannot copy, move, rename,
delete, or edit its source file. (For non-multimedia files, you
will not be able to open the source file from within
ImageAXS.) For information on updating the location of
offline source files, see “Updating Records” on page 108.
Note Click the file type icon to display the Finder location of the
source file in a pop-up window. Select the file name from
this pop-up window to open the source file in its original
application, or select a disk or folder name to open that disk
or folder in the Finder.
Changing the Background Color
ImageAXS offers a choice of backgrounds, either of which is
applied to all windows in the program. The default Dark
Gray background is often preferred for viewing images.
You may find the Light Gray background more useful for
reading text information.
Use the Appearance panel of the ImageAXS Preferences
dialog box to change the background color of all ImageAXS
windows at any time.
Viewing Collections 19
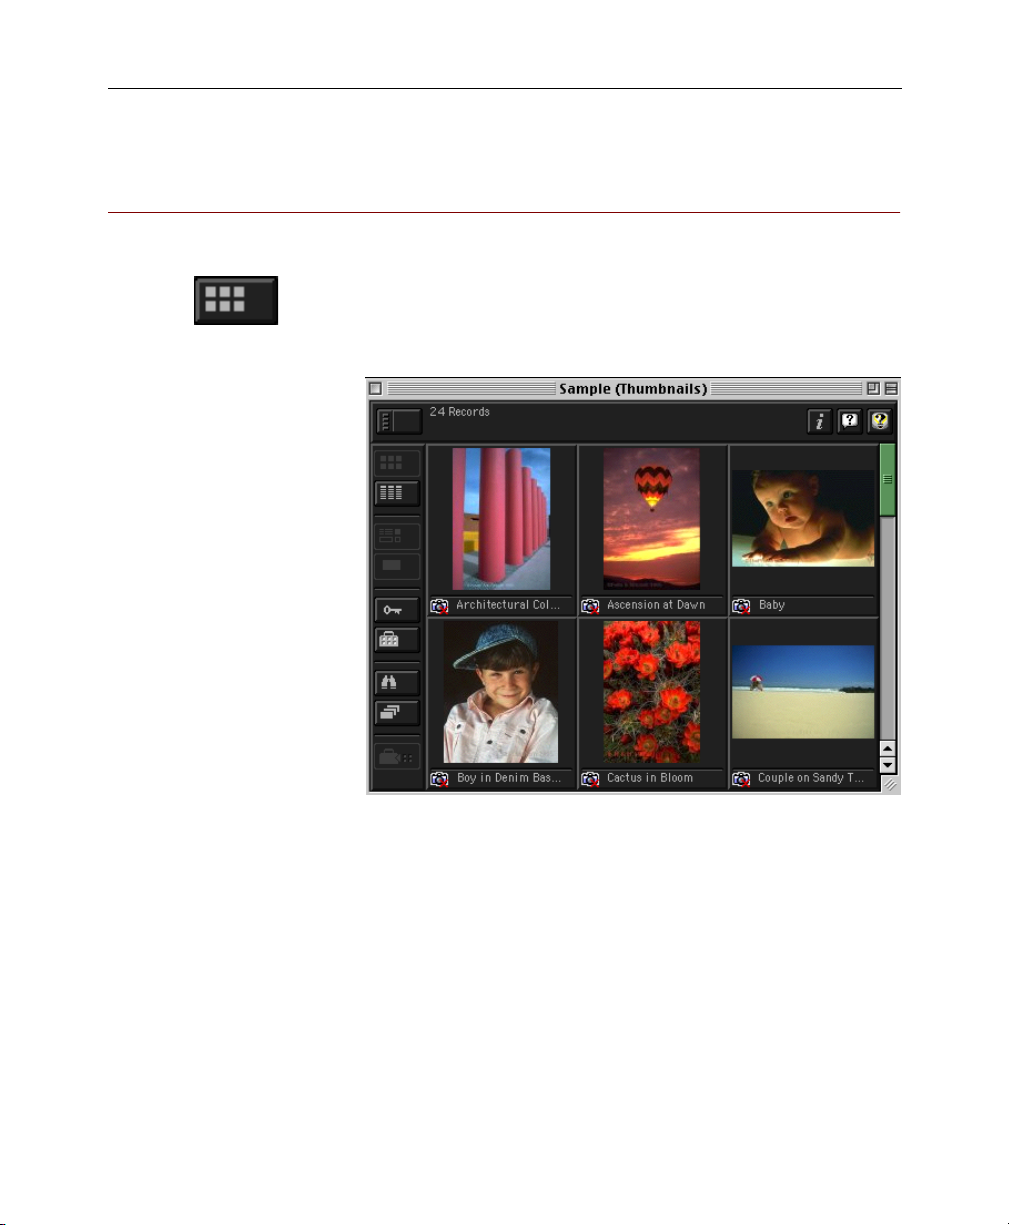
Thumbnails View
Thumbnails View
When you open a collection or portfolio, the Thumbnails
View appears. You can also display the Thumbnails View by
selecting Thumbnails from the View menu, or clicking the
Thumbnails View button in the button panel. (If the view
window is already open, ImageAXS brings it to the front.)
The Thumbnails View window includes these elements:
• The title bar, which shows the name of the collection,
followed by the view (“Thumbnails”) in parentheses
• The number of records, and how many are selected
• The Collection Info, Balloon Help, and ImageAXS Help
buttons (see “Viewing Collections” on page 16)
20 Chapter 3
Thumbnails View
• The button panel (see “Using the Button Panel” on
page 17)
• Thumbnail images for each data record in the collection,
with a file type icon and a caption beneath each image
To show more (or fewer) thumbnails, resize the Thumbnails
View by dragging the lower right corner of the window.
To move back and forth among thumbnail images, use the
scrollbar, or do either of the following:
• Select First Record, Previous Record, Next Record, or Last
Record from the Record menu.
• Use the arrow keys (←, →, ↓, or ↑) on your keyboard.
The following sections explain how to use the Thumbnails
View to get information about data records and source files.
Note You can change several Thumbnails view options in the
Thumbnails panel of the ImageAXS Preferences window.
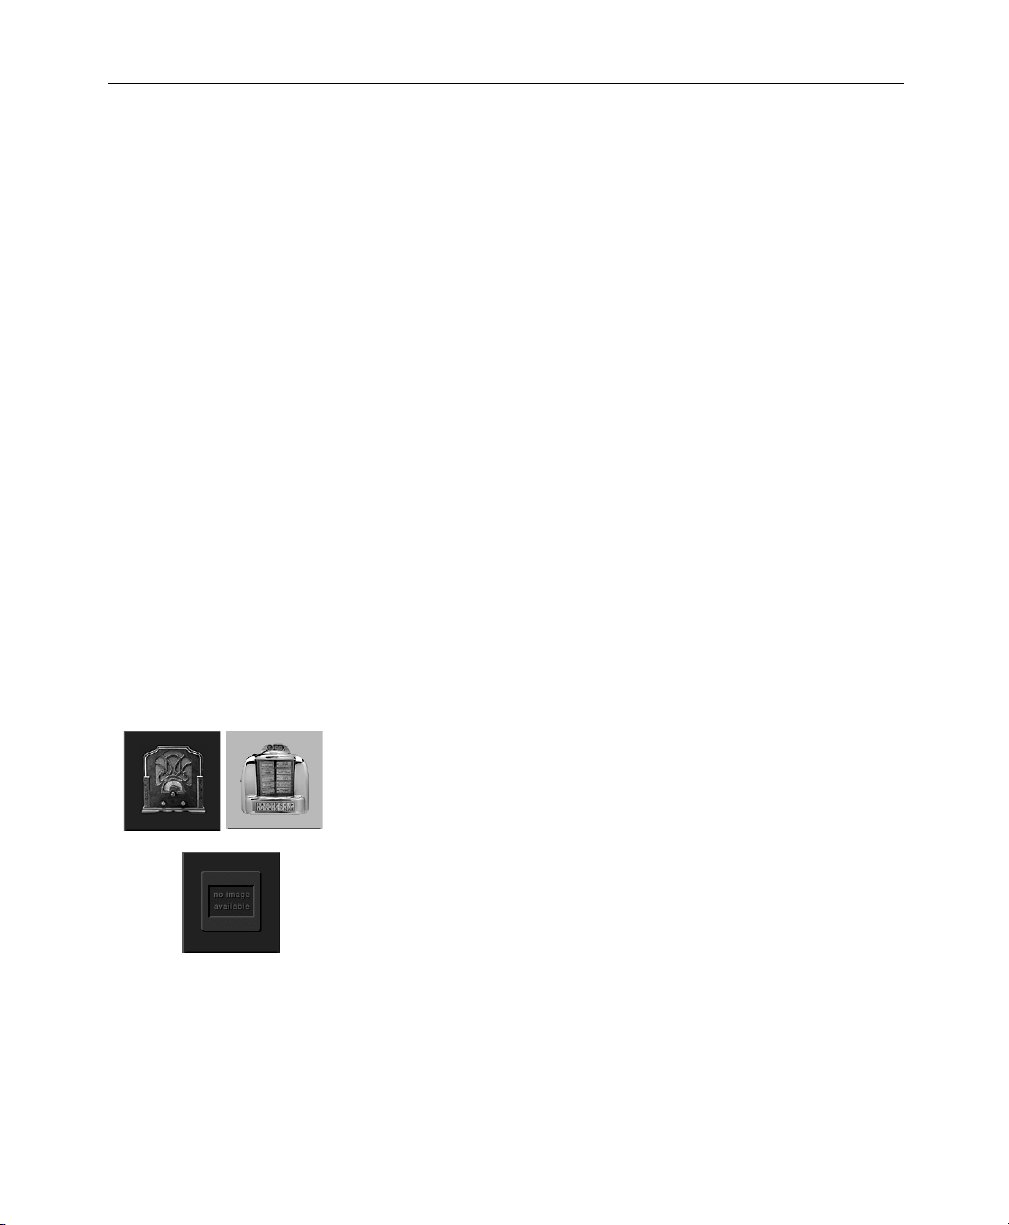
Thumbnail Images
When you acquire an image file, ImageAXS creates a small
JPEG “thumbnail” version of the image. For movie or
animated GIF files, the thumbnail is created from the
opening frame or image.
For digital sound files, a generic thumbnail is used. For
non-multimedia files, ImageAXS uses the Finder icon, if
possible. If ImageAXS cannot create a thumbnail (or if no
source file is attached to a record), a “No Image Available”
thumbnail is displayed.
Double-click the thumbnail image to open the Source File
View for an image, movie, sound, or 3D file. In ImageAXS
Professional, double-clicking the thumbnail image of a nonmultimedia file will open the file in its original program.
Viewing Collections 21

Thumbnails View
Thumbnail Captions
Each thumbnail image has a caption that represents the
contents of one of the fields in the data record. (By default,
the name of the source file is used for the caption.)
Changing Thumbnail Captions
1. Select Field Labels from the Edit menu.
The Field Labels dialog box appears.
2. Select a fieldfrom the Thumbnails Label pull-down menu.
3. Click OK.
The contents of the field you chose appear as the thumbnail
caption for each record in the collection.
Changing Thumbnail Image Orientation
In some cases, thumbnails created from image files may
appear sideways or upside down (for example, if a digital
camera was turned sideways when a picture was taken).
Use the Orientation submenu in the Record menu to rotate
thumbnail images by 90, 180, or 270 degrees.
1. Select the thumbnail(s) you want to rotate.
2. Select 0°, 90°, 180°, or 270° from the Orientation
submenu of the Record menu.
The thumbnails are rotated to the right by the number of
degrees you select. If you select 0°, the thumbnails will be
returned to their original orientation.
Note Changing the orientation of a thumbnail image does not
affect the source file. The Source File View for the image,
however, will reflect the changed orientation. If you export
the source file to a Web page or an e-ZCard (Professional
version only), the changed orientation will also be used.
22 Chapter 3
 Loading...