

Digital-Ally DVM-250, DVM-250 Plus, DVM-800 Operation And Installation Manual

860-00198-00_WIP Rev A
Operation and Installation Guide
March 2014
Wireless Link for and DVM systems
Copyright © 2014, Digital Ally, Inc. All Rights Reserved. This publication may not be reproduced, stored in a retrieval system, or
transmitted in whole or part in any form or by any means electronic, mechanical, recording, photocopying, or in any other manner
without the prior written approval of Digital Ally, Inc.

VuLink Operation & Installation Guide 860-00198-00 REV A
Table of Contents
SECTION - 1: BEFORE YOU BEGIN............................................................................................................................ 1-1
OVERVIEW OF FEATURES ........................................................................................................................................................................ 1-1
INSTALLATION TOOLS NEEDED ............................................................................................................................................................. 1-1
CAUTIONS AND NOTES ............................................................................................................................................................................ 1-1
PARTS AND OPTIONAL ACCESSORIES LIST........................................................................................................................................... 1-2
SECTION - 2: VULINK CONFIGURATION ................................................................................................................ 2-1
USING VUVAULT TO CONFIGURE YOUR VULINK AND FIRSTVUHD ................................................................................................. 2-1
Configuring VuLink .................................................................................................................................................................... 2-2
Configuring your FirstVu HD .................................................................................................................................................. 2-3
Activating VuLink & FirstVu HD within VuVault ............................................................................................................. 2-4
USING THE CONFIGURATION MANAGER TO CONFIGURE YOUR VULINK AND FIRSTVUHD ......................................................... 2-4
Installing the Software ............................................................................................................................................................. 2-4
Configuring VuLink .................................................................................................................................................................... 2-5
Saving your VuLink Settings ................................................................................................................................................... 2-6
Configuring your FirstVu HD .................................................................................................................................................. 2-7
Saving your FirstVu HD Settings ........................................................................................................................................... 2-7
DVM-800, DVM-250, AND DVM-250PLUS DEVICE CONFIGURATION ...................................................................................... 2-8
SECTION - 3: INSTALLATION INSTRUCTIONS ...................................................................................................... 3-1
STEP 1: REMOVE BODY TRIM ............................................................................................................................................................... 3-1
STEP 2: POWER IGNITION, AND GROUND CONNECTIONS ................................................................................................................ 3-2
STEP 3: VULINK TRIGGER CONNECTIONS .......................................................................................................................................... 3-2
STEP 4: VULINK INSTALLATION ........................................................................................................................................................... 3-3
SECTION - 4: MODEL-SPECIFIC WIRING DIAGRAMS ......................................................................................... 4-1
DVM-100 / DVM-400 ........................................................................................................................................................................ 4-1
DVM-500PLUS / DVM-750 ............................................................................................................................................................... 4-2
DVM-800 / DVM-LIVE ....................................................................................................................................................................... 4-3
DV-440ULTRA ......................................................................................................................................................................................... 4-4
DVM-250PLUS OR DVM250 (WITH INTERFACE BOX) ................................................................................................................... 4-5
GENERIC INPUT SOURCE ......................................................................................................................................................................... 4-6
SECTION - 5: OPERATION ........................................................................................................................................... 5-1
POWER CONTROL ..................................................................................................................................................................................... 5-1
TESTING THE SYSTEM ............................................................................................................................................................................. 5-1
COVERT MODE .......................................................................................................................................................................................... 5-1
VULINK™ LED STATUS INDICATORS .................................................................................................................................................... 5-2
FIRSTVUHD™ LED STATUS INDICATORS ............................................................................................................................................ 5-2
SECTION - 6: SUPPORT ................................................................................................................................................ 6-1
SOFTWARE UPDATES ............................................................................................................................................................................... 6-1
PERFORMING A RESET ............................................................................................................................................................................ 6-1
TROUBLESHOOTING ................................................................................................................................................................................. 6-1
SECTION - 7: WARRANTY INFORMATION ............................................................................................................. 7-1
SECTION - 8: CONTACT INFORMATION .................................................................................................................. 8-1
SECTION - 9: REGULATORY ........................................................................................................................................ 9-1
i

VuLink Operation & Installation Guide 860-00198-00 REV A
Digital Ally, Inc. | Before you Begin
1-1
Section - 1: Before you Begin
Overview of Features
Automatically start recordings on your Firstvu HD using the same triggers as vehicle
video systems, regardless of whether the unit is mounted or worn
Simultaneously start recordings with your vehicle video system, whether started
manually on either system or automatically triggered
Eliminate distraction, need to continuously record or remember to press record
Link recordings from both systems into the same incident in VuVault™ management &
reporting software
Installation Tools Needed
Wire Strippers
Tools to remove vehicle trim
Wire Crimpers
Digital Volt Meter
Cautions and Notes
Please read and follow the instructions and precautions in this installation guide when installing
VuLink.
For assistance, a qualified installation technician or mechanic should be consulted.
Do not use excessive force when removing the mirror from the windshield. The mirror
mounting plate may become separated from the windshield and/or the windshield may
break if excessive force is used. If you are unfamiliar with rearview mirror removal seek
professional assistance.
To prevent electrical shorts or breakage in the wiring and cabling, do not allow wiring and
cabling to be pinched behind trim pieces, panels, or other physical objects.
Do not run wires or cables in areas where they may become damaged by heat from the
engine or the exhaust system.
Do not install any wiring in the deployment path of the air bag(s).
When installing the cables or making wire connections, it is recommended you leave a little
‘slack’ in the cable connections to allow for service loops and for movement of the mirror so
the connections do not get pulled or accidentally disconnected.
Where possible, avoid running cables parallel to other wiring and/or antenna coax that may
be installed in the vehicle.
We recommend at least 2 feet of distance between our cabling and that of other systems
which may carry a signal for transmit and/or receive
VuLink Operation & Installation Guide 860-00198-00 REV A
Digital Ally, Inc. | Before you Begin
1-2
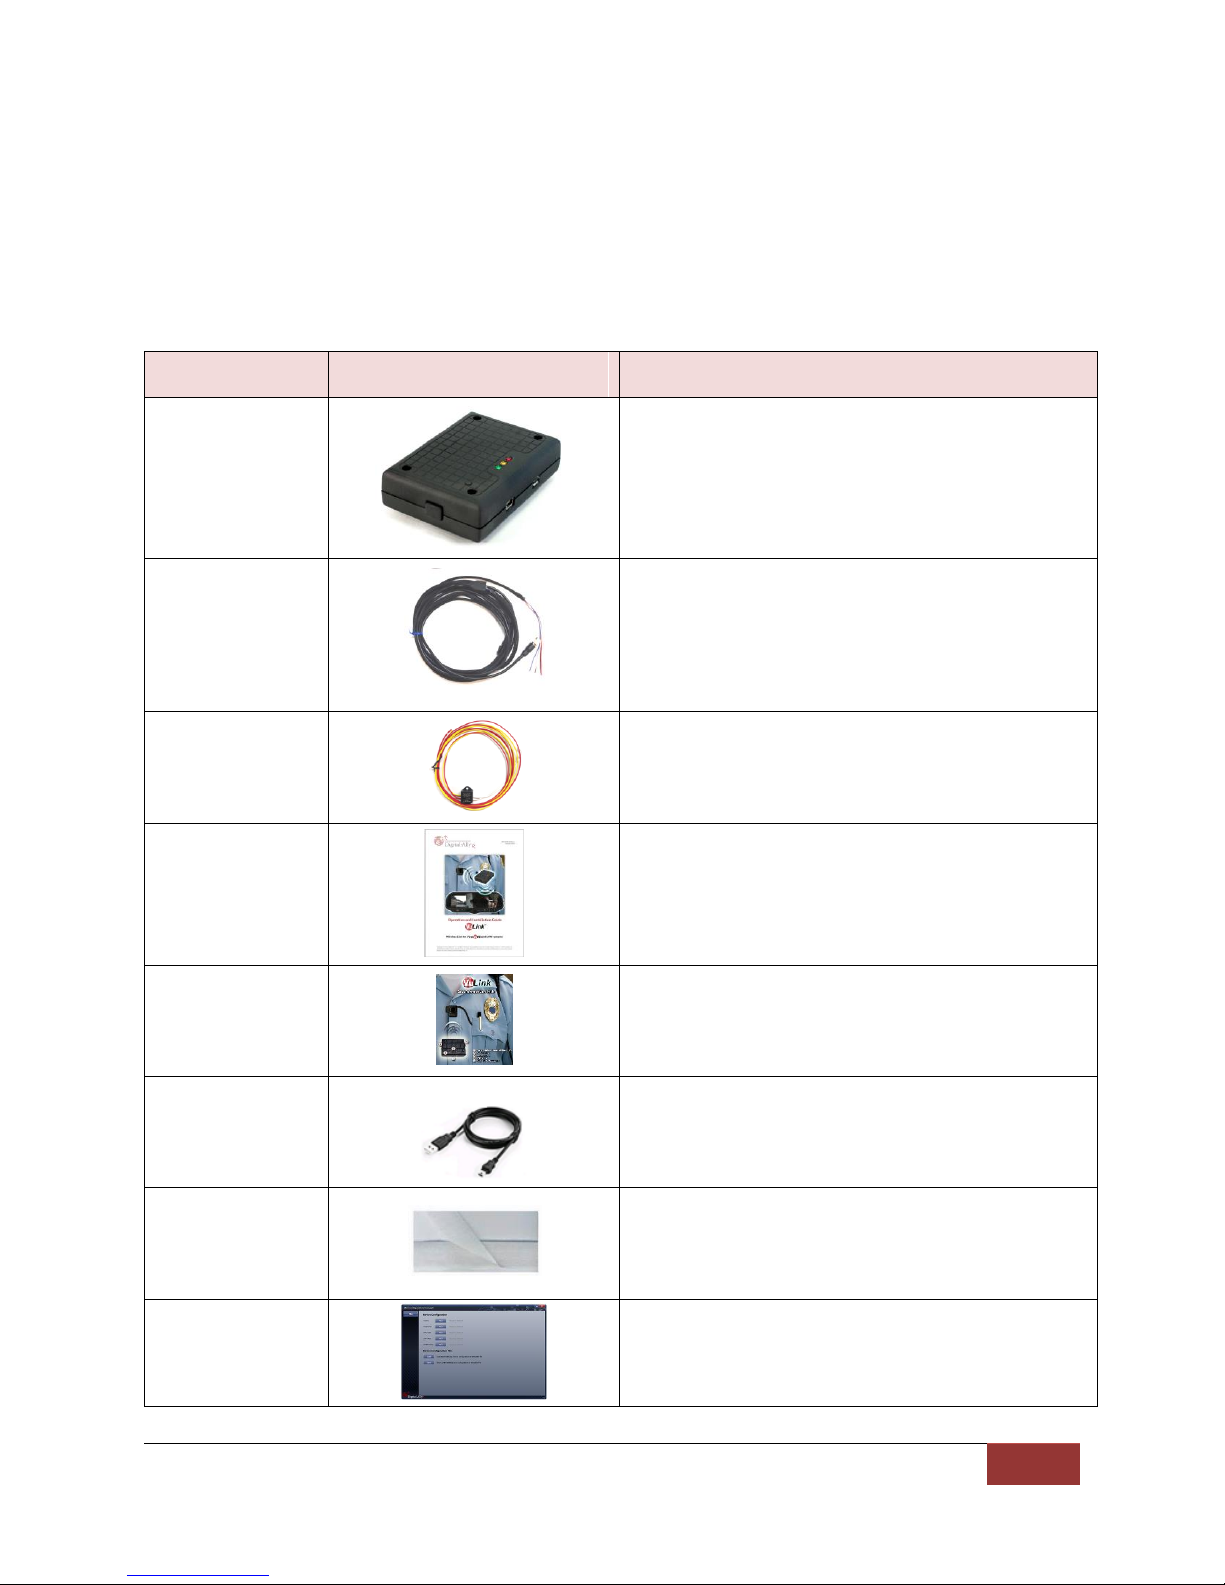
Part Number
Image
Description
006-08257-00
Assembly, VuLink
008-01456-00
Cable, VuLink Base, 15ft
006-0050
Relay with harness, 12VDC
860-00198-00
VuLink Operation and Installation Guide
860-00199-00
VuLink Quick Reference Guide
008-0100
USB Cable
050-10148-10
Mounting Kit, Velcro qty 2 1"x1.5"
914-00001-00
Electronic Files (preloaded on VuLink device)
Mini Configuration Manager / Viewer
Operation Manuals
Parts and Optional Accessories List
VuLink Standard Package (pn#001-0950-00)
The diagram and table below outline the parts that are included with the VuLink Package.
VuLink Operation & Installation Guide 860-00198-00 REV A
Digital Ally, Inc. | VuLink Configuration
2-1
Section - 2: VuLink Configuration
Using VuVault to Configure your VuLink and FirstVuHD
Prior to installation, VuLink must be configured either through the Mini Configuration Manager
Software installer supplied on the VuLink internal memory or by using Digital Ally’s optional
VuVault™ back-office software. If you have purchased VuVault™, follow the instructions on this
page to configure and activate your VuLink.
If you have NOT purchased VuVault, skip to page 2-4 to configure your device.
You must upgrade VuVault to version 4.4 (minimum) to configure and activate a VuLink
device. VideoManagerII and previous versions of VuVault will not work with VuLink.
VuVault is used to manage VuLink settings as well as activate your device for use within the
system.
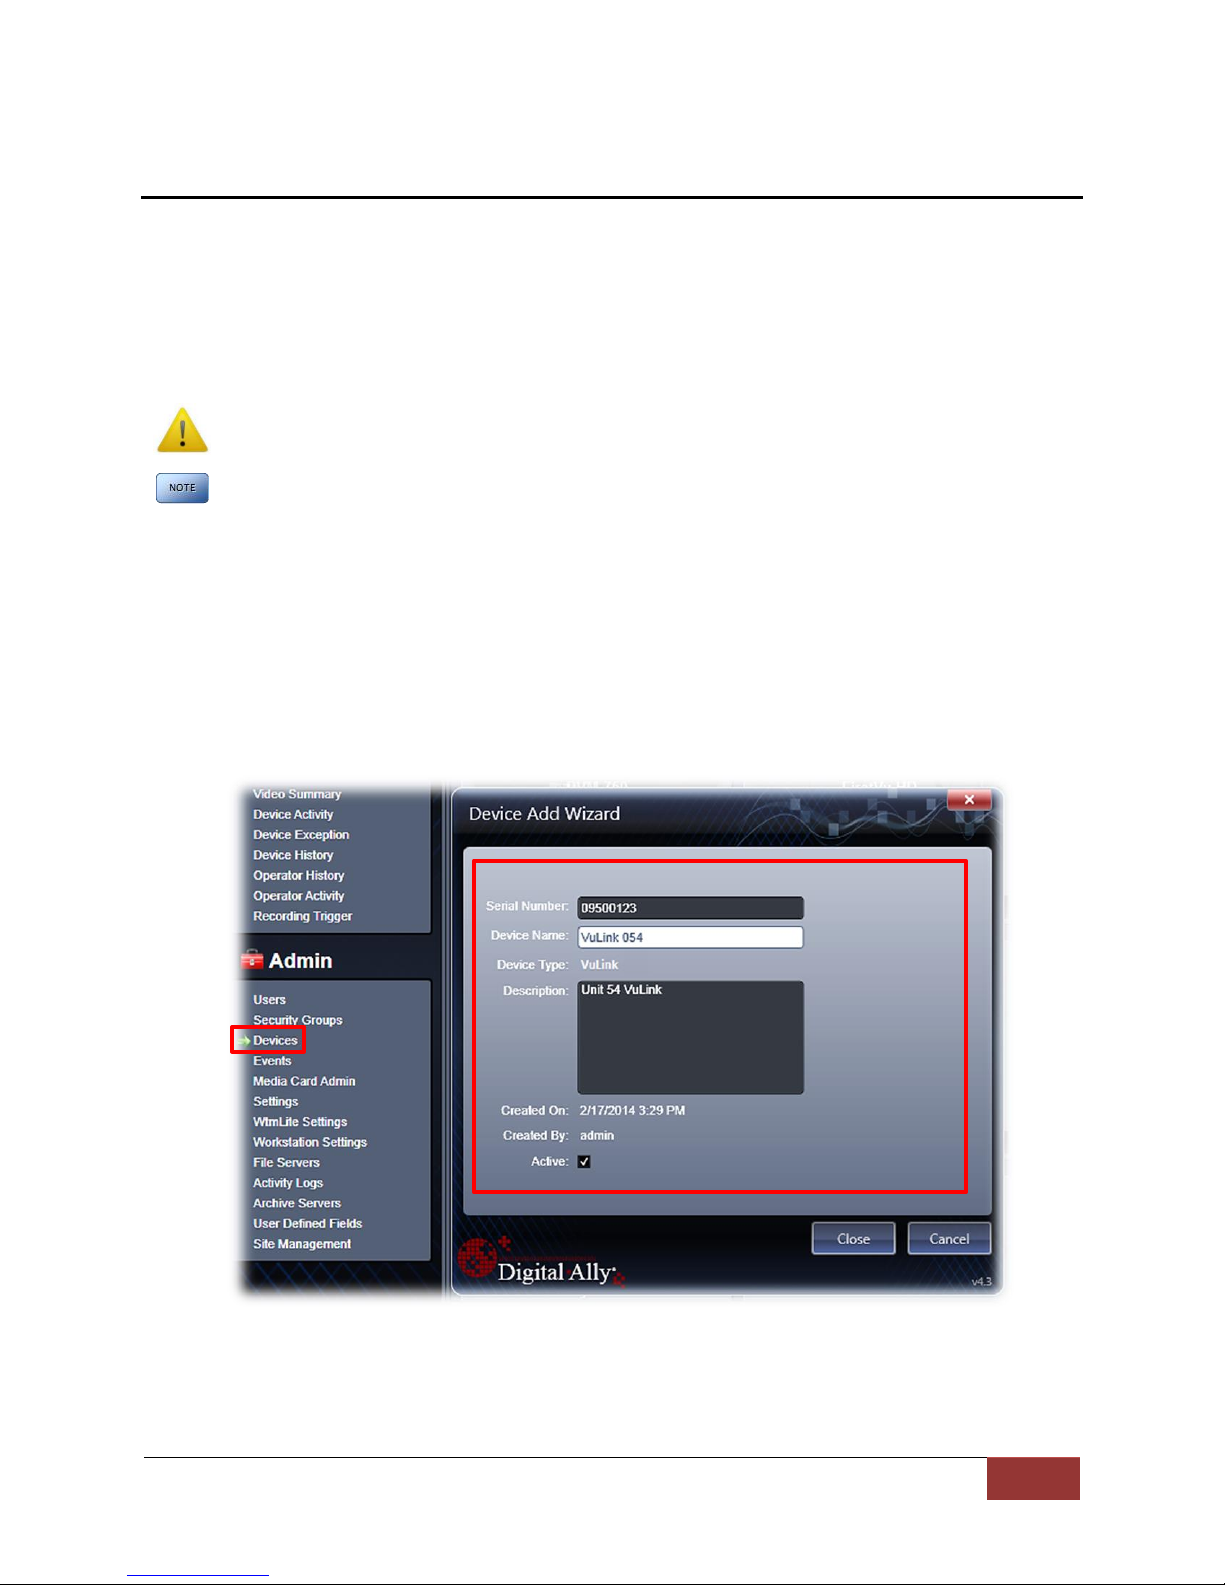
1. Before you can configure your device for use within VuVault, the serial numbers for
VuLink and associated FirstVuHD devices must be added into the system. Select
Admin>Devices>Add Device to add your devices into VuVault. Type in your device serial
numbers and assign a name within the system. When done, press Save (for more
information consult the VuVault User’s Guide “Adding Devices” section).
A configuration field will be available in the Admin>Settings tab within VuVault once a valid
VuLink serial number has been added into the system. These global settings will define how
your FirstVu HD’s will connect to VuLink.
VuLink Operation & Installation Guide 860-00198-00 REV A
Digital Ally, Inc. | VuLink Configuration
2-2
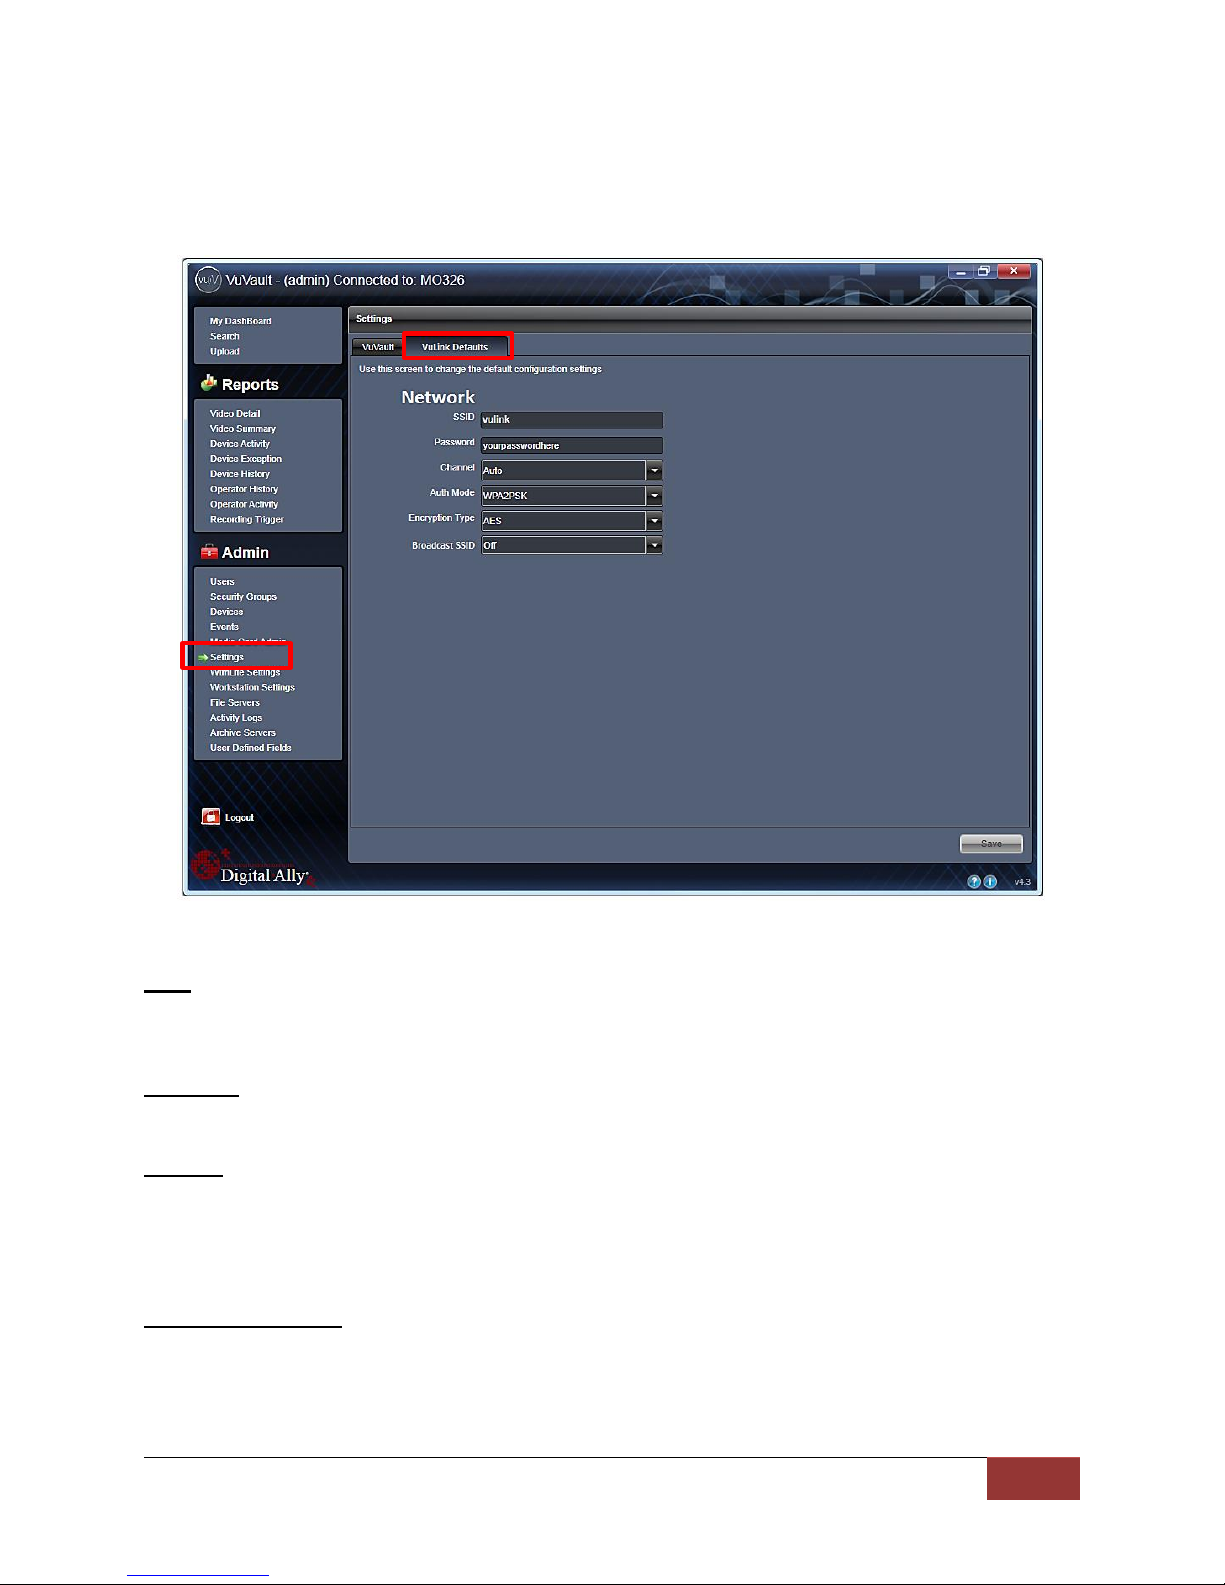
Configuring VuLink
VuLink acts as an 802.11n wireless access point which your FirstVu HD’s will use to
communicate with your in-car video system. After you have made your selections, press Save.
Network
SSID
The SSID is the wireless network name. This parameter specifies the VuLink SSID that
your FirstVu HD’s are authorized to connect to.
Password
This parameter specifies the password or security phrase required to connect to VuLink.
Channel
This parameter specifies the wireless channel that your FirstVu HD’s will use to connect
to the VuLink.
Settings: 1 to 11, Auto [default]
Authentication Mode
This parameter specifies the security authentication required by VuLink.
Settings: WPAPSK, WPA2PSK [default]

VuLink Operation & Installation Guide 860-00198-00 REV A
Digital Ally, Inc. | VuLink Configuration
2-3
Encryption Type
This parameter specifies the wireless encryption protocol required by VuLink. If selecting
WPA2PSK as the authentication mode, choose AES as the encryption type. If selecting
WPAPSK as the authentication mode, choose TKIP as the encryption type.
Settings: TKIP, AES [default]
Broadcast SSID
Choose whether or not to broadcast the SSID. Broadcasting allows computers with
wireless cards to find the network by browsing. Disabling the broadcast of the SSID
prevents browsing to find the network.
Settings: On, Off [default]
Configuring your FirstVu HD
Go to the FirstVu HD settings tab and check the “Use VuVault WAP settings” box as shown
below. When done, press Save.
VuLink Operation & Installation Guide 860-00198-00 REV A
Digital Ally, Inc. | VuLink Configuration
2-4
Activating VuLink & FirstVu HD within VuVault
After you have saved your desired configuration, proceed
to Admin>Media Card Admin to activate each device.
FirstVu HD Activation
1. Turn on your FirstVu HD & plug it into your
computer using the supplied USB cable.
2. Select FirstVu HD as the device type. Click
Refresh and the FirstVu HD will be displayed as a
removable drive.
3. Highlight the drive with your mouse.
4. Select Activate and unplug your FirstVu HD.
VuLink Activation
5. Plug in your VuLink into your computer using the supplied USB cable.
6. Select VuLink as the device type. Click Refresh and VuLink will be displayed as a
removable drive.
7. Highlight the drive with your mouse.
8. Select Activate.
9. All done! Proceed to Section 3 to install your VuLink.
Using the Configuration Manager to Configure your VuLink and FirstVuHD
VuLink must be configured prior to use. Configuration for VuLink is determined by the
configuration files that are downloaded to the device from the Mini Configuration Manager
supplied on the internal memory, or by using Digital Ally’s optional VuVault™ back-office
software.
If you have NOT purchased VuVault™, follow the instructions in this section to configure
and activate your device using the stand-alone Mini Configuration Manager software.
Installing the Software
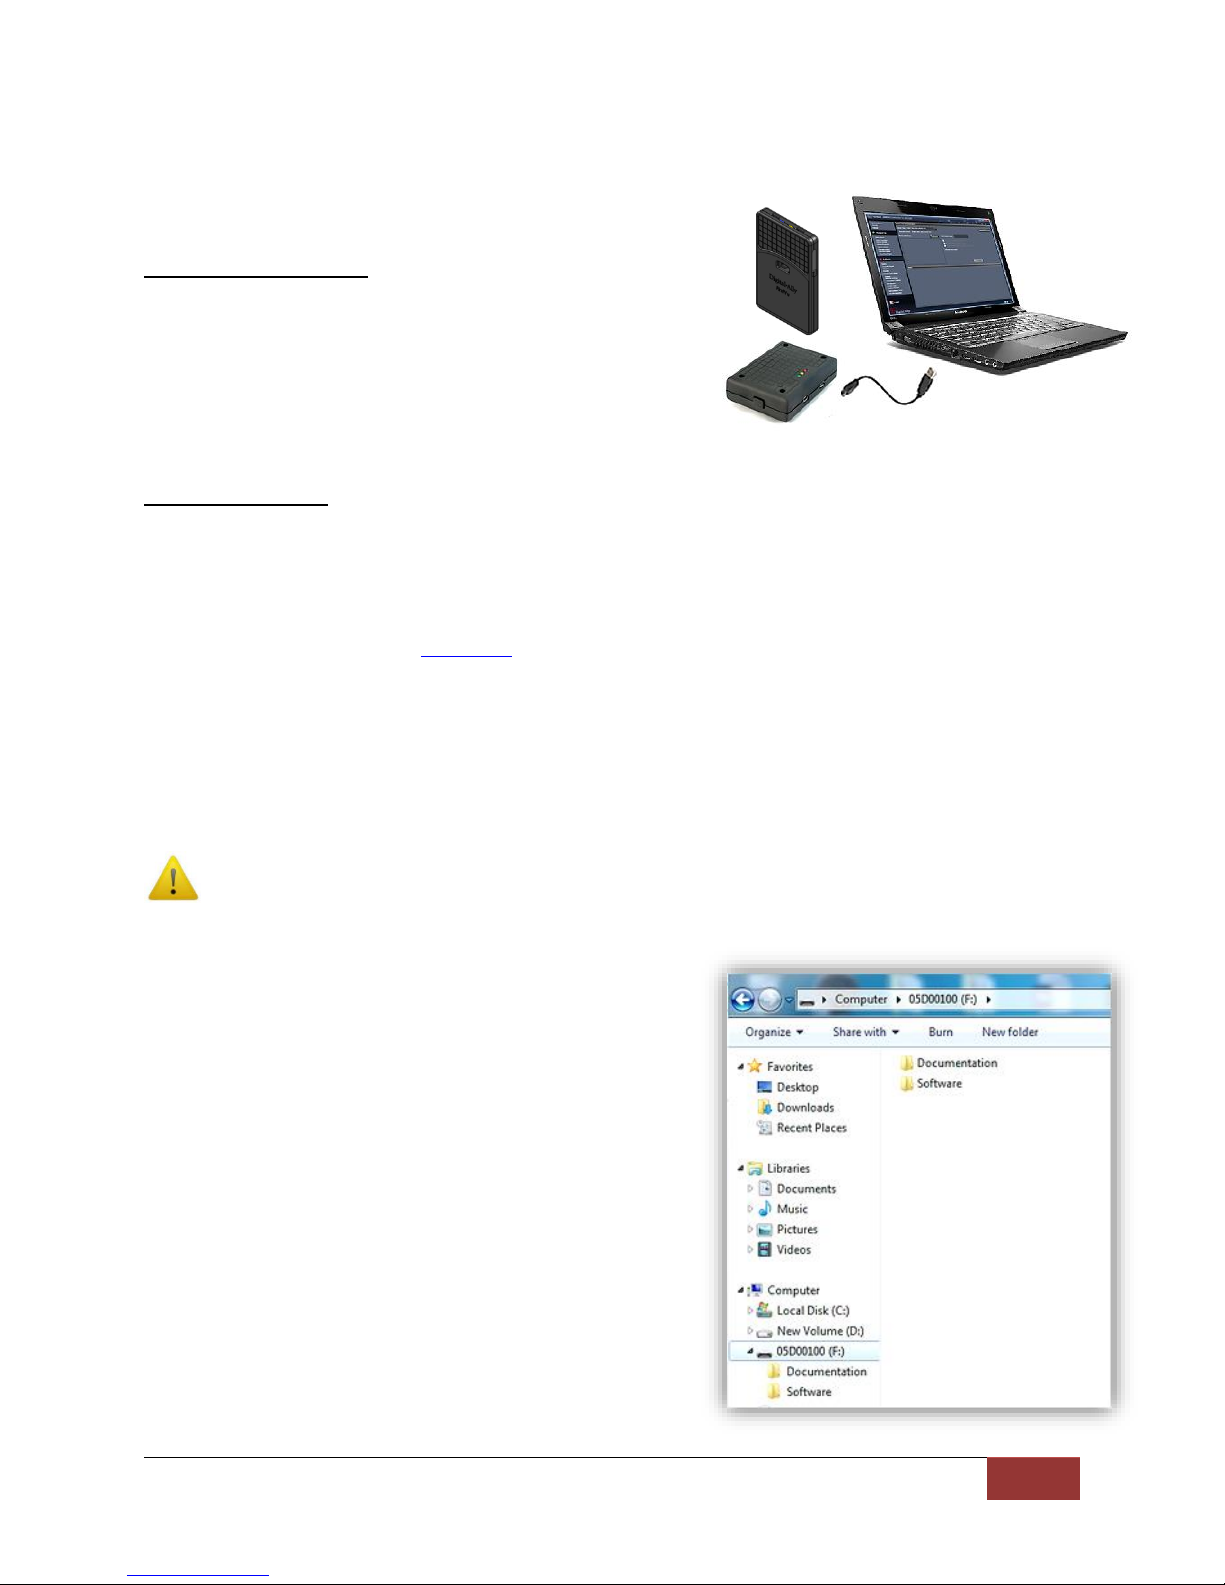
1. Your VuLink is preloaded with software and
documentation files located on its internal
memory. Plug VuLink into a computer using
the included USB cable to access these files.
2. The Documentation folder contains the
Operation Guide and Quick Start Guide. The
Software folder contains the Digital Ally Mini
Configuration Manager and Basic Viewer
software. If you purchased the optional
VuVault™ back office software, it will be
located separately on a DVD.
3. Open the Software folder and run the Digital
Ally Viewer installer. This will install all
necessary files to your computer.
VuLink Operation & Installation Guide 860-00198-00 REV A
Digital Ally, Inc. | VuLink Configuration
2-5
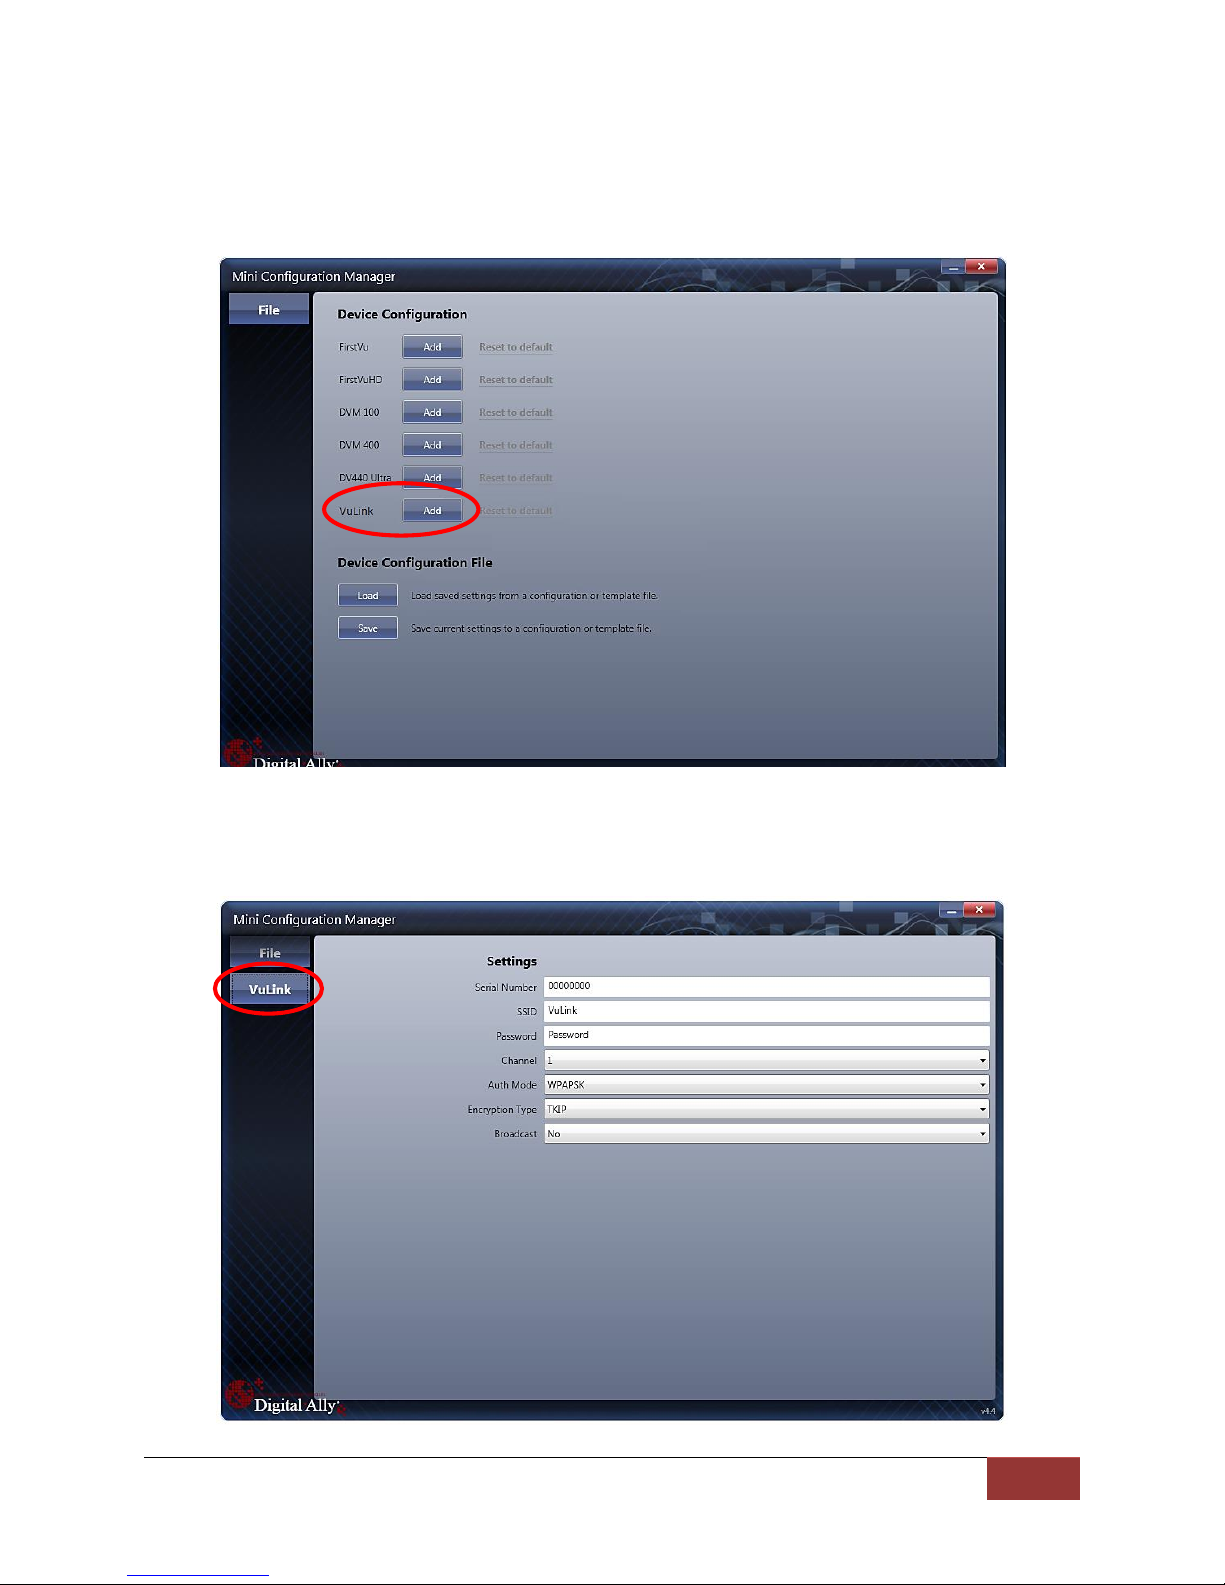
Configuring VuLink
Press the Add button to display the list of available options for VuLink.
Select the Vulink tab. VuLink functions as an 802.11n wireless access point which your FirstVu
HD’s will use to communicate with your in-car video system. After you have made your
selections, return to the File tab to save your settings.
 Loading...