

Digital Acoustics SPKR-IP-CS-IC Getting Started Manual
SPKR-IP-CS-IC
Getting Started Guide
Introduction
The SPKR-IP-CS-IC is a 2’x2’ IP Ceiling Speaker for use with Singlewire
InformaCast software. The internal amplifier delivers a maximum of 8 watts
of audio and is powered by Power over Ethernet (PoE - 802.3af compatible).
The SPKR-IP-CS-IC is DHCP enabled and will be automatically recognized
by InformaCast when connected to a Multicast enabled network. This
Getting Started Guide covers basic hardware installation and software
configuration of the SPKR-IP-CS-IC.
Specifications
• 8” O.D. Speaker
• 8 Watt Amplifier
• PoE (802.3af)
• Integrated Back Box
• Average Sensitivity – 92 dB SPL, 1W/1M
• Maximum Power rating – 15W @ 8 Ohms
• Magnet Type & Weight – BeFe Ceramic, 5 oz. Nominal
• Frequency Response – 65 Hz - 17 kHz EIA 426A Standard
• Nominal Coverage Angle – 100° Included Angle -6 dB / 2 kHz, Half
space
Installation
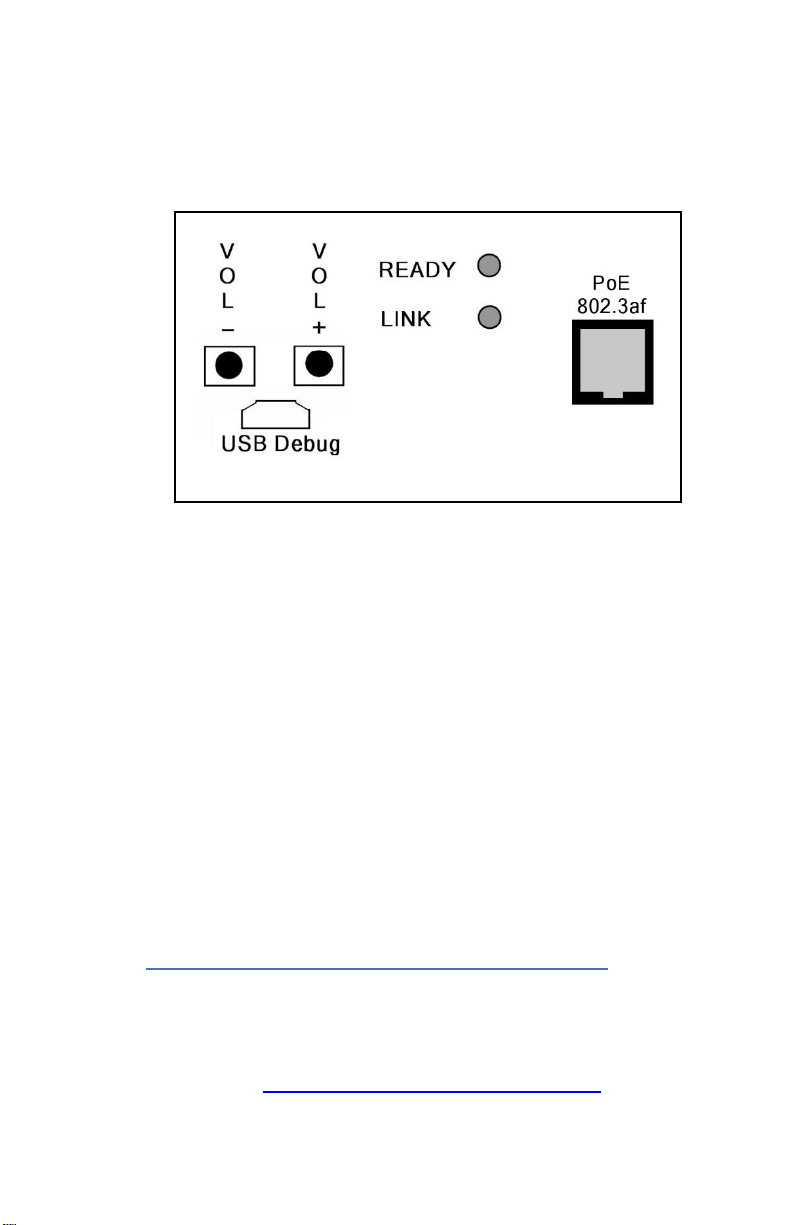
The controls, connectors and LEDs for the SPKR-IP-CS-IC are located on a
faceplate on top of the speaker. There is also a green LED in the speaker grill
that matches the state of the Ready LED.
• Connect the SPKR-IP-CS-IC ceiling speaker to a PoE (802.3af)
network cable. The SPKR-IP-CS-IC will power up within 5 seconds
and request 15.4 watts from the Power Source Equipment
• The red Link LED will turn solid
• The red Ready LED will flash 4x per second
• Once the SPKR-IP-CS-IC ceiling speaker is detected by
InformaCast, the Ready LED will turn solid
• Record the ID# from the label on back of the SPKR-IP-CS-IC for
use during software configuration.
• Optionally, label the speaker grill with one of the extra ID# labels
included in the box
• Install the connected Speaker in a 2’x2’ ceiling grid and verify that
the green Ready LED in the speaker grill is on solid
• Please refer to the Application Note – IP7 for InformaCast
Installation and Configuration Guide available at
www.digitalacoustics.com/support/application-notes/ for additional
information on installation and setup
Digital Acoustics Technical Support
www.digitalacoustics.com/support
 Loading...