

Page 1
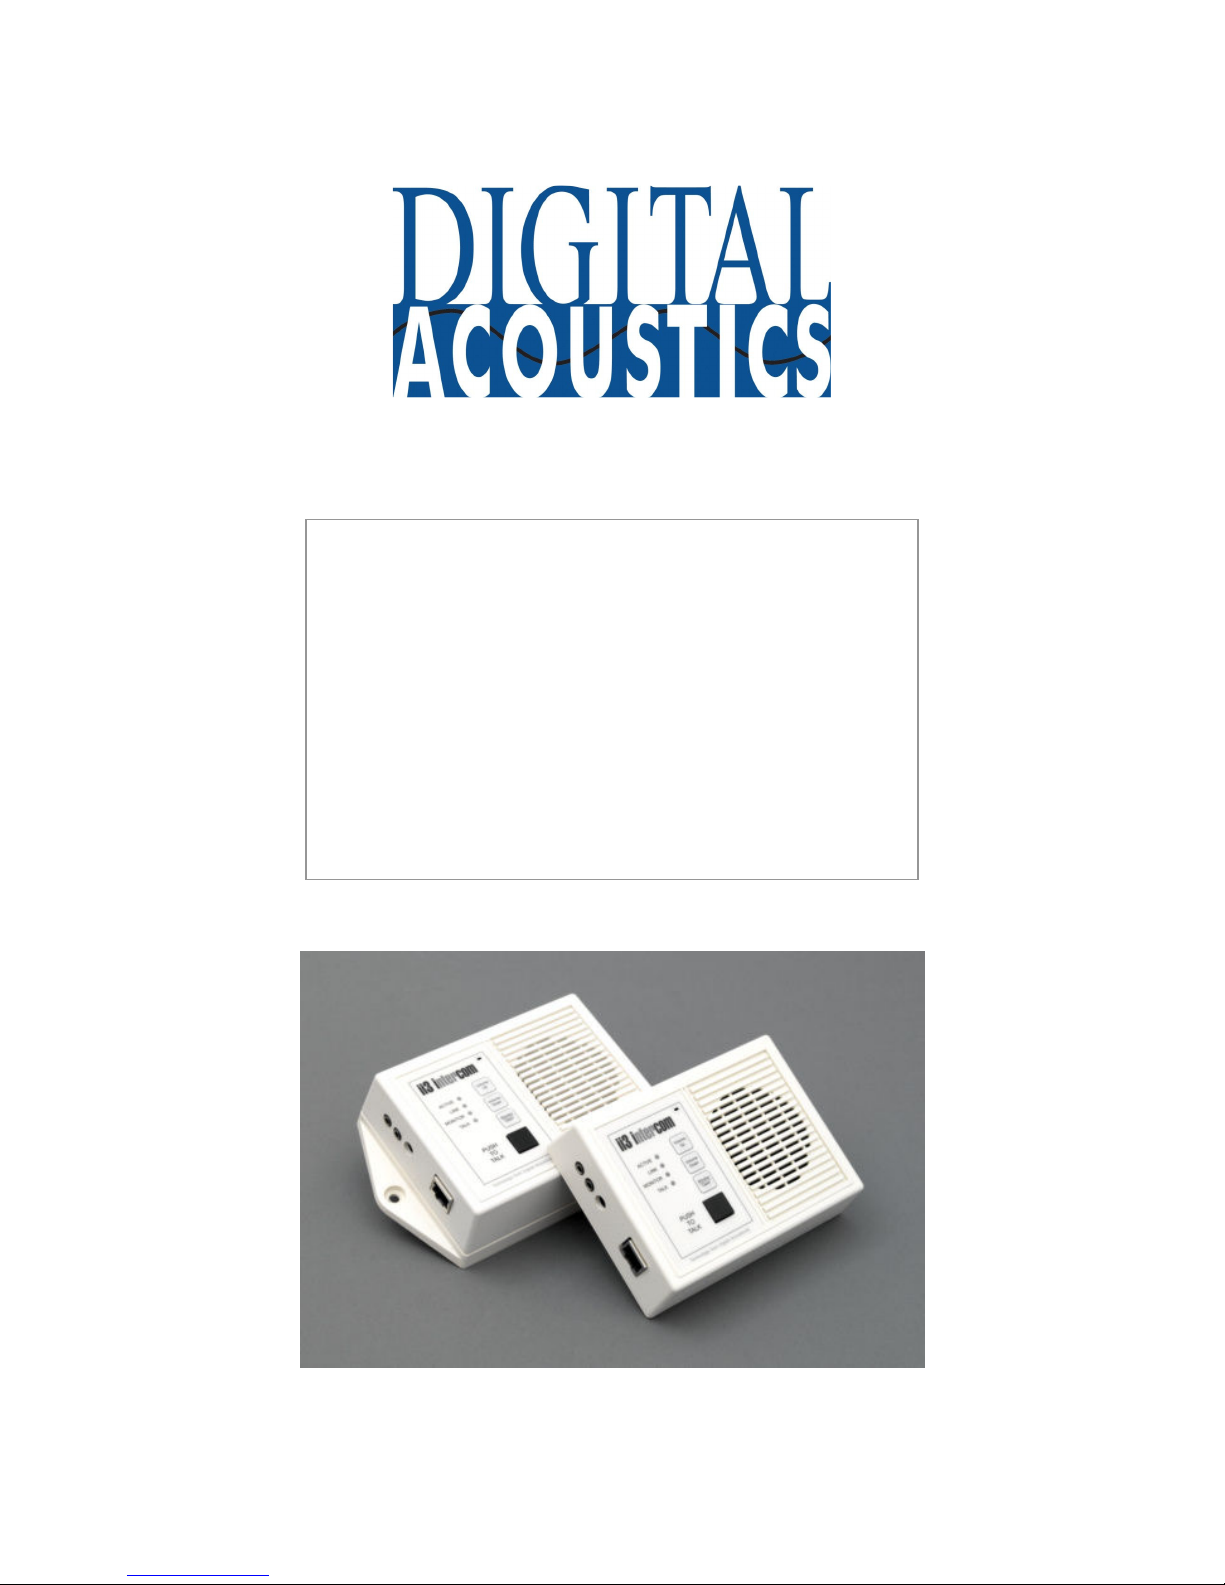
IP7
Desktop
Intercom
Reference Manual
Page 2

This page left blank
Page 3

Table of Contents
Overview ........................................................................................1
Available Models .............................................................................2
Specifications .................................................................................2
IP7 Desktop Layout ........................................................................3
LED Indicators ................................................................................5
Connecting to an Ethernet Network ................................................6
Connecting Power ...........................................................................6
External Power ..................................................................................6
PoE ..................................................................................................6
Connecting Mic In or Audio Out ......................................................6
Mic In...............................................................................................6
Audio Out .........................................................................................6
Setting Volume Levels ....................................................................6
Software Configuration...................................................................7
IP Configuration.................................................................................7
Intercom Options ...............................................................................7
Physical Dimensions .......................................................................8
Environmental ................................................................................8
Troubleshooting..............................................................................9
Reset to Factory Defaults....................................................................9
Contacting Technical Support .........................................................9
Page 4
Overview
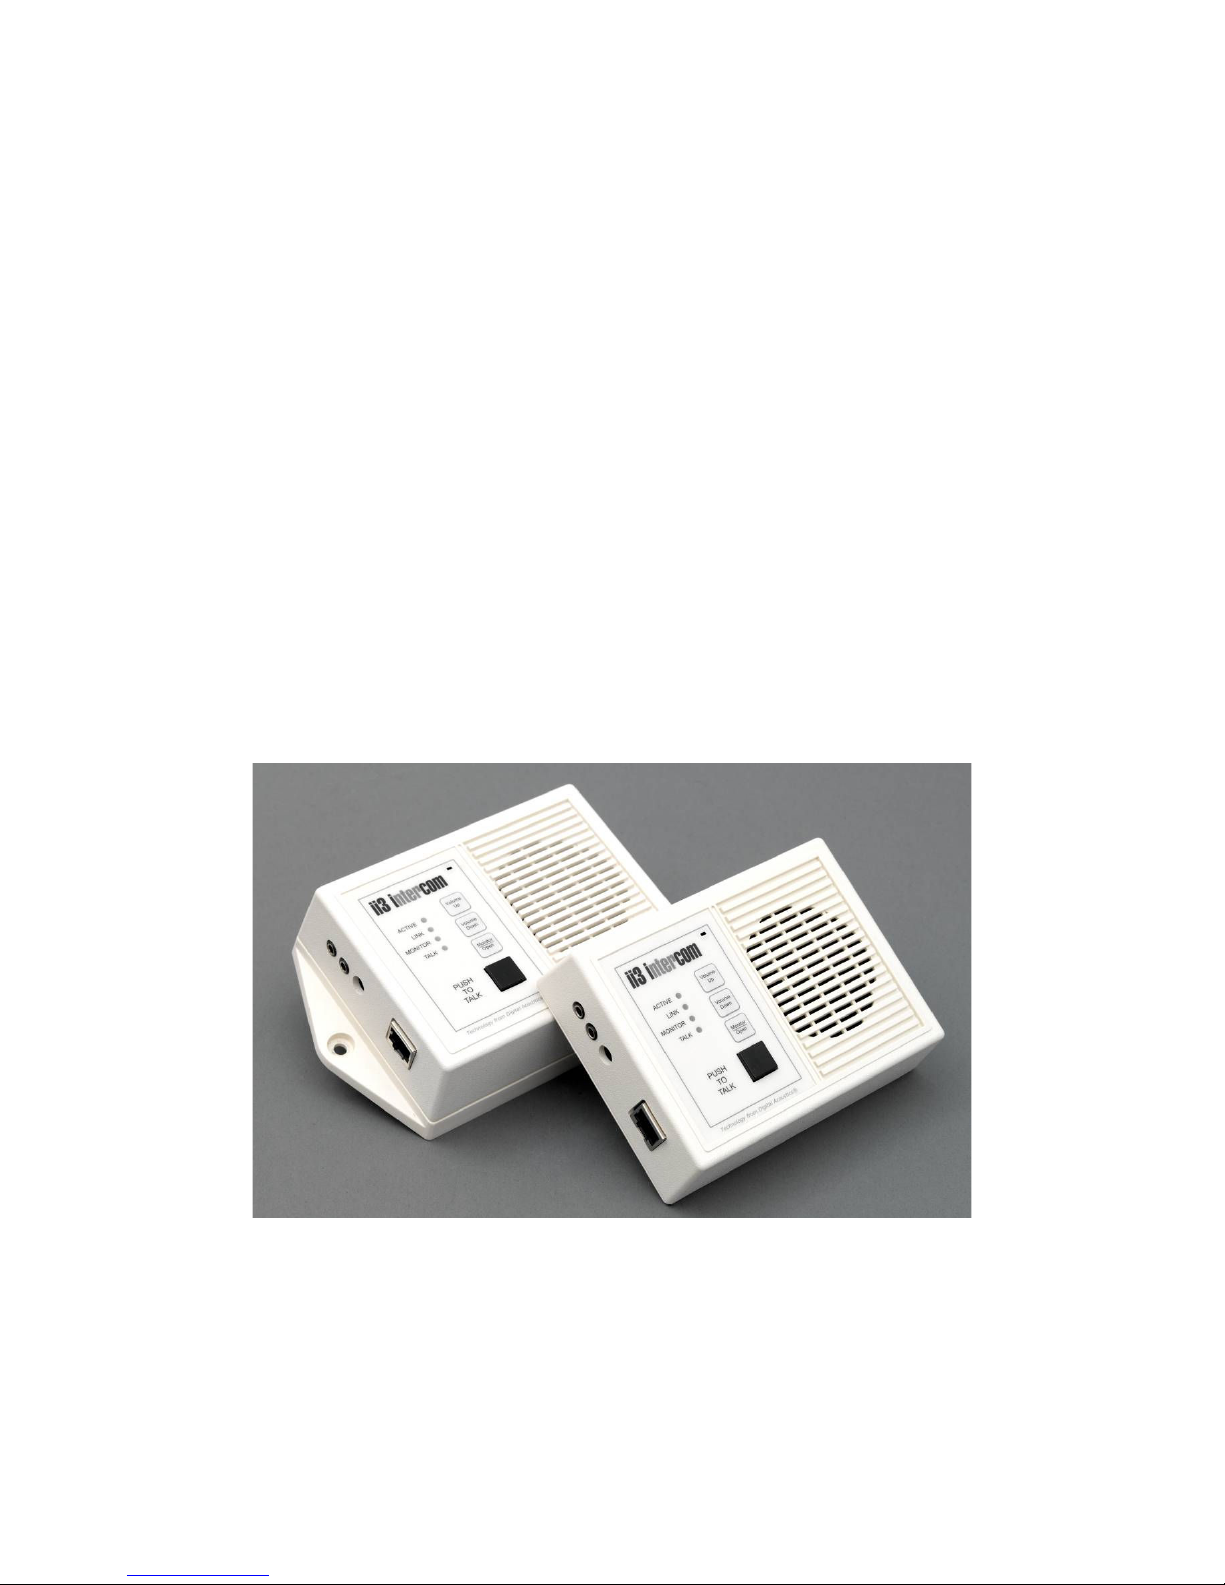
The Digital Acoustics IP7 Desktop models are IP (Internet Protocol) based
Intercoms that provide the functional audio equivalent of the basic "push to
talk" intercom. Simply power it up, connect it to a 10/100 Ethernet switch,
configure its IP address information and communicate to a PC running
TalkMaster™ software.
The IP7 Desktop models replace the previous ii3 series Desktop Intercoms.
Refer to the bottom label to ensure you have an IP7 series Intercom.
Standard features include:
• Integrated microphone and speaker
• Talk to/from an IP7 Desktop to host PC server
• High quality, clear transmit and playback audio
• Hands-free operation for the end user
• Highly scalable and seamless expansion
• Static or DHCP compliant IP assignment
• External 9VDC power
• Optional PoE (802.3af) available
• Available with “surface mount” bottom plate
• Field upgradeable OS using internal Flash memory
The IP7 Desktop must be configured using the TalkMaster™ software before
being used. Please consult the configuration section of the software manual
for details.
Page 1 of 1
Page 5

Available Models
IP7-EDW-110 – White Desktop with 110 power supply
IP7-EDW-220 – White Desktop with 220 power supply
IP7-EDW-PoE – White Desktop with PoE option
IP7-ESW-110 – White Surface Mount with 110 power supply
IP7-ESW-220 – White Surface Mount with 220
IP7-ESW-PoE – White Surface Mount with PoE option
IP7-EDB-110 – Black Desktop with 110 power supply
IP7-EDB-220 – Black Desktop with 220 power supply
IP7-EDB-PoE – Black Desktop with PoE option
IP7-ESB-110 – Black Surface Mount with 110 power supply
IP7-ESB-220 – Black Surface Mount with 220 power supply
IP7-ESB-PoE – Black Surface Mount with PoE option
Specifications
Items Specifications
Hardware Protocols TCP, UDP, IP, ARP, ICMP, IGMP V2/V3, Multicast
Network Interface 10/100 Ethernet (Auto detection, Auto MDIX)
Command protocols Proprietary
Audio Rate 64kbs
Audio Resolution G.711 (8-bit PCM and 16-bit uLaw)
Audio Sample Rate 8 kHz (Voice band)
Audio Frequency 4000 Hz
Internal Amplifier 1 Watt @ 8 Ohms
Humidity 10~90%
Power
Size
External Power 9VDC @ 5 watts
PoE (802.3af) Requires 7 watts from PSE
135mm x 102mm x 37mm
Page 2 of 2
Page 6
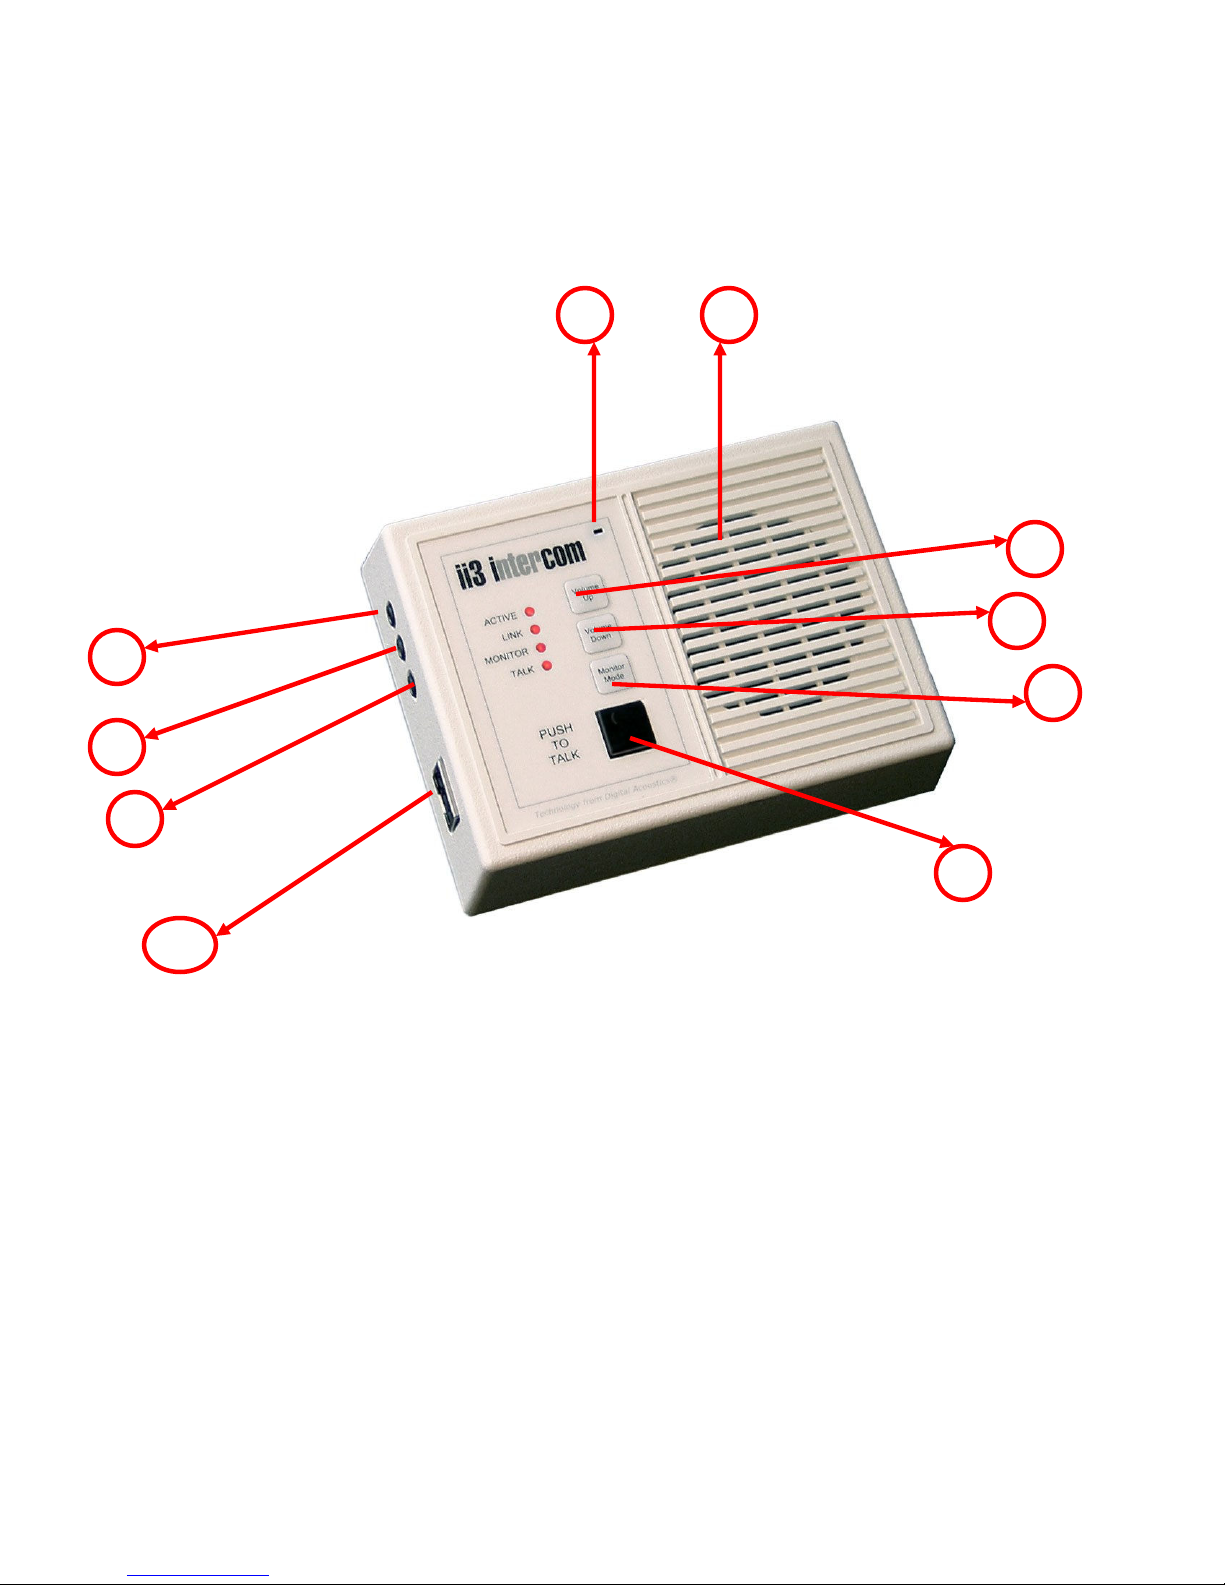
1 2
3
4
5
7
8
9
6
10
IP7 Desktop Layout
Page 3 of 3
Page 7

Connections and Controls
Refer to the preceding pictures for the Connector number.
Number Description Notes
1 Integrated Microphone Uni-directional microphone
2 Integrated Speaker 8Ω speaker
3 Volume Up Increase speaker volume (max 7 levels)
4 Volume Down Decrease speaker volume (max 7 levels)
5 Monitor/Open Used for Direct Mode Server1:
Depress < 2 seconds to toggle Monitor,
Depress > 2 seconds to activate Client
Door Relay
6 Push To Talk (PTT) Initiate a call and/or transmit audio
7 External Mic In Jack 3.5mm External Microphone Jack
8 External Audio Out Jack 3.5mm External Audio Out Jack
9 Power 9VDC at 500ma
10 10/100 Ethernet 10/100 Auto sensing, Auto MDIX
1
Refer to the “Direct Mode Configuration” Application Note for configuring two
Intercoms to operate without the need of a PC. Available on the TalkMaster
Installation CD or the Digital Acoustics’ Website
Page 4 of 4
Page 8
LED Indicators
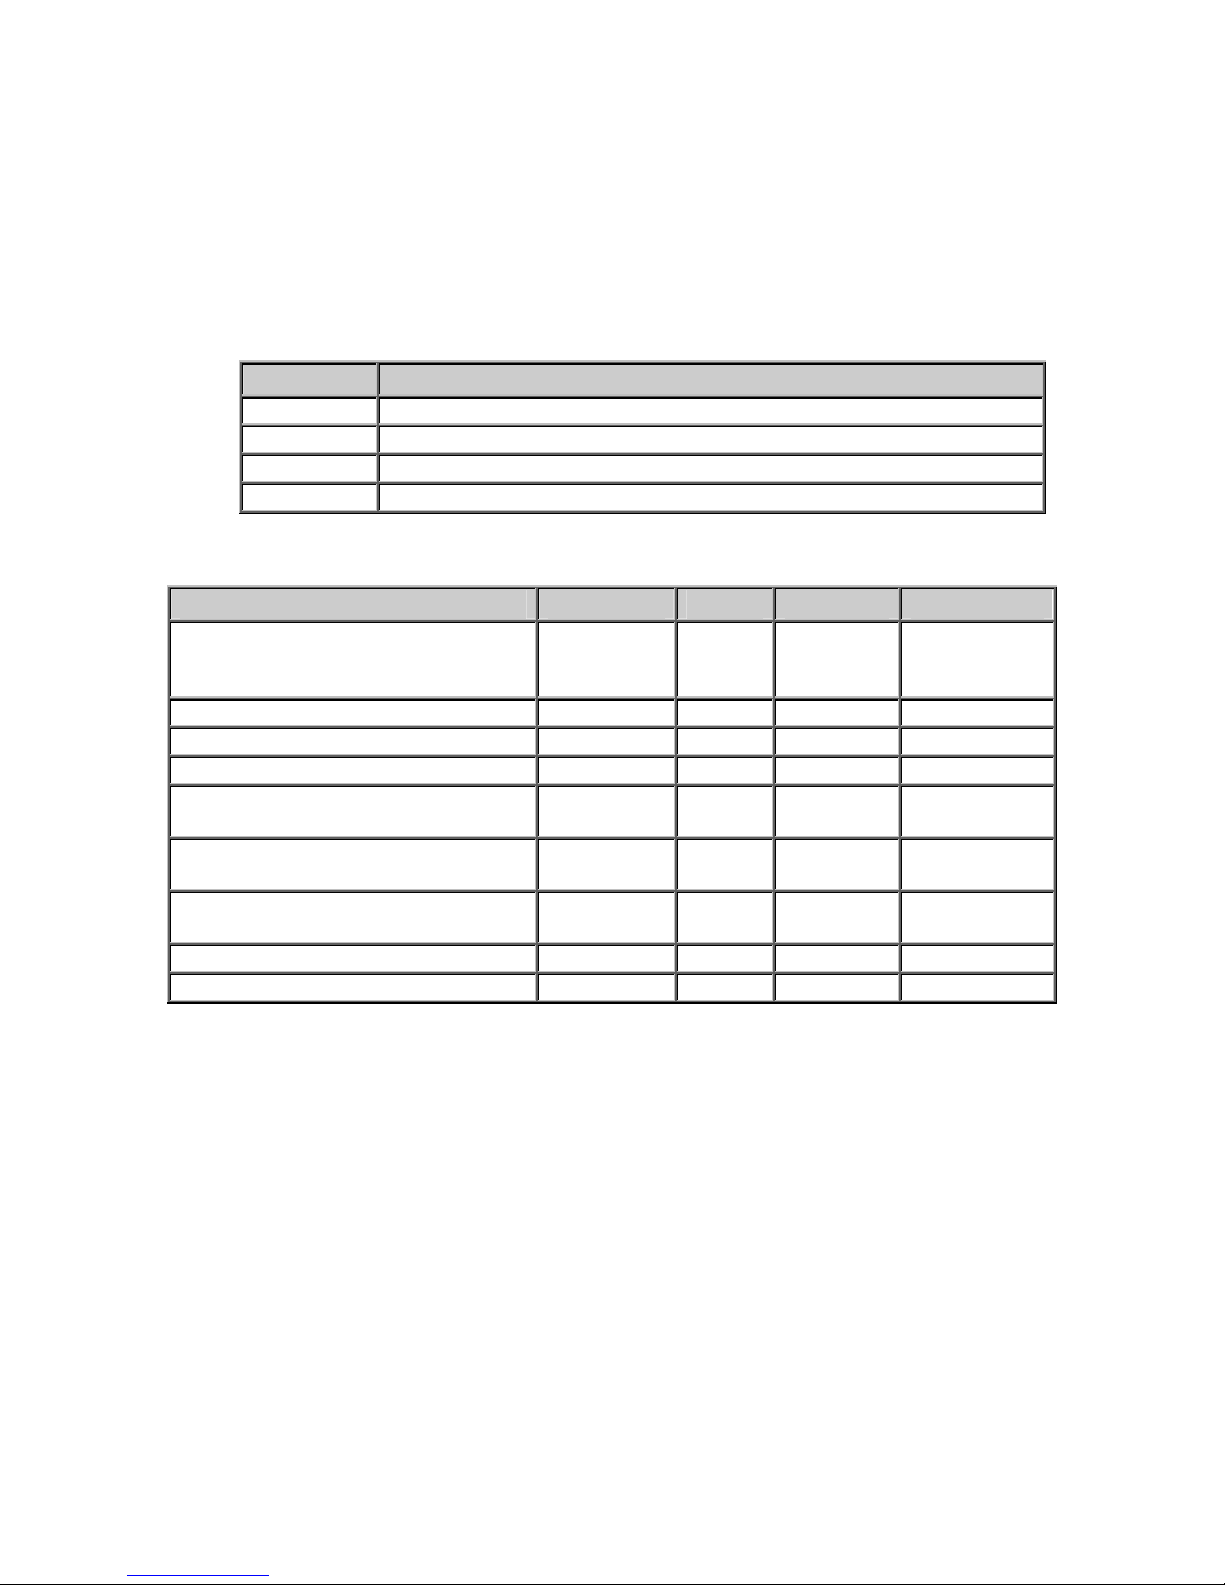
Intercom LEDs
There are four LEDs present on the front of the product. These LEDs
indicate status of the unit.
LED Description
Active Indicates whether the unit has connected to a Server
Link Indicates whether the unit has a valid network Connection
Monitor Indicates whether the remote end is being listened to
Talk Indicates whether audio is being transmitted or received
LED Status Table
Description Active Link Monitor Talk
Normal operational mode.
Intercom can communicate with
its Server
Playing Audio On On Off Flashing
Playing Broadcast Audio Fast Flash On Off Flashing
Sending Audio On On Off On
Waiting for a connection or unit
has not been configured
LAN connection is inactive. The
RJ45 may be unplugged
Unit has been detected by the
Intercom Configuration Tool
Server Mode – Monitoring Client On On On Any
Server Mode – “Door Open” Sent On On Flash Any
On On Off Off
Slow Flash On Off Off
Slow Flash Off Off Off
Fast Flash On Off Off
LAN Connector LEDs
On the Ethernet 10/100 RJ-45 connector:
• The Green LED tracks to the Ready LED
• The Yellow LED tracks to the Link LED
Page 5 of 5
Page 9

Connecting to an Ethernet Network
The Ethernet 10/100 connector allows the unit to be attached to a
standard Ethernet 10/100 network.
• Plug a Cat5 cable into the RJ-45 connector labeled Ethernet
10/100 and connect the other end to a 10/100 switch
• The Ethernet 10/100 connector supports auto “MDIX” and can
be plugged directly into a PC for diagnostic purposes
Connecting Power
External Power
• The 2.1mm Power Jack (center tip positive) accepts 9VDC
PoE
Plug a Cat5 cable from an 802.3af compliant switch or injector into the
Ethernet 10/100 connector. 7 watts will be requested from PoE
(802.3af compatible) Power Source Equipment (PSE).
Connecting Mic In or Audio Out
Mic In
• The 3.5mm Mic In jack accepts a standard electret or dynamic
mic. Use of this jack overrides the integrated mic
• Mono Jack required
Audio Out
• The 3.5mm Audio Out Jack is capable of driving headphones or
an external amplifier. Use of this jack overrides the integrated
speaker
• Mono Jack required
Setting Volume Levels
The IP7 Desktop supports seven volume levels for the internal speaker.
• Press the “Volume Up” or “Volume Down“ button one time to
increase or decrease the speaker volume
• Pressing the “Volume Up” or “Volume Down “ button seven times
sets the unit at its highest or lowest setting
• Refer to the software manuals for setting the volume via
software
Page 6 of 6
Page 10

Software Configuration
IP Configuration
Refer to the software manuals for instructions on setting the IP
address information.
Intercom Options
The IP7 Desktop uses the internal Relay and Sensor. Do not make
any configuration changes to either of these.
Page 7 of 7
Page 11
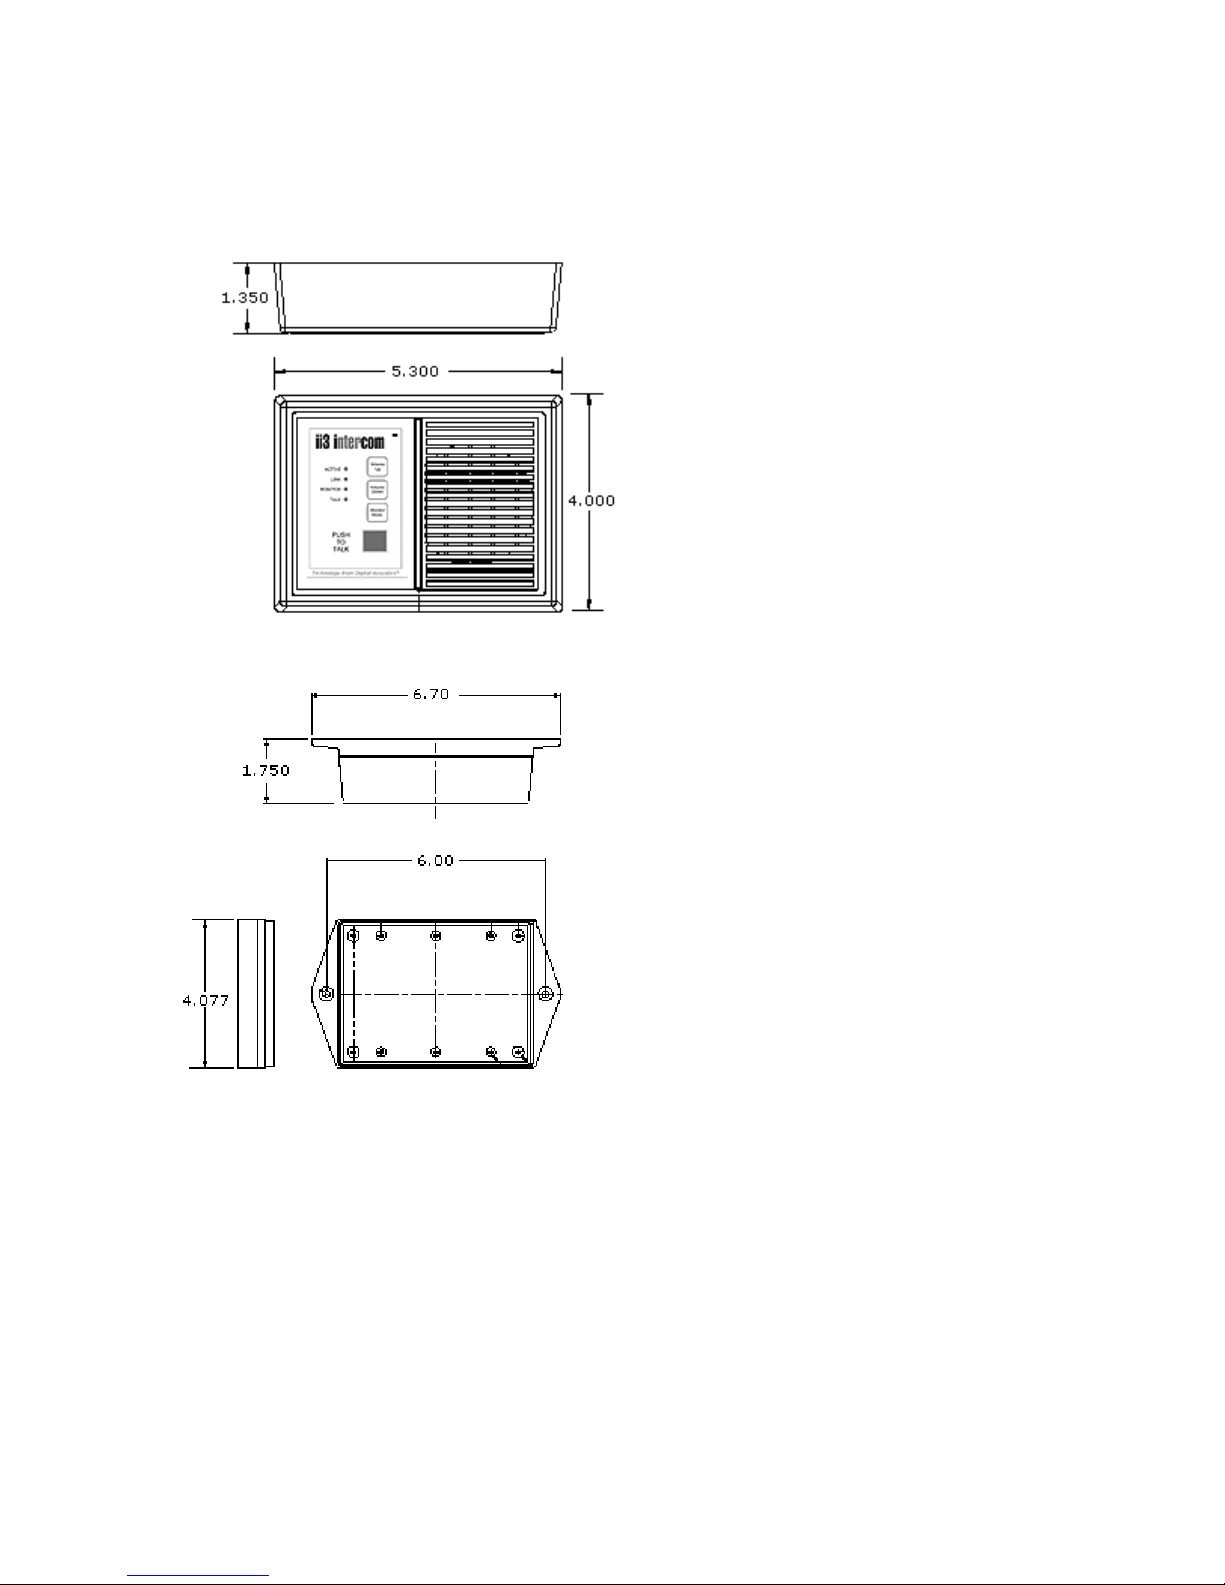
Physical Dimensions
The IP7 Desktop Dimensions are as follows:
Dimensions for the optional Surface Mount bottom:
Environmental
The IP7 Desktop is designed to operate indoors.
Page 8 of 8
Page 12

Troubleshooting
Always refer the LED Indicator table when troubleshooting.
The unit can be reset to factory defaults by following this procedure:
Reset to Factory Defaults
The IP Address information and all Intercom options can be reset to
factory defaults by the following procedure:
• Unplug the Power
• Press and hold the “Volume Up” and “Volume Down “ buttons
• Power the unit
• Wait till the unit plays a 3 tone beep (about 5 seconds)
• Release the “Volume Up” and “Volume Down “ buttons
• Refer to the software manuals for instructions on configuring the
IP address information
Contacting Technical Support
Information online at www.digitalacoustics.com
Email support:
Telephone Support:
+1 (847) 604-9256 Mon-Fri 8-6 (Central Time Zone)
Page 9 of 9
Page 13

2.1mm Power Jack ................ 6
Audio Out ..........................4, 6
Dimensions........................... 8
Direct Mode Server ............. 4
Ethernet 10/100 ................ 6
Factory Default ..................... 9
Intercom Options .................. 7
Intergrated Microphone.......... 4
Intergrated Speaker .............. 4
IP Configuration .................... 7
LAN Connector LED................ 5
LED ..................................... 5
Index
LED Status ........................... 5
LEDs.................................... 5
Mic In ...............................4, 6
Monitor/Open ....................... 4
PoE ..................................... 6
Power .................................. 6
PTT ................ See Push to Talk
Push To Talk......................... 4
Volume ................................ 6
Volume Down ....................... 4
Volume Up ........................... 4
Page 14

www.digitalacoustics.com
Digital Acoustics' product designs are packaged by
leading manufacturers around the world. Contact
factory for technical specification before product
design and/or use. Design and specification are
subject to change without notice.
Digital Acoustics®, IP7™, ii3™ and TalkMaster™
are trademarks of Digital Acoustics, LLC. I2C is a
registered trademark of NXP Semiconductors, Inc.
All other marks used are properties of their
respective owners.
Copyright 2007-2009, All Rights Reserved
IP7 DESKTOP Reference Manual.docu v09011501
 Loading...