

Page 1
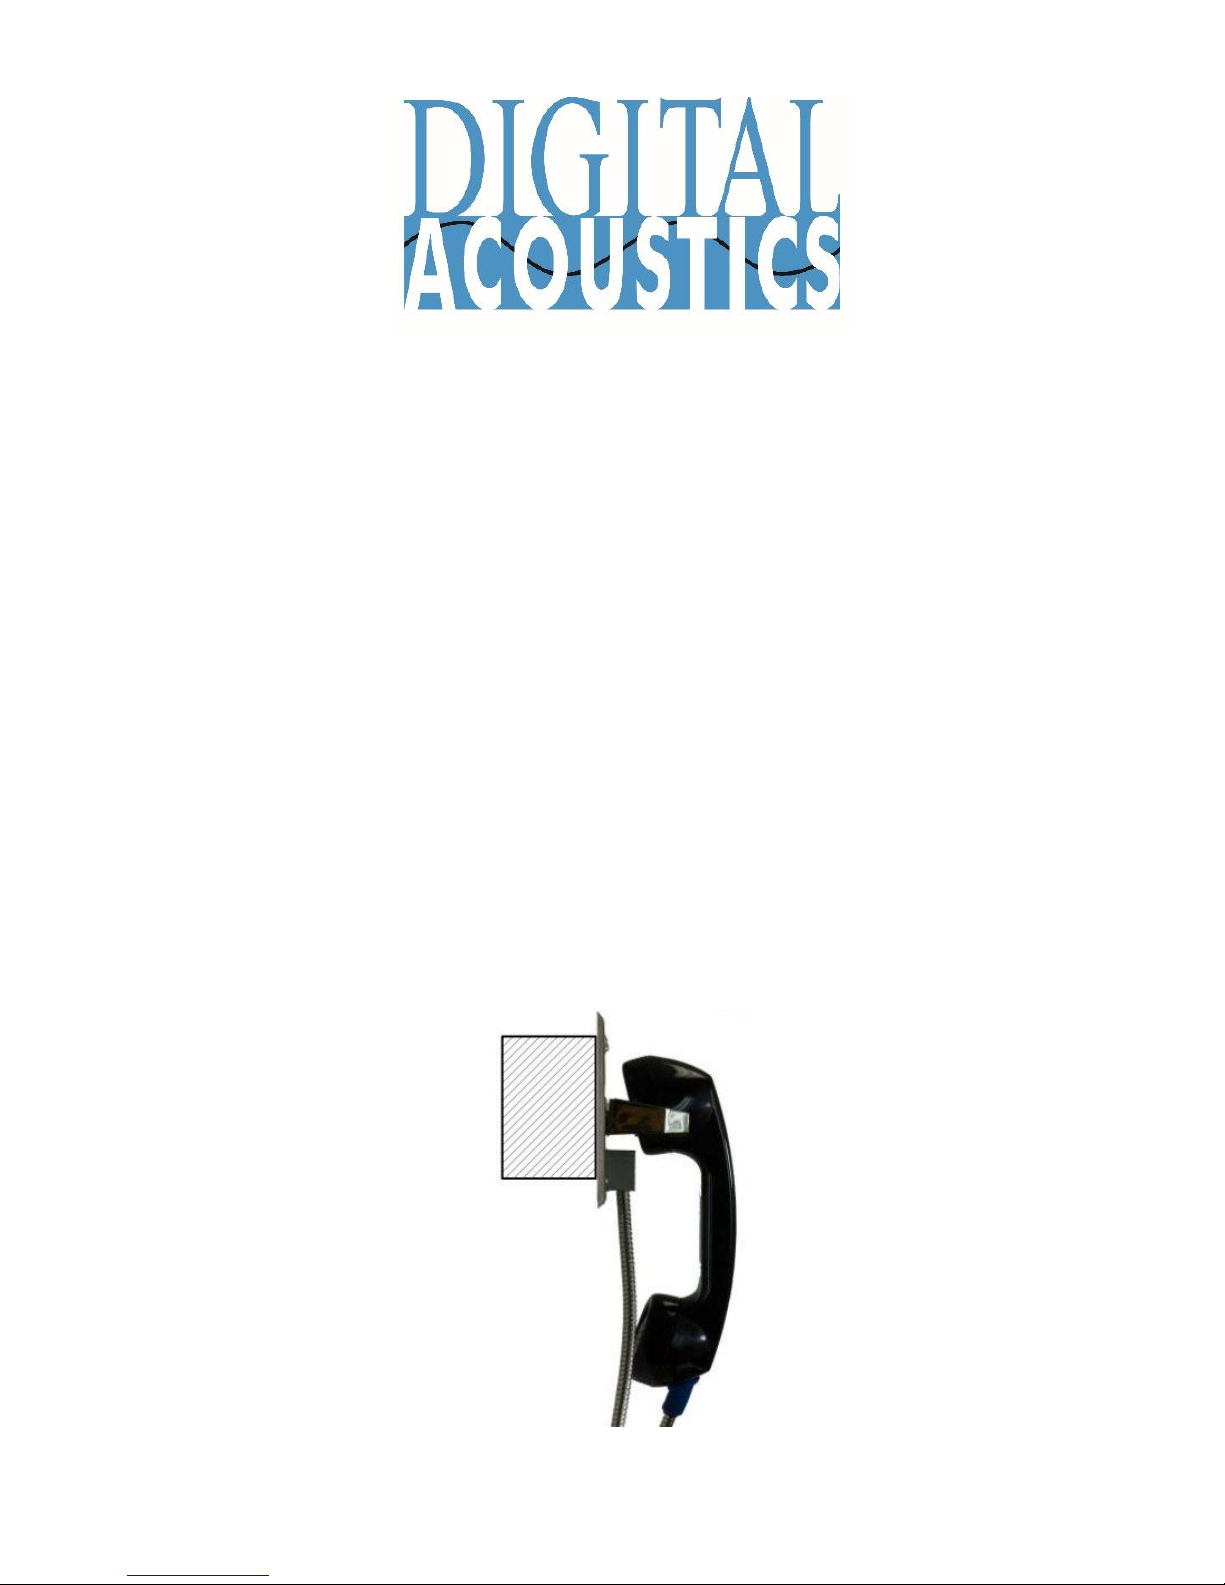
HS-A1
Getting Started Guide
Introduction
The HS-A1 is an analog handset with an armored cable and a hook switch
mechanism designed to be connected to an IP7 intercom module to enable full
duplex audio operations with a TalkMaster operator console or SIP Phone.
The HS-A1 can place a call by removing the handset from the switch hook. If
configured for TalkMaster, it will place an Incoming Call. If the IP7 is
configured to dial out to a SIP Extension, it will initiate a call to the specified
phone number.
If the HS-A1 is called from TalkMaster or from a SIP phone, the internal piezo
buzzer will sound to indicate there is an incoming call. The HS-1A must be
connected to either an IP7-SE8 or IP7-FD IP Module.
Page 2
Installation
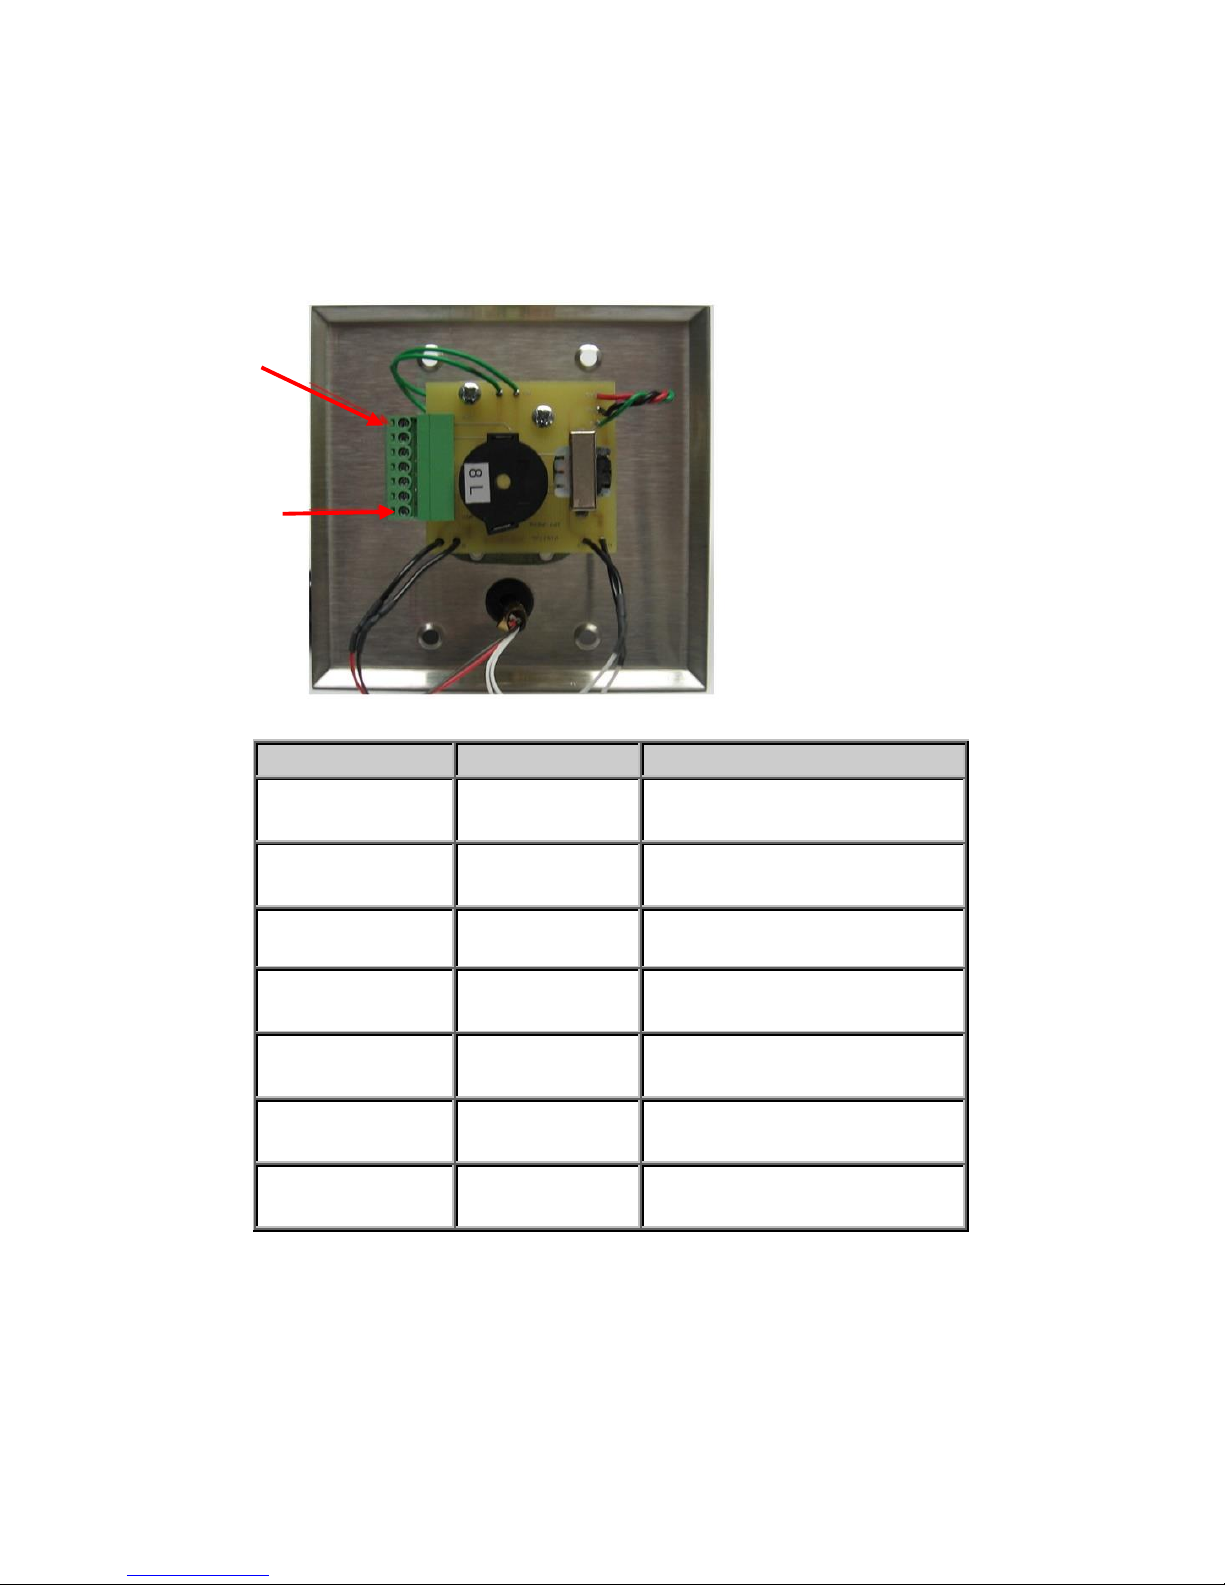
The Handsets are designed to be flush mounted in a 2-gang box. A 3-pair
cable is used to connect the Handset to an IP7-SE8. On the back of the
handset is a seven position 3.81mm DIN connector. The connection details
are:
For best audio quality, install the Handset as close as possible to the IP7
to reduce the chance of picking up audio noise. Use an 18 AWG 3-pair
multi-conductor with a shield. Refer to the IP7 Reference Manual for
instructions on connecting the shield and reducing audio noise.
Connector
Signal
IP7 Connections
J1-1
SPKR 8Ω+
Connect to J2-6 - SPKR
8Ω+ on the IP7
J1-2
SPKR 8Ω-
Connect to J2-7 - SPKR
8Ω- on the IP7
J1-3
RESERVED
J1-4
Hook Switch
Connect to J3-5 –
SENSOR on the IP7
J1-5
GND
Connect to J2-4 – GND
on the IP7
J1-6
MIC -
Connect to J2-2 - MIC- on
the IP7
J1-7
MIC +
Connect to J2-1 - MIC+
on the IP7
J1-1
J1-7
Page 3
Configuration
TalkMaster FOCUS Software is a suite of Windows® based applications used
to configure and manage Digital Acoustics IP Intercoms and Paging endpoints.
TalkMaster FOCUS is available for download on the Digital Acoustics Website.
The TalkMaster Server/Admin Console must be installed to configure IP
Endpoints.
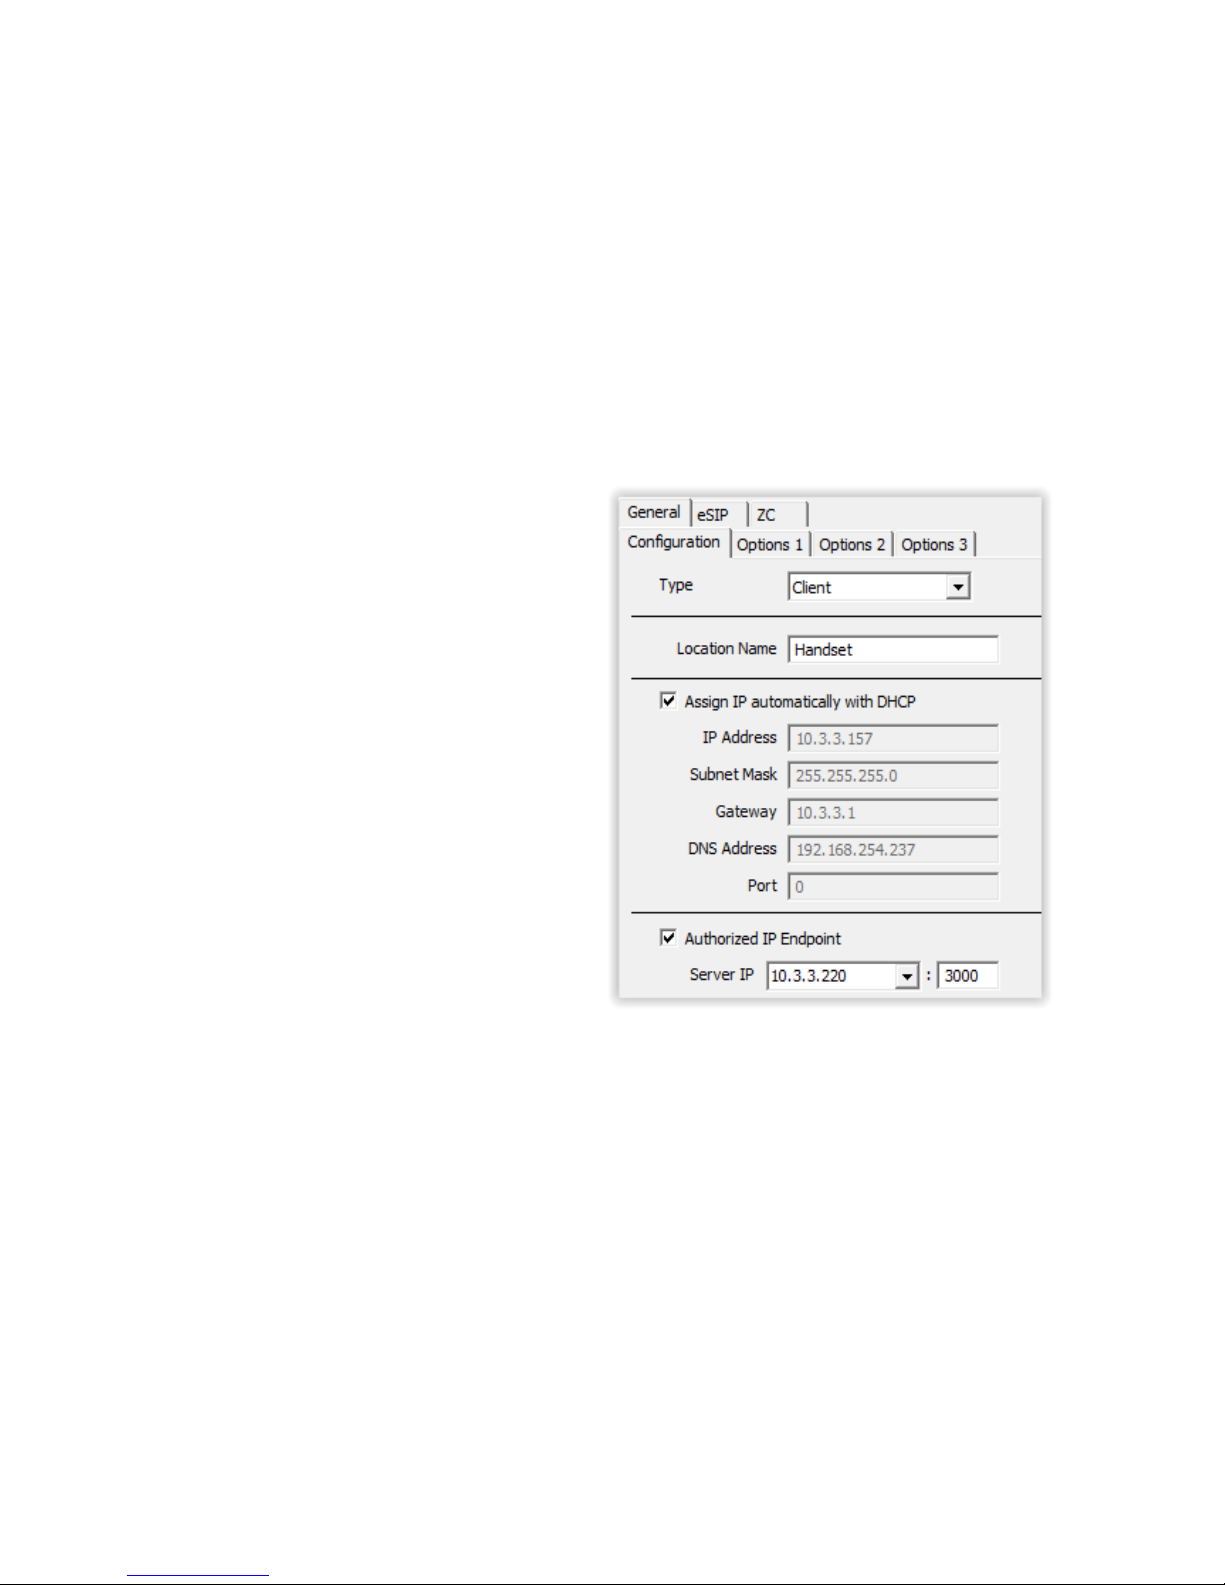
The following procedure is for configuring endpoints as TalkMaster Clients.
For SIP Configuration, see the eSIP Stand-alone Configuration Steps topic
in the Admin Console online help.
To enable Handset support for an IP7:
• Power up the IP7 and
connect it to the network
• Open the TalkMaster FOCUS
Administrator console
• Select the IP Endpoints tab
• Click the Find All button.
This will discover any new
intercoms added to the
network
• Select the IP7 used for the
Handset by matching the
ICOM ID on back of the unit
with the ICOM ID displayed in
the left-hand pane of the IP
Endpoints tab
• Enter the Location Name, IP
Address information, check
the Authorized IP Endpoint
box and enter the Server IP and port
Page 4
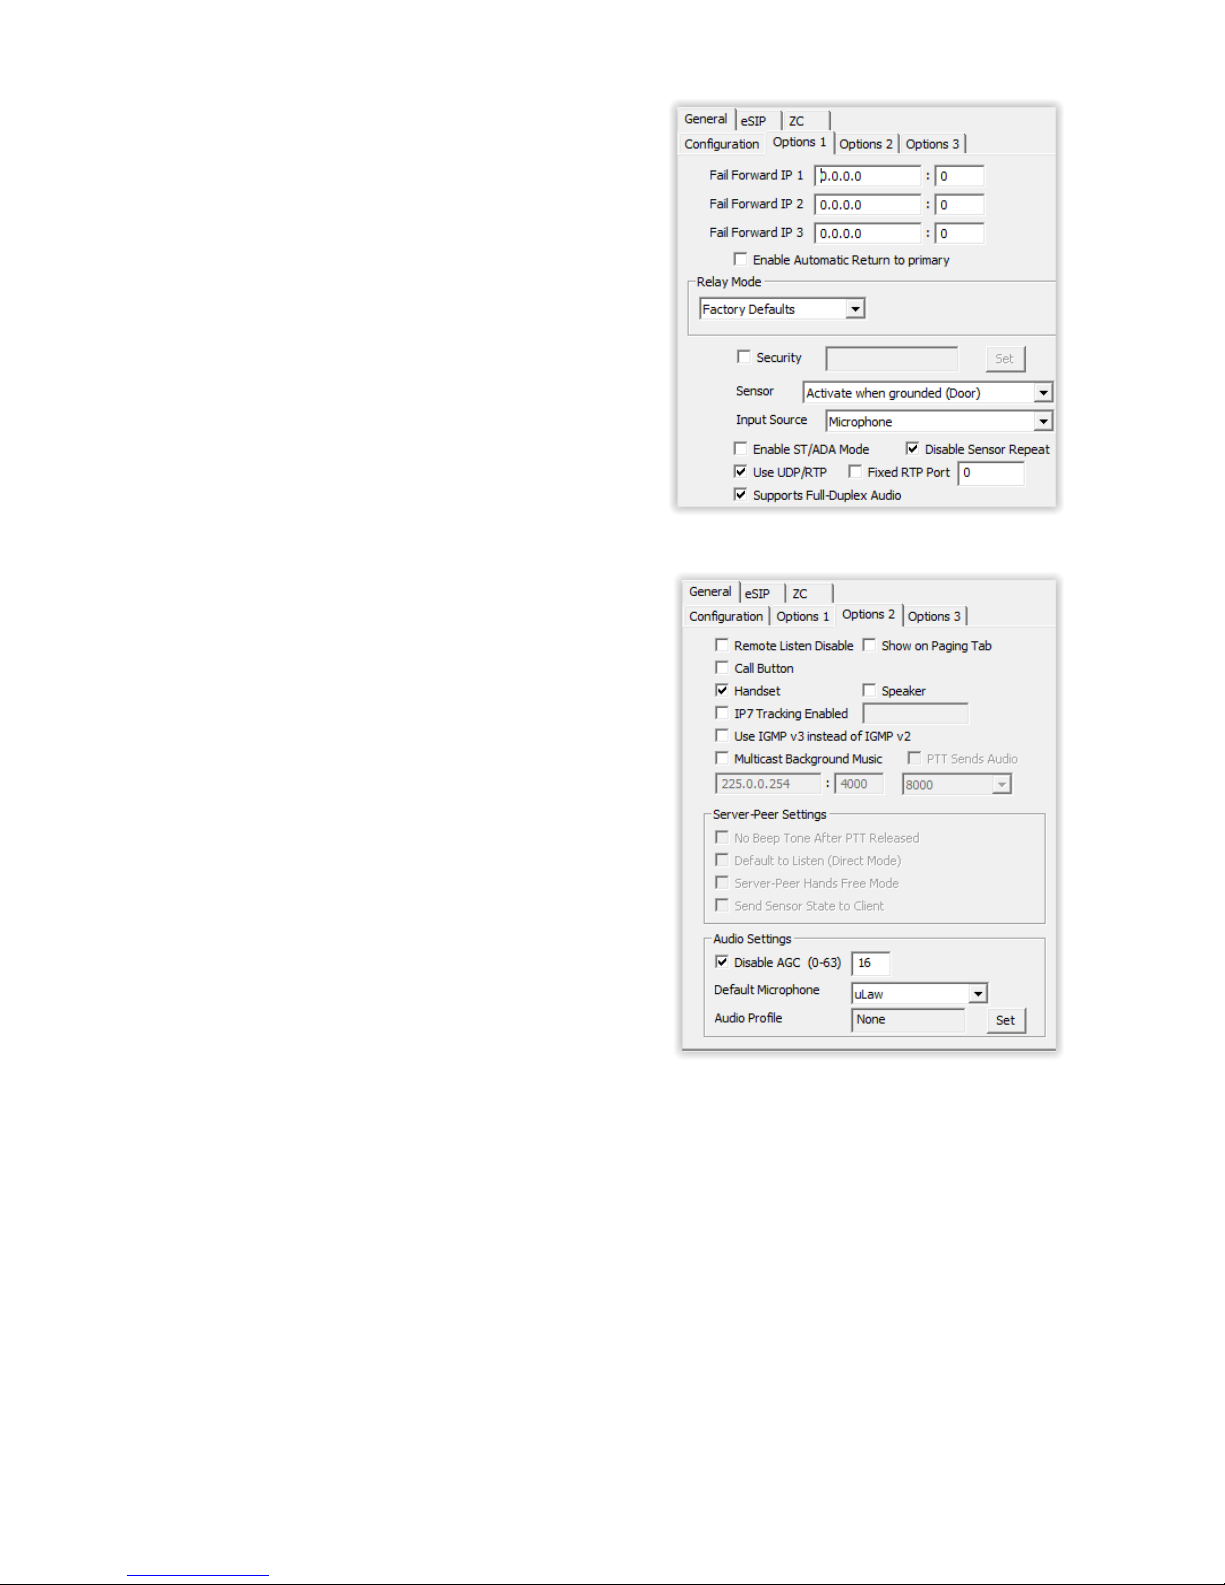
• Select the Options1 tab
• Check the Disable Sensor Repeat
box
• Check the Use UDP/RTP box
• Check the Supports Full Duplex
box
• Select the Options 2 tab
• Place a check next to the Handset
option
• Under Audio Settings,if paired
with an IP7-SE8, check the Disable
AGC box and enter 16 for the
Microphone Sensitivity
• Under Audio Settings, change the
Default Microphone to uLaw
• If paired with an IP7-SE8, check
Disable AGC and enter 16 for the
microphone sensitivity
• If paired with an IP7-FD, press the
SET button and select HS-A1
Handset from the list
• Click the Save button to save the
changes to the Intercom
IP7 and Digital Acoustics® are trademarks of Digital Acoustics LLC.
Other trademarks are the property of their respective owners.
HS-A1GSG - 2018-03-14 - All Rights Reserved ©2018
www.digitalacoustics.com/support
 Loading...