

Page 1
1
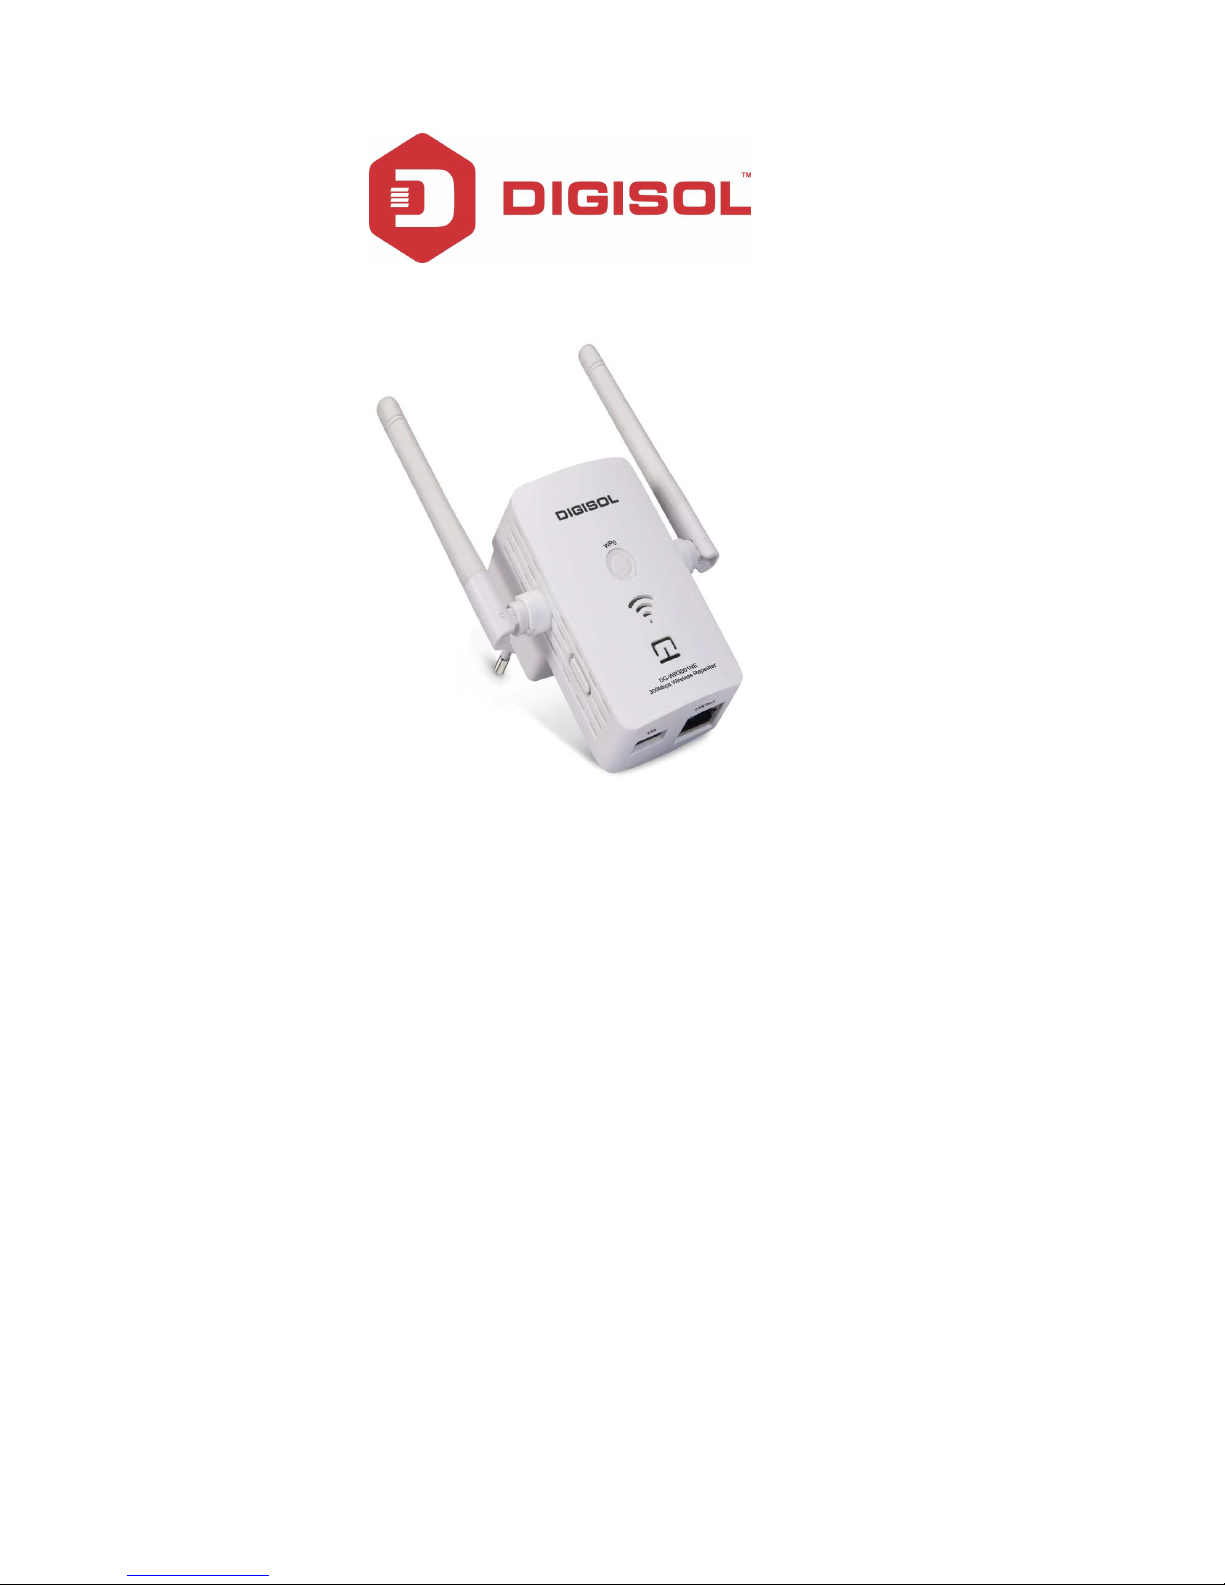
DG-WR3001NE
DIGISOL 300MBPS WALL MOUNT
WIRELESS REPEATER
User Manual
V1.0
2018-04-17
As our products undergo continuous development the specifications are subject to change without prior notice
Page 2

DG-WR3001NE User Manual
COPYRIGHT
Copyright 2018 by DIGISOL Systems Ltd. All rights reserved. No part of this
publication may be reproduced, transmitted, transcribed, stored in a retrieval system,
or translated into any language or computer language, in any form or by any means,
electronic, mechanical, magnetic, optical, chemical, manual or otherwise, without the
prior written permission of this company.
This company makes no representations or warranties, either expressed or implied,
with respect to the contents hereof and specifically disclaims any warranties,
merchantability or fitness for any particular purpose. Any software described in this
manual is sold or licensed "as is". Should the programs prove defective following
their purchase, the buyer (and not this company, its distributor, or its dealer) assumes
the entire cost of all necessary servicing, repair, and any incidental or consequential
damages resulting from any defect in the software. Further, this company reserves the
right to revise this publication and to make changes from time to time in the contents
thereof without obligation to notify any person of such revision or changes.
Trademarks:
DIGISOL™ is a trademark of DIGISOL Systems Ltd. All other trademarks are the
property of the respective manufacturers.
Safety
This equipment is designed with the utmost care for the safety of those who install
and use it. However, special attention must be paid to the dangers of electric shock
and static electricity when working with electrical equipment. All guidelines of this
and of the computer manufacturer must therefore be allowed at all times to ensure the
safe use of the equipment.
2
Page 3

DG-WR3001NE User Manual
Index
1. Product Information ............................................................................................ 5
1-1 Product Introduction ................................................................................. 5
1-2 Safety Information
1-3 System Requirements .............................................................................. 7
1-4 Package Contents .................................................................................... 7
1-5 Get familiar with your new wireless repeater ......................................... 8
2. Extender mode ................................................................................................... 9
2-1 Extender mode Quick Installation Guide ................................................ 9
2-1-1 Step by Step Guide to connect and configure AP/Repeater…..…..10
2-1-2 Extender mode : Configuration
2-2 AP Mode ...................................................................................................14
2-2-1 Extender Mode Advance Settings ..............................................15
2-2-2 Home .............................................................................................16
2-2-3 Status ............................................................................................17
2-2-4 Lan Interface Setup : ....................................................................18
2-2-5 WiFi Setting ...................................................................................20
2-2-6 Security settings ...........................................................................21
2-2-7 MAC Control .................................................................................22
3. Management
3-1 Upgrade Firmware ...................................................................................23
3-2 Save and Load Settings ........................................................................24
3-3 Password Setup …………………………………………………………….25
4 Appendix .............................................................................................................26
4-1 Hardware Specifications .........................................................................26
4-2 Glossary …………………………………………………………………………27
......................................................................................................23
.................................................................................... 6
................................................... .....11
3
Page 4

DG-WR3001NE User Manual
4
Page 5

DG-WR3001NE User Manual
1. Product Information
1-1 Product Introduction
Thank you for purchasing this 802.11N wireless repeater!
The ultra-compact design with in-built power allows you to install this repeater
everywhere, yet providing excellent network performance to extend the Wi-Fi signal
and wireless coverage.
Other features of this wireless repeater include:
• Extended wireless signal inside your home or office.
• Ultra-compact design while maintaining excellent network performance.
• LED signal indicator to easily realize the best location placement to extend
Wi-Fi signal and secure better wireless performance.
• The device can support AP mode, Repeater mode .
• WPS (Wi-Fi Protected Setup) hardware button for easy installation and secure
wireless security.
5
Page 6

DG-WR3001NE User Manual
1-2 Safety Information
In order to keep the safety of users and your properties, please follow the safety
instructions mentioned below:
1. This wireless repeater is designed for indoor use only. DO NOT expose this device
to direct sun light, rain, or snow.
2. DO NOT put this at or near hot or humid places, like kitchen or bathroom. Also, DO
NOT leave this Wireless repeater in the car in summer.
3. DO NOT allow kids to put any small parts of this wireless repeater in their mouth,
it could cause serious injury or could be fatal. If they throw this wireless repeater,
it will get damaged. PLEASE KEEP THIS WIRELESS REPEATER OUT OF
REACH OF CHILDREN!
4. This Wireless repeater will get heated up when used for a long time (This is
normal and is not a malfunction). DO NOT put the Wireless repeater on a paper,
cloth, or other flammable objects after the Wireless repeater has been used for a
long time.
5. There’s no user-serviceable part inside the Wireless repeater. If you find that the
Wireless repeater is not working properly, please contact your dealer of purchase
and ask for help. DO NOT disassemble the Wireless repeater yourself, warranty
will be void.
6
Page 7

DG-WR3001NE User Manual
1-3 System Requirements
• Wireless network card which is compatible with 802.11N wireless network
standard.
• Windows 2000, 2003, XP, Vista, 7 , 10 operating system
• An available AC power socket (100-240V, 50/60Hz)
• At least 200MB of available disk space
1-4 Package Contents
Before you start using this wireless repeater, please check if there’s anything missing in
the package, and contact your dealer of purchase to claim for missing items:
• Wireless Repeater
• Quick Installation Guide
• Installation Guide CD (includes User Manual and QIG)
• Patch cord (1 No.)
7
Page 8
DG-WR3001NE User Manual
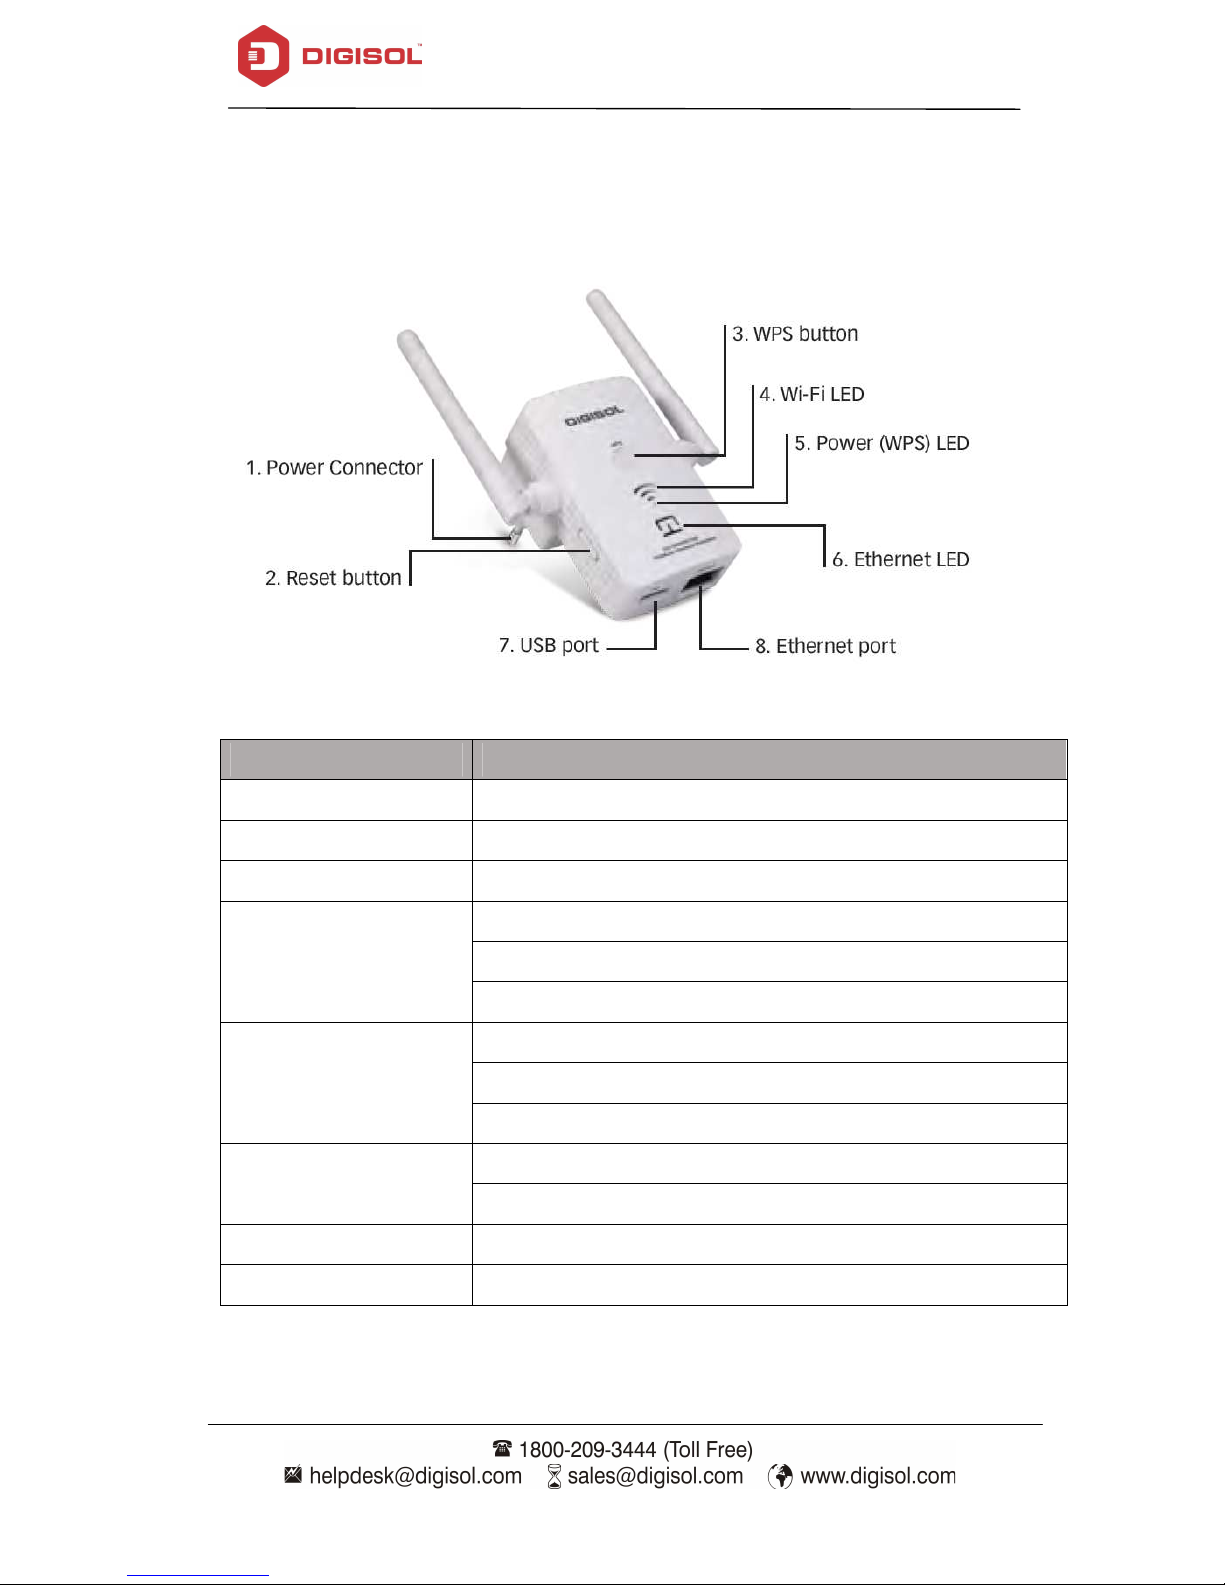
1-5 Get familiar with your new Wireless Repeater
Interface Description
Name Description
Power Connector For power supply
Reset button Press for 10 seconds to factory reset the configuration
WPS button Press for 2 seconds to start WPS connection
(Only 1 Bar Glow) weak signal
WIFI LED
(Only 2 Bar Glow) good signal
(All 3 Bars Glow) strong signal
ON: power is on
Power (WPS ) LED
OFF: power is off
Blinking: WPS connection is initiated
ON: Ethernet connected
Ethernet LED
OFF: Ethernet disconnected
USB port For Charging Devices , Output Upto 5V-0.5A
Ethernet port For connecting Ethernet Enabled Devices
8
Page 9

DG-WR3001NE User Manual
2. Extender mode
Extender mode is your Wi-Fi range extender. It can extend your wireless signal and
coverage and help you to solve wireless dead zone problem.
This section will show you how to quickly install this device by using quick setup and
also shows you each detailed setting on the web page of repeater mode.
2-1 Extender mode Quick Installation Guide
For the first time setup and easy installation, you can move this device close to the
Wireless Broadband Router or Access point you wish to connect, after the installation is
done and wireless connection is built, you can move the Extender to the place you wish
to use.
Insert this device into the power outlet on the wall. You should see ‘Power’ LED light
up in few seconds , If not, please check if the power the outlet you’re using is working.
You can build wireless connection via ‘H
browser’.If your broadband router or access point also supports ‘WPS button’, we
recommend you to use WPS button to establish connection, it is the fast and secure way
without the need of a computer.
ardware WPS button’ or ‘Software web
9
Page 10

DG-WR3001NE User Manual
2-1-1 Step by Step Guide to connect and configure AP/Repeater
using Windows System.
Connect to AP/Extender using Wireless :
Please make sure your computer has configure wireless adapter. Then
please follow the below steps to connect to the AP/Repeater, wirelessly.
1. Click Start > Control Panel > Network and Sharing Center, click Change
adapter settings, right-click Wireless Network Connection, select
Connect/Disconnect.
2. Select the SSID or Wireless name "DIGISOL" then click Connect.
10
Page 11

DG-WR3001NE User Manual
2-1-2 :Extender mode : Configuration
Method-1 : Just Press the WPS button on the Main router or Root
AP and immediately press the WPS button on the DIGISOL extender
(DG-WR3001NE) for 2 to 3 seconds, then a wireless connection will be
established automatically between both Main Router and Extender
Note : The WPS connection will be invalid if it is already connected to any
other router successfully, then you must reset it to the factory default
setting first, then start the WPS connection again.
11
Page 12

DG-WR3001NE User Manual
Method-2 : Type website address, http://192.168.2.1 in Internet explorer
or Browser address column, then input the username as "admin" and
Password as "1234" to login , you can see the Home Page as shown below.
If you select "Clone Router" then Extender's SSID and password will be
same as Main router / Root AP (recommended).
12
Page 13

DG-WR3001NE User Manual
Input the password of Main Router / Root AP and click "Finish".
Note : D
evice will reboot and then both devices will connect successfully. If
connection fails, then please check Main Router's password or if any network
signal strength problem due to distance or interference.Try adjusting the
antenna direction or by reducing the distance.
Congratulations ! You have setup the Extender Mode successfully.
13
Page 14

DG-WR3001NE User Manual
2-2 AP Mode : Wireless Access Point configuration
1. Input the website http://192.168.2.1 in Internet explorer address
column, then input the username “admin” and password with “1234”.when
enter the main page select the “AP” and click “Save Setting”
( You can type Password (minimum 8 characters) to secure the wireless
network , which is Optional )
ote : If you want to setup the Extender Mode again, then you must reset
N
it to factory default setting by pressing reset button upto 10 seconds).
For further help ,Please call on 1800 209 3444 for toll free support or write
to helpdesk@digisol.com
14
Page 15

2-2-1 :Extender Mode Advance Settings
Connect to Web Configuration menu
DG-WR3001NE User Manual
Please open web browser (IE, Firefox, chrome etc.) a
nd input the IP address (given by
the DHCP server of the router) in the address bar then press ENTER key. If you don’t
know repeater IP address then type ‘http://192.168.2.1 to access the web.
Wireless repeater will prompt you to input username and password. Default username
is ‘admin’ and password is ‘1234’. Click ‘Log In’ button to continue.
15
Page 16

DG-WR3001NE User Manual
After login , we can see the Home page as landing page as shown below
2-2-2 Home Page :
N
ow click on this icon on the top right corner of the page to open the advance
settings page .
16
Page 17

DG-WR3001NE User Manual
2-2-3 Status Page :
This page that is displayed shows the current status and some basic settings of the
device, such as firmware version, Wireless SSID ,Encryption , MAC address,
Associated clients , connection state, etc.
Note : The Firmware version / details shown here may vary on User Manual as
compared to the customer device.
17
Page 18

DG-WR3001NE User Manual
2-2-4 Lan Interface Setup :
This page is used to configure the parameters for local area network which
connects to the LAN port of your Access Point. Here you may change the setting for
IP addresss, subnet mask, DHCP, etc..
18
Page 19

DG-WR3001NE User Manual
Parameter Description
IP address Enter the LAN IP address.
Subnet Mask Enter the subnet mask
Default Gateway Enter the IP address of Gateway
1) Enable the DHCP server if you are using this device as
DHCP server. This page
lists the IP address pools available to host on your LAN. The
device distributes
numbers in the pool to host on your network as they request
internet access.
DHCP
2) Enable the DHCP Client if you are using the other DHCP
server to assign IP
address to your host on the LAN. You can set the DHCP server
IP address.
3) If you choose “Disabled”, then AP will do nothing when the
host requests an
IP address.
DHCP Client Range Select the IP Address Pool Range for clients
DHCP Lease Time Set the Lease time for allocating DHCP clients
Static DHCP Map the DHCP IP address to MAC Address
Domain Name set the Domain name (optional)
802.1d Spanning Tree Enable or Disable the Spanning Tree Protocol
Clone MAC Address Type the MAC Address here to clone
19
Page 20

DG-WR3001NE User Manual
2-2-5 WiFi Setting :
This page is used to configure the Wireless LAN Parameters which may connect to
your access point . Here you may change wireless encryption settings as well as
wireless network parameters.
20
Page 21

DG-WR3001NE User Manual
Parameter Description
Disable Wireless LAN Interface Select to Disable the Wireless Function
Band Select the Bands from the drop down list
Mode Select the Mode ( bydefault AP is selected )
Network Type
Select the Network type ( By default Infrastruture is
selected )
SSID Type the SSID or Wireless Network name here
Channel Width Select 40MHz or 20MHz
Control Side band Select Upper or Lower
Channel Number Select Auto , 1 ,2,3,4,5,6,7,8,9,10,11,12,13
Enable : To Unhide the network name and Disable :To
Broadcast SSID
hide it.
Associated Clients Click to view the Active wireless clients connected to AP
Enable Universal Repeater Mode Selected by default in Extender Mode.
SSID of Extended Interface Create Multiple profiles of Root AP's
If enabled ,Device will connect to any Root AP profiles
Enable Wireless Profile
which are added in the list
2-2-6 Security Setting :
This page allows you setup the wireless security. Turn on WEP or WPA by using
Encryption Keys could prevent any unauthorized access to your wireless network.
21
Page 22

DG-WR3001NE User Manual
Parameter Description
Select SSID Select the SSID from the dropdown list
Encryption Select the Encryption type
Key Length Select 64bit or 128bit
Key Format Select Hex / ASCII / Character
Password Type the Password or Preshared key for the selected SSID
2-2-7 MAC Control:
If you choose 'Allowed Listed', only those clients whose wireless MAC addresses are in
the access control list will be able to connect to your Access Point. When 'Deny Listed'
is selected, these wireless clients on the list will not be able to connect the Access Point.
Parameter Description
Disable : All Wireless Clients can connect to AP
Allow Listed : Only the listed MAC address will be able to
Wireless Access Control Mode:
MAC Address Type the MAC Address of Wireless Client
Comment Type any Name or Value here
connect to AP
Deny Listed : Only the listed MAC address will be Not be
able to connect to AP
22
Page 23

DG-WR3001NE User Manual
3. MANAGEMENT :
3-1 Upgrade Firmware
This page allows you upgrade the Access Point firmware to new version. Please note,
do not power off the device during the upload because it may crash the system.
Parameter Description
Click Browse to select Firmware file and click Upload to
Select File
upgrade the software
23
Page 24

DG-WR3001NE User Manual
3-2 Save and Load Settings
This page allows you save current settings to a file or reload the settings from the
file which was saved previously. Besides, you could reset the current configuration
to factory default.
:
Parameter Description
Save Settings to File: Export or backup the configuration file
Load Settings from File: Import or load the saved configuration file.
Reset Settings to Default: Will reset the configuration to factory default.
24
Page 25

Password Setup :
This page is used to set the account to access the web server of Access Point. Empty
user name and password will disable the protection.
DG-
WR3001NE User Manual
3-3
Parameter
Username
New Password
Confirmed Password
Description
Type Login name
Type Password
Type password again
25
Page 26

DG-WR3001NE User Manual
4 Appendix
4-1 Hardware Specifications
Antenna: External Antenna x 2 (2T2R)
LAN Port: 10/100M UTP Port x 1
USB Port x 1 : Charging (Output 5V : 0.5A)
Frequency Band: 2.4000~2.4835GHz (Industrial Scientific Medical Band)
Power: 5VDC, 1A Switching Power Module (In-Built)
Dimensions: 59(W) x 91(H) x 40(D) mm excluding power plug
Net Weight: 96.5gms
Gross Weight: 290gms
Data Rate: 11a: up to 54Mbps
11b: up to 11Mbps
11g: up to 54Mbps
11n (20MHz): up to 144Mbps
11n (40MHz): up to 300Mbps
Transmit Power:
2.4GHz:
11b(11M): 17±1.5 dBm
11g(54M): 14±1.5 dBm
11n(20MHz, MCS7): 13±1.5 dBm
11n(40MHz, MCS7): 13±1.5 dBm
Operating Temperature: 0°C ~ 40°C
Storage temperature: -20°C~60°C
Operating Humidity: 10%-90% (Non-Condensing)
Storage Humidity: Max. 95% (Non-Condensing)
26
Page 27

DG-WR3001NE User Manual
4-2 Glossary
IEEE 802.11g standard:
LAN communications that provide speed up to 54 Mbps in the 2.4 GHz band. 802.11g
is quickly becoming the next mainstream wireless LAN technology for the home, office
and public networks.
802.11g defines the use of the same OFDM modulation technique specified in IEEE
applies it in the same 2.4 GHz frequency band as IEEE 802.11b. The 802.11g standard
requires backward compatibility with 802.11b.
802.11g is the new IEEE standard for high-speed wireless
The standard specifically calls for:
A. A new physical layer for the 802.11 Medium Access Control (MAC) in the 2.4
GHz frequency band, known as the extended rate PHY (ERP). The ERP adds
OFDM as a mandatory new coding scheme for 6, 12 and 24 Mbps (mandatory
speeds) and 18, 36, 48 and 54 Mbps (optional speeds). The ERP includes the
modulation schemes found in 802.11b including CCK for 11 and 5.5 Mbps and
Barker code modulation for 2 and 1 Mbps.
B. A protection mechanism called RTS/CTS that governs how 802.11g devices
and 802.11b devices interoperate.
IEEE 802.11b standard:
which formulates the standard for the industry. The objective is to enable wireless LAN
hardware from different manufactures to communicate.
IEEE 802.11 feature support:
functions:
The IEEE 802.11b Wireless LAN standard subcommittee,
The product supports the following IEEE 802.11
CSMA/CA plus Acknowledge Protocol
Multi-Channel Roaming
Automatic Rate Selection
RTS/CTS Feature
Fragmentation
Power Management
Ad-hoc:
An Ad-hoc integrated wireless LAN is a group of computers, each has a
wireless LAN card, connected as an independent wireless LAN. Ad hoc wireless LAN
is applicable at a departmental scale for a branch or SOHO operation.
Infrastructure:
An integrated wireless and wired LAN is called an Infrastructure
configuration. Infrastructure is applicable to enterprise scale for wireless access to
27
Page 28

DG-WR3001NE User Manual
central database, or wireless application for mobile workers.
BSSID: A specific Ad hoc LAN is called a Basic Service Set (BSS). Computers in a
BSS must be configured with the same BSS ID.
WEP:
shared key algorithm, as described in the IEEE 802 .11 standard.
TKIP:
WEP security, especially the reuse of encryption keys. TKIP is involved in the IEEE
802.11i WLAN security standard, and the specification might be officially released by
early 2003.
WEP is Wired Equivalent Privacy, a data privacy mechanism based on a 40 bit
TKIP is a quick-fix method to quickly overcome the inherent weaknesses in
AES:
developed to ensure the highest degree of security and authenticity for digital
information, wherever and however communicated or stored, while making more
efficient use of hardware and/or software than previous encryption standards. It is also
included in IEEE 802.11i standard. Compared to AES, TKIP is a temporary protocol for
replacing WEP security until manufacturers implement AES at the hardware level.
DSSS:
each bit to be transmitted. This bit pattern is called a chip (or chipping code). The
longer the chip is, the greater the probability that the original data can be recovered.
Even if one or more bits in the chip are damaged during transmission, statistical
techniques embedded in the radio can recover the original data without-the need for
retransmission. To an unintended receiver, DSSS appears as low power wideband noise
and is rejected (ignored) by most narrowband receivers.
FHSS:
changes frequency in a pattern that is known to both transmitter and receiver. Properly
synchronized, the net effect is to maintain a single logical channel. To an unintended
receiver, FHSS appears to be short-duration impulse noise.
Spread Spectrum:
technique developed by the military for use in reliable, secure, mission-critical
communication systems. It is designed to trade off bandwidth efficiency for reliability,
integrity, and security. In other words, more bandwidth is consumed than in the case of
narrowband transmission, but the trade off produces a signal that is, in effect, louder
and thus easier to detect, provided that the receiver knows the parameters of the
spread-spectrum signal being broadcast. If a receiver is not tuned to the right frequency,
a spread –spectrum signal looks like background noise. There are two main alternatives,
Direct Sequence Spread Spectrum (DSSS) and Frequency Hopping Spread Spectrum
(FHSS).
AES (Advanced Encryption Standard), a chip-based security, has been
Direct-sequence spread-spectrum (DSSS) generates a redundant bit pattern for
Frequency-hopping spread-spectrum (FHSS) uses a narrowband carrier that
Spread Spectrum technology is a wideband radio frequency
28
Page 29

DG-WR3001NE User Manual
This product comes with Limited Life time warranty.
For further details about warranty policy and Product
Registration, please visit support section of
WPS:
unencrypted or encrypted connections between wireless clients and access point
automatically. User can press a software or hardware button to activate WPS function,
and WPS-compatible wireless clients and access point will establish connection by
themselves.
WPS stands for Wi-Fi Protected Setup. It provides a simple way to establish
www.digisol.com
29
 Loading...