

digisignage SaaS XMP-120, SaaS XMP-130 User Manual
XMP-120/130 SaaS Media Player
This printed quick guide provides a quick walkthrough of the set up process.
For complete documentation, please visit www.digisignage.com
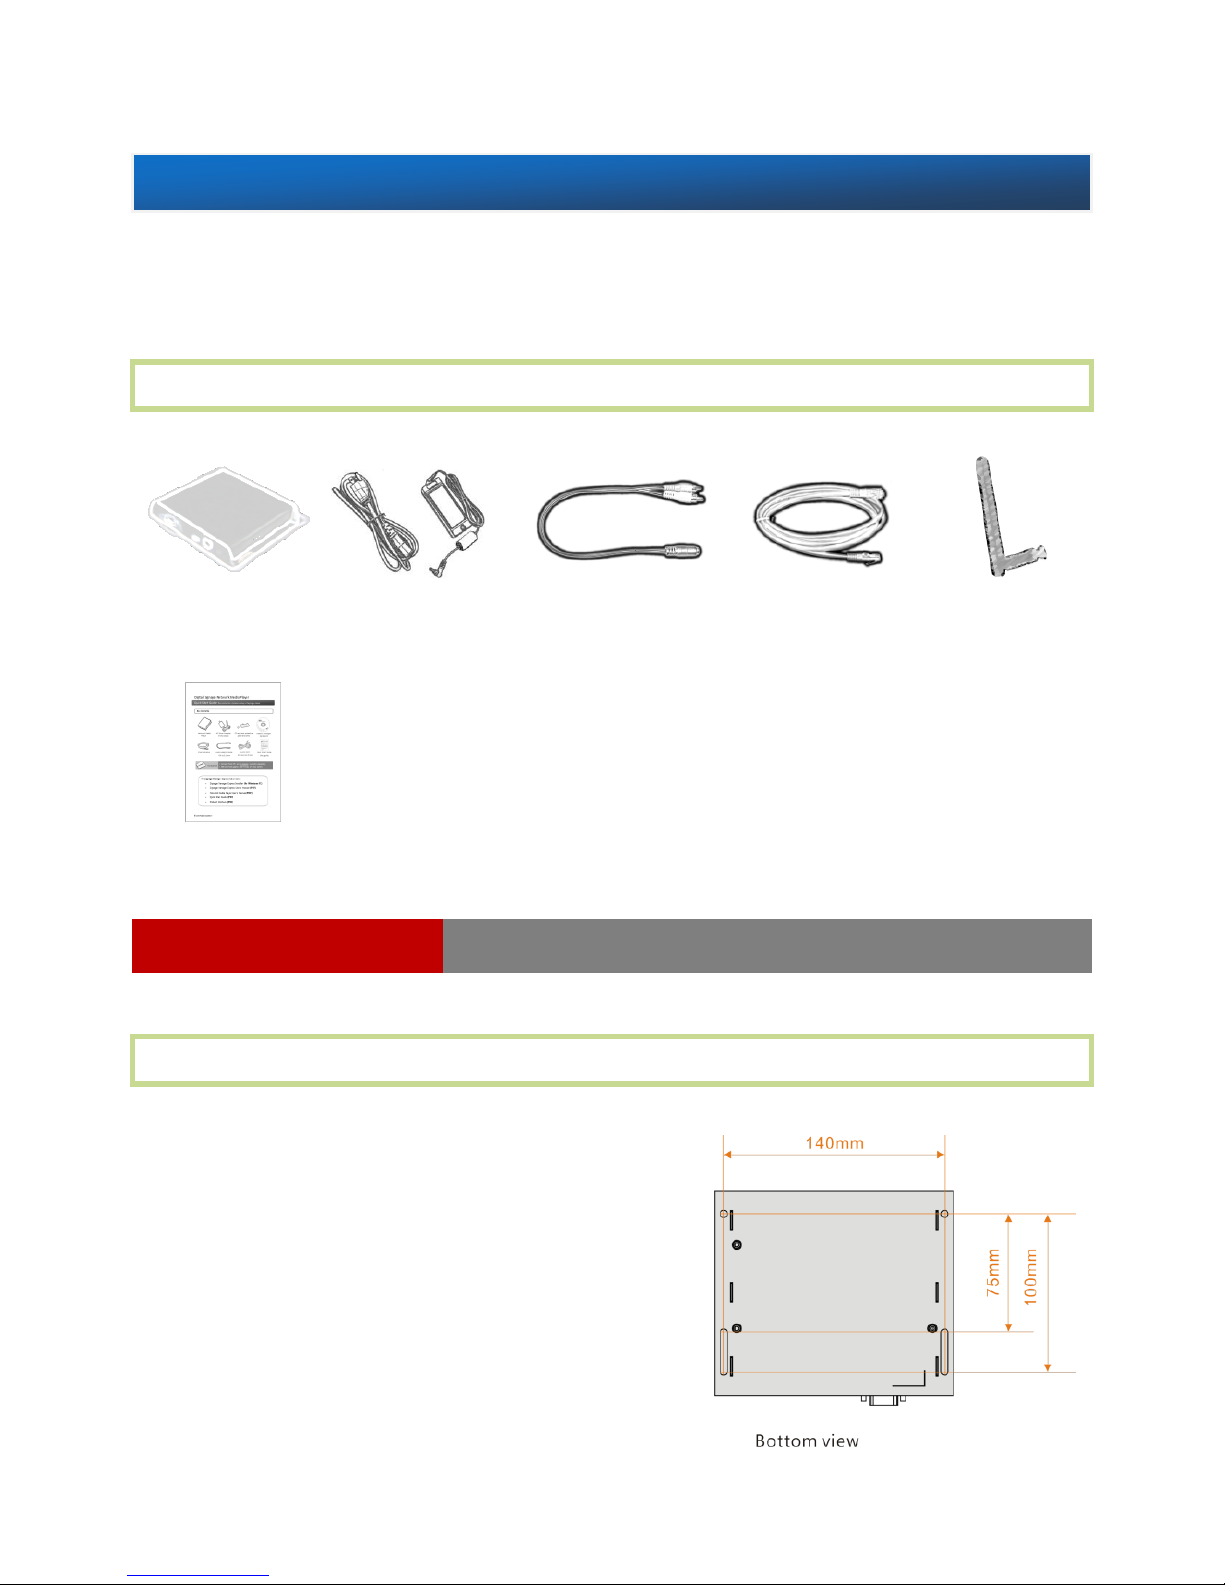
Box Contents
Mounting and Installation
The player can be attached to mounting
posts on the back of screens or inside
cabinetry with the built in 140mm x
75~100mm (variable) mounting flange
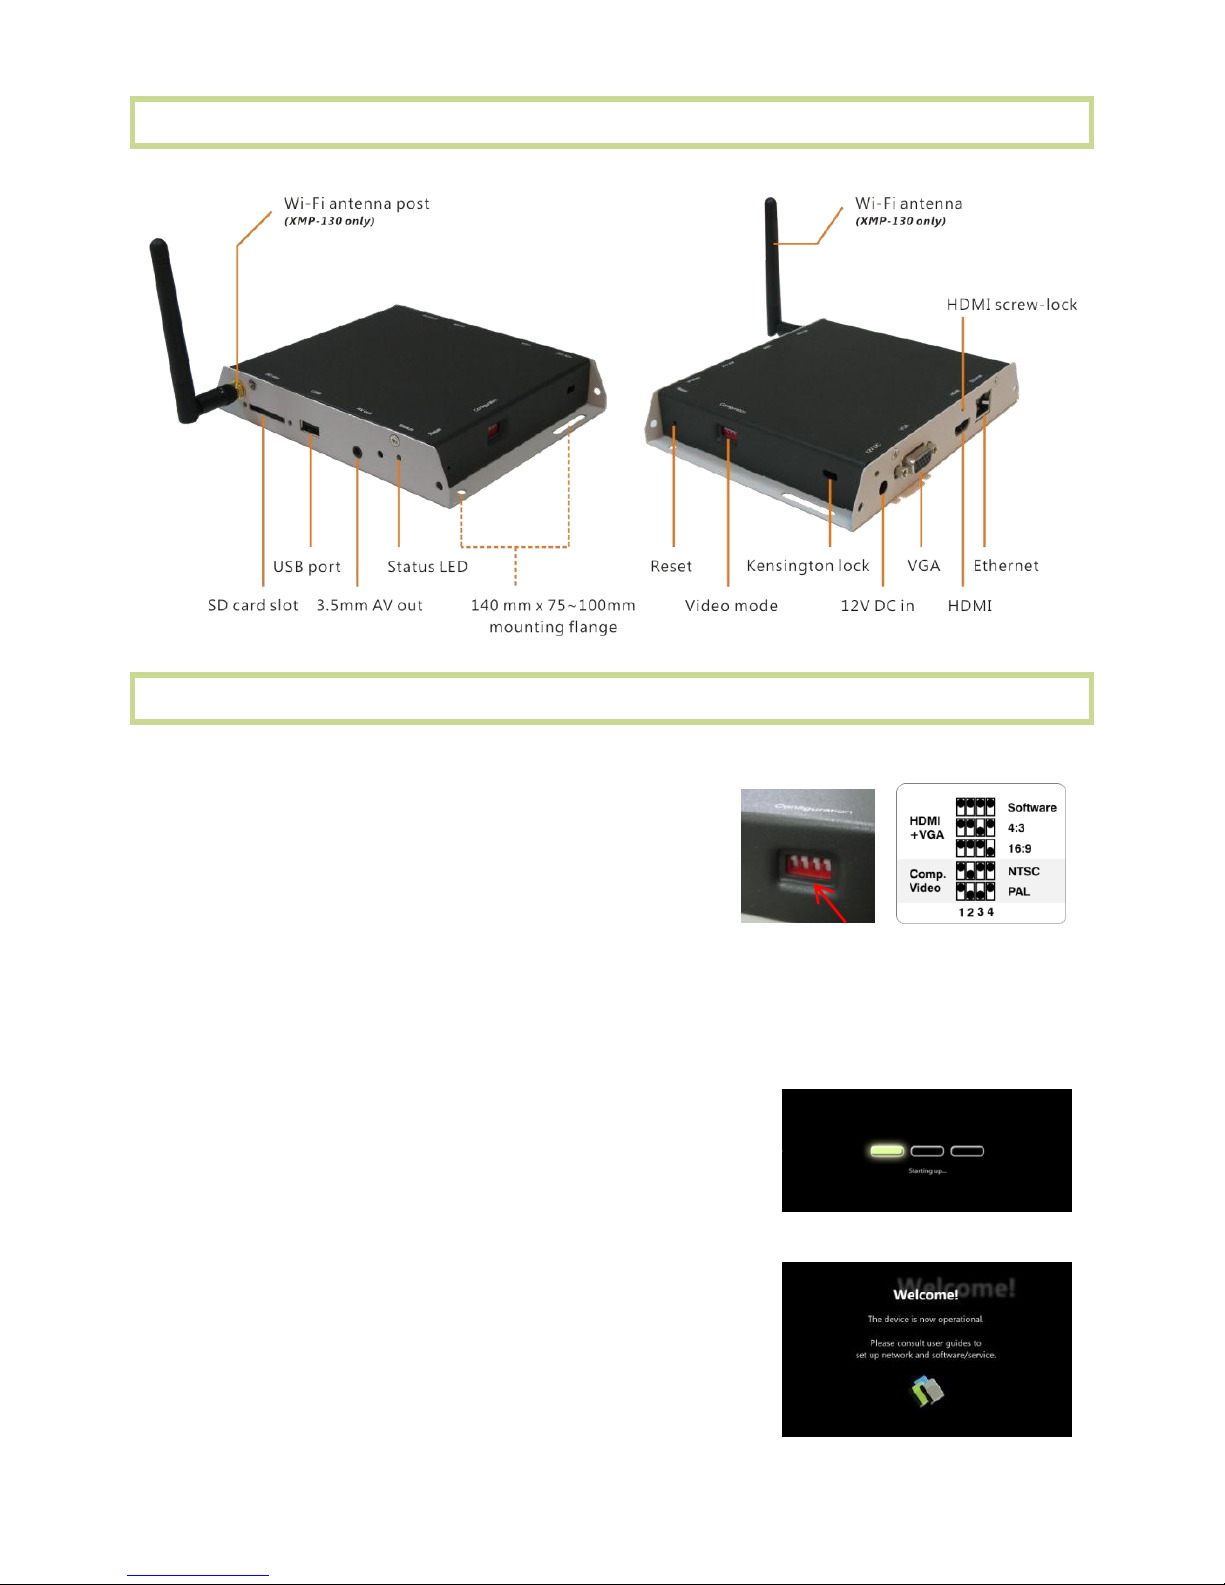
(For XMP-130 only) ATTACH the wireless
antenna as shown in physical views. Screw
the antenna clockwise onto the antenna post
Main Unit
Quick Start Guide
AC Power Adapter
12V DC output
3.5 mm to
RCA AV Cable
Wi-Fi Antenna
(XMP-130 only)
Ethernet Cable
A USB keyboard is required to change system settings.
USB Keyboard required
Quick Start Guide
(this guide)
IAD-DGS-X12-10EP Revision 1.0
Physical views
System setup
1 (for Composite video only; Skip to step 2
for HDMI or VGA)
SET the output switches to NTSC or PAL
2 CONNECT the player to your display with an HDMI, VGA, or supplied
3.5mm composite AV cable, and switch your display on to the
corresponding input mode.
3 ATTACH the AC power adapter
→ main unit status LED lights up and you
should see “Starting up” on screen
4 WAIT while player boots up (~ 90 seconds)
→ once you see “Welcome” on screen, the
unit is ready for content update or menu
configuration
 Loading...