

DigiSender ZX 7 DG45RX User Manual

Model: DG45RX
WATCH A VIDEO
INSTALLATION
& TROUBLESHOOTING GUIDE
Available online at: www.aei.eu/video
WATCH A VIDEO
INSTALLATION
& TROUBLESHOOTING GUIDE
Available online at: www.aei.eu/video
DigiSender® ZX7 Additional Receiver
Please Note
: This DigiSender® ZX7 Additional
Receiver Pack can only be used with an existing
DG458 System
and cannot be used by itself.
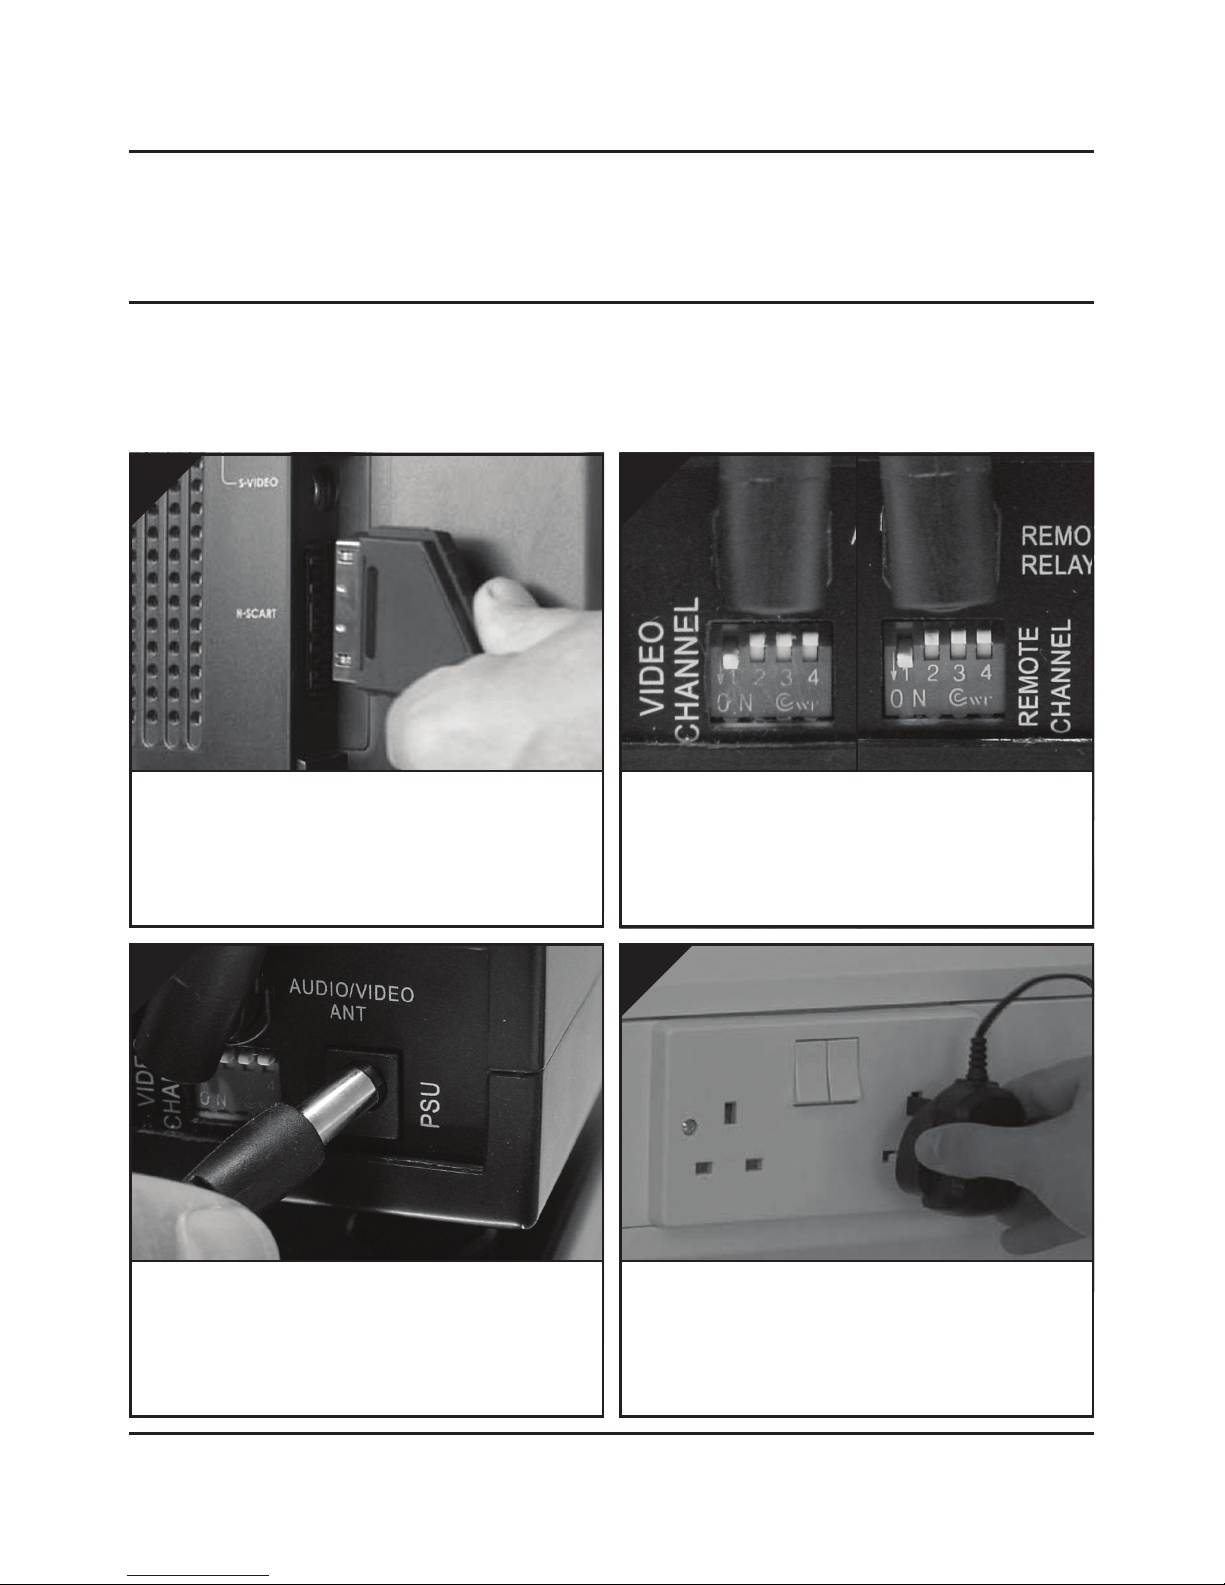
Connect the Power Supply Unit (PSU) to the socket
labelled ‘PSU’ on the Receiver.
3.
Connect the Power Supply Unit (PSU) to an available mains socket.
4.
Locate a vacant SCART socket on the back of your
receiving TV and insert the DigiSender® SCART
cable.
1.
Please read the instructions carefully prior to installation
DG45RX - DigiSender ZX7 Additional Receiver
Installing your DigiSender® ZX7 Additional Receiver
The Receiver will pick up the signals being sent by your Transmitter and output them to a connected
TV.
Obis aut et pe nisin pre nonectius ipis ipicit eum
dem nos net etur modipissi alit in eumet ipsunto te
nobitatur sunt, et, sandae ratur sincimus.
4.
Ensure that the Audio/Video and Remote Relay
Channel switches on the back of the Receiver are
set to 1 (or whatever Channels you have the Transmitter set to).
3.
 Loading...