


IMPORTANT: ALWAYS KEEP THIS INSTRUCTION
MANUAL FOR
FUTURE REFERENCE
Functions of this product are covered
by one or more patents.
MODEL: DG44RX
DigiSender
®
X7
Additional Wireless Receiver
090608-4
Page 1
Watch a movie on how to install at www.aei.eu/video
DG44RX DigiSender® X7 Additional Receiver
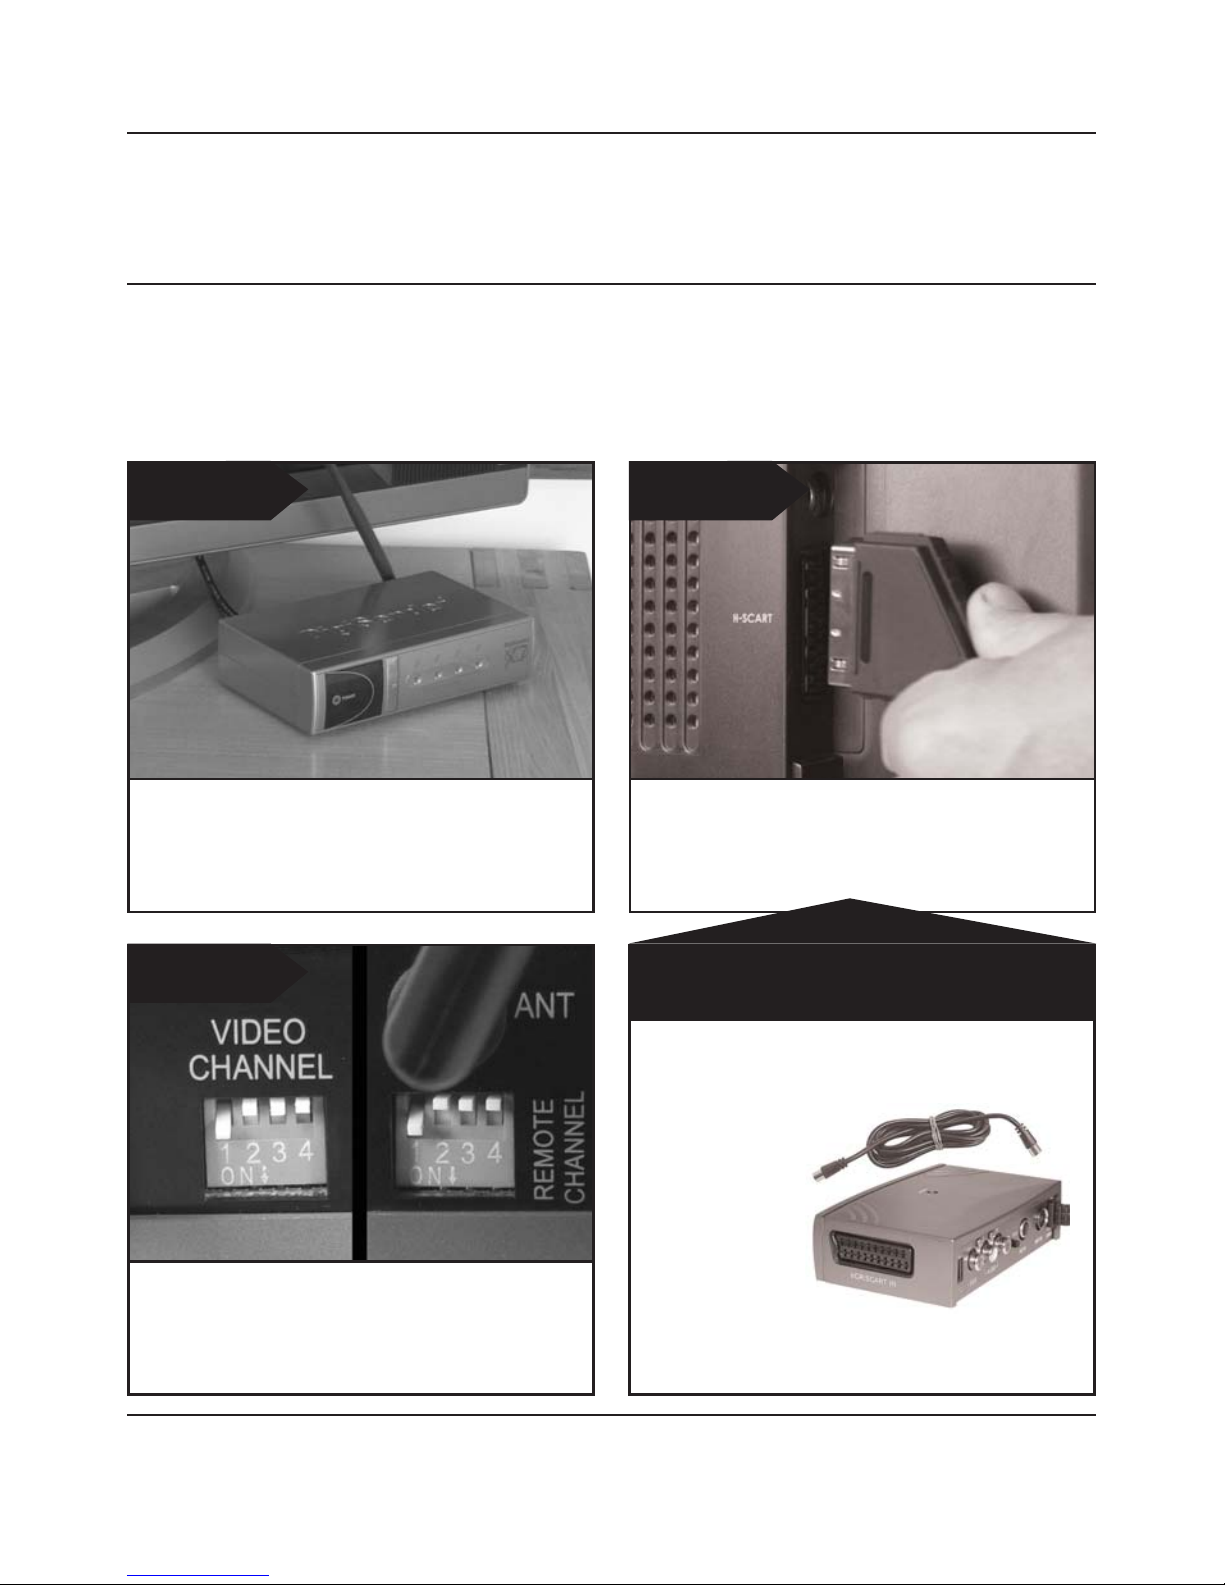
STEP 1 - Install the DigiSender™ X7 Additional Receiver
Once set up correctly, this additional Receiver will allow you to receive the Satellite, Cable,
Freeview, DVD or VCR signals being transmitted by your existing DigiSender® X7 system, on
another TV in your home.
STEP 1 STEP 2
STEP 3
Connect the Receiver SCART plug into the
additional television .
Place the DigiSender® Receiver on a flat surface
near to your additional television. Avoid placing
the Receiver directly on top of other electrical
devices such as the TV.
Ensure that both the A/V Channel and
RemoteRelay™ Channel are set to the same
channel as your DigiSender® X7 Transmitter.
No SCART socket on the TV??
AEI produce an ‘Aerial
Convertor ‘ enabling
you to connect
the receiver to
any TV without a
SCART socket.
Ask for part
number
MOD01PIS
Page 2
Please read this instruction manual carefully prior to installation
DG44RX DigiSender® X7 Additional Receiver
continued...
Did you know?
The DigiSender® Receiver can be connected to a Hi-Fi using the Left & Right Audio outputs
on the rear of the unit.
Phono cable may be required.
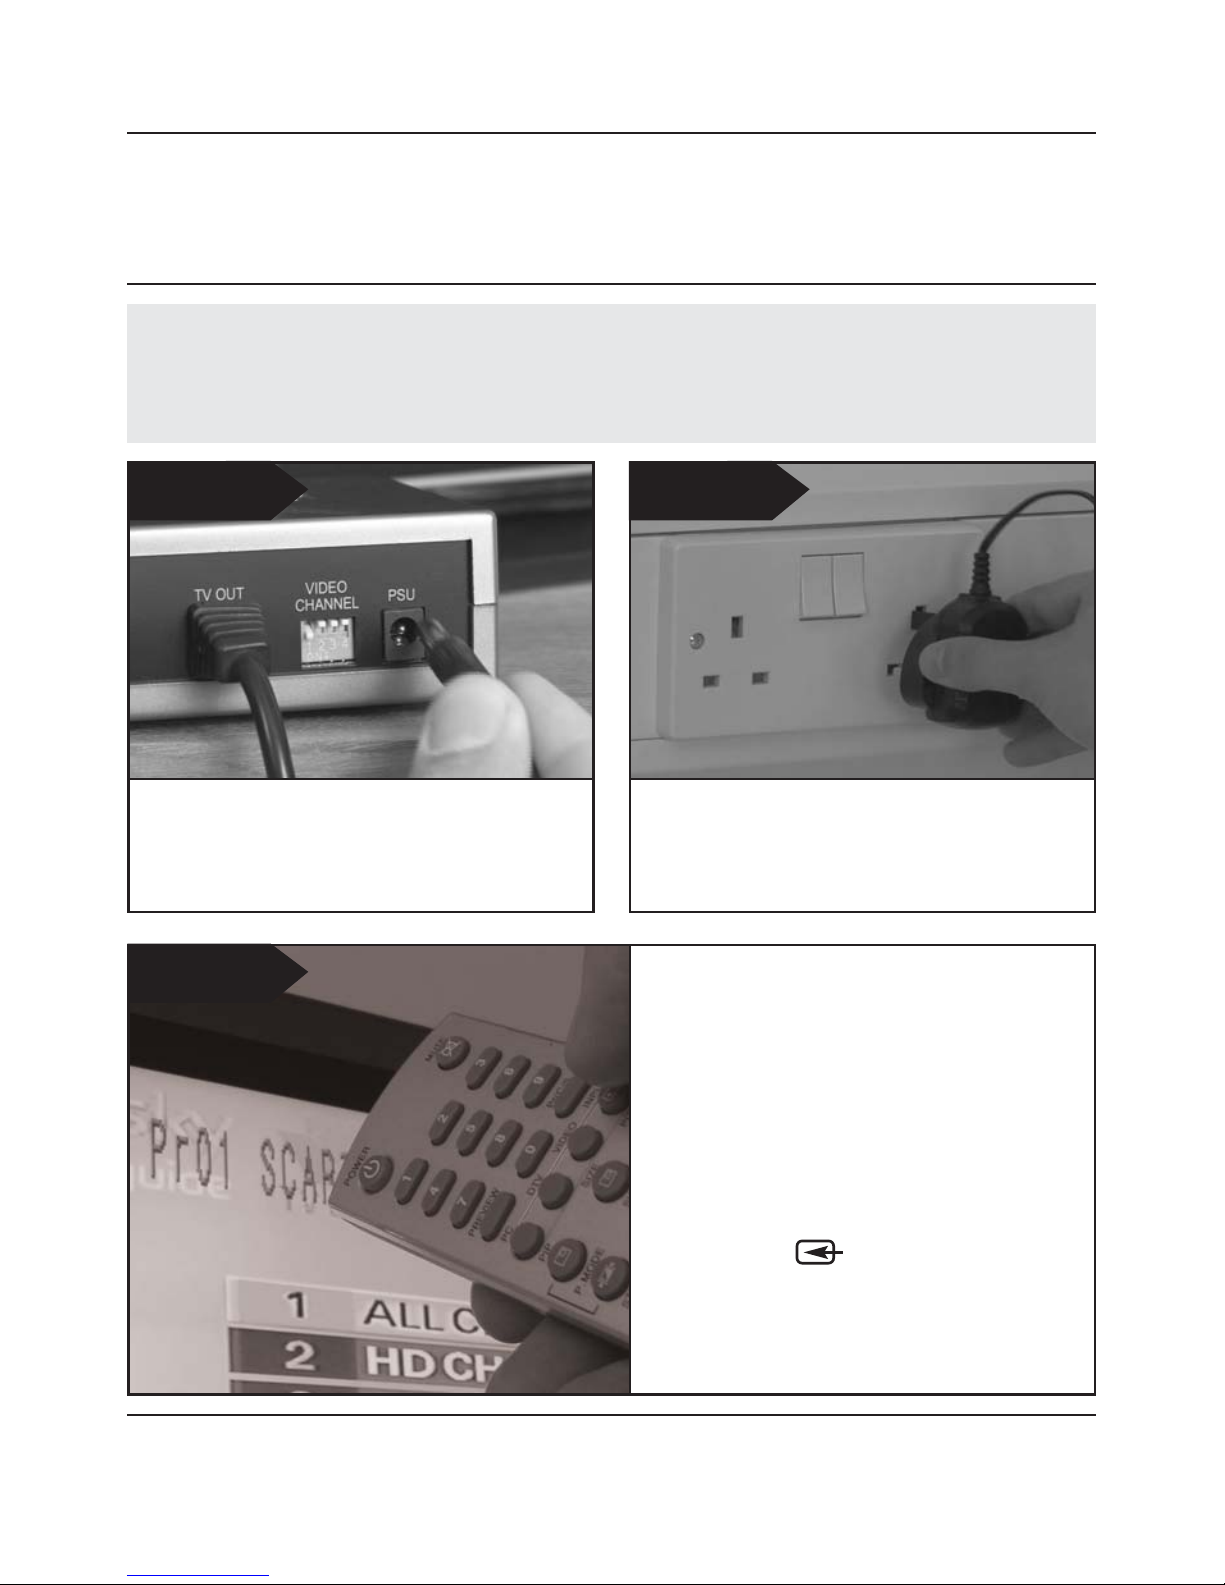
STEP 4 STEP 5
Connect the PSU to an available mains socket.Connect the 9V DC Power Supply Unit (PSU) to
the socket labelled PSU.
Press the POWER button on your DigiSender®
Remote Control to switch the Receiver on. The
power LED will light up green to indicate the
device is switched on.
Switch on the television and select the correct
SCART channel using the TV Remote Control. This
may be labelled as one of the following buttons:
AV, VIDEO, VCR, AUX, SCART,
EXT, 0, or
Refer to your tv’s manual for further assistance.
STEP 6

Page 3
Watch a movie on how to install at www.aei.eu/video
DG44RX DigiSender® X7 Additional Receiver
STEP 2 - Day to day usage
This DigiSender® X7 additional Receiver functions in the same way as your original DigiSender® X7
Receiver.
STEP 1 STEP 2
STEP 3
Select the SCART channel on your additional TV
using the televisions Remote Control. Look for a
button labelled AUX, AV, VIDEO, VCR or .
Switch on the source equipment such as your
satellite receiver or DVD player.
Select the correct source device using the
supplied DigiSender® Remote Control pointed at
the DigiSender® X7 Receiver.
STEP 4
Use your original Satellite, Cable, Freeview, DVD,
or VCR Remote Control to operate your source
equipment while pointing it at the DigiSender® X7
Receiver.

Page 4
Please read this instruction manual carefully prior to installation
DG44RX DigiSender® X7 Additional Receiver
TROUBLESHOOTING
RemoteRelay™
If you have any difficulty operating your source equipment (Satellite, Freeview,
DVD or VCR) in your second room please follow the advice below:
1) Ensure the IR Systeme Technik™ DigiEye™ Remote Control Emitter is connected to the
DigiSender® Transmitter.
2) Ensure you are using the correct Remote Control in the second room. For instance, if
you are trying to change your Satellite channel you will need to use the Satellite Remote
Control.
3) Ensure the IR Systeme Technik™ DigiEye™ Remote Control Emitter is facing the front
of your source equipment, i.e. Satellite, Cable, Freeview, DVD or VCR.
4) Move the IR Systeme Technik™ DigiEye™ Remote Control Emitter further away from
the source equipment using the supplied extension accessory.
5) Move the Transmitter AND Receiver further away from other electrical devices.
6) Choose a new RemoteRelay™ channel taking care that the same channel is selected
on both the Transmitter and Receiver.
7) Operate the Remote Control closer to the
DigiSender® Receiver.
8) Replace the batteries in the source Remote
Control.

Page 5
Watch a movie on how to install at www.aei.eu/video
DG44RX DigiSender® X7 Additional Receiver
Frequently Asked Questions (FAQ) & Technical Support
Q: My DigiSender® Remote Control has
stopped working
A: You need to replace the Remote Control
batteries. It takes a CR2025 battery,
available from most electrical outlets.
Some electrical equipment may interfere
with the Remote Controls operation.
Move the DigiSender® Transmitter and
Receiver away from other electrical
devices and keep cables neat and tidy.
Q: My DigiSender® Remote Control won’t
change my Satellite/Cable channel!
A: The DigiSender® Remote Control is
designed for changing the input device
and/or Audio/Video channel. It will not
operate any satellite or cable systems.
You need to use your original
Satellite/Cable Remote Control.
Q: My neighbour is changing my
Satellite/Cable channel!
A: You need to change the RemoteRelay™
channel of your DigiSender®. See page
19 for details.
Q: Why can I see my neighbours
Satellite/Cable channels on my TV!
A: You need to change the audio/video
channel of your DigiSender®. See page
19 for details.
AEI Security & Communications Ltd is
dedicated to providing our customers with first
class customer care and technical support.
We have provided you with 2 methods of
obtaining technical advice on this product.
During busy periods we would suggest using
the web option to obtain support.
1. Online Video...
Watch a movie on how to install this product at:
http://www.aei.eu/video
2. By telephone...
We have a dedicated helpline, Monday to Friday,
9AM - 5PM.
Please note that calls are charged at the local
rate and your call may be recorded for training
purposes.
UK Customers only:
0845 166 7940
Overseas Customers:
+44 (0) 1797 226123

RECEIVER SPECIFICATIONS:
Remote Relay Transmitter 433.92MHz
Audio/Video Frequency 2.4000GHz ~ 2.4835GHz
Modulation FM
Video Output Level 1V PP/75Ω
Sensitivity -80dBm
Audio Output Level 1.0V PP (Mod 1KHz, Dev 15KHz)
Audio Bandwidth 10Hz - 22KHz (-1dB)
Output Connectors Euro SCART
Power Source DC
Approvals See Declaration of Conformity
Antenna System Internal Omni-directional dipole (2.4GHz)
Omni-directional dipole (433.92MHz)
System Range ≤ 200metres free air space
≈ 40 metres in-building (through walls)
Remote Relay Protocol Coding RC5, RC6, Active Digital
IrDA 16 Channel
AEI Security & Communications Ltd
Weslake Industrial Park
Rye Harbour Road, Rye
East Sussex
TN31 7TE
United Kingdom
Plug’n’Go, DigiConnector, DigiEye, IR Systeme Technik and RemoteRelay are trademarks of AEI Security & Communications Ltd.
DigiSender is a registered trademark of AEI Security & Communications Ltd.
©2008 AEI Security & Communications Ltd. All rights reserved.
 Loading...