

DigiSender X2 DG20RX Owner's Manual

MODEL: DG20RX
DigiSender
®
X2
ENGLISH (EN)
DEUTSCH (DE)
FRANCAIS (FR)
NEDERLANDS (NL)
190308-6
DigiSender®X2 Receiver
DigiSender®X2 Empfänger
DigiSender®X2 Récepteur
DigiSender®X2 Ontvanger
IMPORTANT: ALWAYS KEEP THIS INSTRUCTION MANUAL FOR FUTURE REFERENCE
WICHTIG: HEBEN SIE DIESE BEDIENUNGSANLEITUNG ZU REFERENZZWECKEN AUF
IMPORTANT : VEUILLEZ CONSERVER CE MODE D’EMPLOI AFIN DE POUVOIR VOUS Y REPORTER SI BESOIN
BELANGRIJK: GELIEVE DEZE INSTRUCTIEHANDLEIDING ALTIJD TE BEWAREN VOOR LATER GEBRUIK
Page 1
http://www.digisender.net
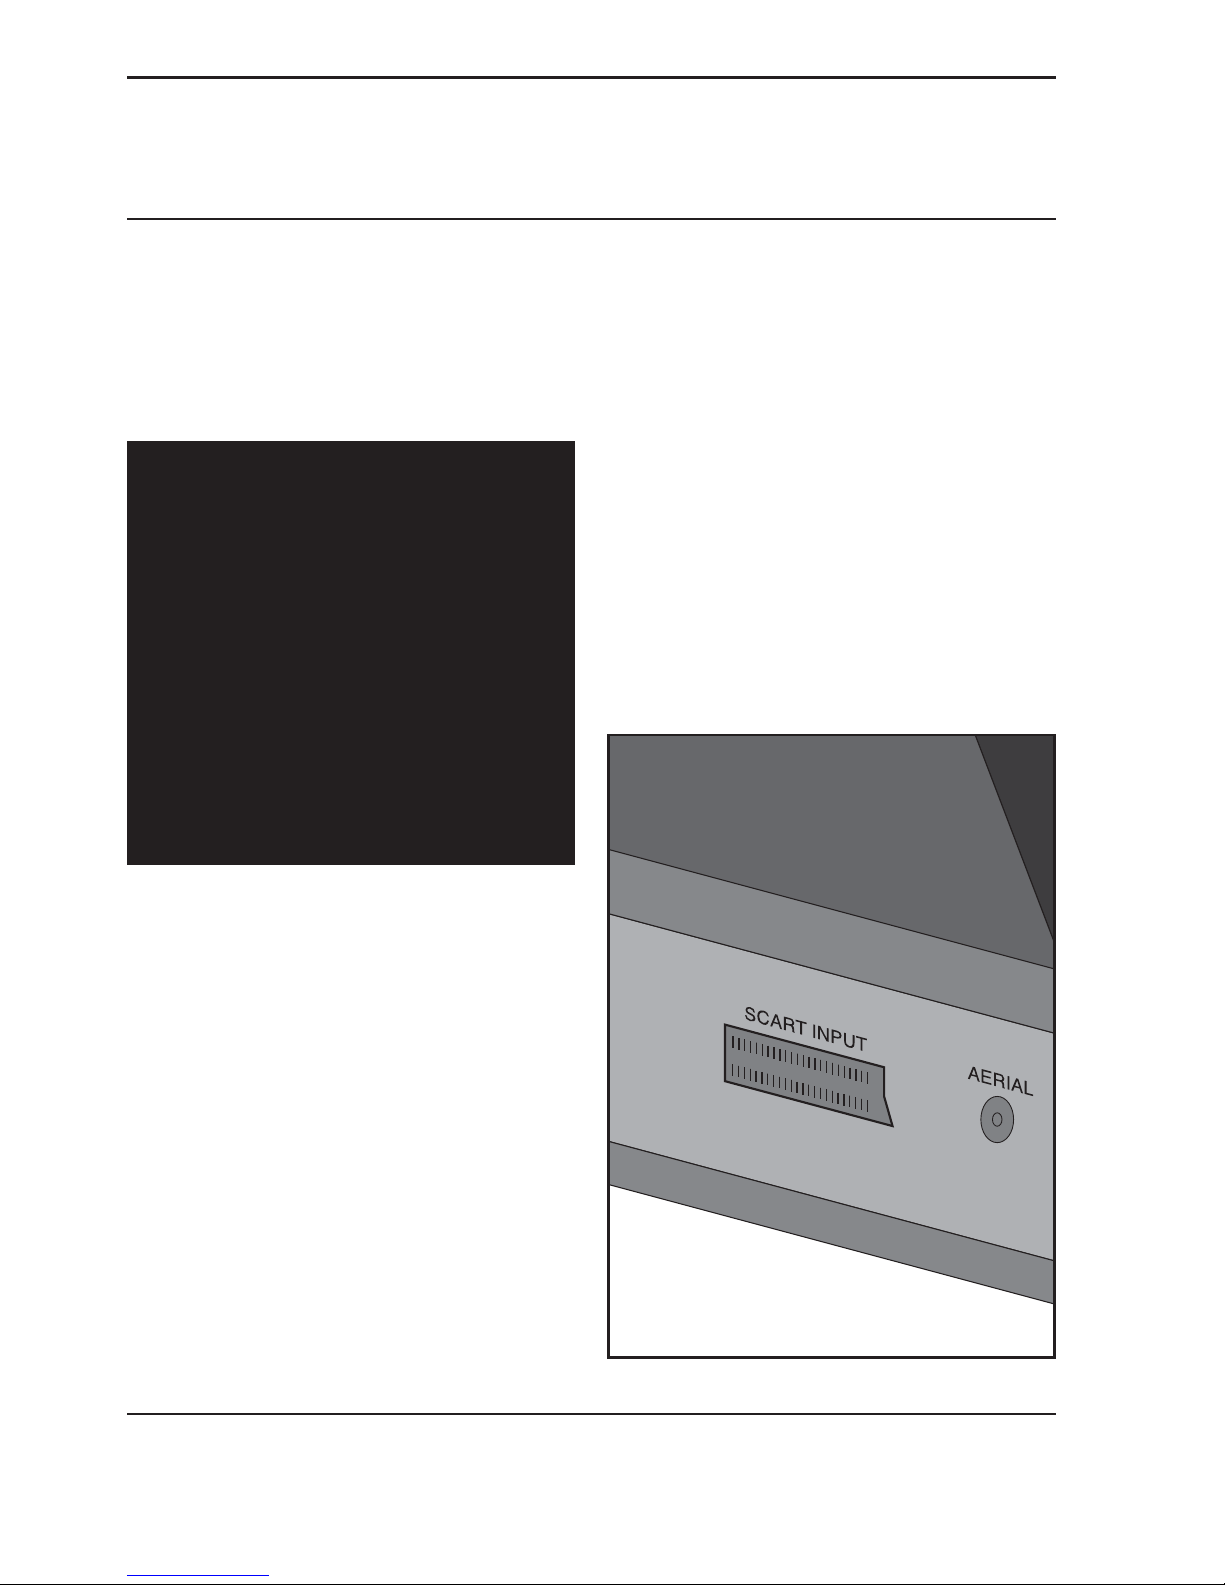
Connecting the DigiSender
receiver to your television
Your DigiSender™ receiver can be connected to any remote television with a
SCART socket.
STEP 1
Connect the SCART lead to an available
SCART socket on your remote television.
IMPORTANT: We recommend
switching off your television set
prior to connecting the SCART
lead.
NO SCART SOCKET?
You need the DigiSender™
Aerial Convertor. Ask for part:
MOD-01-PIS
The Aerial Converter enables
you to connect the DIgiSender
receiver to any television without the need for a SCART
socket.
Figure 12.1 Connecting the receiver to your TV
Page 2
DG200 DigiSender X2
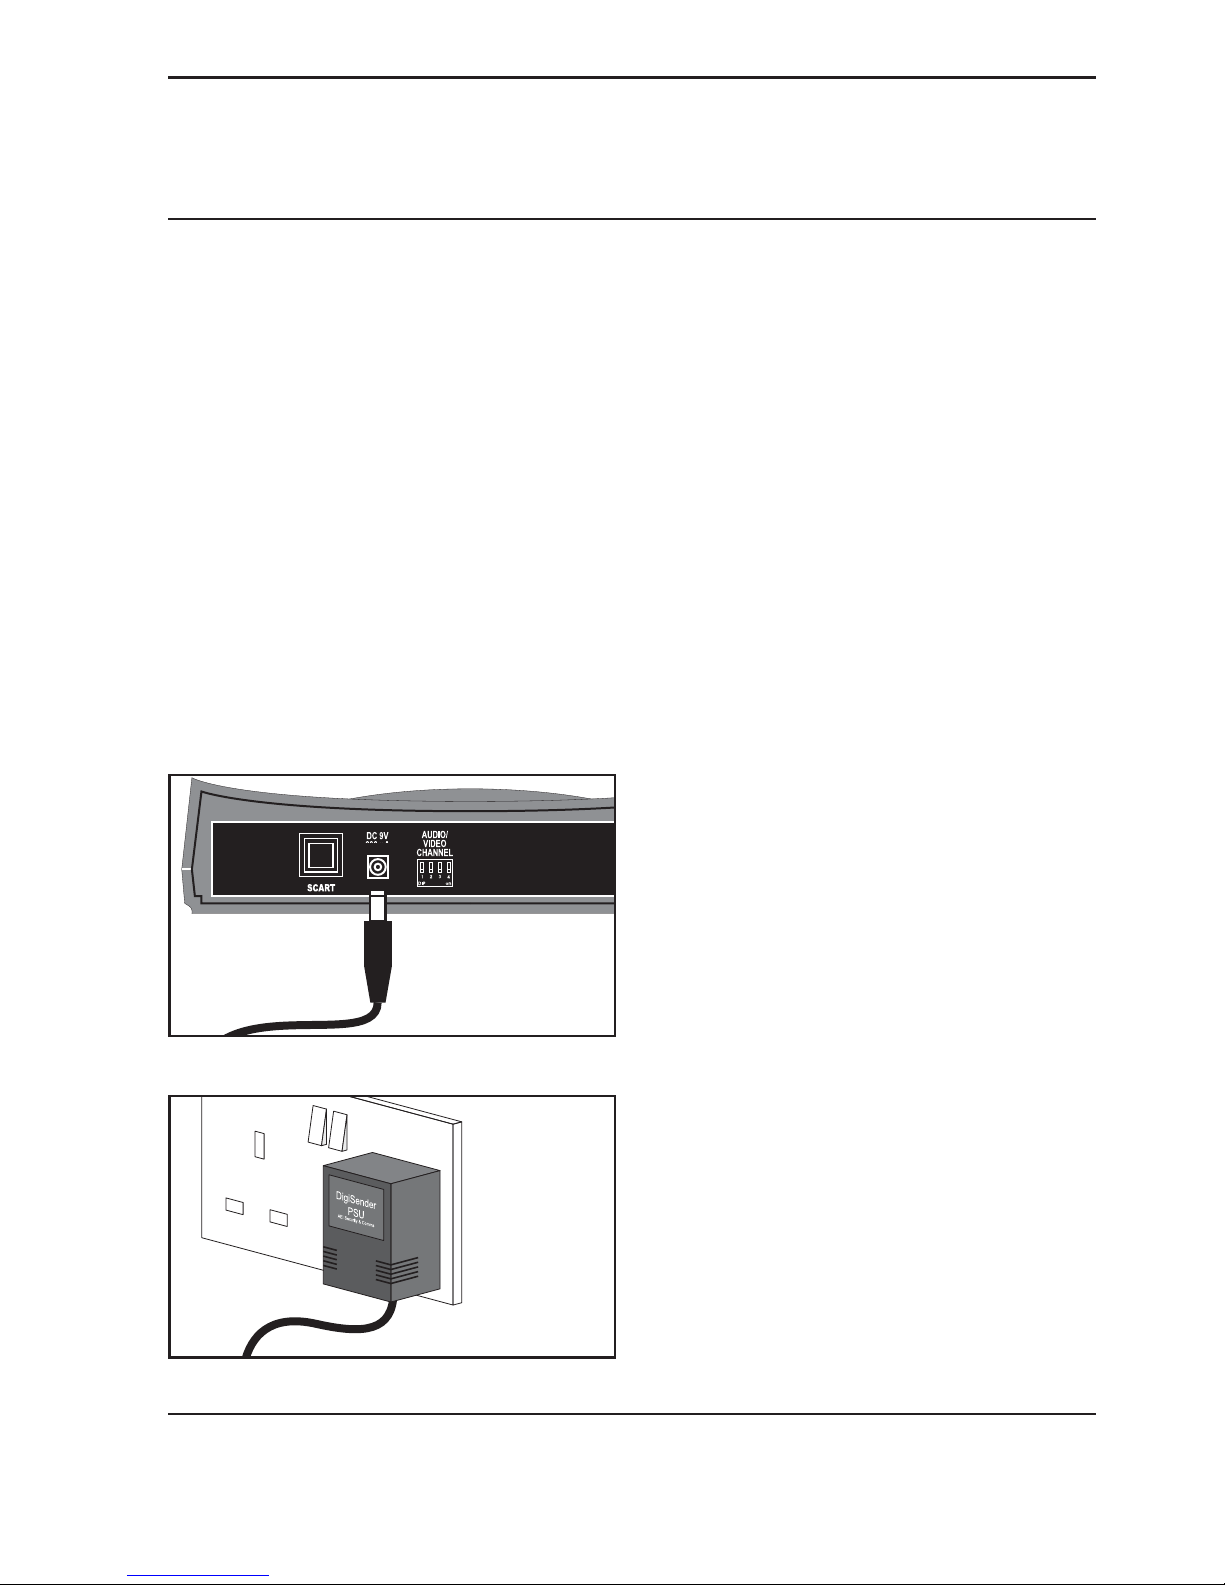
STEP 2
Connect the power supply unit as show
below.Then, switch ON the DigiSender™
receiver and your television.
IMPORTANT: Always switch off
your mains supply at the socket,
prior to connecting the power supply units
STEP 3
You must select your televisions A/V
channel in order to view your remote
equipment (satellite/cable television etc.)
This is done on your televisions remote
control unit. We have made a list below of
some of the more common buttons you
need to press to activate the A/V channel.
Please refer to your televisions user guide
for details on connecting external video
sources.
Press...
A/V
VIDEO
TV/VCR
VCR
EXT
LINE
Please note, you do not need to tune your
TV into the DigiSender, and your TV does
not need an aerial connection.
Figure 13.1 Connect
PSU to Receiver
Figure 13.2:
Connect PSU to
240V mains outlet

Page 3
http://www.digisender.net
Anschluss des DigiSender
Empfängers an Ihren Fernseher
Ihr DigiSender Empfänger kann mit
jedem Fernseher mit SCART Anschluss
verbunden werden.
SCHRITT 1
Schließen Sie das SCART Kabel an eine
freie SCART Buchse an Ihrem Fernseher
an.
WICHTIG: Wir empfehlen, das TVGerät vor Anschluss des SCART
Kabels auszuschalten.
KEIN SCART ANSCHLUSS?
Dann benötigen Sie den
DigiSender
Antennenumwandler Fragen
Sie nach Teil: MOD-01-PIS
Der Antennenumwandler
ermöglicht es Ihnen, den
DigiSender Empfänger an
jedem Fernseher auch ohne
SCART Buchse anzuschließen.
Abbildung 12.1 Anschluss des Empfängers an Ihrem TV
Schlafzimmer TV
 Loading...