

Page 1

Item No. TC -370
DIGITAL CAMERA / CAMCORDER
ULTRA FAST RAPID
WORLD TRAVEL CHARGER
Thank you for purchasing our DigiPower Lithium-Ion
Ultra Fast Rapid Charger. This unique charger now
makes it convenient for you charge your batteries with
almost any AC power source in the World without having
to add country specific pass through adapters.
The Travel Charger comes equipped with a patented,
integrated World AC plug that allows you to use your
Charger around the world in: England, Europe, North
America, South America, China, Asia, Australia, and
New Zealand.
Charging Instructions:
A. For Charging Battery Types:
NP-20 or BP-NP20
NP-40 or BP-NP40
NP-60 or BP-NP60
NP-200 or BP-NP200
1 The TC -370 Charger is equipped with a battery
adaptor plate.
2. Th is adaptor plate has two sides.
Each side is labeled with battery types to be used.
Side 1 is for NP -40, NP-60 and NP -200 battery types.
Side 2 is for NP -20 battery type.
No plate is needed for NP -120 battery type.
3. The plate can be removed from the charger unit, and
inserted with either side facing out, depending on the
type of battery you are charging.
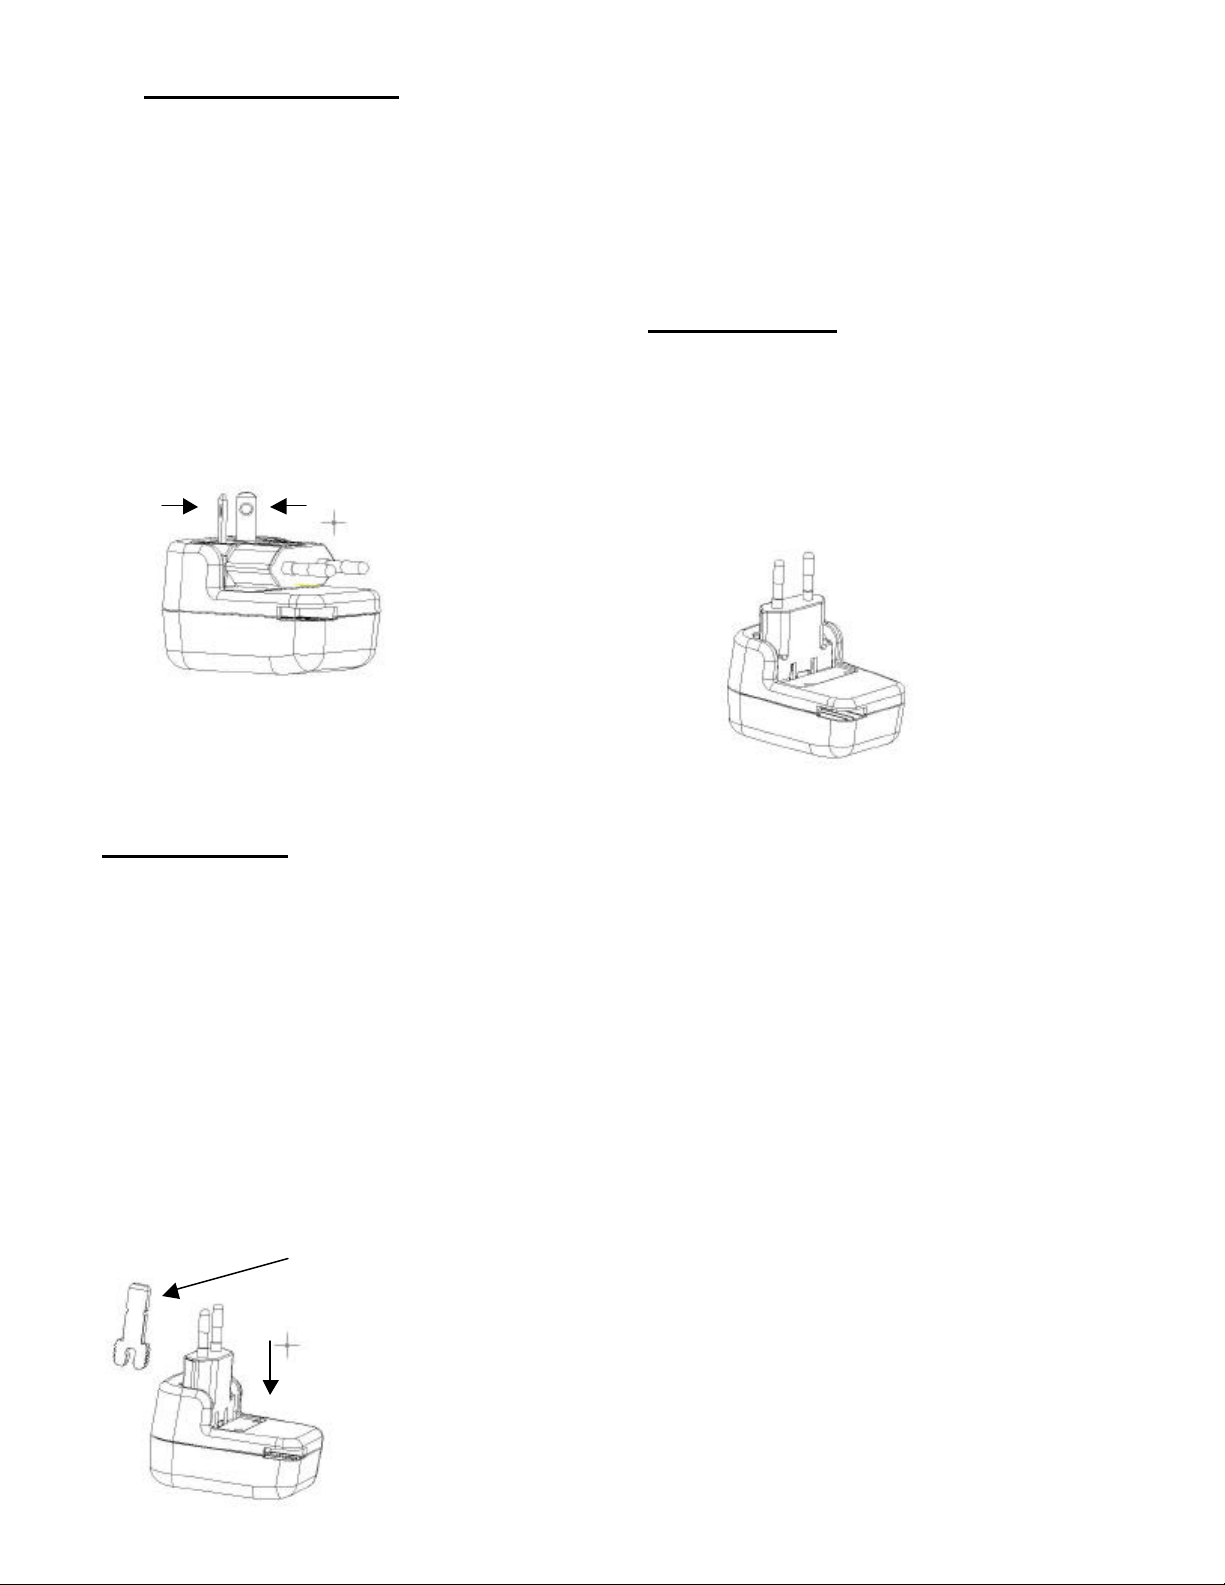
4. Remove the plate by pushing it out with your thumb or
finger just above the LED.
5. When charging any of the batteries listed above (NP -20,
NP-40, NP -60 or NP-200) you must face the side of the
adaptor plate labeled with your battery type out and the
arrow pointing up toward the LED.
6. You must insert the adaptor plate by placing it almost all
the way in and then clicking it into place along the
grooves. Then push the plate the rest of the way in so it
locks into place.
7. DO NOT slide the plate all of the way in the charger
without first clicking it into the grooves as it will not be
set properly and your battery will not charge.
8. Once you have inserted the plate correctly, you may
insert your battery for charging. Make sure to face the
battery out and have the contacts facing in towards the
contacts on the charger.
9. Plug the charger in.
RED LED = unit is charging battery
ORANGE LED = trickle charge (battery is 80% full)
GREEN LED = battery is fully charged
Allow 2 hours for full charge.
B. For Charging Battery Type:
NP-120 or BP-NP120
1. Remove adaptor plate from charger.
2. Place NP -120 battery in charger with face up
and contacts facing the contac ts in the charger.
3. Plug the charger in.
RED LED = unit is charging battery
ORANGE LED = trickle charge (battery is 80% full)
GREEN LED = battery is fully charged
Allow 2 hours for full charge.
Instructions for Adjusting the
Multi-Country Plugs:
A. North America
1. Locate the black button / latch at the base of the
charger where the North American / Australian
Plugs are embedded.
2. Release the North American / Austrailian plug by
pressing down on the button / latch. Continue to
push the North American Plug upward until it is
in a 90 degree position
(Figure A).
Figure A
3. You may now place your Lithuim-Ion battery in
the charger. Insert the plug into a wall outlet
and begin charging your battery.
Page 2
B. Australia/New Zealand
1. Locat e the black button / latch at the base of the
charger where the North American / Austrailian
Plug is embedded.
2. Release the North American / Austrailian plug by
pressing down on the button / latch. Continue to
push the North American Plug upward until it is
in a 90 degree position (Figure A).
3. Twist the North American / Austrailian Plug on
the left side clockwise direction until it is in a 45
degree angled position. Twist the North
American Plug on the right side in a counter
clockwise direction until it is in a 45 degree
angled position (Figure B).
4. You may now place your Lithuim-Ion battery into
the open slots provided on the side opposite of
the plugs. Insert the plug into a wall outlet and
begin charging your batteries.
NOTE: When you have finished charging your
battery, replace the UK Key to its proper
position on the front of the charger.
D. Europe / Asia
1. Locate the Euro Plug on the same side as the
North American / Austrailian Plug. Grasp the
end of the Euro Plug and pull it up until it is in a
90 degree angled position (Figure D).
CAUTION: For safe and proper use make sure
that the North American Plug locks into a closed
position
Figure B
4. You may now place your Lithuim-Ion battery in
the charger. Insert the plug into a wall outlet
and begin charging your battery.
C. United Kingdom
1. Locate the Euro Plug on the same side as the
North American Plug. Grasp the end of the Euro
Plug and pull it up until it is in a 90 degree
angled position.
CAUTION: For safe and proper use make sure
that the North American Plug locks into a closed
position (Figure C).
2. Pull out the UK Key from its position on the
front of the charger.
3. First insert the UK Key into the ground socket of
the wall outlet. This action will open the two top
power sockets. Now insert the Euro Plug into the
power sockets on the wall outlet.
UK Key
Figure C
Figure D
2. You may now place your Lithuim-Ion battery in
the charger. Insert the plug into a wall outlet
and begin charging your battery.
ONE YEAR WARRANTY:
Mizco International, Inc. warrants this product to
be free from defects in materials and workmanship to the
original purchaser for a period of One Year from the
original purchase date. Mizco’s responsibility with regard
to this limited warranty shall be limited solely to the
repair or replacement, at it’s own option, of any product
which fails during normal use. This warranty does not
extend to damage or failure, which results from misuse,
neglect, accident, alteration, abuse, improper
installation, or improper maintenance. To exercise this
limited warranty, send your name and address with proof
of purchase and the UPC from the package. Product
sent for warranty must be mailed to the address below,
freight prepaid. Include $5.00 for return shipping and
handling.
DigiPower
140 58th Street
Building B, Unit 4G
Brooklyn, NY 11220
www.digi-power.com
e-mail: digipowersolutions@mizco.com
MADE IN CHINA
 Loading...