

Digimax 210 User Manual

Digimax 210
Programmable Thermostat
User Guide
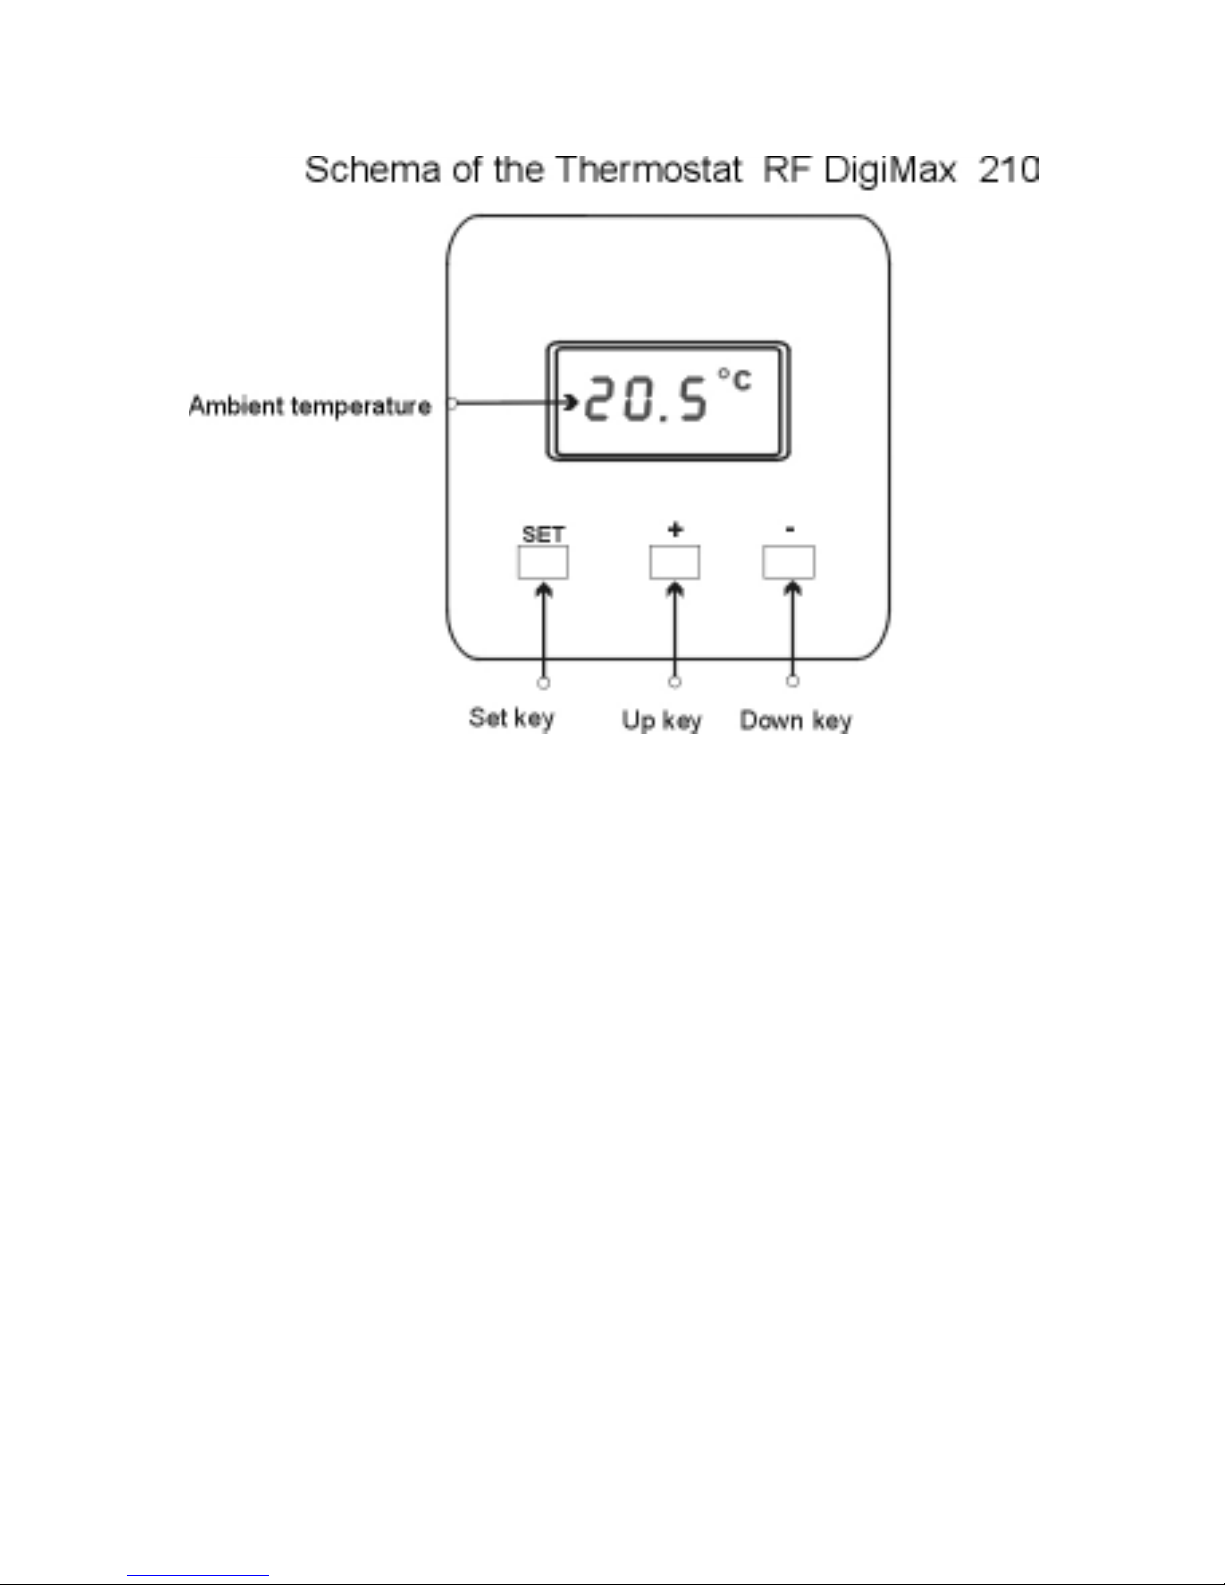
Schema of the thermostat
The RF DigiMax 210 thermostat does not need any extra
wiring and works within 30 meters range around the receiver
RF-Max. The DigiMax 210 is equiped of a secured RF code
which the RF Max will learn during the installation process.
This code will assure that the receiver will only answer to
messages sent by your DigiMax 210. This process is described at the end of this manual.
I. To start :
Remove the battery insulation strip and check unit is functioning.
II. Operation :
The DigiMax 210 Digital Room thermostat is simple to use.
The Liquid Crystal Display continuously shows ambient temperature.

To change the “Set Point” (i.e. temperature requested), press
and hold the “SET” key and at the same time press “+” or “-”
to select the temperature setting. The display will show the
“Set Point” until the “SET” button is released. The display will
then show the ambient temperature.
When the DigiMax 200 instructs your heating system to switch
on, a small flame symbol appears at the bottom right of the
display.
III. Installation :
DigiMax 210 Technical Data
Temperature Range : 5°C to 35°C in 1°C steps
16°C to 35°C selectable
Differential : <1°C at 4K per Hour
Ambient temperature : Operating 0°C to 45°C
Power Supply : 3 type AA 1.5 v alkaline cells
Switch : 230v ac 2 (1)A
Battery Life : 2 years Typical
Maintenance : no user maintenance required
RF range : 30 meters
Please read all installation instructions before proceeding.
The RF DigiMax 210 works with batteries. It does not need
any wire. If you wish it to replace an old cable thermostat,
isolate and secure the old wires, which are useless now. Do
not forget to cut the power when you take off the old thermostat.

IV Position
The ideal position to locate the DigiMax 210 Digital Room
Thermostat is about 1.5m above floor level, accessible, free
from extremes of temperature and draughts. Do not mount
on an outside wall, above a radiator or where it may be sub-
jected to direct sunlight.
The radio link does not mean that the wiring has been simplified, but that the thermostat can be installed in any place of
your house to optimate your needs in heating.
We recommend you to make the installation with the receiver
RF-Max before fixing your thermostat on the wall, in order to
be certain of its good operation at the selected place.
V Fixing
1 The wall plate should be positionned with a minimum of
70 mm clearance all round to allow adequate air flow
2 Fix the wall-plate directly to a flat wall
3 Remove the battery insulation strip and check unit is func-
tioning, place it on its wall-plate
VI Configuring
The unit is supplied with a 5°C minimum temperature set
point and configured as a heating thermostat as factory defaults. Two internal links can be used to reconfigure these
defaults.
1 Open the unit by slackening the retaining screw situated in
the bottom edge and hinging carefully upwards. Disengage the unit from the wall-plate and place it to one side
for safe keeping.
 Loading...