


1300 Henley Court
Pullman, WA 99163
509.334.6306
www.digilentinc.com
PmodHB3™ Reference Manual
Revised April 12, 2016
This manual applies to the PmodHB3 rev. E
DOC#: 502-069
Copyright Digilent, Inc. All rights reserved.
Other product and company names mentioned may be trademarks of their respective owners.
Page 1 of 4
The PmodHB3.
2A H-bridge circuit
Drive a DC motor with operation voltage up
to 12V
Screw terminal blocks for connection to the
motor
Separate header for external motor
feedback
Small PCB size for flexible designs 1.2 in ×
0.8 in (3.0 cm × 2.0 cm)
6-pin Pmod port with GPIO interface
Follows Digilent Pmod Interface
Specification Type 5
Example code available in resource center
Features include:
Overview
The Digilent PmodHB3 offers a 2A H-Bridge circuit with external feedback to drive small to medium sized DC
motors.
1 Functional Description
The PmodHB3 utilizes a full H-Bridge circuit to allow users to drive DC motors from the system board. Two external
pins are provided on the Pmod for sensor feedback on the DC motor, if desired.
2 Interfacing with the Pmod
The PmodHB3 communicates with the host board via the GPIO protocol. Like all H-Bridges, care must be taken to
avoid causing a potential short within the circuitry. In terms of this Pmod, this means that the Direction pin must
not change state while the Enable pin is at a high voltage state. If this does occur, one set of switches that are
driving the motor will be closing while the other set is opening, allowing for the possibility for both sets of switches
to be open at the same time, creating a short.
To drive the motor at a specific speed, users will need to choose a static direction (forwards or backwards
corresponding to high or low voltage) on the Direction pin, and then perform pulse-width modulation on the
PmodHB3™ Reference Manual
Copyright Digilent, Inc. All rights reserved.
Other product and company names mentioned may be trademarks of their respective owners.
Page 2 of 4
2KHz
2KHz
2KHz
3.3V * 10% = 0.33V
3.3V * 50% = 1.75V
3.3V * 75% = 2.48V
Figure 1
Figure 3
Figure 2
10%
90 %
Gnd
VCC
10% Duty
Cycle
75% Duty
Cycle
50% Duty
Cycle
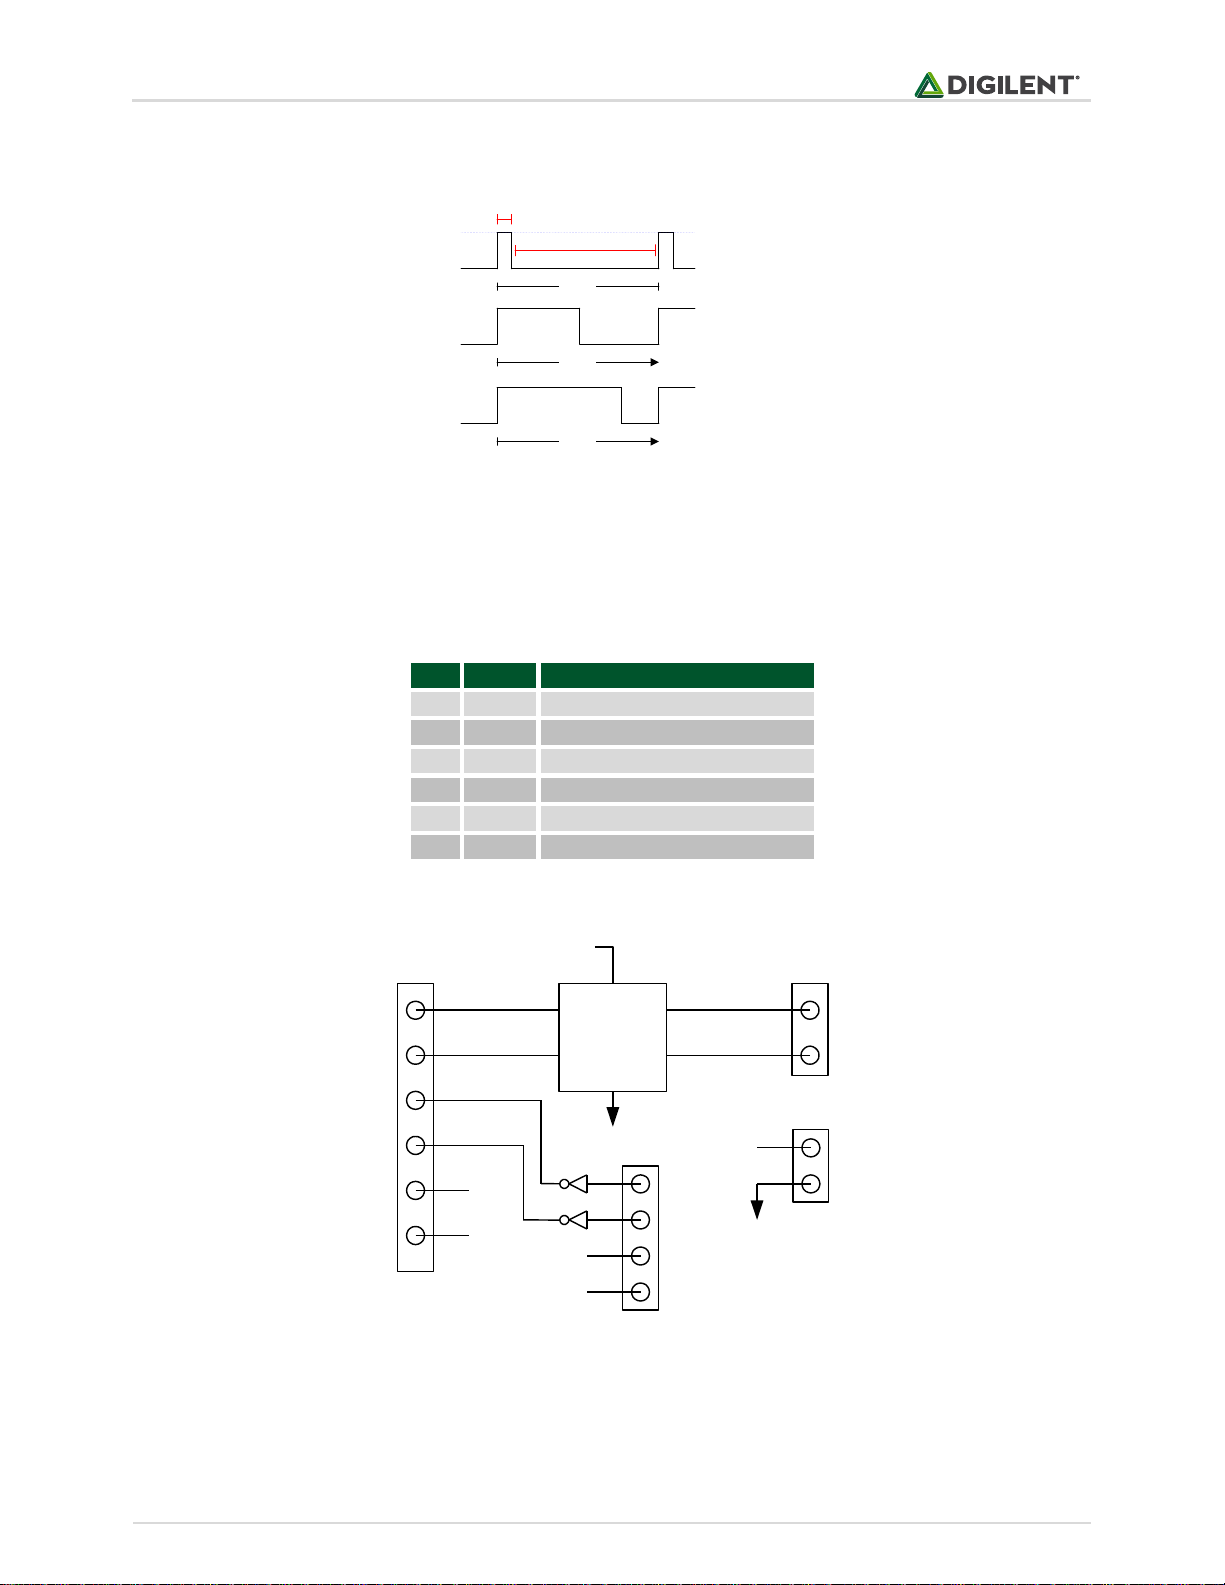
Pin
Signal
Description
1
DIR
Direction pin
2
EN
Enable pin
3
SA
Sensor A feedback pin
4
SB
Sensor B feedback pin
5
GND
Power Supply Ground
6
VCC
Positive Power Supply (3.3/5V)
H-BRIDGE
CIRCUIT
VM
DIR
EN
SA
SB
GND
VCC
GND
VCC
GND
GND
VM
J1
J2
J3
M+
M-
J5
Enable pin. The more often that an enable pin is driven high within a set time frame, the faster the DC motor will
spin.
Table 1. Frequency and corresponding rotation.
The way that this works is that when voltage is being applied, the motor is driven by the changing magnetic forces.
When voltage is stopped, momentum causes the motor to continue spinning a while. At a high enough frequency,
this process of powering and coasting enables the motor to achieve a smooth rotation that can easily be controlled
through digital logic.
Table 1. Pinout description table.
Any external power applied to the PmodHB3 must be within 2.7V and 5.25V; however, it is recommended that
Pmod is operated at 3.3V.
Figure 2. PmodHB3 block diagram.

PmodHB3™ Reference Manual
Copyright Digilent, Inc. All rights reserved.
Other product and company names mentioned may be trademarks of their respective owners.
Page 3 of 4

PmodHB3™ Reference Manual
Copyright Digilent, Inc. All rights reserved.
Other product and company names mentioned may be trademarks of their respective owners.
Page 4 of 4
3 Physical Dimensions
The pins on the pin header are spaced 100 mil apart. The PCB is 1.2 inches long on the sides parallel to the pins on
the pin header and 0.8 inches long on the sides perpendicular to the pin header.
 Loading...