

Page 1
DDiiggiilleenntt FFXX22 BBrreeaaddbbooaarrdd
RReeffeerreennccee MMaannuuaal
Revision: September 26, 2006 215 E Main Suite D | Pullman, WA 99163
l
www.digilentinc.com
(509) 334 6306 Voice and Fax
Overview
The Digilent FX2 Breadboard (FX2BB) offers a
ready-made solution for prototyping
breadboarded or wire-wrapped circuits as
accessories to Digilent system boards. The
FX2BB provides connectors suitable for direct
connection of various Digilent system boards
and Digilent Pmod
The FX2BB is available in a wire-wrap version
or a solderless breadboard version.
Features include:
• two 630 tie point breadboards separated
by 100 tie point bus strip (solderless
breadboard version)
• 32x65 hole wire-wrap area (wire-wrap
version)
• four 6-pin male header
• four 6-pin female header
• FX2 connector
• prototype/wire-wrap connections on
every signal
• two power buses and one ground plane.
Functional Description
Power Connections
The FX2BB provides two power busses and a
ground bus. The two power busses are labeled
VU and VCC. These two busses are made
available at each connector position on the
board. There is also a ground plane that
connects the ground pins from all connectors
together.
The usual Digilent convention is to power the
VCC bus at 3.3V and the VU bus at 5.0V.
However depending on the system board
connected and the power supply used, other
TM
peripheral modules.
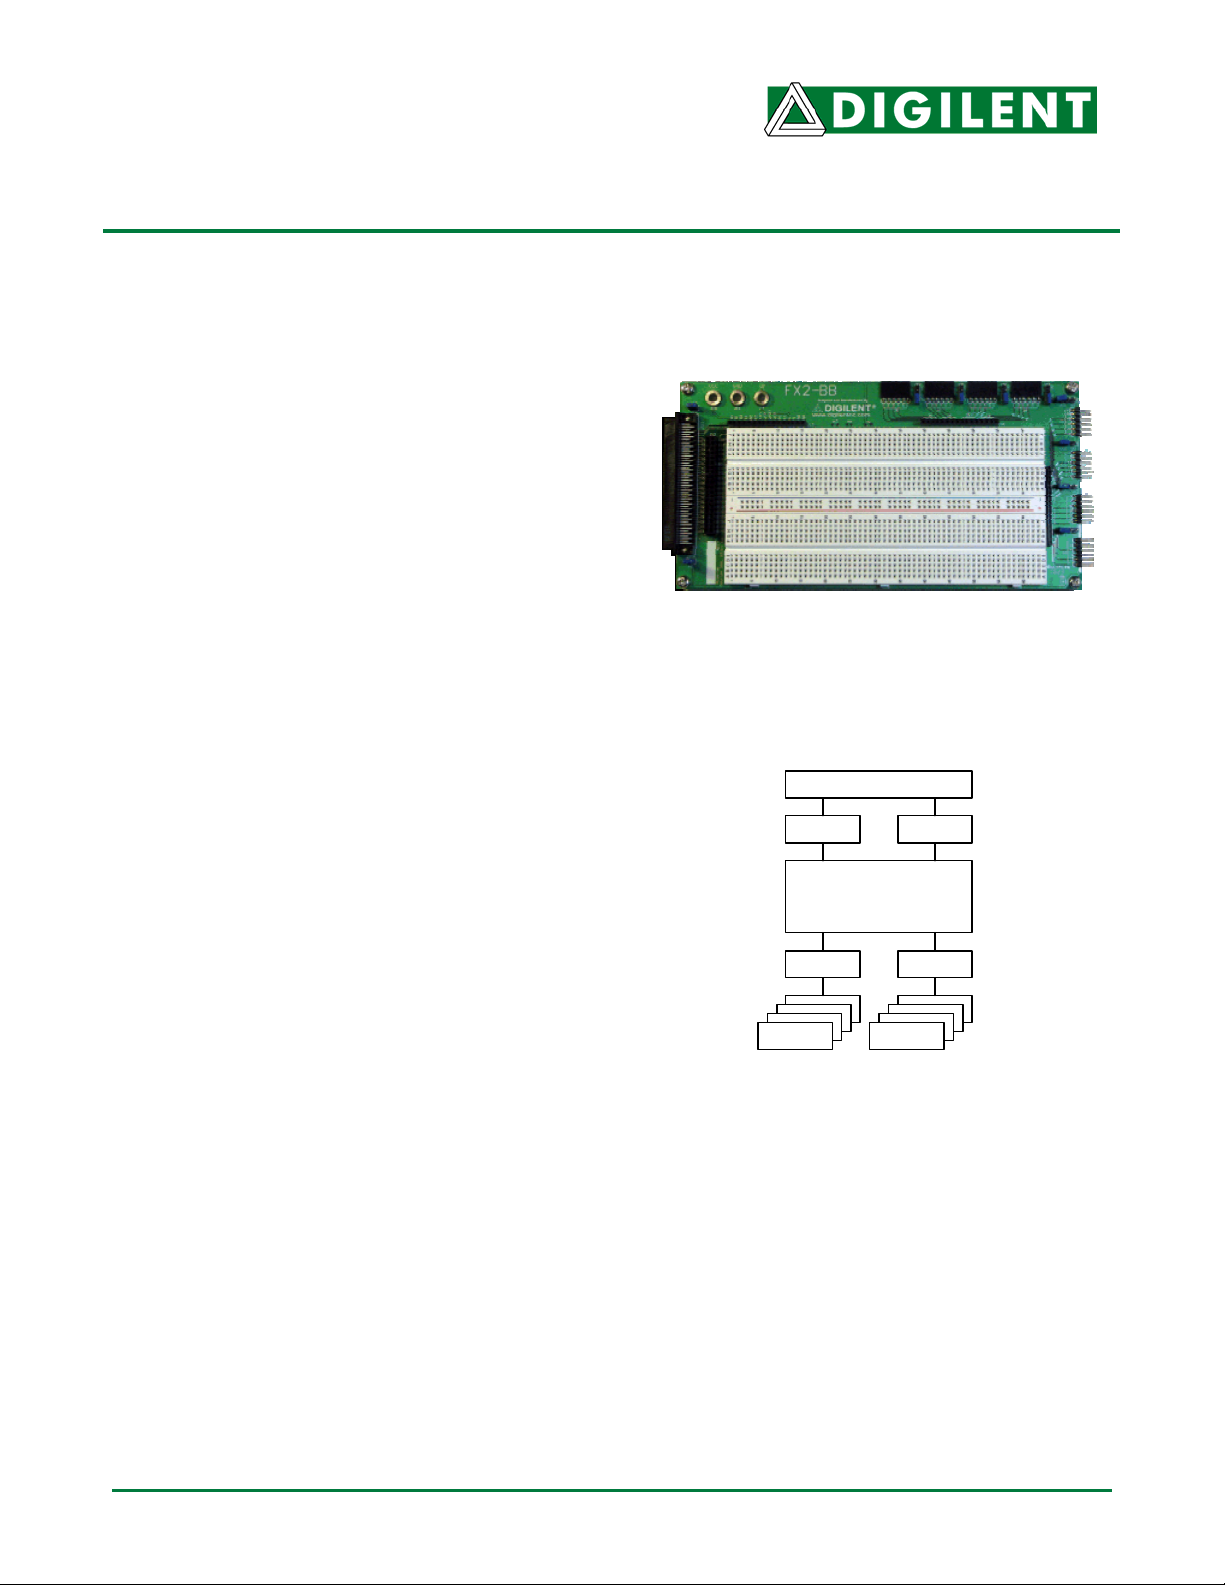
Figure 1
Digilent FX2 Breadboard
FX2 Connecter
J12 J13
Solderless
Breadboard or
W ire-wrap
J9 J10
J5-8J1-4
Male
Pmod
Block Diagram
Female
Pmod
Figure 2
voltages may be present. But observe caution
before using any voltage other than 3.3V on
the VCC bus. Most Digilent system boards will
be damaged if the voltage on the VCC bus is
greater than 3.3V.
®
Doc: 502-011 page 1 of 4
Copyright Digilent, Inc. All rights reserved. Other product and company names mentioned may be trademarks of their respective owners.
Page 2

FX2BB Reference Manual
Digilent, Inc.
Banana jacks J14-J16 provide connection
points for connecting external, bench power
supplies to the board to power the busses.
Alternatively, the power busses can be
powered from the FX2 connector or any of the
Pmod connectors. When configuring power
jumpers and powering the board, it is important
that each power supply bus be powered from a
single power source. Damage can occur if the
same bus is powered by more than one
source.
Hirose, 100 Pin, FX2 Connector
FX2 connector J11 is provided on one side of
the board for connection to Digilent system
boards like the Nexys that contain an FX2 style
connector. The Digilent FX2 connector signal
convention provides for forty general-purpose
I/O signals, three clock signals, JTAG signals,
and power busses.
The forty general-purpose I/O signals from the
FX2 connector are brought out to connector
J12. These signals are labeled IO1-IO40. See
Table 1 for a description of the relationship
between FX2 connector pins and signal names
on J12. The remaining signals from the FX2
connector are brought out to connector J13.
See Table 1 for a description of the
relationship between FX2 connector pins and
connector J13 signal names.
In addition to the FX2 connector signals,
connector J13 also provides access to the
power and ground busses.
Jumper blocks JP9 and JP10 are used to
connect or disconnect the VU and VCC busses
of the system board and the VU and VCC
busses on the FX2BB. Shorting blocks are
placed on JP9 and/or JP10 to connect the
busses, or removed to disconnect the busses.
Pmod Connectors
Digilent Pmod peripheral modules provide
various peripheral functions. These can be as
simple as buttons or switches for inputs and
LEDs for outputs, to as complex as graphical
LCD display panels, accelerometers and
keypads.
All Digilent Pmod modules use a six-wire
interface for connection to a system board. The
interface provides four I/O signals, power and
ground. The signal definitions for the four
signals as well as the voltage requirements for
the power supply depend on the specific
module.
The system board connection is through a 6pin male connector. In addition to the system
board connection, many Pmods, such as A/D
and D/A converters, provide interfaces to
outside signals. These connections are made
through a 6-pin female connector.
The FX2BB provides two sets of four 6-pin
connectors for connection of Pmods.
Connectors J1-J4 are male connectors for
connection to the external signal side of
Pmods like A/D or D/A converters. Connectors
J5-J8 are female connectors for connection to
the system board side of Pmods.
The signals for Pmod connectors J1-J4 are
brought out to connector J9. These signals are
labeled; J1, 1-4; J2, 1-4, etc. Similarly, the
signals for Pmod connectors J5-J8 are brought
out to connector J10 and labeled; J5, 1-4, etc.
Each Pmod connector has an associated
power select jumper. The power select jumper
for J1 is JP1 and so on. These jumpers are
used to select one of the two power busses on
the FX2BB to provide power to the power
supply pin on a Pmod plugged into that
connector position. Placing a shorting block in
the VCC position provides VCC power to the
Pmod. Placing a shorting block in the VU
position provides VU power to the Pmod. Place
a shorting block so that it hangs off of the
center pin only, disconnects power to the
Pmod.
Rev: July 18, 2006 www.digilentinc.com Page 2 of 4
Page 3

FX2BB Reference Manual
Table 1: FX2 Signals and Connector Pinout
A
1 VCC 1 SHLD
2 VCC 2 GND
3 TMS 3 TDI (from host to peripheral)
4 JTSEL 4 TCK
5 TDO (From peripheral to host) 5 GND
6 IO1 6 GND
7 IO2 7 GND
8 IO3 8 GND
9 IO4 9 GND
10 IO5 10 GND
11 IO6 11 GND
12 IO7 12 GND
13 IO8 13 GND
14 IO9 14 GND
15 IO10 15 GND
16 IO11 16 GND
17 IO12 17 GND
18 IO13 18 GND
19 IO14 19 GND
20 IO15 20 GND
21 IO16 21 GND
22 IO17 22 GND
23 IO18 23 GND
24 IO19 24 GND
25 IO20 25 GND
26 IO21 26 GND
27 IO22 27 GND
28 IO23 28 GND
29 IO24 29 GND
30 IO25 30 GND
31 IO26 31 GND
32 IO27 32 GND
33 IO28 33 GND
34 IO29 34 GND
35 IO30 35 GND
36 IO31 36 GND
37 IO32 37 GND
38 IO33 38 GND
39 IO34 39 GND
40 IO35 40 GND
41 IO36 41 GND
42 IO37 42 GND
43 IO38 43 GND
44 IO39 44 GND
B
Digilent, Inc.
Rev: July 18, 2006 www.digilentinc.com Page 3 of 4
Page 4

FX2BB Reference Manual
45 IO40 45 GND
46 GND 46 CLKIN (from peripheral to host)
47 CLKOUT (from host to peripheral) 47 GND
48 GND 48 CLKIO (from host to peripheral)
49 VU 49 VU
50 VU 50 SHLD
Digilent, Inc.
Rev: July 18, 2006 www.digilentinc.com Page 4 of 4
 Loading...