

Digihome 43287FHDDLED, 43287FHDDLEDCNT Operating Instructions Manual
43287FHDDLED
OPERATING INSTRUCTIONS
COLOUR TELEVISION WITH REMOTE CONTROL
From landline - 0800 323 4060
From mobile - 0330 123 4060 (local geographic rate, inclusive of call allowance)
Helpline Number:

50340801

English - 1 -
Contents
Safety Information ..................................................2
Markings on the Product.........................................2
Environmental Information......................................3
Features .................................................................4
Accessories Included..............................................4
Standby Notications .............................................. 4
TV Control Switch & Operation...............................4
Inserting the Batteries into the Remote ..................5
Connect Power ...................................................... 5
Antenna Connection ............................................... 5
Notication .............................................................. 5
Specication ...........................................................5
Remote Control ......................................................6
Connections............................................................7
Switching On/Off ..................................................... 8
First Time Installation..............................................8
Media Playback via USB Input ...............................8
Media Browser Menu..............................................9
CEC and CEC RC Passthrough ............................. 9
TV Menu Contents................................................10
General TV Operation ..........................................14
Using the Channel List .........................................14
Conguring Parental Settings ............................... 14
Electronic Programme Guide (EPG) ....................14
Teletext Services ..................................................15
Software Upgrade.................................................15
Troubleshooting & Tips .........................................15
PC Input Typical Display Modes ........................... 16
AV and HDMI Signal Compatibility ....................... 16
Supported Video File Formats for USB Mode ......17
Supported Picture File Formats for USB Mode ....17
Supported Audio File Formats for USB Mode ......18
Supported Subtitle File Formats for USB Mode ...19
Supported DVI Resolutions ..................................20
Important Instructions ........................................... 21
English - 2 -
Safety Information
Don’t operate your TV in extreme ambient
conditions as this may cause damage to your TV.
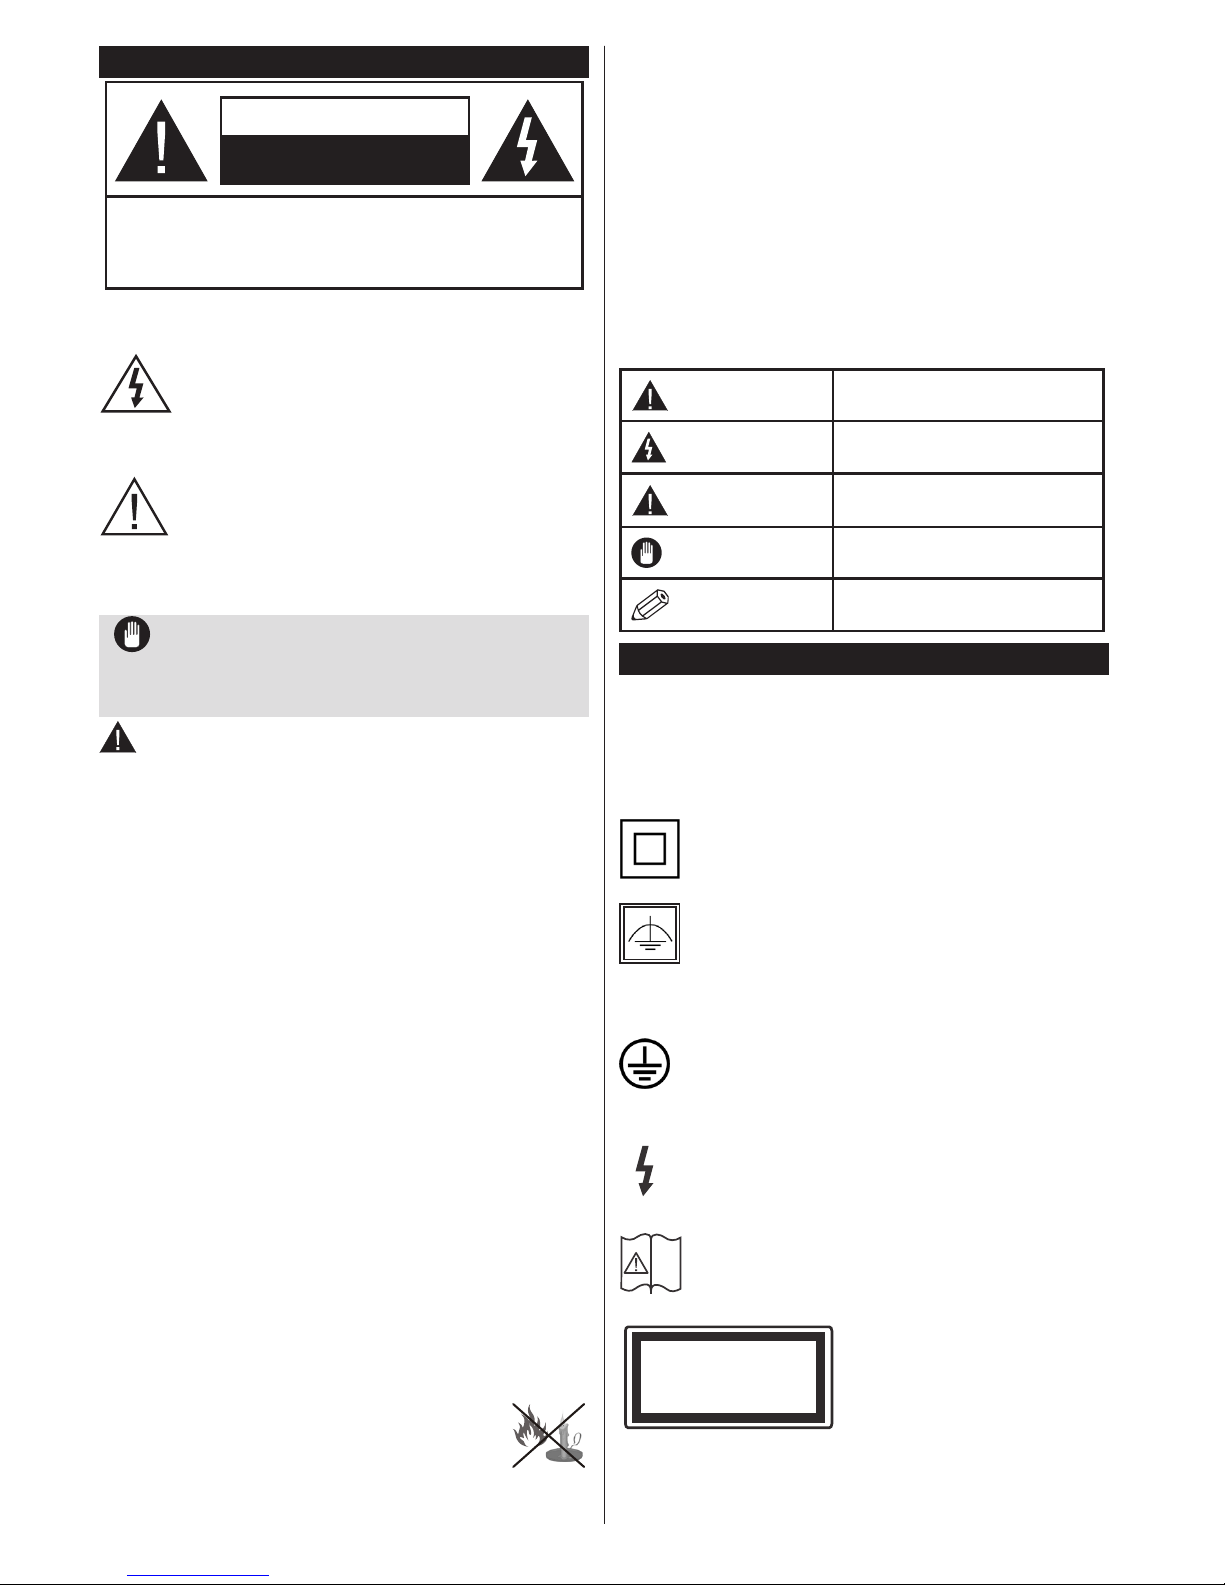
CAUTION
RISK OF ELECTRIC SHOCK
DO NOT OPEN
CAUTION: TO REDUCE THE RISK OF ELECTRIC SHOCK DO
NOT REMOVE COVER (OR BACK).
NO USER-SERVICEABLE PARTS INSIDE. REFER
SERVICING TO QUALIFIED SERVICE PERSONNEL.
Note: Follow the on screen instructions for operating the
related features.
In extreme weather (storms, lightning) and long
inactivity periods (going on holiday) disconnect
the TV set from the mains. The mains plug is
used to disconnect TV set from the mains and
therefore it must remain readily operable.
This sign is present wherever there is very
important information on operation and
maintenance of the appliance in the literature
accompanying it.
IMPORTANT - Please read these
instructions fully before installing or
operating
WARNING: Never let people (including
children) with reduced physical, sensory or
mental capabilities or lack of experience and / or
knowledge use electrical devices unsupervised.
• For ventilation purposes, leave a free space of at
least 10 cm all around the set.
•Do not block ventilation holes.
•Do not place the TV on sloping or unstable surfaces,
the TV may tip over.
• Use this device in moderate climates.
• The power cord plug should be easily accessible. Do
not place the TV, furniture, etc. on the power cord.
A damaged power cord/plug can cause re or give
you an electric shock. Handle the power cord by the
plug, do not unplug the TV by pulling the power cord.
Never touch the power cord/plug with wet hands
as this could cause a short circuit or electric shock.
Never make a knot in the power cord or tie it with
other cords. When damaged it must be replaced,
this should only be done by qualied personnel.
•Do not use this TV in a humid or damp environment.
Do not expose the TV to liquids. In case the cabinet
contacts any liquids unplug the TV immediately
and have it checked by qualied personnel before
operating it any further.
•Do not expose the TV to direct sunlight,
open ames or place it near intense heat
sources such as electric heaters.
• Listening in excessive volumes from earphones and
headphones may cause hearing loss.
• Ensure that no open ame sources, such as lit
candles, are placed on top of the TV.
• To prevent injuries, this TV must be securely
attached to a wall by carefully following the
instructions (if the option is available).
• Occasionally, a few non-active pixels may appear
on the screen as a xed blue, green or red point.
Please note that this does not affect the performance
of your product. Take care not to scratch the screen
with ngernails or other hard objects.
• Before cleaning, unplug the TV from the wall socket.
Only use a soft, dry cloth while cleaning.
Warning
Serious injury or death risk
Risk of electric shock
Dangerous voltage risk
Caution
Injury or property damage risk
Important
Operating the system correctly
Notice
Additional notes marked
Markings on the Product
The following symbols are used on the product as
a marker for restrictions and precautions and safety
instructions. Each explanation shall be considered
where the product bears related marking only. Note
such information for security reasons.
Class II Equipment: This appliance is
designed in such a way that it does not require
a safety connection to electrical earth.
Class II Equipment With Functional
Earthing: This appliance is designed in such
a way that it does not require a safety
connection to electrical earth, the earth connection is
used for functional purposes.
Protective Earth Connection: The marked
terminal is intended for connection of the
protective earthing conductor associated with
the supply wiring.
Hazardous Live Terminal: The marked
terminal(s) is/are hazardous live under normal
operating conditions.
Caution, See Operating Instructions: The
marked area(s) contain(s) user replaceable
coin or button cell batteries.
Class 1 Laser Product:
This product contains Class
1 laser source that is safe
under reasonably foreseeable
conditions of operation.
i
CLASS 1
LASER PRODUCT
English - 3 -
WARNING
Do not ingest the battery, Chemical Burn
Hazard
(The accessories supplied with or) This pro-
duct may contain a coin/button cell battery.
If the coin/button cell battery is swallowed,
it can cause severe internal burns in just 2
hours and can lead to death.
Keep new and used batteries away from
children.
If the battery compartment does not close
securely, stop using the product and keep it
away from children.
If you think batteries might have been swallowed or placed inside any part of the body,
seek immediate medical attention.
WARNING
Never place a television set in an unstable
location. A television set may fall, causing
serious personal injury or death. Many injuries, particularly to children, can be avoided
by taking simple precautions such as;
• Using cabinets or stands recommended by
the manufacturer of the television set.
• Only using furniture that can safely support
the television set.
• Ensuring the television set is not overhanging
the edge of the supporting furniture.
• Not placing the television set on all furniture
(for example, cupboards or bookcases)
without acnhoring both the furniture and the
television set to a suitable support.
• Educating children about the dangers of
climbing on furniture to reach the television
set or its controls.
If your existing television set is being retained and
relocated, the same considerations as above should
be applied.
Environmental Information
This television is designed to be environment friendly.
To reduce energy consumption, you can follow these
steps:
If you set the Energy Saving to Minimum, Medium,
Maximum or Auto the TV will reduce the energy
consumption accordingly. If you like to set the
Backlight to a xed value set as Custom and adjust
the Backlight (located under the Energy Saving
setting) manually using Left or Right buttons on the
remote. Set as Off to turn this setting off.
Note: Available Energy Saving options may differ depending
on the selected Mode in the System>Picture menu.
The Energy Saving settings can be found in the
System>Picture menu. Note that some picture
settings will be unavailable to be changed.
If pressed Right button while Auto option is selected or
Left button while Custom option is selected, “Screen
will be off in 15 seconds.” message will be displayed
on the screen. Select Proceed and press OK to turn
the screen off immediately. If you don’t press any
button, the screen will be off in 15 seconds. Press
any button on the remote or on the TV to turn the
screen on again.
Note: Screen Off option is not available if the Mode is set
to Game.
When the TV is not in use, please switch off or
disconnect the TV from the mains plug. This will also
reduce energy consumption.
English - 4 -
Features
• Remote controlled colour TV
• Fully integrated digital terrestrial TV (DVB-T-T2)
• HDMI inputs to connect other devices with HDMI
sockets
• USB input
• OSD menu system
• Scart socket for external devices (such as DVD
Players, PVR, video games, etc.)
• Stereo sound system
• Teletext
• Headphone connection
• Automatic programming system
• Manual tuning
• Automatic power down after up to eight hours.
• Sleep timer
• Child lock
• Automatic sound mute when no transmission.
• NTSC playback
• AVL (Automatic Volume Limiting)
• PLL (Frequency Search)
• PC input
• Game Mode (Optional)
• Ethernet (LAN) for interactive services available on
digital channels
• Picture off function
Accessories Included
• Remote Control
• Batteries: 2 x AAA
• Instruction Book
• Quick Start Guide
StandbyNotications
If the TV does not receive any input signal (e.g. from
an aerial or HDMI source) for 5 minutes, it will go
into standby. When you next switch-on, the following
message will be displayed: “TV switched to stand-by
mode automatically because there was no signal
for a long time.” Press OK to continue.
If the TV is on and it isn’t being operated for a while
it will go into standby. When you next switch-on, the
following message will be displayed. “TV switched to
stand-by mode automatically because no operation
was made for a long time.” Press OK to continue.
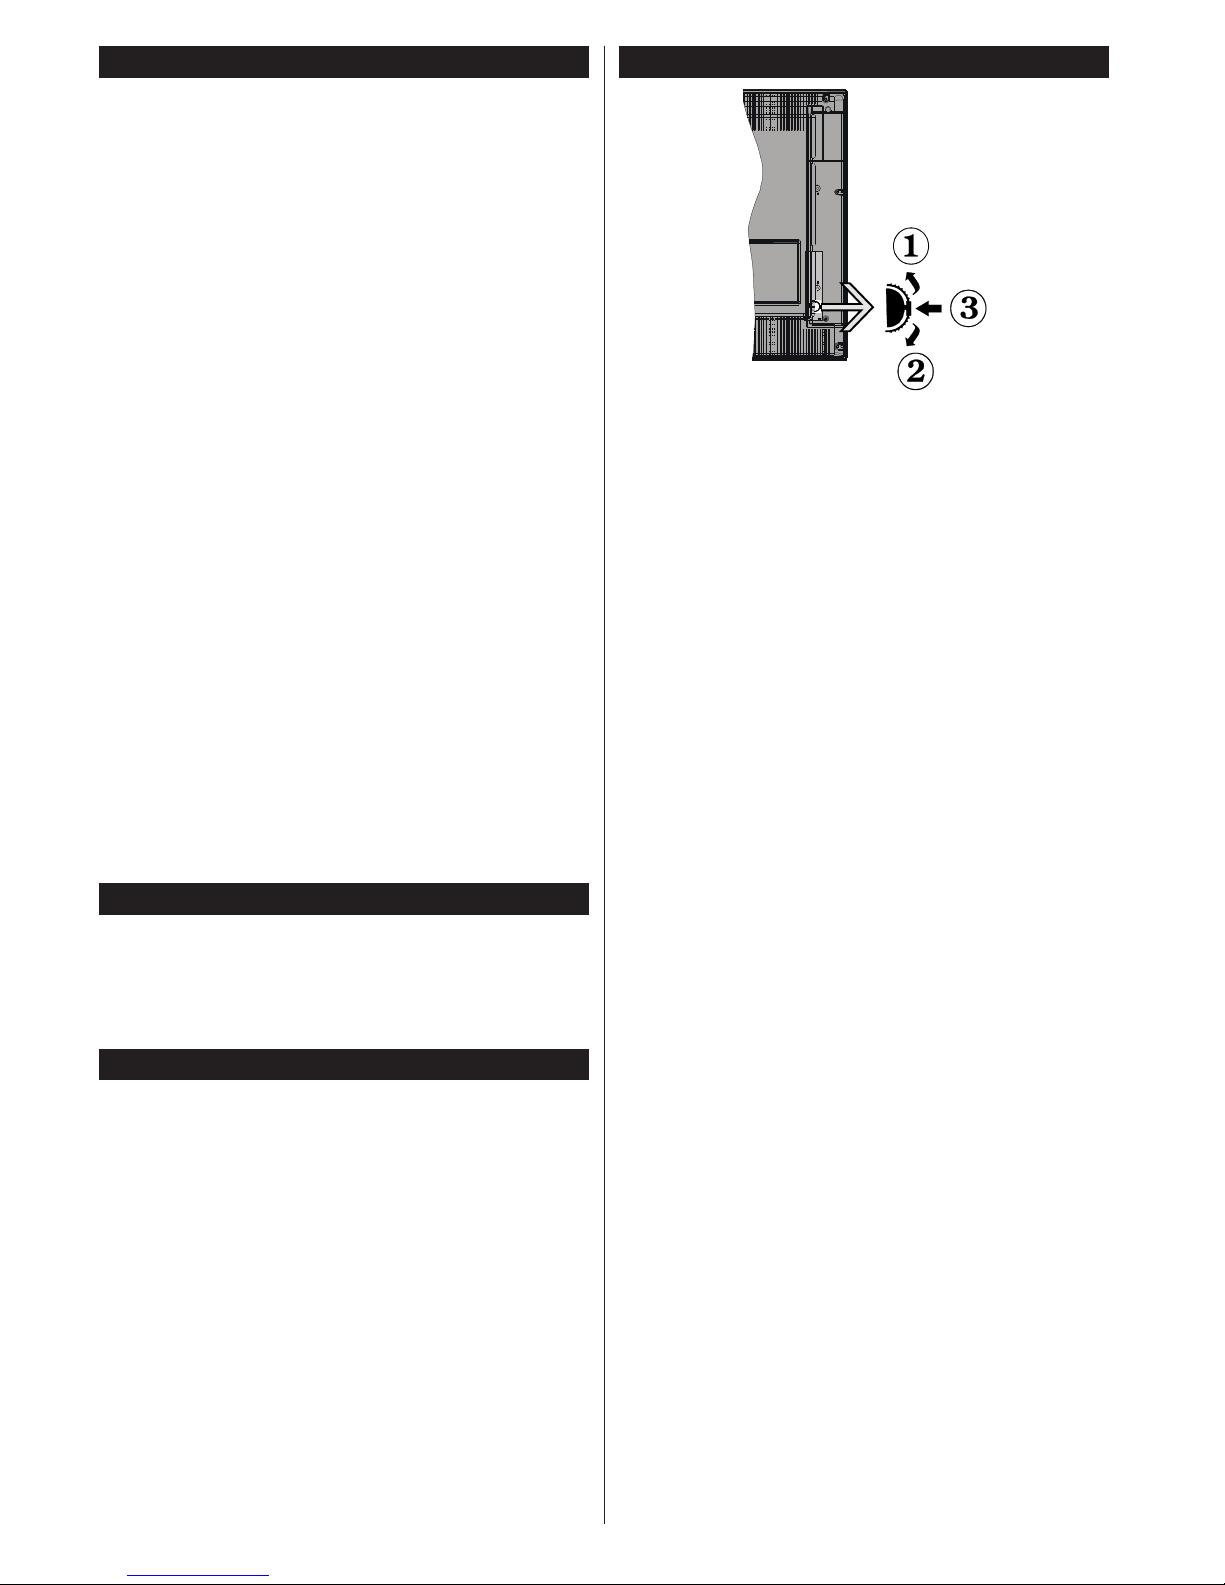
TV Control Switch & Operation
1. Up direction
2. Down direction
3. Volume / Info / Sources List selection and
Standby-On switch
The Control button allows you to control the Volume
/ Programme / Source and Standby-On functions of
the TV.
To change volume: Increase the volume by pushing
the button up. Decrease the volume by pushing the
button down.
To change channel: Press the middle of the button,
the information banner will appear on the screen.
Scroll through the stored channels by pushing the
button up or down.
To change source: Press the middle of the button
twice(for the second time in total), the source list will
appear on the screen. Scroll through the available
sources by pushing the button up or down.
To turn the TV off: Press the middle of the button
down and hold it down for a few seconds, the TV will
turn into standby mode.
Notes:
• If you turn the TV off, this circle starts again
beginning with the volume setting.
• Main menu OSD cannot be displayed via control
button.
Operation with the Remote Control
Press the Menu button on your remote control to
display main menu screen. Use the directional buttons
to select a menu tab and press OK to enter. Use the
directional buttons again to select or set an item. Press
Return/Back or Menu button to quit a menu screen.
Input Selection
Once you have connected external systems to your
TV, you can switch to different input sources. Press the
Source button on your remote control consecutively
to select the different sources.

English - 5 -
Changing Channels and Volume
You can change the channel and adjust the volume
by using the Volume +/- and Programme +/- buttons
on the remote.
Inserting the Batteries into the Remote
Lift the cover on the back of the remote gently. Insert
two AAA batteries. Make sure the (+) and (-) signs
match (observe correct polarity). Place the cover
back on.
Connect Power
IMPORTANT: The TV set is designed to operate on
220-240V AC, 50 Hz socket. After unpacking, allow
the TV set to reach the ambient room temperature
before you connect the set to the mains. Plug the
power cable to the mains socket outlet.
Antenna Connection
Connect the aerial plug to the AERIAL INPUT (ANT)
socket located on the back of the TV.
Notication
TRADEMARK ACKNOWLEDGMENT
The terms HDMI and High-Definition Multimedia
Interface, and the HDMI Logo are trademarks or
registered trademarks of HDMI Licensing LLC in the
United States and other countries.
Manufactured under license from Dolby Laboratories.
Dolby and the double-D symbol are trademarks of
Dolby Laboratories.
Information for Users on Disposal of Old
Equipment and Batteries
[European Union only]
Equipment bearing these symbols should not be
disposed as general household waste.
You should look for appropriate recycling facilities and
systems for the disposal of these products.
Notice: The sign Pb below the symbol for batteries indicates
that this battery contains lead.
Products
Battery
Specication
TV Broadcasting
PAL BG/DK/II’
SECAM BG/DK
Receiving Channels
VHF (BAND I/III) - UHF
(BAND U) - HYPERBAND
Digital Reception
Fully integrated digital
terrestrial TV (DVB-T)
(DVB-T2 compliant)
Number of Preset
Channels
1.000
Channel Indicator On Screen Display
RF Aerial Input 75 Ohm (unbalanced)
Operating Voltage 220-240V AC, 50Hz.
Audio German+Nicam Stereo
Audio Output Power
(WRMS.) (10% THD)
2x8W
Power Consumption (W) 75W
Weight (Kg) 9,50
TV Dimensions DxLxH
(with foot) (mm)
220 x 974 x 615
TV Dimensions DxLxH
(without foot) (mm)
79/98 x 974 x 572
Display 43”
Operation temperature
and operation humidity
0ºC up to 40ºC, 85%
humidity max
English - 6 -
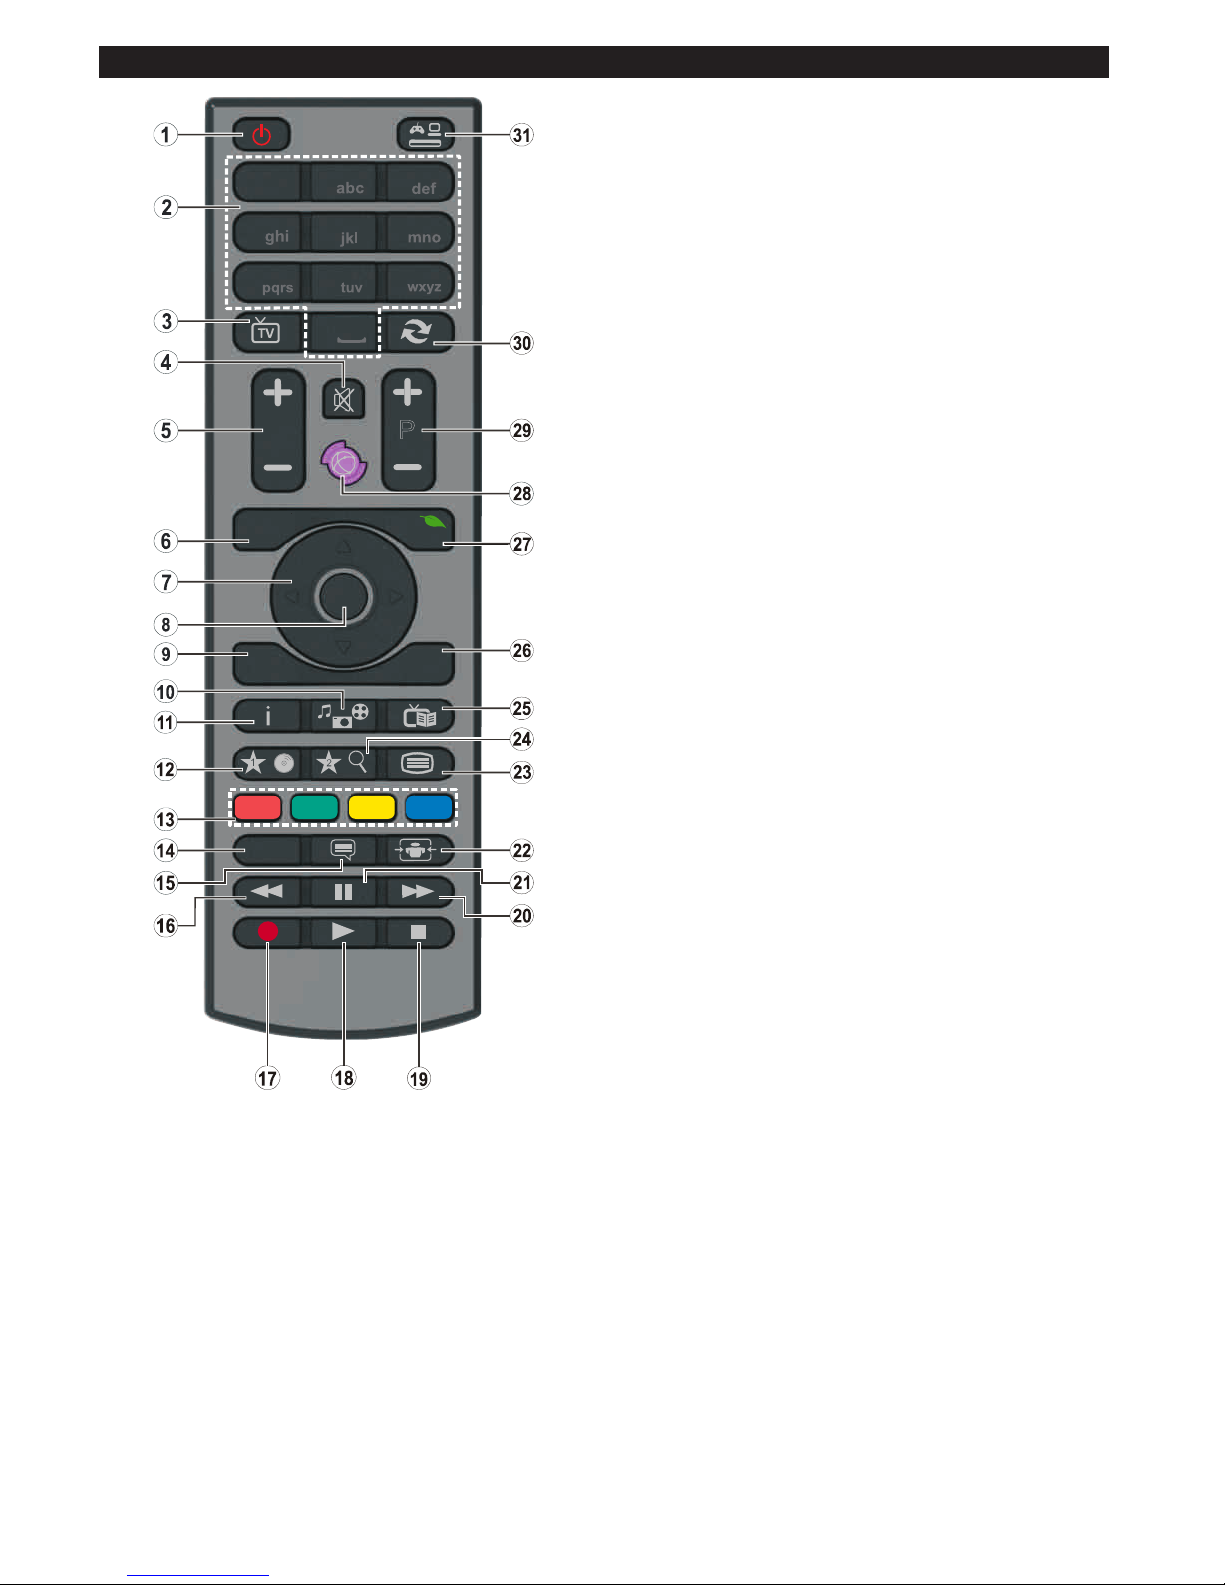
Remote Control
1
2
3
4
5
6
7
8
9
0
V
P
.,/@
LANG.
BACK
EXIT
OK
MENU
Q.
MENU
/
/
1. Standby: Switches On / Off the TV
2. Numeric buttons: Switches the channel, enters a
number or a letter in the text box on the screen.
3. TV: Displays channel list / Switches to TV Source
4. Mute: Completely turns off the volume of the TV
5. Volume +/-
6. Menu: Displays TV menu
7. Directional buttons: Helps navigate menus, content
etc. and displays the subpages in TXT mode when
pressed Right or Left
8. OK: Conrms user selections, holds the page (in TXT
mode), views channel list (DTV mode)
9. Back/Return: Returns to previous screen, opens index
page (in TXT mode)
10. Media browser: Opens the media browsing screen
11. Info: Displays information about on-screen content,
shows hidden information (reveal - in TXT mode)
12. My button 1 (*)
13. Coloured Buttons: Follow the on-screen instructions
for coloured button functions
14. Language: Switches among sound modes (analogue
TV), displays and changes audio/subtitle language
(digital TV, where available)
15. Subtitles: Turns subtitles on and off (where available)
16. Rapid reverse: Moves frames backwards in media
such as movies
17. No function
18. Play: Starts to play selected media
19. Stop: Stops the media being played
20. Rapid advance: Moves frames forward in media such
as movies
21. Pause: Pauses the media being played
22. Screen: Changes the aspect ratio of the screen
23. Text: Displays teletext (where available), press again
to superimpose the teletext over a normal broadcast
picture (mix)
24. My button 2 (*)
25. EPG (Electronic programme guide): Displays the
electronic programme guide
26. Exit: Closes and exits from displayed menus or returns
to previous screen
27. Quick Menu: Displays a list of menus for quick access
28. No function
29. Programme +/-
30. Swap: Quickly cycles between previous and current
channels or sources
31. Source: Shows all available broadcast and content
sources
(*) MY BUTTON 1 & MY BUTTON 2:
These buttons may have default functions depending on
the model. However you can set a special function to these
buttons by pressing on them for ve seconds when on a
desired source or channel. A conrmation message will be
displayed on the screen. Now the selected MY BUTTON is
associated with the selected function.
Note that if you perform First Time Installation, MY BUTTON
1&2 will return to their default function.
 Loading...