

Page 1

0
Quick Installation Guide
DIGIARRAY
DA-4000E
1.0.0.2
Information in this document is subject to change without notice.
© Copyright 2015, DIGIEVER Corporation. All rights reserved.
Page 2
Quick Installation Guide
Thank you for cho os ing DIGIARRAY DA -4000E. The following quick guide will
lead you to co mpl ete the installation and configuration of the DIGIARRAY.
Please read the following descr i ption car efull y.
Create RAID of DIGIARRAY
Note: Please do not connect DIGIARRAY to DIGIEVER NVR when
setting RAID ty pe.
Please follow the below steps to cr eate RAID:
1. Put the HDDs into DIGIARRAY
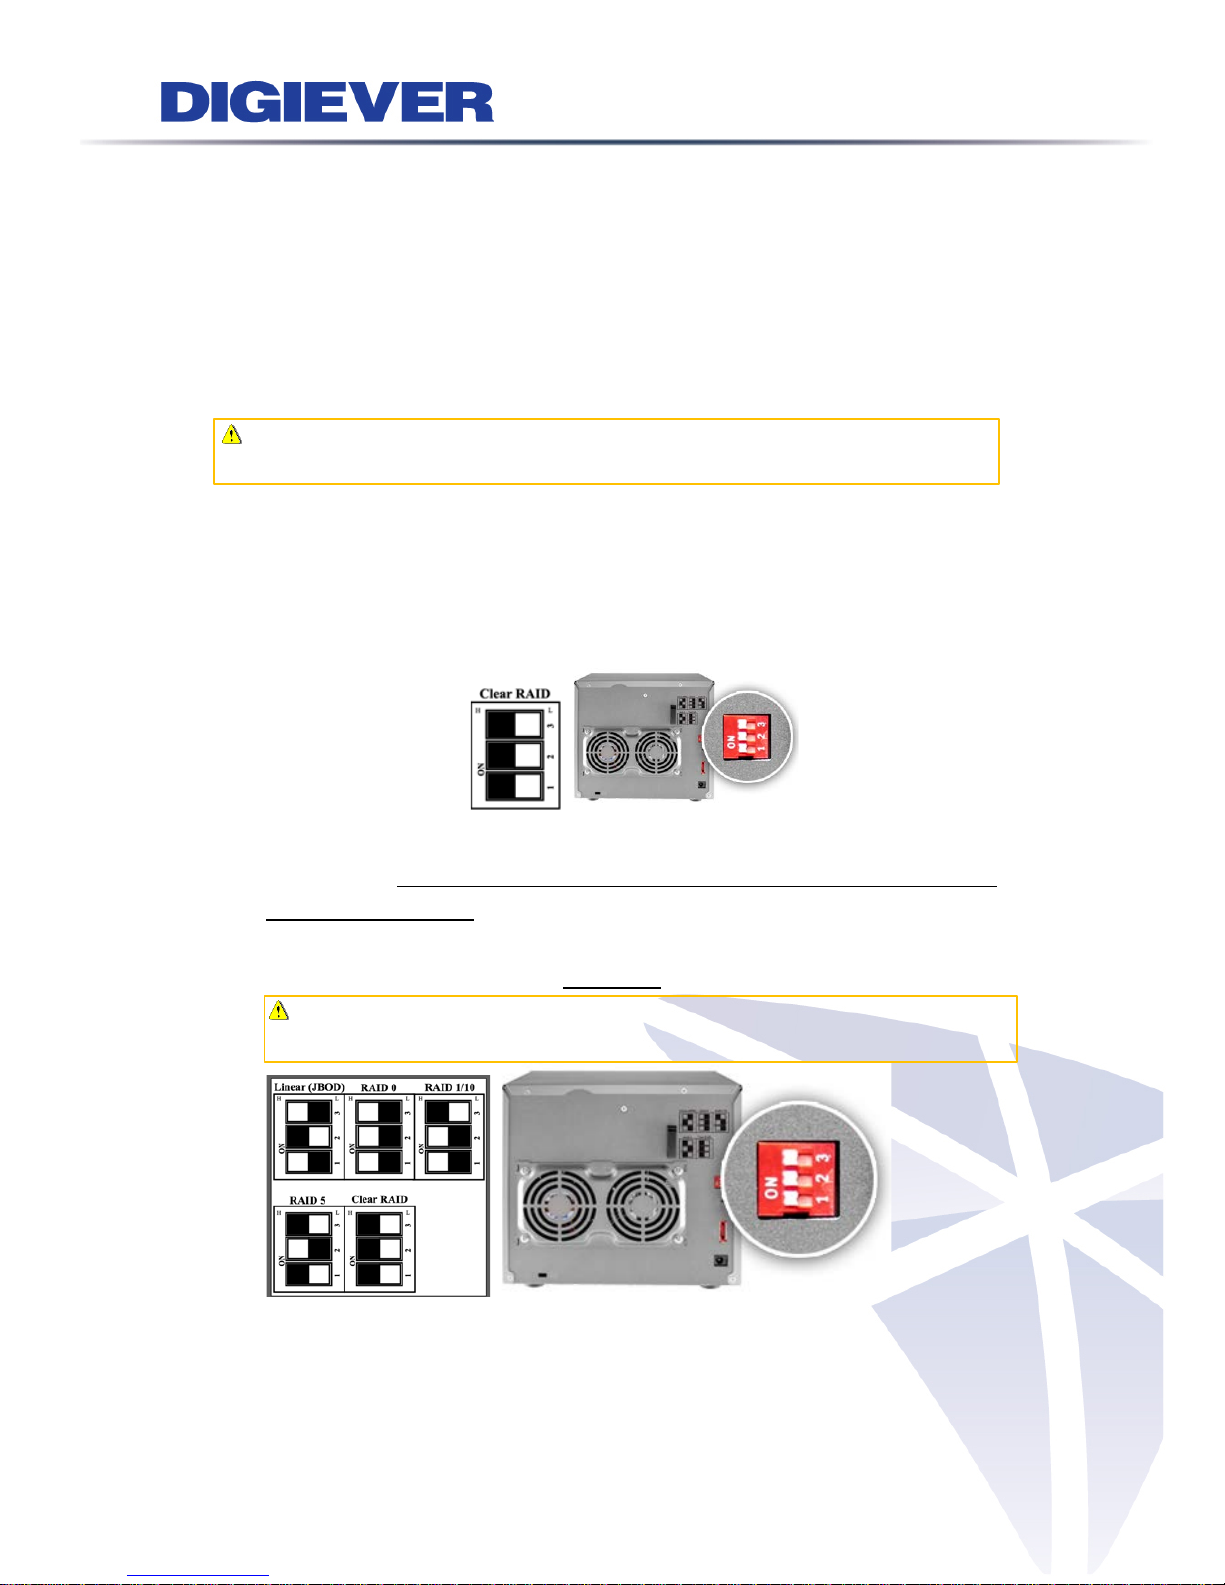
2. Adjust DIGIARRAY’s RAID type to “Cl ear RAID” on the rear p anel of
DIGIARRAY.
3. Simultaneous ly press “reset butto n” and “power button” until there is a
beep sound. When DIGIARRAY pow ers on with a beep sound, the RAID
configuration is done.
4. Press the power button to power off DIGIARRAY
5. Set up desired RAID type via dip swit ch on the rear panel of DIGIARRY
Note: On the sticker, please ref er t o black color as RAID
configuration.
1
Page 3
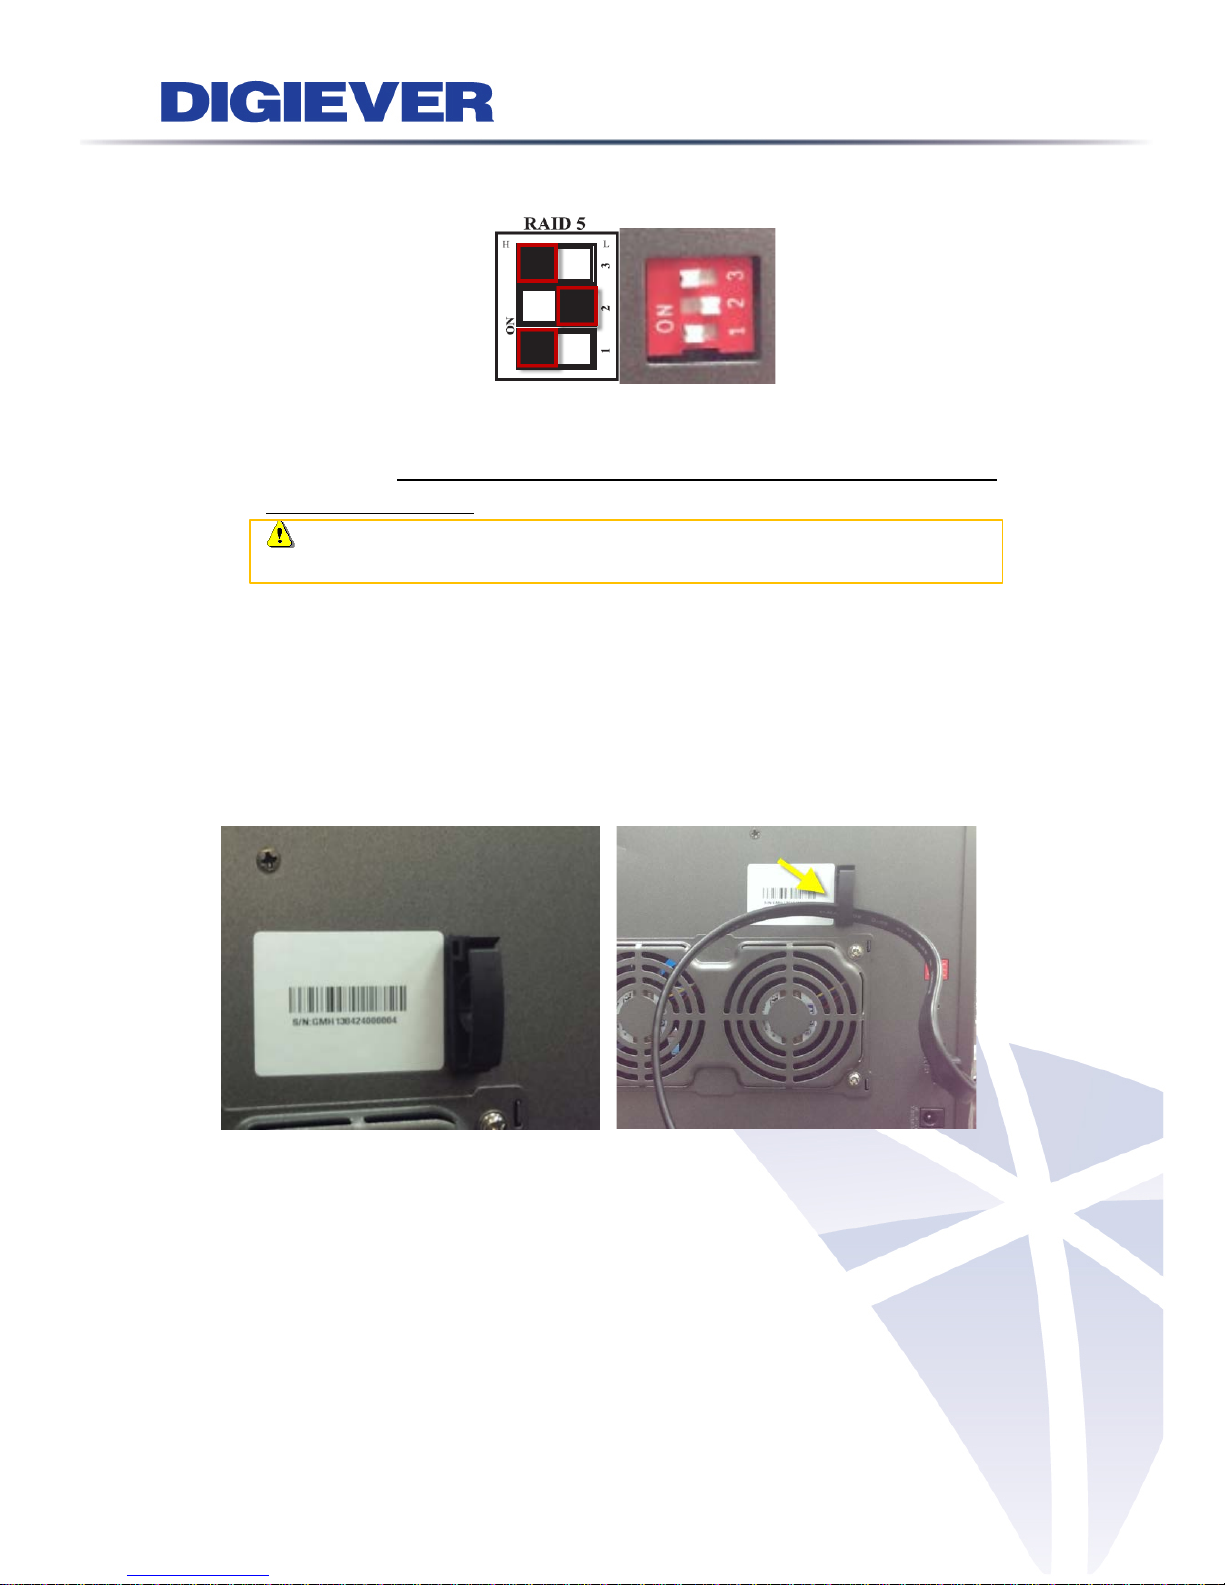
For instance, if you wo uld like to set up RAID5, the dip switch should be
High/Low/High as below.
6. Simultaneously press "reset butt on” and “power button” until there is a
beep sound. When DIGIARRAY pow ers on with a beep sound, the RAID
configuration is done.
Note: User can use t he paper clip in t he ac c es sory box to press the
reset button.
Connect DIGIA RRAY to DIGIEVER NVR
Please connect your DIGIARRAY to a DIGIEVER NVR via eS ATA cable.
DIGIARRAY is equi pped with an eSATA hook to fix eSATA cable in order to
prevent loosing eSATA cable.
2
Page 4

LED Indicators Status
LED indicator helps users to check HDD status and eSATA connection status.
LED on Front Panel
LED
LED Color & Status
Indicate
eS ATA
Off No data transmission
Orange blinking The eSATA device is being accessed
HDD1
HDD2
HDD3
HDD4
Off Hard disk drive device is not established
Green Hard disk drive is ready to be accessed
Green blinking Hard disk drive data is being accessed
Red Hard disk drive failure and need to be removed
3
Page 5

Add New Volume into Storage Volume Pool
Please mak e s ur e NVR and DIGIARRAY are power on with a complete RAID
type, bef ore you start t o c onnec t DIGIARRAY to NVR.
1. Go to Disk Management page on NVR configuration page:
Choose the volume which one you want to add into the v olume pool and
press “Format” button.
2. Check the information of storage volume p ool from Storage Volume
Management page.
Volume of DIGIA RRA Y will be added into NVR’s volume pool when
DIGIARRAY is completely formatted.
4
Page 6

Change the RAID Type of DIGIARRAY
Please follo w below steps to modify the RAID t ype of DIGIARRAY that has
been added to the NV R.
1. Remove DIGIARRAY from NVR
Remove the volume of DIGIARRAY from NVR Storage Volume Po ol.
Unplug the eSATA cable from NVR.
Power off the DIGIARRAY by pressing its power button until the there
is a “beep” sound.
2. Clear RAID Type
Adjust DIGIARRAY’s RAID type to “Cl ear RAID” on
the rear panel of D IGIARRAY.
Simultaneously press “reset button” and “power button” until there
is a beep sound. When DIGIARRAY powers on with a beep s ound,
the RAID config ur ation is done.
Press the power button to power off DIGIARRAY
3. Change RAID Type
Adjust dip switch to configure RAID type.
Simultaneously press “reset button” and
“power button” until there is a beep sound.
When DIGIARRAY powers on with a beep
sound, the RAID configuration is done.
DIGIARRAY now is r eady to connect to NV R.
Note: Before change DIGIARRAY’s RAID type, please make sure
1. eSATA cable is unplugged to DIGIEVER NVR
2. DIGIARRAY has been removed from NVR’s storage volume pool.
5
Page 7

Appendix:
I. Package Contents
DIGIARRAY DA-4000E
Power adapter
Screw bag
eSATA cable
CD-ROM
Paper clip
6
Page 8

II. Hardware Description
Front View Rear View
1. Power button
2. LED indicators: HDD x 4
3. LED indicators: eSATA
4. eSATA hook
5. Dip Switch
6. Reset button
7. eSATA x 1
8. Power connector
Note: DIGIARRAY has a built-in buzzer which will start alarm when
DIGIARRAY encounters hardware error. For instance, if RAID failures, the
buzzer will alarm and LED indicator will turn to red light.
(There is a beep sound when users power on DIGIARRAY and set RAID
type.)
7
Page 9

III. RAID Introducti on
The introduction of disk configuration is in the below table.
Linear
(JBOD)
Linear is a collection of hard disk drives and does not provide any
RAID protection. The data are written to the disks continuously.
RAID 0
RAID0 is one larger volume with 2 or more hard disk drives. The
data are written to the hard disk drives without any parity
information. The total storage capacity is the sum of all hard disk
drives.
RAID 1 2 hard disk drives are required to create a RAID1 array. RAID1 can
provide disk mirroring by duplicating the data between two hard
disk drives.
RAID 5
A minimum of 3 hard disk drives are required to create RAID5. The
data are striped in all hard drives in a RAID5 array and the parity
information is stored in each drive. If a hard disk drive fails, the
array enters degraded mode. The data can be rebuilt from other
member drives after installing a new drive to replace the failed
one.
RAID 10 Data are written in stripes across primary disks that have been
mirrored to the secondary disks. A typical RAID 10 configuration
consists of four drives, two for striping and two for mirroring
8
 Loading...