

Quick Start
GUIDE
What’s in the Box?
•broadband modem
•Power adapter
•Ethernet cable
•Quick Start Guide
•complete user manual cd
Option 2 - Connecting the broadband modem to a computer wirelessly
Please note that your broadband modem does not send out a WiFi signal when
you first turn it on.
To turn on the WiFi signal, follow these simple steps:
• Connect your computer to the Ethernet port of the broadband modem with
an Ethernet cable (See Figure 5)
• Launch your web browser
• Enter the URL “192.168.1.1” in the address field
• Log into the Web Self Care Portal by entering “user” in the user name field
and “user” in the password field then click “Log in”
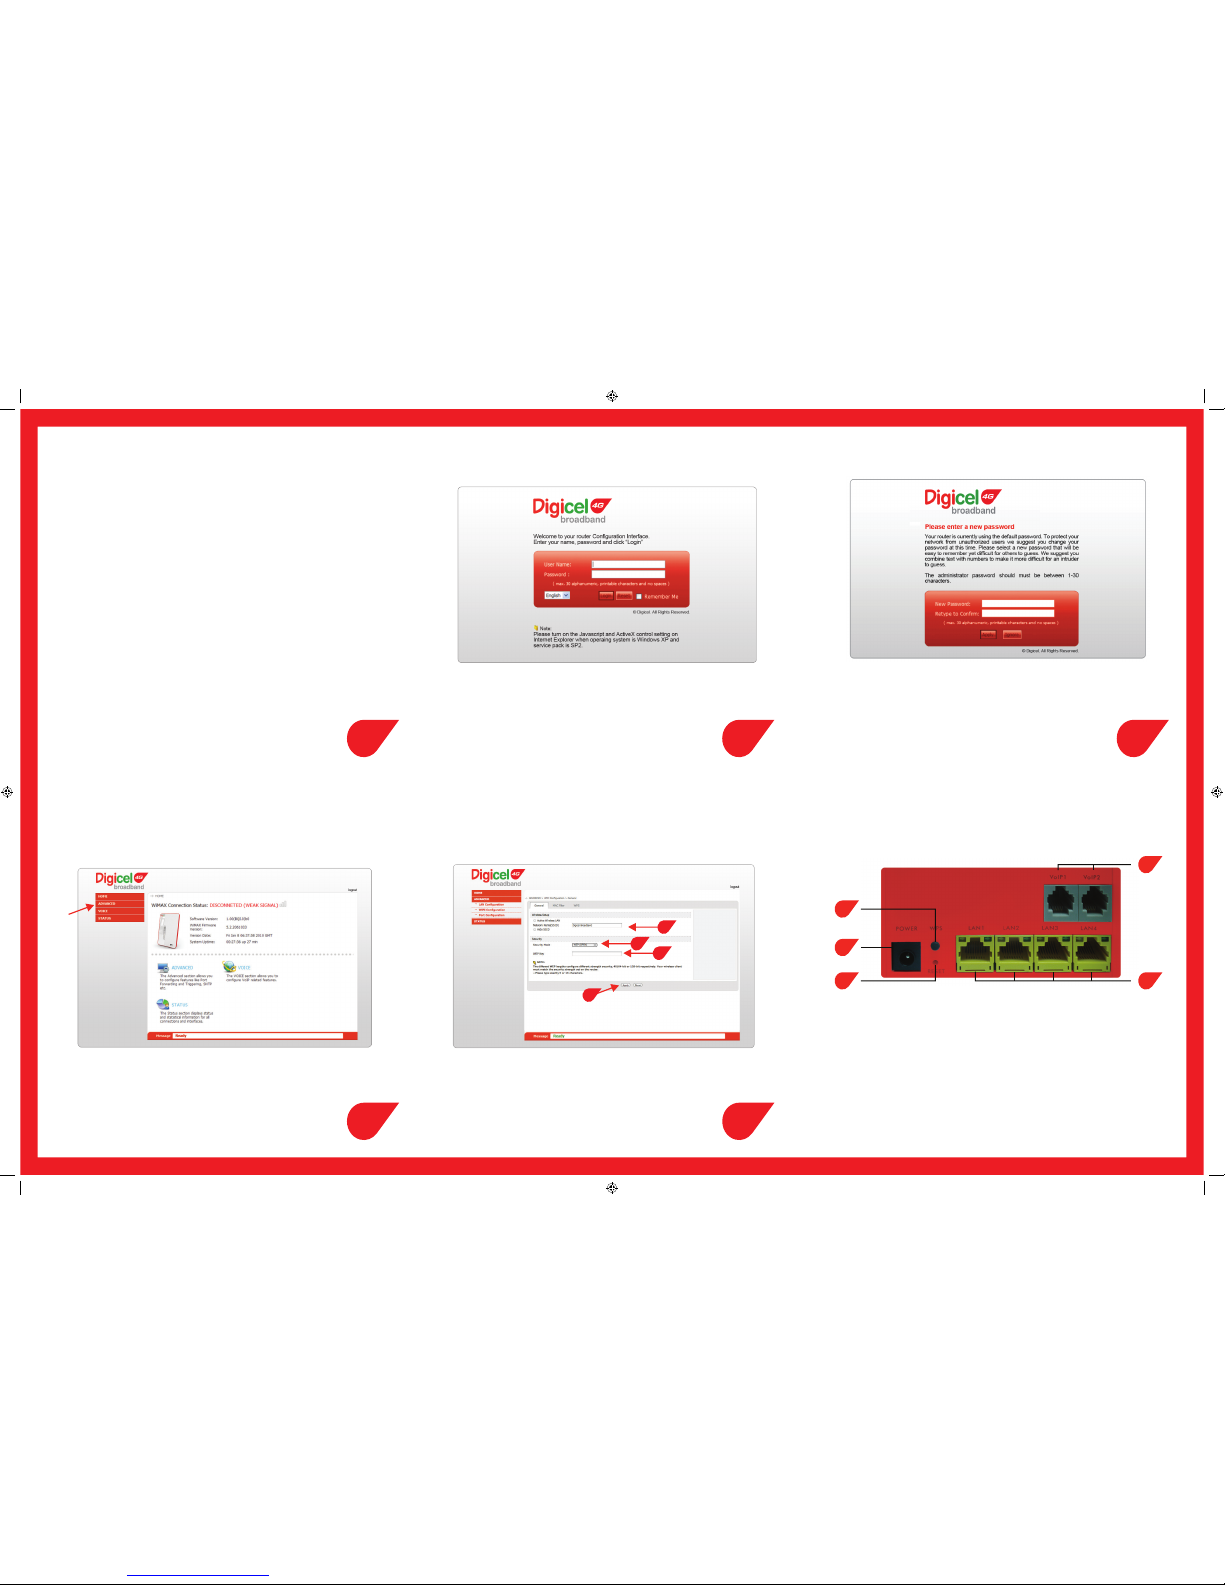
Please see Figure 1 for an example of the login screen.
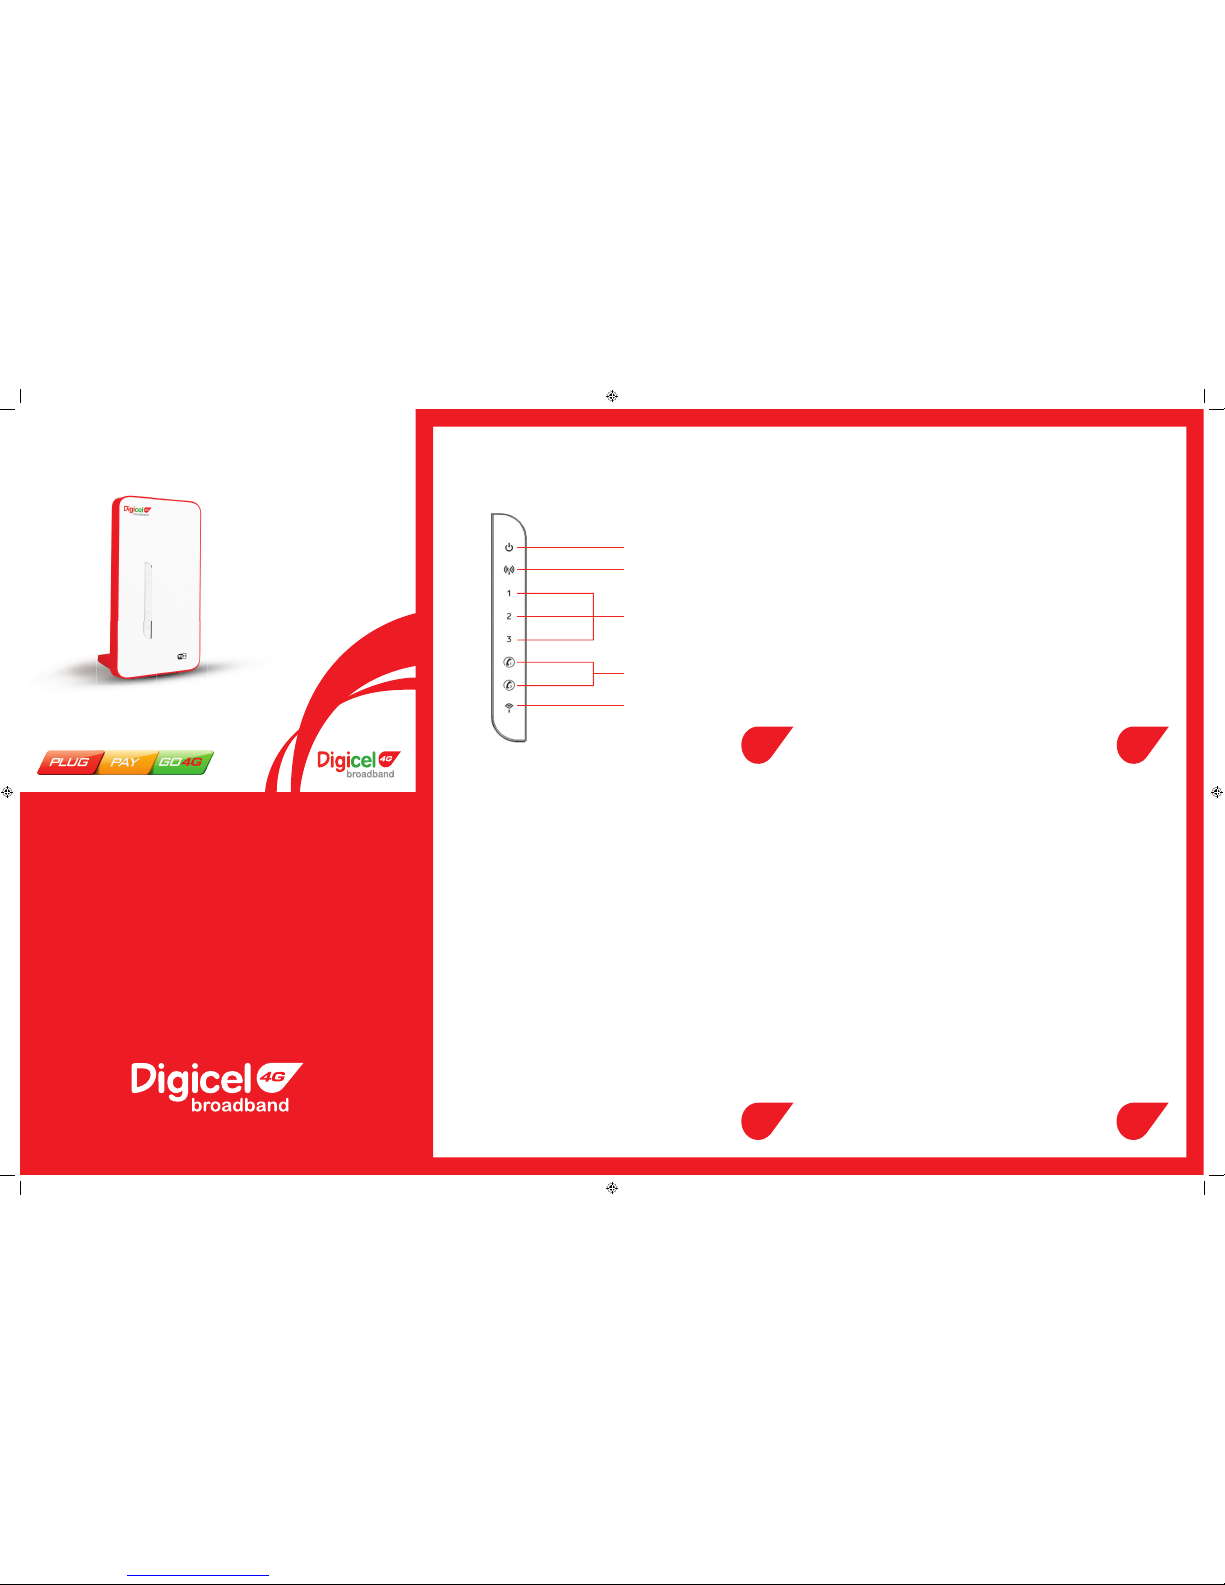
The first step to setting up your broadband modem is getting to know
what the icons mean.
The following figure shows the icons on your Digicel 4G Broadband modem:
Broadband Modem for
wireless internet access
Power
WiMAX Connection
Signal Strength Indicators
Voice Lines 1&2
Wireless Network
(WiFi)
Option 1- How to connect your broadband modem to your computer with
an Ethernet cable
1. Connect your computer to the Ethernet port of the broadband modem with
an Ethernet cable (See Figure 5).
2. Power on your computer.
3. Connect the power adapter to the broadband modem and the other end to the
wall outlet. (See Figure 5).
4. Wait a few minutes for the broadband modem to be initialised.
5. When the WiMAX connection and the signal strength icons are both lit, the
broadband modem is now operational.
Note: You can connect four computers simultaneously using Ethernet cables.
1 2
3
The Figure 2 screen will display if you have not yet changed your password.
We recommend that you change the default password. To change the
password, enter a new password, retype it to confirm and click “Apply”.
Alternatively click “Ignore” to go straight to the main menu if you do not
want to change the password now.
After you have clicked on “Ignore” or entered a new password, follow the steps
below to enable WiFi:
• Click on “Advanced” (See Figure 3).
• Click on “WiFi Configuration”.
• Click on “General”.
• To enable the WiFi Signal, check the “Active Wireless LAN” box (See Figure 4).
• To change the name of the WiFi signal, enter a new name in the “Network
Name (SSID)” box (See Figure 4).
• To change the Security Mode, select the first or second option in the drop
down menu (See Figure 4). Once you have selected a security mode type in
a password in the space below. Remember this password as you will need to
enter it in any device that you want to be connected wirelessly to the modem.
• Click ‘”Apply” to save all settings (See Figure 4).
After you have applied the settings, the WiFi signal on your modem will be
enabled. To connect using this new WiFi signal, search and select your newly
enabled connection.
Note: You can connect four computers simultaneously using WiFi. Digcel 4G Broadband
recommends that you secure your WiFi signal so that unauthorised persons do not connect to it.
Unauthorised connections may result in slower connection speeds for authorised persons. Please
consult the broadband modem manual on how to choose your wireless security mode.
4
Now it’s time to surf the Internet!
After you’ve connected your modem with the Ethernet cable or wirelessly it’s
time to open your web browser and complete registration.
If you’re a postpaid customer, after registering on Web Self Care you can instantly
start surfing the Internet. Prepaid customers must first register, pick a prepaid plan
then pay for it on Web Self Care before being able to browse. After connecting your
broadband modem, open a browser and Web Self Care will automatically open or
enter http://selfcare.digicelbroadband.com into the address field of the browser.
If you’re a prepaid customer, after registration and/or paying for your prepaid
package you are ready to go online!
Select the button on Web Self Care for new users and follow the instructions to
create a username, password and add other information.
The Web Self Care Portal can also be used to:
• View and update your user details
• Change your plan at the end of a period
• Top-up your account with a prepaid voucher
• Purchase and manage additional services
Figure 1
Figure 2
Figure 3 Figure 4 Figure 5
4
2
3
1
5
1. Power input:
Plug the power adapter into this port to supply power to the broadband modem.
2. Phone line outputs 1 & 2: Plug a standard line coming from your telephone
into one of these ports to use the Digicel 4G Broadband VoIP service (if available).
(Only available if you have registered for this service)
3. LAN outputs 1, 2, 3 & 4: Plug an Ethernet cable into one of these connections and the other
end into your device to connect to the Internet with wires instead of wirelessly.
4. WPS button: WPS Push Button Configuration (PBC) is started by pressing a
button on each WPS-enabled device, allowing them to connect automatically without having
to enter any information.
5. Reset button:
This button is used to reset the broadband modem to its factory default settings.
1. Change WiFi Signal name here to something you’d like
2. Choose Security Mode here. Choose “WEP” or “WPA-PSK”
3. Type a password for WiFi signal here and keep it safe for future
reference
4. Click here to save settings
65
8
7
9
1
2
3
4
Click here to
enter WiFi
configuration
menu
 Loading...