

Welcome to your Digi product
Get started: This guide helps you with initial product setup. Need more? Find additional
Quick Start Guide
TransPort® WR11 XT
Documentation Feedback: To provide feedback on this documentation, send your comments to techcomm@digi.com.
product support at www.digi.com/support/TransPortWR11XT. Or connect to the online
documentation by scanning this code:
Digi Technical Support: Digi offers multiple support plans to help you get the most out of your
product. For information on Technical Support plans and pricing, contact us at 877.912.3444 or
visit www.digi.com/support.
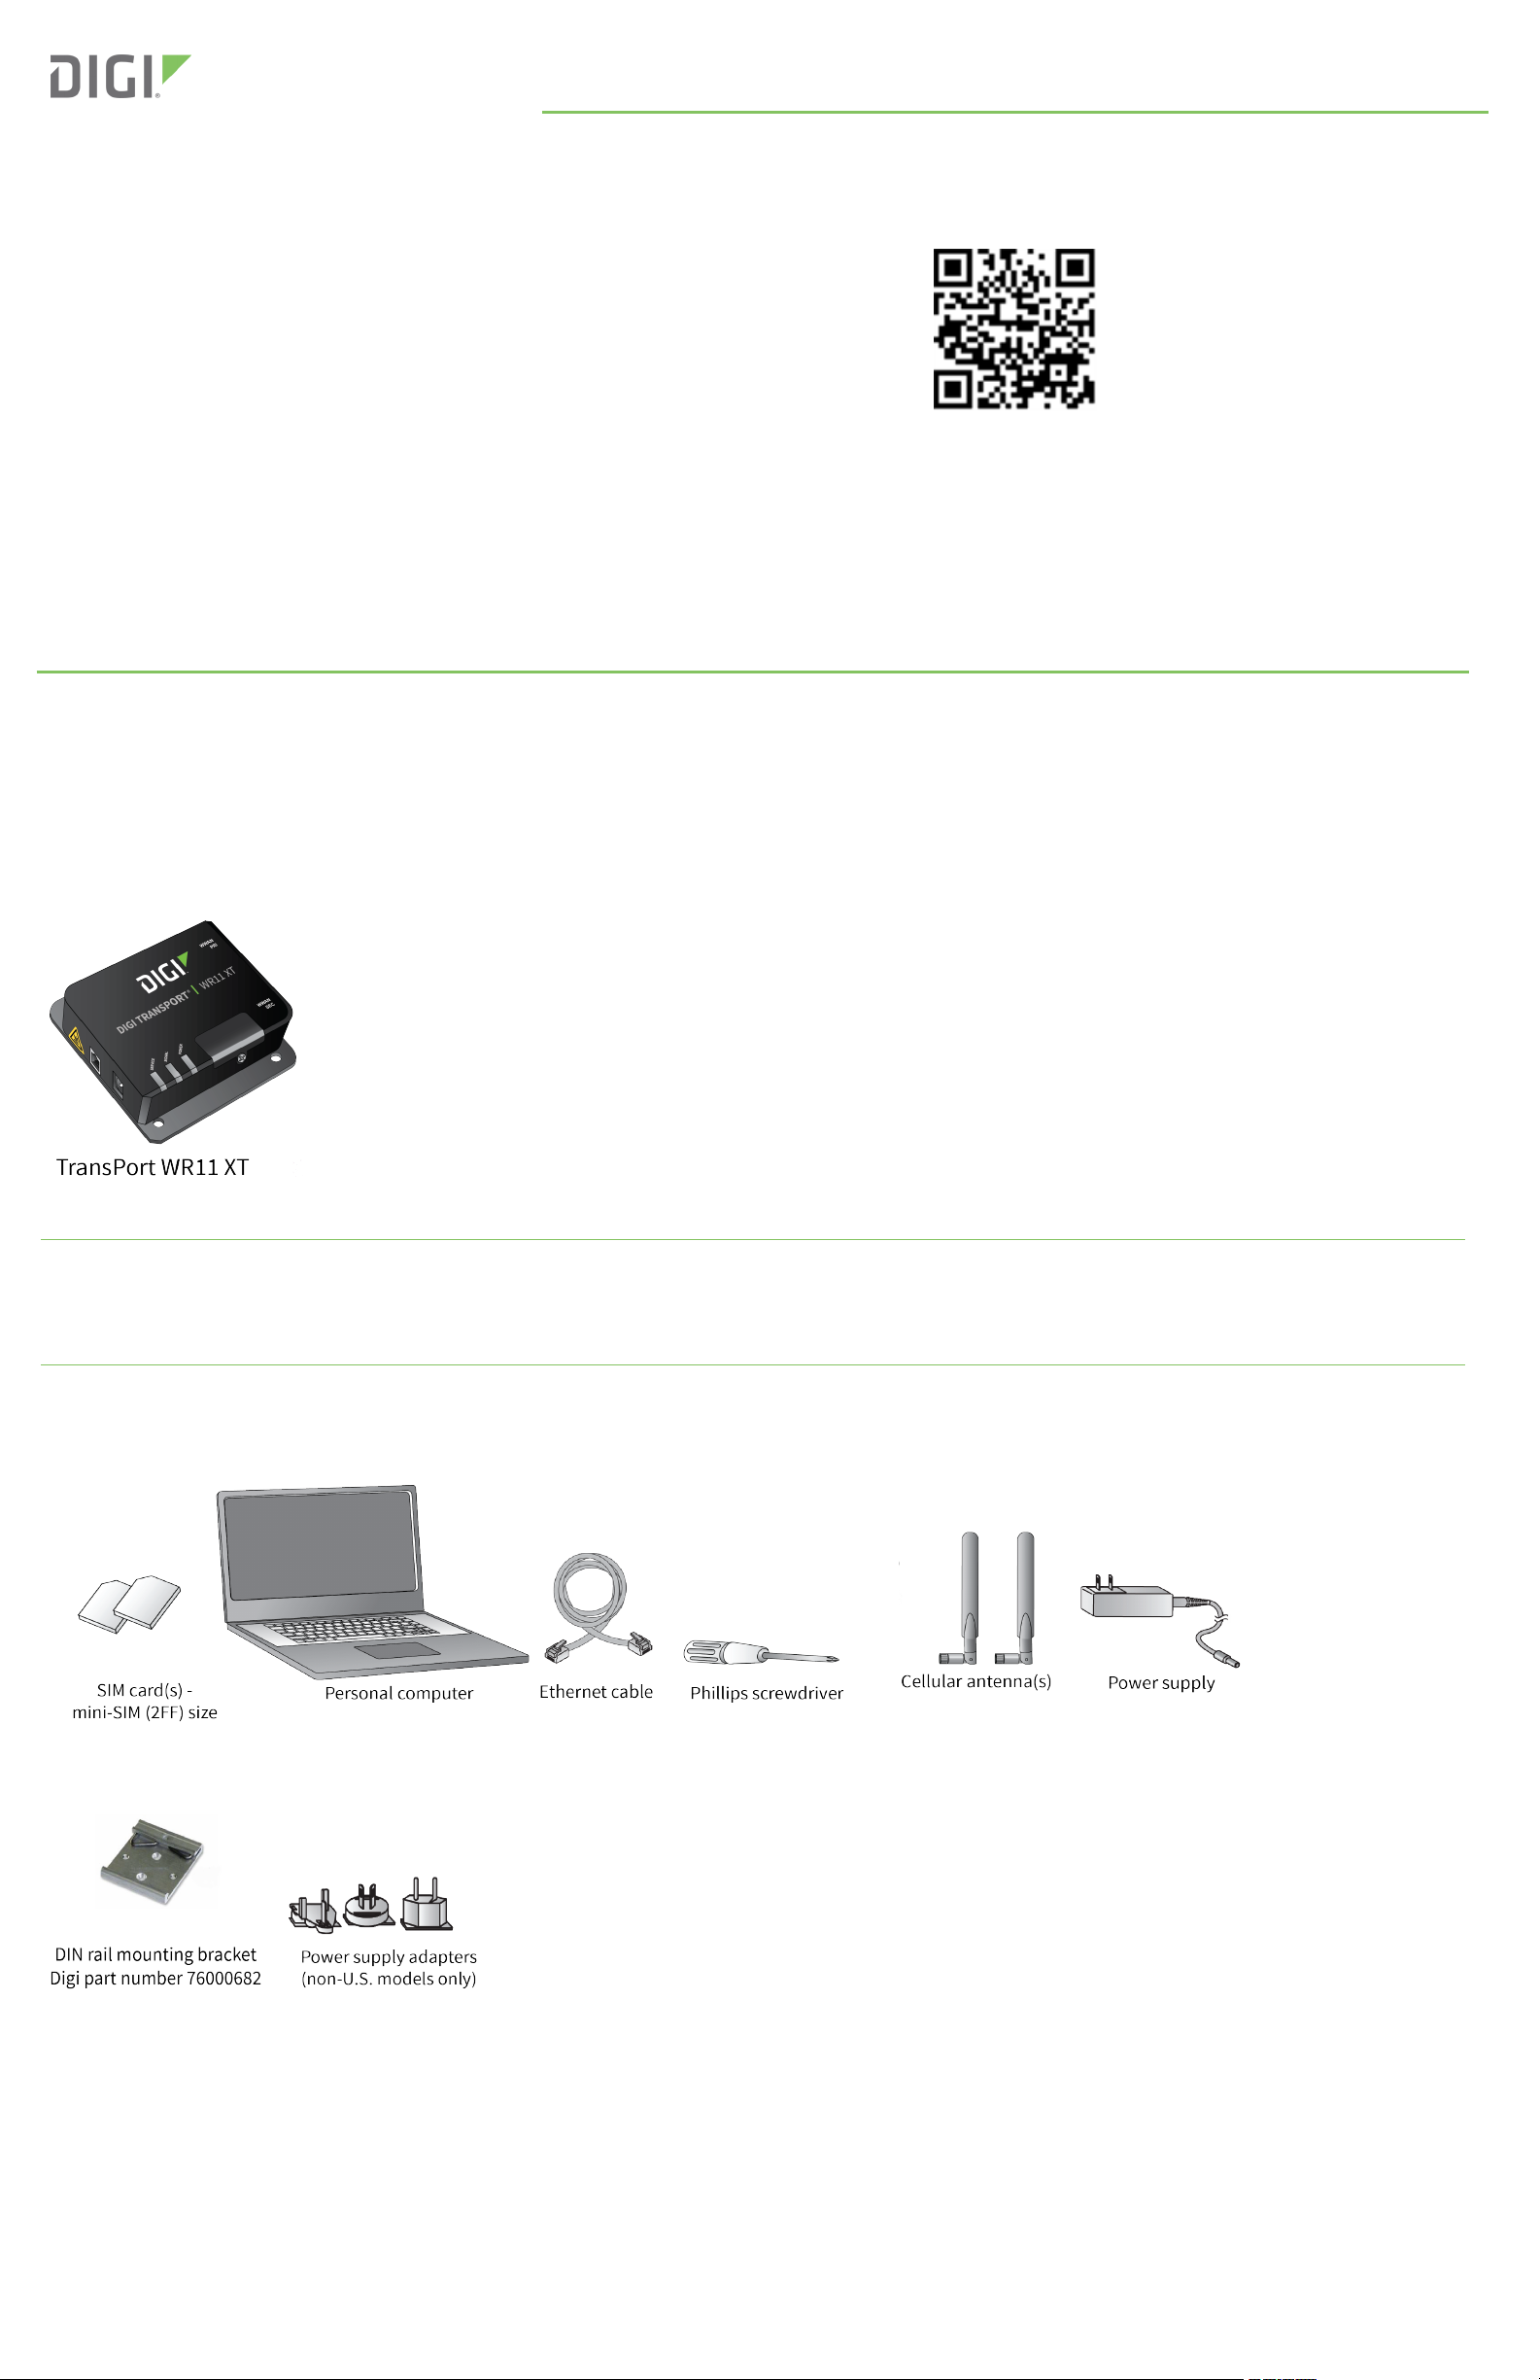
1 Verify your components
Some models include some additional equipment. For details about the accessories that ship with your product and for a list of available
accessories that can be purchased separately, go to www.digi.com/support/TransPortWR11XT. Click on the Part Numbers and Accessories link
and then find your specific part number.
Contact a preferred carrier or the distributor for your device to inquire about cellular service options.
Included equipment
Note A loose label sticker that includes the unique device password is included in the box. Retain this label sticker with your hardware records.
This default password will be needed if the device is factory reset and you want to access the web UI on the device or register the device with
Digi Remote Manager. If the device was already registered with Remote Manager at the time of the factory reset, you do not need the unique
password to access the device in Remote Manager.
Required additional equipment
Optional equipment
© 2019 Digi International Inc.
Digi, Digi International, and the Digi logo are trademarks or registered trademarks in the United States and other countries worldwide. All other trademarks mentioned in this
document are the property of their respective owners.
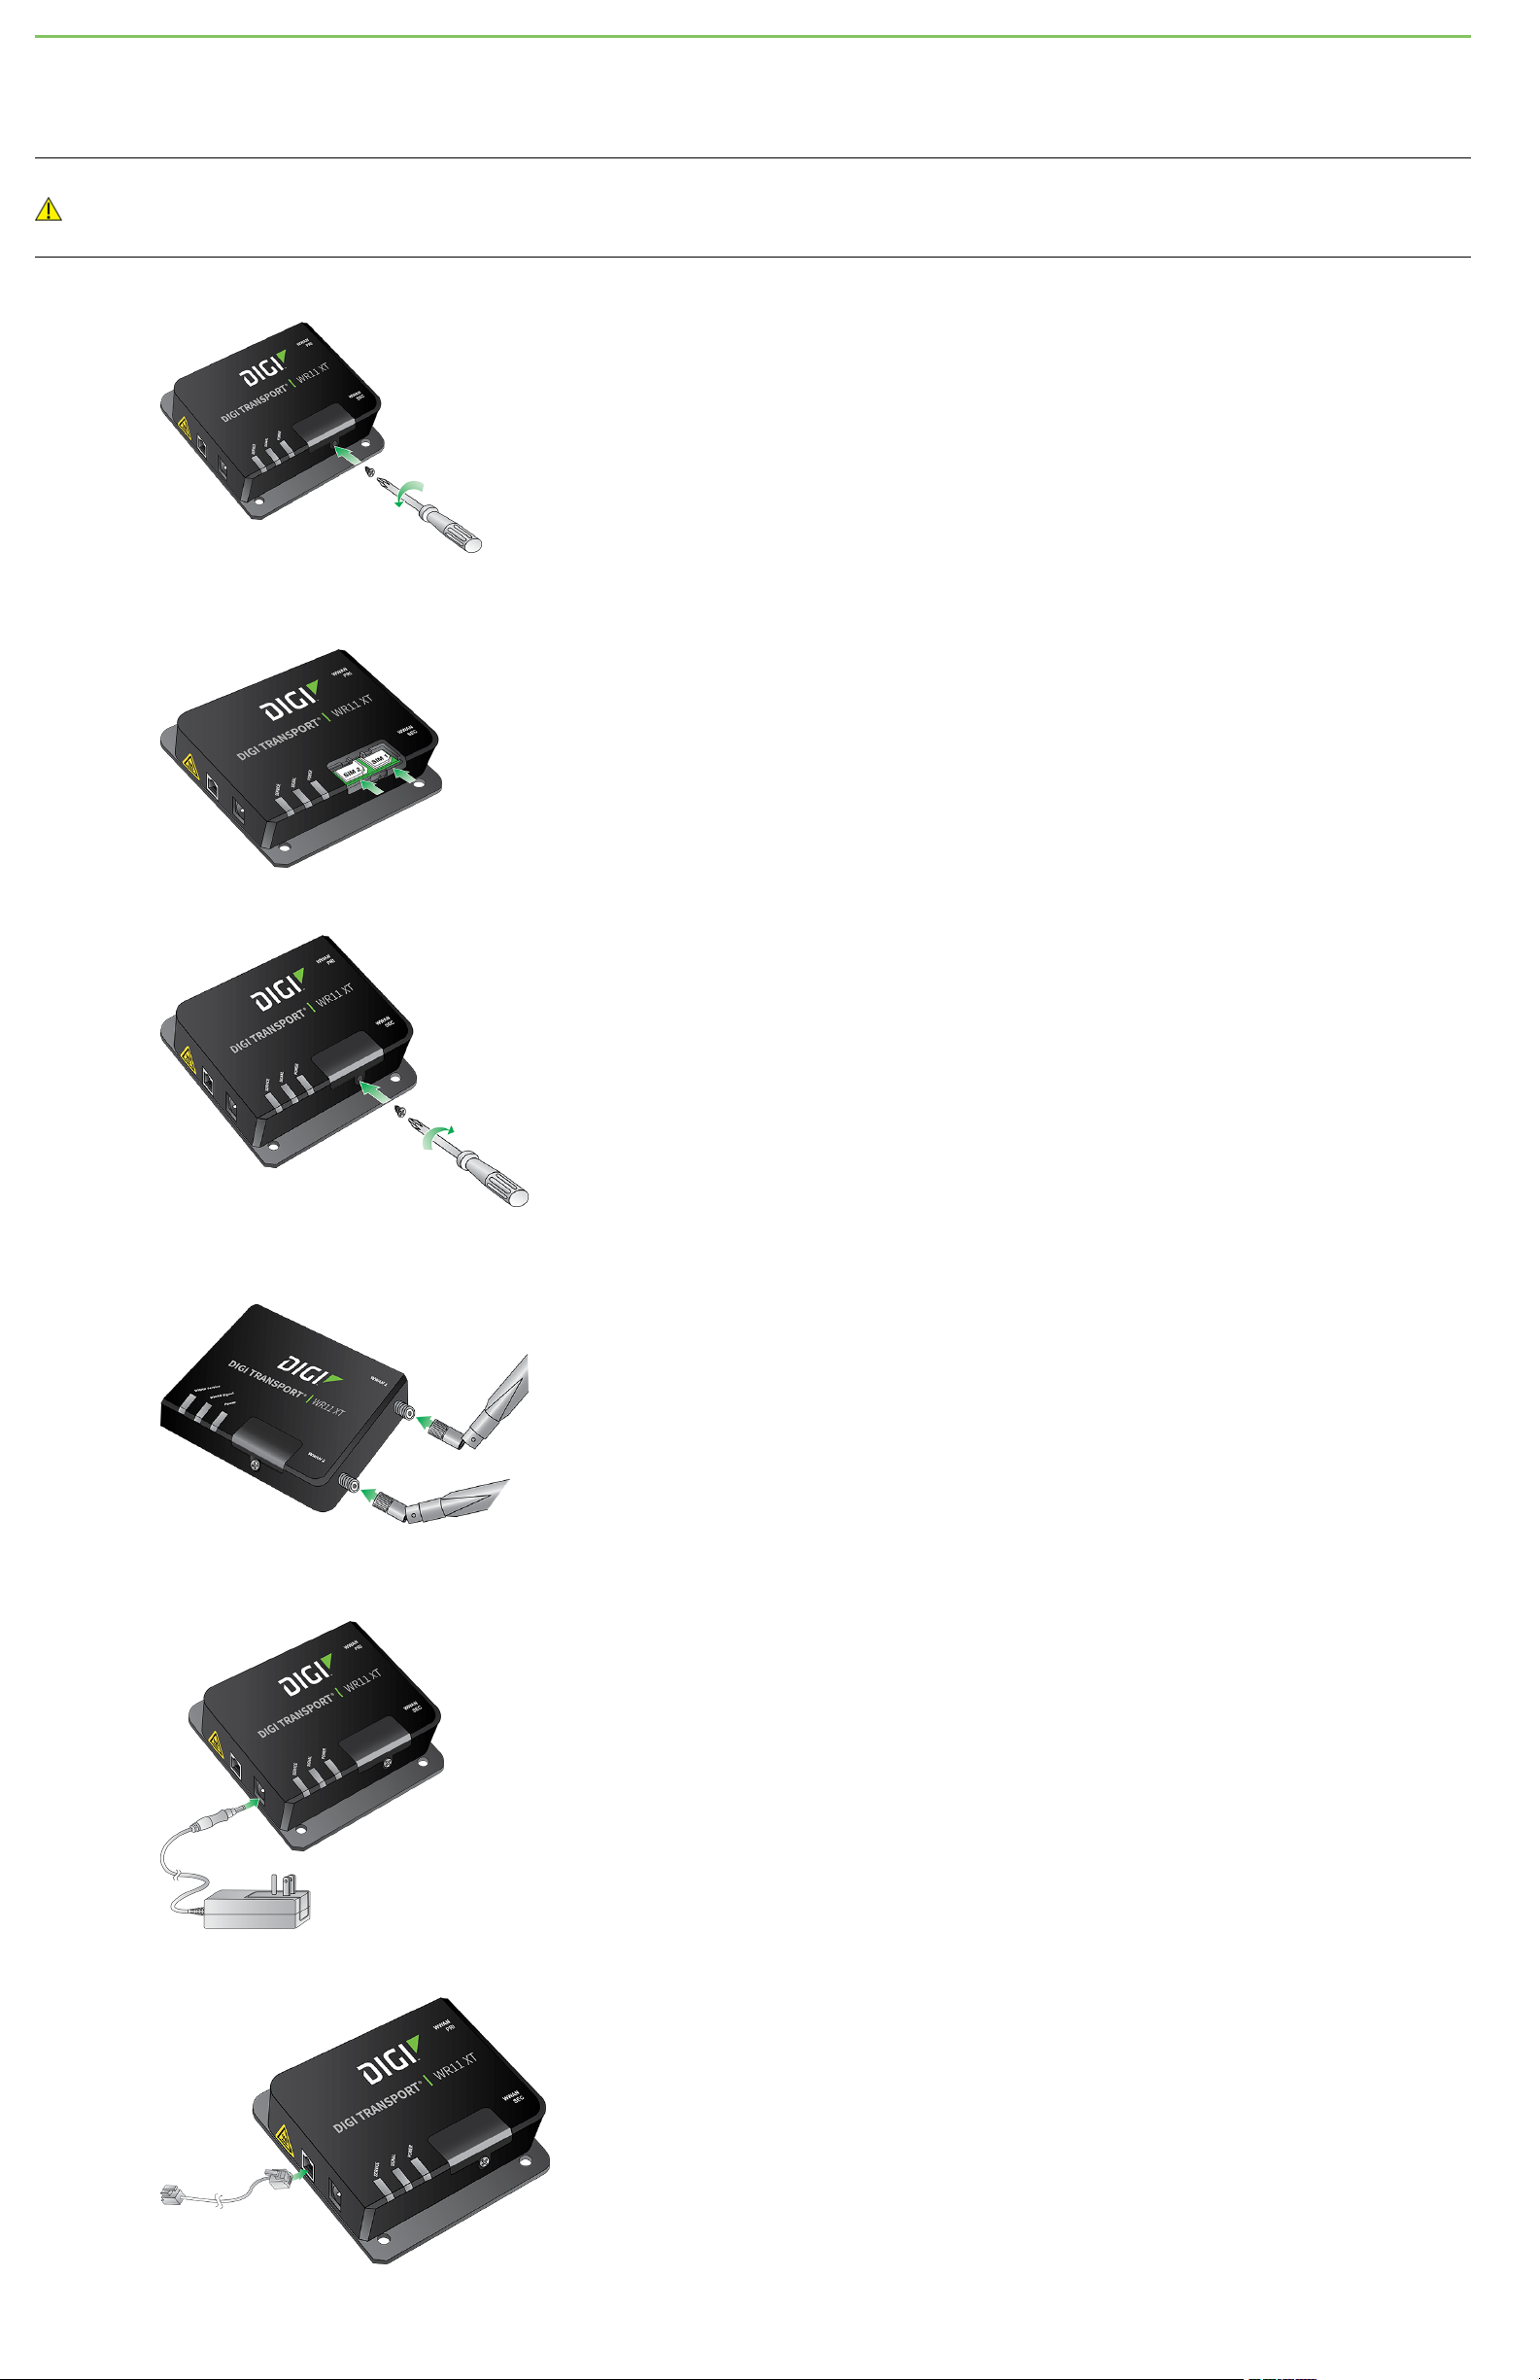
2 Connect the hardware
Position the Digi TransPort WR11 on a flat, level surface in a location with adequate ventilation. The unit is designed for indoor use. Do not
expose the unit to extreme heat or cold, strong magnetic fields, or liquids.
Caution Restricted Access Location: Because of the hot metal surface of the enclosure, installations with operating temperatures greater
than 122F (50C) must be limited to Restricted Access Locations accessible only to trained service personnel.
a. Using a screwdriver, remove the SIM slot cover.
b. Insert the SIM card(s) as shown, with the notch facing the bottom-right corner of the device. If you are using only one SIM card, insert it in
the SIM 1 slot.
c. Replace the SIM slot cover.
d. Connect the cellular antenna to the WWAN PRIconnector on the unit. If the unit is equipped with a secondary cellular antenna connector,
connect it to the WWAN SEC connector.
e. Connect the plug end of the 5-volt power supply to the power connector on the unit, and plug the other end into a wall outlet.
Alternatively, you can remove the wall plug cover and use the IEC 60320-C6 connector with an AC cord of the same connector type.
f. Connect one end of the Ethernet cable to the Ethernet port on the unit and the other end to an Ethernet port on a PC.

3 Get started with the Digi mobile app
Take advantage of the Digi Remote Manager subscription bundled with your product model purchase.
Use the Digi Remote Manager mobile app to quickly set up your product model.
Here's how:
a. Download the Digi Remote Manager mobile app from the App Store (iPhone) or Google Play (Android).
b. Click Log in or Sign Up and then click Sign up to create a new account.
c. You'll receive an email with login instructions.
d. From the Digi Remote Manager mobile app, click Log in and log into your new account.
e. From the menu, select Install a device with a QR or bar code and scan the installation QR code on the label.
f. Follow the prompts to complete your product model registration.
4 Run the Getting Started Wizard
If your PC is configured to automatically get an IP address, it can obtain the IP address from the device. Otherwise, make sure your PC can
connect to the network 192.168.1.0 (255.255.255.0).
1. Enter 192.168.1.1 into the address bar of the web browser. The first page of the Getting Started Wizard appears.
2. Enter login credentials:
a. Enter 192.168.1.1 into the address bar of the web browser. The first page of the Getting Started Wizard appears.
b. Enter login credentials:
n User name: admin
n Password: The default password is printed on the device label.
n If a device that was manufactured prior to release 8.0.0.3 has been upgraded to the current release:
l If the device was upgraded using the Web UI Update Firmware, the router retains the existing default user accounts.
For example, after upgrading from release 7.1.2.2 to the current release, the default user account name remains
username, and the default password is password.
o
After upgrading using the Web UI Update Firmware, if you then factory reset the device, the user name will be admin,
and the default password will be default.
l If the device was upgraded using Flashwriter, the user name is admin, and the default password is default.
n If a device that was manufactured with release 8.x is downgraded to a release prior to 8.0.0.3:
l If the device was downgraded using the Web UI Update Firmware, the user name is admin, and the default password is
default.
l If the device was downgraded using Flashwriter, the admin account is longer be present. Instead, the default account
user name is username, and the default password is password.
o
After downgrading with Flashwriter, if you then upgrade to 8.0.0.3 or greater using the Web UI Update Firmware, the
router will retain the username/password account and not include an admin account. If you then factory default the
router, the admin account with the preprogrammed unique password will return.
o
After downgrading with Flashwriter, if you then upgrade to 8.0.0.3 or greater using Flashwriter, the admin account
with the preprogrammed unique password will again be present and the username/password account will be
removed.
c. To run the wizard, click Get Started or click Skip Wizard to manually configure the device.
d. The Getting Started Wizard prompts you to enter your Digi Remote Manager username and password. If you do not already have
a Digi Remote Manager account, go to https://remotemanager.digi.com to sign up for a free trial.
3. To run the wizard, click Get Started or click Skip Wizard to manually configure the device.
4. The Getting Started Wizard prompts you to enter your Digi Remote Manager username and password. If you do not already have a Digi
Remote Manager account, go to https://remotemanager.digi.com to sign up for a free trial.

5 View the TransPort LEDs and startup states
n Service LED: Indicates the presence and level of cellular service running on the device.
Off: No cellular service
1 blink: GPRS mode
2 blinks: EDGE mode
3 blinks: UMTS mode
4 blinks: HSDPA mode
5 blinks: HSUPA mode
6 blinks: LTE mode
n Signal LED: Indicates the strength of the cellular signal.
Off: Poor or no signal. Place the device in a location where it gets a better signal.
Amber: Fair
Green: Good
n Power LED:
Off: No power
Green:TransPort device is powered
After the Getting Started Wizard completes, the TransPort web interface appears. For additional configuration, use the web interface and refer
to the Digi TransPort User Guide and Application Notes on the Digi website at www.digi.com/support/TransPortWR11.
6 Update device and modem firmware
Digi strongly recommends updating the router’s device and modem firmware before first use. This ensures that the router has the latest device
security and cellular network patches applied. To download the latest firmware, go to https://www.digi.com/support > Firmware Updates, select
the model and follow the steps outlined in TransPort Firmware Update Instructions.
 Loading...