

Page 1
Quick Start Guide
1
Welcome
Email
You will have received an email containing your USERNAME and PASSWORD, if you have not
please contact your customer representative.
3 2
System Access
You can access the Honeycomb system by using the web-site or a mobile application installed
on your iPhone or Android device.
Web-site Access:
1) using your internet browser go to www.bnhoneycomb.com
2) Enter in your USERNAME and PASSWORD
3) You should now be on your company dashboard
iPhone Access:
Android Access:
1) On your iPhone or iPad go to the Apple iTunes App Store
2) Search for 'bluenica honeycomb'
3) Follow instructions to install on your device
(NOTE: a $0.99 download charge applies)
2) Enter in your USERNAME and PASSWORD
3) You should now be on your company dashboard
1) On your Android device go to the Google Play Store
2) Search for 'bluenica honeycomb'
3) Follow instructions to install on your device
2) Enter in your USERNAME and PASSWORD
3) You should now be on your company dashboard
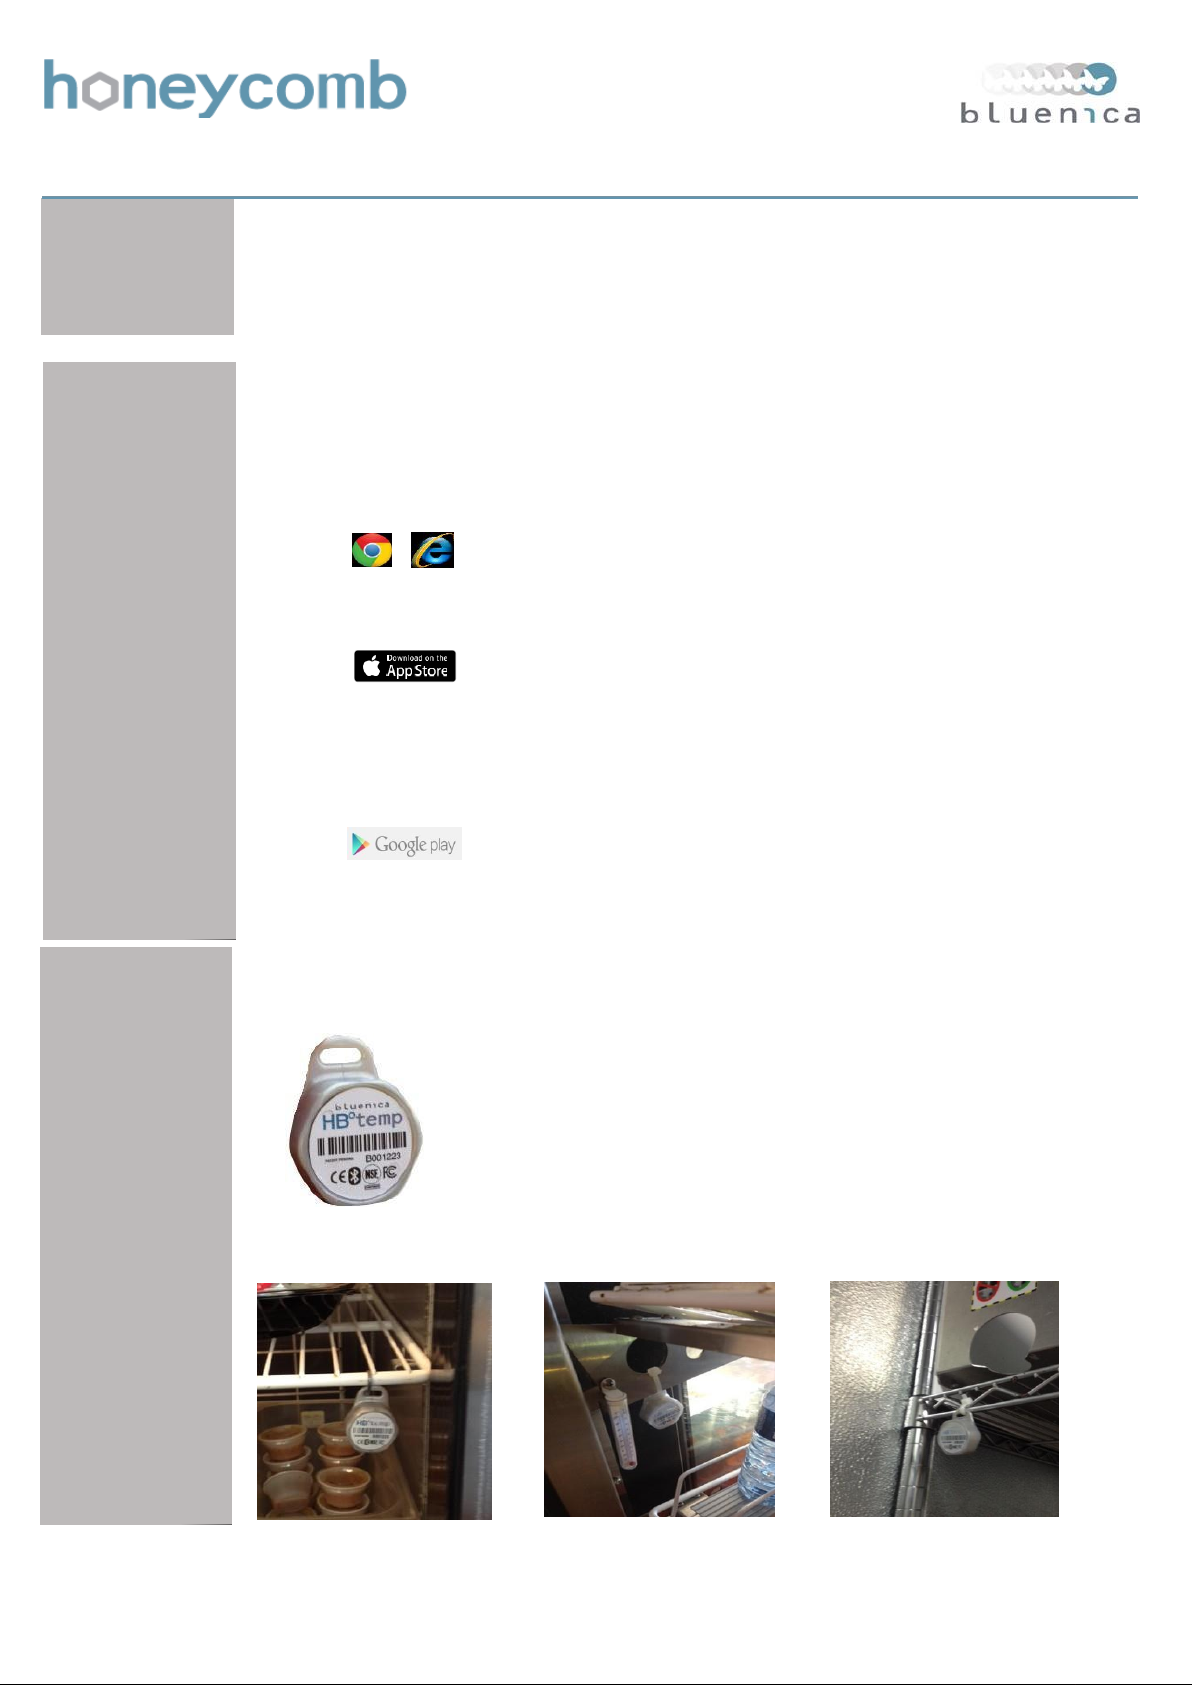
Sensor Installation
Sensor mounted on
fridge rack
The HBtemp sensors are designed to be mounted next to the existing
thermometers in your equipment. At the top of the HBtemp is a mounting tab
to allow for easy installation. The sensor should be mounted at the warmest
point in the equipment such as next to or above the equipment door.
Identify location to mount sensor, and mount near the front of the unit.
Zip tie sensor to location with tab facing up, trim excess zip tie.
Record serial number of sensor with name of equipment installed in.
Sensor mounted on
display case
Sensor mounted on
rack in Walk-In
Page 2
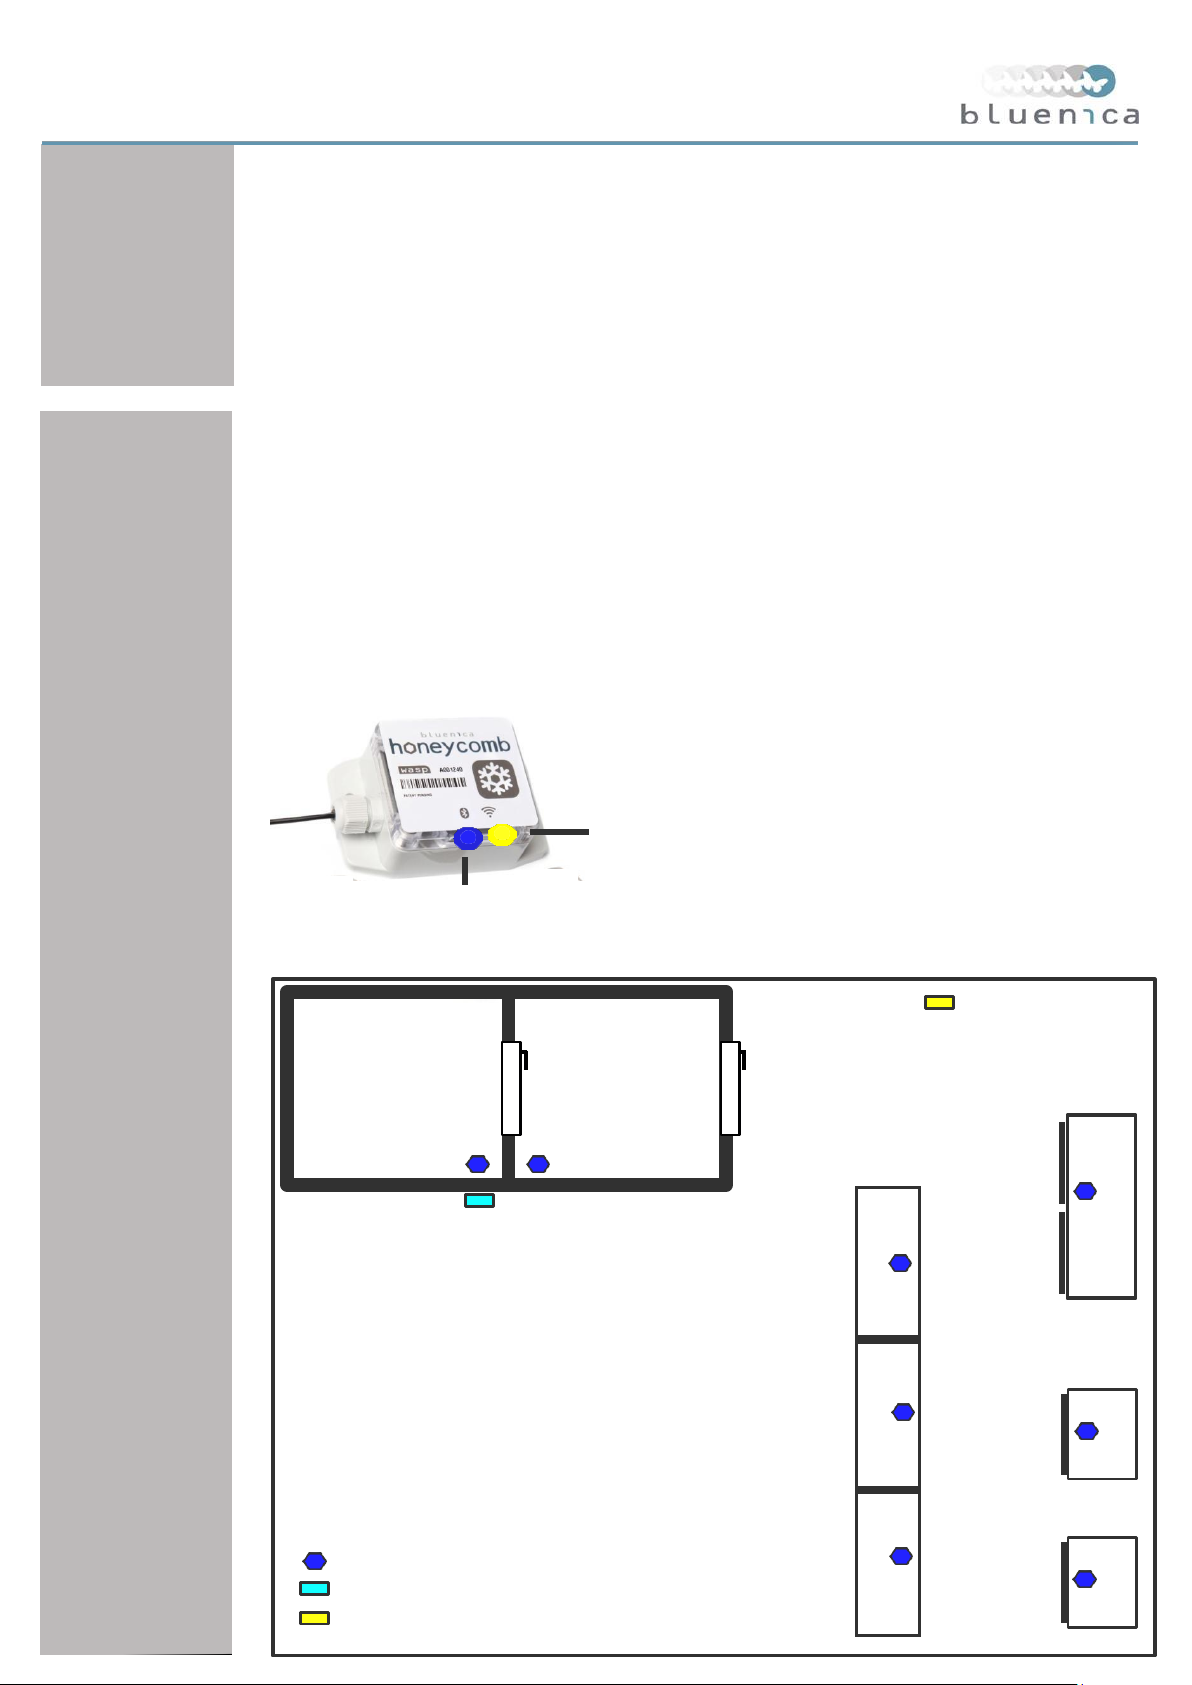
WALK-IN
FREEZER
Centrally located
Mounted high on wall
Power cable is secure
YELLOW WiFi
CONNECTION LED
BLUE POWER LED
WaSP
WALK-IN
COOLER
STAND-UP
FREEZER
HBRepeater
LINE
FRIDGE
TYPICAL KITCHEN
LAYOUT
GRILL
COOLER
FRYER
FRIDGE
LEGEND
STAND-UP
COOLER
FRYER
HBtemp Sensor
FREEZER
HBRepeater
Wireless Access Portal (WaSP)
4
WaSP Configuration
The Wireless Sensor Portal (WaSP) collects the wireless Bluetooth data from the HBtemp sensors
and transmits the temperature to the Internet every 5 minutes. In order to do this it first must be
configured to connect to your WiFi network. To do this you will need the following WiFi network
information: SSID and PASSWORD
The next step is to configure the WaSP from the mobile application. Please see WaSP Configuration
Guide for detailed instructions on setting the configuration based on your phone type.
5
WaSP Installation
In order for the HBtemp sensors to consistently report temperature data every ten minutes it is important
that the WaSP is centrally located in the kitchen so all the sensors will be in range. The standard
range of the sensors is 300 feet, but given the metal doors and thermal insulation of refrigeration
equipment the range will be reduced. In a typical kitchen the location of a wall outlet for power will likely
be a greater factor on the mounting of the WaSP then any other factor, we do recommend however
to be as centrally located as possible. When powered the WaSP has a BLUE power light that will be ON.
When the WaSP is connected to your WiFi the YELLOW light will be ON.
WaSP
WaSP Mounting Guidelines
Page 3

7
6
HBRepeater Installation
The thick insulated walls of a Walk-in unit can dampen the wireless signal from the
HBtemp sensor. If the sensor does not consistently report every 10 minutes to the mobile
application the signal may be too weak to reach the WaSP.
A HBRepeater can be mounted directly opposite the sensor on the outside wall of the
walk-in to boost the signal as shown:
In the case where two walk-ins are built beside each other a single HBRepeater can
be used to boost the signal from both HBtemp sensors. The diagram below shows
placement options for two different configurations of walk-ins.
Sensor Point Configuration
At this point your system should now be reporting temperature data. The last step is
to rename the sensor points in the web-site with name of the equipment that the
sensor was installed in. This is also where the temperature profile of the sensor point
is selected. Please see the Honeycomb Sensor Point Configuration Instruction sheet.
If you have any additional questions please do not hesitate to contact your customer
representative directly.
Page 4

Digi HBtemp and Bluenica HBtemp: Regulatory Information
RF Exposure Statement
In order to comply with RF exposure limits established in the ANSI C95.1 standards, the distance between the
antenna or antennas and the user should not be less than 20 cm.
FCC Certifications and Regulatory Information (USA only)
FCC Part 15 Class B
This device complies with part 15 of the FCC Rules. Operation is subject to the following two conditions:
(1) This device may not cause harmful interference, and
(2) This device must accept any interference received, including interference that may cause undesired operation.
Radio Frequency Interface (RFI) (FCC 15.105)
This device has been tested and found to comply with the limits for Class B digital devices pursuant to Part 15
Subpart B, of the FCC rules. These limits are designed to provide reasonable protection against harmful interference
in a residential environment. This equipment generates, uses, and can radiate radio frequency energy, and if not
installed and used in accordance with the i nstruction manual, may cause harmful interfer ence to radio
communications. However, there is no guarantee that interference will not occur in a particular installation. If this
equipment does cause harmful interference to radio or television reception, which can be determined by turning the
equipment off and on, the user is encouraged to try and correct the interference by one or more of the following
measures:
• Reorient or relocate the receiving antenna.
• Increase the separation between the equ i pment and receiver.
• Connect the equipment into an outlet on a circuit different from that to which the receiver is connected.
• Consult the dealer or an experienced radio/TV technician for help.
Modifications (FCC 15.21)
CAUTION: Changes or modifications to this equipment not expressly approved by Digi may void the user’s
authority to operate this equipment.
Industry Canada (IC) Certifications
This device complies with Industry Canada’s licence-exempt RSSs. Operation is subject to the following two
conditions:
(1) This device may not cause interference; and
(2) This device must accept any interference, including interference that may cause und esired operation of the
device.
Le présent appareil est conforme aux CNR d'Industrie Canada applicables aux appareils radio exempts de
licence. L'exploitation est autorisée aux deux conditions suivantes :
(1) l'appareil ne doit pas produire de brouillage, et
(2) l'utilisateur de l'appareil doit accepter tout brouillage radioélectrique subi, même si le brouillage est
susceptible d'en compromettre le fonctionnement.
90001944_B
 Loading...