

Page 1
0099001978-01
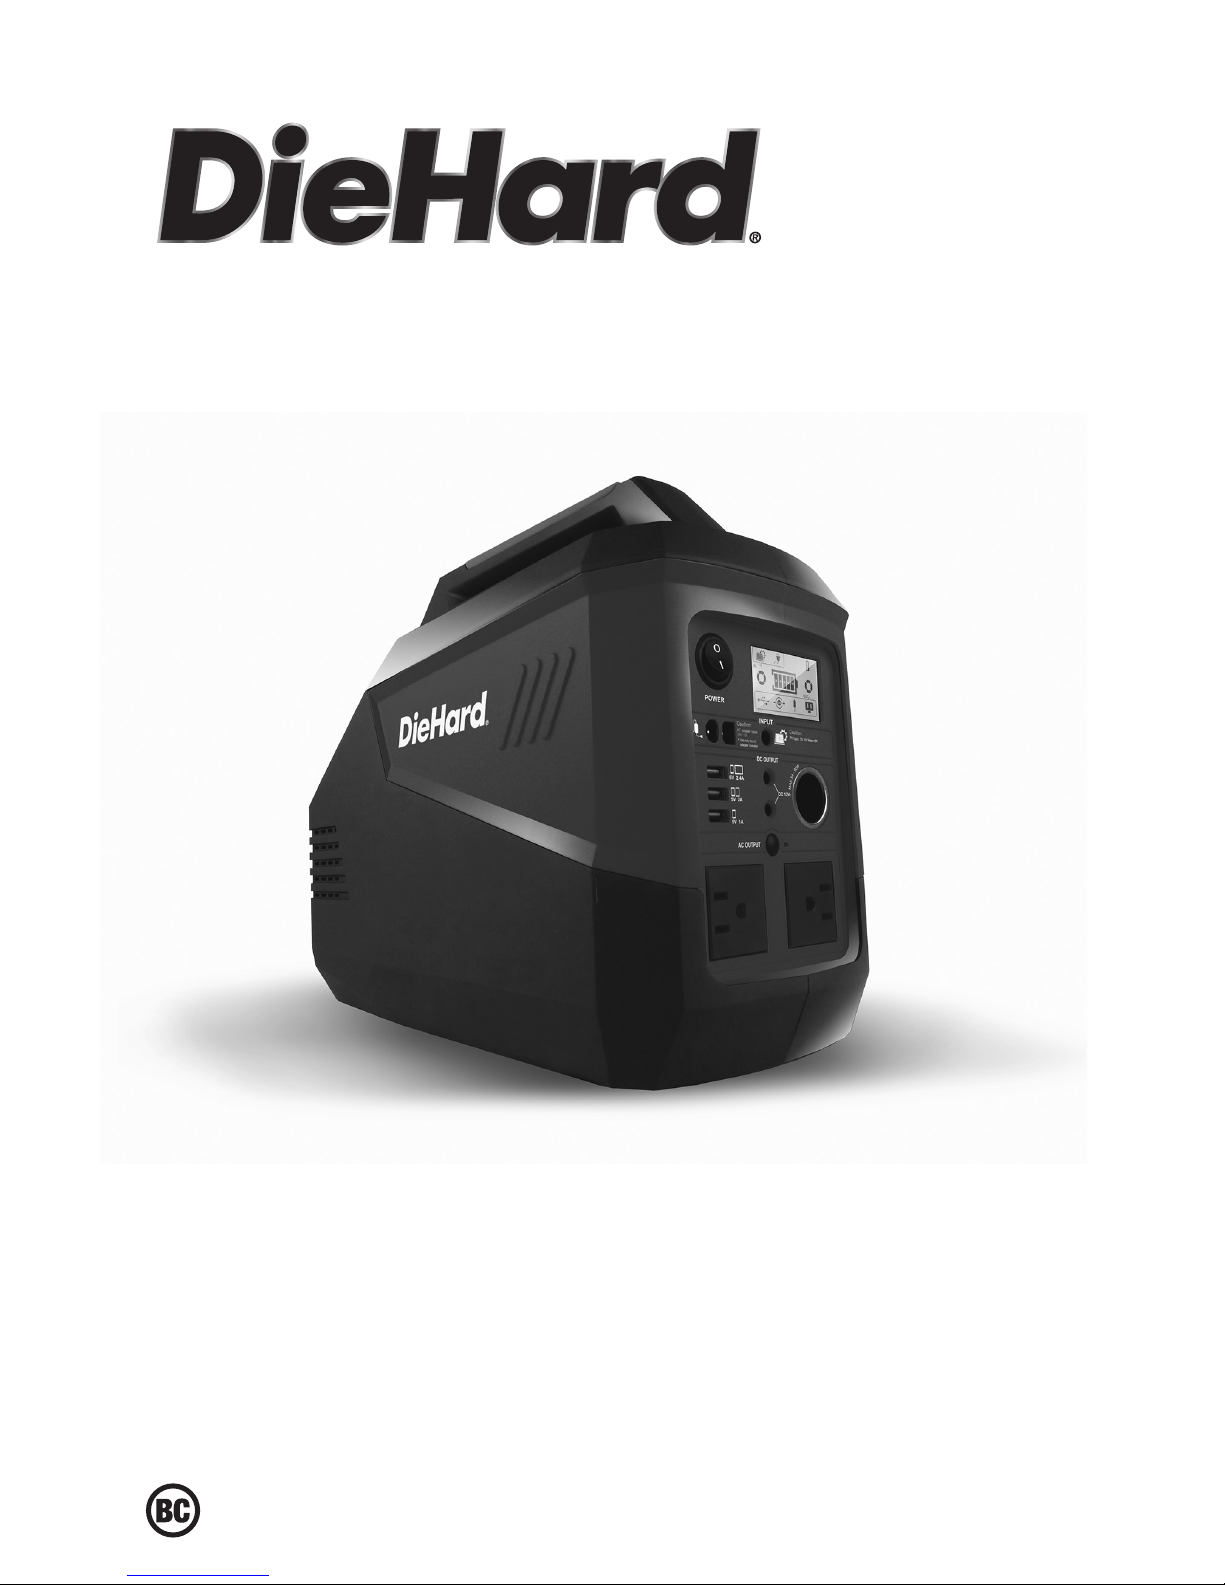
Portable Power Generator
Generador eléctrico transportable
OPERATOR’S MANUAL / MANUAL DEL USUARIO
Model / Modelo:
DH139
CAUTION:
Read and follow all safety
rules and operating instructions
before every use of this product.
SAVE THESE INSTRUCTIONS.
ATENCIÓN:
Lea y siga todas las reglas
de seguridad e instrucciones de uso
antes de cada uso de este producto.
GUARDE ESTAS INSTRUCCIONES.
Page 2

DIEHARD LIMITED WARRANTY
FOR ONE YEAR from the date of sale, this product is warranted against
defects in material or workmanship when it is operated according to all supplied
instructions.
WITH PROOF OF SALE, return a defective product to the retailer from which it
was purchased for free replacement.
This warranty is void if this product is ever used while providing commercial
services or if rented to another person.
This warranty gives you specic legal rights, and you may also have other rights
which vary from state to state.
Schumacher Electric Corporation, Mount Prospect, IL 60056
FOR CUSTOMER ASSISTANCE OR REPLACEMENT PARTS,
CALL 1-800-621-5485 TOLL-FREE
FROM 7 AM TO 5 PM CT, MONDAY-FRIDAY.
DieHard is a registered trademark of KCD IP, LLC, in the United States,
and Sears Brands, LLC in other countries, used under license.
GARANTÍA LIMITADA DIEHARD
DURANTE UN AÑO desde la fecha de venta, este producto está garantizado
contra defectos de materiales o mano de obra cuando se opera de acuerdo a las
instrucciones provistas.
CON EL COMPROBANTE DE VENTA, devolver un producto defectuoso a la tienda
donde fue comprado para el reemplazo gratuito.
Esta garantía no es válida si el producto se utiliza en cualquier momento durante
la prestación de servicios comerciales o si se alquila a otra persona.
Esta garantía le otorga derechos legales especícos, así como otros derechos,
que varían de estado a estado.
Schumacher Electric Corporation, Mount Prospect, IL 60056
PARA ASISTENCIA AL CLIENTE O REPUESTOS,
LLAME GRATIS AL 7 AM-5 PM CT
LUNES A VIERNES: 1-800-621-5485
DieHard es una marca registrada de KCD IP, LLC, en los Estados Unidos
de América, y Sears Brands, LLC en otros países, usada bajo licencia.
Page 3

CONTENTS
IMPORTANT SAFETY INSTRUCTIONS ......................................................................4
PERSONAL SAFETY PRECAUTIONS.........................................................................4
ASSEMBLY INSTRUCTIONS ....................................................................................... 4
FEATURES ................................................................................................................... 5
LCD SCREEN ............................................................................................................... 5
OPERATING INSTRUCTIONS ..................................................................................... 6
MAINTENANCE AND CARE ........................................................................................ 8
WARNINGS ..................................................................................................................8
TROUBLESHOOTING .................................................................................................. 8
BEFORE RETURNING FOR REPAIRS ........................................................................9
SPECIFICATIONS ........................................................................................................9
REPLACEMENT PARTS ..............................................................................................9
DISPOSAL INFORMATION ..........................................................................................9
CONTENIDOS
INSTRUCCIONES IMPORTANTES DE SEGURIDAD ............................................... 10
PRECAUCIONES DE SEGURIDAD PERSONAL ......................................................10
INSTRUCCIONES DE MONTAJE ..............................................................................10
CARACTERÍSTICAS .................................................................................................. 11
PANTALLA LCD .......................................................................................................... 11
INSTRUCCIONES DE OPERACIÓN ..........................................................................12
MANTENIMIENTO Y CUIDADO ................................................................................. 14
ADVERTENCIAS ........................................................................................................14
LOCALIZACIÓN Y SOLUCIÓN DE PROBLEMAS .....................................................14
ANTES DE DEVOLVER A REPARACIONES .............................................................15
ESPECIFICACIONES ................................................................................................. 15
REPUESTOS .............................................................................................................. 16
INFORMACIÓN DE ELIMINACIÓN ............................................................................ 16
Page 4

• 4 •
1. IMPORTANT SAFETY INSTRUCTIONS
SAVE THESE INSTRUCTIONS.
1.1 SAVE THESE INSTRUCTIONS –
This manual contains important safety
and operating instructions.
1.2 This product is not intended for use by
children.
1.3 If someone else uses the unit, ensure
they are well informed on how to use it
safely, and have read and understood the
operating instructions.
1.4 Do not use near ammable fumes or
gases, such as in the bilge of a gasolinepowered boat or near propane tanks.
1.5 Do not use in an enclosure containing
automotive-type lead-acid batteries.
1.6 Do not expose the unit to temperatures
over 113 °F (45 °C).
1.7 Do not operate the unit with damaged
cord or plug – replace the cord or plug
immediately.
1.8 Do not recharge the unit with a damaged
extension cord.
1.9 Do not operate the unit if it has received
a sharp blow, been dropped, or otherwise
damaged in any way; take it to a qualied
service person.
1.10 Do not disassemble the unit. If repair is
required, contact Customer Service for
assistance.
1.11 To reduce risk of electric shock, unplug
the unit from the outlet before attempting
any maintenance or cleaning. Turning off
controls will not reduce this risk.
1.12 The unit gets uncomfortably warm during
use and must have proper ventilation.
Ensure at least 3 in. (7.5 cm) air space is
maintained on all sides of the unit.
1.13 Do not set the unit on ammable materials,
such as carpeting, upholstery, paper,
cardboard, etc. During operation, keep unit
away from materials that can be affected
by high temperatures, such as blankets,
pillows and sleeping bags.
2. PERSONAL SAFETY PRECAUTIONS
WARNING!
RESTRICTIONS ON USE.
2.1 This unit may not be used with life
support devices or systems. Failure of
this device can reasonably be expected
to cause failure of that life support device
or system, or to affect the safety or
effectiveness of that device or system.
2.2 When working on electrical equipment,
always ensure someone is nearby to aid
you in case of an emergency.
2.3 WARNING: This product contains one
or more chemicals known to the State
of California to cause cancer and birth
defects or other reproductive harm.
3. ASSEMBLY INSTRUCTIONS
3.1 Remove all cord wraps and uncoil the cables prior to using the unit.
Page 5
• 5 •
4. FEATURES
1. 110V AC power outlets (2)
2. 1A USB port
3. 2A USB port
4. 2.4A USB port
5. AC adaptor input socket
6. ON/OFF power switch
7. LCD display
8. Solar charging input socket
9. 12V DC output ports
13
14
15
16
1
2
3
4
5
6 7
8
9
10
11
12
10. 12V DC cigarette lighter
output only port
11. AC output button
12. AC output LED indicator
13. Handle
14. Light button
15. Light
16. Cooling vents
5. LCD SCREEN
AC ADAPTOR
CHARGING
BATTERY
CAPACITY
INDICATOR
SOLAR
CHARGING
WARNING
POWER OUTPUT
INDICATOR
AC OUTPUT
CHARGING
INDICATOR
USB
OUTPUT
12V DC
OUTPUT
12V DC
CIGARETTE
LIGHTER
OUTPUT
Page 6

• 6 •
6. OPERATING INSTRUCTIONS
IMPORTANT! Charge immediately after
purchase and when battery level is below
40%, to keep the internal battery fully
charged and prolong battery life. Do not
recharge unit for more than 12 hours.
POWERING ON
Press the ON/OFF power switch. The unit
will initialize, and all icons on the LCD
screen will activate. If normal function
is detected, the screen will return to its
normal display.
CHECKING THE LEVEL
OF THE INTERNAL BATTERY
The Battery Capacity Indicator on the
LCD display will show the battery’s charge
level in 20-percent increments. For best
performance, the battery capacity should
be 20% or greater.
CHARGING THE INTERNAL BATTERY
NOTE: Do not use the unit while charging
its internal battery.
AC adaptor
1. If the red AC Output LED is lit, press
the AC Output button to turn off before
charging.
2. Connect the provided AC charger to
the socket on the front of the unit. Plug
the charger’s power cord directly into
a live grounded 120V outlet. Charging
will start automatically, and the AC
Adaptor Charging icon will show on
the display.
3. While the unit is charging, the rotating
Charging indicator will show on
the display. When the internal battery
is fully charged, all ve bars of the
Battery Capacity indicator on the
display will show. Complete charging
will take approximately 5 hours.
4. When the unit is fully charged, unplug
the charger from the 120V outlet and
then from the unit.
Solar Charging
Solar charging can be accomplished by
plugging in a 30-36V solar panel (not
included) into the Solar Charging Input port.
The Solar Charging icon will show on
the display. For best results, face the panel
toward the sun, away from curtains and
windows. Charging by solar panel takes
approximately 10 hours (on a sunny day).
POWERING A 12V DC DEVICE
NOTE: Do not power a 12V device while
charging the internal battery.
12V DC Output
1. Make sure the device to be powered is
OFF before inserting the 12V DC plug
into one of the two 12V DC output ports.
2. Plug the 12V DC device into one of the
12V DC output ports and turn on the
12V DC device (if required). The
12V DC output icon and the rotating
Discharging indicator will show on the
display.
3. When nished, turn off the DC device
(if required) and unplug from the DC
output port.
4. Recharge the unit when the battery
level is below 40%.
12V DC Cigarette lighter plug
1. Make sure the device to be powered
is OFF before inserting the 12V DC
cigarette lighter plug into the 12V DC
cigarette lighter socket.
2. Plug the 12V DC device into the DC
cigarette lighter socket and turn on
the 12V DC device (if required). The
Cigarette Lighter Output icon and the
rotating Discharging indicator will
show on the display.
3. When nished, turn off the DC device
(if required) and unplug from the DC
Cigarette Lighter socket.
4. Recharge the unit when the battery
level is below 40%.
USING THE USB PORTS
The USB ports provide 1A, 2A and 2.4A
at 5V DC.
1. Plug the device into one of the three
USB ports on the front panel.
2. Turn on the USB device, if necessary.
The USB Output icon and the
rotating Discharging indicator will
show on the display.
3. When nished, turn off the USB
device (if required) and unplug from
the USB port.
4. Recharge the unit when the battery
level is below 40%.
Page 7

• 7 •
USING THE LIGHT
There are 5 lighting modes:
• High (100% power)
• Normal (50% power)
• Energy saving (25% power)
• Emergency ash
• SOS
Press once to turn the light ON or OFF.
Press twice quickly, to change to the
next mode.
USING THE AC POWER OUTLETS
The DH139 is equipped with a 500W pure
sine wave inverter, which produces the
best power for all electronic devices and
appliances, without damage.
It is important to know the continuous
wattage of the device you plan to use with
the AC outlets. The unit must be used with
devices drawing 500 watts or less.
Devices such as fans or electric motors
require additional power to start (commonly
known as the “starting” or “peak” power).
The generator can supply a momentary
surge in wattage of as high as 2,500W
for less than 1/10 of a second; however
even devices rated less than the maximum
500 watts can exceed the inverter’s surge
capability and cause an automatic overload
shutdown.
Do not use the inverter with a product that
draws a higher wattage than the inverter
can provide, as this may cause erratic
operation.
CAUTION: Always run a test to establish
whether the inverter will operate a
particular piece of equipment or device.
In the event of a power overload (noted
with an audible alarm beeping every 3
seconds and a ashing Warning icon),
the inverter is designed to automatically
shut down. This safety feature prevents
damaging the inverter while testing devices
and equipment within the 500-watt range.
If powering more than one device, start one
device at a time to avoid a power surge and/
or inverter overload. The surge load of each
device should not exceed the inverter’s
Continuous Operation wattage rate.
You can use an extension cord from the
inverter to the device without signicantly
decreasing the power being generated by
the inverter. For best operating results,
the extension cord should be 16 AWG
(1.31 mm2) or larger and no longer than
50 feet.
WARNING!
RISK OF ELECTRIC SHOCK.
Incorrect operation of your inverter may
result in damage and personal injury. The
inverter output is 110V AC and can shock
or electrocute the same as any ordinary
household AC wall outlet.
NOTE: The maximum continuous load
is 500 watts. Do not use the AC outlets
with a product that draws more than
500 watts, as this may cause erratic
operation.
CAUTION:
• Do not connect an AC power source to
the 110V AC outlets.
• Do not connect the unit’s AC power cord
to its 110V AC outlets.
NOTE: Do not power an AC device while
charging the internal battery.
1. Connect your AC-powered devices or
small household appliances to one or
more of the unit’s two AC outlets.
NOTE: Make sure the device to be
powered is OFF before inserting the plug
into the AC power outlet.
2. Press the AC Output button. The
AC Output icon will show on the
display and the green AC power LED
lights, to conrm that the unit is on and
ready to provide AC power. The rotating
Discharging indicator will also show
on the display.
NOTE: Extended operation of an AC device
may result in excessive battery drain.
3. Recharge the unit when the battery
level is below 40%.
ESTIMATED RUN-TIMES
APPLIANCE TYPE
ESTIMATED
RUN TIME
CHARGES
Projector 8 hours —
12V Heated blanket 15 hours —
12V Cooler 17 hours —
Mini refrigerator 23 hours
Drone 24 hours 145
Television 24 hours —
Fan 29 hours —
Router 60 hours —
Table lamp 65 hours —
Laptop 117 hours 17
LED lights 167 hours —
Go Pro 210 hours 140
Radio 245 hours —
Tablet 273 hours 22
Speaker 750 hours 63
Smartphone 843 hours 70
NOTE: Actual time may vary. Times are based
on the internal battery being fully charged.
Page 8

• 8 •
7. MAINTENANCE AND CARE
7.1 Recharge the unit when the battery level
is below 40%.
7.2 Never completely discharge the internal
battery.
8. WARNINGS
WARNING
LCD DISPLAY TIME CAUSE
Alarm LED
3 short beeps every
2 seconds, lasting 30
seconds
AC LED
blinking
Low battery icon ashes
for 30 seconds.
30 sec.
before
AC OFF
Economy mode. Prealert for AC OFF.
3 short beeps every
2 seconds, lasting 30
seconds
N/A
Low battery icon ashes until
battery is charged above 10%.
30 sec.
before
DC OFF
Low battery capacity
mode.
Pre-alert for DC OFF.
Every 1 second N/A
Warning icon ashes until fault is removed.
Charging fault.
Every 2 seconds N/A DC output fault
Every 3 seconds N/A AC output fault
Every 4 seconds N/A Over temperature
3 short beeps every
3 seconds.
N/A Overload
9. TROUBLESHOOTING
PROBLEM CAUSE SOLUTION
Power-up failure Under-voltage protection
Abnormal load protection
Damaged unit
Recharge unit.
Remove loads and recharge unit.
Contact customer service.
Charger fault Unmatched charger
Damaged charger
Abnormal power supply or
connection
Use only the included charger.
Contact customer service for
replacement.
Reconnect the charger. If problem
persists, replace the charger.
Solar panel
charging fault
Over-current
Weak sunlight
Damaged solar panel
Abnormal wiring-harness
connection
Use only the recommended solar
panel.
Charge in a sunny place.
Replace the solar panel.
Reconnect the wiring-harness.
If problem persists, replace the
solar panel.
DC/AC output fault Battery under-voltage protection
Discharge over-current protection
Over-temperature protection
Damaged unit
Charge the unit.
Make sure loads are within allowed
range (total ≤500W).
Turn unit off, allow to cool down
and then restart.
Contact customer service.
Page 9

• 9 •
PROBLEM CAUSE SOLUTION
Abnormal icon
display
Abnormal loads
Hardware fault
Damaged LCD screen
Remove loads.
Contact customer service.
Contact customer service.
LCD screen fault Damaged LCD screen Contact customer service.
10. BEFORE RETURNING FOR REPAIRS
When an UNKNOWN OPERATING PROBLEM arises, please read
the complete manual and call the customer service number for information.
This will usually eliminate the need for return.
If the above solutions do not eliminate the problem,
or for information about troubleshooting or replacement parts,
call toll-free from anywhere in the U.S.A.
1-800-621-5485
7:00 am to 5:00 pm CST, Monday through Friday
11. SPECIFICATIONS
Internal battery type .......................................................................................... Lithium-Ion
Capacity ............................................................................................. 750 Wh (25V, 30 Ah)
AC input .................................................................................................... 147W/29.4V, 5A
Solar input ...................................................................... 30-36V (Max. power up to 200W)
AC output .................................................................................................... 2 x 110V/60 Hz
DC output .................................................................................................2 x 12V DC, 2.5A
Cigarette lighter output................................................................................1 x 12V DC, 5A
USB output..........................................................................................5V DC, 1A, 2A, 2.4A
Light ...............................................................................................................................1W
Operating Temperature ................................................................ 14˚–113˚F (-10 ˚– 45 ˚C)
Storage Temperature ...................................................................... 32˚–113˚F (0 ˚– 45 ˚C)
Dimensions (H x W x D)....................... 13.7˝ x 6.3˝ x 11.2˝ (349 mm x 6.3 mm x 285 mm)
Weight ...................................................................................................... 16.7 lbs. (7.6 kg)
12. REPLACEMENT PARTS
AC charger module ........................................................................................... 93026980Z
AC charger cable .......................................................................................... 3899003972Z
13. DISPOSAL INFORMATION
Do not dispose of this product with other household waste. To prevent possible
harm to the environment or human health from uncontrolled waste disposal, and
to promote the sustainable reuse of material resources, recycle it responsibly. To
discard your used device, please use the return and collection systems or contact
the retailer where the product was purchased, for environmentally-safe recycling.
Page 10

• 10 •
1. INSTRUCCIONES IMPORTANTES DE SEGURIDAD
GUARDE ESTAS INSTRUCCIONES.
1.1 GUARDE ESTAS INSTRUCCIONES –
Este manual contiene instrucciones
operativas y de seguridad de importancia.
1.2 Este producto no está destinado para ser
usado por niños.
1.3 Si otra persona usa la unidad, asegúrese
de que esté bien informada sobre cómo
usarlo de manera segura y además,
de que haya leído y comprendido las
instrucciones de funcionamiento.
1.4 No utilice la unidad cerca de humos o gases
inamables, como en la sentina de un barco
a gasolina o cerca de tanques de propano.
1.5 No utilice la unidad en un recinto que
contenga baterías de plomo ácido de tipo
automotriz.
1.6 No exponga la unidad a temperaturas
superiores a 113 °F (45 °C).
1.7 No utilice la unidad si el mismo posee un
enchufe o cable dañado; substituya el
cable o el enchufe inmediatamente por
una persona calicada en el ramo.
1.8 No recargue la unidad con un cable de
extensión dañado.
1.9 No utilice la unidad si el mismo posee un
enchufe o cable dañado; substituya el
cable o el enchufe inmediatamente por
una persona calicada en el ramo.
1.10 No desarme la unidad. Si requiere
reparaciones, comuníquese con Servicio
al Cliente para recibir asistencia.
1.11 Para reducir el riesgo de descarga
eléctrica, desenchufe la unidad del
tomacorriente antes de intentar llevar a
cabo cualquier actividad de mantenimiento
o limpieza. El simple apagado de los
controles no reducirá este riesgo.
1.12 La unidad se calienta considerablemente
durante su uso y debe contar con
ventilación adecuada. Asegúrese de que
se mantengan por lo menos 3 in (7.5 cm)
de espacio de aire en todos los lados de
la unidad.
1.13 No coloque la unidad sobre materiales
inamables como alfombras, tapicería,
papel, cartón, etc. Durante el
funcionamiento, mantenga la unidad alejada
de materiales que puedan ser afectados por
las altas temperaturas, tales como mantas,
almohadas y sacos de dormir.
2. PRECAUCIONES DE SEGURIDAD PERSONAL
ADVERTENCIA:
RESTRICCIONES DE USO.
2.1 Esta unidad no se puede utilizar
con dispositivos o sistemas de
soporte vital. El incumplimiento
de este dispositivo puede esperar
razonablemente causar fallo de ese
dispositivo de soporte de vida o sistema,
o para afectar la seguridad o ecacia
de ese dispositivo o sistema.
2.2 Cuando trabaje en equipo eléctrico,
siempre asegúrese de que haya alguien
cerca que pueda ayudarlo en caso de una
emergencia.
2.3 ADVERTENCIA: Este producto
contiene una o más sustancias químicas
conocidas en el Estado de California
como causantes de cáncer y defectos de
nacimiento u otros daños reproductivos.
3. INSTRUCCIONES DE MONTAJE
3.1 Desenrede todos los cordones y extienda los cables antes de usar la unidad.
Page 11

• 11 •
4. CARACTERÍSTICAS
1. Tomas de CA de 110V (2)
2. Puerto USB de 1A
3. Puerto USB de 2A
4. Puerto USB de 2.4A
5. Receptáculo de entrada de
adaptador de CA
6. Interruptor de alimentación ON/OFF
7. Pantalla LCD
8. Receptáculo de entrada
para carga solar
13
14
15
16
1
2
3
4
5
6 7
8
9
10
11
12
9. Puertos de salida de 12V de CC
10. Puerto de salida único de CC para
encendedor de cigarrillos de 12V
11. Botón de salida de CA
12. Indicador LED de salida de CA
13. Manilla
14. Botón de luz
15. Luz
16. Ventilas de enfriamiento
5. PANTALLA LCD
INDICADOR
DE CAPACIDAD
DE BATERÍA
CARGA DE
ADAPTADOR
DE CA
CARGA
SOLAR
ADVERTENCIA
INDICADOR
DE POTENCIA
DE SALIDA
SALIDA
DE CA
INDICADOR
DE CARGA
SALIDA
USB
SALIDA DE
CC DE 12V
SALIDA DE
CC PARA
ENCENDEDOR
DE CIGARRILLOS
DE 12V
Page 12

• 12 •
6. INSTRUCCIONES DE OPERACIÓN
¡IMPORTANTE! Cargue de inmediato
después de la compra y cuando el nivel
de la batería caiga sea inferior a 40% para
mantener la batería interna totalmente
cargada y prolongar su vida útil. No
recargue la unidad por más de 12 horas.
ENCENDIDO
Presione el interruptor de alimentación
ON/OFF. La unidad se inicializará
y todos los íconos de la pantalla
LCD se activarán. Si se detecta un
funcionamiento normal, la pantalla
retornará a la visualización normal.
REVISIÓN DEL NIVEL
DE LA BATERÍA INTERNA
El Indicador de Capacidad de la Batería
de la pantalla LCD muestra el nivel de
carga de la batería en incrementos de
20%. Para un mejor funcionamiento, la
capacidad de la batería debería ser de
20% o mayor.
CARGA DE LA BATERÍA INTERNA
NOTA: No use la unidad mientras carga
su batería interna.
Adaptador de CA
1. Si el LED de salida de CA está
encendido, presione el botón de salida
de CA para apagar antes de cargar.
2. Conecte el cargador de CA
suministrado al receptáculo en la parte
delantera de la unidad. Conecte el
cable de alimentación del cargador
directamente a la toma viva de 120V
puesta a tierra. La carga comenzará
automáticamente y el ícono de carga
del adaptador de CA aparecerá en
la pantalla.
3. Mientras la unidad esté cargando,
aparecerá el indicador de carga
girando en la pantalla. Cuando la
batería interna esté totalmente cargada,
aparecerán en la pantalla las cinco
barras del indicador de capacidad de
la batería . Completar la carga toma
aproximadamente 5 horas.
4. Cuando la unidad esté totalmente
cargada, desconecte el cargador de la
toma de 120V y luego de la unidad.
Carga solar
La carga solar se puede realizar
conectando un panel solar de 30-36V
(no incluido) en el puerto de entrada de
carga solar. Aparecerá en la pantalla el
ícono de carga solar . Para mejores
resultados, apunte el panel hacia el
sol, lejos de cortinas y ventanas. La
carga mediante panel solar toma
aproximadamente 10 horas (en un
día soleado).
ALIMENTACIÓN DE UN DISPOSITIVO
DE CC DE 12V
NOTA: No alimente un dispositivo de 12V
mientras carga la batería interna.
Salida de CC de 12V
1. Asegúrese de que el dispositivo que
va a energizar esté apagado antes de
insertar el conector de CC de 12V en
uno de los dos puertos de salida de CC
de 12V.
2. Conecte el dispositivo de CC de 12V
en uno de los puertos de salida de CC
de 12V y encienda el dispositivo (si es
necesario). Aparecerán en la pantalla
el ícono de salida de CC de 12V y
el indicador de descarga girando.
3. Cuando termine, apague el dispositivo
de CC (si es necesario) y desconéctelo
del puerto de salida de CC.
4. Recargue la unidad cuando el nivel de
la batería esté bajo 40%.
Conector del encendedor de cigarrillos
de CC de 12V
1. Compruebe que el dispositivo que va
a energizar esté apagado antes de
insertar el conector del encendedor
de cigarrillos en el receptáculo del
encendedor de cigarrillos de CC de 12V.
2. Conecte el dispositivo de CC de 12V
en el receptáculo del encendedor
de cigarrillos de CC y encienda el
dispositivo (si es necesario). Aparecerán
en la pantalla el ícono de salida del
encendedor de cigarrillos y el indicador
de descarga girando.
3. Cuando termine, apague el dispositivo
de CC (si es necesario) y desconéctelo
del receptáculo del encendedor de
cigarrillos de CC.
4. Recargue la unidad cuando el nivel de
la batería esté bajo 40%.
USO DE LOS PUERTOS USB
Los puertos USB proporcionan 1A, 2A y
2.4A a 5V de CC.
1. Conecte el dispositivo en uno de los
tres puertos USB en el panel frontal.
2. Encienda el dispositivo USB, si es
necesario. Aparecerán en la pantalla el
ícono de salida USB y el indicador
de descarga girando.
3. Cuando termine, apague el dispositivo
USB (si es necesario) y desconéctelo
del puerto USB.
4. Recargue la unidad cuando el nivel de
la batería esté bajo 40%.
Page 13

• 13 •
USO DE LA LUZ
Hay 5 modos de iluminación:
• Alto (100% de potencia)
• Normal (50% de potencia)
• Ahorro de energía (25% de potencia)
• Flash de emergencia
• SOS
Presione una vez para encender o apagar
la luz. Presione dos veces de manera
rápida para cambiar al modo siguiente.
USO DE TOMAS
DE CORRIENTE ALTERNA
La unidad DH139 está equipada con un
inversor de onda sinusoidal pura de 500W,
que energiza de mejor manera todos los
dispositivos y artefactos electrónicos, sin
dañarlos.
Es importante conocer la potencia continua
del dispositivo que planea usar con las
tomas de CA. La unidad se debe utilizar con
dispositivos que consuman 500W o menos.
Dispositivos como ventiladores o motores
eléctricos necesitan potencia adicional
para ponerse en funcionamiento (lo que
se conoce comúnmente como “arranque”
o “pico” de potencia). El generador puede
suministrar un pico momentáneo de
potencia de hasta 2,500W por menos de
1/10 de segundo; sin embargo, incluso
dispositivos de 500W de potencia como
máximo pueden superar la capacidad
del inversor y causar una desconexión
automática por sobrecarga.
No use el inversor con un producto que
consuma una potencia superior a la que
puede entregar, ya que el funcionamiento
sería errático.
PRECAUCIÓN: Siempre haga una prueba
para comprobar si el inversor funcionará
con un equipo o dispositivo en particular.
En caso de sobrecarga de potencia (que
se informa con una alarma que suena
cada 3 segundos y el ícono de advertencia
parpadeando ), el inversor está diseñado
para desconectarse automáticamente.
Esta característica de seguridad evita
dañar el inversor al probar dispositivos y
equipos en el rango de 500W.
Si se energiza más de un dispositivo,
arranque uno a la vez para evitar un pico de
potencia y/o una sobrecarga del inversor.
El pico de potencia de cada dispositivo
no debería exceder de la capacidad del
inversor en operación continua.
Puede usar un cable alargador desde
el inversor al dispositivo sin disminuir
signicativamente la potencia que genera
el inversor. Para los mejores resultados de
operación, el cable alargador debería ser de
16 AWG (1.31 mm2) o mayor y no tener más
de 50 pies de largo.
¡ADVERTENCIA!
RIESGO DE CHOQUE ELÉCTRICO.
El funcionamiento incorrecto de su
inversor podría causar daños y lesiones
personales. El voltaje de salida del
inversor es de 110V en corriente alterna
y puede provocar una descarga o
electrocución de la misma manera que
una toma doméstica de CA de pared.
NOTA: La carga máxima continua es 500W.
No use las tomas de CA con un producto
que consuma más de 500W, ya que puede
provocar un funcionamiento errático.
PRECAUCIÓN:
• No conecte la fuente de alimentación de
CA a tomas de CA de 110V.
• No conecte el cable de alimentación de
CA de la unidad a tomas de CA de 110V.
NOTA: No conecte un dispositivo de CA
mientras esté cargando la batería interna.
1. Conecte sus dispositivos de CA o
pequeños artefactos a una o a las dos
tomas de CA de la unidad.
NOTA: Compruebe que el dispositivo esté
apagado antes de insertar el conector en
la toma de CA.
2. Presione el botón de salida de CA. El
ícono de salida de CA aparecerá en la
pantalla y se encenderán las luces LED
verdes para conrmar que la unidad está
encendida y lista para generar potencia
de CA. Aparecerá en la pantalla el
indicador de descarga girando.
NOTA: El funcionamiento extendido de
un dispositivo de CA podría descargar
excesivamente la batería.
3. Recargue la unidad cuando el nivel de
la batería esté bajo 40%.
TIEMPOS DE FUNCIONAMIENTO ESTIMADOS
Tipo de Aparatos
Tiempo de
Funcionamiento
Estimado
Número
de Cargas
Proyector 8 horas —
Calientacamas de 12V 15 horas —
Enfriador de 12V 17 horas —
Minirrefrigerador 23 horas
Drone 24 horas 145
Televisor 24 horas —
Ventilador 29 horas —
Router 60 horas —
Lámpara de mesa 65 horas —
Laptop 117 horas 17
Luces LED 167 horas —
GoPro 210 horas 140
Radio 245 horas —
Táblet 273 horas 22
Altavoces 750 horas 63
Smartphone 843 horas 70
NOTA: El tiempo real puede variar. Los tiempos
se basan en que la batería interna esté totalmente
cargada.
Page 14

• 14 •
7. MANTENIMIENTO Y CUIDADO
7.1 Recargue la unidad cuando el nivel de la
batería esté bajo 40%.
7.2 Nunca descargue completamente la
batería interna.
8. ADVERTENCIAS
ADVERTENCIA
PANTALLA LCD HORA CAUSA
Alarma LED
3 pitidos cortos cada
2 segundos, durante
30 segundos
LED de CA
parpadeando
El ícono de batería baja
parpadea durante 30 segundos.
30 seg.
antes de
apagar CA.
Modo económico.
Prealerta para apagar
CA.
3 pitidos cortos cada
2 segundos, durante
30 segundos
N/A
El ícono de batería baja
parpadea hasta que la batería
esté cargada sobre 10%.
30 seg.
antes de
apagar CC.
Modo de capacidad de
batería baja. Prealerta
para apagar CC.
Cada 1 segundo N/A
El ícono de advertencia parpadea hasta
que se elimina la falla.
Falla de carga
Cada 2 segundos N/A Falla de salida de CC
Cada 3 segundos N/A Falla de salida de CA
Cada 4 segundos N/A Sobretemperatura
3 pitidos cortos cada
3 segundos.
N/A Sobrecarga
9. LOCALIZACIÓN Y SOLUCIÓN DE PROBLEMAS
PROBLEMA CAUSA SOLUCIÓN
Falla de encendido Protección contra subvoltaje
Protección contra carga anómala
Unidad dañada
Recargue la unidad.
Retire las cargas y recargue la
unidad.
Consulte al Servicio al Cliente.
Falla del cargador Cargador no correspondiente
Cargador dañado
Fuente de alimentación o conexión
anormal
Use solo el cargador incluido.
Consulte al servicio al cliente para
remplazarlo.
Reconecte el cargador. Si el
problema persiste, remplace el
cargador.
Falla de carga de
panel solar
Sobrecorriente
Luz solar débil
Panel solar dañado
Conexión anormal del arnés de
cables
Use solo el panel solar
recomendado.
Cargue en un lugar soleado.
Remplace el panel solar.
Reconecte el arnés de cables.
Si el problema persiste, remplace
el panel solar.
Page 15

• 15 •
PROBLEMA CAUSA SOLUCIÓN
Falla de salida de
CC o CA
Protección contra subvoltaje de
batería
Protección contra sobrecorriente
de descarga
Protección contra sobretemperatura
Unidad dañada
Cargue la unidad.
Compruebe que las cargas estén
dentro del rango permitido (total
≤500W).
Apague la unidad, deje que se
enfríe y luego vuelva a arrancar.
Consulte al Servicio al Cliente.
Visualización
anormal del ícono
Cargas anómalas
Falla de hardware
Pantalla LCD dañada
Retire las cargas.
Consulte al Servicio al Cliente.
Consulte al Servicio al Cliente.
Falla de la pantalla
LCD
Pantalla LCD dañada Consulte al Servicio al Cliente.
10. ANTES DE DEVOLVER A REPARACIONES
Cuando surja un PROBLEMA DE FUNCIONAMIENTO DESCONOCIDO,
por favor lea todo el manual y comuníquese con el número de atención al cliente
para más información que no haga falta la devolución.
Si estas soluciones no eliminan el problema o si desea obtener
más información sobre la solución de problemas o repuestos,
llame gratis al desde cualquier parte del U.S.A.
1-800-621-5485
Lunes-viernes 7:00am-5:00pm CST
11. ESPECIFICACIONES
Tipo de batería interna .................................................................................... Iones de litio
Capacidad ..........................................................................................750 Wh (25V, 30 Ah)
Entrada de CA........................................................................................... 147W/29.4V, 5A
Entrada solar.........................................................30-36V (potencia máxima hasta 200W)
Salida de CA ...............................................................................................2 x 110V/60 Hz
Salida de CC ............................................................................................2 x 12V DC, 2.5A
Salida de encendedor de cigarrillos ............................................................1 x 12V DC, 5A
Salida USB..........................................................................................5V DC, 1A, 2A, 2.4A
Luz .................................................................................................................................1W
Temperatura de operación ........................................................... 14˚–113˚F (-10 ˚– 45 ˚C)
Temperatura de almacenamiento ................................................... 32˚–113˚F (0 ˚– 45 ˚C)
Dimensiones (H x W x D)..................... 13.7˝ x 6.3˝ x 11.2˝ (349 mm x 6.3 mm x 285 mm)
Peso ......................................................................................................... 16.7 lbs. (7.6 kg)
Page 16

12. REPUESTOS
Módulo de cargador de CA ...............................................................................93026980Z
Cable del cargador de CA .............................................................................3899003972Z
13. INFORMACIÓN DE ELIMINACIÓN
Ni elimine este producto con otros residuos domésticos. Para evitar posibles
daños al medio ambiente o a la salud humana por desechos no controlados,
y para promover la reutilización sostenible de recursos materiales, recicle de
manera responsable. Para desechar un dispositivo usado, use los sistemas
de retorno y recolección o comuníquese con el distribuidor donde adquirió al
producto para coordinar el reciclaje seguro.
• 16 •
 Loading...