

Page 1
DiDiT DAC212
Manual
Page 2
2
Page 3
3
Thank you for investing in this beautiful
product. We are convinced you will enjoy many
pleasurable hours listening to our design.
This guide provides the steps needed for
installing and using the DAC212, please follow
this manual and when in doubt always consult
your DiDiT specialist for support.
Check the package content during unpacking.
Package contents
• DiDiT DAC212
• Power cord
• Remote control
• Manual
• Safety information card
Page 4
4
Page 5
5
Unpacking the DAC212
• Remove the product from the cork packaging
andplaceonarigidandatsurface
• Inspect the DAC212 for signs of
damage during shipment
Placement
• PlacetheDAC212onasolidandatsurface
• Place the DAC212 close to the
associated equipment
• Place the DAC212 close to a power outlet
• Place the DAC212 out of direct sunlight
We strongly advice you to keep the original
packaging, to protect the DAC212 in the future
when moving or transporting the DAC212 to
other locations. In case of warranty issues,
DiDiT High-End will only accept returns with the
original cork packaging. This way we can ensure
your investment is kept safe during transport.
INTRODUCTION: BEFORE USE
Page 6
6
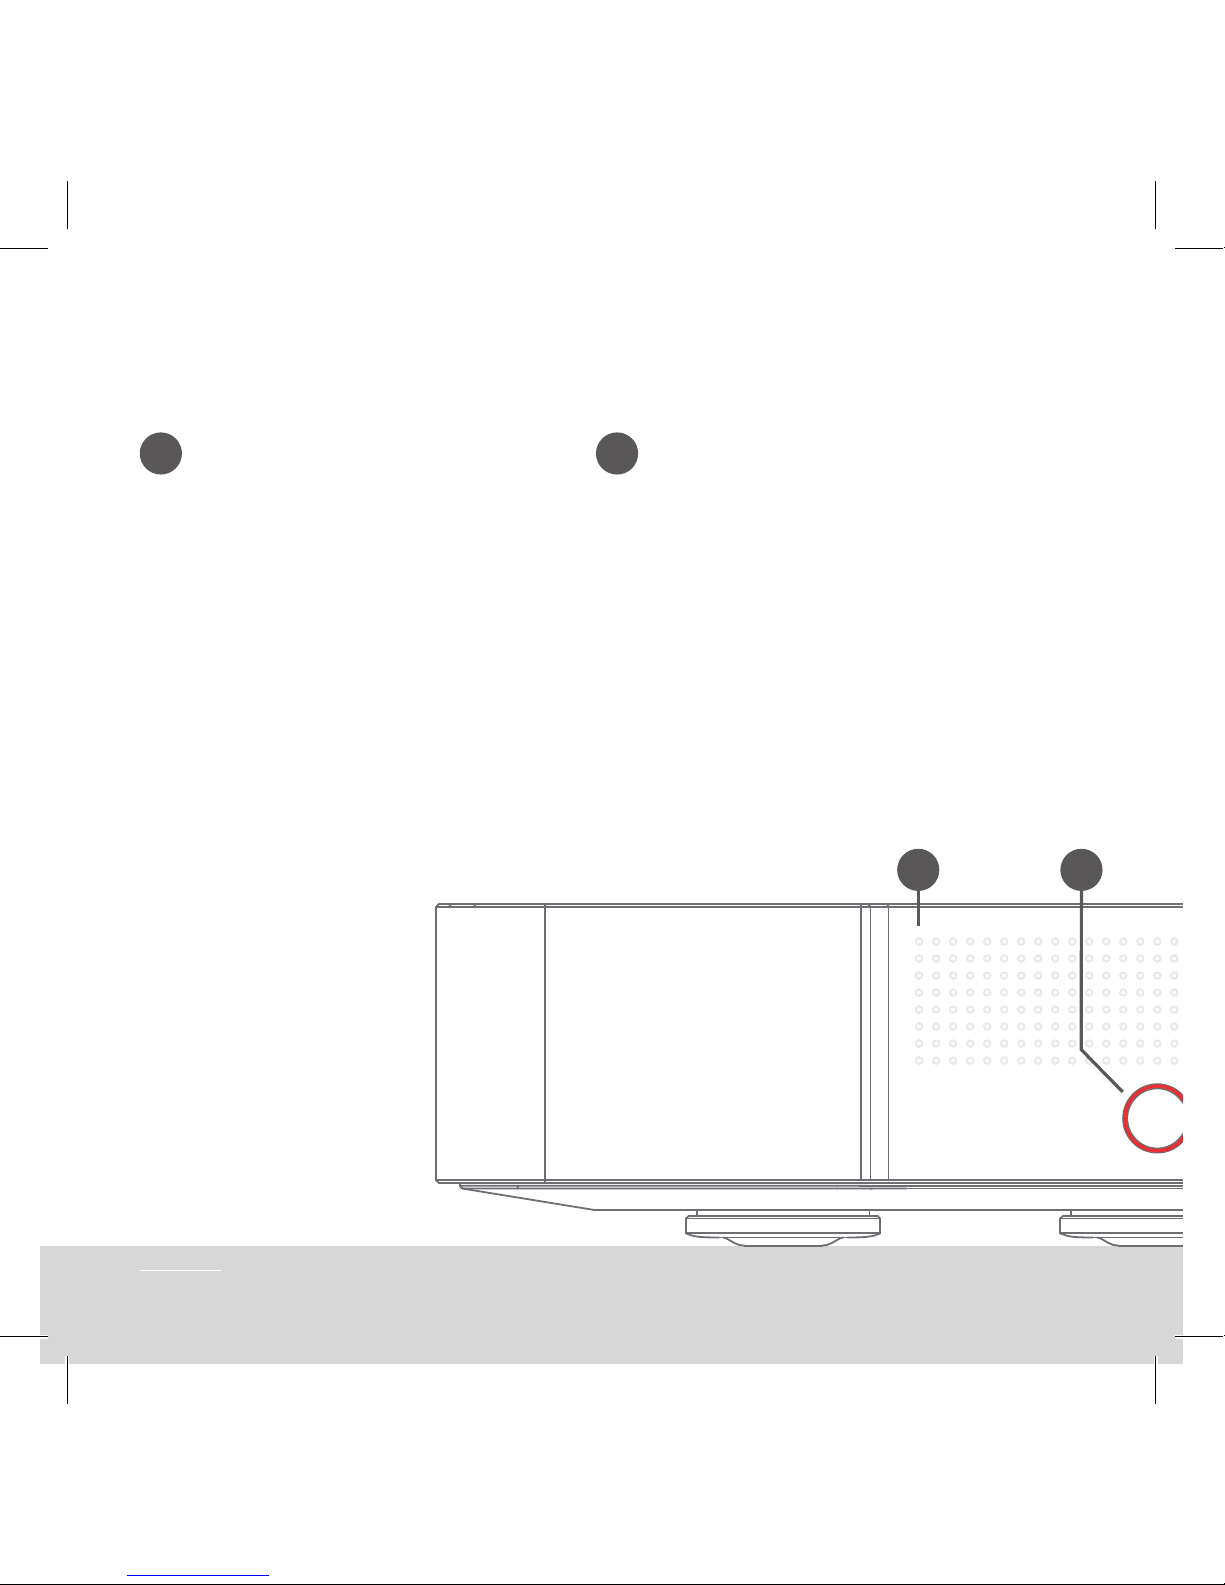
On/off input select switch
The on/off select switch is
located at the front center
of the device. The switch is
illuminated once the mains
power is connected and the
device is in standby mode.
Display
The pin hole display located at
the front of the device shows
information of the selected
inputs. The sample rate (kHz) of
source material is shown during
changes.
INTRODUCTION: FRONT PANEL LAYOUT
1
1 2
2
Page 7
7
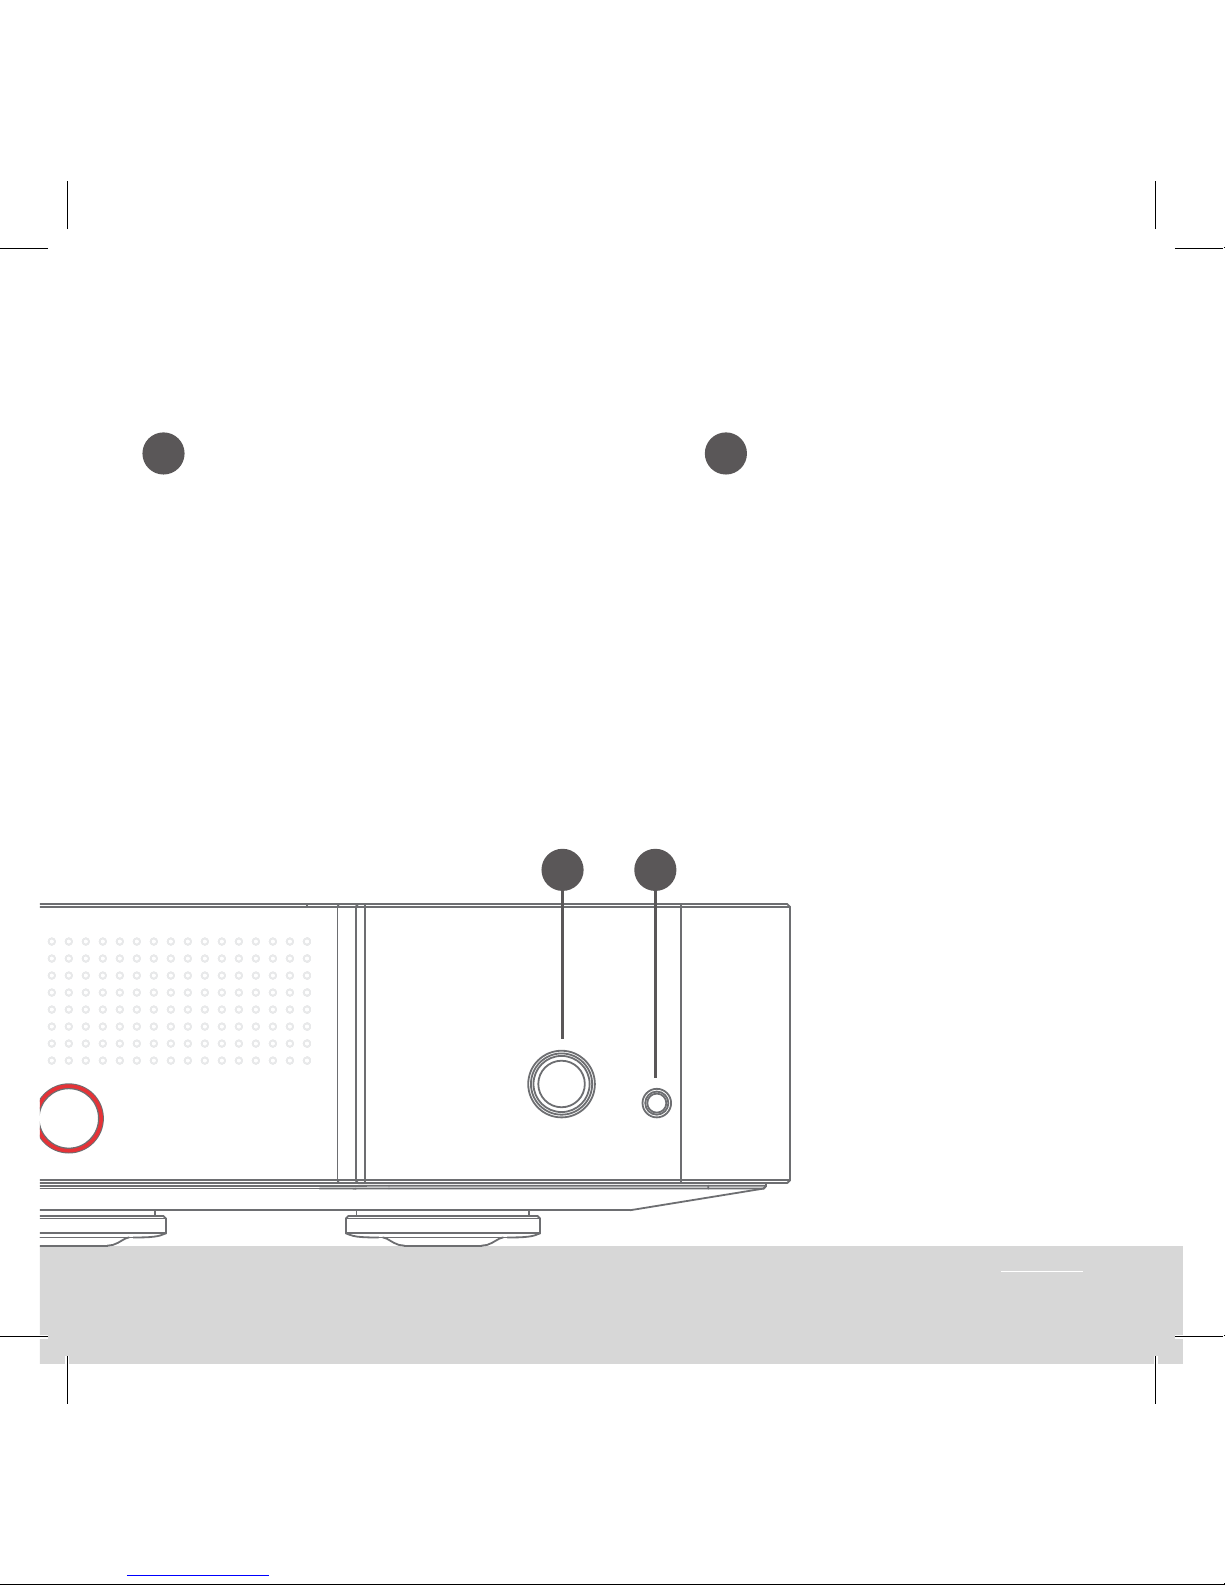
6,3mm headphone output
The headphone output is
located at the front of the
device. DAC212 by default
automatically switches
between outputs once a
headphone is connected or
disconnected.
IR & daylight sensor
DAC212 senses the daylight
intensity and automatically
adjusts the display intensity
setting accordingly.
The DAC212 also receives
infra red remote control
signals through this
location.
3
3 4
4
Page 8
8
S
vol
+ A23
S
vol
vol
vol
S
vol
INTRODUCTION: REMOTE CONTROL
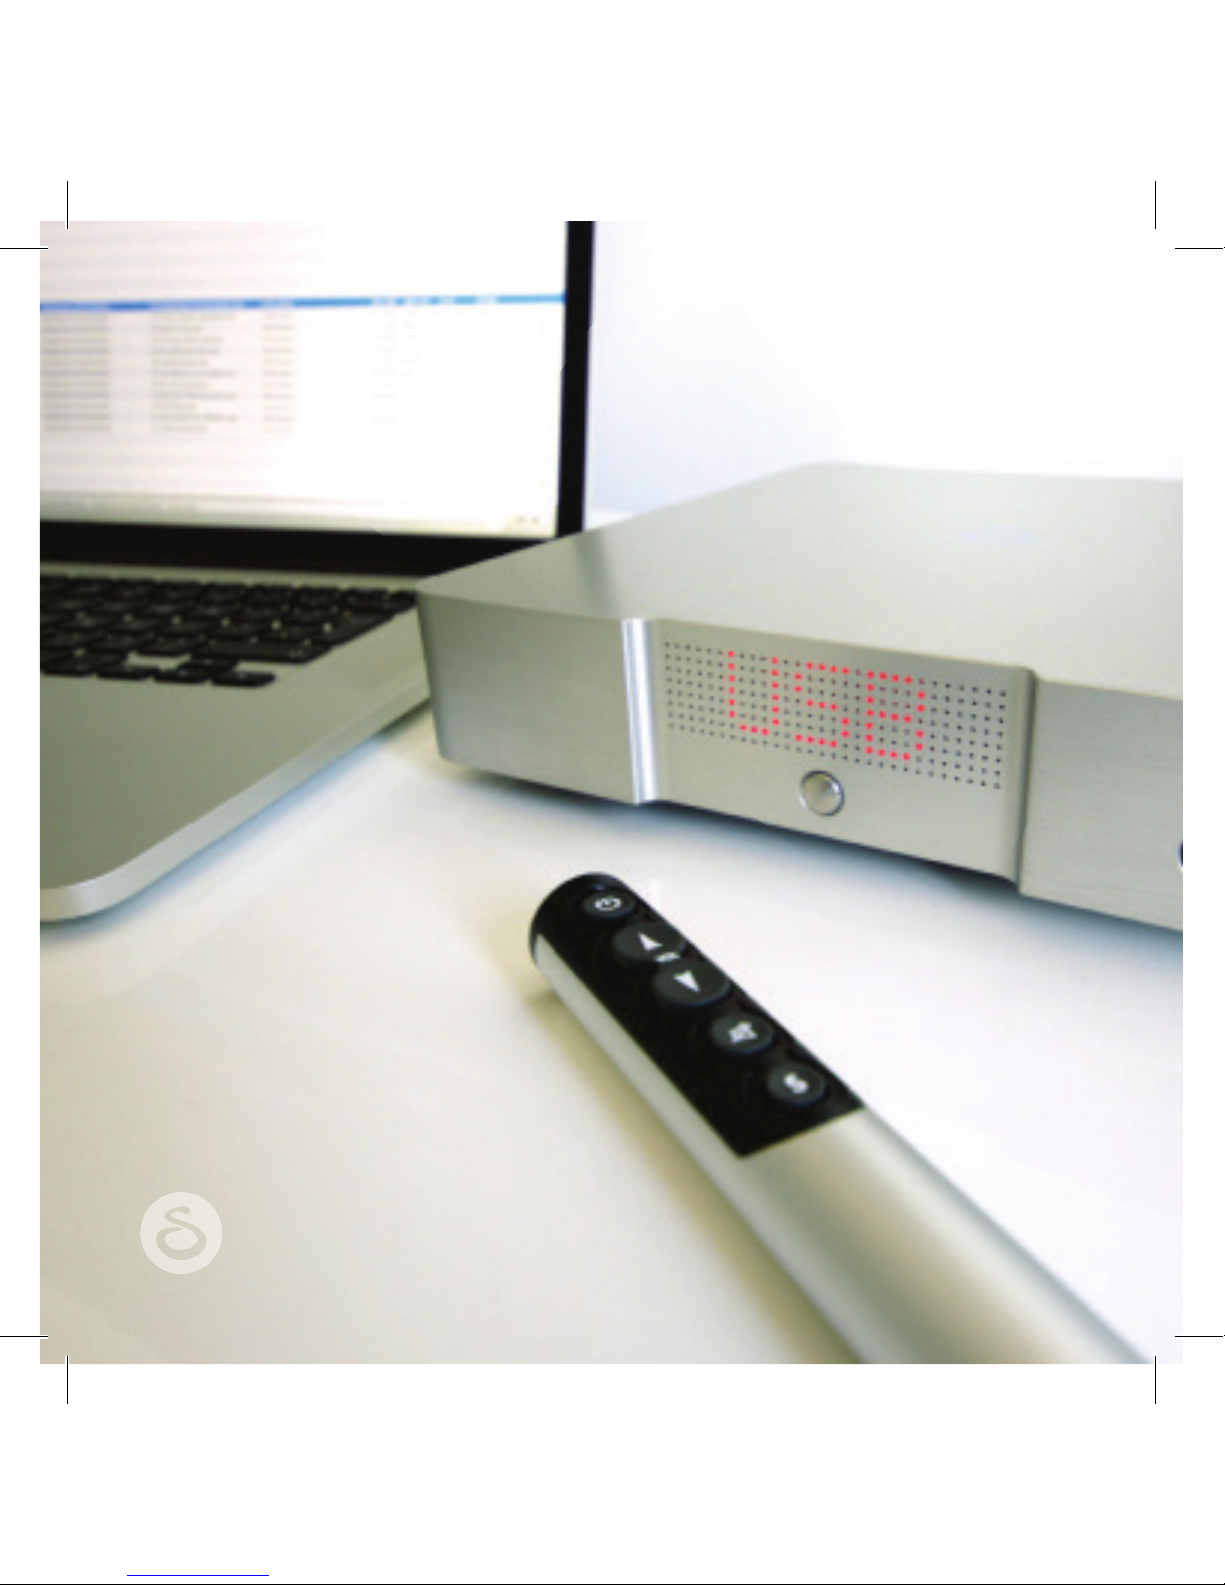
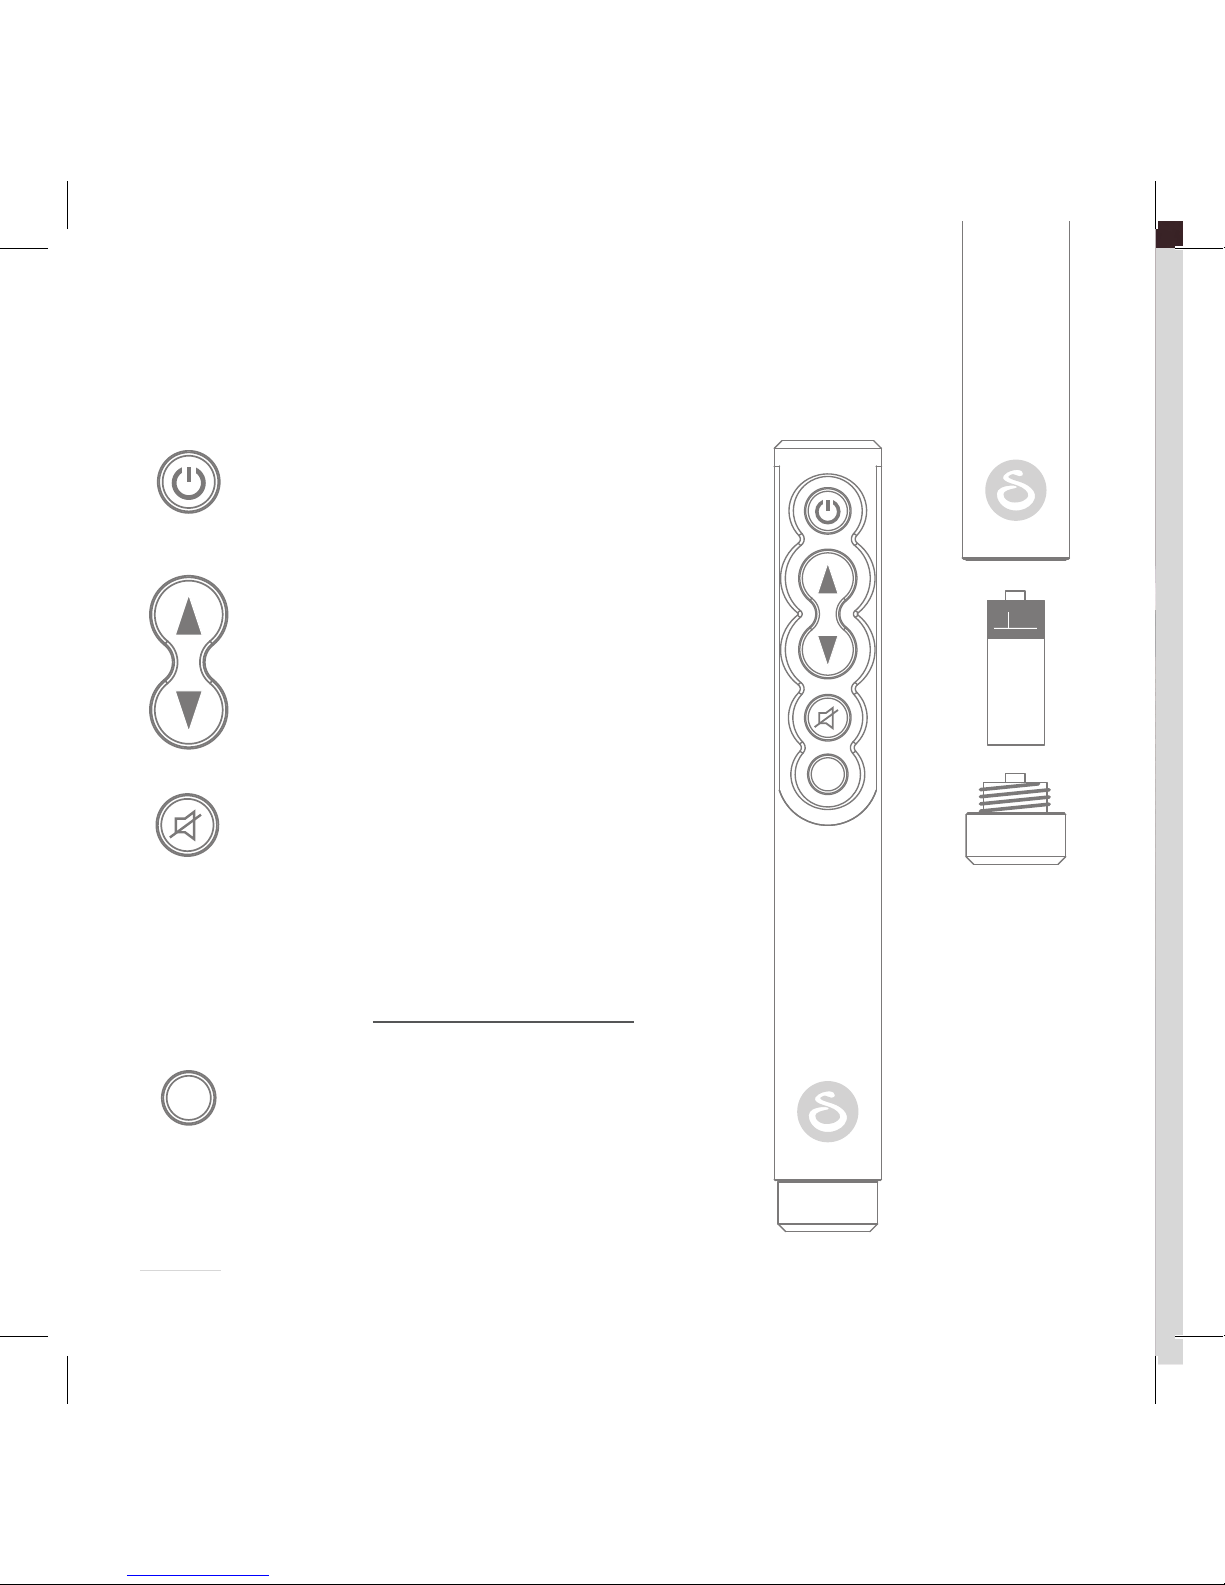
On/off
Switch the device on and off using
the on/off button.
Volume up/down
Arrow up is volume up.
Arrow down is volume down.
Volume can only be controlled through
the use of the remote control.
Mute
Pressing the mute button will mute or
unmute the audio output.
Press and hold the mute button to enter
and exit the setup menu. Find out more
about these advanced features on our
website: www.didit-highend.com
Input select
Press the S button multiple times to
cycle through the available inputs.
Only use type E23A 12V
Alkaline replacement
bateries. Placement as
illustrated above.
Page 9
9
NOW:
CONNECT
PLAY
ENJOY
Page 10
10
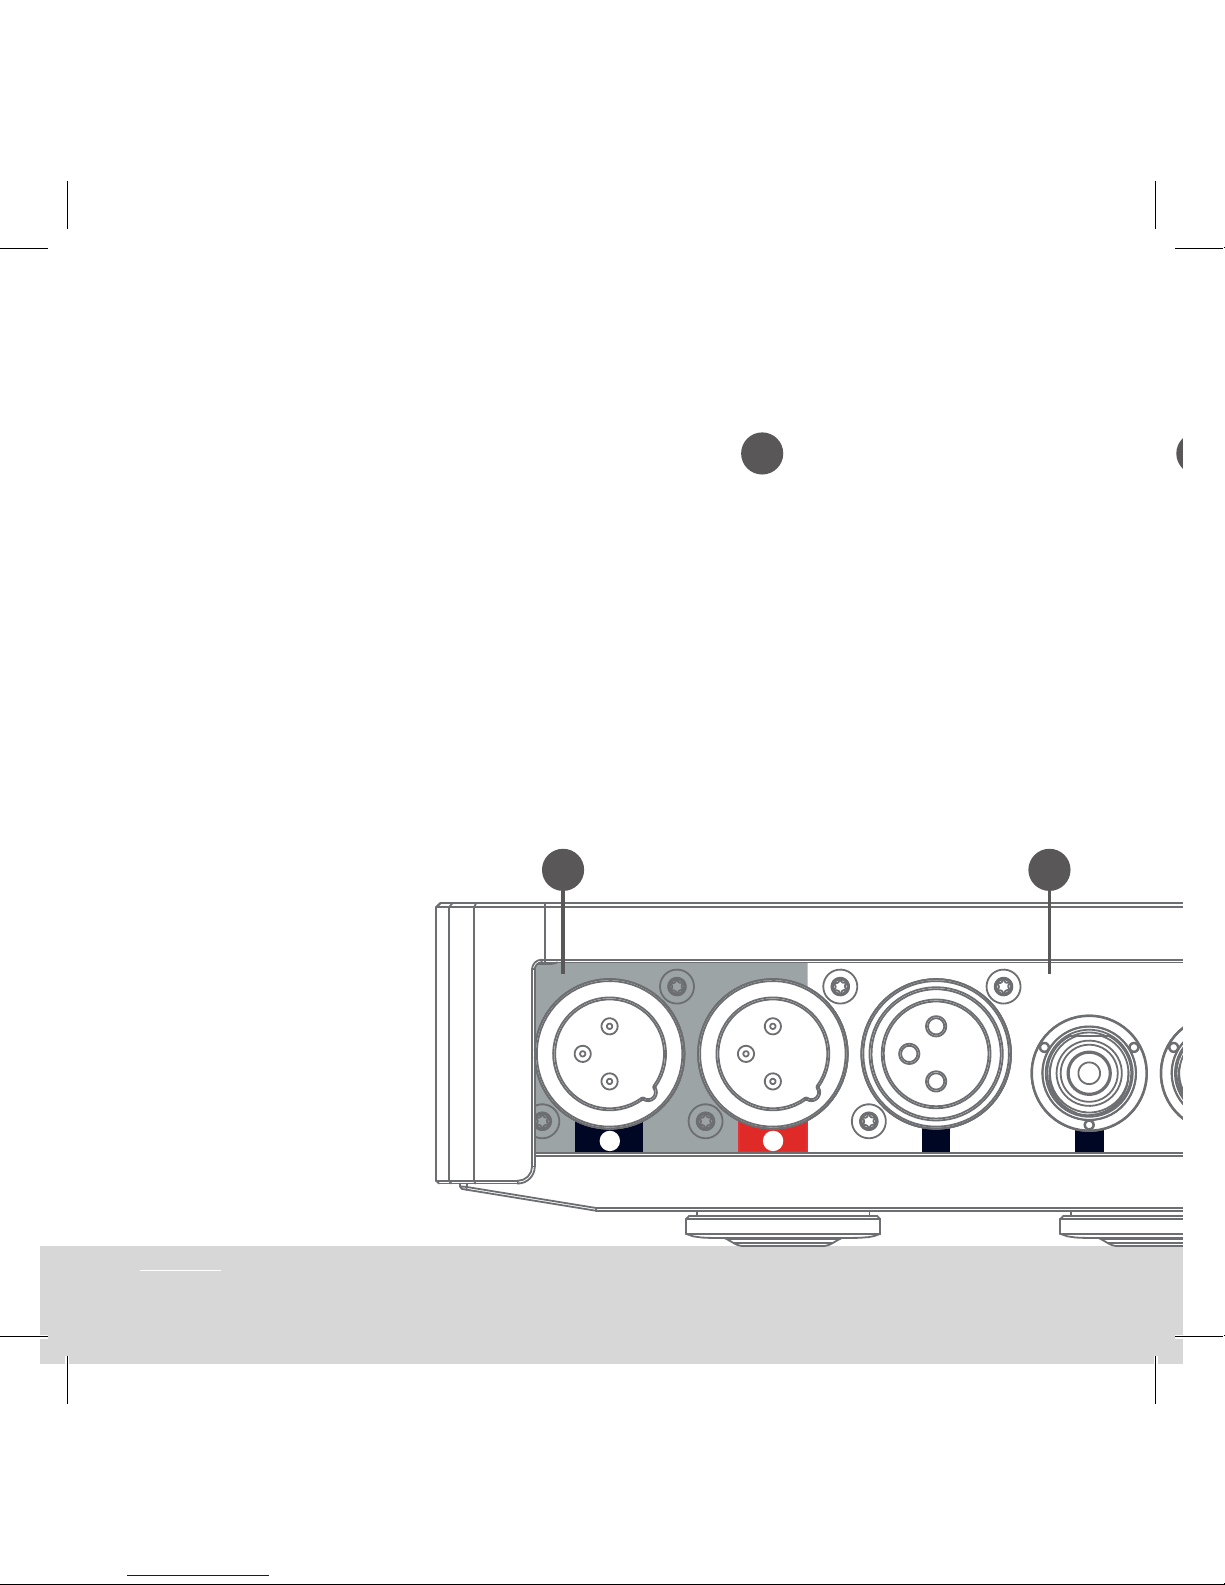
DIGITAL INPUTS
1 2
3 I2S
5 4
USB HOST
LINK
RL
Output
XLR outputs can be
found on the back of the
device.
CONNECTING: REAR PANEL IN AND OUTPUTS
IMPORTANT: First make all the audio
connections before you connect the
mains power cord. Check twice if
all connections are made correctly
(please refer to the illustrations below)
When connected to the mains power,
a red illuminated ring will appear
behind the button below the display
21
1
2
Page 11
11
3 I2S
5 4
USB HOST
LINK
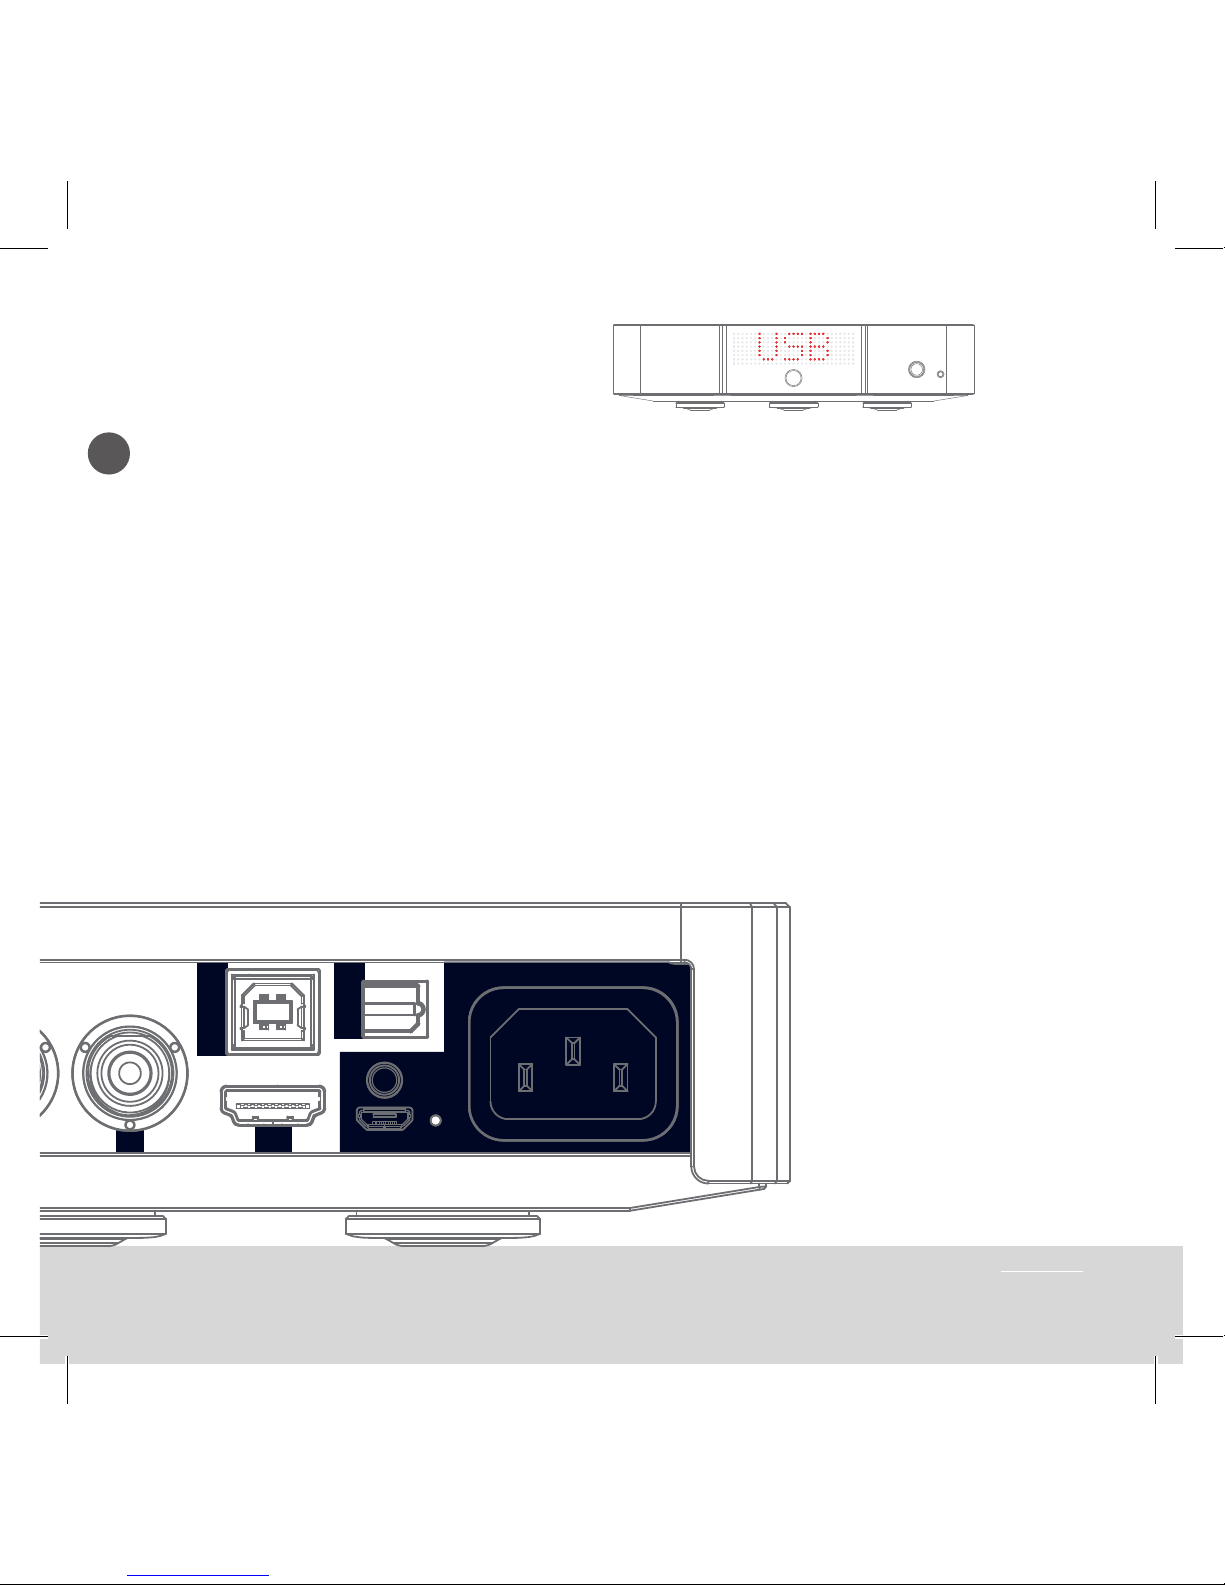
Digital Inputs (6x)
Inputs are numbered
from 1 to 5 on the back
panel. Select inputs
using the S button
on the remote or by
pressing the button on
the front of the device
shortly.
Input 1: AES (Display: AES)
44.1 KHz - 192KHz
Input 2: Coaxial 1 (Display: Coax1)
44.1 KHz - 192KHz
Input 3: Coaxial 2 (Display: Coax2)
44.1 KHz - 192KHz
Input 4: Optical (Display: Optic)
44.1 KHz - 192KHz
Input 5: USB (Display: USB)
44.1 KHz - 384KHz, DSD64, DSD128, DSD256, DSD512
Input 6: Bluetooth (Display: xBT)
Wireless streaming input (aptX 48KHz)
2
Page 12
12
DIGITAL INPUTS
1 2
3 I2S
5 4
USB HOST
LINK
RL
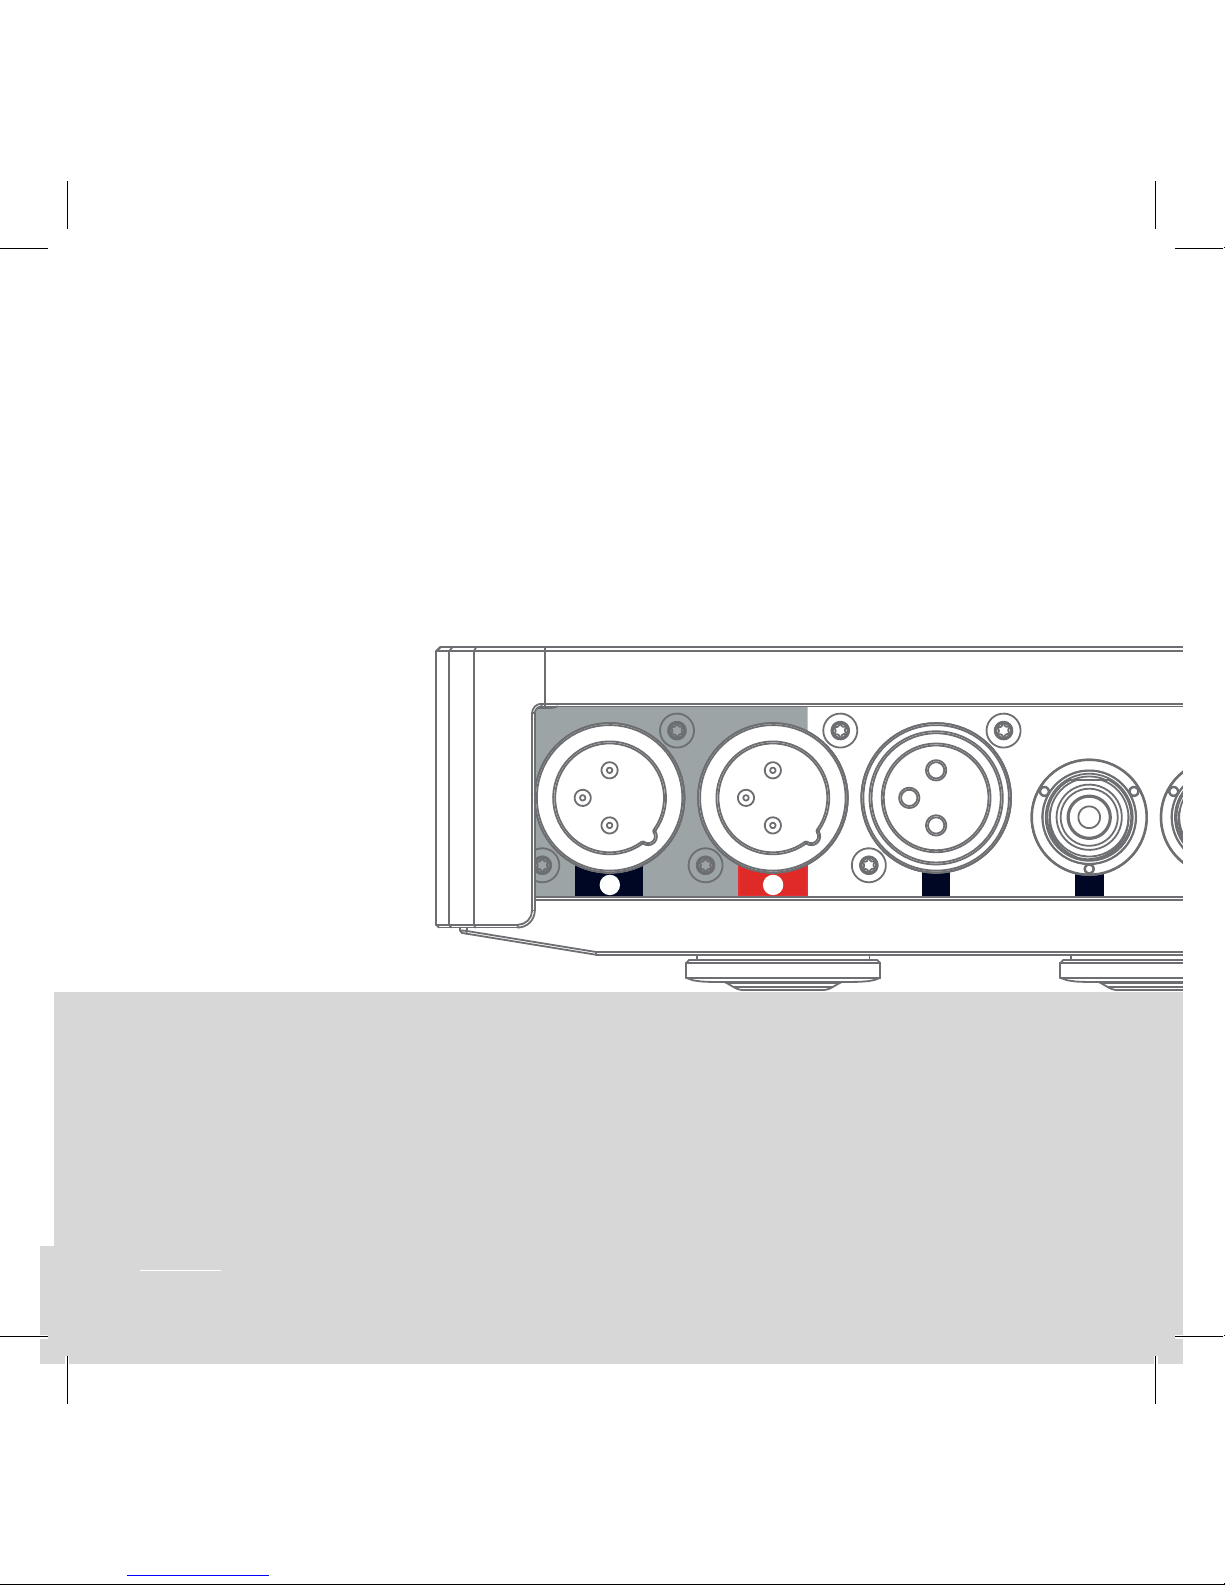
CONNECTING: POWER INPUT + DATA CONNECTIONS
Page 13
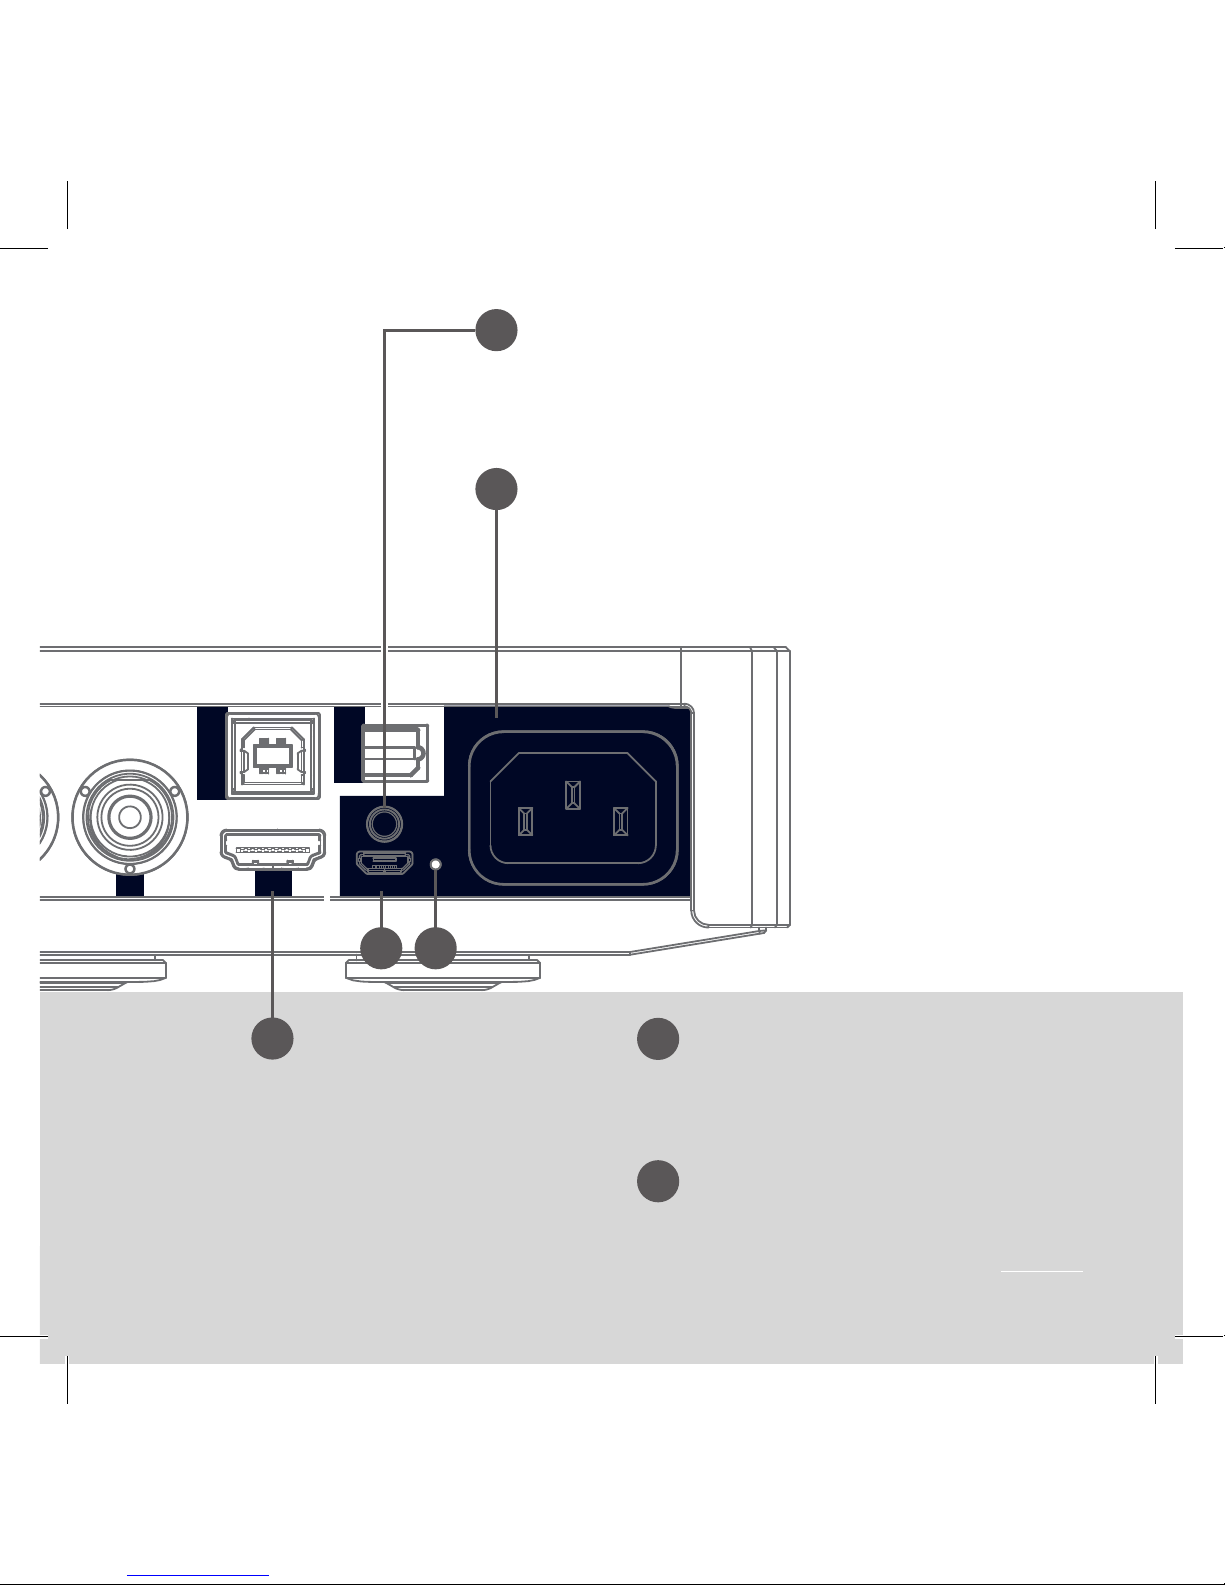
USB host
This usb connection is used for
rmwareupdates.
Boot switch
Used to enter the bootloader for
rmwareupdates.
13
3 I2S
5 4
USB HOST
LINK
Power input (90 - 260 VAC)
Use the supplied AC power cord to power the
device. Plug the other end of the AC power
adapter in your wall socket.
I2S
Congurableinput
that can be used for
dedicated I2S links
and break-out cables.
4
3
6
7
5
6 7
DiDiT link
The DiDiT link is a device data connection between
DiDiT devices. The DiDiT link can be used for home
automation purposes as well.
Page 14

14
Avoid any contact with liquids. The
DAC212 is not waterproof and is
designed to function in a total dry
environment.
Disconnect the mains power in the
following events:
• When not used for a
prolonged period of time
• When going on holiday or leave
• When the device produces
excessive heat and/
or is too hot to touch
• When the output sound
seems distorted
• When liquids got into contact
with the enclosure
• In case of lightning strikes
• When your family is complaining
you are spending to much
time listing to music while
they need your attention
Caution! Your ears are fragile
and once damaged, the effect is
irreversible. Be aware that (long
term) high listening levels can cause
damage to your ears. Because
the DAC212 has such a clean
undistorted sound, there may be
a tendency to keep increasing the
volume level. Higher listening levels
are often reached unnoticed.
We strongly advice you to initially
set the volume a little lower than
you would normally do. This is
especially the case when using the
high-power headphone output.
Be sure you connect the DAC212
to a 3 pin earthed mains power
connection. If this is not available
pleasecontactyourlocalcertied
electrician to modify your mains
outlets.
IMPORTANT USAGE INFORMATION
Page 15
15
The DAC212 will work with a mains
voltage from 90 to 260VAC. Be sure
your mains connection is within this
range.
Only use high quality audio
interconnect cables between the
DAC212 and your other equipment.
When connected to a power
amplier,checkthevolumesetting
before you start playing music. By
default the DAC212 is set to be on
the safe side, start at a setting of
-40dB or lower and slowly turn the
volume up.
Proudly made by:
DiDiT High-End
Reeweg 12-6
1394 JD Nederhorst den Berg
The Netherlands
For more information and details
of the more advanced features of
this device please visit:
www.didit-highend.com
Page 16
16
CONNECT
PLAY
ENJOY
v 1.14
 Loading...