

Page 1
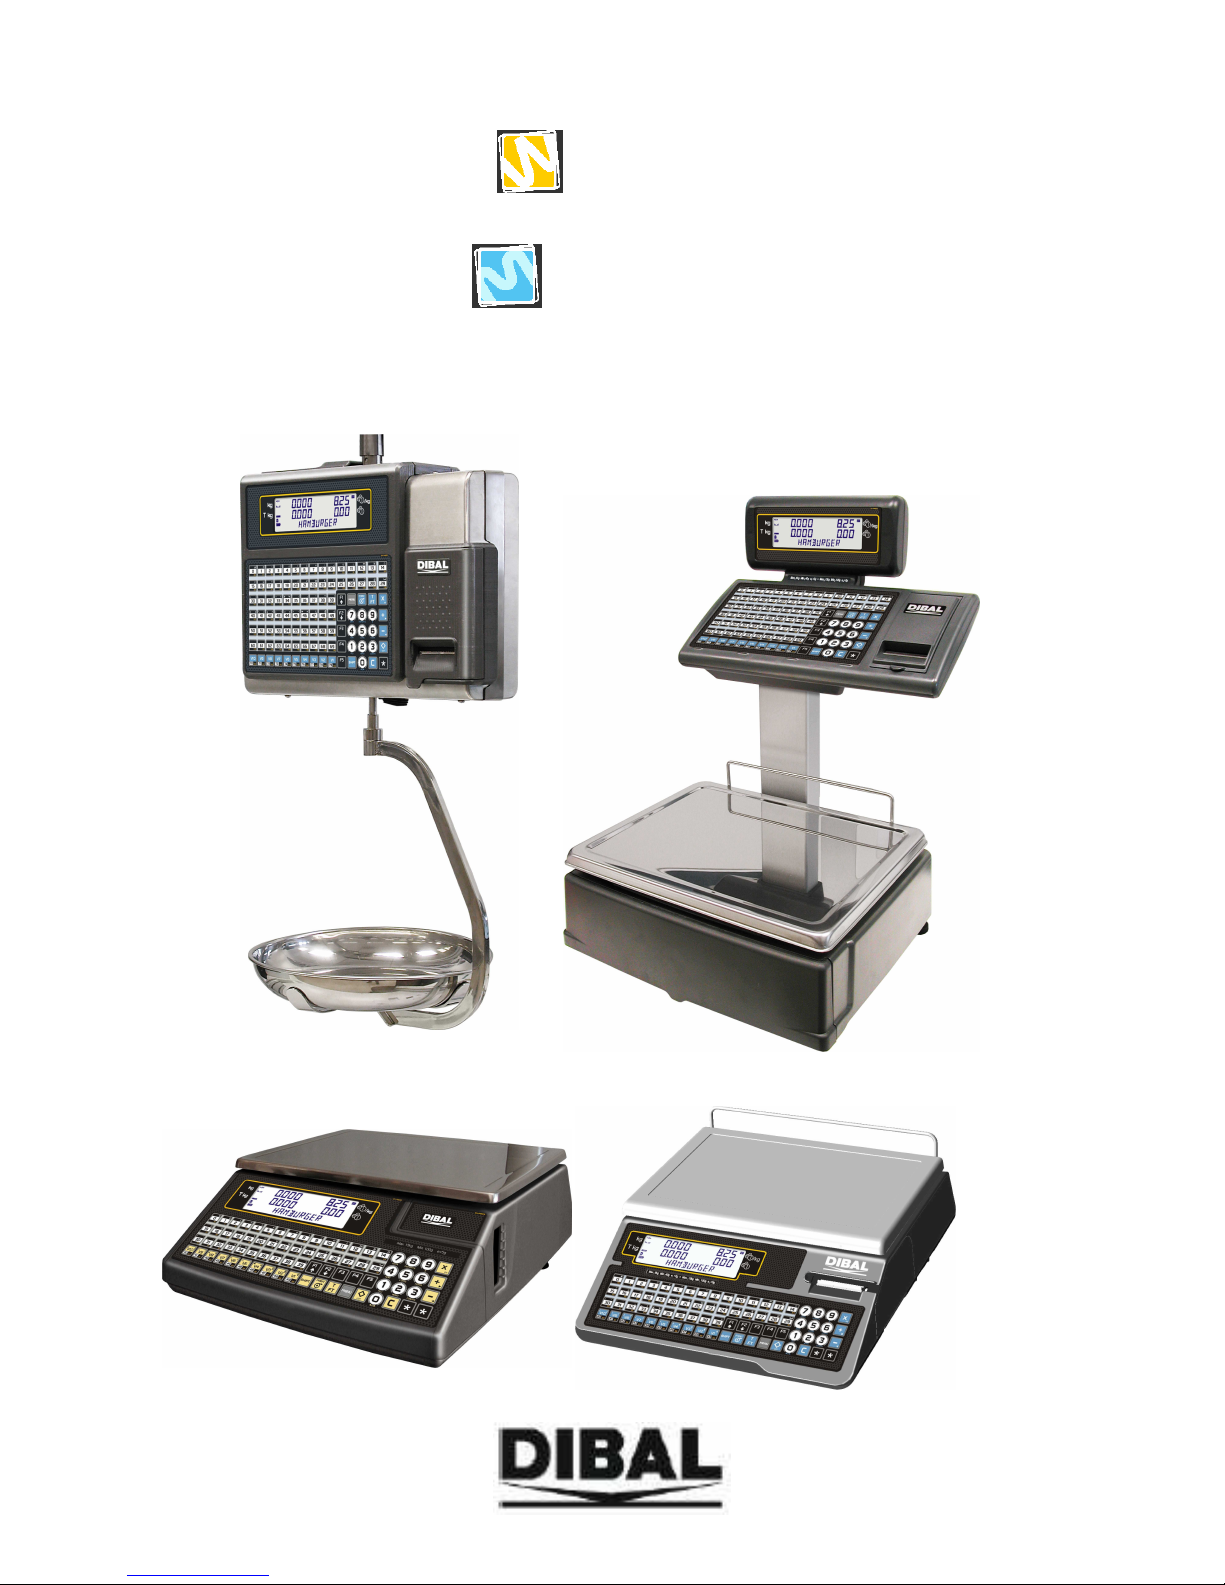
500 RANGE
500 RANGE500 RANGE
500 RANGE
W
W W
Wind
indind
ind
WWWW----010, W
010, W010, W
010, W----015, W
015, W015, W
015, W----020, W
020, W020, W
020, W----025
025025
025
M
M M
Mistral
istralistral
istral
MMMM----510, M
510, M510, M
510, M----515, M
515, M515, M
515, M----555520, M
20, M20, M
20, M----525
525525
525
49-M500WMEN25
USER´S MANUAL USUARIO
Page 2

Page 3

500 Range
I
CONTENTS
1. INTRODUCTION.................................................................................................................................................1
1.1. PRESENTATION...........................................................................................................................................1
1.2. MAIN CHARACTERISTICS ........................................................................................................................1
1.3. WEIGHING SCALES SPECIFICATIONS...................................................................................................2
1.3.1. General....................................................................................................................................................2
1.3.2. Accessories..............................................................................................................................................2
1.4. INSTALLATION OF SCALES.....................................................................................................................3
1.5. MAINTENANCE ADVICE AND HOW TO LOOK AFTER YOUR 500 RANGE SCALES...................4
2. OPERATION.........................................................................................................................................................5
2.1. SWITCHING ON............................................................................................................................................5
2.2. STARTING UP...............................................................................................................................................6
2.3. HOW TO OPERATE THE SCALES.............................................................................................................7
2.3.1. Direct price.............................................................................................................................................7
2.3.2. Normal weight.........................................................................................................................................7
2.3.3. Non-weight operations (adding, subtraction and multiplication)..........................................................8
2.3.4. Manual zero............................................................................................................................................8
2.3.5. In line discount........................................................................................................................................9
2.3.6. Receipt printing: calculation of change and discount............................................................................9
2.3.7. Review receipt.......................................................................................................................................10
2.3.8. Receipt reopening..................................................................................................................................11
2.3.9. Operation in label mode........................................................................................................................11
2.3.10. Fix price................................................................................................................................................12
2.3.11. Increase or decrease price....................................................................................................................12
2.3.12. Net weight operations...........................................................................................................................13
2.3.13. Free price..............................................................................................................................................14
2.3.14. Return weight........................................................................................................................................14
2.3.15. Best Before*..........................................................................................................................................15
2.3.16. Batch number*......................................................................................................................................15
2.3.17. Totals labels..........................................................................................................................................16
2.3.18. Forms of payment..................................................................................................................................17
2.3.19. Account payment form ..........................................................................................................................17
2.3.20. Two Pay Mode......................................................................................................................................18
2.3.21. Selecting a default vendor.....................................................................................................................20
2.3.22. Next Plu.................................................................................................................................................20
2.3.23. SELF-SERVICE MODE........................................................................................................................21
2.3.24. Configure backlighting..........................................................................................................................21
2.3.25. Stock Manager ......................................................................................................................................21
3. PROGRAMMING...............................................................................................................................................27
3.1. ARTICLES [ 1 ]............................................................................................................................................29
3.1.1. Creating/modifying a PLU....................................................................................................................29
3.1.2. Copy An Article.....................................................................................................................................34
3.1.3. Delete Article.........................................................................................................................................34
4. VENDORS [ 2 ]....................................................................................................................................................35
4.1. REGISTERING VENDORS [ 2 1 ].............................................................................................................35
4.1.1. Consulting active vendors.....................................................................................................................36
4.1.2. Training model......................................................................................................................................36
4.2. REMOVING VENDORS [ 2 2 ]..................................................................................................................37
4.2.1. Removing all vendors............................................................................................................................37
4.3. CASH DRAWER OPERATION [ 2 3 ]......................................................................................................38
5. CONFIGURATION [ 3 ]....................................................................................................................................39
5.1. MAIN CONFIGURATION..........................................................................................................................39
5.1.1. PC Configuration [ 3 1 ]......................................................................................................................39
5.1.2. Conf. keyboard [ 3 2 ]..........................................................................................................................41
5.1.3. Receipt configuration [ 3 3 ]................................................................................................................42
Page 4
USER´S MANUAL
II
5.1.4. Label configuration [ 3 4 ]...................................................................................................................46
5.1.5. Printing configuration [ 3 5 ]...............................................................................................................48
5.1.6. Conf. EAN [ 3 6 ]..................................................................................................................................50
5.1.7. Configuration. Others [ 3 7 ] ...............................................................................................................54
5.1.8. Conf. Display [ 3 8 ].............................................................................................................................56
6. TEXTS [ 4 ] ..........................................................................................................................................................57
6.1. HEADING LINES (FREE TEXT IN LABEL) [ 4 1 ].................................................................................57
6.2. ADVERTISING TEXTS [ 4 2 ]...................................................................................................................58
6.3. SECTIONS [ 4 3 ].........................................................................................................................................59
6.3.1. Section names........................................................................................................................................59
6.3.2. Ean13 per Section.................................................................................................................................59
6.4. PAYMENT MODE [ 4 4 ]...........................................................................................................................60
6.5. TRACEABILITY [ 4 5 ] ..............................................................................................................................61
6.5.1. Definition of PLU Class........................................................................................................................61
6.5.2. Product programming [ 4 5 1 ] ...........................................................................................................62
6.5.3. Table of texts Programming [ 4 5 2 ] ..................................................................................................63
6.5.4. Example.................................................................................................................................................64
6.6. SHORT MESSAGES [ 4 6 ]........................................................................................................................66
6.6.1. Read messages [ 4 6 1 ].......................................................................................................................66
6.6.2. Delete messages [ 4 6 2 ].....................................................................................................................66
7. COMUNICATIONS [ 5 ]....................................................................................................................................67
7.1. ETHERNET COMMUNICATION PARAMETER [ 5 1 ]......................................................................68
7.1.1. Configure the Scale’s IP Address [ 5 1 1 ]..........................................................................................68
7.1.2. Configure the PC’s IP Address [ 5 1 2 ]..............................................................................................68
7.1.3. Equipment Number [ 5 1 3 ]................................................................................................................68
7.1.4. Configure the TCP TX Port [ 5 1 4 ]...................................................................................................68
7.1.5. Configure the TCP RX Port [ 5 1 5 ]...................................................................................................69
7.1.6. MAC Address [ 5 1 6 ].........................................................................................................................69
7.1.7. Subnetwork Mask [ 5 1 7 ]...................................................................................................................69
7.1.8. Gateway Address [ 5 1 8 ] ...................................................................................................................69
7.2. RS-232 COMMUNICATION PARAMETER [ 5 2 ] .................................................................................70
7.3. OPERATIONS WITH PC [ 5 3 ].................................................................................................................70
7.3.1. Send end of day with totals clearance [ 5 3 1].....................................................................................70
7.3.2. Send end of day without totals deletion [ 5 3 2 ].......................................................................71
7.3.3. Request start of day [ 5 3 3 ]................................................................................................................71
7.3.4. Initialization of scale [ 5 3 4 ]..............................................................................................................71
7.3.5. BACKUP (LBS) [ 5 3 5 ] .....................................................................................................................71
7.4. SCALE NETWORK [ 5 4 ]..........................................................................................................................72
7.4.1. Master slave..........................................................................................................................................72
7.4.2. Slave scale.............................................................................................................................................74
8. SCANNER CONNECTION*.............................................................................................................................76
8.1. SCANNER INSTALLATION*....................................................................................................................76
8.2. SCANNER* BAR CODE READING..........................................................................................................76
9. FORMATS [ 6 ]...................................................................................................................................................79
9.1. LABEL [ 6 1 ]...............................................................................................................................................79
9.1.1. Program label format [ 6 1 1 ] ............................................................................................................79
9.1.2. Copying a label format [ 6 1 2 ]..........................................................................................................84
9.1.3. Deleting a label format [ 6 1 3 ]..........................................................................................................84
9.2. RECEIPT [ 6 2 ] ...........................................................................................................................................85
9.2.1. Program Receipt Format [ 6 2 1 ].......................................................................................................85
9.2.2. Copying a receipt format [ 6 2 2 ].......................................................................................................91
9.2.3. Deleting a receipt format [ 6 2 3 ].......................................................................................................91
10. LOGOTYPES LOADING..............................................................................................................................92
10.1. PRINTING LOGOTYPES.......................................................................................................................92
10.2. PROGRAMMABLE LOGOTYPES........................................................................................................92
Page 5
500 Range
III
11. DATA [ 7 ]........................................................................................................................................................93
11.1. DATES [ 7 1 ]...........................................................................................................................................93
11.1.1. Group Number[ 7 1 1 ]........................................................................................................................93
11.1.2. Wholesalers Limit [ 7 1 2 ]..................................................................................................................93
11.1.3. Vat Types [ 7 1 3 ]................................................................................................................................94
11.1.4. Tares [ 7 1 4 ].......................................................................................................................................94
11.1.5. Currencies [ 7 1 5 ]..............................................................................................................................94
11.1.6. Date and time [ 7 1 6 ].........................................................................................................................96
11.1.7. Programming Euro [ 7 1 7 ]................................................................................................................96
11.1.8. Programmable EAN [ 7 1 8 ]...............................................................................................................97
11.1.9. Loyalty points [ 7 1 9 ].........................................................................................................................97
11.2. SELF-SERVICE MODE [ 7 2 ]...............................................................................................................98
11.2.1. Self-service Mode Configuration [ 7 2 1 ]...........................................................................................98
11.2.2. Self-service Mode. Fix Code [ 7 2 2 ]..................................................................................................99
11.3. PROGRAMMING CODES [ 7 3 ] ........................................................................................................100
11.3.1. Master Password [ 7 3 1 ] .................................................................................................................100
11.3.2. Programmation Password [ 7 3 2 ]...................................................................................................100
11.3.3. Vendors Passwords [ 7 3 3 ]..............................................................................................................100
11.3.4. Communications Password [ 7 3 4 ] .................................................................................................101
11.3.5. Lists Password [ 7 3 5 ] .....................................................................................................................101
11.4. PRINTING PARAMETERS [ 7 4 ].......................................................................................................101
11.4.1. Label parameters [ 7 4 1 ].................................................................................................................101
11.4.2. Receipt parameters [ 7 4 2 ]..............................................................................................................105
12. REPORTS [ 8 ]..............................................................................................................................................106
12.1. LISTS [ 8 1 ]...........................................................................................................................................106
12.1.1. Report of Articles by Code from 00000 to 99999 [ 8 1 1 ]................................................................106
12.1.2. Report of Articles by PLU [ 8 1 2 ]....................................................................................................106
12.1.3. Report of Articles by Equivalence PLU / CODE [ 8 1 3 ].................................................................106
12.1.4. Sales per Artcile by Code [ 8 1 4 ].....................................................................................................107
12.1.5. Sales per Artcile by PLU [ 8 1 5 ]......................................................................................................107
12.1.6. Sales by Vendor/Article [ 8 1 6 ]........................................................................................................108
12.1.7. Big Total Group [ 8 1 7 ]...................................................................................................................108
12.1.8. Sales per Article by Code [Extended] fom 00000 to 99999 [8 1 8] ..................................................109
12.1.9. Big Total Group [ 8 1 9 ]...................................................................................................................110
12.1.10. V.A.T Totals [ 8 1 10 ]...................................................................................................................111
12.1.11. Sales per Section [ 8 1 11 ]............................................................................................................112
12.1.12. Hourly Sales Report [ 8 1 12 ].......................................................................................................112
12.1.13. Last PLU modified [ 8 1 13 ].........................................................................................................112
12.1.14. Cash Drawer Report [ 8 1 14 ]......................................................................................................113
12.1.15. Traceability Report [ 8 1 15 ]........................................................................................................113
12.1.16. On Credit Customers Report [ 8 1 16 ].........................................................................................113
12.1.17. Fiscal Report [ 8 1 17 ]..................................................................................................................113
12.1.18. Stock Report [ 8 1 18 ]...................................................................................................................114
12.2. LOGOS [ 8 2 ]........................................................................................................................................114
12.3. FONTS [ 8 3 ].........................................................................................................................................114
13. DELETIONS [ 9 ]..........................................................................................................................................115
13.1. Z DELETION [ 9 1 ]..............................................................................................................................115
13.2. DELETING LEVELS [ 9 2 ]..................................................................................................................115
13.3. PARCIAL DELETINGS [ 9 3 ].............................................................................................................116
13.3.1. Articles Deletion [ 9 3 1 ] ..................................................................................................................116
13.3.2. Formats Deletion [ 9 3 2 ].................................................................................................................116
13.3.3. Traceability Deletion [ 9 3 3 ]...........................................................................................................116
13.3.4. Configuration Deletion [ 9 3 4 ]........................................................................................................117
14. MACROS [ 10 ]..............................................................................................................................................118
14.1. PROGRAM. MACROS [ 10 1 ]............................................................................................................118
Page 6

USER´S MANUAL
IV
14.2. COPYING MACROS [ 10 2 ]...............................................................................................................119
14.3. DELETING MACROS [ 10 3 ].............................................................................................................119
14.4. EDITING MACROS [ 10 4 ].................................................................................................................120
15. APPENDIX ....................................................................................................................................................121
15.1. TROUBLESHOOTING..........................................................................................................................121
15.1.1. Problems with weighing......................................................................................................................121
15.1.2. Communication errors........................................................................................................................121
15.1.3. Problems with articles.........................................................................................................................122
15.1.4. Printing Problems...............................................................................................................................122
15.1.5. Problems with the screen and keyboard.............................................................................................123
15.1.6. Programming Problems......................................................................................................................123
15.2. COMMUNICATION CONNECTORS.................................................................................................124
15.3. TURNOMATIC......................................................................................................................................124
15.4. CASH DRAWER OPENING CABLE ..................................................................................................124
15.5. CHANGE OF PAPER............................................................................................................................125
15.5.1. Changing paper in the printer.............................................................................................................125
15.5.2. Changing paper in the labelling machine...........................................................................................126
15.6. FORMATS..............................................................................................................................................131
15.6.1. label formats........................................................................................................................................131
15.6.2. Voucher formats..................................................................................................................................134
15.7. KEYBOARDS........................................................................................................................................135
15.7.1. Formats...............................................................................................................................................135
15.7.2. Key Options.........................................................................................................................................135
15.8. DISPLAY................................................................................................................................................138
16. BACK-UP AND RESTORE (LBS).............................................................................................................139
16.1. BACKUP COPY.....................................................................................................................................139
16.2. RESTORE FILE (RESTORE)................................................................................................................140
17. BLUE GRAPHIC DISPLAY.......................................................................................................................141
17.1. INTRODUCTION..................................................................................................................................141
17.2. DISPLAY FORMATS............................................................................................................................141
17.2.1. Display Formats..................................................................................................................................142
17.3. MENUS...................................................................................................................................................143
17.4. ITEM DETAILS.....................................................................................................................................144
17.5. VENDORS..............................................................................................................................................144
17.6. LABEL FORMAT EDITION.................................................................................................................145
17.7. TOTAL SCREENS.................................................................................................................................145
17.8. SUBTOTAL SCREENS.........................................................................................................................146
17.9. DISPLAY SETUP MENU......................................................................................................................147
17.9.1. Display Standby [ 3 8 1 ]...................................................................................................................147
17.9.2. Logo Start Up [ 3 8 2 ].......................................................................................................................147
17.9.3. Change Display [ 3 8 3 ]....................................................................................................................147
17.9.4. Clock section logo [ 3 8 4 ]................................................................................................................147
17.10. WARNING SCREENS...........................................................................................................................148
17.11. STANBY SCREEN................................................................................................................................148
18. APPENDIX ON BATTERIES.....................................................................................................................149
18.1. RECOMMENDATIONS FOR SCALES WITH BATTERIES............................................................149
18.2. WORKING MODES OF THE 500 SERIES BATTERY......................................................................150
18.3. BATTERY CONTROL PARAMETERS..............................................................................................150
18.4. OPERATION DEPENDING ON THE BATTERY CONTROL PARAMETER VALUE..................150
18.4.1. Battery control to 0 .............................................................................................................................150
18.4.2. Battery control to 1(default value)......................................................................................................150
18.4.3. Battery control to 2 .............................................................................................................................150
18.5. MESSAGES AND INDICATORS IN BATTERY-RUN SCALE........................................................151
18.5.1. Messages and indicator of battery load..............................................................................................151
18.5.2. Messages and indication depending on operation status...................................................................151
18.5.3. Messages in operating mode changes.................................................................................................152
18.6. ANTI BLACK-OUT BATTERY...........................................................................................................152
18.7. OPERATION WITH EXTERNAL BATTERY....................................................................................152
19. LINERLESS APPENDIX.............................................................................................................................153
Page 7

500 Range
V
19.1. MODELS................................................................................................................................................153
19.2. LABELLING ASSEMBLY....................................................................................................................153
19.2.1. LINERLESS CASSETTE.....................................................................................................................153
19.2.2. INCOMPATIBILITIES........................................................................................................................154
19.3. CONFIGURATION................................................................................................................................154
19.4. RECOMMENDATIONS OF USE.........................................................................................................154
Page 8

Page 9

500 Range
49-M500WMEN25
1
1.INTRODUCTION
1.1. PRESENTATION
The 500 weighing scale Range are the top of the DIBAL range,
especially designed for use in direct sales to the public.
DIBAL’s 500 weighing scale Range are a powerful work tool that will
permit you to reap maximum benefit from your business.
This manual should always be kept with the weighing scales in order
to ensure maximum performance from your scales in any work
situation.
1.2. MAIN CHARACTERISTICS
The Table below shows the characteristics of all the models in the
DIBAL 500 Range, and the sections in which the main functions are
described.
Furthermore, all the scales in the 500 Range offer:
• Graphic LCD Display with background light.
• Possibility of manual, fixed and pre-programmed net weights.
• Programmable formats for receipt and label.
• Possibility of working with 99 sections.
• BACK-UP operations through the LBS programme.
• 5 VAT rates.
• Connection to cash drawer or turnomatic.
• Logos on receipt / label.
• Different range types (see characteristics chart on scales):
MONO-RANGE MULTI-INTERVAL MULTI-RANGE
Range (kg) Step (g) Range (kg) Step (g) Range (kg) Step (g)
3 1 3/6 1/2 3/6 1/2
6 2 6/15 2/5 6/15 2/5
15 5 15/30 5/10 15/30 5/10
30 10
12 2
Page 10

USER´S MANUAL
49-M500WMEN25
2
1.3. WEIGHING SCALES SPECIFICATIONS
1.3.1.General
POWER SUPPLY.........................................110/230 VAC,50Hz, 1,3A
PRINTING METHOD .............................................THERMAL PAPER
DISPLAY...................................................................
According to model*
* DISPLAY SUPERLUX or DISPLAY BLUE L
PAPER SIZE OF LABELLING MACHINE........
Dimensions: Width x Length
Maximum Length: 100*mm
Max. 80mm. Models:W-010 W-015, M-510, M-515.
Max. 100mm. Models: W-020, W-025,M-520, M-525.
Minimum Length: 30mm
Models: W-015, W-025, M-515 & M-525.
Minimum Width: 30mm
Models: W-015, W-025, M-515 & M-525.
Width with support: 63mm
Models: W-015, W-025, M-515 & M-525.
PAPER SIZE OF RECEIPT...............................
External diameter 100* mm
*According to model
• External diameter: 57mm. Models: W-010, W-020, M-510 & M-520
• External diameter: 62mm. Models: W-015, W-025, M-515 & M-525
• Big Roll: 100mm. Models W-015, W-025, M-515 & M-525
COMMUNICATION TO SCALES............................................
Ethernet*
* Wireless, Homeplug
COMMUNICATION TO PC......................................................
Ethernet*
* Wireless, Homeplug
CANAL DE COMUNICACIÓN OPCIONAL..............................................USB*
*Only models: W-010, W-015, W-020, W-025
TEMPERATURE FOR OPERATION............................-10ºC to +40ºC
PRECISION ........................................1/3000 || 1/6000 MAX. RANGE
1.3.2.Accessories
POWER SUPPLY CABLE
ADHESIVE LABEL ROLL
RECEIPT ROLL
USER’S MANUAL
Page 11

500 Range
49-M500WMEN25
3
1.4. INSTALLATION OF SCALES
Follow the instructions below to ensure correct installation and operation
of the scales.
1. Check that the mains voltage corresponds to that stated on the
specifications label on the scales and that it does not fluctuate in
excess of 10% of nominal voltage.
2. Make sure that the scales can be connected to a nearby socket
that is easy to access. We recommend that the socket should be
provided with differential breaker, thermal-magnetic trips, and
ground.
3. Make sure that other equipment such as refrigerators, cutting
machines, etc. are not connected to same socket.
4. If the scales have a battery option, see Annex Battery operation.
5. Only use the scales in areas that comply with the room
temperature values stated on the specifications label (-10ºC to
40ºC).
6. Peripheral devices connected to the equipment must be
protected against fluctuation peaks of above 8A 100VA.
7. The scales must be placed on a stable, level surface.
8. No objects must come into contact with the dish.
9. Avoid extreme temperatures. Do not place the scales in direct
sunlight or close to air conditioning vents.
10. These scales have not been designed as waterproof scales.
Therefore, avoid high levels of humidity since this might cause
condensation. Protect from rain and avoid direct contact with
water. Do not spray water on the scales or submerge in water. If
the scales get wet, switch off the power supply immediately.
Page 12
USER´S MANUAL
49-M500WMEN25
4
1.5. MAINTENANCE ADVICE AND HOW TO LOOK AFTER YOUR 500 RANGE
SCALES
By following these recommendations, your scales will remain in perfect
working order, thus obtaining a better performance and a longer
life.
1. Never place a weight on the scales that exceeds the maximum
limit.
2. Do not place weights suddenly on the dish if they exceed a sixth of
the maximum limit.
3. Do not exert sideways pressure on the dish
4. Always keep the keypad and dish clean. Use a dry cloth (and a
suitable cleaning product) to clean the scales.
5. Never pour or spray water on the scales. If the scales get wet,
switch off the power supply immediately.
6. Do not move the printer when it is switched on.
7. Do not modify the scales’ mechanical or electrical characteristics.
8. Clean the thermal head with the scales switched off. Do not use
blades or sharp objects for this purpose.
9. Only have the scales repaired by authorised persons, with suitable
training.
10. Always use original parts.
11. It is recommended to keep the scales out of direct sunlight,
protected from rain; avoid excessively humid conditions.
12. If the scales are operated with a battery, follow the
recommendations given in Annexe Battery operation.
WARNING:
Disconnect the cable of the mains supply of the scale from the
electrical socket if the scale needs to be opened or manipulated.
The scales leave the factory prepared for retail sales. Therefore, labels
can be printed at below the minimum limit.
In the case of pre-packaging activities, in accordance with legislation in force
(Standard EN 45501 and Directive 2009/23/EC), this type of equipment may
only be used if packages are above the minimum limit.
The scales can be set up for specific use for pre-packaging tasks.
Consult your supplier or technical assistance service.
Page 13
500 Range
49-M500WMEN25
5
99999
99999
99999 99999
H5XX ESP V010N
-----
-----
-----
----
ALC 15kg
0.000 0.00
0.000 0.00
2.OPERATION
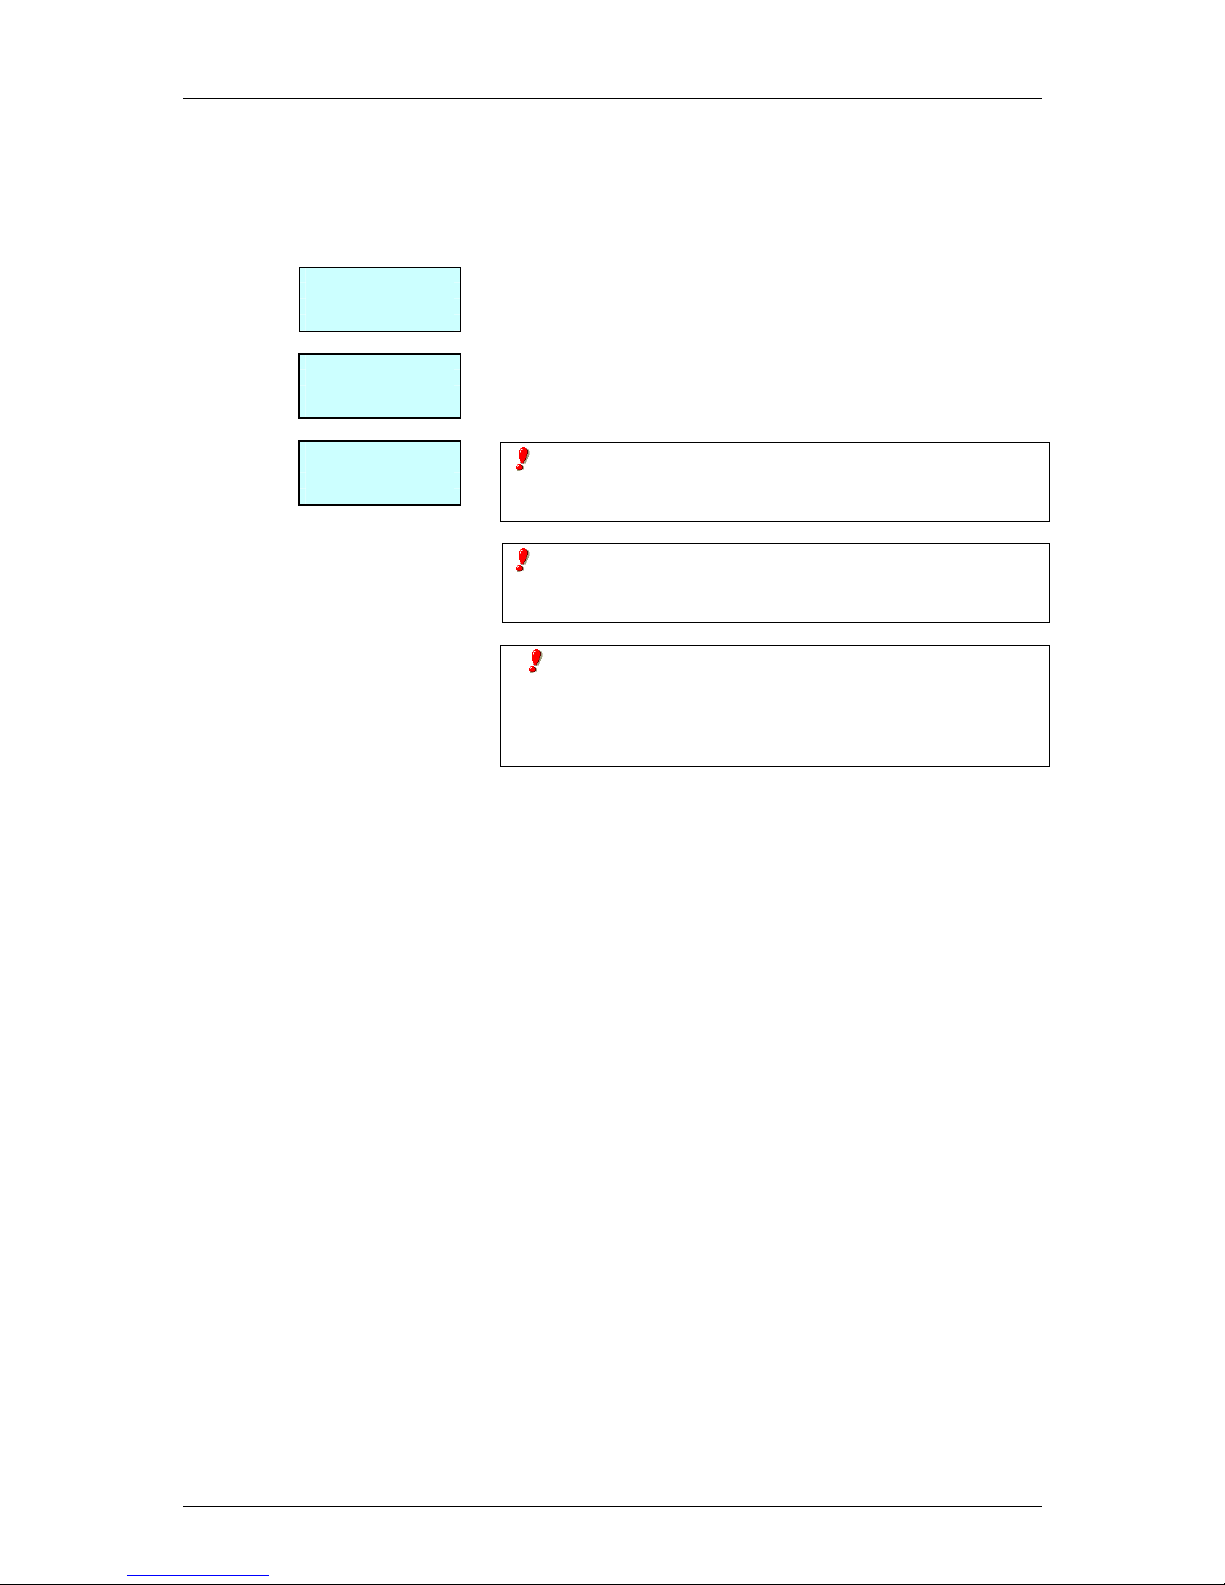
2.1. SWITCHING ON
Check that the weighing scales are correctly installed and then
turn on the switch on the bottom of the scales.
While the scales are checked for any possible errors, the
display shows a countdown from 9 to 0, and information on the
model, programme version and maximum range of the scales is
shown.
When the countdown is complete, and no errors have been
detected, articles and ingredients are checked, and the display
shows some dashes to indicate the scale range.
When the scales are switched on, there should not be
anything on the plate, because when the object is removed,
the scales will consider that weight as the net weight.
If the message, CONNECT THE COMPUTER appears after
countdown, press any key to enter the scales' normal
operation mode.
If the scales are programmed as SLAVE (see section. 3.1
INTRODUCTION) and the corresponding MASTER is not
working the message LOADING DATA will appear, and the
scales will remain in this status, press any key for the scales to
enter normal operation mode.
Page 14

USER´S MANUAL
49-M500WMEN25
6
2.2. STARTING UP
Each of the following steps must be completed to start operating
the scales:
STEP 1: Install the scales as described in sect
1.4.INSTALLATION OF SCALE and switch on as
described in sect. 2.1.SWITCHING ON.
STEP 2: Programme the weighing scale communications, i.e.,
set up the scales as MASTER or SLAVE and assign
the corresponding address (See sect.7.4.1.1 Set up
as MASTER-SLAVE)
STEP 3: If the scales are being used for the first time, or you
wish to programme them again, the memory should
be deleted. (See sect. 7.3.4. INITIALIZATION OF
SCALE)
STEP 4: Assign each of the sales assistants who is to use the
scales one of the 20 available memories, i.e. register
the employees (See sect. 4 REGISTERING
VENDORS)
STEP 5: Programme the articles. (See sect. 3.1ARTICLES )
STEP 6: If the scales are for operation in a EU country, check
that the current EURO PHASE is set up correctly.
(See sect. 11.1.7 PROGRAMMING EURO)
STEP 7: Select the receipt format or programme a new one
(See sect 9.2 RECEIPT).
STEP 8: Programme printing parameters (See sect. 11.4.
PRINTING PARAMETERS ).
STEP 9: Set up the label formats (See sect. 9.11 PROGRAM
LABEL FORMAT)
STEP 10: Start to work with the scales, referring to the next
section 2.3 HOW TO OPERATE THE SCALES.
Page 15
500 Range
49-M500WMEN25
7
F4
F4
0 0 0 2
1 2
SHIFT F3
0.000 0.00
0.000
0.00
D
IRECT PRICE
0.000 0.00
0.000 0.00
0.000
0.00
0.000 0.00
0.410 0.00
0.000 0.00
DIRECT PRICE
0.410 0.00
0.000 0.00
000212
0.410 5.00
0.000
2.05
<Article name>
2.3. HOW TO OPERATE THE SCALES
DIBAL 500 Range weighing scale are specially designed to
simplify the sales assistant’s work, ensuring a high level of
speed and reliability on the part of the system, whether the latter
is one set of weighing scales or a network of MASTERS and
SLAVES connected to a PC.
The starting point of all explanations is the work status when the
weight, prince and amount is 0.
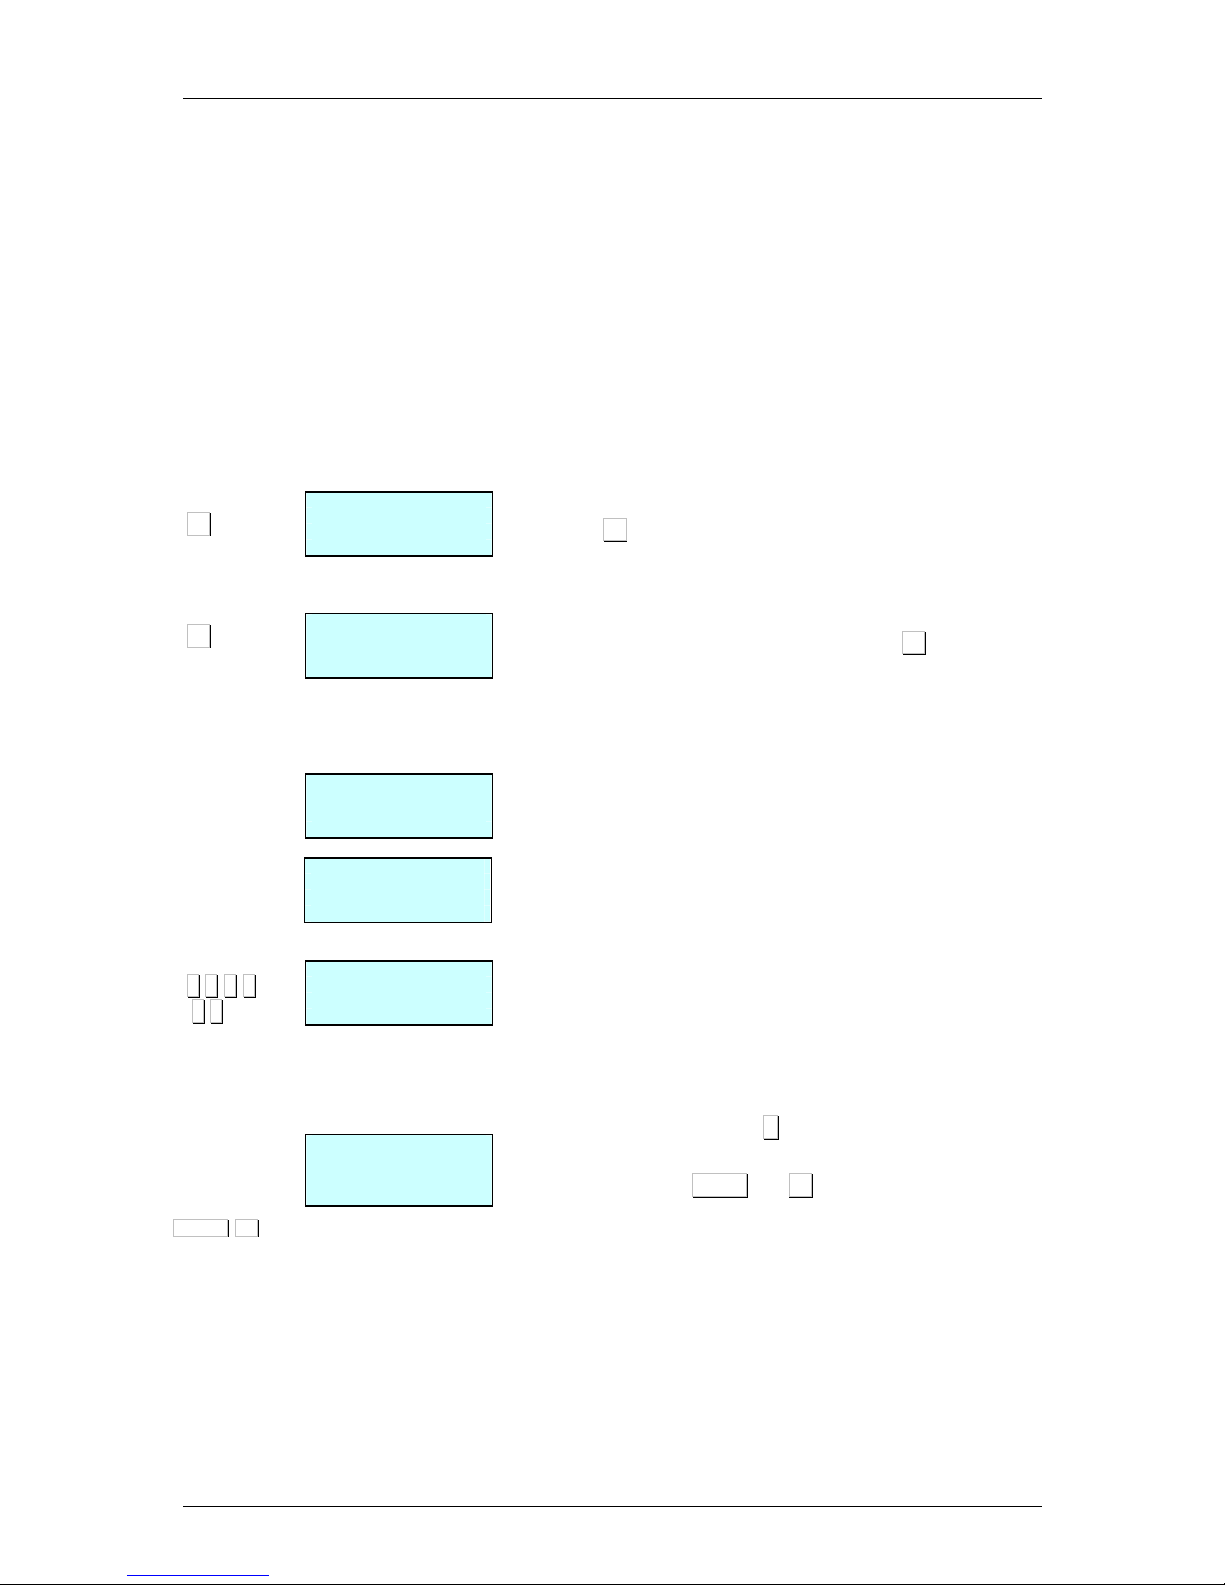
2.3.1.Direct price
The direct price must be activated in order to enter a price
with the number keys. To do this:
1. Check that the scales have been set up correctly. (See Sect..
5.1.2.4, DIRECT PRICE)
2. Press F4 until the words DIRECT PRICE appear on the
display.
3. Thus, when a weight is placed on the platform, the number
keys can be used to enter the price.
4. To deactivate the direct price, simply press F4 until DIRECT
PRICE disappears from the display.
2.3.2.Normal weight
In order to weigh a product, proceed as follows:
1. Place the product to be weighed on the platform.
2. Enter the price using one of the following methods:
-Directly with the number keys and then by pressing the
corresponding memory key. To do this the DIRECT PRICE
must be activated. (See 5.1.2.4. DIRECT PRICE)
-By entering the article code (check that it is in the
corresponding department and be careful to enter all the
digits in the code: code 212 is not the same as 000212!!).
To do this the DIRECT PRICE must be deactivated. (See
sect . 5.1.2.4 DIRECT PRICE)
-Press the corresponding direct key (check that it is in the
corresponding department of the corresponding PLU).
In the event of an error, press C to set the price to zero.
3. If you wish to see the price and amount in the secondary
currency, press keys SHIFT and F3.
Page 16
USER´S MANUAL
49-M500WMEN25
8
V1
+
1 2 0
V1
X 4
SHIFT 0
0.410
832
0.000
341
^Euros^
0.410
5.00
0.000
2.05
<
Article
name
>
( + )
( + )
( x )
Units
0.000 0.00
0.000 0.00
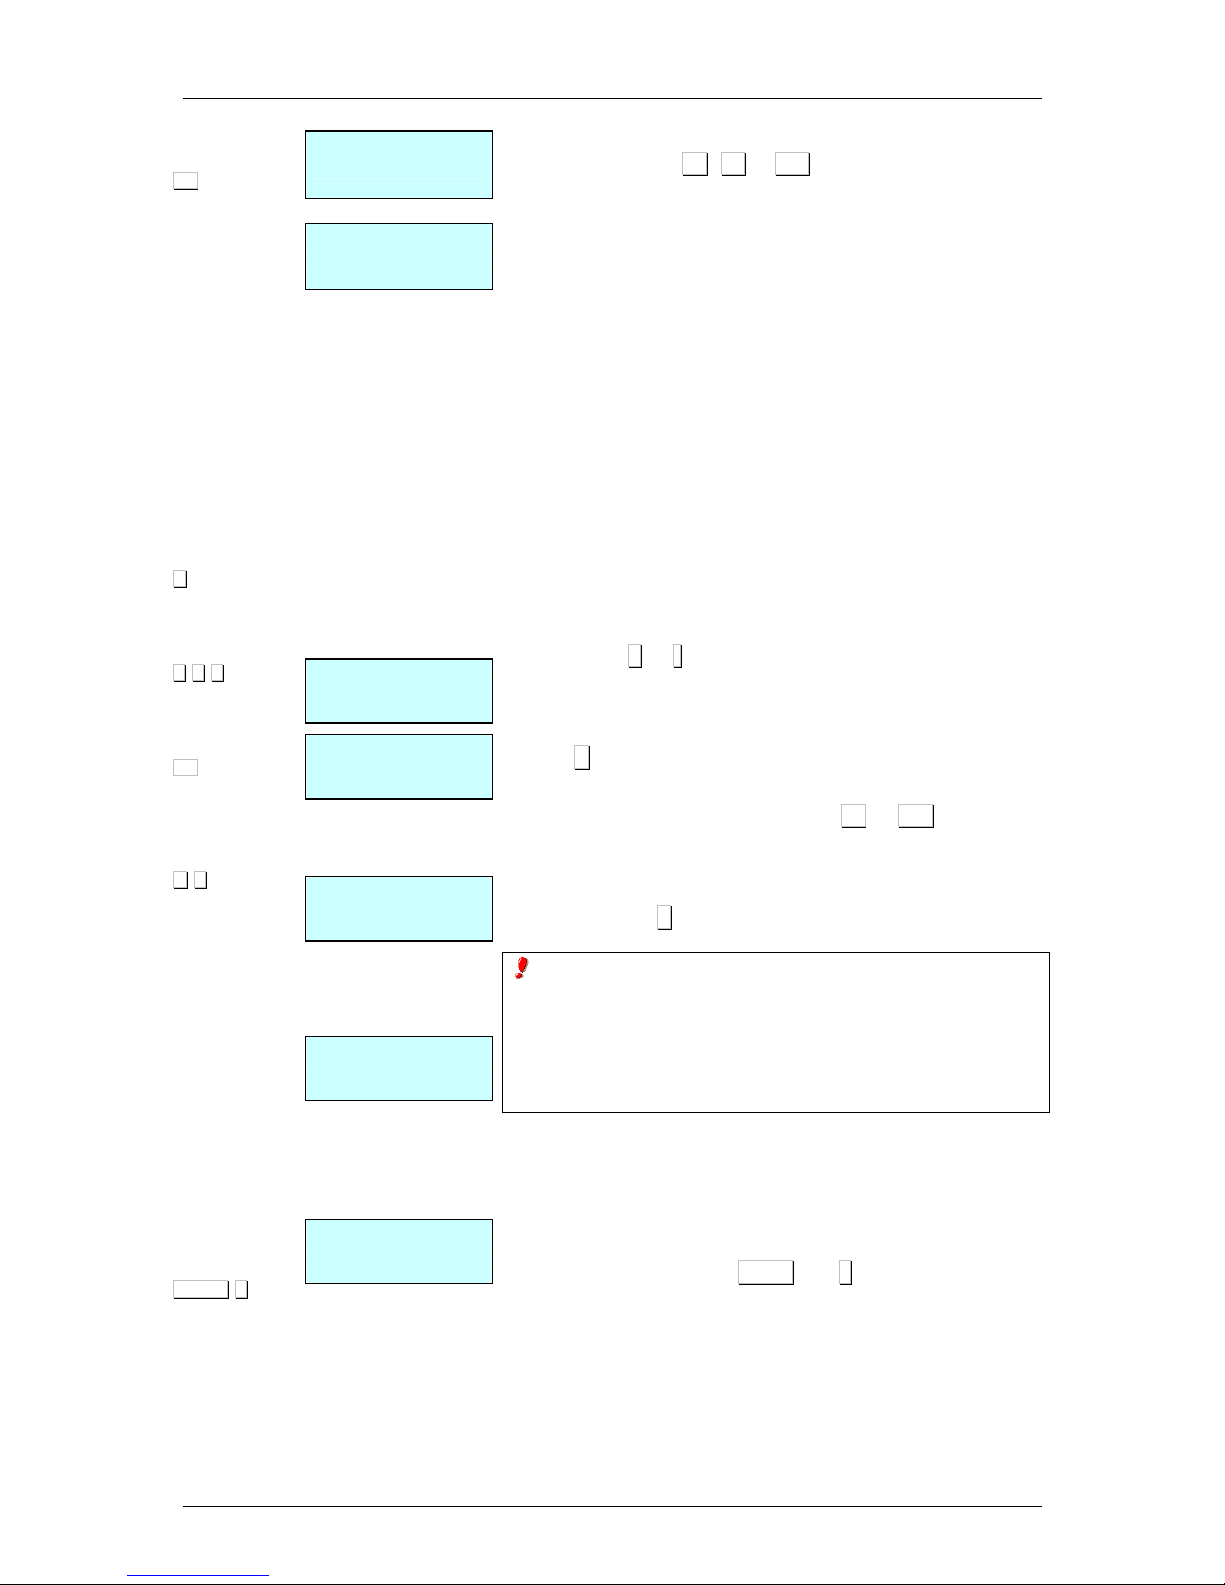
4.Memorise the operation for the corresponding sales assistant by
pressing one of the, V1, V2..., Vxx keys. These memory keys
must have been registered beforehand. (See sect. 4.1.
REGISTERING VENDORS ).
5. Remove the article and then start again with the next one.
If you want to to check the total amount of sale before
totalizing, hold pressed the vendor’s key of the corresponding
sale for 2 seconds. The display will show for a few seconds the
number of sales the vendors has until that moment.
2.3.3. Non-weight operations (adding, subtraction
and multiplication)
The scales are able to function with articles that are not sold by
weight (price/kg), but which have a price per article, such as a
bottle of milk.
The scales must be programmed to enable adding, subtraction
and/or multiplication operations. (See sect. 5.1.2.5
MULTIPLICATION , 5.1.2.7 SUBTRACTION and 5.1.2.6
ADDITION).
The method of operation is as follows:
1. Press + or - depending on whether you wish to add or
subtract.
2. Enter the price/unit of the product, as explained in section
2.3.2 NORMAL WEIGHT. In the event of an error, press
C to set the price to zero.
3. Memorise the operation for the corresponding sales
assistant by pressing one of the V1,..., Vxx keys. These
memory keys must have been registered beforehand.
(See sect. 4.1. REGISTERING VENDORS)
If more than one unit is to be added or subtracted before being
memorised, press X and enter the number of products.
If the MULTIPLICATION parameter is set to “2”, then the units
must be indicated in all unit sales. Therefore, if an attempt is
made to memorise a unit sale that is not multiplication, the
scales will beep and the following message will appear on the
display:
“Enter units”.
2.3.4.Manual zero
The scales are equipped with a manual reset to zero mechanism.
If, for any reason the value of the weight is not zero, but it is within
a certain range, press keys SHIFT and 0, to reset the weight to
zero.
Page 17
500 Range
49-M500WMEN25
9
PRINT
-
5 0
V1
PRINT
V4
∗∗∗∗
V4
2 0
∗∗∗∗
0.000 0.00
0.000 0.00
0.410 dct
00
0.000
2.00
<
Article
name
>
0.410 dct
50
0.000
2.00
<
Article
name>
0.000 0.00
0.000 0.00
VENDOR TOTAL?
4
M=1 dct 00
M=1 dct 20
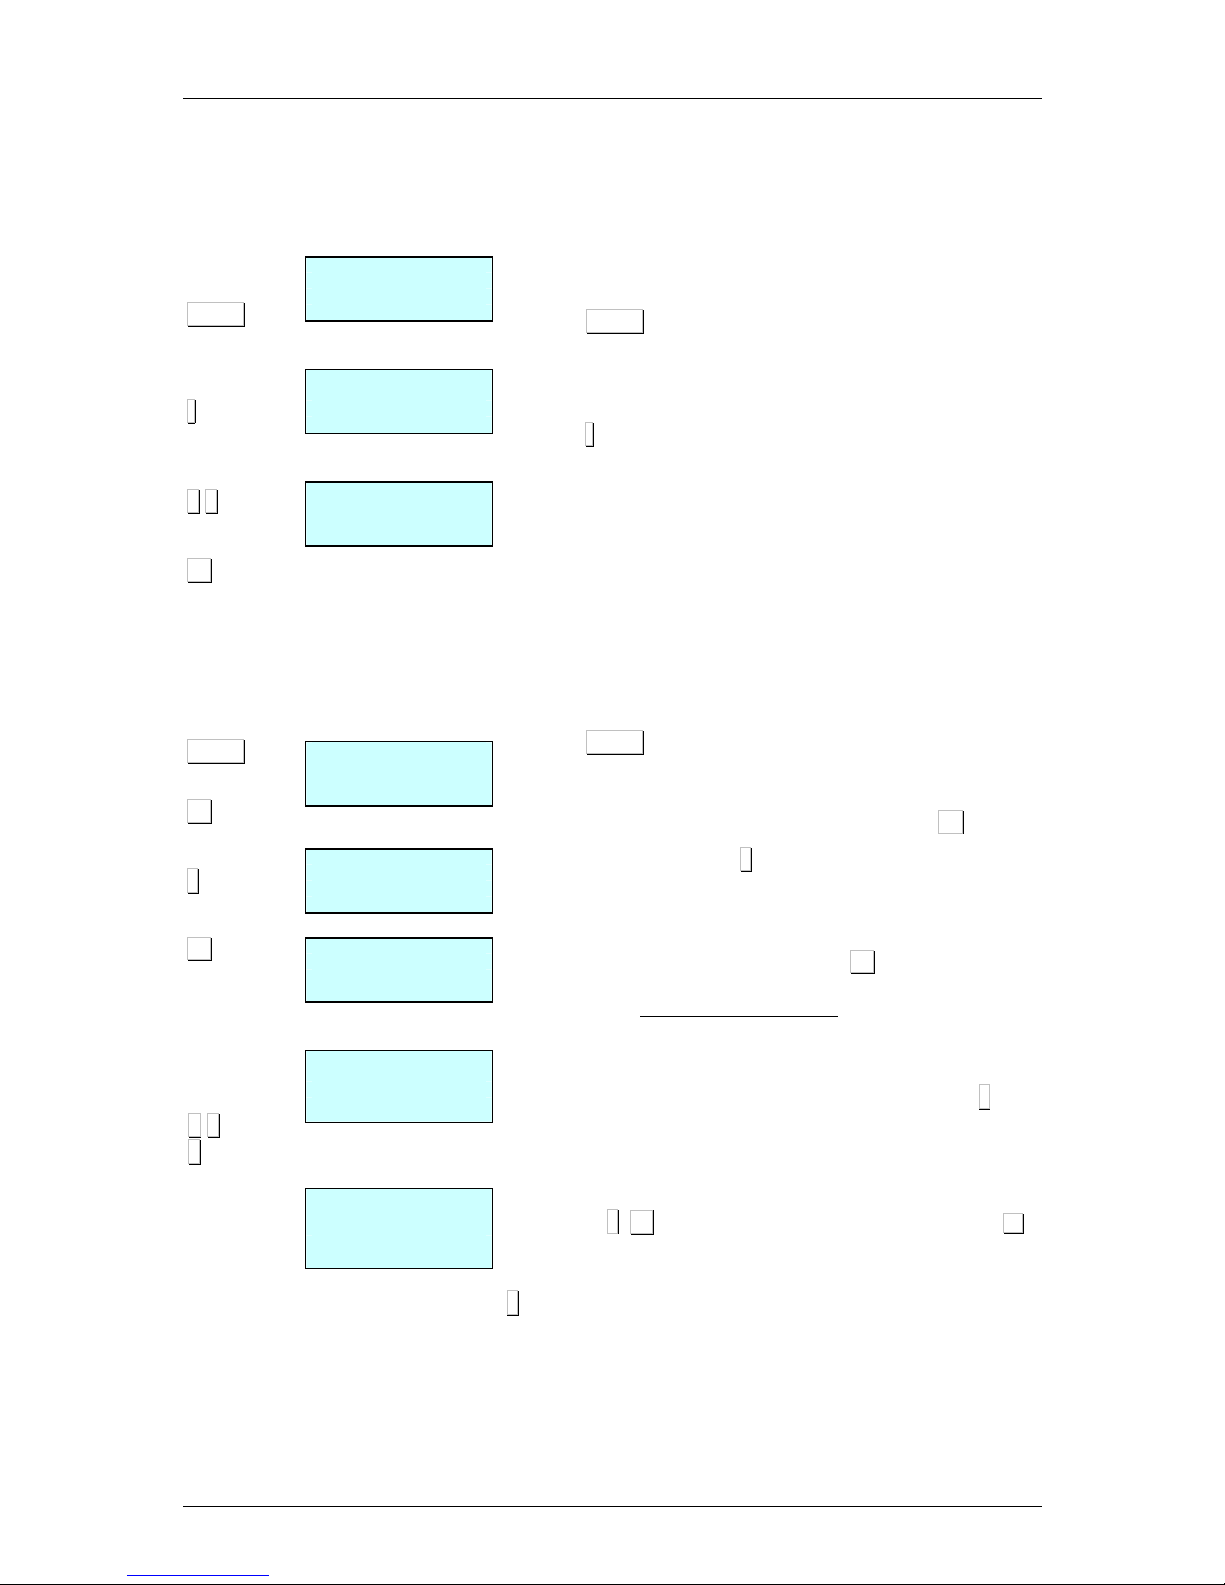
2.3.5. In line discount
In receipt mode, this option permits a percentage discount to be
applied to a certain article. Proceed as follows:
1. Check that the parameter for applying discounts has been set
up correctly. (See sect. 5.1.3.6. DISCOUNT IN LINE)
2. Press PRINT until the symbol E disappears from the display.
This indicates that the scales are in receipt mode.
3. Effect the normal weight operation as far as the memorisation
step, without actually memorising.
4. Press -.
5. Enter the PERCENTAGE discount to be applied. (For example
50 represents 50%) This discount will be directly reflected in
the amount on the display and it will be applied to the receipt
on the corresponding article line.
6. Memorise and continue with normal operation.
2.3.6.Receipt printing: calculation of change and
discount
To print the total operations effected by a sales assistant, proceed
as follow:
1. Press PRINT until the symbol E disappears from the display.
This indicates that the scales are in receipt mode.
2. Effect a memorisation operation in accordance with the
sections above. For example, with sales assistant V4.
3. To print the receipt press ∗∗∗∗ The scales will request the number
of the sales assistant with which the last operation is to be
printed.
4. Press the corresponding sales assistant key for whom the
operation is to be printed. For example V4.
5. If the option DISCOUNT ON TOTAL is activated (See sect .
5.1.3.5 DISCOUNT ON TOTAL), then the memory number,
number of articles and sum total will be shown. The scales will
request the discount percentage to be applied to the receipt.
Enter the desired value (for example 20%) and press ∗∗∗∗. If no
operation is effected with the scales for 15 seconds, the
receipt is directly printed.
If parameter 335 is programmed (Discount on Total) as “2”,
i.e., discount on request, the discount can be applied by
pressing ∗∗∗∗ F1 and the corresponding sales assistant key Vx .
If the discount on total is not activated, the selected memory
number, number of articles and sum total will be shown, and when
∗∗∗∗ is pressed, the receipt will be printed..
Page 18

USER´S MANUAL
49-M500WMEN25
10
∗∗∗∗
F1
Vx
◊◊◊◊
V4
+
C
MENU
TO
TAL: 15.00
Change: 5.00
SUBTOTAL SALES
004
Subto
0.36
11111
<
Article
>
0.865
1.25
Article
01
11111
6. If the option CALCULATE EXCHANGE is activated (See sect .
5.1.3.1 CALCULATE EXCHANGE), TYPE the amount
tendered by the customer. The display will then show the
amount tendered by the customer, the amount to be returned
by the sales assistant or the change, and the amount to pay. If
the amount tendered by the customer is not entered for 15
seconds and the ∗∗∗∗ key is not pressed, the receipt is directly
printed.
If no other operation is effected using the same memory, the
receipt may be printed as many times as required (See sect.
5.1.5.3. COPIES OF RECEIPT), and the following text will
appear on the receipts:
*** Copy ***
If other data is memorised in the same memory, it is presumed
that the operation corresponds to a new customer, and data
will be reset to 0.
2.3.7. Review receipt
To review operations effected by a sales assistant before the
corresponding receipt is printed, check that parameter 3128 is set
up correctly (See sect .5.1.2.8 SUBTOTAL), proceed with the
following steps:
1. Press the subtotal key ◊◊◊◊ .
2. Press the corresponding sales assistant’s memory key.
3. SEARCH for the operation to reviewed on the receipt using
the keys + and -. If you wish to DELETE the selected
operation, press C.
4.To return to normal operation status, press MENU.
Page 19
500 Range
49-M500WMEN25
11
◊◊◊◊
V4
0
◊
◊◊
◊
V4 X
PRINT
SUBTOTAL SALES ASSIST
001
Subto 0.36
M: 04
SUBTOT VENDOR
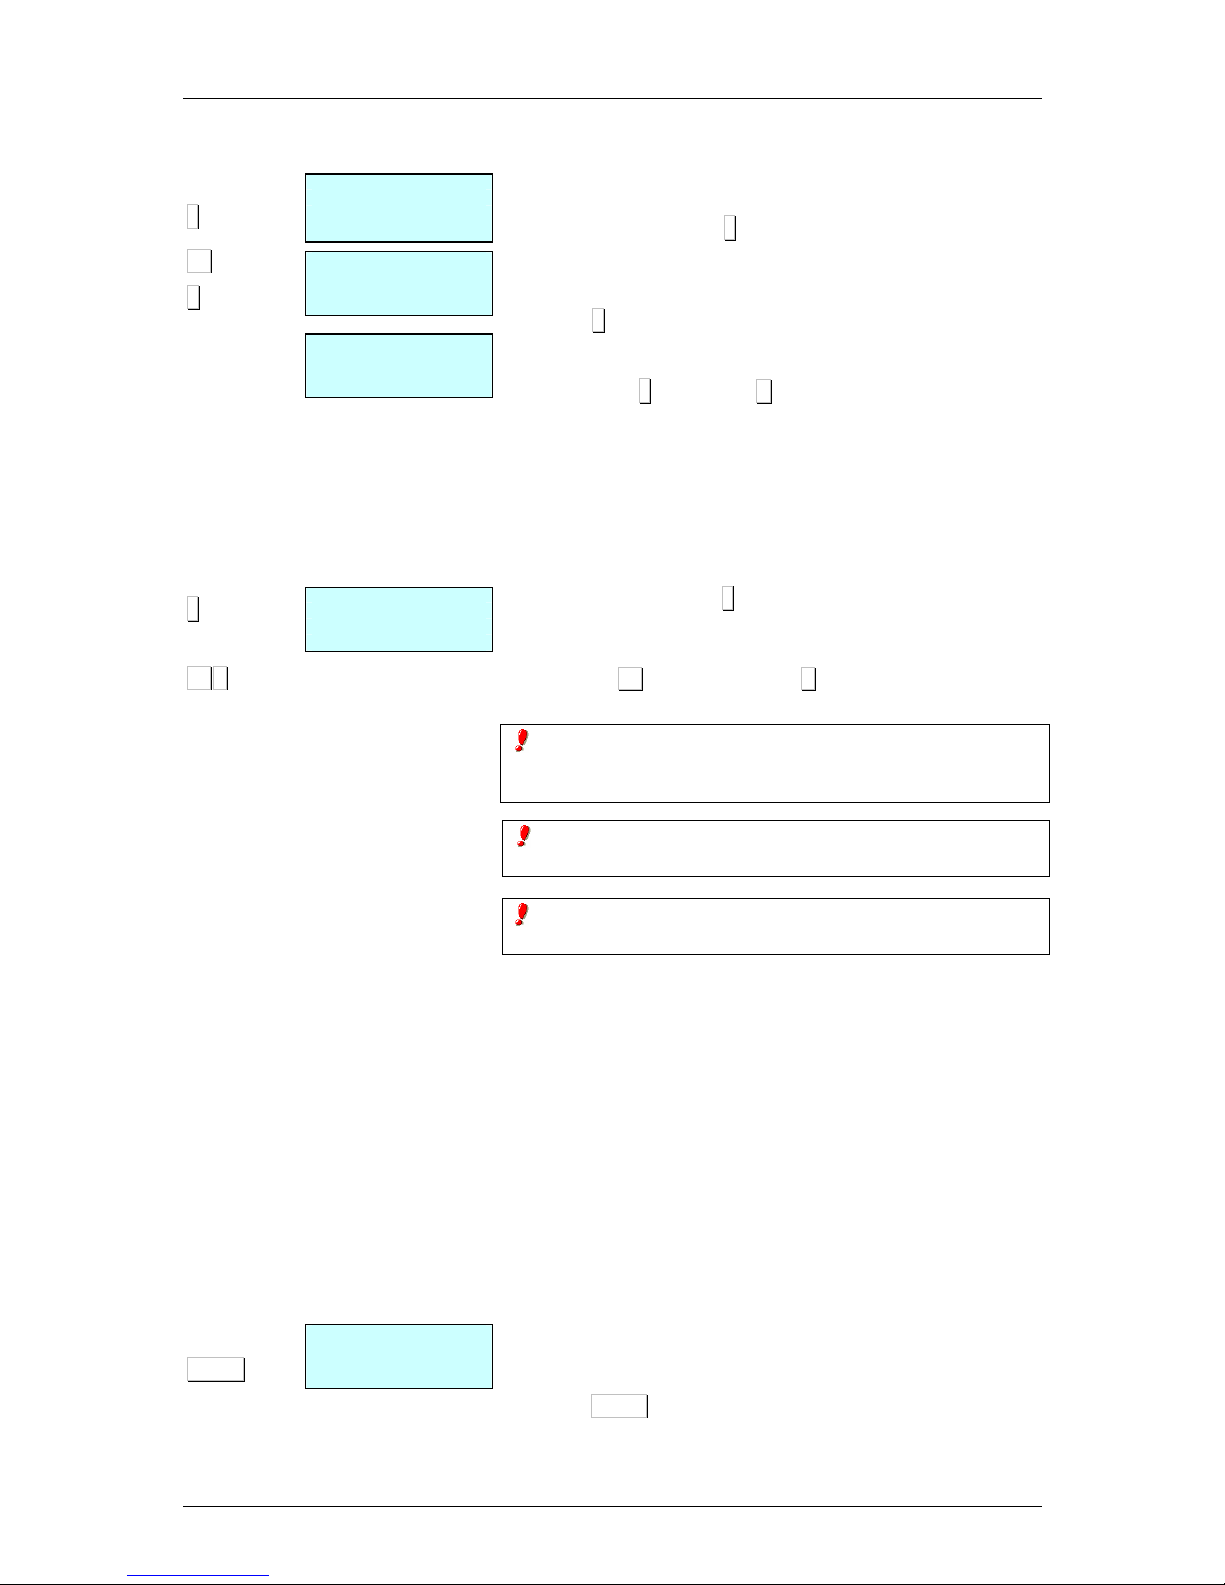
2.3.7.1. Complete deleting receipt
If you wish to cancel the entire ticket, Follow the next steps:
1. Press the subtotal key ◊◊◊◊ .
2. Press the corresponding sales assistant’s memory key.
3. Press 0.
4. The scale will ask if you wish to delete the receipt. In order to
delete press∗∗∗∗, if not press C.
2.3.8. Receipt reopening
It is possible to reopen the receipt when it has already been
printed. Parameter 3154 must be activated.(See sect. 5.1.5.4:
RECEIPT REOPENING).
To do this, and after effecting the operation with the customer:
1. Press the subtotal key ◊◊◊◊ .
2. If you wish to reopen the last receipt printed by one particular
sales assistant, press the corresponding memory key (for
example V4) and then press X. The receipt will then be
reopen in order to delete or add sales.
If after printing the receipt for one transaction, the scales are
changed to label mode, it will not longer be possible to reopen
the receipt.
When another operation is memorised in the same memory,
the previous receipt can no longer be reopened.
If the RECEIPT REOPENING parameter is set to 9, the scales
will allow any receipt to be reopened.
Working at “Reopening receipt” set to 9, if you wish to reopen a
closed receipt in order to modify it, a menu with two options will
appear:
‘1’ – Last receipt.
‘2’ – Other receipts.
Option “1” permits the last closed receipt to be reopened.
If option “2” is selected, other receipts can be opened and the
scales will request the number of the receipt to be reopened.
If the receipt number is in the memory and it is reopen able, a
“recover receipt” message will be displayed and the receipt may
be modified. Otherwise, the scales will show a “non-valid receipt”
message.
2.3.9.Operation in label mode
To print one label for each memorisation operation (label mode
operation) proceed as follows:
1. Press PRINT until the symbol LABEL appears on the display.
2. Effect the desired operation (weight, etc...).
Page 20
USER´S MANUAL
49-M500WMEN25
12
∗∗∗∗
F2
F2
F2
SHIFT 1
SHIFT 3
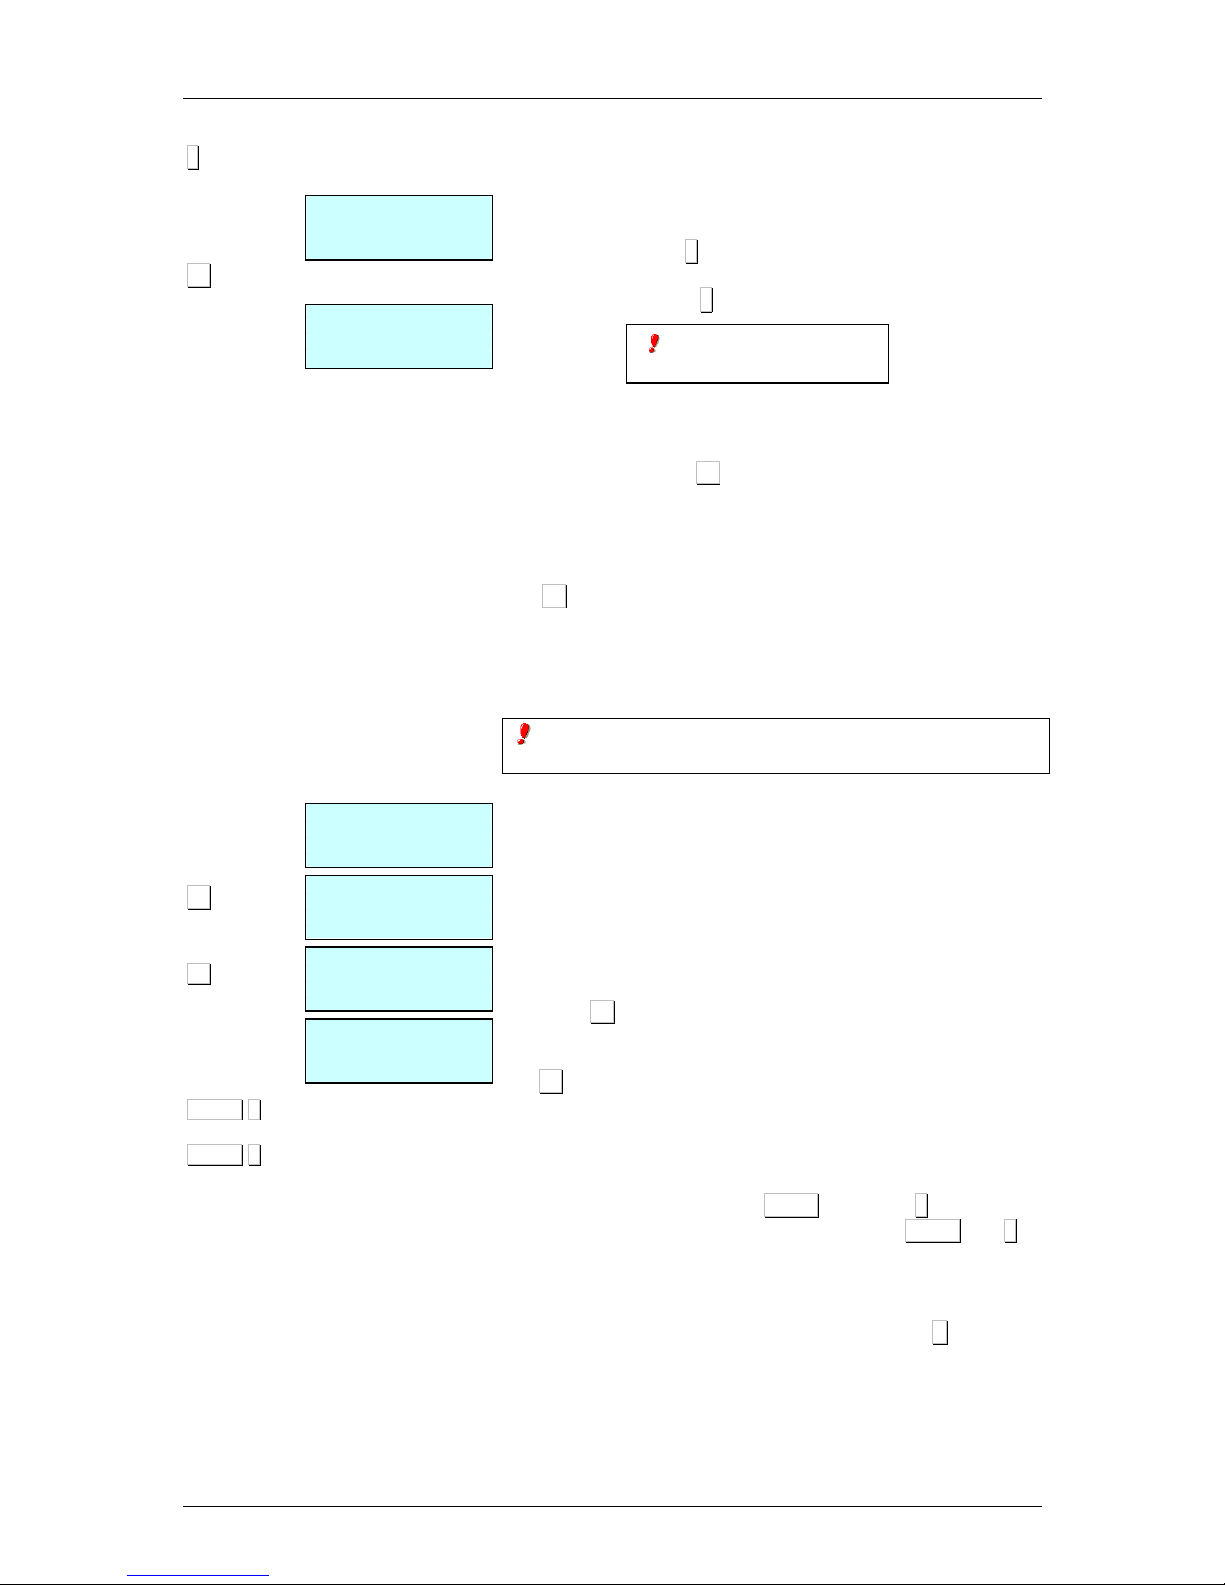
The label will be printed when the memory key is pressed
corresponding to the sales assistant who has effected the
operation.
3. If you wish to make a certain number of COPIES* of the last
label issue, press ∗∗∗∗, then press the sales assistant key where
the operation has been saved, enter the number of copies
required, and press ∗∗∗∗.
4. If you wish to work in automatic labelling mode, check that the
corresponding parameter has been set correctly (See sect.
5.1.4.3 AUTOMATIC WEIGHING ), then select the required
article and press F2 until the symbol F appears on the
display.
If parameter 343 is set to 1, the memory in which the sales
are accumulated will have to be selected. If parameter 343 is
set to 2, sales will be automatically accumulated in memory
V1.
If there is any variation in the weight after a stable weight has
been attained, a label can be printed after a stable weight is
attained again, without having to press any article or sales
assistant key.
If you want to have reflected on the label the amount and the
total in EUROS
see the section
5.1.3.8 Type of ticket and label.
2.3.10. Fix price
This process is used to effect operations with the same article,
and to do this the corresponding parameter must be set up
correctly (See sect .5.1.2.2 FIX PRICE). Proceed as follows:
1. Place the required article on the platform.
2. Select the article to be fixed.
3. Press F2 to fix the price, and the symbol F will appear.
4. Now weigh the next article. To deactivate the fixed price press
F2 until symbol F disappears.
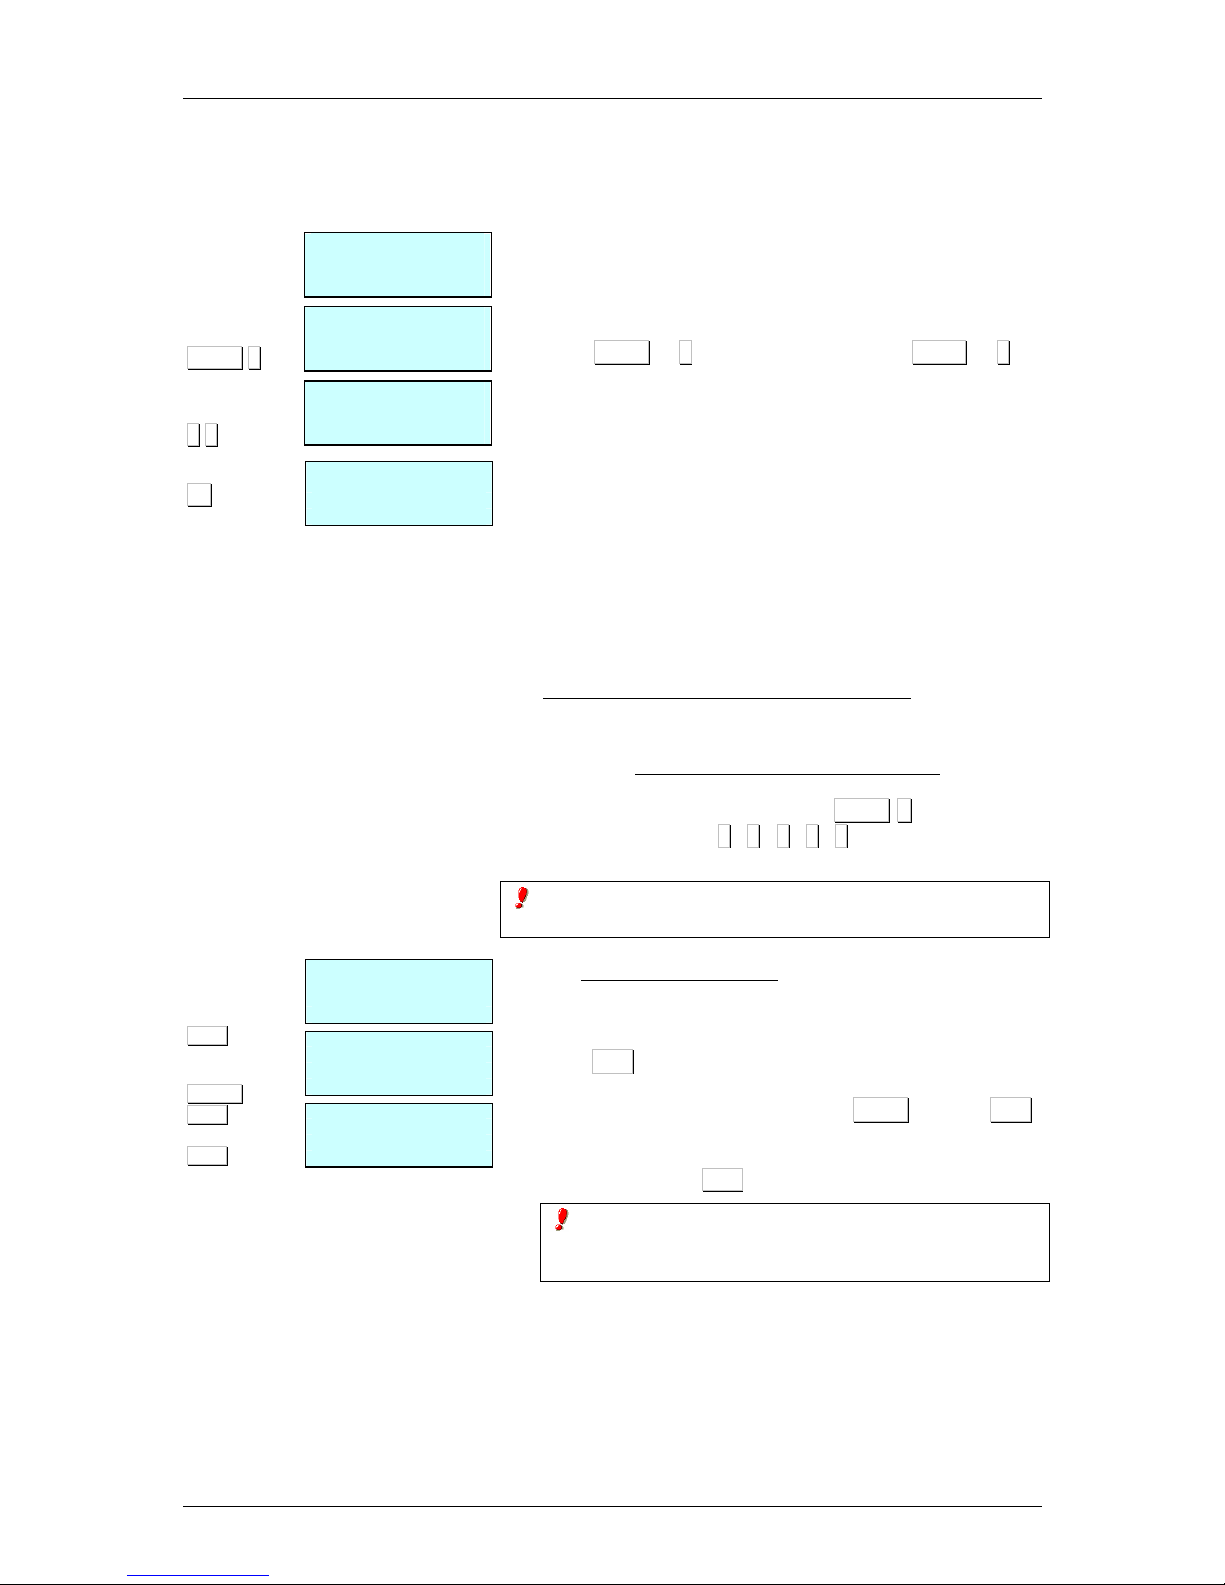
2.3.11.Increase or decrease price
After having entered a price, either defined in PLU, or as an offer
price or a direct price, press SHIFT and then 1 to enter the
percentage value to increase the price, or press SHIFT and 3 to
enter a percentage value to decrease the price. To do this,
parameter 5.1.7.6 must be activated (See sect. 5.1.7.6
INCREASE PRICE ).
If you do not wish to enter any percentage, press C to resume
normal weighing mode.
To memorise the operation, effect the same procedure as that
without the percentage, i.e., after having entered the percentage,
press the memory key of the corresponding sales assistant.
*According to model.
•
Models: W
-
025 & M
-
525.
Page 21
500 Range
49-M500WMEN25
13
SHIFT 1
1 0
V1
T/FT
SHIFT
T/FT
T/FT
0.590 7.89
0.000 4.69
01 – SERLOIN
0.590 inc .00
0.000 4.69
01 – SERLOIN
0.590 inc .10
0.000 5.16
01 - SERLOIN
0.590
0.00
0.000
0.00
• This procedure is compatible with adding and
subtraction of one or more articles to be weighed.
• In-line discount is not compatible (See sect. 5.1.3.6. IN
LINE DISCOUNT ) with this procedure.
Effect the following procedure:
1. Place the required article on the platform and select the article
to be fixed.
2. Press SHIFT + 1 to increase the price or SHIFT + 3, to
decrease the price of the article.
3. Enter the percentage to be applied, using the number keys.
4. Press the key of the sales assistant who has made the sale.
2.3.12. Net weight operations
It is possible to work with net weight values associated to each
PLU, either through the corresponding programmable net weight
keys or those obtained through manual net weights. The net
weight is shown at the bottom left corner of the display.
The NET WEIGHT ASSOCIATED TO EACH PLU is programmed
in the net weight field in the PLU creation or modification section.
(See sect. 3.1 ARTICLES).
To work with PROGRAMMABLE NET WEIGHTS, place the
article to be weighed on the platform, select one of the
programmable net weights by pressing SHIFT X and the key of
the desired net weight (1, 2, 3, 4, 5), enter the price and
memorise the weight.
To use the NET WEIGHT KEYS check that they have been
correctly programmed. (See sect 11.1.4 TARES).
To effect MANUAL NET WEIGHT:
1. Place the weight to be fixed as net weight on the platform.
2. Press T/FT.
3. If you wish to fix the net weight, press SHIFT and then T/FT.
4. To cancel the net weight, make sure there is not anything on
the platform, press T/FT.
If the fixed net weight mode is being used, when the
weight is removed from the platform, a negative net weight
value will be shown on the weight display.
Page 22
USER´S MANUAL
49-M500WMEN25
14
F3
F1
V1
0.430 1.00
0.000 0.43
01 - MILK
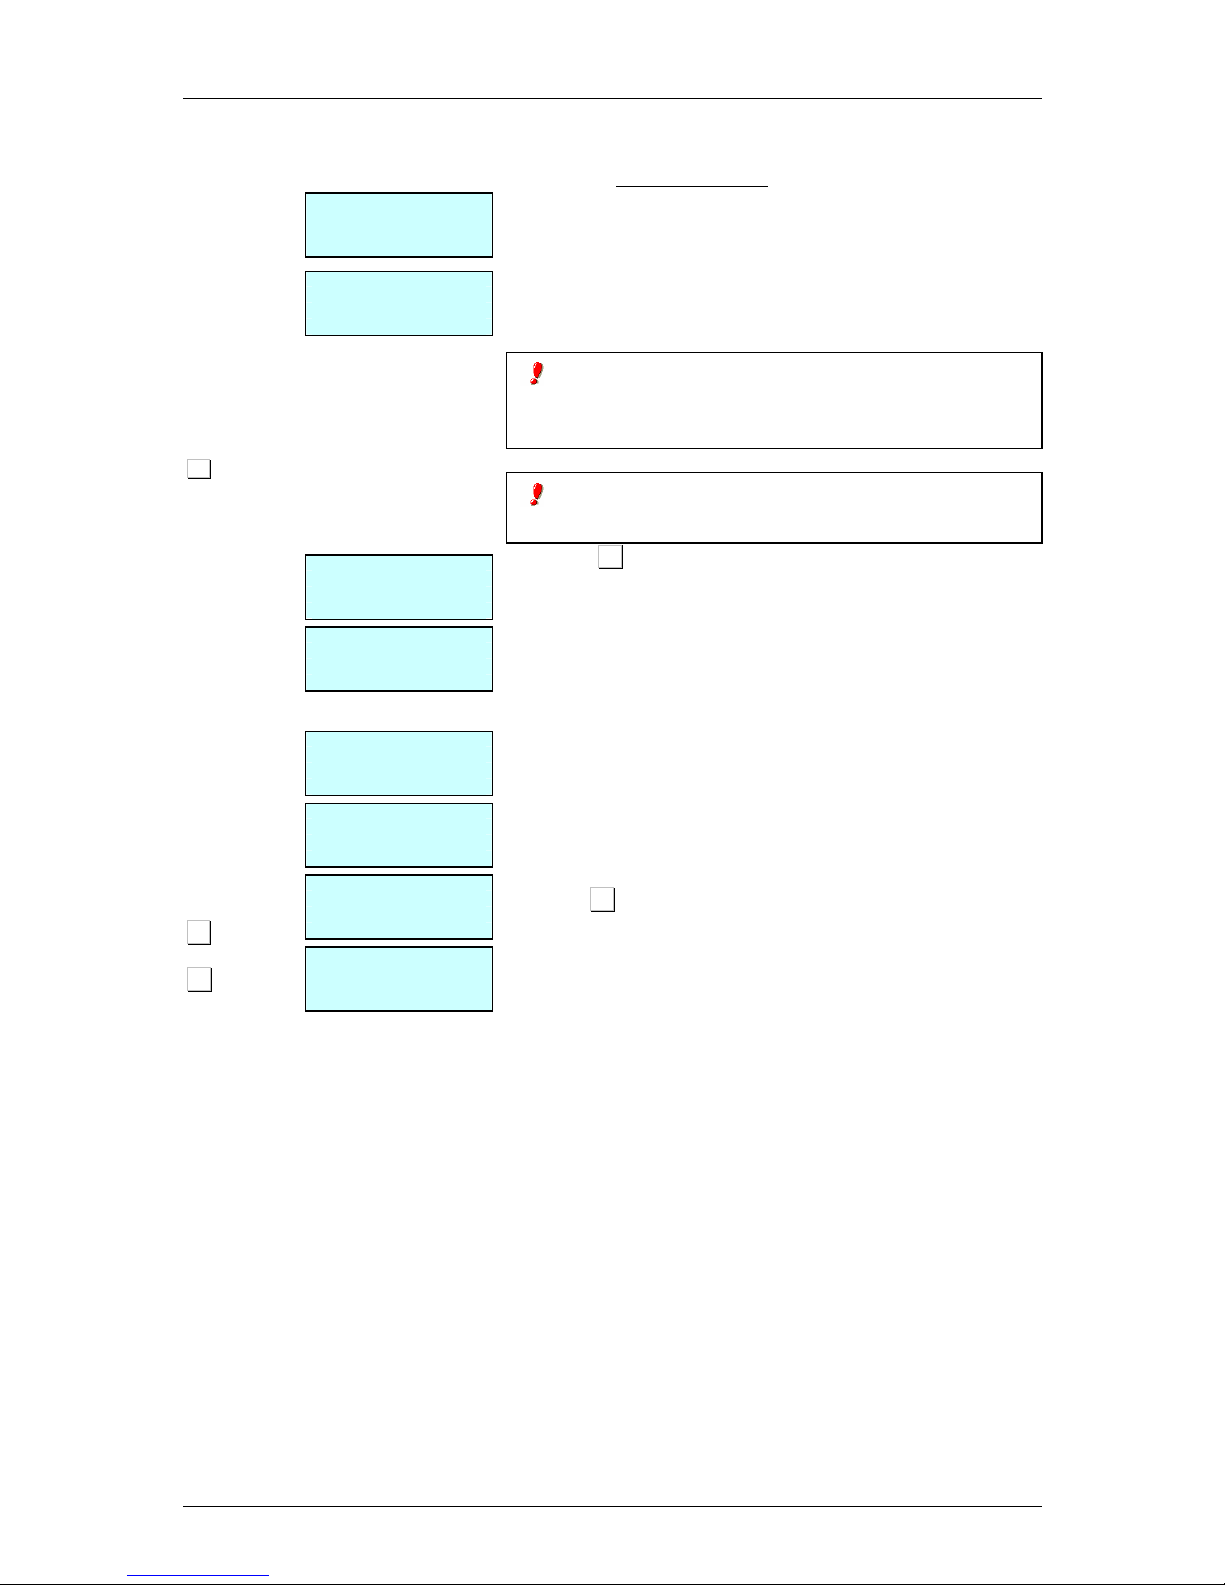
2.3.13. Free price
If you wish to FREE THE PRICE of a product at any time:
1. Check that configuration parameter 323: FREE PRICE has
the default value (See sect. 5.1.2.3 FREE PRICE) and place
the product on the platform.
2.
The article should have enabled Modify Price.(See section 3.1.1
point 24. Modify Price)
Press the product direct key or enter its
code with the number keys.
3.
Press F3.
4. Enter the new price and proceed with normal operation for
the product.
2.3.14.Return weight
If you wish to return a product that has already been weighed and
the corresponding amount has been accumulated, the associated
parameter must be set up correctly (See sect. 5.1.2.1 RETURN
WEIGHT). Then proceed as follows:
1. Replace the article on the platform.
2. Select the corresponding PLU.
3. Press F1.
4. Press the key of the corresponding sales assistant.
Check that it is in the corresponding department and be careful to
enter all the digits in the code: code 212 is not the same as 000212
To allow releasing the price, the item selected should be the
"Modify Price" set to "YES " (see par. 3.1.1, Create / Modify a PLU,
point 24 Modify Price).
Page 23
500 Range
49-M500WMEN25
15
F5
T/FT:
SHIFT
◊◊◊◊
,
∗∗∗∗.
C
BEST BEFORE
00 / 00 / 0000
360
BATCH NUMBER
2.3.15.Best Before*
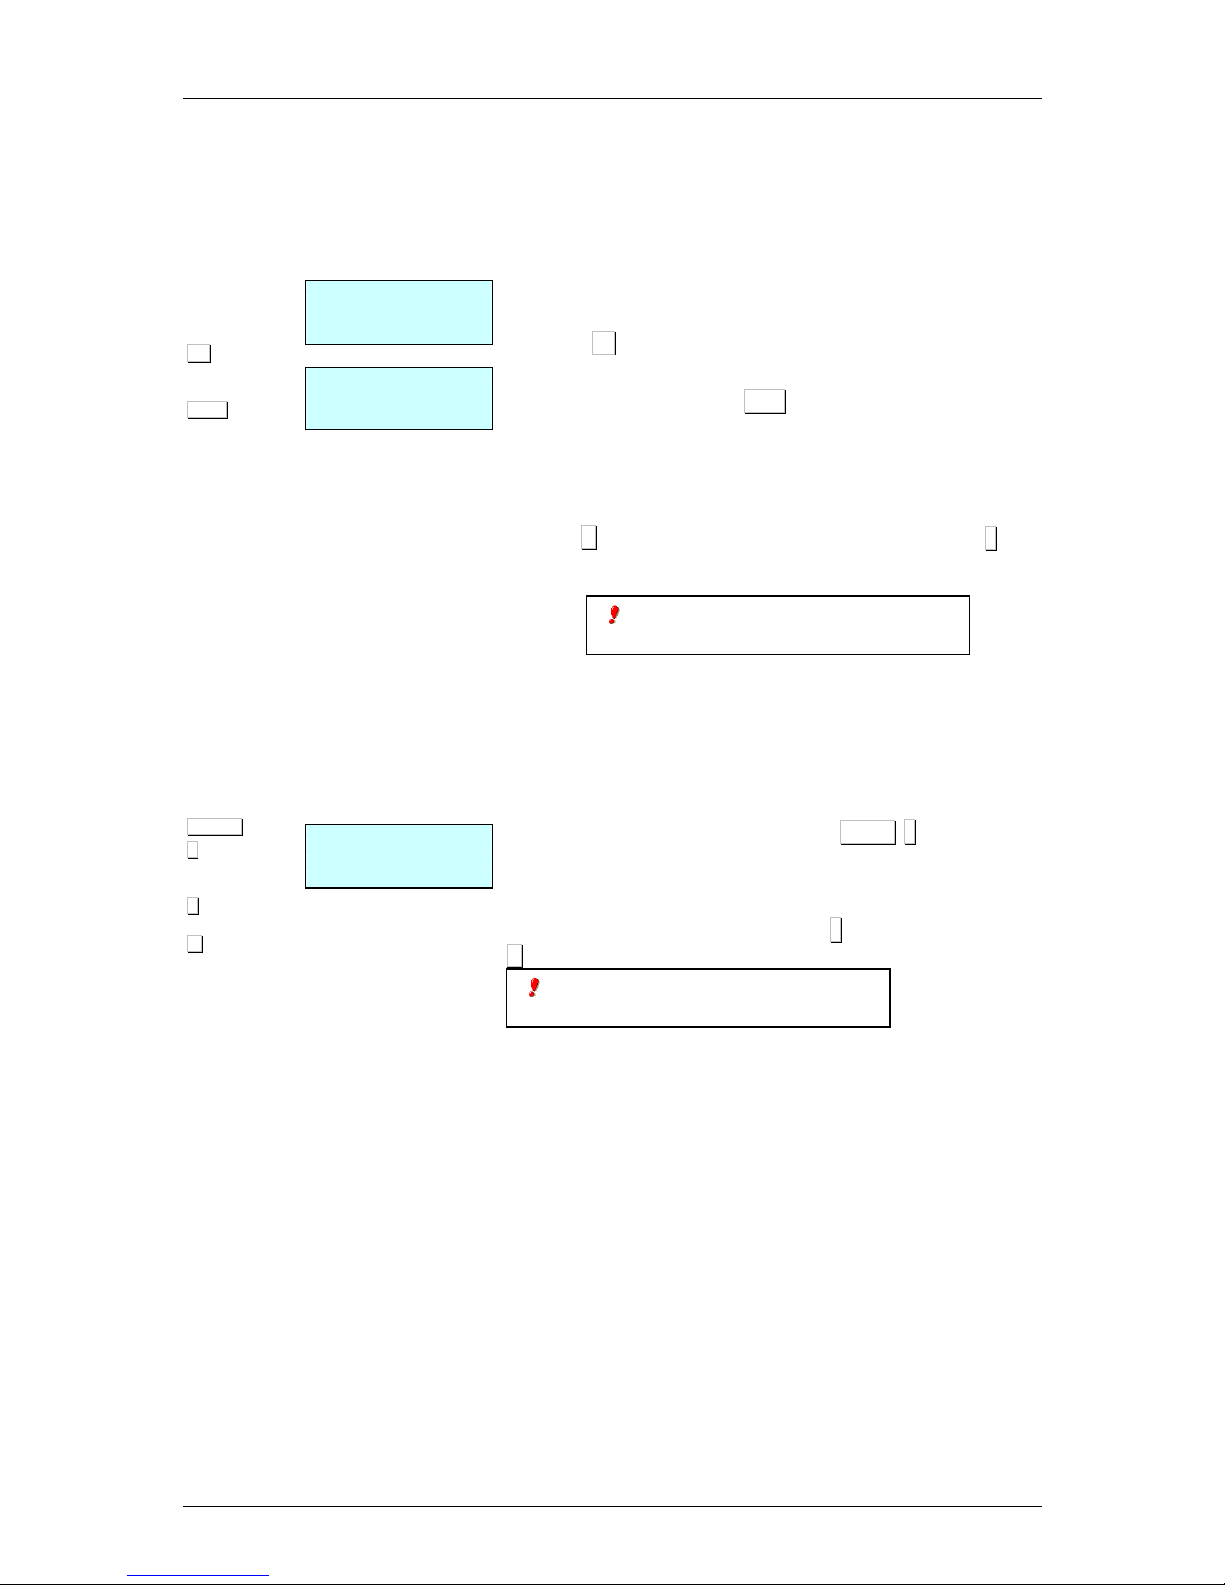
If in the expiry configuration there is a value set up that allowes
the global expiry date,(See Sect. 5.1.7.3. BEST BEFORE) it will
be possible to select the global temporary expiration data.
To do this:
1. Make sure that the weighing scale is a MASTER and it is in
the working possition.
2. Press F5.
Program the expiration data. The Format of the expiration data
can be changed by pressing T/FT:
- Absolute date in the format dd/mm/yyyy (day/month/year).
- - Number of days from the date of printing the label. .+000
- -00:00 hora concreta/ time concrete.
With the C key The expiry date is deleted. To save press
∗∗∗∗
, and
passed to set the expiry global date.
2.3.16.Batch number*
In the Dibal 500 Range scales it is possible to programme a
batch number, which can be alphanumeric with a maximum of ten
digits, in which a global reference to labels of articles may be
assigned when the scales are in label mode.
To programme the batch number press SHIFT ◊◊◊◊ , and enter the
batch number. By default this value will be the number of days
passed from the beginning of the year, for example batch number
252 will correspond to day 9/9.
To exit the data input dialog box, press ∗∗∗∗. To delete editing press
C
*According to model.
• Models: W-020, W-025 & M-520,M-525
*According to model.
• Models: W-020, W-025 & M-520,M-525
Page 24
USER´S MANUAL
49-M500WMEN25
16
◊◊◊◊
V1
◊
◊◊
◊
1
V1
SUBTOT SALES AS.
0.000
0.00
0.000
0.00
SUBTOTAL LEVEL 1
0.000
0.00
0.000
0.00
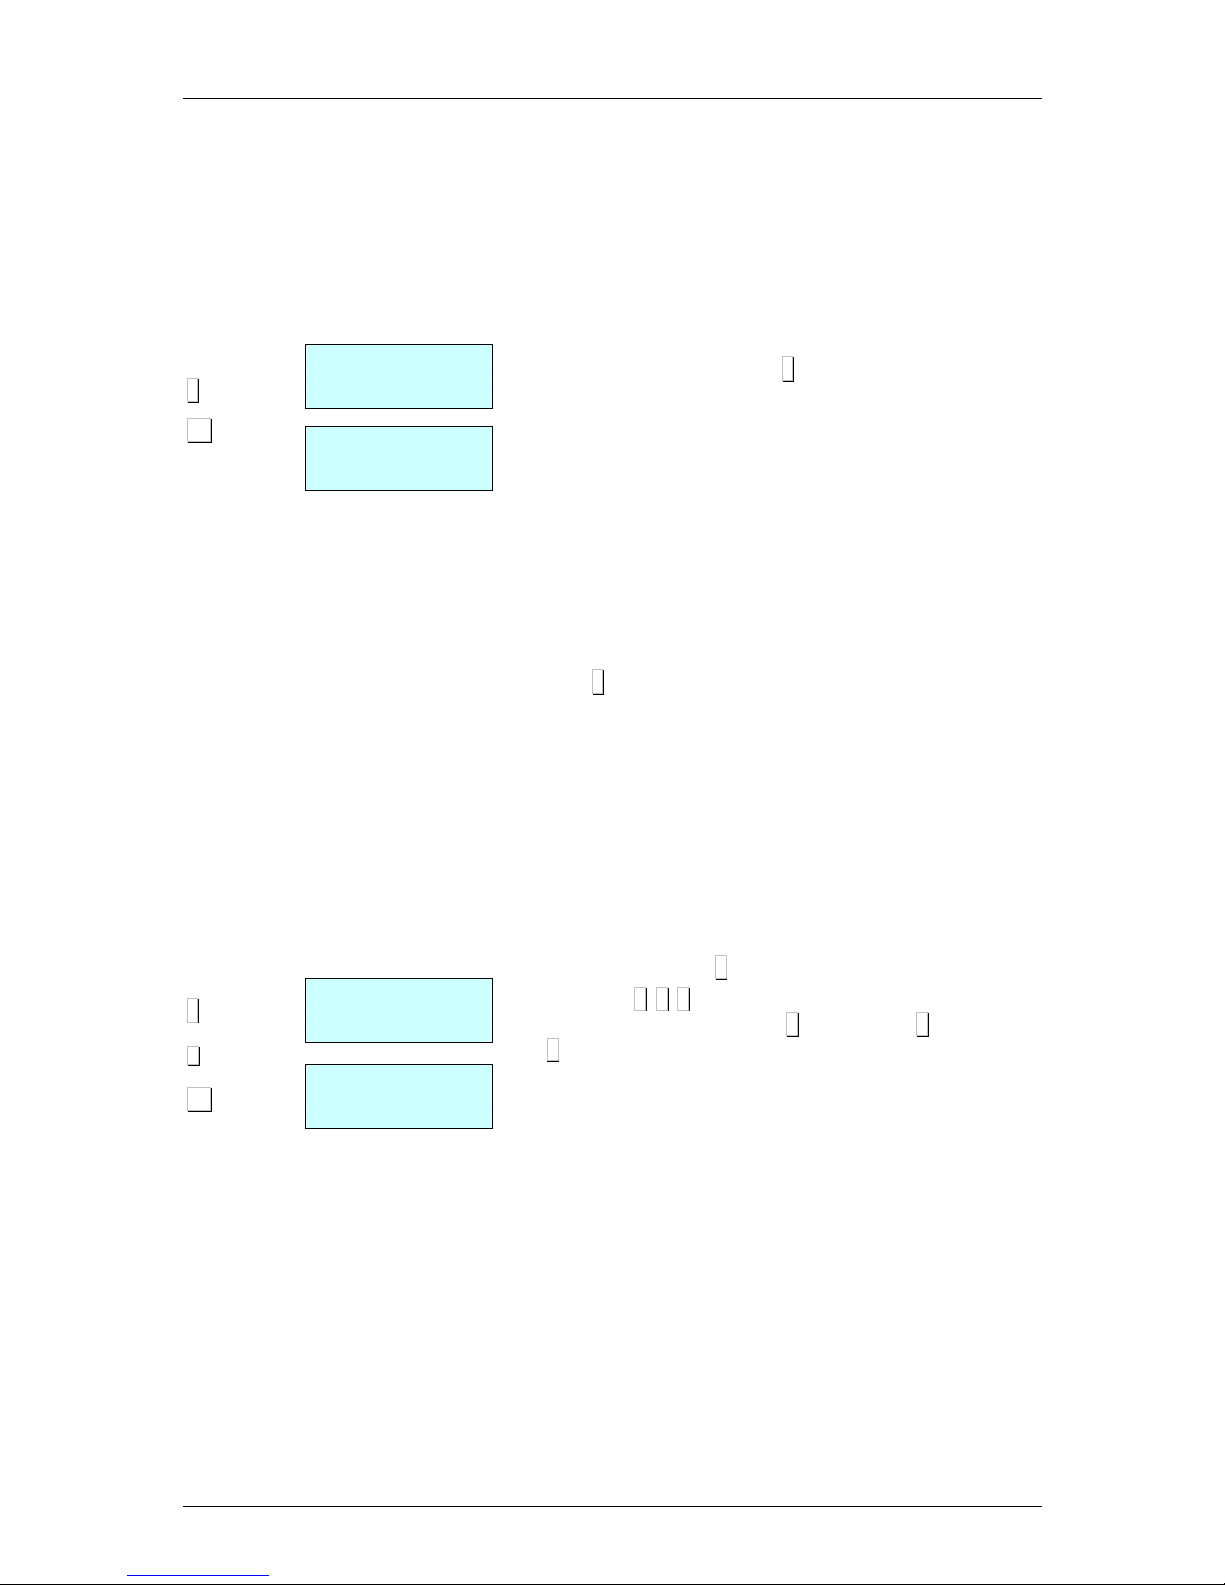
2.3.17.Totals labels
With this procedure it is possible to issue a label with the totals of
the previously issued labels.
There are two modes of operation:
2.3.17.1.Normal Accumulation Label
After issuing several labels, you can request a label with the totals
of the previous operations. To do this:
1. Working in label mode, Press ◊◊◊◊ .
2. Press the key of the sales assistant who effected the
operations.
In this case, the totals will be calculated from the labels issued
from this memory key since the last time a totals label was
printed.
2.3.17.2.Totals Label For One Article
The weight and amount values will be accumulated for one
particular code. If a different code is selected, totals accumulated
until then will be reset to zero. To select this accumulation mode,
review parameter (See sect .5.1.4.1. ONE ARTICLE). To do this:
1. Press ◊◊◊◊ .
2. Press the key of the sales assistant who effected the
operations.
2.3.17.3.Totals Levels
The 500 Range scales have three totals levels. When a totals
label is printed for one level, the data automatically accumulates
on the totals label on the next level up.
Each accumulated level has an associated label format and EAN
code format.
To select the totals level, proceed as follows:
1. In label mode, press ◊◊◊◊ ,
2. Press the 1 2 3 keys to select the level accumulated you
are looking for (level 1 press 1 level 2 press 2 level 3 press
3)
3. Finally press the sales assistant's key.
If there is not EAN TOTAL CODE defined, is taken the label
default value “Ean-13 format label”
If the article is not changed at accumulation level 1, the label fields
that correspond to the PLU itself (code, name, price, etc.) will
show PLU data.
In this case too (even if the article is not changed) level 1 labels
will show the expiry date even if “One article” is not set to 1 ART
OBL (See sect. 5.1.4.1. ONE ARTICLE).
However, if the article has changed, nothing will be shown in
these fields, except in the name field, which will show
"Accumulated total".
If parameter "One article" has a value of 1 ART OBL, then plu
data will be shown at all levels. Furthermore, in this case, when an
article is changed, the accumulative totals at all three levels will be
deleted.
Page 25
500 Range
49-M500WMEN25
17
∗∗∗∗
PLU1
V1
PLU 4
V1
1 1 1 1
∗∗∗∗
∗∗∗∗
P E P E
SHIFT 4
1 1 1 1
TOTAL SALES ASSIST.
CASH
TOT SALES ASSIST
?
CUSTOMER
0
NEW CUST.
1111
OK ?
NEW CUST. 1111
NAME <
CUSTOMER 0
PEPE
AMOUNT 99.99
Amount Paid
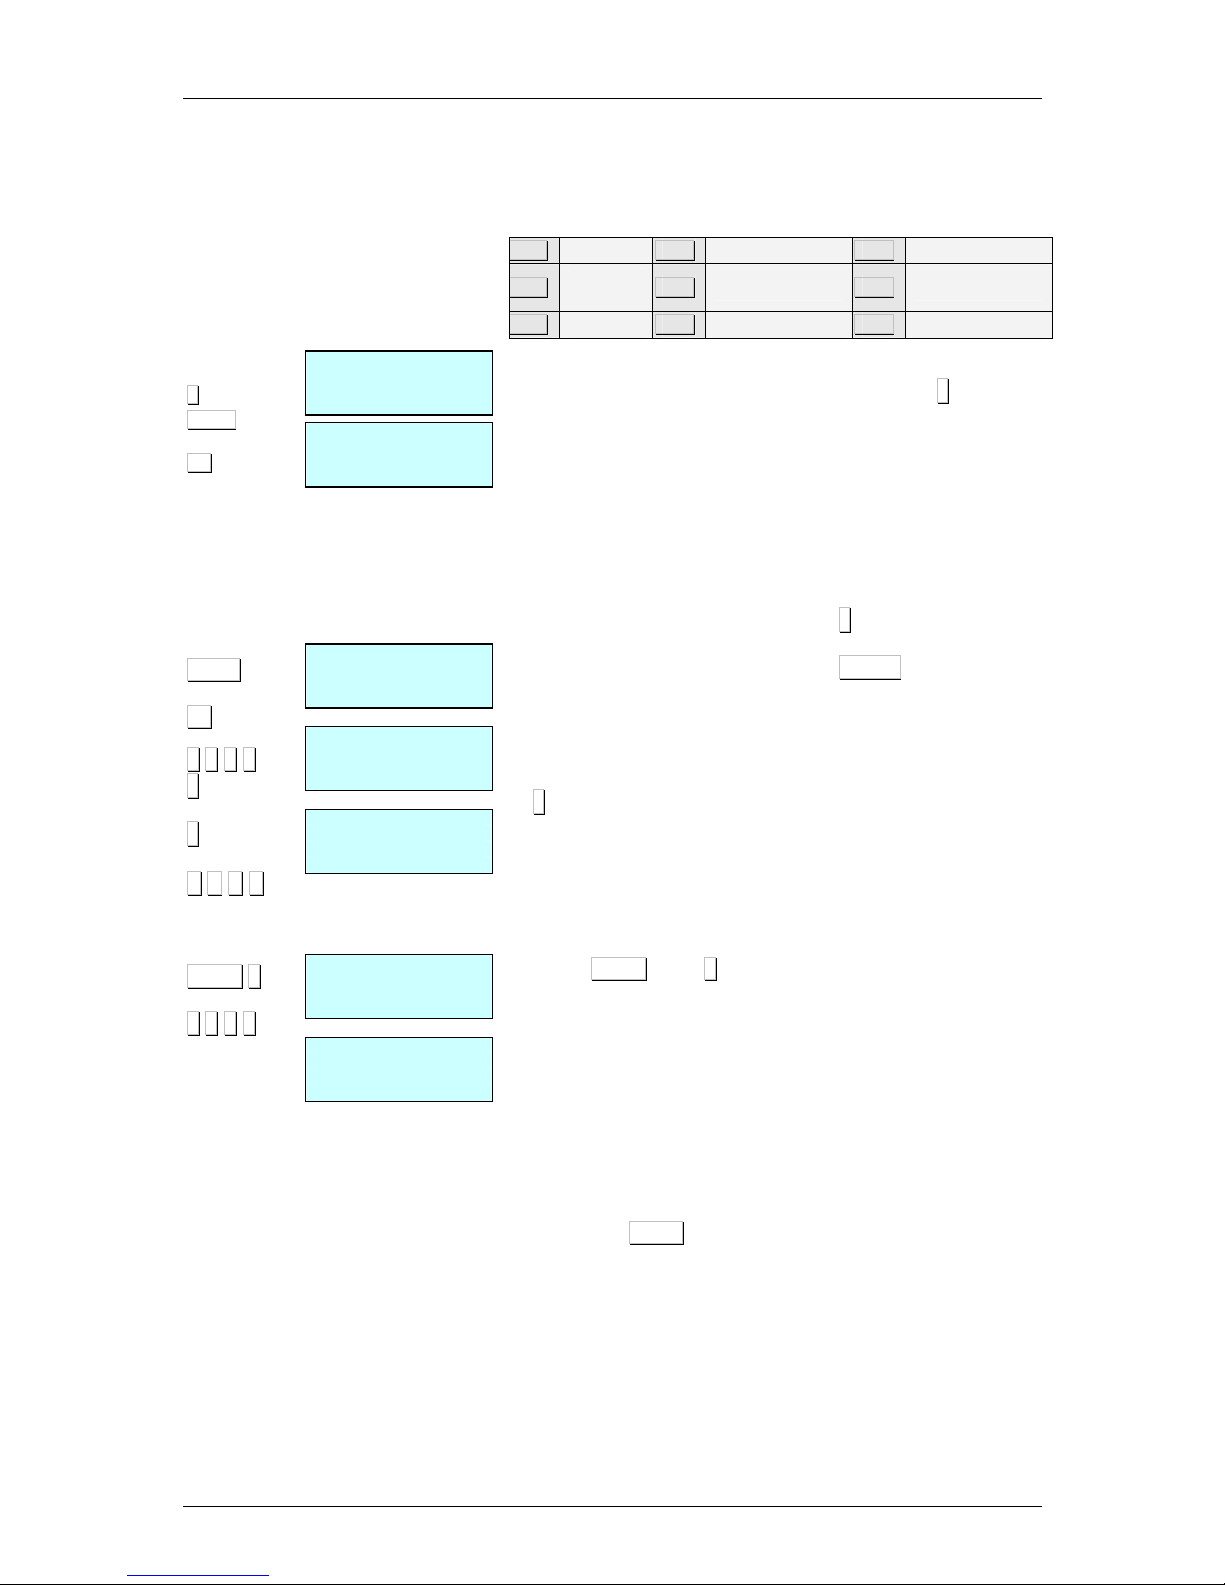
2.3.18.Forms of payment
This Function permits sales to be associated with a form of
payment so that later they can be listed separately. There are
nine forms of payment, four of which are defined:
PLU1
Cash
PLU4
To account
PLU7
Programmable
PLU2
Card or
cheque
PLU5
Others
PLU8
Programmable
PLU3
Credit
PLU6
Programmable
PLU9
Programmable
The operation is as follows:
1. When the receipt is to be printed, after pressing ∗∗∗∗, select the
form of payment (PLU1,...,PLU9).
2. Press the key of the corresponding sales assistant.
2.3.19.Account payment form
Programme the parameter customer number in the weighing
scale configuration with values 4 to 7 (See sect. 5.1.3.2.
CUSTOMER NUMBER)
1. When the receipt is printed, press ∗∗∗∗, to enter the form of
payment. When the sales assistant number is pressed, if the
form of payment is ‘ACCOUNT’ (PLU 4), the customer
number will be requested (the 4 digits of the client number can
be entered with the number keypad or with a barcode reader.
The client number represents the last 4 digits in the barcode,
not including the control character). If it already exists, his/her
name will be shown, and confirmation will be requested (press
∗∗∗∗) and the amount on the receipt will be added to the amount
owed by the customer. If the customer number does not exist,
the name and amount owed on the receipt will be requested. If
the ‘ACCOUNT’ form of payment is selected, the text
‘ACCOUNT PAYMENT’ will be added to the receipt to
distinguish it from a normal sale.
2. If a customer wishes to pay part or all of the amount owed,
press SHIFT and 4, and the customer number will be
requested, (if the client does not exist, the scales will beep).
If no amount is entered as payment, a copy of the client's
account will be made. If a negative amount is entered, the
amount pending will increase. A record will be printed of the time
and date, customer code, customer name and sum owed before
payment, the amount paid and the amount pending payment. The
format of this record has the same parameters as the receipt, i.e.,
the same headings, logos, in pesetas and euros or just in the
principal currency, depending on the Euro phase, etc.
If you wish to exit without any payment being made, press THE
function key MENU .
3. A client may leave a certain amount as a deposit, and this is
reflected as a pending negative sum. Clients can only be removed
by going to the RMS or from the scales if your .balance is zero (0).
Page 26
USER´S MANUAL
49-M500WMEN25
18
MENU
8 1 16
SHIFT
4
◊
◊◊
◊
◊
◊◊
◊
◊
◊◊
◊
MENU
TOTAL SALES ASSIST.
ACCOUNT CUSTOMERS
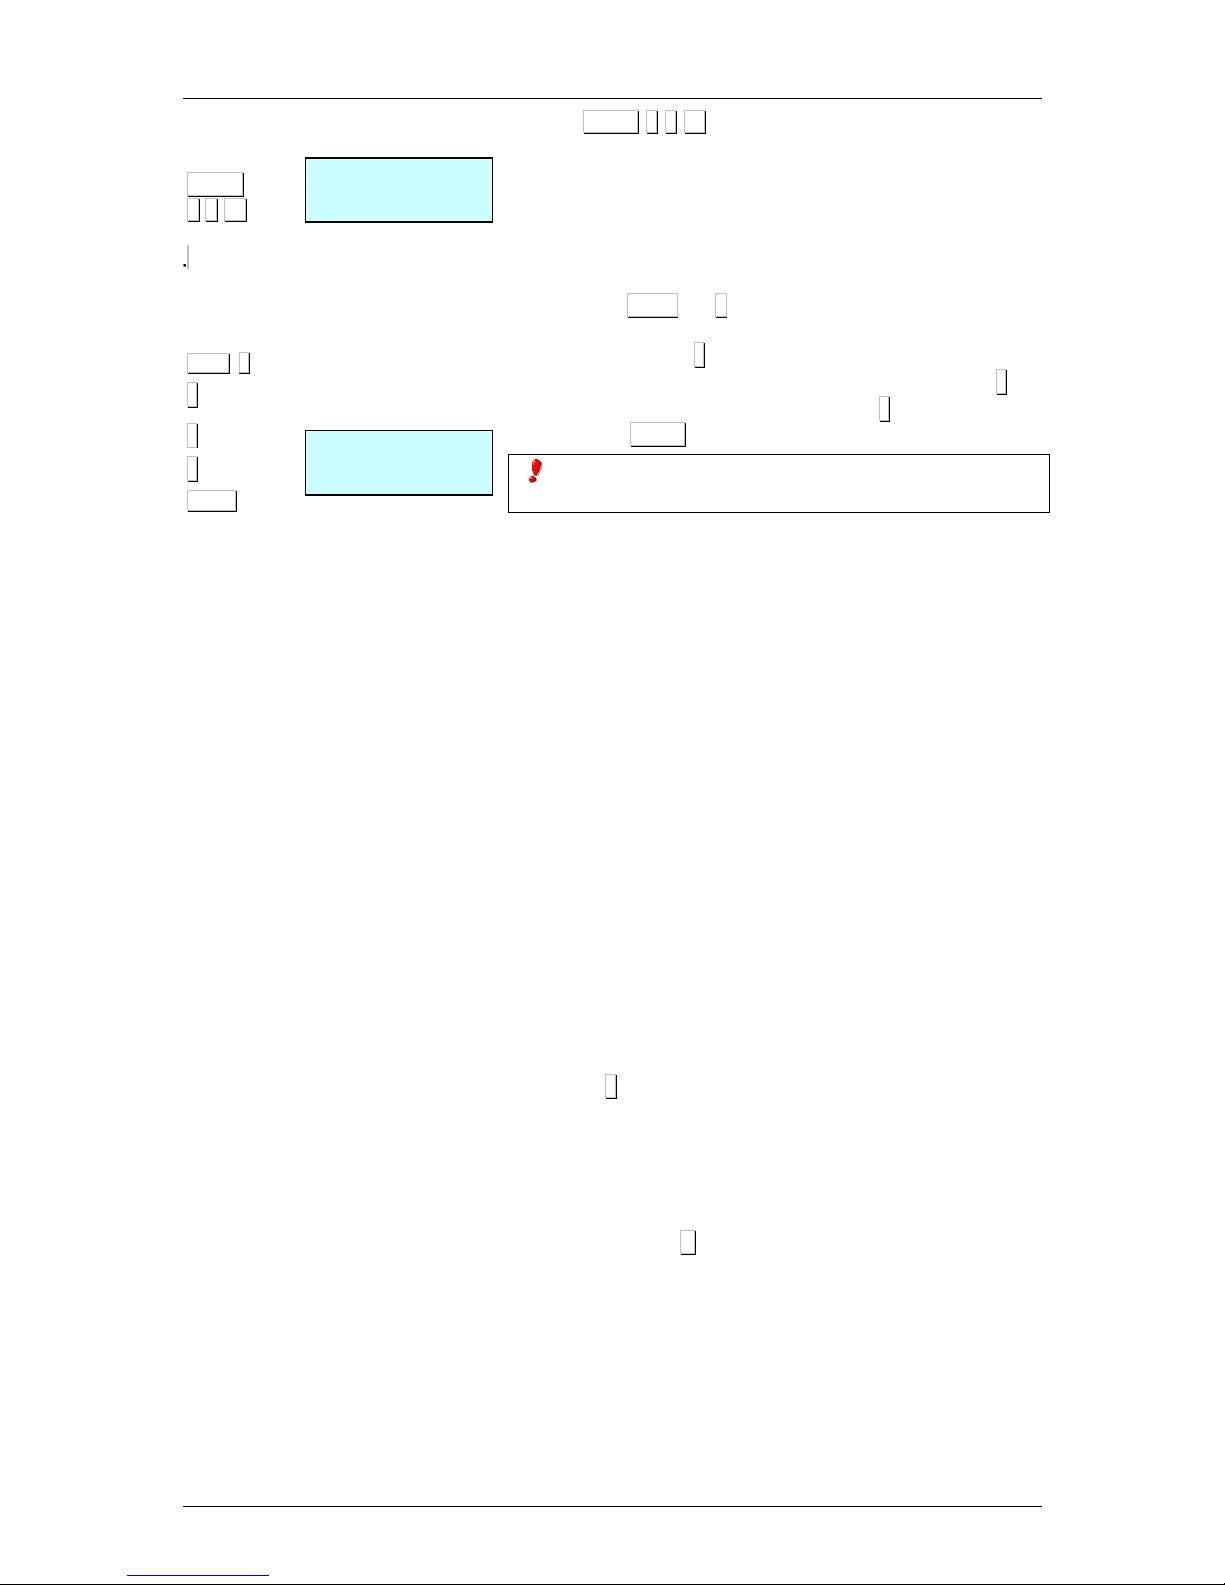
4. Press MENU 8 1 16 to enter the Lists menu. Enter number 21,
which is the number that corresponds to the customers’ list. This
list shows each customer, name and amount owed.
To ensure that the balance of the cash drawer adds up correctly, in list
20 a new line is added that corresponds to the sum of payments
made by customers who pay through their accounts.
5. To delete a customer completely:
1. Press SHIFT and 4.
2. You will be asked for the number of the customer (to be
deleted). Press ◊◊◊◊.
3. You will be asked if you want to “Delete customer”. Press ◊◊◊◊.
4. You will be asked if you are “sure”. Press ◊◊◊◊.
5.
Press MENU to continue weighing.
A customer memory does not become free even if his/her
balance is at zero.
2.3.20.Two Pay Mode
A new procedure has been created in which one or two forms of
payment may be chosen.
At present, if parameter TWO PAY MODE is set to 0, this means that
only one type of form of payment will be used per receipt, and this
form will be selected using the PLU keys (PLU 1 Cash, DPLU 2
Cheque, etc.).
If parameter TWO PAY MODE is set to 1, this means that two types
of forms of payment may be used per receipt. To do this, after
pressing the sales assistant key in the “SALES ASSISTANT TOTAL?”
dialog box, the weighing scales will await the selection of the form of
payment, that can be entered by selecting the PLU keys (PLU 1
Cash, PLU 2 Cheque, etc.).
In this situation, the following is shown on screen:
- Number of articles sold
- Sales total
- Sales assistant code
- Description of form of payment
- Amount payable through this form of payment.
Cash is the default form of payment and the total amount of the
receipt is shown as the amount payable in this form of payment.
Therefore, if ∗∗∗∗ is pressed in this dialog box, the receipt is printed with
this form of payment, and a second form cannot then be entered.
In order to select a different form of payment from the default form, or
pay with two pay mode, select a form of payment in this dialog box
using keys PLU1 to PLU 9 as indicated above. The selected form of
payment will be shown on screen and the number key will remain
active in order to enter the amount to be paid through this first form of
payment (if you press C, the amount will be left at zero). At any time
you may change forms of payment by pressing a PLU key.
Page 27
500 Range
49-M500WMEN25
19
∗∗∗∗ V1
∗∗∗∗
PLU3
∗∗∗∗
0.275
0.00
0.000
0.00
D0
1 TOT
2.17
M = 1 2.17
CASH
1 TOT
2.17
M = 1 1.00
CASH
1 TOT
2.17
M = 1 1.17
CASH
1 TOT
2.17
M = 1 1.17
CREDIT
The choice of the first form of payment and the amount to pay through
this form are confirmed by pressing ∗∗∗∗, and a second dialog box will
appear, showing:
- Number of articles sold
- Sales total
- Sales assistant code
- Description of second form of payment
- Remainder of the total outstanding amount
Here you can select the second form of payment with the PLU
keys. In this case the number keys remain inactive. If you press ∗∗∗∗
without selecting any form of payment, it is understood that the
second form of payment is the default form (effective form).
Press ∗∗∗∗ to print the receipt. (If cash is one of the forms of
payment and the change option is active, the receipt will not be
printed and the scales will wait for the amount tendered by the
customer to be entered).
If change control is activated and cash is one of the forms
of payment, the total sum of the receipt will be shown (the sum
of the two pay mode) and the amount tendered will be
requested. The change due will be shown (amount in cash
minus amount tendered).
There are 9 forms of payment available, which are defined:
PLU1
Cash
PLU4
To account
PLU7
Other
PLU2
Card or
cheque
PLU5
Other
PLU8
Other
PLU3
Credit
PLU6
Other
PLU9
Other
The operation is as follows:
1. Set the scales to working mode. Effect the sale of an article
and memorise with a sales assistant key.
2. Press ∗∗∗∗ followed by the sales assistant who has sold the
article.
3. If parameter Two Pay Mode is activated, the scales will wait
for you to enter the desired form of payment by using the
department keys.
4. When the form of payment has been entered, then enter the
corresponding amount and press ∗∗∗∗.
5. The scales show the outstanding balance from the sale. Use
the department keys to select the second form of payment.
Press ∗∗∗∗ to print the receipt.
Below is an example of payment through two forms of payment:
• First form of payment, not cash.
• Another, second form of payment, not cash.
The “VENDOR TOTAL?” dialog box shows the number of articles
and the total. Enter the discount (if this option is enabled). Press ∗∗∗∗
and the scales will request the form of payment. Press PLU 2, for
example, to select CHEQUE.
Page 28
USER´S MANUAL
49-M500WMEN25
20
SHIFT F2
++++
SHIFT F2
−−−−
Use the number keys to enter the amount the customer wishes to
pay by cheque. Press ∗∗∗∗ again. If the amount entered differs from
the amount due (i.e. if it is less) a second form of payment will be
requested. This should be selected using the PLU keys (e.g. PLU
3 to pay the remainder by CREDIT).
Press ∗∗∗∗ and the receipt will be printed with CHEQUE as the first
form of payment and CREDIT as the second form (in this
example, even if the change option is enabled, the scales will not
request the amount tendered by the customer).
In any event, if the amount entered for payment by means of
the first form of payment is equal to or greater than the total due,
it is understood that the exact total is paid through one form of
payment, which is the one that has been selected.
2.3.21.Selecting a default vendor
It is possible to select a default sales assistant so that the sales
assistant key does not have to be pressed. To do this, parameter
must be set-up. (See sect. 5.1.4.3. AUTOMATIC WEIGHING)
• If the configuration parameter automatic weighing is ‘WITH
SEL MEMO’
- Working in label mode:
The automatic weighing mode will be effected with the default
memory.
Memorisations cannot be effected on a memory that is being
used by another machine, because the latter will block the
memory.
• If the configuration parameter automatic weighing is
‘WITHOUT SEL MEMO’:
- Working in label mode:
The automatic weighing mode will be effected without the default
memory.
2.3.22.Next Plu
If you wish to select a PLU stored in the scale it is possible to view
the different PLUs on the display.
Once selected a PLU we can see the previous and next PLU: To do
this:
1. Select a PLU.
2. To select the next one. Press SHIFT F2 +. When it finished,
it starts again.
3. To select the previous one. Press SHIFT F2 –
Page 29
500 Range
49-M500WMEN25
21
SHIFT −−−−
C
∗∗∗∗
SHIFT F5
0.135 0.00
0.000 0.00
03 - POTATOES
0.410 0.00
0.000 0.00
POTATOES
0.000
0.00
0.000 0.00
BACKLIGHT
MODE
TIME
BACKLIGHT
ON
0.000 0.00
0.000 0.00
STOCK
MANAGER
0.000
STOCK
2.3.23.SELF-SERVICE MODE
The way it works in this mode is performed by placing a weight on
the plate and when pressing the corresponding key label, without
requiring the intervention of a vendor, the label of the required
product is printed.
In self-service mode only direct keys ate operative and depending
on the model, the simple keypad ( keys 0….9)
To print a label:
1. Put the product on the plate.
2. Press the code for the product key.
3. The scale saves the operation and print the label.
To accede to the programming, press any key for two seconds
and in less than one second press another key during two
seconds.
All the operations done in the scale will allocated as sales to
the memory 1.
2.3.24.Configure backlighting
The scale’s backlighting (display lighting) can be configured.
There are three working positions:
• Off: backlighting stays off until operations are carried out on
the scale.
• On: it is always on even though the machine is not being used
• Time mode: backlighting switches on when operations are
carried out on the scale and switches off when the scale is not
being used approximately 30 seconds after.
To set the configuration parameters, take the following steps:
1. Set the scale to working position (POSITION 0)
2. Press SHIFT and then −−−−.
3. Select working mode with the C
4. To store the value, press ∗∗∗∗.
2.3.25.Stock Manager
With this new functionality, you take control of the stock you have
in the shop for different articles.
When the order is received, the operative must enter the amounts
received in the scale, either by keyboard or by weighing them.
As the sales are made, the quantities sold will be discounted.
(See sect. 5.1.7.12 Stock Control). Having an inventory of the
stock you have in the shop the whole time. This inventory may be
printed or sent to PC.
You can access to this new functionality pressing on the keys
SHIFT and F5 ( 3 seconds ). Then locate the article on which we
want to vary the stock by its corresponding direct key or by
entering its code or via scanner *:
In the screen it will appear the code, the description and the
current article stock.
Page 30
USER´S MANUAL
49-M500WMEN25
22
T/FT
∗∗∗∗
MENU
∗∗∗∗
100.525 STOCK
12- POTATOES
100.525 STOCK
0.000
[+]12- POTATOES
100.525 STOCK
UPDATE?
<*> YES <C> NO
EXIT STOCK
MANAGER ?
<*> YES <C> NO
The movements we can have are the following ones
++++ Add the stock: The indicated amount is added to the
current stock.
−−−− Subtract the stock: The indicated amount is subtracted
from the current stock.
◊
◊◊
◊ Regulate the stock: The current stock is replaced by the
indicated amount.
Pressing any of these keys you will be able to edit the quantity in
order to make the movement:
Next to the articles description it will appear the movement symbol
that is taking place:
[+] =Add stock
[–] = Subtract stock
[R] = Regulate
It is possible to edit the quantity of the weight articles placing the
product on the plate and pressing the key T/FT.
The Tare Percentage articles work with the gross weight.
The Return articles do not make sense in this operation.
Once entered the wanted quantity, you must press the key ∗∗∗∗ and
it appears a screen asking for the confirmation.
For each article we are updating in the stock, the machine will
print a record of the movements done indicating:
♦ Article Code
♦ Description
♦ Original Stock
♦ Type of Movement
♦ Quantity
♦ Resulting Stock
To exit from this operation and return to the normal weighing
screen, press the key MENU and confirm ∗∗∗∗.
*Only models with scanner option.
Page 31

500 Range
49-M500WMEN25
23
[ 1 ] ARTICLES
[ 2 ] VENDORS
[ 2 1 ] CREATION
[ 2 2 ] DELETION
[ 2 3 ] CASH DRAWER
[ 2 4 ] ACTIVE VENDOR
[ 3 ] CONFIGURATION
[ 3 1 ] CONFIGURATION WITH PC
[ 3 1 1 ] Day Movement
[ 3 1 2 ] End of Day
[ 3 1 3 ] Message Label
[ 3 1 4 ] PC Receipt Registration
[ 3 1 5 ] PC Communication Report
[ 3 1 6 ] Stock sending
[ 3 1 7 ] Stock movements sending
[ 3 2 ] CONF. KEYBOARD
[ 3 2 1 ] Weight Refund
[ 3 2 2 ] Fix Price
[ 3 2 3 ] Free Price
[ 3 2 4 ] Direct Price
[ 3 2 5 ] Multiplication
[ 3 2 6 ] Subtraction
[ 3 2 7 ] Addition
[ 3 2 8 ] Subtotal
[ 3 3 ] CONF. RECEIPT
[ 3 3 1 ] Exchange Calculation
[ 3 3 2 ] Customer Number
[ 3 3 3 ] Receipt Code
[ 3 3 4 ] Receipt Tare
[ 3 3 5 ] Discount in total
[ 3 3 6 ] Discount in line
[ 3 3 7 ] VAT in Receipt
[ 3 3 8 ] Receipt Conf.
[ 3 3 9 ] Deleted Lines
[ 3 3 10 ] Rounding Receipt
[ 3 4 ] CONF. LABEL
[ 3 4 1 ] One article
[ 3 4 2 ] Adhesive paper
[ 3 4 3 ] Automa. Weighing
[ 3 4 4 ] Label per Weight
[ 3 4 5 ] Centre texts
[ 3 4 6 ] Label Accumulation
[ 3 4 7 ] General Text
[ 3 5 ] CONF. PRINTING
[ 3 5 1 ] Voucher
[ 3 5 2 ] Voucher (2)
[ 3 5 3 ] Receipt Copy
[ 3 5 4 ] Receipt Reopening
[ 3 5 5 ] Two Pay. Modes
[ 3 5 6 ] Section barcode
[ 3 6 ] CONF. EAN
[ 3 6 1 ] Bar Code - Receipt
[ 3 6 2 ] Bar Code - Label
[ 3 6 3 ] Interpr. Line
[ 3 6 4 ] EAN 13 Receipt Format
[ 3 6 5 ] EAN 13 Receipt
[ 3 6 6 ] EAN 13 Label Format
[ 3 6 7 ] EAN 13 Label
[ 3 6 8 ] EAN 128 Format
[ 3 6 9 ] Scanner Sold Sales
[ 3 6 10 ] 128 Reading
[ 3 6 11 ] Substitution Letters Prepack
Reading
[ 3 6 12 ] EAN per line format
[ 3 7 ] CONF. OTHER
[ 3 7 1 ] Units x 1000
[ 3 7 2 ] Code Numbers
[ 3 7 3 ] Best before
[ 3 7 4 ] Advertising
[ 3 7 5 ] Draw Control
[ 3 7 6 ] Price Increase
[ 3 7 7 ] Automatic Mode
[ 3 7 8 ] Code Timeout
[ 3 7 9 ] Memo amount zero
Page 32

USER´S MANUAL
49-M500WMEN25
24
[ 3 7 10 ] Memo weight zero
[ 3 7 11 ] Headers Lin Lists
[ 3 6 12 ] Scan Load Class
[ 3 7 13 ] Stock Control
[ 3 8 ] CONF. DISPLAY
[ 3 8 1 ] Display Standby
[ 3 8 2 ] Logo start up
[ 3 8 3 ] Change Display
[ 3 8 4 ] Clock in section logo
[ 3 8 5 ] Backlight
[ 3 8 6 ] Advertising Display
[ 3 8 7 ] Colour display advertising
[ 3 8 7 1 ] First image
[ 3 8 7 2 ] Image sequence
[ 3 8 7 3 ] Time interval
[ 3 9 ] CHECKWEIGHER
[ 3 9 1 ] Checkweigher
[ 4 ] TEXTS
[ 4 1 ] FREE TEXTS
[ 4 2 ] ADVERTISING
[ 4 3 ] SECTIONS
[ 4 4 ] PAYMENT MODES
[ 4 5 ] TRACEABILITY
[ 4 5 1 ] Products
[ 4 5 2 ] Table of Texts
[ 4 6 ] SHORT MESSAGES
[ 4 6 1 ] Read messages
[ 4 6 2 ] Delete messages
[ 4 7 ] RECIPES
[ 5 ] COMMUNICATIONS
[ 5 1 ] ETHERNET PARAMETERS
[ 5 1 1 ] Scale IP Address
[ 5 1 2 ] PC IP Address
[ 5 1 3 ] Equipment Number
[ 5 1 4 ] TCP Tx Port
[ 5 1 5 ] TCP Rx Port
[ 5 1 6 ] MAC Address
[ 5 1 7 ] Subnet Mask
[ 5 1 8 ] Gateway IP Address
[ 5 2 ] RS-232 PARAMETERS
[ 5 2 1 ] Baudrate
[ 5 2 2 ] Device
[ 5 2 3 ] Monitoring mode
[ 5 3 ] OPERATIONS WITH PC
[ 5 3 1 ] End Day with Deletion
[ 5 3 2 ] End Day W/O Deletion
[ 5 3 3 ] Begin of Day Request
[ 5 3 4 ] Initialization of scale
[ 5 3 5 ] Backup
[ 5 4 ] INTERCONEXION
[ 5 4 1 ] Master/Slave Configuration
[ 5 4 1 1 ] Net Identifier
[ 5 4 1 2 ] Scale Address
[ 5 4 1 3 ] UDP Port
[ 5 4 1 4 ] Slaves IP Address
[ 5 4 1 5 ] Slaves communicated
[ 5 4 2 ] Master/Slave Operations
[ 5 4 2 1 ] Net Autoconfiguration
[ 5 4 2 2 ] Master/Slave Test
[ 5 4 3 ] Sending Data
[ 5 4 3 1 ] Sending All
[ 5 4 3 2 ] Sending PLU's
[ 5 4 3 3 ] Sending Traceability
[ 5 4 3 4 ] Sending Logos
[ 5 5 ] OPERATIONS WITH USB
[ 5 5 1 ] Restore data
[ 5 5 2 ] Backup data
[ 5 5 3 ] Backup sales
[ 6 ] FORMATS
[ 6 1 ] LABEL
[ 6 1 1 ] Prog Label Format
[ 6 1 2 ] Copy Label Format
[ 6 1 3 ] Delete Label Format
[ 6 1 4 ] Rotate Label Format
Page 33

500 Range
49-M500WMEN25
25
[ 6 2 ] RECEIPT
[ 6 2 1 ] Prog Receipt Format
[ 6 2 2 ] Copy Receipt Format
[ 6 2 3 ] Delete Receipt Format
[ 7 ] DATA
[ 7 1 ] DATA
[ 7 1 1 ] Group number
[ 7 1 2 ] Wholesaler Limit
[ 7 1 3 ] VAT Types
[ 7 1 4 ] Tares
[ 7 1 5 ] Currencies
[ 7 1 6 ] Date and Time
[ 7 1 7 ] Euro Programm.
[ 7 1 8 ] EAN Programm.
[ 7 1 8 X ] EANC01... EAN128GLOBAL
[ 7 1 9 ] Loyalty points
[ 7 2 ] SELF-SERVICE MODE
[ 7 2 1 ] Conf Self-Service Mode
[7 2 2 ] Fix Code
[ 7 3 ] PASSWORDS
[ 7 3 1 ] Master Password
[ 7 3 2 ] Prog. Password
[ 7 3 3 ] Vendors Password
[ 7 3 4 ] Comms Password
[ 7 3 5 ] Lists Password
[ 7 4 ] PRINTING PARAMETERS
[ 7 4 1 ] Label Parameters
[ 7 4 1 1 ] Label Way Out
[ 7 4 1 2 ] Label Contrast
[ 7 4 1 3 ] Label Format
[ 7 4 1 4 ] Heading
[ 7 4 1 5 ] Type of Paper
[ 7 4 1 6 ] For. total L 1
[ 7 4 1 7 ] For. total L 2
[ 7 4 1 8 ] For. total L 3
[ 7 4 1 9 ] For. EAN Tot L 1
[ 7 4 1 10 ] For. EAN Tot L 2
[ 7 4 1 11 ] For. EAN Tot L 3
[ 7 4 1 12 ] Centre Label
[ 7 4 1 13 ] Centre Receipt
[ 7 4 1 14 ] Dist Opto-Thermal Head
[7 4 1 15 ] Backing Paper Rewinder
[7 4 1 16 ] Way out control
[ 7 4 2 ] Receipt Parameters
[ 7 4 2 1 ] Receipt Contrast
[ 7 4 2 2 ] Lines End of Receipt
[ 7 4 2 3 ] Receipt Format
[ 7 4 2 4 ] Receipt For Label
[ 7 4 3 ] Label opto calibration
[ 8 ] REPORTS
[ 8 1 ] REPORTS
[ 8 1 1 ] Report of Articles by Code
[ 8 1 2 ] Report of Articles by PLU
[ 8 1 3 ] Report of Articles by Equivalence
PLU / CODE
[ 8 1 4 ] Sales per Artcile by Code
[ 8 1 5 ] Sales per Artcile by PLU
[ 8 1 6 ] Sales by Vendor/Article
[ 8 1 7 ] Big Total Group
[ 8 1 8 ] Sales per Artcile by Code [Extended]
[ 8 1 9 ] Big Total Group [Extended]
[ 8 1 10 ] V.A.T. Total
[ 8 1 11 ] Sales per Section
[ 8 1 12 ] Hourly Sales Report
[ 8 1 13 ] Last PLU Modified
[ 8 1 14 ] Cash Drawer Report
[ 8 1 15 ] Traceability Report
[ 8 1 16 ] On Credit Customers Report
[ 8 1 17 ] Fiscal Report
[ 8 1 18 ] Stock Report
[ 8 1 19 ] Monthly Sales Report
[ 8 2 ] LOGOS
[ 8 3 ] FONTS
[ 9 ] SALES DELETION
[ 9 1 ] Z DELETION
[ 9 2 ] LEVELS
Page 34

USER´S MANUAL
49-M500WMEN25
26
[ 9 3 ] PARTIALS
[ 9 3 1 ] Articles Deletion
[ 9 3 2 ] Formats Deletion
[ 9 3 3 ] Traceability Deletion
[ 9 3 3 1 ] Complete
[ 9 3 3 2 ] Only Products
[ 9 3 3 3 ] Active Animal
[ 9 3 4 ] Configuration Deletion
[ 10 ] MACROS
[ 10 1 ] MACRO PROG
[ 10 2 ] COPY MACROS
[ 10 3 ] DELETE MACROS
[ 10 4 ] EDIT MACROS
Page 35
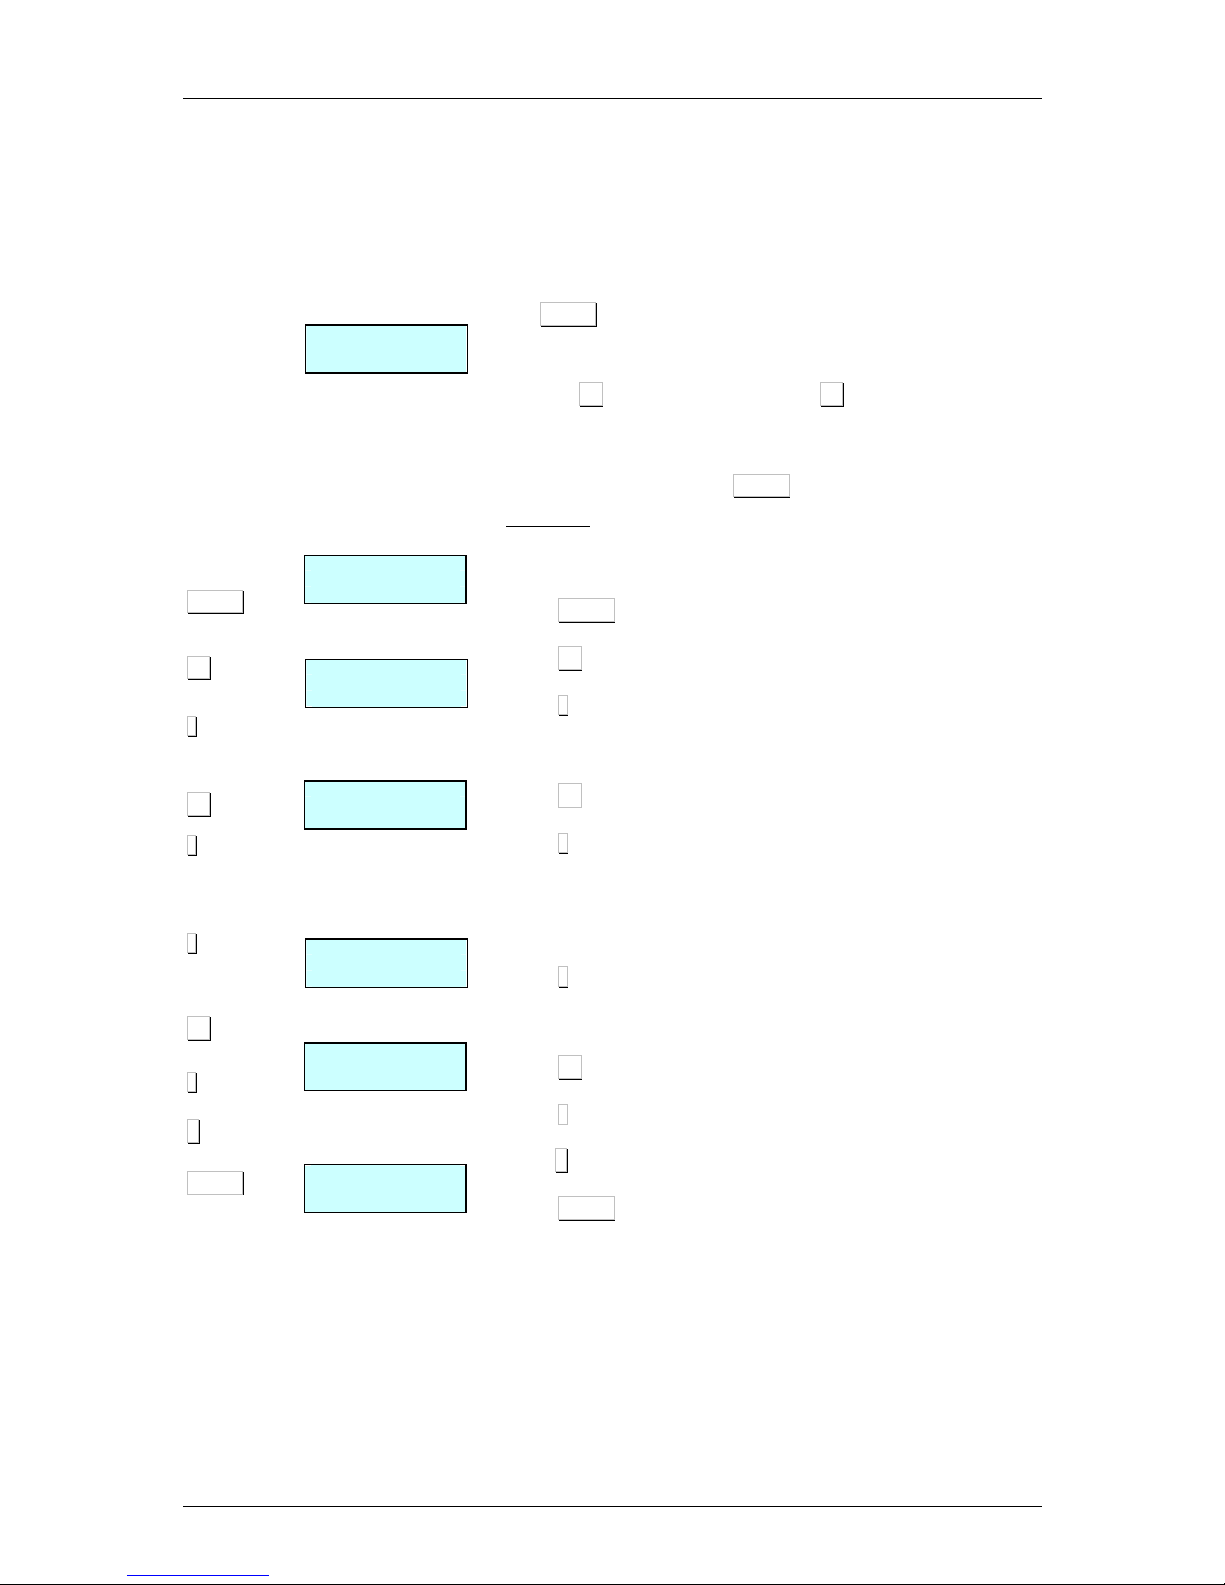
500 Range
49-M500WMEN25
27
MENU
F2
∗∗∗∗
F2
∗∗∗∗
∗∗∗∗
F2
∗∗∗∗
5
MENU
PROG
1
1 - 9
ARTICLES
PROG 1
1 - 9
ARTICLES
PROG 7
7 - 9
DATA
PROG 74
DATA 4
- 4
PRINT PARAM
PROG 741
PARAM IMP 1
- 2
PARAM LBL
PROG 7413
PARAM ET 3
-
14
FORMAT LBL
PROG 7413
5
FORMAT LBL
3.PROGRAMMING
DIBAL 500 Range scales offer a menu-based programming
system, i.e. there is a hierarchical coded structure of programming
menus that provides fast and simple access to the different
programmes by using their corresponding codes.
Access to the main programming menu is gained by pressing the
key MENU for 2 seconds.
After gaining access to the programming mode, the selected
option will be shown in black. Change from one option to another
by using F2 to go down the menu and F1 to go up.
An option can also be selected by entering its code using the
number keys.
To exit programming, press MENU
OPTION 1:
Example: Select Global Format of Label 5.
Press MENU
Press F2 until menu Data is selected
Press
∗∗∗∗
The Data submenu appears.
Press F2 until see on the screen the Print Parameters
Press
∗∗∗∗
The Print Parameters submenu appears.
The Label Parameters option is already selected.
Press
∗∗∗∗
The Label Parameters submenu appears.
Press F2 until Label Format is selected.
Press
∗∗∗∗
Enter 5 to select format 5.
Press MENU until the programming menu is exited.
Page 36

USER´S MANUAL
49-M500WMEN25
28
MENU
7 4 1 3
5
MENU
PROG
1
1 – 9
ARTICLE
S
PROG
7
.4.1.
3
5
FORMAT LBL
OPTION 2:
OPTION 2:OPTION 2:
OPTION 2:
Press MENU
Pressr
7 4 1 3
Enter the value of the parameter, in this case 5.
Press MENU to exit the Programming menu.
The menus structure is the following:
ARTICLES
Articles programming
SALES ASSISTANTS (VENDORS)
Registration, removal and details of sales assistants
CONFIGURATION
Programming of PC Configuration, keyboard, label,
ticket, printing and EAN.
TEXTS
Programming of heading lines, publicity, sections,
payment modes and traceability.
COMUNICACIONES
Programming of communications parameters and
operations with PC.
FORMATS
Receipt and label programming formats.
DATA
Programming of data, selef-service mode, passwords
and printing parameters.
REPORTS
Printing of reports.
DELETIONS
Deletion of data.
Page 37
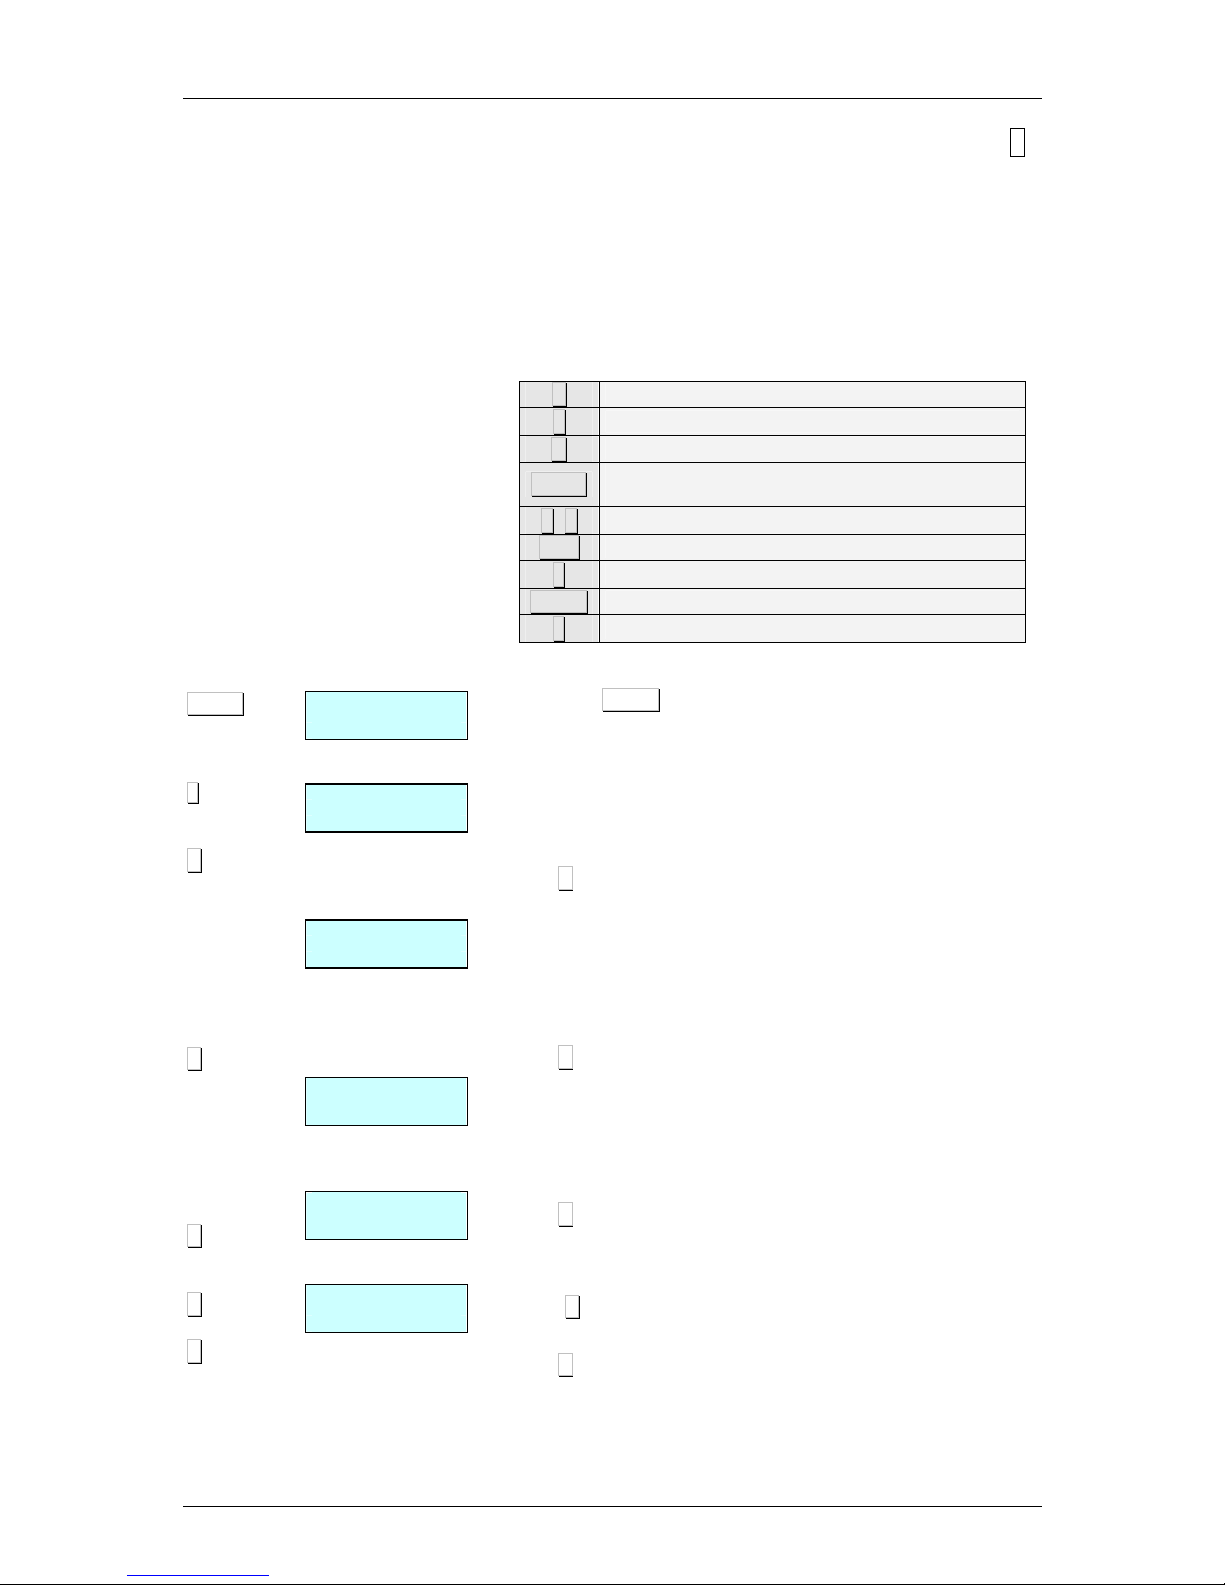
500 Range
49-M500WMEN25
29
MENU
1
X
X
X
X
X
PROG
1
1 - 9
ARTICLE
S
C 000001
C 000001
PLU
1
C 000001
P
RICE
0.00
C 000001
NAME
POS – 1 M
_
C 000001
NAM2 POS – 1 M
_
3.1. ARTICLES [ 1 ]
3.1.1.Creating/modifying a PLU
In this section articles are programmed on the scales. The 500
model scales. The models Wind: W-010, W-015 and Mistral: M510, M515 allow to program 2000 articles. On the other hand, the
models W-020, W-025, M-520 and M-525 allow to program 5000
articles.
The following keys are used to create or modify a PLU:
X Proceed to edit the NEXT article field.
↑
Proceed to edit the PREVIOUS article field.
C Delete character that has been edited.
SHIFT
Switch between CAPITALS and SMALL
LETTERS or pressing some seconds the letter.
++++, −−−−
Go (Go back) to next (previous) PLU.
T/FT Enter a blank space.
◊
◊◊
◊
Delete article/copy article.
PRINT Print a list of PLU data.
∗∗∗∗
Save data entered.
1. Check that the scales are the MASTER. To programme,
press MENU during 2 seconds. Type 1 to enter article
programming. First, the display will show a C in order to
enter the article code.
2. Enter the PLU code to be created or modified using the
number keys (max. 6 digits) or press the corresponding
direct key.
Press X to assign a direct key associated to a PLU.
3. Type the corresponding number for the direct key (PLU) to
be assigned to the article.
In order to not assign a direct key to the article, it is sufficient
leaving in blank the corresponding field. When doing any
operation with the article, you must enter a 6 cifres code.
Press X to proceed to enter the price per kg.
4. Enter the price per kg.
If the value of currency units / kg is entered as 0, then the
article in question will have a free price, i.e. the price can be
entered when an operation is effected.
Press X to proceed with programming the name.
5. Enter the article name (max. 20 characters).
Press X to proceed to enter a second name line name 2*
(NAME2).
Press X to programme the type of article.
* Models W-020, W-025, M-520 & M-525
Page 38
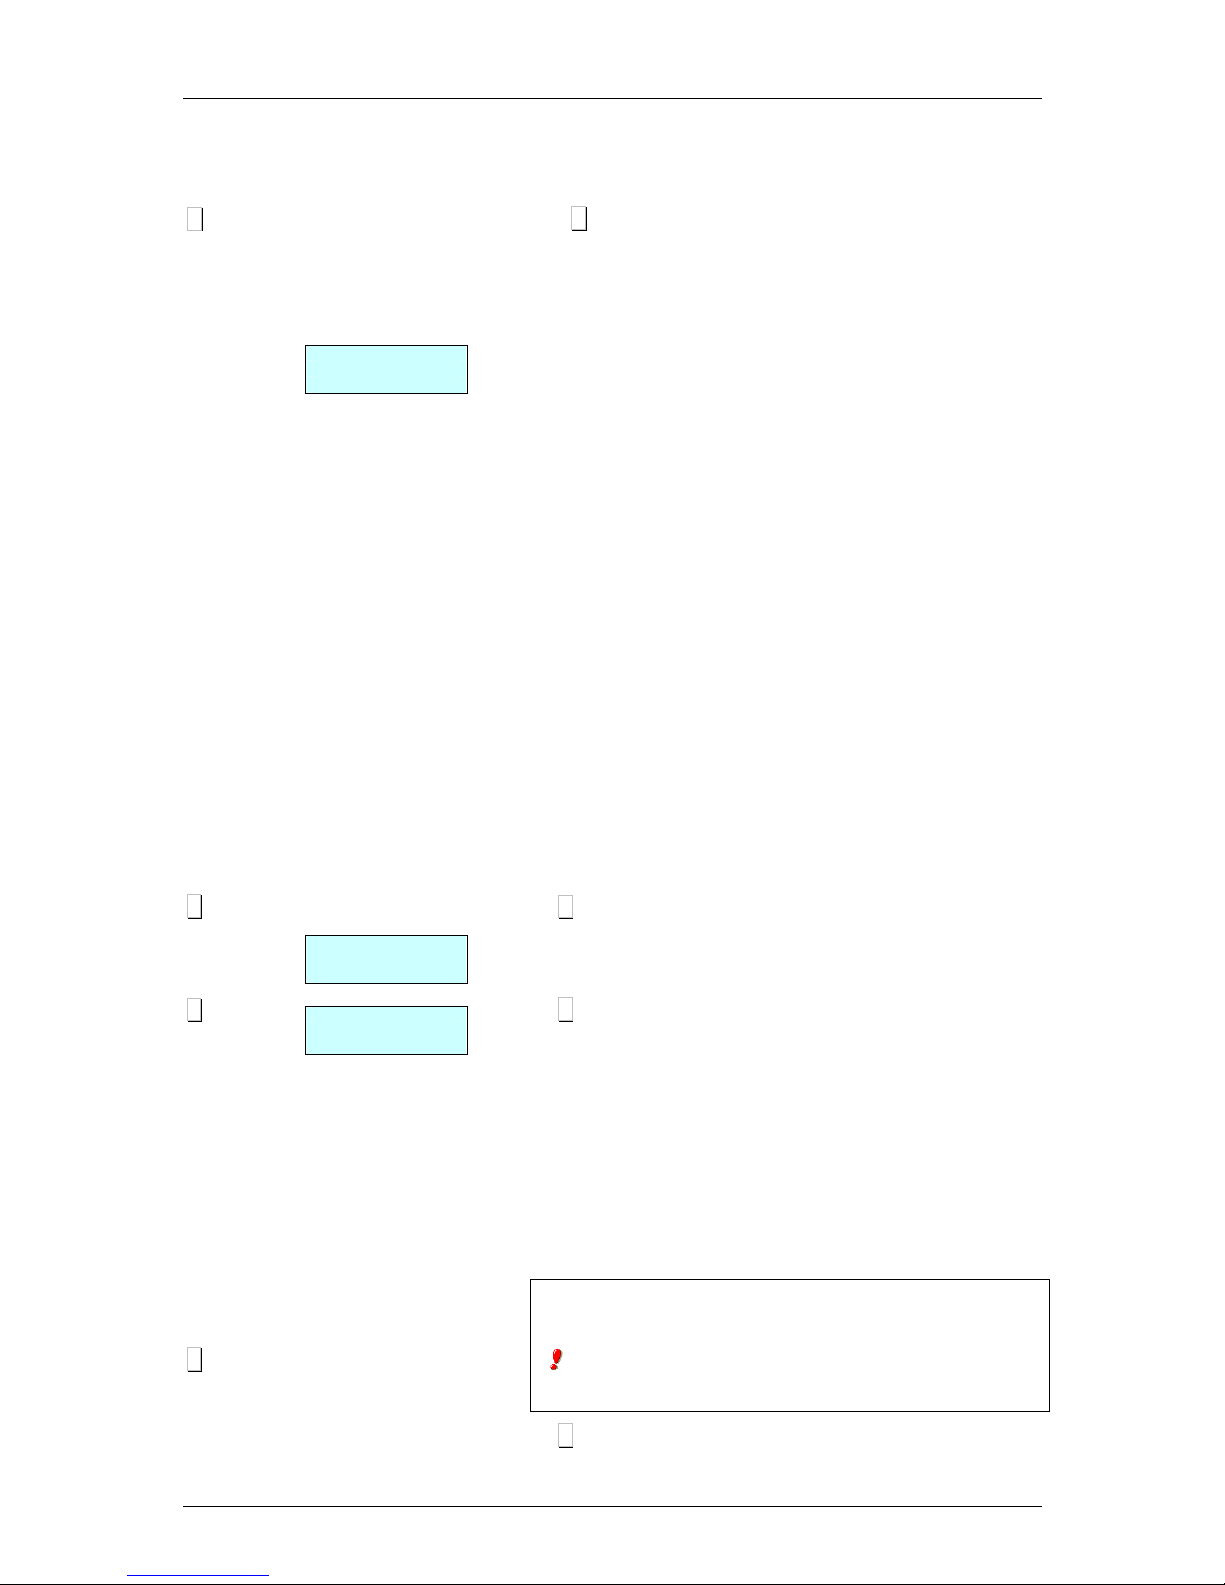
USER´S MANUAL
49-M500WMEN25
30
C
X
X
X
C 0000
01
TYPE
MILK
C 000001
SECTION
1
MILK
C 000001
LBL FORM
0
MILK
6. Proceed to programme the type of article. Articles may be of
the following types: price/Kg. (WEIGHT), unit price (UNIT),
fixed weight (FIXED W.) o.
Use C to select type of article desired:
- WEIGHT. Type of article by default; the price per kilo will
be programmed, and the amount will be the weight of the
product multiplied by the price. The article must be
weighed by the scales.
- UNIT. The amount is the price of the article. The weight
and the unit price are not printed. The article does not
have to be weighed.
- REFUND. The amount for this type of article will be
discounted from the total sum, and the amount will be
shown on the display as a negative value. This amount
will also be printed on the receipt.
- FIXED WEIGHT. The amount will be the product of the
known weight of the article that has been entered when
programming the TARE field, multiplied by the price. The
article will not be weighed, but the weight and price will
both be printed.
- A FIXED WEIGHT PLU (FROZEN) appears on the
display as a WEIGHT-type PLU, but the difference is that
instead of the tare appearing in the bottom left-hand
corner of the display, the text PF appears, indicating that
the weight is fixed, and therefore the weight placed on
the platform is not taken into consideration.
- PERCENTAGE TARE: The article must be weighed, but
a percentage of the weight will be discounted from the
gross weight, representing the tare. The percentage is
programmed in the section on Tare %, which appears
later, in the point 17.
Press X to proceed with defining the section parameter.
7. Enter the section code to which the article belongs (from 0-
99) with the number keys.
Press X to proceed to define the label format of the article
8. Enter the label format that is to be used to print the label of
the product that is being edited. You can enter a value
between 0 and 30* can be entered, with the following
meanings:
- From 0 to 20: predefined formats; See APPENDIX:
PROGRAMMED LABEL FORMATS, to select on of these
formats. All these formats will be given in the current EURO
phase.
- From 21 to 30*: user-definable formats.
*According to model.
• Models: W-015 & M-515 Maximum 25
• Models: W-025 & M-525 Maximum 30
The printing parameter GLOBAL LABEL FORMAT must be set to 0 in
order to programme the above (See sect. ¡Error! No se encuentra el origen
de la referencia.. PRINTING PARAMETERS ).
Press X to proceed to define the barcode format.
Page 39
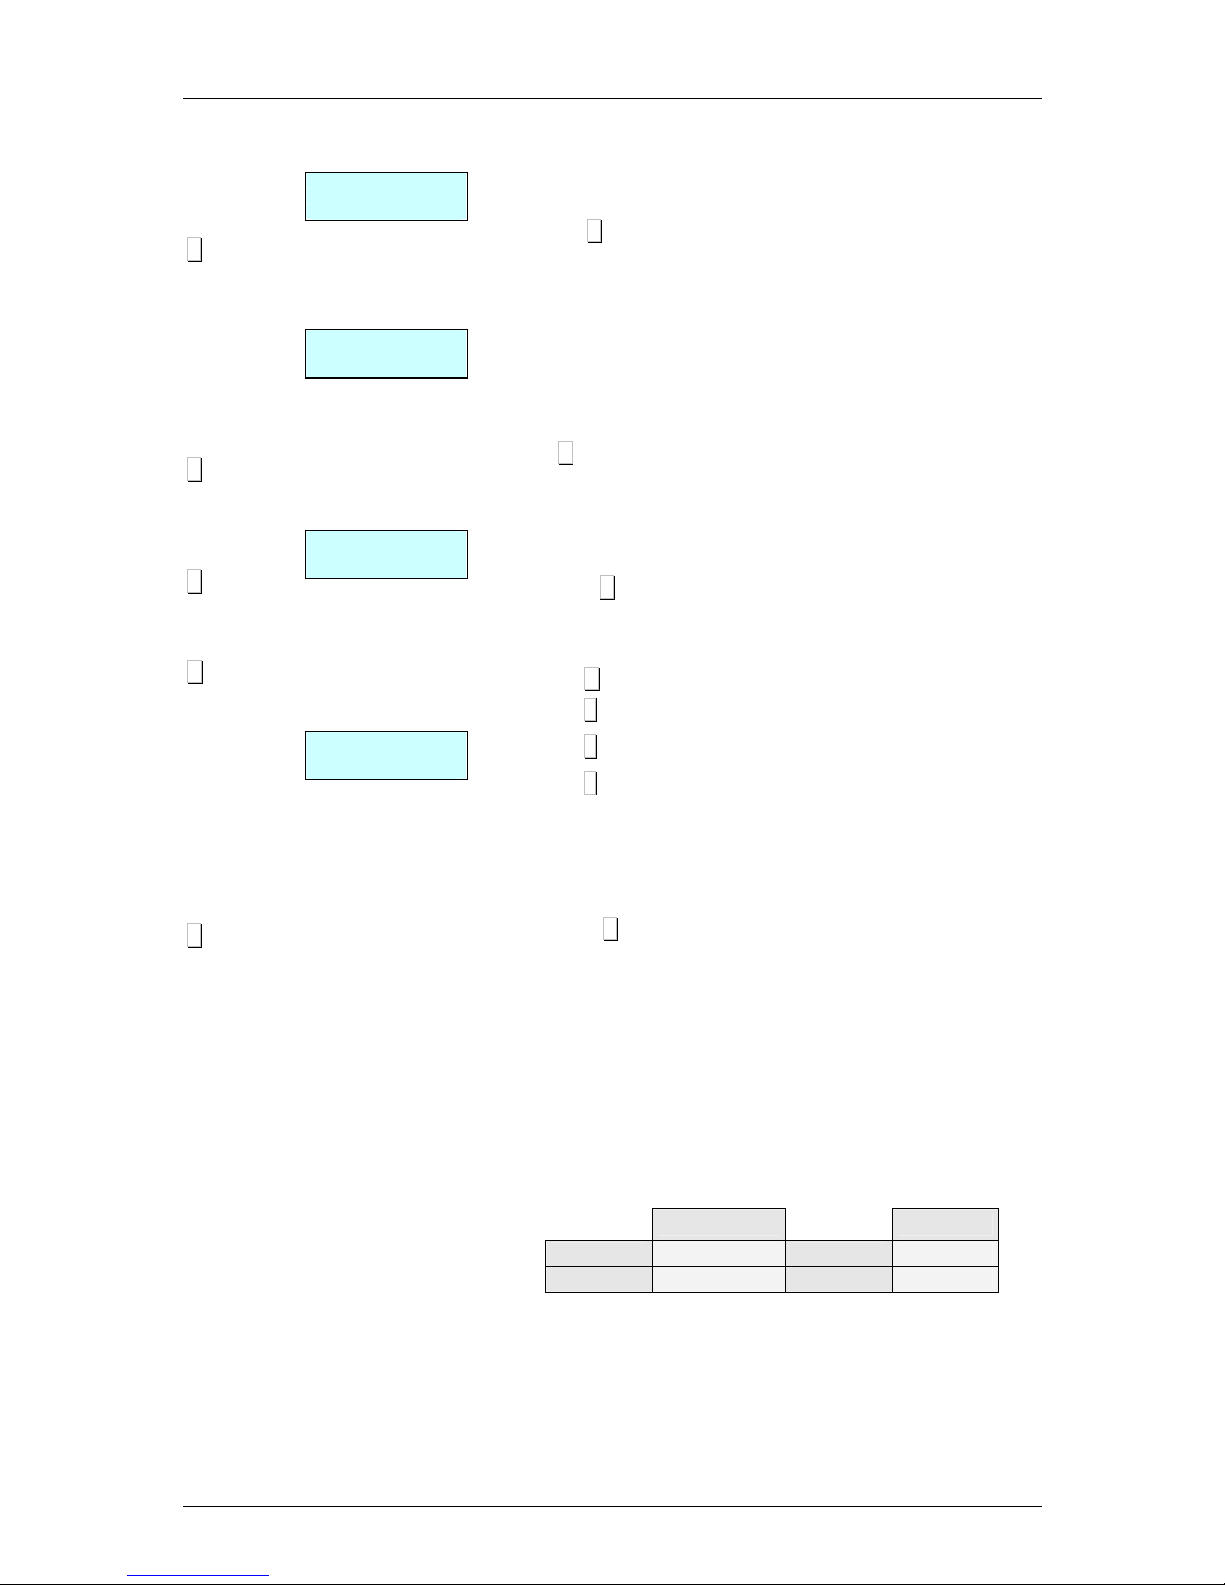
500 Range
49-M500WMEN25
31
X
X
X
C
X
C 000001
FOR
EAN 13
1
MILK
C 000001
VAT
TYPE
3
MILK
C 000001
COD SMILEY
0
MILK
C 000001
OFFER
PRICE-WEIGHT
9. Assign the barcode format (from 1 to 10) that is to appear on
the article label and/or receipt.
All 10 barcode types can be defined by the user in
sect..11.1.8.1. CONF. EANC01...EANC10.
Press X to proceed to define the VAT rate associated to the
PLU.
10. Enter one of the 6 VAT rates of application:
0: 0% (no VAT).
1 to 5: These values can be defined according to
sect.VAT PROGRAMMING. By default these VAT rates
are 0% (factory-set values). VAT rate 1 is assigned to
direct price articles.
Press X to proceed to define the article profitability code.
11. Enter the associated Smiley code (profitability) for the
article. The code may be a number from 0 to 9 and it will be
shown on the sales assistant’s display every time the article is
called up.
Press X to proceed to define the price per weight fraction or
number of units associated to the PLU.
12. Offer (Price-Weight or Free Amount)
Use C to select one of the following options:
[ 0 ] – NO
[ 1 ] – Price per weight fraction or unit
[ 2 ] – Free amount
If Price per weight fraction or unit is selected.
This parameter permits different prices to be defined
according to the quantity of product that the customer
purchases.
When X is pressed, the price is requested along with the
weight above which this offer is applied. The other fractions
are configured in the same way.
Therefore, if the weight is less than the first fraction, the price
defined in the PRICE field will be applied. If a greater quantity
of product is purchased, the price of the fraction of the
corresponding weight will be applied.
Example:
A storeowner would like to reward the loyalty shown by some
customers who purchase large quantities of potatoes. To do
this, he makes the following offers:
Price
Weight
Price 1
1,00 Euro/ kg.
Weight 1
5,000 kg.
Price 2
0,50 Euro/ kg.
Weight 2
10,000 kg.
Therefore, if a customer purchases 5 kg or less of potatoes,
he/she will not benefit from any price offer. If the purchase is over
5 kg but under 10 kg, the customer will obtain a price offer of 0.50
Euro/kg.
Page 40
USER´S MANUAL
49-M500WMEN25
32
X
∗∗∗∗
T/FT
T/FT
T/FT
X
T/FT
X
T/FT
X
C 000001
COST P
0,00
MILK
C 000001
SELL BY
DATE
00/00/00
00
C 000001
SELL BY DATE
+000
C 000001
SELL BY DATE
00:00
C 000001
EXTRA DATE
00/00/00
C 000001
TARE 0,000
MILK
If you select Free Quantity, it will program the quantity from which
you offer another amount free of charge, press X to programme
the value of the free amount. There are three areas.
Example:
A store owner makes the following offers:
Free quantity Weight
Gift 1
1,000 kg.
Weight 1
2,000 kg.
Gift 2
2,000 kg.
Weight 2
3,000 kg.
If a customer purchases 2 kg of tomatoes, the store will reward
him/her by giving 1 further kg free of charge. If the purchase
weight is over 3 kg, the customer will be given a further 2 kg as
a gift.
Press X to save and proceed to define the offer price associated
to the PLU.
13. Cost price. This field is used in the lists of profit margins for
the product. In this section, the purchase price of the product is
entered.
Press X to proceed to define the expiry date associated to the
PLU or ∗∗∗∗ to save the data.
14. Sell-by date. Access to this parameter is only enabled if the
SELL-BY DATE parameter that can be programmed from the
scales test mode is set to YES.
The expiry date can be entered in one of the following ways:
1.Absolute date in the format ddmmaa (day, month,
year).
2.Number of days after the date the label is issued.
3.Number of hours after the label is issued.
Press T/FT to select the value.
Press X to proceed to define the extra date associated to the
PLU.
15. Enter an extra date (best before date, etc...). If you wish to
enter an expiry time, press T/FT and enter it directly.
Press X to proceed to define the PLU tare.
16. Tare. In this field the tare associated to the product is defined.
There are two ways of entering this value:
1. Using the number keys.
2. By placing the weight to be tared on the platform
and pressing T/FT.
Press X to proceed to define the text lines for the PLU.
Page 41
500 Range
49-M500WMEN25
33
C
F5 10 ∗∗∗∗
F5
F5
F5 9 ∗∗∗∗
X
X
X
C 000001
TEXT
S
YES
MILK
C 000001
GT
POS
_
C 000001
EAN 13
_
C 000001
CLASS
1
MILK
C 000001
Idn 1
MILK
17. Text lines. There are a total of 10 text lines with a maximum
of 24 characters per line available for each article.
If the article is to be supplied with text lines, press C until
Yes can be selected.
To add a new line in a text, press F5 10 ∗∗∗∗. It is possible to add
more than one in the same text.
Next, press F5 to carry on editing.
Press F5 9 ∗∗∗∗ at the first character so as not to centre the text
lines at printing. The symbol is (see the scale).
Next, press F5 to carry on editing.
To print the lines consecutively on the label, press F5 9 ∗∗∗∗ at any
position (except the first one).
Next, press F5 to carry on editing.
To change lines press X.
18. General text*. Each article may have up to 1024* characters
of text. Use F4 to move 1 characterforwards in groups and F3
to move 1 character backwards. Pressing on + during two
seconds to go to the last character of the text. Pressing –
during two seconds to go to the first character of the text..
Press X to proceed to define the PLU EAN.
19. EAN 13. The EAN code for the article is defined in this field.
Use the number keys to enter the EAN code for the article or
use a scanner. Press X to proceed to define the PLU class.
20. CLASS:
This is to define whether the article has traceability.
1. CLASS = 0: No traceability. Press
∗∗∗∗
to end PLU
programming.
2.
CLASS ≠≠≠≠ 0: Traceability. The class to which the PLU belongs
is assigned here. There are 10 different classes.
21. IDN
If a class was assigned to the PLU in the foregoing point, then
the Identification Product Number (IDN) to which the PLU
belongs must be assigned in this field using the number keys.
The number may range from 1 to 20*.
Press X to proceed to define the recipe to be associated to
the PLU.
* According to model.
• Models: W-010, W-015 & M-510,M-515 Maximum 10
• Models: W-020, W-025 & M-520,M-525 Maximum 20
* According to model.
• Models: W-010, W-015 & M-510,M-515 Maximum 1
• Models: W-020, W-025 & M-520,M-525 Maximum 2
If the PLU has traceability, see section 6.5. TRACEABILITY.
* According to model.
• Models: W-010, W-015 & M-510,M-515 Maximum 1
Page 42
USER´S MANUAL
49-M500WMEN25
34
∗∗∗∗
∗∗∗∗
∗∗∗∗
0 0 0 0 0 1
◊◊◊◊
C
∗∗∗∗
1 1 1 1
1 1
∗∗∗∗
2
∗∗∗∗
0 0 0 0 0 1
◊◊◊◊
C
∗∗∗∗
C
000001
LOGO
MILK
C 000001
ALT
PRICE
YES
LECHE
C 000000
C 000001
P L U
1
NAME MILK
C 000000
C 000001
P L U 1
NAME MILK
22. Logo.
The logo associated with the article is programmed here. The
scale has one set of programmed logos.
Press
∗∗∗∗
in order to save
23.- Alter price
When this field is programmed to “Yes”, it is possible to modify
the price of the article by pressing on its direct key.
The procedure is the following:
1. Keep pressed the direct key of the article
2. Enter the new price
3. Press
: ∗
∗ ∗
∗
When all the details referring to the article have been entered,
press ∗∗∗∗ to memorise the data.
3.1.2.Copy An Article
Effect the following operation:
1. Enter article programming on the scales.
2. Select the article code to be copied.
3. Press ◊◊◊◊ and select the option Copy Article with the key C and
confirm with
∗∗∗∗
4. Select the new article code.
5. Press
∗∗∗∗
6. Press the new direct key associated to this article.
7. Press
∗∗∗∗
3.1.3. Delete Article
Effect the following operation:
1. Enter article programming on the scales.
2. Select the article code to be deleted
3. Press ◊◊◊◊ and select the option Delete Article with the key C.
4. Press
∗∗∗∗
Page 43
500 Range
49-M500WMEN25
35
MENU
2 1
V4
2 7 0 5 4
X
∗∗∗∗
MENU
PROG
1
1-9
A
RTICLES
IN
n = 1
E =
IN
n = 4
E = 0
IN
n = 4 L
E = 27054
IN
n = 4 L
E = 27054
CARLOS_
IN
n = 5
E = 0
IN
n =
1
E =
4.VENDORS [ 2 ]
The maximum number of vendors available on each scale will
depends on the model.
• For models: W-010, W-015, M-510 & M-515 Max.: 5
vendors.( V5 )
• For models: W-020, W-025, M-520 & M-525 Max.: 10
vendors.( V10 )
The keys corresponding to the vendors will be labelled with the
key V followed by a number which identificates the vendor
number (V1, V2, etc...)
The vendors must have previously been registered in the
corresponding memory in order for the operations carried out by
the same to be stored. If this is not the case it is not possible for
the operations to be stored and the associated keys V1, V2,...
Vxx are out of order.
Remember that this type of programming can only be done on a
MASTER scale.
4.1. REGISTERING VENDORS [ 2 1 ]
To register the memory of a new vendor.
1. Make sure the scale is set up as master and access the
programming menu MENU
2. Type in the access code to programming of vendors 2 1
3. Press the key you wish to assign to the new vendor, for
example V4.
The symbol L indicates that the selected memory is FREE. If this
message does not display, it means that the chosen memory is
being used by another sales assistant. See section 4.2
REMOVING SALES ASSISTANTS if you wish to free this
memory.
4. Enter a five digit code for the new sales assistant (for example
2 7 0 5 4).
4. Press X to confirm and go on to enter the operator’s name.
5. Enter the name* (maximum 26 characters) of the new sales
assistant: the current position of the cursor will display in the
bottom left hand corner.
7. Press ∗∗∗∗ to confirm: the next sales assistant’s screen will show
(in this case, that of V5).
8. Go to point 3 if you wish to register a new sales assistant, or
press the MENU key to quit the programming menu.
*
Only models:
W-020, W
-
025, M
-
520 & M
-
525
Page 44
USER´S MANUAL
49-M500WMEN25
36
4.1.1.Consulting active vendors
Once in the Registering Vendors screen,
1. Press T/FT: the keys of the active sales assistants will display
in groups of 5 in the first line (for example, sales assistants 1,3
and 4). The code associated with each sales assistant
displays in the second line.
2. Press the X key to move to the following group of five 5 sales
assistants.
3. Use the ++++ and −−−− keys to move forward or backward to view
the sales assistants.
4. Press MENU return to normal working mode.
In order to change the code or name of a sales assistant,
they must first be removed and then registered.
4.1.2.Training model
The DIBAL 500 Range scale has a special working mode for
training new sales assistants.
In this working position, the transactions carried out are not
accumulated in the scale’s totals, and the receipts issued include
this line of text:
*** Training mode ***
ENTER TRAINING MODE
1. Make sure the scale is set up as MASTER, and enter the
Registering Sales Assistants screen
2. Press the key of the sales assistant you wish to be trained (for
example V4), this sales assistant must already have been
registered.
3. Select training mode by pressing the subtotal ◊◊◊◊ and ∗∗∗∗ keys:
the symbol E will display.
4. Press MENU to quit.
QUIT TRAINING MODE (NORMAL MODE)
Remove the vendors.
Page 45
500 Range
49-M500WMEN25
37
MENU
2 2
V4
∗∗∗∗
MENU
T/FT
∗∗∗∗
OUT n =
1
E = 0
4.2. REMOVING VENDORS [ 2 2 ]
In order to remove a vendor, that is, free the memory occupied by
the said sales assistant, take the following steps:
1. Access vendors programming and select Remove Vendors
MENU (2 sec) 2 2.
2. Press the key associated to the sales assistant to be removed,
for example V4. If you do not register a new sales assistant,
this key will remain inactive and operations accumulated
cleared to zero.
3. Press
∗∗∗∗
to confirm the removal of this sales assistant.
4. Press MENU to return to working mode.
This operation is only possible if the parameter Remove
vendors is set at YES (TEST MODE) and if the memory you
wish to delete is not being used at that moment.
When registering or removing sales assistants, the ++++ and −−−−
keys go forward and backward respectively to the next or
previous sales assistant. Likewise C deletes the data of the
input line, except in training mode which removes the said
sales assistant from this operating mode.
4.2.1.Removing all vendors
You can disable all the sales assistant keys at the same time. To
do so:
1. Press T/FT (ALL).
2. Press
∗∗∗∗
to confirm the elimination of all the vendors.
Page 46
USER´S MANUAL
49-M500WMEN25
38
MENU
2 3
1
2
∗∗∗∗
1 = DEPOSIT
2 =
WITHDRAW
0.00
DEPOSITING
200.00
WITHDRAWING
CASH
UPDATED
4.3. CASH DRAWER OPERATION [ 2 3 ]
The 500 Range weighing scales permit joint operation with a cash
drawer. To do this, a connection cable is required, and this
operation mode must be activated (See sect .5.1.7.5 CASH
DRAWER CONTROL). For cash drawer operation:
1. Check that the scales are the MASTER, press MENU (2 sec)
Enter the access code to the vendor configuration 2 3.
2. If you wish to DEPOSIT money in the cash drawer at any time
during the day, press 1
3. If you wish to WITHDRAW money from the cash drawer at
any time during the day, press 2.
4. Enter the amount of the operation performed (deposit or
withdrawal) on the weighing scales using the number keys. In
the event of error, use C to delete.
5. Press ∗∗∗∗ to validate data: the weighing scales will be updated
and the cash drawer will open automatically
In order to control the cash drawer BALANCE, it is possible to
issue a corresponding list in which totals are printed according to
forms of payment and cash drawer balance.
It is possible to open the cash drawer in normal operation
mode (position 0) in the receipt issue phase, by pressing ++++ at
any time after having pressed ∗∗∗∗ or ◊◊◊◊ .
Page 47
500 Range
49-M500WMEN25
39
MENU
3
∗∗∗∗
MENU
3 1
PROG
1
1
-9
ARTI
CLES
PROG
3 1
CONFIGURA 1
-7
CONF WITH
PC
PROG
3
3-9
ARTIC
LES
PROG
3 1
CONFIGURA 1
-7
CONF
WITH
PC
5.CONFIGURATION [
3 ]
5.1. MAIN CONFIGURATION
These parameters allows to program the operative setup of the
section where the scale is installed.
The access to the main programming menu is gained by pressing
the key MENU for 2 seconds.
After gaining access to the programming mode, select the option
3 Section Configuration and press
∗∗∗∗
.
Change from one option to another by using F2 to go down the
menu and F1 to go up.
An option can also be selected by entering its code using the
number keys.
To exit Configuration programming, press MENU
When the lower level of the programming menu is shown, it is
possible to print a list of the parameters by pressing the key
PRINT.
5.1.1.PC Configuration [ 3 1 ]
This programming allows to define all the parameters related to
the communication with PC.
To enter in this menu press MENU for 2 seconds and then 3 1.
Change from one option to another by using F2 to go down the
menu and F1 to go up.
The access to the submenus it is possible by pressing the key
∗∗∗∗
or by entering directly the code of the each submenu.
To exit Configuration programming, press MENU
Page 48
USER´S MANUAL
49-M500WMEN25
40
PROG
3 1 1
Day Movement
YES
PROG 3 1 2
0
End of Day
PROG
3 1
3
0
M
essage L
abel
PROG
3 1 4
PC Receipt Re
LA
PROG
3 1 5
0
PC Com Report
5.1.1.1. Day Movement
[ 3 1 1 ]
The value of this parameter indicates if the scale sends data to
the computer. This parameter has either of the following values:
‘NO’ – The scale does NOT send data to the computer.
‘YES’ – The scale DOES send data to the computer.
‘END OF DAY’ – The scale send data to the computer when
an End of Day is requested
5.1.1.2. End of Day
[ 3 1 2 ]
The value of this parameter indicates if the scale does close shop
and send data to the computer.
'0 '- Disabled End of Day.
'1 '- Enabled End of Day.
5.1.1.3. Label messages computer
[ 3 1 3 ]
This parameter is used to differentiate between the messages
sent to the PC for the receipt and label.
‘0’ – It does not differentiate between the messages on the
receipt and label.
‘1’ – It differentiates between the messages on the receipt and
label.
5.1.1.4. PC Receipt Registration
[ 3 1 4 ]
This parameter is used to select one of two types of receipt
registers, which can be used to send a literal copy of the receipt to
the PC., i.e. the sales effected at the scales.
Possible values are:
‘LA’ – Sales are sent to the PC through the LA register.
‘LY’ – Sales are sent to the PC through the LY register. This
provides more complete information.
If fiscal mode is on, this parameter can only be set to 1 (LY register).
5.1.1.5. Report on communication with PC
[ 3 1
5 ]
This parameter permits a series of messages to be displayed on the
printer, indicating the status of different processes that are executed
in communications with the PC.
‘0’ – Messages on processes related to PC communication are
not printed.
‘1’ – Messages on processes related to PC communication are
printed.
These messages are created for different process such as “start and
end a Start of Day”, “start and end price sending”, “start-up scales”,
etc. An example of such a message is:
The PC starts a Start of day. (PC: START 2000)
"End of Day START Msg: xx"
The PC ends a Start of Day. (PC: END 2000)
"End of Day OK Msg: xx"
The time and date that the event occurs are shown in the line above
the message. The internal number of the message sent between the
PC and the scales is printed at the end of each text.
Page 49

500 Range
49-M500WMEN25
41
MENU
3 2
MENU
F1
F2
F3
F4
PROG
3 2
CONFIGU
RA
2-7
CONF. KEYBOARD
PROG
3 2 1
WEIGHT
REFUND
YES
PROG
3 2 2
FIX PR
ICE
YES
PROG
3 2 3
FREE PRICE
YES
PROG
3 2 4
DIRECT PRICE
ALLOWED
5.1.2.Conf. keyboard [ 3 2 ]
This programming allows to define all the parameters related to
the keyboard and keys functions
To enter in this menu press MENU for 2 seconds and then 3 2.
Press
∗∗∗∗
The access to the submenus it is possible by pressing the key
∗∗∗∗
or by entering directly the code of the submenu after pressing
MENU.
Change from one option to another by using F2 to go down the
menu and F1 to go up.
To exit Configuration programming, press MENU
5.1.2.1. Weight Refund
[ 3 2 1 ]
Use this parameter to determine if, during normal operation, with
the F1 key weighed articles can be returned.
‘YES’ – It enables weight return operations.
‘NO’ – It does not enable weight return operations.
5.1.2.2. Fixing the price
[ 3 2 2 ]
This option allows the F2 key to be activated or not. This
parameter only affects the F2 key when the scale is at normal
functioning, and its purpose is to provide the possibility to fix the
article or the price:
‘YES’ – Permits the price to be set. (Default value).
‘NO’ – Price cannot be set.
5.1.2.3. Free price
[ 3 2 3 ]
In normal working mode the scale is able to free the price of the
articles in the memory with the aid of the F3 key. The possible
values for this parameter are:
‘YES’ – Free price operations are enabled. (The F3 key is
activated)
‘NO’ – Free price operations are not enabled. (The F3 key is
deactivated.)
Check that the status of Modify Price is activated.
5.1.2.4. Direct price
[ 3 2 4 ]
With the scale in normal working mode, the F4 key allows you to
change between the modes for working with direct price and
working with article code.
This option enables the functioning of this key in order to limit the
access of the user to articles which are not in the direct keyboard,
or to prevent products being sold at direct price.
‘ALLOWED’ – It enables direct price operations.
‘NOT ALLOWED’ – It impedes direct price operations.
‘MANDATORY’ – It makes working with direct price obligatory.
(The F4 key is deactivated.)
‘AFTER DP NORMAL’ – Return to normal mode after working
on direct price. Volver a modo normal tras cada operación
hecha a precio directo.
‘AFTER NORMA DP’ – Return to direct price mode after
working on normal price.
Page 50
USER´S MANUAL
49-M500WMEN25
42
MENU
3 3
PROG
3 2 5
MULTIPLI
CATIO
YES
PROG
3 2
6
SUBSTRACTION
YES
PROG
3 2
7
ADDITION
YES
PROG
3 2 8
0
SUBTOTAL
PROG 3
3
CONFIGUR 3
-7
CONF. RECEIPT
5.1.2.5. Multiplication
[ 3 2 5 ]
This option is used to determine if the scale can carry out
multiplication operations in normal working mode.
‘YES’ – It enables multiplication. (Default value)
‘NO’ – It does not enable multiplication.
‘FORCE UNIT’ – Permits multiplication. Units must be entered
in all article sales that are classified as UNIT type.
5.1.2.6. Subtraction
[ 3 2 6 ]
Just like the previous parameter but for subtraction operations.
(The – key)
‘YES’ – It enables subtraction. (Default value)
‘NO’ – It does not enable subtraction.
5.1.2.7. Addition
[ 3 2 7 ]
Just like the previous parameter but for addition operations. (The
+ key)
‘YES’ – It enables addition. (Default value)
‘NO’ – It does not enable addition.
5.1.2.8. Subtotal
[ 3 2 8 ]
It allows you to configure the ◊◊◊◊ (subtotal) key. You can enter one
of the following values:
‘0’ – The ◊◊◊◊ key is enabled for subtotal operations. On pressing
◊
◊◊
◊ the subtotal appears on the visual display and, on pressing
the + and – keys, you can review the receipt line by line.
‘1’ – The ◊◊◊◊ key is disabled for any subtotal operation.
‘2’ – The ◊◊◊◊ key is enabled for both subtotal and provisional
subtotal. Whenever an operation is stored, the subtotal is
shown for four seconds (temporary subtotal). Moreover, on
pressing the ◊◊◊◊ and the memory key corresponding to the sales
assistant, the subtotal shows up on the visual display, and, on
pressing the + and – keys, the receipt can be reviewed line by
line.
‘3’ – Only provisional subtotal operations are carried out.
5.1.3.Receipt configuration [ 3 3 ]
This programming allows to define all the parameters related to
the receipt data and printing
To enter in this menu press MENU for 2 seconds and then 3 3.
Press
∗∗∗∗
The access to the submenus it is possible by pressing the key
∗∗∗∗
or by entering directly the code of the submenu after pressing
MENU.
Change from one option to another by using F2 to go down the
menu and F1 to go up.
To exit Configuration programming, press MENU
Page 51
500 Range
49-M500WMEN25
43
PROG
3 3
1
EXCHANGE
CALC
YES
PROG
3 3 2
0
CUSTOMER
NUMBE
R
PROG 3 3 3
RECEIPT CODE
YES
5.1.3.1. Calculate Exchange
[ 3 3 1 ]
With this option you determine if the scale must calculate the
change before issuing the receipt or not. To do so:
‘N0’ – Without calculation of the change. (Default value)
‘DELAYED’ – With calculation of the change, after a 10-sec.
pause.
‘YES’ – With calculation of the change, wait to press ∗∗∗∗.
Enter the required change value with the numeric keypad.
If we are in a stage with secondary currency (for example. PTAS)
and main currency (for example EURO), we can change either of
them by pressing F2 key.
Example 1:
EURO PTAS
F2
F2
If we are in a stage with secondary currency (for example PTAS)
and main currency (for example EUROS), the secondary currency
is temporarily showed on the display by pressing F1.
Example 2:
EURO PTAS
F1
To get all these operatives done, “Calculate Exchange” option
must be previously activated.
5.1.3.2. Customer number
[ 3 3 2 ]
It decides which number will appear on the receipt number, a
successive number provided by the scale itself, or a number the
scale will request before printing the receipt (Customer number)
and whether what is printed is this receipt number or the sales
assistant’s code.
Enter one of the following values:
‘0’ – The sales assistant number is printed in the heading.
‘1’ – The customer number is requested before printing the
receipt, in order to print this number at the end. The sales
assistant number is printed in the heading.
‘2’ – The next consecutive receipt number is printed in the
heading.
‘3’ – A customer number is requested before the receipt is
printed, and this number is printed at the end. The next
consecutive receipt number is printed in the heading.
5.1.3.3. Code on receipt
[ 3 3 3 ]
This parameter allows you to configure the scale to print the
article code on the receipt or not. This parameter can have two
values.
‘NO’ – It does not show the article code on the receipt.
‘YES’ – It shows the article code with a description.
TOTAL: 25,69
TENDERED: 50,00
CHANGE: 24,31
TOTAL: 4.274
TENDERED: 8.319
CHANGE: 4.045
TOTAL: 25,69
TENDERED: 50,00
CHANGE: 24,31
TOTAL: 4.274
TENDERED: 8.319
CHANGE: 4.045
Page 52
USER´S MANUAL
49-M500WMEN25
44
PROG 3 3 4
RECEIPT TARE
YES
PROG
3 3 5
DISCOUNT IN TOTAL
YES
PROG
3 3 6
DISCOUNT
IN L
NO
PROG
3 3 7
VAT
IN RECEIPT
YES
PROG 3 3 8
0
RECEIPT CONF
5.1.3.4. Tare on receipt
[ 3 3 4 ]
This parameter is for setting the printing of the tare. You can enter
one of these values:
‘NO’ – The tare is not printed on the receipt.
‘YES’ – The tare is printed on the receipt.
5.1.3.5. Disc. In Total
[ 3 3 5 ]
This parameter sets the scale to apply or not a discount
percentage to the total of a transaction, in such a way that if the
value is:
‘NO’ – A discount is not applied to the total.
‘YES’ – The discount percentage is applied at the end of the
receipt.
‘FAULT’ – A percentage discount is applied at the end of the
receipt, only if requested.
5.1.3.6. Disc. In Line
[ 3 3 6 ]
Depending on the value of this parameter it is possible to apply a
discount or not to a product, while at the operation stage. If the
parameter is set at:
‘NO’ – Then it does NOT enable the application of a discount
to each product.
‘YES’ – It allows the application of a discount (with -).
5.1.3.7. VAT In Receipt
[ 3 3 7 ]
This parameter allows you to configure the printing of VAT on
the receipt.
‘YES’ – VAT IS printed in the receipt.
‘NO’ – VAT is NOT printed in the receipt.
5.1.3.8. Type of receipt/label
[ 3 3 8 ]
Depending on the values of this parameter, you can obtain
different types of receipts and labels, as well as print the
information in EURO, that is:
‘0’ – Normal receipt and label.
‘1’ – Simplified receipts: only header 2 is printed on the receipt
(the time, date and sales assistant’s number are not included
and are substituted by the centred date).
‘2’ – Normal receipt and normal label with total in secondary
currency
‘3’ – Simplified receipt with total in secondary currency.
‘4’ – Simplified receipt and label with total and lines in secondary
currency.
‘5’ – Simplified receipt with total and lines in secondary currency.
Page 53

500 Range
49-M500WMEN25
45
PROG
3 3 9
0
DELETED
LINES
PROG 3 3 10
ROUNDING RECE
YES
5.1.3.9. Deleted lines
[ 3 3 9 ]
This parameter shows how to print and send to a pc lines that
have cancelled from a receipt. Deleted lines will be shown in
inverted video, regardless of how they are printed later. Possible
values are:
‘0’ – Cancelled lines:
Are not printed on the receipt with the word “CANCELLED”.
Are not counted in the number of articles on the receipt.
Do not blink on the screen when cancelled.
Are not sent to the PC in the “Immediate Sales” register.
‘1’ – Cancelled lines:
Are printed on the receipt with the word “CANCELLED”.
Are counted in the number of articles on the receipt.
When cancelled, these are shown as a negative value on
the display.
Are not sent to the PC in the “Immediate Sales” register
‘2’ – Cancelled lines:
Are not printed on the receipt with the word “CANCELLED”.
Are not counted in the number of articles on the receipt.
Appeared blinking on the display when cancelled.
Are sent to the PC in the “Immediate Sales” register
‘3’ – Cancelled lines:
Are printed on the receipt with the word “CANCELLED”.
Are counted in the number of articles on the receipt.
When cancelled, these are shown as a negative value on
the display.
Are not sent to the PC in the “Immediate Sales” register.
‘4’ – Receipt lines cannot be cancelled
5.1.3.10.Receipt rounding off
[ 3 3 10 ]
This parameter is for activating or deactivating rounding off the
total amount of the receipt. Rounding off is performed on the total
amount after any discount has been applied on the total (where
applicable). The following criteria is used:
Amounts that are multiples of 5 cents are left as such.
Other amounts are rounded off to the nearest multiple of 5
cents
3 lines will be shown:
Total (before rounding off)
Rounding off (up or down)
Rounded total
In the case of a secondary currency, only the total after rounding
off will be given.
Possible values for this parameter are:
’NO’ – Without rounding in the receipt
’YES’ – Rounding in the receipt
(To configure the sale of stamps: See sect. 5.3.10. LOYALTY
STAMPS)
Page 54

USER´S MANUAL
49-M500WMEN25
46
MENU
3 4
PROG 3 4
CONFIGURA 4
-7
CONF. LABEL
PROG 3 4 1
ONE ARTICLE
ALLOWED
PROG
3 4 3
LABEL PER WEI
SEL X WEIGHING
Rounding off is not considered for all accountancy lists that
are accumulated per receipt line (e.g. article sales), i.e., the
sum of amounts that appear in these lists refers to a
calculation without rounding off.
At the end of lists 7 and 9 a line is printed to indicate the total
sum of rounding off that has been applied to receipts.
E.x. TOTAL GR. ROUNDING OFF -0.02
5.1.4.Label configuration [ 3 4 ]
This programming allows to define all the parameters related to
the label data and printing
To enter in this menu press MENU for 2 seconds and then 3 4.
Press
∗∗∗∗
The access to the submenus it is possible by pressing the key
∗∗∗∗
or by entering directly the code of the submenu after pressing
MENU. Change from one option to another by using F2 to go
down the menu and F1 to go up.
To exit Configuration programming, press MENU
5.1.4.1. One Article
[ 3 4 1 ]
It affects the PRINT key when the scale is at normal working
mode. This option enables you to force the status of the key.
‘ALLOWED’ – It enables you to work in label mode. (Default
value)
‘DISALLOWED’ – It does not enable you to work in label
mode.
‘OBLIGATORY’ – It obliges you to work in label mode.
‘1 ART OBL’ – It obliges you to work in label mode with
accumulation of totals per article. The bar code on the totals
label is the one selected in the set-up menu for printing.
5.1.4.2. Adhesive paper [ 3 4 2 ]
Not available.
5.1.4.3. Automatic weighing
[ 3 4 3 ]
This option allows you to program the scale to work with labels, in
such a way that if there is a fixed article (with the F2 key), when
the weight placed on the dish is stable, a label will be printed.
‘NO’ – It does not enable automatic weighing.
‘WITH MEM SEL’ – It allows automatic weighing with the
preselection of a memory key.
‘W/O SEL MEM’ – This permits automatic weighing without
preselection of memory key. The machine automatically
assigns this to sales assistant V1 (MASTER) or to the
slave number + 1 (SLAVE).
Example:
If weighing scales number 2 are used, and they are set up as a
slave, when the automatic weighing parameter is set to 2, the
scales will memorise all amounts under sales assistant V3.
Page 55
500 Range
49-M500WMEN25
47
PROG 3 4 4
LABEL PER WEI
SEL X WEIGHING
PROG
3 4 5
CENTRE TEXTS
YES
PROG 3 4 6
LABEL ACCUMUL
NO COPY ACC
PROG 3 4 7
GENERAL TEXT
NO JUSTIFY
5.1.4.4. Label per weighing
[ 3 4 4 ]
Working in receipt mode, it is allowed to print a label for each
weighing, according to the value its parameter takes. It can have the
following values.
‘NO’ – It enables to print a label for each weighing,apart from
carring out the information of sales in the receipt.
‘YES’ – A label will be printed for each piece of information
stored, thus allowing you to obtain a receipt of the labels issued
since the last receipt stored in that memory.
‘SEL X WEIGHING’ – Pressing SHIFT and F1 before
selecting a PLU, prints a label of the weighing, in addition
stores it for its subsequent recording on the receipt.
‘YES W/O SCANNER’ – Still in receipt mode, a label will be
issued for each memorisation effected, PROVIDING THAT THE
ARTICLE IS NOT READ BY A SCANNER, and a receipt can be
issued for labels issued, from the last receipt that is saved in this
memory.
5.1.4.5. Centre texts
[ 3 4 5 ]
With this parameter you can set the scale to automatically centre the
lines of text of the different label formats. Depending on the size of
the label and the length of the lines, the scale may change the size
of the characters of the text so that text fits into one line. The
possible values of this parameter are:
’YES’ – Centre the lines of text.
‘NO’ – The lines of text are NOT centred.
5.1.4.6. Accumulate labels
[ 3 4 6 ]
This parameter is for determining whether the labels issued are
accumulated.
‘NO COPY ACC’ – Normal operation: each label is accumulated
in sales totals.
Copies of labels cannot be accumulated in sales totals.
‘NO ACC’ – All labels that are printed are NOT accumulated in
sales. If the client's number appears, it will show 0 and the
receipt number will not increase.
Copies of labels cannot be accumulated in sales totals
‘ACC ALL’ – Normal operation: each label is accumulated in
sales totals.
Copies of labels can be accumulated in sales totals.
5.1.4.7. Print General Text
[ 3 4 7 ]
DIBAL’s 500 Range scale allows the printing on labels of a
general text on each article. This text is programmed after the 10
texts for each article. It has 1024* characters but the ingredients
cannot be entered by code. Use the F3 and F4 keys to move
forward and backward 20 by 20 characters. It is programmed at
section 124 of label formats and the parameter has the following
values:
‘NO JUSTIFY’ – It does not justify the text to the right.
‘JUSTIFY’ – It justifies the text to the right.
*Only models: W-020, W-025, M-520 and M-525
Page 56
USER´S MANUAL
49-M500WMEN25
48
MENU
3 5
PROG
3 5
CONFIGURA
5-7
CONF.
PRINT
PROG
3 5 1
0
VOUCHER
PROG
3 5
2
0
VOUCHER [2]
PROG
3 5 3
RECEIPT COPY
YES
PROG
3 5 4
0
RECEIPT REOPENING
5.1.5.Printing configuration [ 3 5 ]
This programming allows to define all the parameters related to
the printed data (register voucher, copies of ticket, ticket
reopening and payment modes).
To enter in this menu press MENU for 2 seconds and then 3 5.
Press
∗∗∗∗
The access to the submenus it is possible by pressing the key
∗∗∗∗
or by entering directly the code of the submenu after pressing
MENU.
Change from one option to another by using F2 to go down the
menu and F1 to go up.
To exit Configuration programming, press MENU
5.1.5.1. Voucher
[ 3 5 1 ]
With this option the user decides on the need for, and aspect of, a
voucher with the receipt.
Enter one of the following values:
‘0’ – Without voucher.
‘1’ – With voucher and bar code on the receipt (but not in the
voucher)
‘2’ – With voucher and bar code on the voucher and not on
the receipt. (Default value)
‘3’ – With voucher and bar code on the voucher and on the
receipt.
5.1.5.2. Voucher (2)
[ 3 5 2 ]
This parameter is used to set up the time, in seconds, the voucher
takes to be printed after the receipt is printed.
Enter one of the following values:
‘0’ – The voucher is printed 10 seconds later, or sooner if you
press
∗∗∗∗
. (If it is printed by the same printer as the receipt).
‘1’ to ‘9’ – The voucher is printed immediately after the receipt,
with a gap in time between both depending on the value
programmed.
5.1.5.3. Receipt Copy
[ 3 5 3 ]
‘YES’ - Permits copies of receipts to be made.
‘NO’ -Copies of receipts can NOT be made.
5.1.5.4. Receipt Reopening
[ 3 5 4 ]
The 500 model scale affords the possibility to select the
REOPENING of receipt operating mode. (see Section 2.3.8.
Reopen Receipt)
‘0’ – Without reopening
‘1’ – Reopening of receipt, normal operation.
‘X’ – Timed reopening.
Page 57
500 Range
49-M500WMEN25
49
PROG 3 5 5
TWO PAY MODE
NO
PROG 3 5 6
3
SECTION BARCODE
If the user sets a value other than ‘1’ or ‘0’, reopening is enabled
for a specific length of time. Once this time has passed the receipt
can no longer be reopened.
Use the table below to configure the reopening time, depending
on the ‘X’ parameter.
Parameter
Reopening time
2 1 min.
3 1 min. 30 sec.
4 2 min.
5 2 min 30 sec.
6 3 min.
7 3 min. 30sec.
8 4 min.
9 Without reopening time limit
5.1.5.5. Two Pay Mode
[ 3 5 5 ]
Dibal’s 500 Range scale allows two forms of payment. (see
Section.2.3.21 Two Pay Mode).
‘NO’ – One form of payment
‘YES’ – Two forms of payment
5.1.5.6. Barcodes per Section in Voucher
[ 3 5
6 ]
The Dibal 500 Range scales permits a voucher obtaine specific
information of the sales by section.
‘0’ – Barcodes per section are not printed.
‘1’ – In one receipt the information about all the sections is
printed. In the Voucher is obatined the barcode for each
section of which have been made sales on the receipt.
‘2’ – One receipt and a voucher are printed by section, which
prints the barcode associated with the corresponding section.
‘3’ – A receipt is printed by section (without voucher), which
prints the barcode associated with the corresponding section.
The code of each section is programmable (See sec 6.3
SECTIONS) being by default if there is not asigned another one
2KKNNNNEEEEE.
Page 58

USER´S MANUAL
49-M500WMEN25
50
MENU
3 6
PROG
3 6
CONFIGURA
6-7
CONF. EAN
PROG
3 6 1
BAR CODE
-
RE
YES – ABS AMOUNT
PROG
3 6 2
BAR CODE
-
LA
YES WITH AMMNT
≥ 0
5.1.6.Conf. EAN [ 3 6 ]
This programming allows to define all the parameters related to
the barcodes programming and printing
To enter in this menu press MENU for 2 seconds and then 3 6.
Press
∗∗∗∗
The access to the submenus it is possible by pressing the key
∗∗∗∗
or by entering directly the code of the submenu after pressing
MENU.
Change from one option to another by using F2 to go down the
menu and F1 to go up.
To exit Configuration programming, press MENU
5.1.6.1. Receipt Bar Code
[ 3 6 1 ]
This is to inform the scale if it is to issue a bar code, and when it is
to do so:
‘NO’ – No bar code.
‘YES WITH AMNT ≥ 0’ – Bar code on the receipt when the
total is positive. (Default value)
‘YES IF AMNT ≤ 0’ – Bar code on the receipt always positive.
If the total is negative, a zero shows.
‘YES – ABS AMOUNT’ – Bar code always, with the absolute
value of the amount being written in.
5.1.6.2. Bar code in label
[ 3 6 2 ]
This is to inform the scale if it is to issue a bar code, and when it is
to do so:
‘NO’ – No bar codes.
‘YES WITH AMNT ≥ 0’ –Bar code on the receipt when the
total is positive. (Default value)
‘YES IF AMNT ≤ 0’ – Bar code always, with the total value
positive. If the total is negative a zero appears in the field on
the barcode. No bar code.
‘YES – ABS AMOUNT’ – Bar code always, with the absolute
value of the amount being written in
Press ∗∗∗∗ to go to the next parameter
Page 59
500 Range
49-M500WMEN25
51
PROG 3 6 3
INTERPRET LINE
NO CODEBAR
PROG
3 6 4
EAN – 13
RECEIPT
F 80
PROG
3 6 5
EAN 13 RECEIPT
2
0BBBBB
EEEEE
PROG 3 6 6
EAN – 13 LABEL
SECTION
5.1.6.3. Interpret Line
[ 3 6 3 ]
This parameter is for setting up the read-out line of the bar code.
The possible values are:
‘NO CODEBAR’ – If the amount exceeds the limit (999,99 €),
the bar code is not printed on the receipt.
‘INTERPRET LIN’ – If the amount exceeds the limit (999,99
€), the read-out line is not printed on the receipt, but in the
read-out line will be printed.
When it is working with the default bar code o with bar code
defined by the user, with just 5 possitions to indicate the total
amount (Ex. 2AABBBBEEEEE), the maximun amount that can be
show is 999,99.In the case of having more digits, the read-out line
parameter has effect when it is not posible to show the amount in
the bar code. (Ex having a bar code 2AABBEEEEEE, it can be
shown till 9999,99)
5.1.6.4. EAN 13 Receipt Format
[ 3 6 4 ]
With this parameter you can determine if the bar code is to be
printed on both the receipt and the label:
‘DEFAULT’ – Format by default of the bar code. (Default
value)
‘F 80’ – Special format in receipt mode.
Here the overall EAN13 bar code is defined for the receipt. It is
called the special bar code.
The numbers are symbolized directly on the bar code, and the
meaning of the different letters is shown in Table 5.2
5.1.6.5. EAN 13 Receipt
[ 3 6 5 ]
Here the overall EAN13 bar code global is defined for the receipt
(special bar code).
The numbers are symbolized directly on the bar code, and the
meaning of the different letters is shown in Table 5.2.
5.1.6.6. EAN 13 Label Format
[ 3 6 6 ]
With this parameter you can determine if the bar code is to be
printed on both the receipt and the label:
‘DEFAULT’ - Format by default of the bar code. (Default value)
‘F 81’ -Special format in label mode.
‘FORMAT ARTICLE’ - Special format in the field FTO EAN for
the article.
‘ARTICLE’ -Special format in the field EAN for the article.
‘SECTION’ -in the field EAN for the section
Page 60
USER´S MANUAL
49-M500WMEN25
52
PROG 3 6
7
EAN 13 LABEL
_
Default formats are automatically generated by the scale while the
special formats are those defined by the user in configuration
parameters (EAN 13 LABEL).
The configuration parameter EAN 13 Label is the special bar code
that is printed in the label. It is an alphanumeric text with 12
positions. They must be programmed like the text for headers and
the name of the article.
The numbers are symbolized directly on the bar code, and the
meaning of the different letters is shown Table 5.2 below.
The default bar code for the receipt and label is:
‘2AABBBBEEEEE’
Press ∗∗∗∗ to go to the next parameter
Code
Representation
on the bar code
Code
Representation
on the bar code
A
Group number
I
VAT rate
B
Customer number
K
Section
C
Article code
N
Receipt Number
D
Employee code
Q
Control Check
E
Total sum of the
receipt
R or T
Weight with 2
decimal
F
Sign of the amount
X
Price (in scanner)
G
Number of articles
Y
Total moneda
secundaria
H
Weight
Table 5.2
5.1.6.7. EAN 13 Label
[ 3 6 7 ]
Here the overall EAN13 bar code global is defined for the label
(special bar code).
The numbers are symbolized directly on the bar code, and the
meaning of the different letters is shown in Table 5.2.
Press ∗∗∗∗ in order to go to the next parameter.
5.1.6.8. EAN 128 Format
[ 3 6 8
]
Not available.
Page 61
500 Range
49-M500WMEN25
53
PROG 3 6 9
SCANNER SOLD
NO
PROG 3 6 11
SUSTIT LETTERS
NO
5.1.6.9. Scanner* Sales Mode
[ 3 6 9 ]
This option allows to make a direct sale of articles readen with
scanner, when the scale is working in receipt mode.
The possible values are:
'NO' – It is not possible to make direct sale of the articles
readen with scanner.
‘WITH MEM SEL’ – It is possible to make direct sale of the
articles readen with scanner. In the first sale of scanner
readen products the vendor must be selected.
‘W/O SEL MEM’ – It is possible to make direct sale of the
articles readen with scanner. The scale assigns
automatically the vendor for the scanner readen articles ( V1
in master and Slave number +1 in slaves)
Press ∗∗∗∗ to go to the next parameter.
5.1.6.10.EAN 128 Reading
[ 3 6 10 ]
Not available.
5.1.6.11.Substitution Letters Prepack Reading
[ 3 6 11 ]
‘NO’ – Does not allow the direct reading using the scanner of
FIX WEIGHT or FIX AMOUNT.
‘YES’ – Allows the direct reading using the scanner of FIX
WEIGHT or FIX AMOUNT.
Press ∗∗∗∗ to go to the next parameter.
*
Models
: W-020, M
-
520, W
-
025 & M
-
525
*
Models
: W-020, M
-
520, W
-
025 & M
-
525
Page 62
USER´S MANUAL
49-M500WMEN25
54
MENU
3 7
PROG
3 7
CONFIGURA
7-7
CONF.
OTHER
PROG
3 7 1
UNITS X 1000
NO
PROG
3 7 2
0
CODE NUMBERS
PROG
3 7 3
BEST BEFORE
ONLY PLU
PROG
3 7 4
0
ADVERTISING
5.1.7.Configuration. Others [ 3 7 ]
This programming allows to define other operative the parameters
related to the barcodes programming and printing
To enter in this menu press MENU for 2 seconds and then 3 7.
Press
∗∗∗∗
The access to the submenus it is possible by pressing the key
∗∗∗∗
or by entering directly the code of the submenu after pressing
MENU.
Change from one option to another by using F2 to go down the
menu and F1 to go up.
To exit Configuration programming, press MENU
5.1.7.1. Units x 1000
[ 3 7 1 ]
Here you decide whether in accumulative lists, the weight totals
are printed in grams or kilograms.
‘0’ – It accumulates unit sales in grams. (Default value)
‘1’ – It accumulates unit sales in kilograms.
5.1.7.2. Code Numbers
[ 3 7 2 ]
You decide how many digits you must enter to seek an article in
the scale at normal working mode. The maximum length an article
code may have is 5 digits.
‘0’ – The 6 figures of the article code are used.
‘1’ to ‘6’ – As many figures as in the programmed number are
used.
5.1.7.3. Best Before
[ 3 7 3 ]
The printing mode of the sell by date is established by setting the
values of this parameter:
‘ONLY PLU’ – It does not enable an overall sell by date to be
printed (F5). The sell by date of each PLU will be printed.
‘YES - GLOB PREVAIL’ – Permits programming of global
expiry date (F5) and global expiry date prevails.
‘ANY’ – It disables the printing of any type of sell by.
‘SI-PLU PREVAIL’ – Permits programming of global expiry
date F5) and the article expiry date prevails.
5.1.7.4. Advertising
[ 3 7 4 ]
Advertising messages can be displayed automatically on the
purchaser’s display, and, depending on the option chosen, on the
sales assistant’s display as well, if a certain length of time has
passed since the last operation was made with the scale and no
weight has been placed on the dish. The value of the parameter
to be configured here is:
‘0’ – It does not show advertising text.
‘1’ – Advertising on display in 10 seconds.
‘2’ – Advertising on display in 20 seconds.
‘3’ – Advertising on display in 30 seconds.
‘4’ – Advertising on display in 40 seconds.
‘5’ – Advertising on display in 50 seconds.
Page 63
500 Range
49-M500WMEN25
55
PROG 3 7 5
DRAW
CONTROL
CONTROL OFF
PROG 3 7 6
PRICE
INCREAS
NO
PROG
3 7 7
AUTOMATIC MODE
MANUAL
PROG
3 7 8
CODE TIMEOUT
1.5 SEC
5.1.7.5. Draw Control
[ 3 7 5 ]
This parameter allows you to enable or disable the cash drawer
check.
‘CONTROL OFF’ – Cash drawer check is disabled.
‘CONTROL ON’ – Cash drawer check is enabled.
‘DETECT ON’ – Draw control detector enabled
5.1.7.6. Increase/Decrease price
[ 3 7 6 ]
It allows you to enable the operation for increasing or decreasing
the price. The possible values are:
‘NO’ – Disabled increase or decrease in price
‘YES’ – Enabled increase or decrease in the price
5.1.7.7. Automatic Mode
[ 3 7 7 ]
There are two possible values:
‘MANUAL’ – Manual Operation
Every time an article with traceability is sold, the display shows
the article and product to which it is associated, and the
possibility is offered to change this association through the
association menu.
‘AUTOMATIC’ – Automatic Operation
Every time an article with traceability is sold, the sale is applied
to the last product belonging to the associated article. It is also
permitted to enter the product /article association menu
manually through a combination of keys.
Whatever the working mode, it can be accesed to the product
association menu with articles by pressing SHIFT +, once selected the
traceability article.
In this association menu, it is shown in the display the code and the
article
denomination, the fast identification of the product and the identification
number of the product.
The keys
+ -
look for the next and the previous value o f the
programmed scale. In addition the alphanumeric keypad can be used to
introduce the number of the wish product. To save the association press
∗∗∗∗.
5.1.7.8. CODE TIMEOUT
[ 3 7 8 ]
It is not necessary to enter all the digits of an article code in order
to select it.
The timer is activated each time a key is pressed while an article
code is being entered.
After the time has gone past, as entered for this parameter, the
article is shown with the code as far as it has been entered.
Possible values are:
‘NO’ – Timer not activate. Operation as normal.
‘0.5 SEC’ – 0.5 seconds.
‘1 SEC’ – 1 seconds.
‘1.5 SEC’ – 1.5 seconds.
‘2 SEC’ – 2 seconds.
‘2.5 SEC’ – 2.5 seconds.
'3 SEC’ – 3 seconds.
Page 64
USER´S MANUAL
49-M500WMEN25
56
PROG
3 7 9
MEMO AMNT ZER
NO
PROG
3 7 10
MEMO WEIGHT 2
NO
PROG
3 7 11
HEADERS LIN L
NO
PROG
3 7 1
2
STOCK CONTROL
NO CONTROL
5.1.7.9. Memo Zero Amount
[ 3 7 9 ]
‘NO’ – Does not Allow to memorise with Amount Zero
‘YES’ – Allows to memorise with Amount Zero
5.1.7.10.Memo Zero Weight
[ 3 7 10 ]
‘NO’ – Does not Allow to memorise withWeight Zero
‘YES’ – Allows to memorise with Weight Zero
5.1.7.11.Headers Lines in Lists
[ 3 7 11 ]
‘NO’ – Prints heading lines in the Lists
‘YES’ – Does not print the heading lines on the Lists
Lists drawn up through this parameter may or may not print the
headings. The header lines printed are numbers 12, 13, 14, 15
from the receipt format in operation, regardless of the
programmed status. If these lines are programmed in the DO
NOT PRINT mode, they will not appear in te receipt but they will in
the lists. They will be printed in the mode, frame and letters that
have been programmed.
5.1.7.12.Scan Load Class
[ 3 7 12 ]
Not available.
5.1.7.13.Stock Control
[ 3 7 13 ]
Once programmed the stock of the articles, as they are making
the sales, the will be deducted from the current stock.
Thus, you have updated the scale database with the real stock in
the shop.
It will discount the stock weight sold of the weight articles and the
units listed in the stock of the unit-type articles.
Adjusting the settings in the MENU 3 7 12 is possible to
configured which are the sales subtract from the stock:
‘NO CONTROL’: Without stock control.
‘IN TICKET’: Only the tickets subtract the stock.
‘IN TCK & LABL’: The tickets and the labels subtract stock.
‘IN LABELS’: Only the labels subtract the stock.
5.1.8.Conf. Display [ 3 8 ]
See annex for blue graphic display.
5.1.8.1. Display Standby
[ 3 8 1 ]
5.1.8.2. Logo initialization
[ 3 8 2 ]
5.1.8.3. Display load
[ 3 8 3 ]
5.1.8.4. Clock section logo
[ 3 8 4 ]
Page 65
500 Range
49-M500WMEN25
57
MENU 4
∗∗∗∗
∗∗∗∗
MENU
F2
F1
MENU
4 1
X
∗∗∗∗
MENU
PROG
4
4-9
TEXT
S
PROG
4 1
TEXT
S
1
-5
HEADING LINES
PROG HEAD
1
TYPE
STD
PROG HEAD
2
TYPE
2 x 2
6.TEXTS [ 4 ]
This programming allows to define all the programmable texts of
the scale.
To enter in this menu press MENU for 2 seconds and then 4
Press
∗∗∗∗
to save.
The access to the submenus it is possible by pressing the key
∗∗∗∗
or by entering directly the code of the submenu after pressing
MENU.
Change from one option to another by using F2 to go down the
menu and F1 to go up.
To exit Configuration programming, press MENU
6.1. HEADING LINES (FREE TEXT IN LABEL) [ 4
1 ]
These lines can be printed on labels. Up to 15 header lines of up
to 52 characters long can be stored, depending on the size of the
letter selected for printing.
To program header lines:
1. To access this configuration, press MENU and then code 4
1
2. Use the keypadto type in the number of the line to be
programmed and then press X.
3. Enter the size of the letter from this table:
Press to store the line.
For example: Ramon Fish Market
To quit programming press MENU and return to working mode
A series of special characters can be inserted in any text of the
article and free text for the label. They allow you to modify some
parameters during printing.
Control characters are inserted in any part of the text by pressing
F5.
Then insert the special character code and press
∗∗∗∗
to save.
To disable the mode, press F5 again.
The control character codes are as follows:
- 9: Do not centre when placed in the first position of
the text.
- 9: Link together when placed anywhere in the text
except for the first position.
- 10: New line Anywhere in the text.
Page 66
USER´S MANUAL
49-M500WMEN25
58
MENU
4 2
3 X
5 X
X
D I B A L
◊
◊◊
◊
∗∗∗∗
MENU
LINE 1
RYTO
LINE
3
RYTO
LINE
3
RYT5
LINE
3
RYT5
DIBAL
DIBAL
6.2. ADVERTISING TEXTS [ 4 2 ]
If the number of seconds programmed in configuration parameter
Advertising (See the section 5.1.7.4. Advertising) have passed since
the scale last operated and if there is no weight on the dish, then the
scale will start to display ADVERTISING on both displays.
The scale will continue to emit advertising until a weight is placed on
the plate or a key is pressed.
There are four lines of 120 characters each, to enter the text of
the advertise you want.
To programm the advertisement texts:
1. To enter programming mode, press MENU (2 seconds) and
then the code 4 2
2. Enter the line number ( 1 to 4 ) and press X
3. Enter the speed of change of the message as a value between
1 and 9 (1 =slow, 9= fast). 0 means non showing the line. And
press X.
4. Enter the text . To make a preview of the line under edition
press ◊◊◊◊ .
5. Press ∗∗∗∗ to record the line.
Press MENU to exit from the programming menu.
Page 67
500 Range
49-M500WMEN25
59
MENU
4 3
1 ∗∗∗∗
∗∗∗∗
∗∗∗∗
MENU
MENU
4 3 2
PROG SECTI
ON
n = 0
PROG SECTION
n = 1
_
PROG EAN 13
n = 0
6.3. SECTIONS [ 4 3 ]
This parameter allows to program the section names and the
barcode format for each section.
The names of 100 sections, as well as logo an barcode format
EAN-13.
To access to the setting up, press MENU (2 seconds) and then
code 4 3
6.3.1.Section names
The section names with a maximum of 20 characters, are
programmed. The process is as follows.
1. Enter the section number and press ∗∗∗∗
2 Enter the name of the section, a maximum of 20 characters.
3. Press ∗∗∗∗
4. Select the section logo. To do this press + to view the logo.
To quit programming press F4 and return to working mode.
5. Press ∗∗∗∗ to record and pass to next section.
Press MENU to exit from the programming menu.
6.3.2.Ean13 per Section
1. Introduce the EAN-13 code format associated to the section
as the Table 6.2 shown below
Code DESCRIPTION Code DESCRIPTION
A
Group number
G
Nº of articles
B
Customer number
H
Weight
C
Article code
I
VAT rate
D
Employee code
K
Section
E
Total amount of receipt.
L
Manufacturer’s code
F
Sign of amount
Q
Control check
Table 6.2
Page 68
USER´S MANUAL
49-M500WMEN25
60
MENU
4 4
6
X
∗∗∗∗
PAYMENT MODE
PAYMENT MODE
6
SHORT NAME
N
_
6
PAYMENT MODE 6
LONG
NAMEE
N
6
6.4. PAYMENT MODE [ 4 4 ]
The 500 Range scales permit the payment mode 6 to 9 to be
programmed, and printed on the receipt when the corresponding
form of payment is selected.
To programme payment mode:
1.Press MENU (2 seconds) and 4 4.
2.Select the form of payment to be programmed with the number
keys.
3.Press X to edit the form of payment name.
4.Press ∗∗∗∗ to save the name.
[ 0 ] –
FIXED LONG NAME
[ 5 ] –
FIXED OTHER
[ 1 ] –
FIXED CASH
[ 6 ] –
SHORT NAME N _ 6
[ 2 ] –
FIXED CHEQUE
[ 7 ] –
SHORT NAME N _ 7
[ 3 ] –
FIXED CREDIT
[ 8 ] –
SHORT NAME N _ 8
[ 4 ] –
FIXED ACCOUNT
[ 9 ] –
SHORT NAME N _ 9
Page 69
500 Range
49-M500WMEN25
61
MENU 1
F2
1
X
2
∗∗∗∗
C 000002
CLASS
0
C 000002
CLASS 1
C 000002
IDN 2
NOM CHORIZO
C 000002
ARTIC
RECORDED
6.5. TRACEABILITY [ 4 5 ]
Articles that are defined with traceability belong to a class or type,
such as meat, fish, fruit…
A general text table has to be created for these classes in order to
define the text that is common to each class. For example,
slaughtered in:, caught in: produced in…
Every master scales have a table with 200 text lines, which will be
referred to as a text table, with lines of different lengths up to 32.
The properties or characteristics of the article are then entered,
and up to 20 text lines can be added with different characteristics
The process to programme texts and animals with general
traceability is as follows:
Press MENU (2 seconds).
In programming mode, the selected option is shown in black. Use
F2 and F1 respectively to go up and down through the menu
options.
Select option 4 Texts. Press
∗∗∗∗
and in this menu select option 5
Traceability. Press
∗∗∗∗
To exit the programming mode press MENU (2 seconds)
6.5.1.Definition of PLU Class
Program the PLU fields pressing on MENU 1 (See 3.1.1
Creating/ Modifying a PLU). For example, choose the PLU 2 and
press F2 until you find the field CLASS.
1. Class*: We define if the article has or not traceability.
Class = 0: Article without traceability. Press
∗∗∗∗
to end PLU
programming
Class ≠≠≠≠ 0: Traceability. The class to which the PLU
belongs is assigned here. There are 2* different classes.
Select the class 1
Press the key X in order to go on with the programtion:
2. IDN*: Introducing in the keypad the Identification Number
Product (IDN), as a number with a range from 1 to 20*.
Enter the Identification Number Product with the numeric
keyboard. For example 2.
Press ∗∗∗∗ to memorised the article with traceability, which has
already programmed.
** EAN 13 Reading:
Models: W-020, W-025, M-520 & M-525.
* Class:
W-010, W-015 & M-510,M-515 Max 1
W-020, W-025 & M-520,M-525 Max 2
* NRP:
W-010, W-015 & M-510,M-515 Max 10
W-020, W-025 & M-520,M-525 Max 20
Page 70
USER´S MANUAL
49-M500WMEN25
62
MENU
4 5 1
2
X
1
X
X
X
F2
X
∗
PRINT
IDN
--
IDN
2
CLASS
--
IDN
2
CLASS 1
IDN
2
N. IDENTIFICA
TIO
N M
ES12345678
IDN
2
SLAUGHTERING HOUSE NUMBER
M
12345678
6.5.2.Product programming [ 4 5 1 ]
The following keys are useful in programming product
characteristics:
X
Change field and record
C
Delete the character that is being edited.
++++
Move the cursor forwards.
−−−−
Move the cursor backwards.
◊
◊◊
◊
Delete a previously recorded product. The scales will
request confirmation. If you wish to delete it press ∗∗∗∗, again,
and if you do not wish to delete it, press C.
PRINT
Print programmed texts
∗∗∗∗
Record product set-up.
To define the product characteristics, proceed as follows:
1. From the Traceability programming position, MENU (2
seconds) 4 5 1.
2. Enter the IDN, product, (1-20*), defined by the keypad for
example 2 and press X.
3. Define the class(1-2*) to which it belongs and press X again.
4. Then program the TEXTS (answers) associated with the
Table of Text (questions) from 1 to 20 *. Use the X button to
change from lineof text to next line.
5. Programme the N. Identification (Given by default). Press X
to be changing the next field edited in the section 6.5.3. Table
of Text programming.
6. To pass to text of lines press F2.
7. Program the field SLAUGHTERING HOUSE NUMBER.
Press X to g oto the next field.
8. To exit and record press
∗∗∗∗
9. Pulsar la tecla PRINT para imprimir las líneas de texto
introducidas.
*
NRP:
• Models: W-010, W-015 & M-510,M-515 Max 10
• Models: W-020, W-025 & M-520,M-525 Max 20
*
Class:
• Models: W-010, W-015 & M-510,M-515 Max 1
• Models: W-020, W-025 & M-520,M-525 Max 2
Page 71
500 Range
49-M500WMEN25
63
MENU
4 5 2
X
F2
1
X
X
∗∗∗∗
PRINT
CLASS
--
CLASS
--
Lin Text
CLASS
--
Lin Text 1 M
CLASS
--
Lin Text 1 M
DATE OF PRODUCTION
:
CLASS
--
RECORDED
6.5.3.Table of texts Programming [ 4 5 2 ]
The following keys are useful in programming the table of text:
X
Change field and record
C
Delete the character that is being edited.
++++
Move the cursor forwards.
−−−−
Move the cursor backwards.
◊
◊◊
◊
Delete a previously recorded product. The scales will
request confirmation. If you wish to delete it press ∗∗∗∗, again,
and if you do not wish to delete it, press C.
PRINT
Print programmed texts
∗∗∗∗
Record product set-up.
The text table is defined below, and it also can be used as a
legend to define the article characteristics.
1. From the Traceability programming position, MENU (2
seconds) 4 5 2
2. Enter the class (1-2*), for example, press 1 and press X
3. To pass from line of text (questions) press the key F2
4. Enter the number of line that we want to define with the
keypad. For example, press 1 to define the first line and then
press X
5. Write the text (SLAUGHTERING HOUSE NUMBER,
COUNTRY OF SLAUGHTER, QUARTERING NUMBER,
Country, DATE OF PRODUCTION …) Move through the text
by pressing ++++ and −−−−. The press the key X to recorded and
move to the next text of line.
6. To exit and record press
∗∗∗∗
7. Press the key PRINT in order to print the entered lines of text.
Some caracters as for example :
&, :,´,`,¨,
etc they won’t be
visualize in display (alphanumeric) although it will be
printed.
N. Identification: It is a compulsory field and it is given by
default, that is why there is no need to create.
Page 72
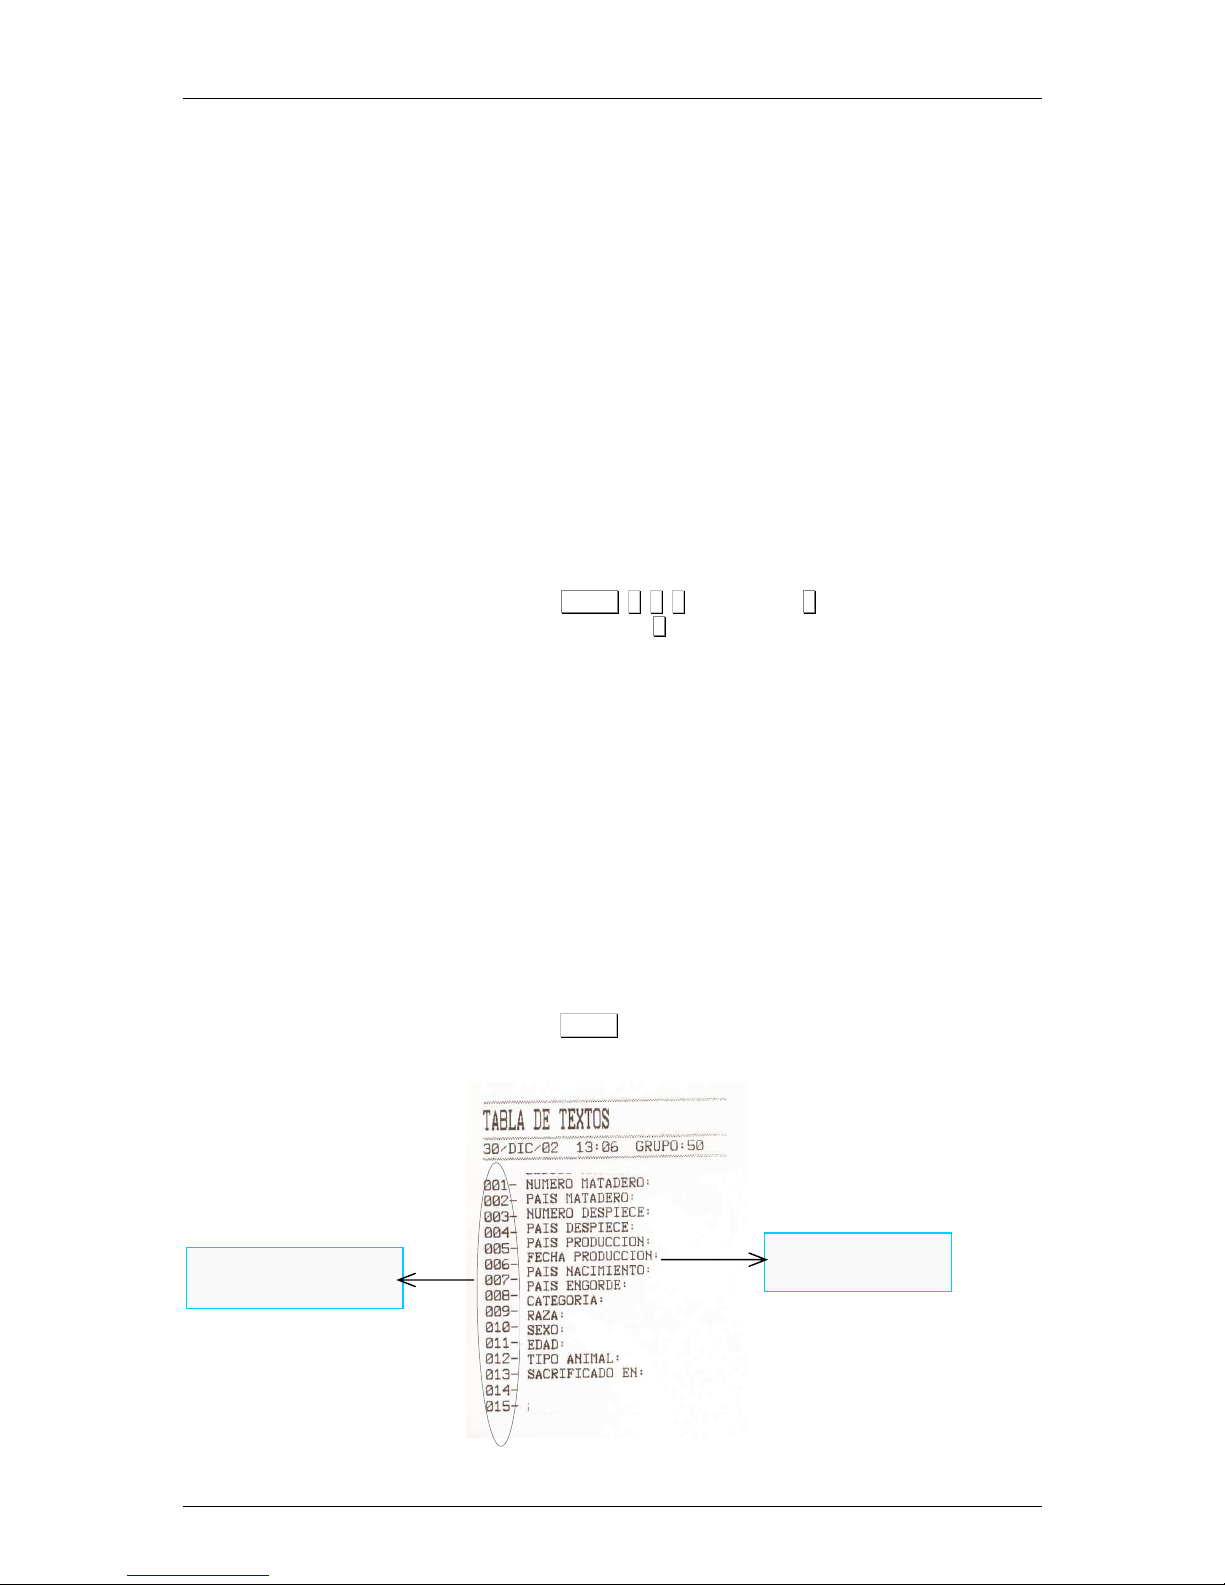
USER´S MANUAL
49-M500WMEN25
64
6.5.4.Example
6.5.4.1. . PLU with beef type traceability
Here a PLU with traceability will be defined. In this case the item
belongs to the beef-type class.
The class refers to the fact that the PLU belongs to a certain class
such as beef, fish, fruit, etc.
The 500 Range scales allow 2* different classes, we define the
PLU in class one.
Initially, when the PLU is being defined, the scales must be
informed that the item has traceability (See sect. 3.1.1.
Creating/modifying a PLU). Since this PLU is a BEEF-type, the
IDN refers to an animal with certain characteristics, such as
country of origin, age, breed, etc.
Then the text to be used as the legend should be entered, in order
to determine the characteristics of the item.
Press MENU 4 5 2 and the key 1 (class) and to record and
pass the next line X.
For example, the following fields will be used to define the PLU:
♦ Text 1: Slaughter House
Number:
♦ Text 8: Country of
Fattening:
♦ Text 2:
Country of Slaughtering:
♦ Text 9: Category:
♦ Text 3: Quartering Number: ♦ Text 10: Breed:
♦ Text 4: Country of Quartering: ♦ Text 11: Sex:
♦ Text 5: Country of Production: ♦ Text 12: Age:
♦ Text 6: Production Date: ♦ Text 13: Type of Animal:
♦ Text 7: Country of Birth: ♦ Text 14: Slaughtered in:
These texts are entered in accordance with par. 6.5.3. Table of
Texts Programming.
Press PRINT to print the receipt to see the texts that have been
entered. The above example would be as follows:
Text entered by the
user.
Indicate the position of
the table of text.
Page 73
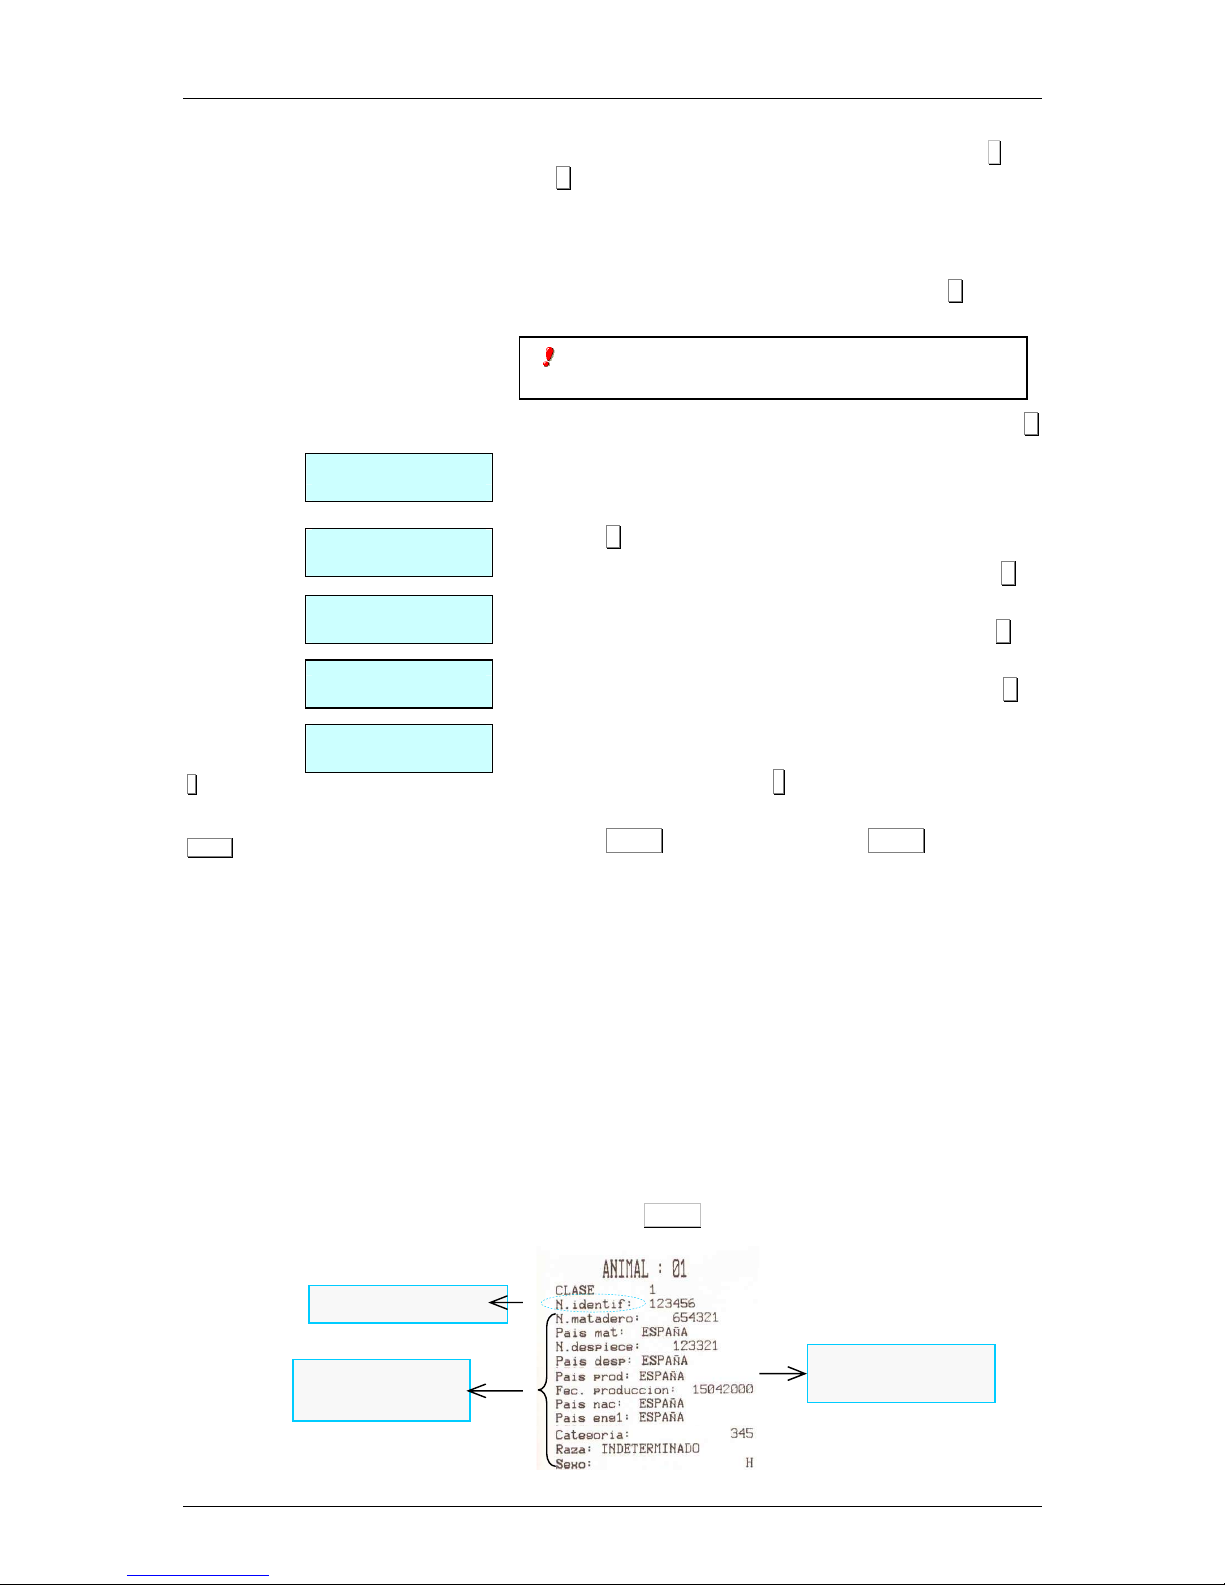
500 Range
49-M500WMEN25
65
∗∗∗∗
PRINT
IDN
2
N. IDENTIFICA
TIO
N M
ES12345678
IDN
2
SLAUGHTERING HOUSE NUMBER.
M
12345678
IDN
2
COUNTRY OF SLAUGHTE
M
ESPAÑA
IDN
2
QUARTERING NUM.
M
135849
IDN
2
COUNTRY OF
QUARTERING
M
ESTONIA
Enter the characteristics of the PLU we are programming such as
IDN, product, (1-20*), defined by the keypad for example 2 and
press X.
We have continue programming sections in the point 6.5.2
Products programming, having into account that:
1. Then program the TEXTS (answers) associated with the
Table of Text (questions) from 1 to 20 *. Use the X button to
change from lineof text to next line.
2. Programme the N. Identification (Given by default). Press X
to be changing the next field edited in the section 6.5.3.
Table of Text programming.
3. Program the field SLAUGHTERING HOUSE NUMBER.
Press X to g oto the next field.
4. Programme the COUNTRY OF SLAUGHTER. Press X to
proceed to the next field.
5. Programme the QUARTERING NUMBER. Press X to
proceed to the next field.
6. Programme the COUNTRY OF QUARTERING. Press X to
proceed to the next field.
7. Do the same with the rest of the parameters.
8. To exit and record press ∗∗∗∗ to memorised the article with
traceability, which has already programmed
9. Press PRINT to print the product. And MENU to exit.
N. Identification*: ES1234546 Country of Fattening1: Spain
Slaughter House Number: 654321 Category: 345
Country of Slaughtering: Spain Breed: Not specified
Quartering Number 1: 123321 Sex: Female
Country of Quartering 1: Spain Age: 3 years
Country of Production: Spain Type of Animal: Veal
Production Date: 15/04/200 Slaughtered in: Spain
Country of Birth: Spain
*
N. Identification: Compulsory parameter, it is note necessary to edit
because the scale has it as default.
We can introduce 20 lines of text that is available for each product
(See section. 6.5.2. Products Programming).
When you press PRINT we have:
N. Identification: It is a compulsory field and the first one it
appears, before the text of lines.
Text entered by the
user.
Table of text.
Compulsory Text.
Page 74
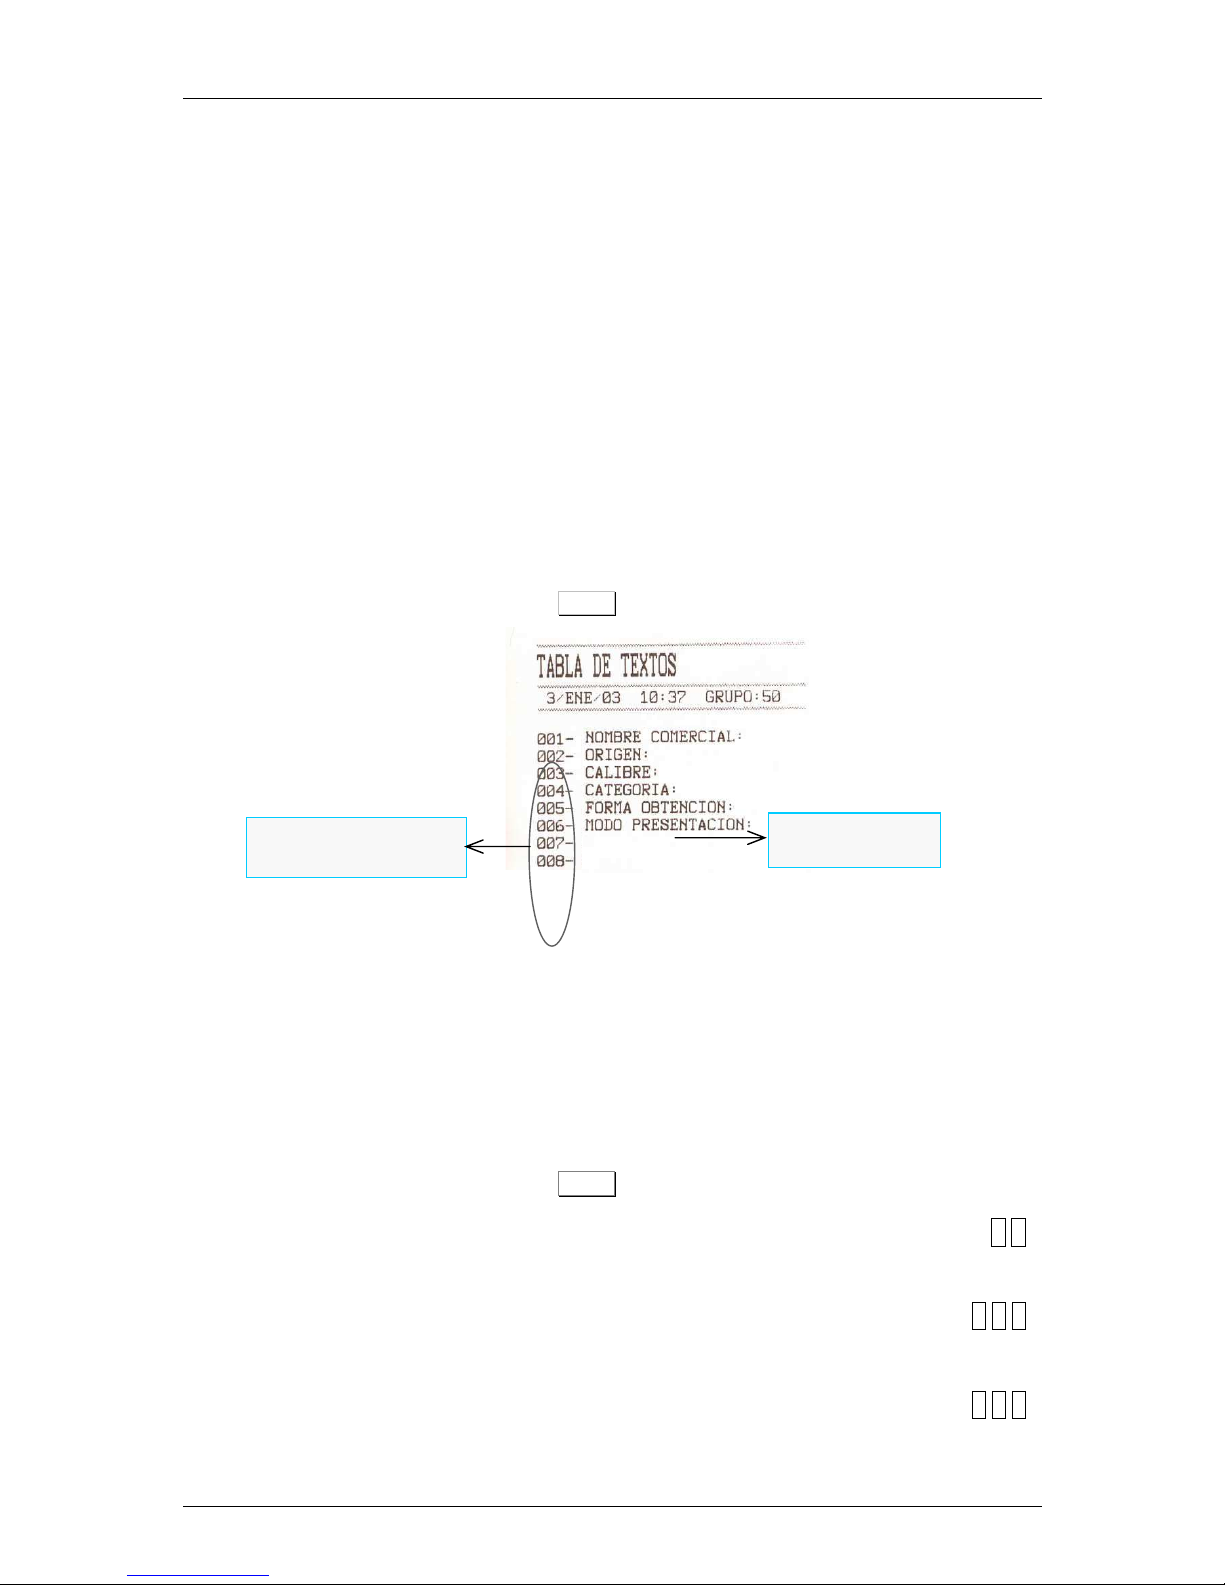
USER´S MANUAL
49-M500WMEN25
66
6.5.4.2. PLU with fish type traceability
Here is an example of how to define a PLU with fish-type
traceability, assuming that the beef-type class has already been
defined. The PLU to be programmed will therefore be entered in
class two*. The IDN refers to the fish to which the PLU belongs,
for example IDN = 3, (See sect. 6.5.1 . Definition of PLU Class).
* Only certain models.
Since no lines have been deleted, the class 1 will be occupied.
We have to define the new lines of text, all except N. Identification
that is given by default (See sect. 6.5.3 Table of Text
Programming) will have to be defined for this PLU:
Text 1: Commercial name
Text 2: Origin:
Text 3: Size
Text 4: Category:
Text 5: Form obtained:
Text 6: Form of presentation:
Press PRINT to obtain the following table:
To define the PLU use the lines of text (see section 6.5.2.
Products Programming):
N. Identification: FAO12345
TEXT 1: Hake
TEXT 2: Spain
TEXT 3: 1 - 2 KG
TEXT 4: Extra
TEXT 5: Aquaculture
TEXT 6: Fillets
Press PRINT.
6.6. SHORT MESSAGES [ 4 6 ]
Not available
6.6.1.Read messages [ 4 6 1 ]
Not available.
6.6.2.Delete messages [ 4 6 2 ]
Not available.
Indicate the position of
the text in the table.
Text entered by
the user.
Page 75
500 Range
49-M500WMEN25
67
7.COMUNICATIONS [
5 ]
The DIBAL 500 Range scale was designed to work alone or s
part of a network of MASTER and SLAVE scales.
If operating alone, the scale must be set up as MASTER. (Follow
the steps shown below to obtain this configuration)
If the scale is set up as master, it may also be connected to a
computer (which will enable it to be programmed and managed at
greater speed and reliability as well at a distance from the scale
itself by means of a modem), and it may also create a scale
network.
A NETWORK of 500 RANGE scales can be made up of 100
MASTERS and 9* SLAVES depending on each master.
Within a network of scales, each MASTER scale is assigned a
number (any number between 00 and 99, for example you can
speak of master scale 02) which is known as its address: each
master scale will have one address within the network, i.e., it will
be clearly addressed. Consequently, there cannot be two or more
scales with the same address.
Each of the master scales can be connected to up to 9* scales
set up as slaves. A slave scale will be assigned an address which
will be a number between 1 and 9*.
The slave scale whose address is 01 is called the SUBMASTER,
as it automatically loads a safety copy of all the data programmed
to the master scale on which it depends.
For SAFETY reasons, THERE MUST BE A SLAVE SCALE
01 IN ALL SLAVE SUBNETWORKS: in the case of
breakdown of the master scale, by merely CHANGING THE
SUBMASTER SCALE TO MASTER you can go on working
without the loss of any data.
To communicate with the computer, the group must be defined.
(Parameter 711) A group is a set of master scales.
Communication between the computer and the scales takes place
by means of groups of scales and master addresses.
To send data from the computer to the scales as well as from the
scales to the computer, you need to know which group and which
master you must address. This is important when setting up the
scale network and the computer program.
* According to model
• Models: W-010, W-015, M-510 & M-515 Maximum 4
• Models: W-020, W-025, M-520 & M-525 Maximum 9
Page 76
USER´S MANUAL
49-M500WMEN25
68
MENU
5 1 1
∗∗∗∗
MENU
MENU
5 1 2
∗∗∗∗
MENU
MENU
5 1 3
∗∗∗∗
MENU
MENU
5 1 4
∗∗∗∗
MENU
PROG 5.1
5-9
COMUNICATIONS
PROG 511
010 001 002 155
SCALE
IP ADDRESS
PROG 512
010 001 002 154
PC
IP ADDRESS
PROG 514
3001
TCP TX PORT
7.1. ETHERNET COMMUNICATION PARAMETER
[ 5 1 ]
If ETHERNET TCP/IP communication is to be used, the next step
is programming ETHERNET COMMUNICATION.
7.1.1.Configure the Scale’s IP Address [ 5 1 1 ]
1. Access to the configuration of scale’s IP address by pressing
the MENU (2 seconds) 5 1 1 keys.
2. Enter the IP address in groups of three characters. Press X
after the third character. E.g.: 010. X 001. X 002. X 155
3. Press ∗∗∗∗ to save.
4. Press MENU (2 seconds) to quit the programming menu.
7.1.2.Configure the PC’s IP Address [ 5 1 2 ]
1. Access to the configuration of PC’s IP address by pressing
the MENU (2 seconds) 5 1 2 keys.
2. Enter the IP address of the PC to which the scale is to be
connected in groups of three characters. Press X after the
third character. E.g.: 010.X 001.X 002.X 154
3. Press ∗∗∗∗ to save.
4. Press MENU (2 seconds) to quit the programming menu.
7.1.3.Equipment Number [ 5 1 3 ]
1. Access to the number of equipment by pressing the MENU
(2 seconds) 5 1 3
2. Program the equipment number, with a number between 00
and 99.
3. Press ∗∗∗∗ to save.
4. Press MENU (2 seconds) to quit the programming menu.
7.1.4.Configure the TCP TX Port [ 5 1 4 ]
1. Access to the configuration of the TX port by pressing the
MENU (2 secons) 5 1 4
2. Program Tx TCP port=3001 (always)
3. Press ∗∗∗∗ to save.
Press MENU (2 seconds) to quit the programming menu.
PROG 513
0
EQUIPMENT NUMBER
Page 77

500 Range
49-M500WMEN25
69
MENU
5 1 5
∗∗∗∗
MENU
MENU
5 1 6
∗∗∗∗
MENU
MENU
5 1 7
∗∗∗∗
MENU
MENU
5 1 8
∗∗∗∗
MENU
PROG 515
3000
TCP RX PORT
PROG 516
01 10 01 00 12 15
MAC
ADDRESS
PROG
51
8
255 255 255 255
GATEWAY
IP ADDRESS
7.1.5.Configure the TCP RX Port [ 5 1 5 ]
1. Access to the configuration of the RX port by pressing the
MENU (2 secons) 5 1 5
2. Program Rx TCP port=3000 (always)
3. Press ∗∗∗∗ to save.
Press MENU (2 seconds) to quit the programming menu.
7.1.6.MAC Address [ 5 1 6 ]
Display the scale’s MAC address.
1. Access to the MAC Configuration by pressing the
MENU (2
seconds)
5 1 6 keys.
2. Enter the password. Consult to the Technical support.
3. Enter the MAC address in groups of two characters, pressing
X
alter the second carácter. E.g.: 01X10X 01X 00 X 12X 15
4. Press ∗∗∗∗ to save.
5. Press MENU (2 seconds) to quit the programming menu.
7.1.7.Subnetwork Mask [ 5 1 7 ]
This sets up the subnetwork mask.
4. Enter master-slave set-up by pressing MENU (2 seconds) 5
1 7.
5. Enter the subnetwork mask progressing through three by
three characters, and press X after the third character. Eg:
255.X 000.X 000.X 000
6. Press ∗∗∗∗ to save.
7. Press
MENU
(2 seconds) to quit the programming menu.
7.1.8.Gateway Address [ 5 1 8 ]
This sets up the gateway address.
1. Enter master-slave set-up by pressing MENU (2 seconds) 5
1 8.
2. Enter the subnetwork mask progressing through three by
three characters, and press X after the third character. Eg:
255.X 255.X 255.X 255
3. Press ∗∗∗∗ to save.
4. Press
MENU
(2 seconds) to quit the programming menu.
PROG 51
7
255
255
000 000
SUBNET
MASK
Page 78
USER´S MANUAL
49-M500WMEN25
70
MENU
5 2
1
C
∗∗∗∗
MENU
MENU
5 3 1
∗∗∗∗ ∗∗∗∗ ∗∗∗∗ ∗∗∗∗
MENU
SEND
7.2. RS-232 COMMUNICATION PARAMETER [ 5
2 ]
500 Range scales can communicate at 8 bits without parity. You
Orly can programm the speed of de comunication betwen scale
and scaner. This parameter is measure in (Bd).
1. Make sure the scale is a MASTER.
2. Press the MENU (2 seconds) 5 2 keys.
3. Select 1.Transmission speed.
4. Pressing C you can select one of the 7 values available.
5. Press ∗∗∗∗
6. Press MENU (2 seconds) to quit the programming menu.
7.3. OPERATIONS WITH PC [ 5 3 ]
Using one of the DIBAL scales’ communication programs for
working under commonly used operating systems (MS-DOS, MSWINDOWS, UNIX,...), you can use the PC to do all the tasks
related to set-up as well as obtain all the data concerning the
transactions carried out by the scales for their subsequent
computer processing.
You can also make a back-up copy of the scale’s data (backup)
and load data from the scale (restore) with the aid of the LBS
program.
The following are the programs available:
UTILITY SCALE TYPE
OPERATING
SYSTEM
DIBALCOM
Communications Driver All
Windows 9X, NT,
XP, Me
DIBAL RMS
Scale configuration
Store management
All
Windows 9X, NT,
XP, Me
DIBAL LBS
Back-up copy
Loading data
All
Windows 9X, NT,
XP, Me
When operating, the DIBAL RMS program must always be
accompanied by the application DIBALCOM, as the latter
provides the computer with the necessary resources to enable the
communications port (COM1 or COM2 or COMX) and set up
communication with the scale.
7.3.1.Send end of day with totals clearance [ 5 3 1]
This operation allows you to forward the data stored in the scale
to the computer for their subsequent processing by a suitable
program like DIBAL RMS.
In addition, the totals accumulated in the different memories
throughout the day will be cleared to zero.
5. Press the MENU (2 seconds) 5 3 1 keys.
6. To do so, press the ∗∗∗∗ key 4 times.
7. Then, press MENU (2 seconds) to quit the programming
menu.
PROG 521
BAUDRATE
4800
Page 79
500 Range
49-M500WMEN25
71
MENU
5 3 2
∗∗∗∗ ∗∗∗∗ ∗∗∗∗ ∗∗∗∗
MENU
MENU
5 3 3
∗∗∗∗
MENU
MENU
5 3 4
∗∗∗∗
x 7
MENU
MENU
5 3 5
∗∗∗∗
¿¿ SURE ??
7.3.2.Send end of day without totals deletion
[ 5 3 2 ]
This operation allows you to forward the data stored in the scale
to the computer for their subsequent processing by a suitable
program like DIBAL RMS.
The totals accumulated will NOT be cleared to zero.
1. Enter by pressing MENU (2 seconds) 5 3 2.
2. To do so, press the
∗∗∗∗
key 4 times.
3. Then, press MENU (2 seconds) to quit the programming
menu.
7.3.3.Request start of day [ 5 3 3 ]
This operation allows you to send the data on receipt text, the
registering of sales assistants, section and department names,
etc. from the computer to the scale by means of a suitable
program like DIBAL RMS.
1. Enter by pressing MENU (2 seconds) 5 3 3.
2. Press the
∗∗∗∗
key.
3. Then, press MENU (2 seconds) to quit the programming
menu.
7.3.4.Initialization of scale [ 5 3 4 ]
With this operation it is possible to delete all data from the scales
except data on logos, fonts, ingredients and all customer
information (customer number, pending payments, etc.). The
PLUs and sales assistants’ memories will be deleted.
1. Enter by pressing MENU (2 seconds) 5 3 4.
2. Press the
∗∗∗∗
key 7 times.
3. Then, press MENU (2 seconds) to quit the programming
menu.
If the scales are a MASTER, after start-up all PLUs must be
re-programmed, either manually or by downloading them from
the PC. The same process must also be followed for the sales
assistants and other set-up values. If the scales are a SLAVE,
when the delete option has been effected, the scales will
request that new articles should be sent from the corresponding
MASTER.
7.3.5.BACKUP (LBS) [ 5 3 5 ]
This operation allows you to forward the data stored in the scale
to the computer for a backup.or to resend the data from the
computer to de scale.
Press MENU (2 seconds) 5 3 5
Press
∗∗∗∗
.
In the computer select the option
Receive o Send
SEND
¿¿SURE??
¿¿ SURE ??
Page 80
USER´S MANUAL
49-M500WMEN25
72
MENU
5 4
MENU
5 4 1
MENU
5 4 1 1
0
∗∗∗∗
MENU
MENU
5 4 1 2
0 0 0 0
∗∗∗∗
MENU
MENU
5 4 1 3
6 0 0 0
∗∗∗∗
MENU
MENU
5 4 1 4
++++
MENU
MENU
5 4 1 5
++++
MENU
PROG 5.4
COMMUNICA 4
- 4
INTERCONEXION
PROG 5.4.1
INTERCONE 1
- 2
C
ONFIGURAC M/E
PROG 5.4.1.1
M E CONFI 1
- 5
NET IDENTIFIER
PROG 5.4.1.2
MAESTRA…………………0
SCALE ADD
PROG 5.4.1.3
6000
UDP PORT
SLAVE 01
ADDRESS IP
000000000000
n0 SLAVES
COMMUNICATED
SLAVES COMMUNICATED
7.4. SCALE NETWORK [ 5 4 ]
To acces to this menu press MENU (2 secs) 5 4.
7.4.1.Master slave
When a scale is setted up as a master the next submenu will
appeared.
7.4.1.1. Set up as MASTER-SLAVE [ 5 4 1 ]
To acces to this menu press MENU (2 secs) 5 4.1.
1. Network identification [ 5 4 1 1 ]
This parameter is assigned to a 4 digit number to identify the
network that will work in.
1. Acces pressing MENU (2 secs) 5 4 1 1.
2. Enter the wanted value and press
∗∗∗∗
.
3. Press MENU in order to exit the configuration menu.
2. Scale address [ 5 4 1 2 ]
This parameter is assigned to the address of the scale. The
parameter may be between 00 and the maximum number of
slaves that this model can have. If you want to set as Master,
introduce 00. If you want to configure as Slave, introduce a value
between 01 and the maximum number of slaves depending on
the scale model.
1. Acces pressing MENU (2 secs) 5 4 1 2.
2. Enter the wanted value and press
∗∗∗∗
.
3. Press MENU in order to exit the configuration menu.
3. UDP Port (6000) [ 5 4 1 3 ]
This parameter is assigned to the number of port that the master
and slave communication is done, being a 4 digit number
1. Acces pressing MENU (2 secs) 5 4 1 3.
2. Enter the wanted value and press
∗∗∗∗
.
3. Press MENU in order to exit the configuration menu.
4.Ip slaves address [ 5 4 1 4 ]
I n this parameter you display the IP of the slaves which the
master it connected.
1. Acces pressing MENU (2 secs) 5 4 1 4.
2. Press
++++
to display the next slave connected or
−−−−
or to
display the previous one.
3. Press MENU in order to exit the configuration menu.
5. Slaves connected [ 5 4 1 5 ]
This parameter is assigned to displayed the addresses of the
connected slaves scales
1. Acces pressing MENU (2 secs) 5 4 1 5.
2. Press
+
+ +
+
or
−−−−
to display the next or the previous screen, if
it is not enough space in the screen to all the slaves scales
addresses.
3. Press MENU in order to exit the configuration menu.
Page 81
500 Range
49-M500WMEN25
73
MENU
5 4 2
MENU
5 4 2 1
∗∗∗∗
MENU
MENU
5 4 2 2
∗∗∗∗
MENU
MENU
5 4 3 1
∗∗∗∗
MENU
MENU
5 4 3 2
∗∗∗∗
MENU
MENU
5 4 3 3
∗∗∗∗
MENU
MENU
5 4 3 4
∗∗∗∗
MENU
PROG
5
.4.2.
INTERCONE 2
- 2
M/S OPERATIONS
PROG
5.4.2.
1
M S OPERA 1
- 3
NET AUTOCONF
IGURATION
M
TESTCOM
S 00
M/S
TEST
PROG 5.4.3.1
SENDING 1
- 4
SENDING ALL
PROG 5.4.3.2
SENDING 2
- 4
SENDING PLU’S
PROG 5.4.3.3
SENDING
3
- 4
SENDING TRACEABILITY
7.4.1.2. Master-slave operations [ 5 4 2 ]
To acces to this submenu press MENU (2 secs) 5 4 2.
1. Network set up [ 5 4 2 1 ]
Autoconfigurating the scale is set as master. The other scales are
connected with the same network ID and the UDP port remains
as slaves. The parameters of master-slave communication will be
set automatically.
1. Acces pressing MENU (2 secs) 5 4 2 1.
2. Press
∗∗∗∗
during 3 seconds..
3. Press MENU in order to exit the configuration menu.
2. Master-slave test [ 5 4 2 2 ]
Run a test between the master and slave to check if the
communication is correct. This test is only accessible from the
slave scales.
7.4.1.3. Sending data to slaves [ 5 4 3 ]
It may be useful to do back up data from a MASTER scale in their
slaves, so that you have a security backup of these in each of
them.
The scale will print a list of the state of the scale in the network
and it will begin the data loading to the slaves. After loading a new
list with the result of the operation will print.
1. Sending All
. [ 5 4 3 1 ]
Send all necessary information to the slaves.
1. Acces pressing MENU (2 secs) 5 4 3 1.
2. Press
∗∗∗∗
.
3. Press MENU in order to exit the configuration menu.
2. Sending PLU’s
. [ 5 4 3 2 ]
Send PLUs to slaves.
1. Acces pressing MENU (2 secs) 5 4 3 2.
2. Press
∗∗∗∗
.
3. Press MENU in order to exit the configuration menu.
3. Traceability sending
[ 5 4 3 3 ]
Send the traceability to the slaves.
1. Acces pressing MENU (2 secs) 5 4 3 3.
2. Press
∗∗∗∗
.
3. Press MENU in order to exit the configuration menu.
4. Sending logos
[ 5 4 3 4 ]
Send logos to slaves.
1. Acces pressing MENU (2 secs) 5 4 3 4.
2. Press
∗∗∗∗
.
3. Press MENU in order to exit the configuration menu.
PROG 5.4.3.4
SENDING
4
- 4
SENDING LOGOS
Page 82
USER´S MANUAL
49-M500WMEN25
74
MENU
5 4 1
MENU
5 4 1 1
0
∗∗∗∗
MENU
MENU
5 4 1 2
0 0 0 0
∗∗∗∗
MENU
MENU
5 4 1 3
6 0 0 0
∗∗∗∗
MENU
MENU
5 4 1 4
MENU
MENU
5 4 1 5
++++
MENU
PROG
541
ICONFIG
ID
PROG
5411
MASTER…………
ID
PROG
5412
MASTER
ADD SCALE
PROG
5413
…….………
………
PORT
UDP
S
LAVE
01
ADD
IP
000000000000
PROG
5415
…….…………………
SLAVES
COMUNI
7.4.2.Slave scale
When a scale is setted up as a slave the next submenu will
appeared.
7.4.2.1. Set up as MASTER-SLAVE [ 5 4 1 ]
To acces to this menu press MENU (2 secs) 5 4.1.
1. Network identification [ 5 4 1 1 ]
This parameter is assigned to a 4 digit number to identify the
network that will work in.
1. Acces pressing MENU (2 secs) 5 4 1 1.
2. Enter the wanted value and press
∗∗∗∗
.
3. Press MENU in order to exit the configuration menu.
2. Scale address [ 5 4 1 2 ]
This parameter is assigned to the address of the scale. The
parameter may be between 00 and the maximum number of
slaves that this model can have. If you want to set as Master,
introduce 00. If you want to configure as Slave, introduce a value
between 01 and the maximum number of slaves depending on
the scale model.
1. Acces pressing MENU (2 secs) 5 4 1 2.
2. Enter the wanted value and press
∗∗∗∗
.
3. Press MENU in order to exit the configuration menu.
3. UDP Port (6000) [ 5 4 1 3 ]
This parameter is assigned to the number of port that the master
and slave communication is done, being a 4 digit number
1. Acces pressing MENU (2 secs) 5 4 1 3.
2. Enter the wanted value and press
∗∗∗∗
.
3. Press MENU in order to exit the configuration menu.
4.Ip master address [ 5 4 1 4 ]
In this parameter you enter the IP address of the master which the
slave it connected.
1. Acces pressing MENU (2 secs) 5 4 1 4.
2. Press
++++
to display the next slave connected or
−−−−
or to
display the previous one.
3. Press MENU in order to exit the configuration menu.
5. Slaves connected [ 5 4 1 5 ]
This parameter is assigned to displayed the addresses of the
connected slaves scales
1. Acces pressing MENU (2 secs) 5 4 1 5.
2. Press
+
+ +
+
or
−−−−
to display the next or the previous screen, if
it is not enough space in the screen to all the slaves
scales addresses.
3. Press MENU in order to exit the configuration menu.
Page 83
500 Range
49-M500WMEN25
75
MENU
5 4 2 1
∗∗∗∗
MENU
MENU
5 4 2 2
∗∗∗∗
MENU
MENU
5 4 3 1
∗∗∗∗
MENU
MENU
5 4 3 2
∗∗∗∗
MENU
MENU
5 4 3 3
∗∗∗∗
MENU
MENU
5 4 3 4
∗∗∗∗
MENU
PROG
5421
P
RESS
TOTAL
AUTOCONFIG
PROG
5422
OPERA
TEST M/E
PROG
5431
SEND DAT
GENERAL
PROG 5432
DAT SEND
PLUS REQUEST
PROG 5433
DAT SEND
TRACEABILITY REQUEST
PROG 5434
DAT SEND
LOGOS REQUEST
7.4.2.2. Master slave operations
1. Network set up [ 5 4 2 1 ]
Autoconfigurating the scale is set as master. The other scales are
connected with the same network ID and the UDP port remains
as slaves. The parameters of master-slave communication will be
set automatically.
1. Acces pressing MENU (2 secs) 5 4 2 1.
2. Press
∗∗∗∗
during 3 seconds..
3. Press MENU in order to exit the configuration menu.
2. Master-slave test [ 5 4 2 2 ]
Run a test between the master and slave to check if the
communication is correct.
1. Acces pressing MENU (2 secs) 5 4 2 2.
2. Press
∗∗∗∗
to star the test.
3. Press
∗∗∗∗
to pause the test.
4. Press C to stop the test.
5. Press MENU in order to exit the configuration menu.
7.4.2.3. Master data request [ 5 4 3 ]
In the case that any error is sent to the slaves or a new slave is
connected alter having switching on the master.
1. General request
[ 5 4 3 1 ]
All the necessary information of the master is requested.
1. Acces pressing MENU (2 secs) 5 4 3 1.
2. Press
∗∗∗∗
.
3. Press MENU in order to exit the configuration menu.
2. PLUs request
[ 5 4 2 3 2 ]
The Master’s PLUs are requested.
1. Acces pressing MENU (2 secs) 5 4 3 2
2. Press
∗∗∗∗
.
3. Press MENU in order to exit the configuration menu.
3. Traceability request
[ 5 4 3 3 ]
The Master’s Traceability is requested.
1. Acces pressing MENU (2 secs) 5 4 3 3
2. Press
∗∗∗∗
.
3. Press MENU in order to exit the configuration menu.
4. Logo request
[ 5 4 3 4 ]
The Master’s Logo is requested.
1. Acces pressing MENU (2 secs) 5 4 3 4.
2. Press
∗∗∗∗
.
3. Press MENU in order to exit the configuration menu.
Page 84

USER´S MANUAL
49-M500WMEN25
76
8.SCANNER
CONNECTION*
The Software has been developed for Dibal 500 Range scales to
communicate with a scanner for reading bar codes, so that the
article bar codes are read and sales operations carried out on the
scale.
The scanner must have the requirement COMMUNICATION
SERIES RS-232 through a DB9 female connector.
The scale RS-232 connector, has power output for the scanner.
The DB9 powered PIN is PIN 9.
The scale software is set up with the following protocol for the
scanner:
• Speed: 9600 bauds
• 8 data bits
• Without parity
The scanner must send the bar code followed by CR or LF.
8.1. SCANNER INSTALLATION*
The scanner is connected taking into account that the output of
the scale feeds to 5V.
8.2. SCANNER* BAR CODE READING
All articles will have a field called EAN in which the EAN scanner
code can be entered for the particular article. In the said field,
representative numbers and letters can appear within the bar
code. This field is for the exclusive use of the scanner. In it, you
can enter:
• 13 characters, then becoming an EAN 13
• 8 characters followed by spaces to form an EAN 8
To program the article’s EAN code, enter the PLU programming
option. When you reach the EAN field, enter the EAN code you
require. To do so, you can:
• Read the bar code with the scanner and the value will be
updated.
• Enter it manually, allowing to this end the representative
numbers and letters within the bar code.
Remember that depending on whether there are 13 or 8
characters in this field, you will have an EAN 13 or an EAN 8
respectively.
* EAN13 reading. Models
W-020, W-025, M-520 & M-525
* Only Models
W-020, W-025, M-520 & M-525
* EAN13 reading. Models
W-020, W-025, M-520 & M-525
Page 85
500 Range
49-M500WMEN25
77
Remember that the last character of the bar code is the
checksum, which is why, if you do not wish to, it is not necessary to
enter it. Therefore, you will need 12 or 7 digits for each EAN (the
last character is omitted).
In normal working position, when a bar code is read by a scanner,
a search is made through all those articles whose EAN
SCANNER CODE corresponds to that which has been read by
the scanner. In the case of finding an article whose EAN code
corresponds, the information on this article will show up on the
screen, just as if you had pressed the key corresponding to its
PLU. In the case of not finding any article meeting this condition,
wrong code message will appear.
If there is no scanner and you wish to make the search with the
aid of the EAN scanner code, you can press the F3 key and the
letters:
EAN<*************>
will show up on the display.
Here, you can enter the bar code to make the search. The
character “*” will be used as a substitute. To seek an EAN 8 code,
the last five characters must be “-“ and consequently, it will only
seek in articles with an EAN 8 code.
When seeking an article while programming the PLU, you can
read with the scanner, and the programming of the first of the
codes that meet the condition of the EAN code read by the
scanner will show up.
You can also print a label with the bar code to be the article’s
EAN. For this purpose, you will have to change configuration
parameter of the label EAN-13 FORMAT takes the value 3.
Thus, if you are working in label mode, the bar code that the
article has within the EAN scanner code will appear.
Remember that in this case you will be able to print the direct
code or the representation of certain values depending on the
corresponding representative letters within the bar code.
Prices can also be interpreted on the bar code which is then read.
For this purpose, the title of the article’s EAN code must contain
the letters E or X..
Reading with scanner AMOUNT, WEIGHT, PRICE, etc.
To read AMOUNT, WEIGHT, PRICE, etc. with the scanner, the
INTERPRETATION parameter must be set.
The following are the different cases:
In the case of NON-WEIGHED articles:
•••• If the price of the article is 0 and the letter ‘E’ appears on
the article’s EAN code, the scale will associate the value
of the positions of the EAN code where the ‘E’ are with
the value of the price of the article for that sale
•••• If the price is not 0, it will show the price which the scale
has entered.
•••• If the price is 0, but it does not detect ‘E’ in the article’s
EAN code, the article will show up on the screen but in
the position for entering the price.
Page 86

USER´S MANUAL
49-M500WMEN25
78
In the case of separate ‘E’ appearing in the article’s EAN code, it
will only take into account the last to be found.
In the case of WEIGHED articles:
- If the price of the article is 0 and the letters ‘E’ or ’X’ appear in
its EAN code, the scale will associate the value of the
positions of the EAN code where the letters are with the value
of the price of the article for that sale.
- If the price is not 0, it will show the price which the scale has
entered.
- If the price is 0 but it can detect neither ‘E’ nor ‘X’ in the
article’s EAN code, the article will show up on the screen,
but in the position for entering the price.
- If the letters “H” appear in the EAN code, the scales will
associate the value of the EAN code positions where the
letters are, with the weight of the article for this sale.
In the case that appears the articles ‘E’ ‘H’ and ‘X’ separately in
the EAN code of the article, only will be considered the last letters
found.
Example.
If the EAN code of an article is programmed:
EAN Code < 23 00001 EEEEE 5>
and if the following code is read with the scanner :
23 00001 00456 5
then the following will appear on the display of the scales:
Amount: 456 euros.
In the case of ‘E’ and ‘X’ appearing separately within the article’s
EAN code, it will only take into account the last to be detected.
Page 87
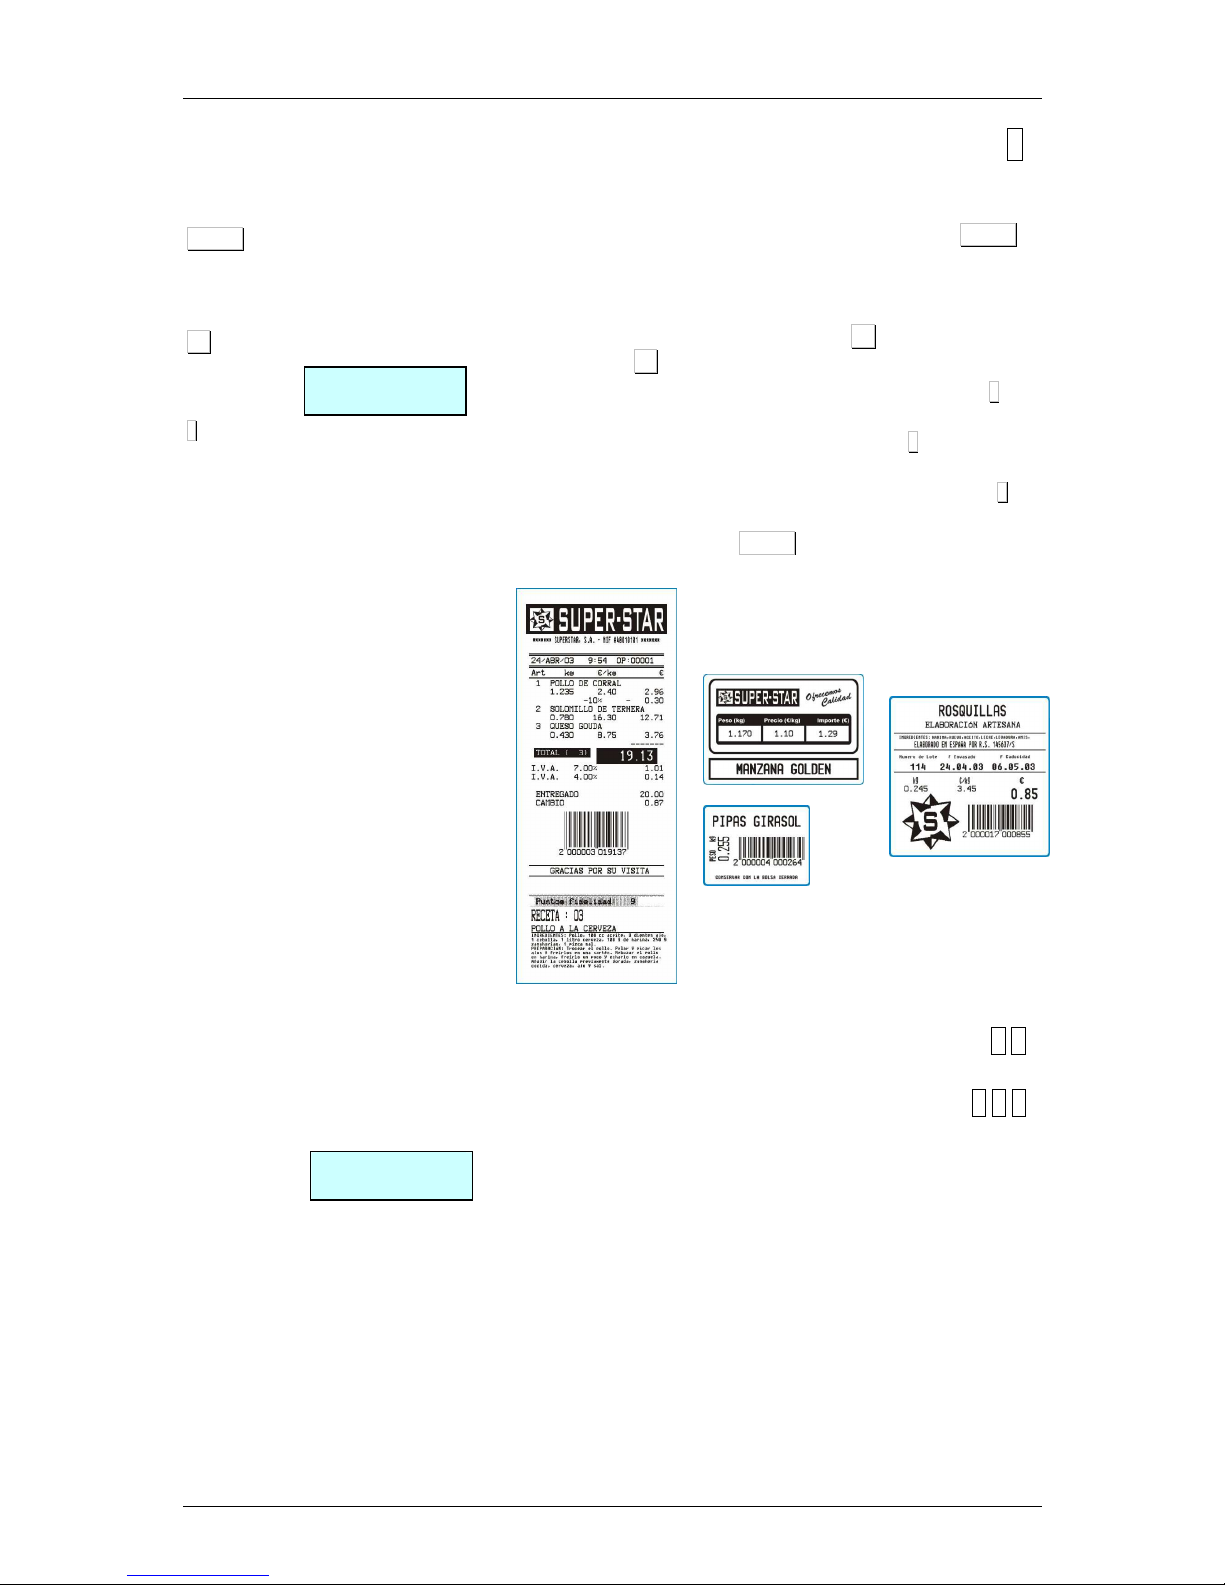
500 Range
49-M500WMEN25
79
MENU
F2 x 5
∗∗∗∗
PROG
FORMATS
PROG 6 .1.1
LABEL 1
-3
PROG LABEL FORMAT
9.FORMATS [ 6 ]
This section is for programming the characteristics of the receipt
and label.
Access to the main menu is gained by pressing MENU 2
seconds.
In the programming menu, the selected option always appears in
black.
To move from one option to another use F2 to go down through
the menu and F1 to go up.
In programming mode, select option 6 Formats, press
∗∗∗∗
and
then choose one of the 2 options:
Select option 1, Programme Labels and press
∗∗∗∗
to programme
the label formats.
Select option 2, Programme Receipts and press
∗∗∗∗
to
programme the receipt formats.
To exit programming press MENU 2 seconds.
Examples of receipts and labels:
9.1. LABEL [ 6 1 ]
9.1.1.Program label format [ 6 1 1 ]
DIBAL 500 Range Scales has different label formats that can
be programmed by the user. This section explains how to design
(the size and fields to print) these special labels. The fields that
can be programmed on the label are described in the table
below. Depending the model of scale
Page 88

USER´S MANUAL
49-M500WMEN25
80
Sect. Description Sect.
Description Sect. Description Sect.
Description
1 Barcode 28 Vendor Name 55 Euro Exchange Rate 82 Text Line 22: “Cold”
2 Amount 29 Name 3 56
Total secondary
currency
83 Text Line 23: “OFFER”
3 Weight 30
Offer Price / Special
Price
57
Total for Register
Voucher
84 Text Line 24: “SAVE”
4 Hour 31 Saving 58
Complete Date (01
MAY 2000)
85
Text Line 25:
“DISCOUNT”
5 Customer 32 Name 2 59
Number of articles
on receipt
86 Text Line 26: “£“
6 Price 33 Section
60 Total Receipt
87 Text Line 27: “£/kg“
7 Current Date
34 Batch Number
61
Text Line 1:
“WEIGHT”
88 Text Line 28: “£/Unit“
8 Best Before
35 Article Text Line 4 62 Text Line 2: “PRICE”
89
Text Line 29:
“BETWEEN 0/5ºC“
9 Extra Date 36 Article Text Line 5
63
Text Line 3:
“AMOUNT”
90
Text Line 30: “ IN A
PLACE“
10 ---
37 Combined Date 1
64 Text line 4: “kg“ 91
Image 1: ------------------
-(line)
11
Label Counter,
lower level, for
total labels
38 Combined Date 2 65 Text line 5: “£/kg“
92
It indicates the sum
without rounding off in
total.
12 Name 39
Total articles and
amount on Voucher:
“TOTAL (X) amount”
66 Text line 6: “£“ 93
It indicates the total
rounded off sum
13 Article Text Line 1 40 Rectangle 67 Text Line 7: “UNITS”
94 –
100
---
14 Article Text Line 2 41 % Discount 68
Text Line 8: “GBP/
Unit”
101 Heading 9
15 Article Text Line 3 42 Amount after discount 69
Text line 9: “Current
Date“
102 Heading 10
16 Article code 43 Amount before offer 70
Text line 10: “Expiry
Date“
103 Heading 11
17 Heading 1 44
Logo (for scales with
logos)
71
Text Line 11: “BEST
BEFORE”
104 Heading 12
18 Heading 2 45
Tare by Percentage
Value tare
72
Text Line 12: “CASH
REGISTER
VOUCHER”
105 Heading 13
19 Heading 3 46 Percentage of the tare 73
Text Line 13:
“TOTAL”
106 ---
20 Heading 4 47 Logo per PLU’s section 74
Text Line 14:
“Weight Kg“
107 Heading 14
21 Heading 5 48
Text line: “Packing
data“
75
Text Line 15: “Total
GBP”
108 Heading 15
22 Heading 6 49
Text line 31 “Packed In“
76
Text Line 16: “Pack
Date”
109 Article Text Line 6
23 Heading 7 50 Text line 32 “Use By“ 77
Text Line 17: “Best
Before”
110 Article Text Line 7
24 Heading 8 51
Text line: “Minced
Date“
78 Text Line 18: “TARE” 111 Article Text Line 8
25 Tare 52 Text line: “Reference” 79
Text Line 19: “Batch
Number”
112 Article Text Line 9
26 Gross weight 53 Unit price in Euro 80
Text Line 20:
“Preserve”
113 Article Text Line 10
27 Vendor Code 54 EAN 128 barcode 81
Text Line 21: “At –
18º C”
114 -
123
Article Text Line from
11 to 20
Page 89

500 Range
49-M500WMEN25
81
Sect. Description Sect. Description Sect.
Description Sect.
Description
124
General Text (1024
Text)
144 Piece Portions 201 Product’s Answer 2 221 Product’s Question 2
125 Recipe Title
145 -
149
--- 202 Product’s Answer 3 222 Prodcut’s Question 3
126 Recipe Text 150
Text Line:
“TEMPERATURE
IDEAL TO
CONSERVATION“
203 Product’s Answer 4 223 Product’s Question 4
127 Label total Price 151 Made the 204 Product’s Answer 5 224 Product’s Question 5
128
Text Line 36: “Best
Before: “
152 Made by 205 Product’s Answer 6 225 Product’s Question 6
129
Text Line:
“CURRENCY 1“
153
Text Line 40:
“Unrounded total: “
206 Product’s Answer 7 226 Product’s Question 7
130
Text Line:
“CURRENCY 2“
154
Text Line 41:
“Rounding: “
207 Product’s Answer 8 227 Product’s Question 8
131 Amount Currency 1
155 -
156
--208 Product’s Answer 9 228 Produt’s Question 9
132 Amount Currency 2 157 Price x Factor 209 Product’s Answer 10 229 Product’s Question 10
133 Symbol Currency 1 158 Plu Number 210 Product’s Answer 11 230 Product’s Question 11
134 Symbol Currency 2 159 Code 25 211 Product’s Answer 12 231 Product’s Question 12
135 Tare by % Value 160
Text Line A 0:
“Reference
number:“
212 Product’s Answer 13 232 Product’s Question 13
136
Value the
Percentage of tare
161 -
169
--- 213 Product’s Answer 14 233 Product’s Question 14
137 Text: “% TARE” 170 “Type of Animal” 214 Product’s Answer 15 234 Product’s Question 15
138
Net Weight Not
Drained
171 --- 215 Product’s Answer 16 235 Product’s Question 16
139
Net Price Not
Drained
172
Print the Animals
Number
Identification
216 Product’s Answer 17 236 Produt’s Question 17
140
Net Amount Not
Drained
173 -
184
--- 217 Product’s Answer 18 237 Product’s Question 18
141 Packing Time 185 Animal Class 218 Product’s Answer 19 238 Product’s Question 19
142 Best Before time
186 -
199
--- 219 Product’s Answer 20 239 Product’s Question 20
143 Piece Weight 200 Product’s Answer 1 220 Product’s Question 1
Page 90
USER´S MANUAL
49-M500WMEN25
82
MENU
F2 x 5
∗∗∗∗
1
∗∗∗∗
x
∗∗∗∗
C
PROG 6 .1.1
LABEL 1
-3
PROG LABEL FORMAT
FOR – 00
FOR - 22
FOR - 22
X - 0 Y
-
0
FOR - 22
X - 50
Y - 70
X - 0 Y
-
0
ROT - 0 TL
-
0
AP – 001 BAR COD
X - 0 Y
-
0
A - 0 L
-
0
AP – 040 RECTANGLE
X - 0 Y
-
0
ROT - 0
TL
-
0
AP – 013 TEXT 1
Press the MENU key 2 seconds.
To move from one option to another use F2 to go down through
the menu and F1 to go up.
Select option 6 Formtas, press
∗∗∗∗
and then press option 1, Label.
Select option 1, Programme Labels and press
∗∗∗∗
to programme
the label formats.
The scales will show each step to go through in the programming
of label formats:
1. Enter the programmable format number (21 to 30*)you want
to design.
2. Press x.
3. Enter the label dimensions, remembering that 8 print units or
dots are 1mm. The maximum value that may be entered in
the length of the X-axis is 480. It is advisable to enter a value
of approximately 25 dots more than the length of the Y-axis.
4. Press ∗∗∗∗ to enter the sections desired.
5. Enter the different sections to be included in the design,
following the table above. The maximum of sections is 40*
and will depend on the model of machine.
When the section has been selected, the following parameters will
be programmed:
- Position X.
- Position Y.
- Rotation.
- Letter type, line thickness, barcode size, or logo
number, depending on the chosen section.
If the section is a rectangle (section 40) the parameters are:
- Position X.
- Position Y.
- Rectangle width.
- Rectangle length.
- Line thickness.
Depending on the version, if the section is a PLU Text Line
(sections 13, 14, 15, 35, 36,109,110,111,112 and 113) the
parameters are:
- Position X.
- Position Y.
- Rotation.
- Letter type.
- Column width.
In the case of recipe fields: Title and Text, the field TL (letter type)
refers to the recipe number.
To change the parameter press the C.
* Models.
•: W-015 & M-515 Maximum 25
•: W-025 & M-525 Maximum 30
*
Models:
W-015, M
-
515, W
-
025 & M
-
525
Page 91
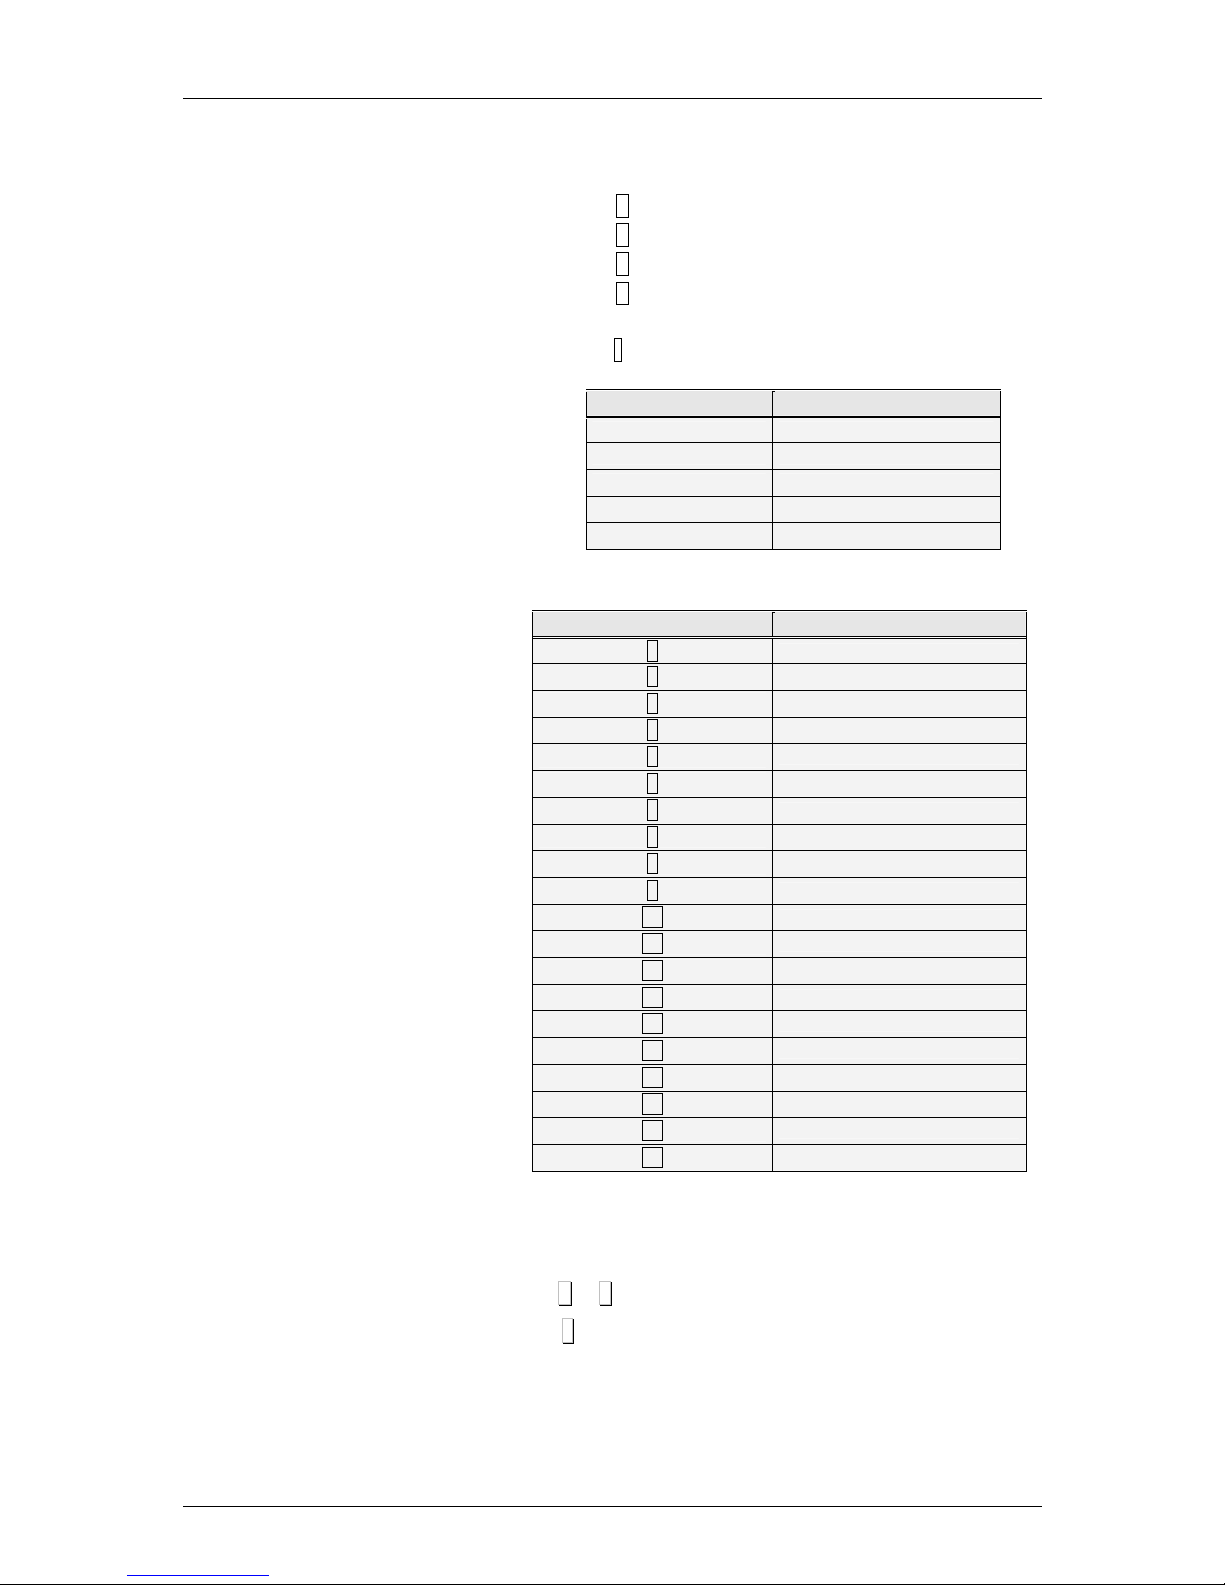
500 Range
49-M500WMEN25
83
The values of positions X and Y may range from 0 to the value of
the label size.
The different parameters in the ROTATION field are:
‘[0]’ – No rotation.
‘[1]’ – 90º rotation.
‘[2]’ – 180º rotation.
‘[3]’ – 270º rotation.
The LETTER TYPE is programmed by entering a value from 0
to 89, where this value indicates the form and type of letter. The
base letter types are as follows:
BASE LETTER TYPE SIZE (Width x Height)
0 12 x 17
20 16 x 28
40 9 x1 4
60 16 x 32
80 6 x 9
If the letter types are to be increased in size either by width, height
or both, a number is added according to the following table:
INCREASED NUMBER SIZE MULTIPLICATION
[ 0 ]
Width x 1, Height x 1
[ 1 ]
Width x 2, Height x 2
[ 2 ]
Width x 3, Height x 3
[ 3 ]
Width x 4, Height x 4
[ 4 ]
Width x 5, Height x 5
[ 5 ]
Width x 1, Height x 2
[ 6 ]
Width x 2, Height x 1
[ 7 ]
Width x 2, Height x 3
[ 8 ]
Width x 3, Height x 2
[ 9 ]
Width x 4, Height x 3
[ 10 ]
Width x 3, Height x 4
[ 11 ]
Width x 5, Height x 4
[ 12 ]
Width x 4, Height x 5
[ 13 ]
Width x 2, Height x 4
[ 14 ]
Width x 2, Height x 5
[ 15 ]
Width x 1, Height x 1
[ 16 ]
Width x 1, Height x 1
[ 17 ]
Width x 1, Height x 1
[ 18 ]
Width x 1, Height x 1
[ 19 ]
Width x 1, Height x 1
Therefore, if letter type 74 is selected, this means that the base
letter type is 60, size 16 x 32 and it is increased by 14, which
means that the letter width is multiplied by 2 and the height by 5,
and the final letter size will therefore by 32 x 160.
Press + or – to go up or down, respectively, to the next section.
Press ∗∗∗∗ to change parameter and at the last parameter in the
section, the next section is accessed.
Page 92

USER´S MANUAL
49-M500WMEN25
84
MENU
6 1 2
0 2 ∗∗∗∗
∗∗∗∗
MENU
MENU
6 1 3
0 2 ∗∗∗∗
MENU
SOURCE
- -
DESTINY
COPY LABEL
FORM
SOURCE
0 2
DESTINY
3 1
COPY FOR
LABL
FORMAT
– –
DELET LABEL
FORM
Therefore, if letter type 74 is selected, this means that the base
letter type is 60, size 16 x 32 and it is increased by 14, which
means that the letter width is multiplied by 2 and the height by 5,
and the final letter size will therefore by 32 x 160.
Press + or – to go up or down, respectively, to the next section.
Press ∗∗∗∗ to change parameter and at the last parameter in the
section, the next section is accessed.
Press ◊◊◊◊ to delete an undesired section. The scales will request
confirmation. Pressing C. we select delete (Yes or No) and
pressing on ∗∗∗∗ accept.
To delete the last sections from a format, select the first to be
deleted and then in the section number enter 00.
When all the sections have been programmed, section 00
appears. Press ∗∗∗∗ to record data. The scales will confirm that the
label format has been recorded.
When a label format is being designed, if you wish to print a
sample label, press T/FT. To print a list of sections with their
parameter values, press PRINT.
9.1.2.Copying a label format [ 6 1 2 ]
It is possible to copy one label format to another provided that the
latter is a programmable type. To do this:
1. Check that the scales are the MASTER.
2. Access programming by pressing MENU
3. Enter the label programming code 6 1 2
4. Enter the original format number using 2 digits (for example 0
2 for format 2)
5. Press ∗∗∗∗.
6. Enter the target label format number to be designed (from 21
to 30*). Press ∗∗∗∗ as many times as required to save all fields.
7. Then, press MENU 2 seconds to quit the programming
menu.
9.1.3.Deleting a label format [ 6 1 3 ]
It is possible to delete one of the programmed label format. To do
this:
1. Access programming by pressing MENU.
2. Enter the label programming code 6 1 3.
3. Enter the source format number using 2 digits (for example 0
2 for the format 2). Press ∗∗∗∗
4. Then, press MENU 2 seconds to quit the programming
menu.
* Models.
•: W-015 & M-515 Maximum 25
•: W-025 & M-525 Maximum 30
Page 93

500 Range
49-M500WMEN25
85
MENU
F2 x 5
∗∗∗∗
2
∗∗∗∗
X
PROG 6 .2.1
RECEIPT 1
-3
PROG RECEIPT FORMAT
PROG
6 .2.1
RECEIPT 1
-3
PROG RECEIPT FORMAT
FTO
–
9.2. RECEIPT [ 6 2 ]
9.2.1.Program Receipt Format [ 6 2 1 ]
The 500 Range scales offer the possibility of printing different
types of receipts. There are different fixed receipt formats and
user programmable receipt formats depending the model of
scale.
Although formats 0 and 1 are fixed formats the user can
programme the associated headings. The headings in format 0
are programmed from any of the fixed formats. There are 15
header lines for each receipt format, with 56 characters each.
Receipts are printed in accordance with the instructions in the
corresponding printing parameter “Global receipt format”. This
parameter, which may be set from 0 to 2*, determines the format
in which all receipts are printed. This parameter programmes the
values:
0 – 1 Receipts are printed with fixed format values.
2*Receipts are printed with the chosen format, the values of
which are programmed by the user.
The total line on the voucher on continuous paper is printed the
same way as on the receipt, i.e., with the parameter set-up in the
receipt format that is enabled at that moment.
Reduced receipts are printed just with the header lines
programmed with 0 and 9.
Lists drawn up through parameter headers in lists may or may
not print the headings. The header lines printed are numbers 12,
13, 14, 15 from the receipt format in operation, regardless of the
programmed status. If these lines are programmed in the DO
NOT PRINT mode, they will not appear. They will be printed in the
mode, frame and letters that have been programmed.
If the user attempts to programme anything that cannot be
programmed, the scales will emit a warning beep. These
programming errors can occur if an attempt is made to
programme:
• Lines in a fixed format, except in the case of headings.
• Values that are not enabled.
The process to programme a receipt format is as follows:
Press MENU 2 seconds.
To move from one option to another use F2 to go down through
the menu and F1 to go up.
Select option 6 Formats, press
∗∗∗∗
and then press option 2,
Receipt, Press
∗∗∗∗
Select option 1 and press
∗∗∗∗
to programme the receipt formats.
First, enter the receipt number that is programmed, and press X
* Models: W-020, W-025, M-020 & M-525
Page 94
USER´S MANUAL
49-M500WMEN25
86
The key functions are as follows:
X Programme the next section.
C
In general, the field being edited is deleted.
In the format number field:
If it is a fixed format: this deletes the associated
headings
If it is a programmable format: this deletes the whole
format.
In the Mode field, it switches between possible
values.
++++
Go to the next programming section in the same line.
−−−−
In headings, this is for going to the previous Heading.
In text programming it moves the cursor backwards.
◊
◊◊
◊
Deletes the format.
F1/F2 Goes back to programming the previous section.
PRINT Prints programmed parameters.
∗∗∗∗
Records entered format.
Table 9-1
A programmable receipt is made up of the following different lines:
1. Head line
2. Head line 1
3. Vendor name
4. Title
5. Sale line
6. Total in principal 1 currency (Tot Pri Cur 1)
7. Total in principal 2 currency (Tot Pri Cur 2)
8. Total in principal currency (Tot Pri Cur)
9. Total secondary 1 currency (Tot Sec Cur 1)
10. Total secondary 2 currency (Tot Sec Cur 2)
11. Total secondary currency (Tot Sec Cur )
12. Discount line (Linre Disc)
13. VAT
14. Currency
15. Tendered/change 1 (Tend Change 1)
16. Tendered/change 2 (Tend Change 2)
17. Barcode
18. Loyalty points (Loyalty Pts)
19. You were served by 1 (Served by 1)
20. You were served by 2 (Served by 2)
21. You were served by (Served by )
22. Logos
Page 95
500 Range
49-M500WMEN25
87
9.2.1.1. Meaning of Fields
Each receipt line presents certain fields, and in each line the field
presents different options. The details of each field are given
below.
1. MODE
For printing with “special effects”: NORMAL, UNDERLINE,
FRAME, and REVERSE
Table 9-2
2. FONT
Type of font to be used. There are nine different fonts, from 0 to 8.
3. MULTIPLICATION
The multiplication or zoom is used to increase the letter size, as
follows:
MULTIPLICATION
MULTIPLICATION
[ 0 ] Width x 1, Height x 1
[ 1 ] Width x 2, Height x 2
[ 2 ] Width x 3, Height x 3
[ 3 ] Width x 4, Height x 4
[ 4 ] Width x 5, Height x 5
[ 5 ] Width x 1, Height x 2
[ 6 ] Width x 2, Height x 1
[ 7 ] Width x 2, Height x 3
[ 8 ] Width x 3, Height x 2
[ 9 ] Width x 4, Height x 3
[ 10 ] Width x 3, Height x 4
[ 11 ] Width x 5, Height x 4
[ 12 ] Width x 4, Height x 5
[ 13 ] Width x 2, Height x 4
[ 14 ] Width x 2, Height x 5
Table 9-3
MODE
Represents the text print mode of
the line
NOT PRINT
[ 0 ]
In some receipt lines only, the user
decides whether or not to print the
line.
NORMAL [ 1 ]
Normal text
INVERSE [ 2 ]
Text printed white on black
SHADED [ 3 ]
Text has dark shadow
SOFT
SHADED
[ 4 ]
Text has soft shadow
UNDERLINED [ 5 ]
Text underlined
FRAMED [ 6 ]
Text is framed
CROSSED
OUT
[ 7 ]
The text appears crossed
Page 96
USER´S MANUAL
49-M500WMEN25
88
4. FRAME LINE STATUS
This represents the status of the lines that frame the receipt line. Four
types of lines can be defined, with the following values:
POSITION
Represent
‘NO’
[ 0 ]
No line
‘LOWER’
[ 1 ]
Lower line
‘UPPER’
[ 2 ]
Upper line
‘LOW-UP’
[ 3 ]
Lower and upper line
5. FRAME EFFECT
This represents the effect of the lines that frame the receipt line.
Programming values are:
FRAME EFFECT
Represent
‘NO EFFECT’
[ 0 ]
No effect
‘SOLID LINE’
[ 1 ]
Continuous line
‘BROKEN LINE’
[ 2 ]
Discontinuous line
‘GREY’
[ 3 ]
Grey line
‘2 SOLID’
[ 4 ]
Double continuous line
‘2 BROKEN’
[ 5 ]
Double discontinuous line
‘2 GREY’
[ 6 ]
Double grey line
6. POSITION
This parameter aligns the header line values. Programming values
are:
POSICIÓN
Representa
‘LEFT’
[ 0 ]
Justified text to left
‘CENTER’
[ 1 ]
Centred text
‘RIGHT’
[ 2 ]
Justified text to right
7. PLACEMENT / UBICATION
This represents the position of the heading in the receipt. There are
10 possible positions. A value is selected from 0 to 9, corresponding
to one of the positions on the receipt diagram (See RECEIPT
DIAGRAM).
8. ROTATION
This field appears when the “barcode” line is programmed.
ROTACIÓN
Representa
[ 0 ]
Sin rotación
[ 1 ]
Rotación 90º
[ 2 ]
Rotación 180º
[ 3 ]
Rotación 270º
9. TEXT
This is the text in the header line. It has a maximum 56
characters.
Page 97

500 Range
49-M500WMEN25
89
10. BARCODE FORMAT NUMBER
This field defines the barcode format, where:
‘[0]’: EAN - 8 format
‘[1]’: EAN – 13 format
11. NUMBER
This section refers to the logo number to be printed from 1 to
10, for fixed logos and from 11 to 15 for user-programmable
ones.
12. TICKET DIAGRAM
In the next page, is the distribution of the sections of the tickets.
In the case of the printing of the trazability of the tickets it is not
programmable in pinting mode.
Page 98
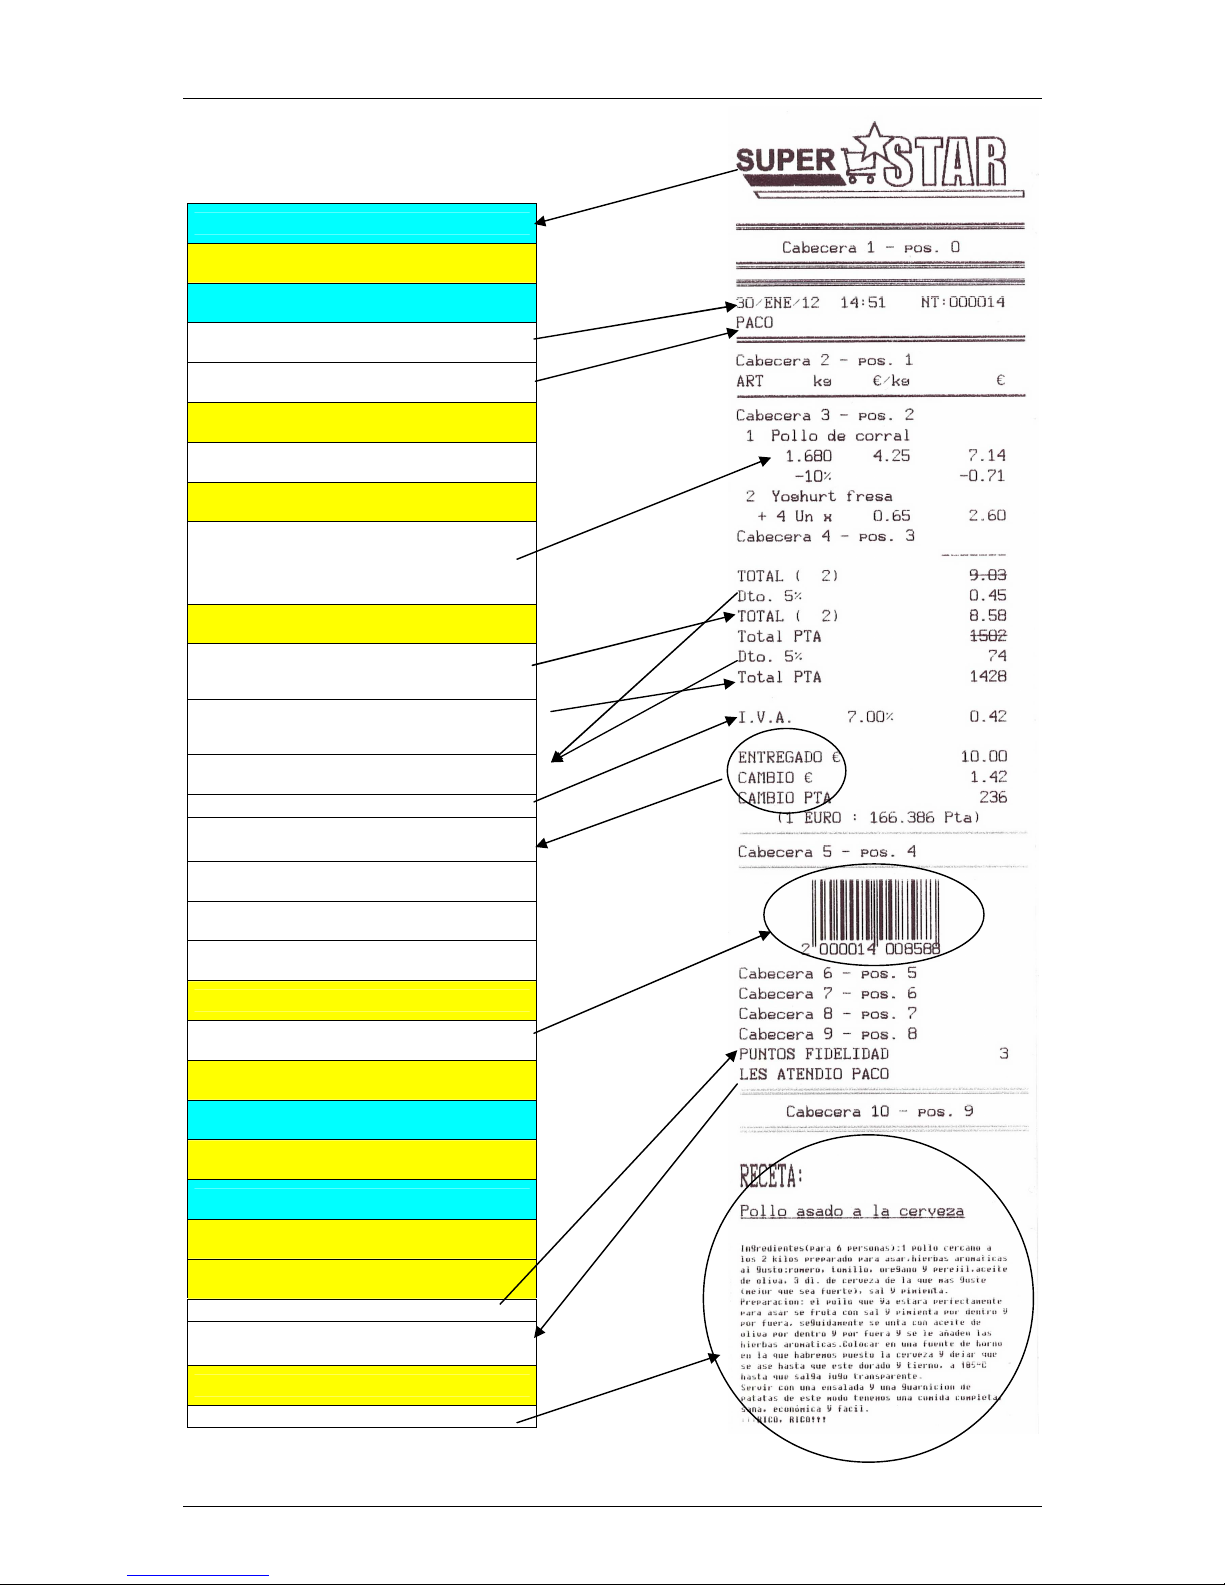
USER´S MANUAL
49-M500WMEN25
90
LOGO (0)
UBICATION (0)
LOGO (1)
INITIAL LINES
SALES ASSISTANT NAME
UBICATION (1)
TITLE LINE
UBICATION (2)
Sales lines
DESCRIPTION LINE
UBICATION (3)
TOTAL IN PRINCIPAL CURRENCY
2 fields
TOTAL IN SECONDARY CURRENCY
2 fields
DISCOUNT
VAT
TENDERED/CHANGE
TENDERED/CHANGE SEC CURR
EURO EXCHANGE RATE
CURRENCY
UBICATION (4)
BARCODE
UBICATION (5)
LOGO (2)
UBICATION (6)
LOGO (3)
UBICATION (7)
UBICATION (8)
LOYALTY POINTS
You were attended by
2 Fields
UBICATION (9)
RECIPES ( WITH LOGO)
Page 99
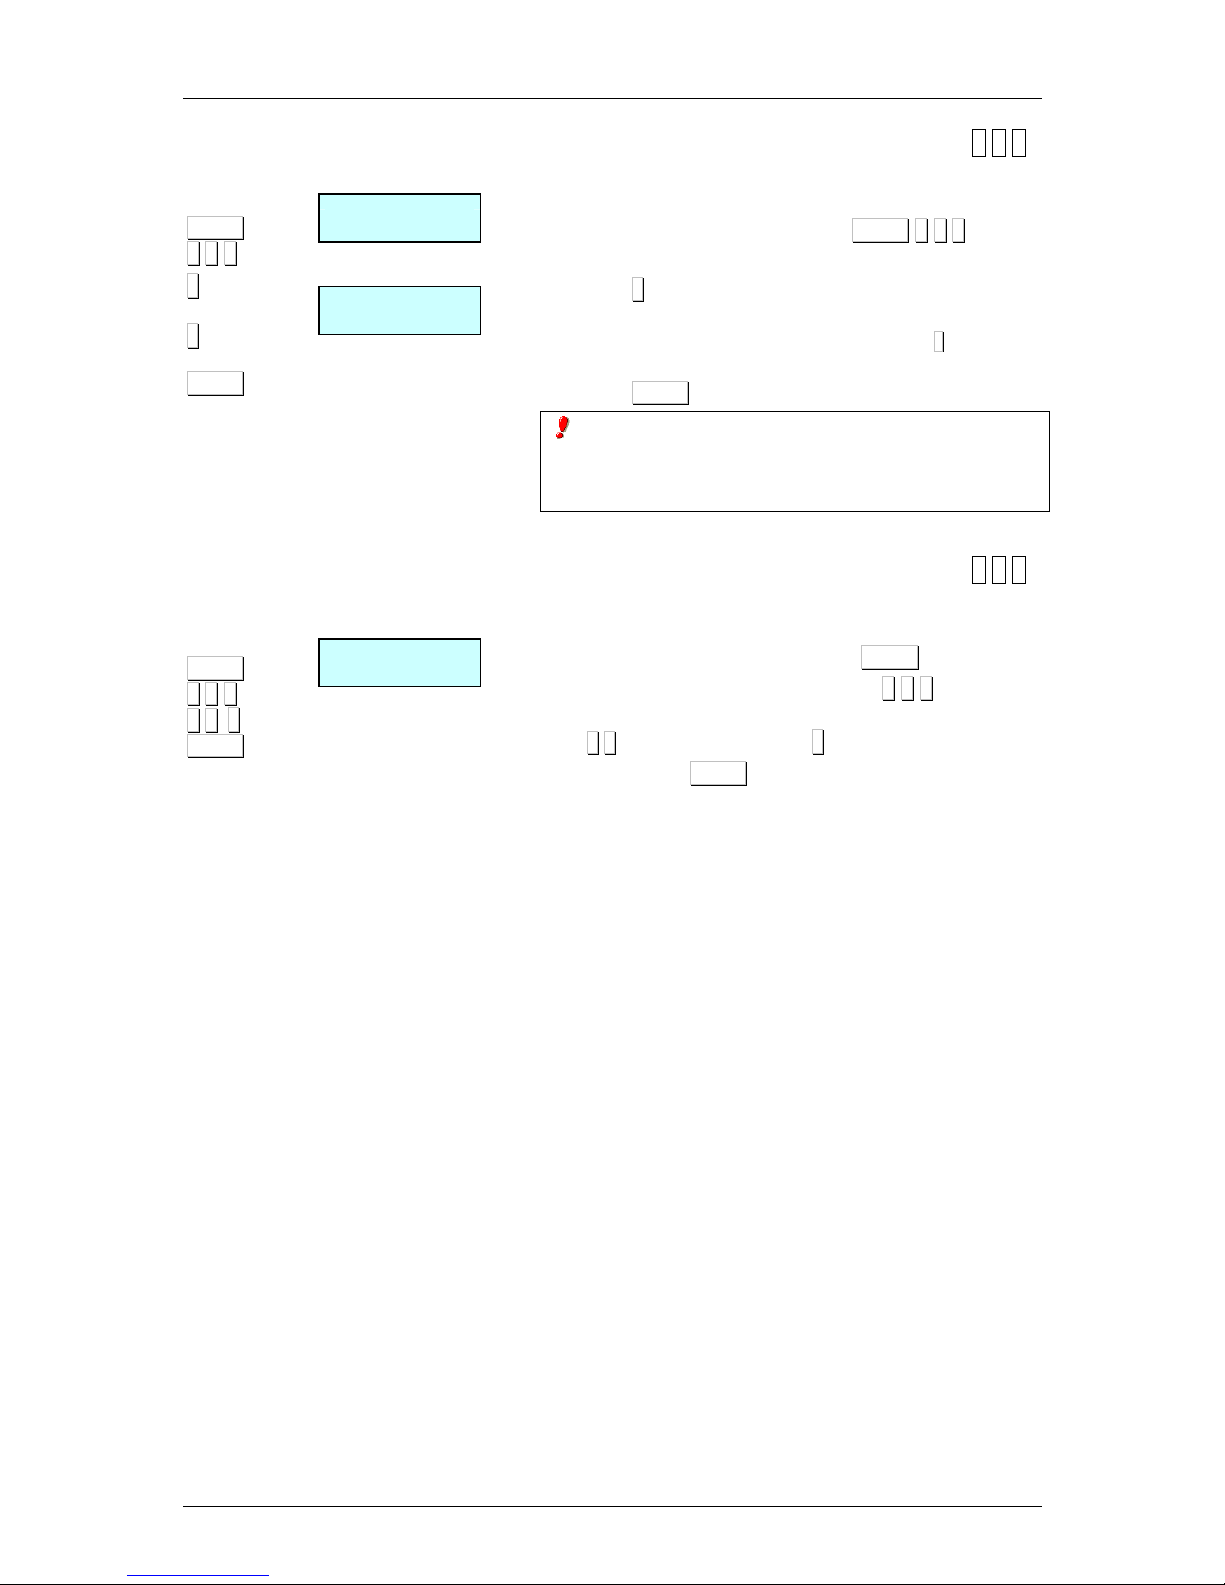
500 Range
49-M500WMEN25
91
MENU
6 2 2 .
∗∗∗∗
∗∗∗∗
MENU
MENU
6 2 3
0 2 ∗∗∗∗
MENU
SOURCE
0
DESTIN
Y 0
COPY TCK FORMAT
ORIGN
1
DESTIN
2
COPY
TCK FORMAT
FORMAT
–
DELETION
TCK FOR
9.2.2.Copying a receipt format [ 6 2 2 ]
It is possible to copy one receipt format to another. To do
this:
1. Enter receipt programming menu MENU 6 2 2.
2. Select source format.
3. Press ∗∗∗∗.
4. Using the number keys, enter the format number to
which the format is to be copied and then press
∗∗∗∗
to save the
format. A "Format copied" message will appear on screen.
5. Press MENU 2 seconds to quit the programming menu.
If the copy is made from a fixed format to a
programmable format, the whole format will be copied, but if
a copy is made from a programmable format to a fixed
format, only the heading lines will be copied.
9.2.3.Deleting a receipt format [ 6 2 3 ]
It is possible to delete one of the programmed receipt format.
To do this:
1. Access programming by pressing MENU.
2. Enter the receipt programming code 6 2 3.
3. Enter the format number using two digits, (for example
0 2
for the format 2). Press ∗∗∗∗
4. Then, press MENU 2 seconds to quit the programming
menu
Page 100

USER´S MANUAL
49-M500WMEN25
92
10.LOGOTYPES
LOADING
500 serie weighing scales are allowed to print the logos in
the receipt and the label. The machine will have 100 fixed
logos and other 100 logos that the client can charged the
RMS program.
In terms of size, the maximum of each of these images will
be a maximum of 432 pixels width and 1200 high.
The print speed is 100* mm per second for both receipt and
label.
10.1. PRINTING LOGOTYPES
•••• Print a LOGO ON A LABEL:
Access field no. 44. In TL field (type of logo) you must
choose the number of the logo type you wish to represent
(from 1 to 100 for fixed ones, and 101 and 200 for the
programmable ones).
If the type of logo is set at 0, none will be printed. (See
paragraph 9.1.1 PROGRAMMING LABEL FORMATS).
Any logo can be rotated just as if it were any other normal
field.
•••• Print LOGOS ON THE RECEIPT:
Four logos can be printed on the programmable receipt
formats. See Par 9.2.1 PROGRAMMING RECEIPTS
FORMAT.
10.2. PROGRAMMABLE LOGOTYPES
The scale affords the possibility to incorporate 100 logos
from an image the user may have or develop. The following
are the specifications to be met:
•••• The maximum size of these images are 432 x 1200
píxeles and black and white. The image may be square
or rectangular. It should be noted that the larger is the
image the longer will take to print in the receipt and the
label.
•••• The size in pixels must be, in both width and length, a
multiple of 8, and, as a ratio, you are informed that 1 cm
is approximately 80x80 pixels. Example: A 1cm2 drawing
would be defined as 80 x 80 pixels
•••• The format of the image must be of the BMP and
monochrome bit map type. For this porpoise is
recommended to use ‘Paint’.
Once you have the image, it is sent through the PC.
These logos may be included in Programmable ticket
formats 2 and 3 (see par. 9.2.1 Programming ticket format),
in which will necessary to introduce the position mode,
number of logo and rotation.
*According to the model:
• W-010, W-015, M-510 and M-515 Maximum 80
• W-
020, W-
025, M-
520
and M-525
Maximum
100
 Loading...