

Page 1
Quick Information
Tire & Wheel information
Rear:
R30: 406 bead seat diameter, 1"-1.75" wide (ex 20 x 1.5")
Front:
R30: 349mm bead seat dia, 1"-1.5" wide (ex 16 x 1 3/8")
Inflation pressures:
Inflate to the pressure moulded on tire sidewall
Torque specifications:
Pinch bolt type: 6mm x 1mm -- 25mm long
Handlebar Extension: 65 in-lbs (6 N-M)
Handlebar Stem: 65 in-lbs (6 N-M)
Chain:
Nexus Hub, Standard Frame = 206 links
Nexus Hub, X-Long Frame = 221 links
3x7 Hub, Standard Frame = 206 Links
3x7 Hub, X-Long Frame = 221 Links
Serial number location:
Stamped on the back plate, at the end of the main frame.
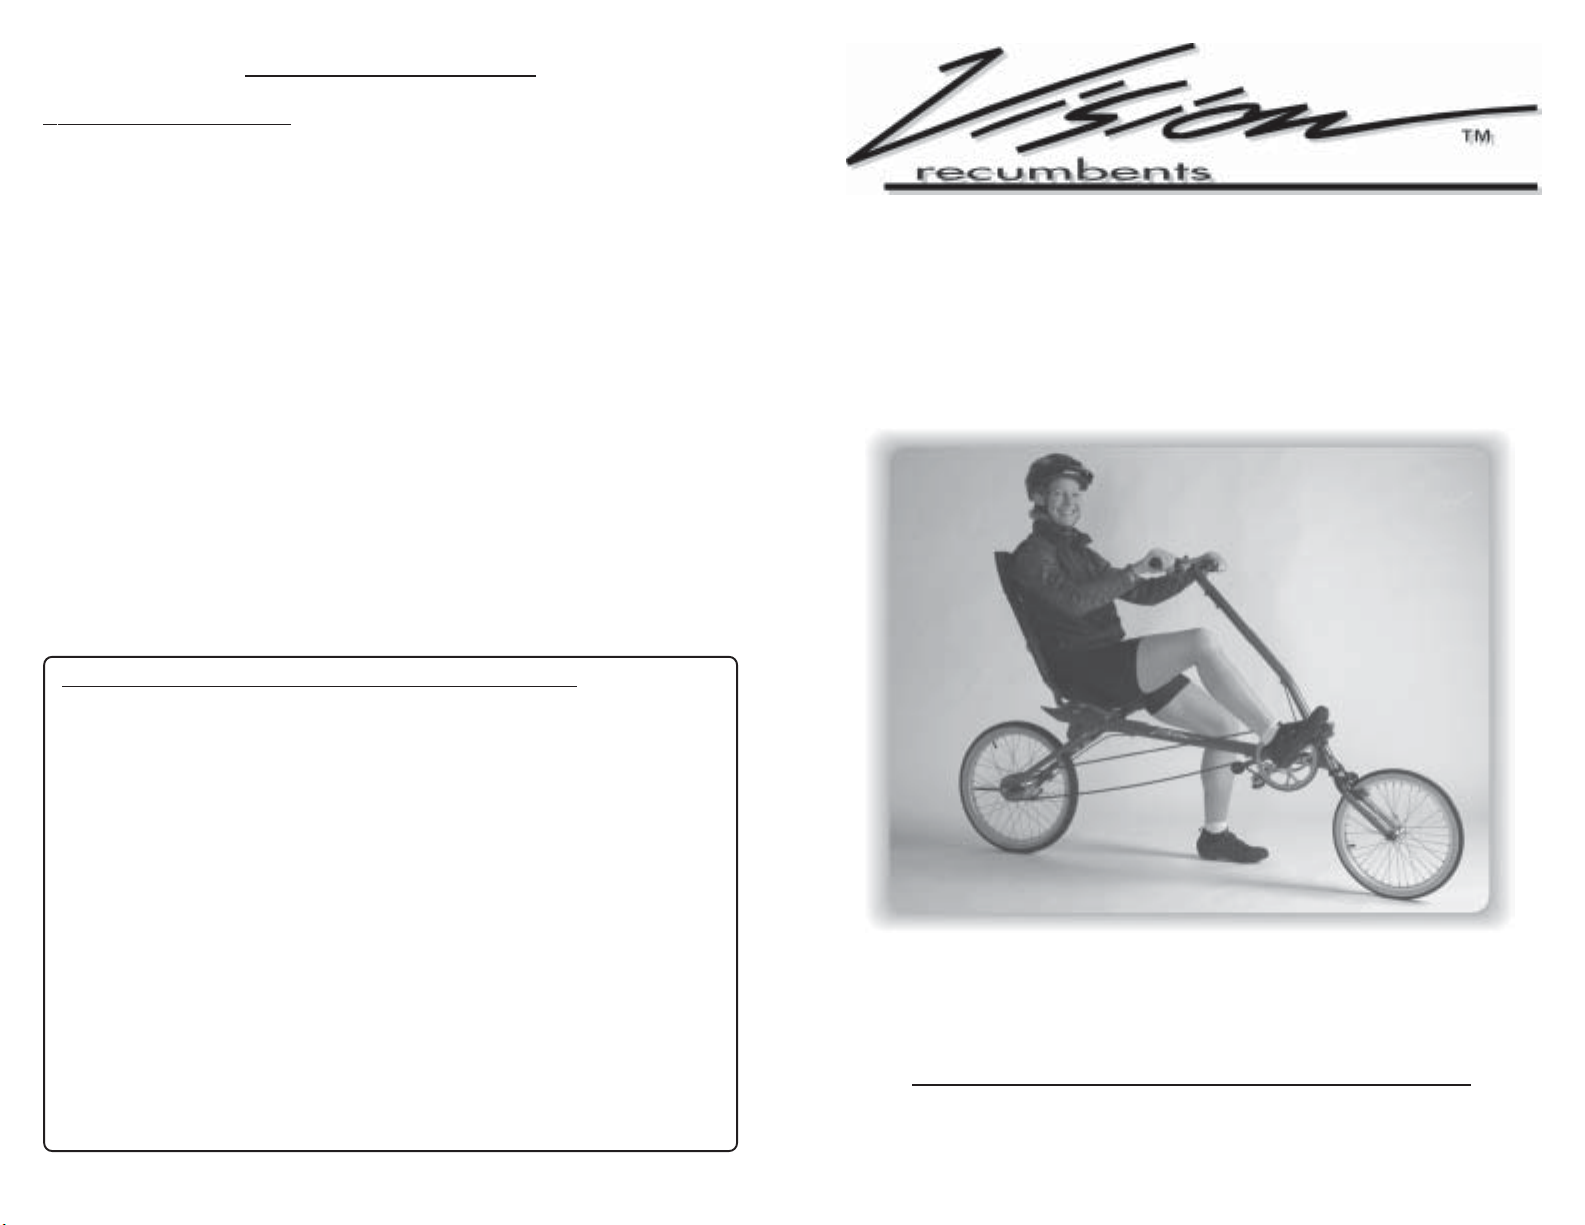
Owner's Manual
Models R30NT & R30ST
The Advanced Transportation Products Inc. Warranty
Advanced Transportation Products Inc. warrants each new VISION bicycle frame, fork,
and seat frame against defects in workmanship and materials for the lifetime of the original
owner. Paint and decals, seat fabric, and all original parts, are warranted for a period of one
year from the date of purchase. This warranty is expresssly limited to the repair or replacement of a defective frame, fork, seat or defective parts and is the sole remedy of the warranty.
This warranty applies to the original owner and is not transferable.
Claims under this warranty are to be made through an authorized VISION dealer. Proof of
purchase is required. A Warranty Registration Card must be completed and received by
Advanced Transportation Products Inc. before warranty claims may be processed.
The warranty does not cover normal wear and tear, improper assembly or maintenance, or
installation of parts or accessories not originally intended or compatible with the bicycle as
sold.
The warranty does not apply to damage or failure due to accident, abuse or neglect.
Advanced Transportation Products Inc. shall not be responsible for incidental or consequential damages. Labor charges for part changeovers is not covered by this warranty . The
user assumes the risk of any personal injury or damage to the bicycle or other losses if the
bicycle is used in any competitive event including but not limited to bicycle racing, triathalons,
or similar activities.
20
Advanced Transportation Products, Inc.
400 Terry Ave. N Seattle, WA 98109 (206) 467-0231 fax: 467-0175
ATPV ision@AOL.com — http://Cyclery .com/Vision
1
Page 2
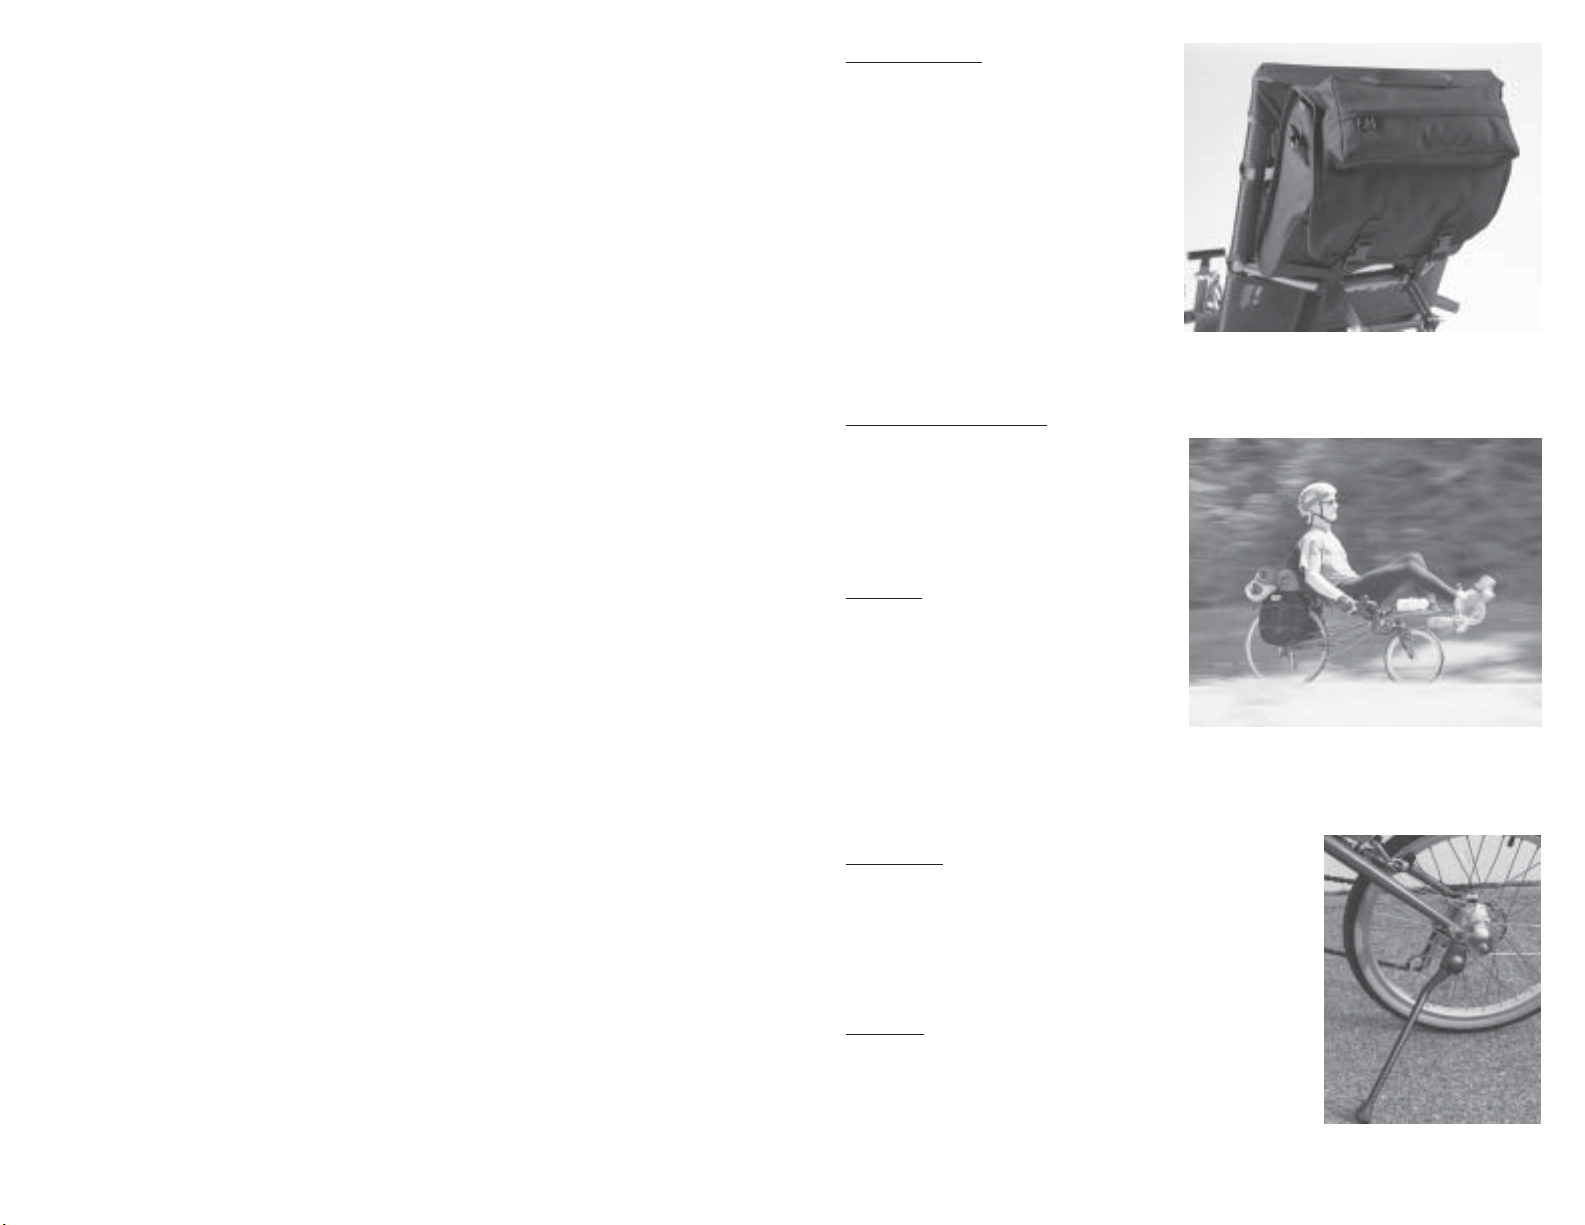
Table of Contents
Chapter 1: Read me First! ................................................................... 3
Anatomy of a Metro.............................................................................. 4
Chapter 2: Assembly and Setup .......................................................... 7
Unpacking the Metro ........................................................................ 7
The Handlebar ................................................................................... 7
The VISION™ Recumbent Seat ...................................................... 8
Adjusting the seat for proper leg extension ....................... 9
Adjusting the Gears........................................................................... 9
Nexus 7 speed Hub - VR30N ............................................... 9
Nexus Hub Adjustment...................................................... 10
Sachs 3x7 — 21 speed System ....................................... 10
Sachs Hub Adjustment - VR30S ...................................... 10
Rear Derailleur ................................................................... 10
Rear Suspension ...............................................................................11
System Pre-Load .................................................................11
Folding your Metro ..........................................................................11
Un-Folding your Metro................................................................... 12
Adjusting the Brakes....................................................................... 12
General Maintenance ......................................................................... 13
Chapter 3: Riding the VISION ........................................................14
Quick Information.............................................................................. 20
Tire & Wheel information.............................................................. 20
Rear: .................................................................................... 20
Front:................................................................................... 20
Inflation pressures: ............................................................ 20
Torque specifications:............................................................. 20
Chain: ...................................................................................... 20
Serial number location:.......................................................... 20
The Advanced Transportation Products Inc. Warranty.............. 20
Seat Back Bag
Advanced Transportation Products has
designed a custom bag to sit on your seat
back. It has approx. 800 cubic inches of
storage capacity in two sections: a main
storage compartment with flap, and a zippered pouch on the main flap for wallet,
keys, etc. The main section features two
pockets, handy for tools, Powerbars, etc.
The bag slips over the back of your VISION seat, and straps around the seat
crossbar. Off the bike it features a comfortable shoulder strap. The bag is ideal
as a day bag, or a touring companion bag for carrying valuable items.
Rear Rack / Panniers
Your VISION is equipped from the factory with mounting positions for a rear
rack, available from your VISION dealer.
This allows you to use any standard pannier set for touring/commuting.
Fenders
For wet weather riding your Metro will
accept fenders. Any 20” fender set that
has a sliding brake clip will work - just
slide the clip around the rear fender until
it matches with the 5mm braze-on at the
rear of your Metro frame. For the front
you can either cut down the 20” front
fender to fit under the front fork, or you can simply leave the front fender off - the 1.75"”
main backbone tube on your Metro makes a wonderful fender by itself!
Kickstand
I hate always looking for a tree or wall to lean my Metro
against. We've built in an attachment point for a standard
Greenfield kickstand. You should be able to get one of these
at your local bike shop. They are also available from us, if
your shop isn't close.
T-Shirts
Declare to the world that you are a Vision™ recumbent
owner - has the V ision™ recumbent logo over the left breast.
A vailable in XL, L
C. Copyright 1997 ATP Inc. All rights reserved. Do not copy without written permission of ATP Inc.
2
KickStandKickStand
KickStand
KickStandKickStand
19
Page 3
Chapter 4: Customize your Metro
Chapter 1: Read me First!
Now that you are comfortable riding your new Metro, I’m sure that you will want to
customize it for your particular riding needs. Your Vision™ recumbent has been designed to accept a full range of standard bicycling accessories, as well as some custom
items that have been designed by ATP.
Rhode Gear Mirror
If you ride in traffic, a mirror is a must. We recommend the Rhode Gear bar-end mounted
(Mt. Bike style) mirror. You should be able to find this at your local bike shop, or it's
available from us.
Computer
Virtually any small bicycle computer will fit on your Vision™ recumbent. We recommend that you mount the computer on the handlebars, although make sure that the wire is
long enough, You may have to lengthen it.
Water bottles
Don’t forget to drink plenty of water! There are braze-ons in the Vision™ recumbent
frame for a waterbottle cage. Official Vision™ recumbent water bottles are now available. "Bladder" style drinking systems, such as a "Camelback" can be hung from the
back of the seat, or inside the seat bag.
Thank you for choosing a Vision™ Recumbent! We
here at Advanced Transportation Products have tried to
build for you the most advanced, full featured recumbent
available. Please take a few moments now to fill out your
warranty registration card - we want to know what you
think about your new bike.
Before we explore your new Vision™
recumbent's features, we would like to take a few moments to discuss some important points about recumbents
and bike riding in general:
Always wear an ANSI or Snell appr oved helmet -- Yes, with their lower center of
gravity and feet-first position, recumbents are significantly safer than upright bicycles.
Y ou still need to protect your most valuable body part. Modern bicycle helmets are light,
cool, and offer lifesaving protection.
Check your bike carefully before each ride -- Spend a few moments before
each ride inspecting your VISION for problems.
*Check all the nuts, bolts and other fasteners to make sure none are loose.
*The tires should be inflated to the pressure moulded on the sidewall, and free
of cuts or imperfections.
Pedals/Toeclips
Your Vision™ recumbent will accept all standard pedaling systems. Clipless pedals
such as the SPD and LOOK work extremely well on recumbents. T oeclips are also work
well, but whatever system you use, be sure to practice getting in and out of them a while
before hitting the streets.
Seat Cushion
For the Ultimate in comfort, a combination air/foam
cushion fits in the bottom of any V ision™ recumbent seat. The mattress is self-inflating, and you
can control the height/softness of the seat with its
attached air valve.
18
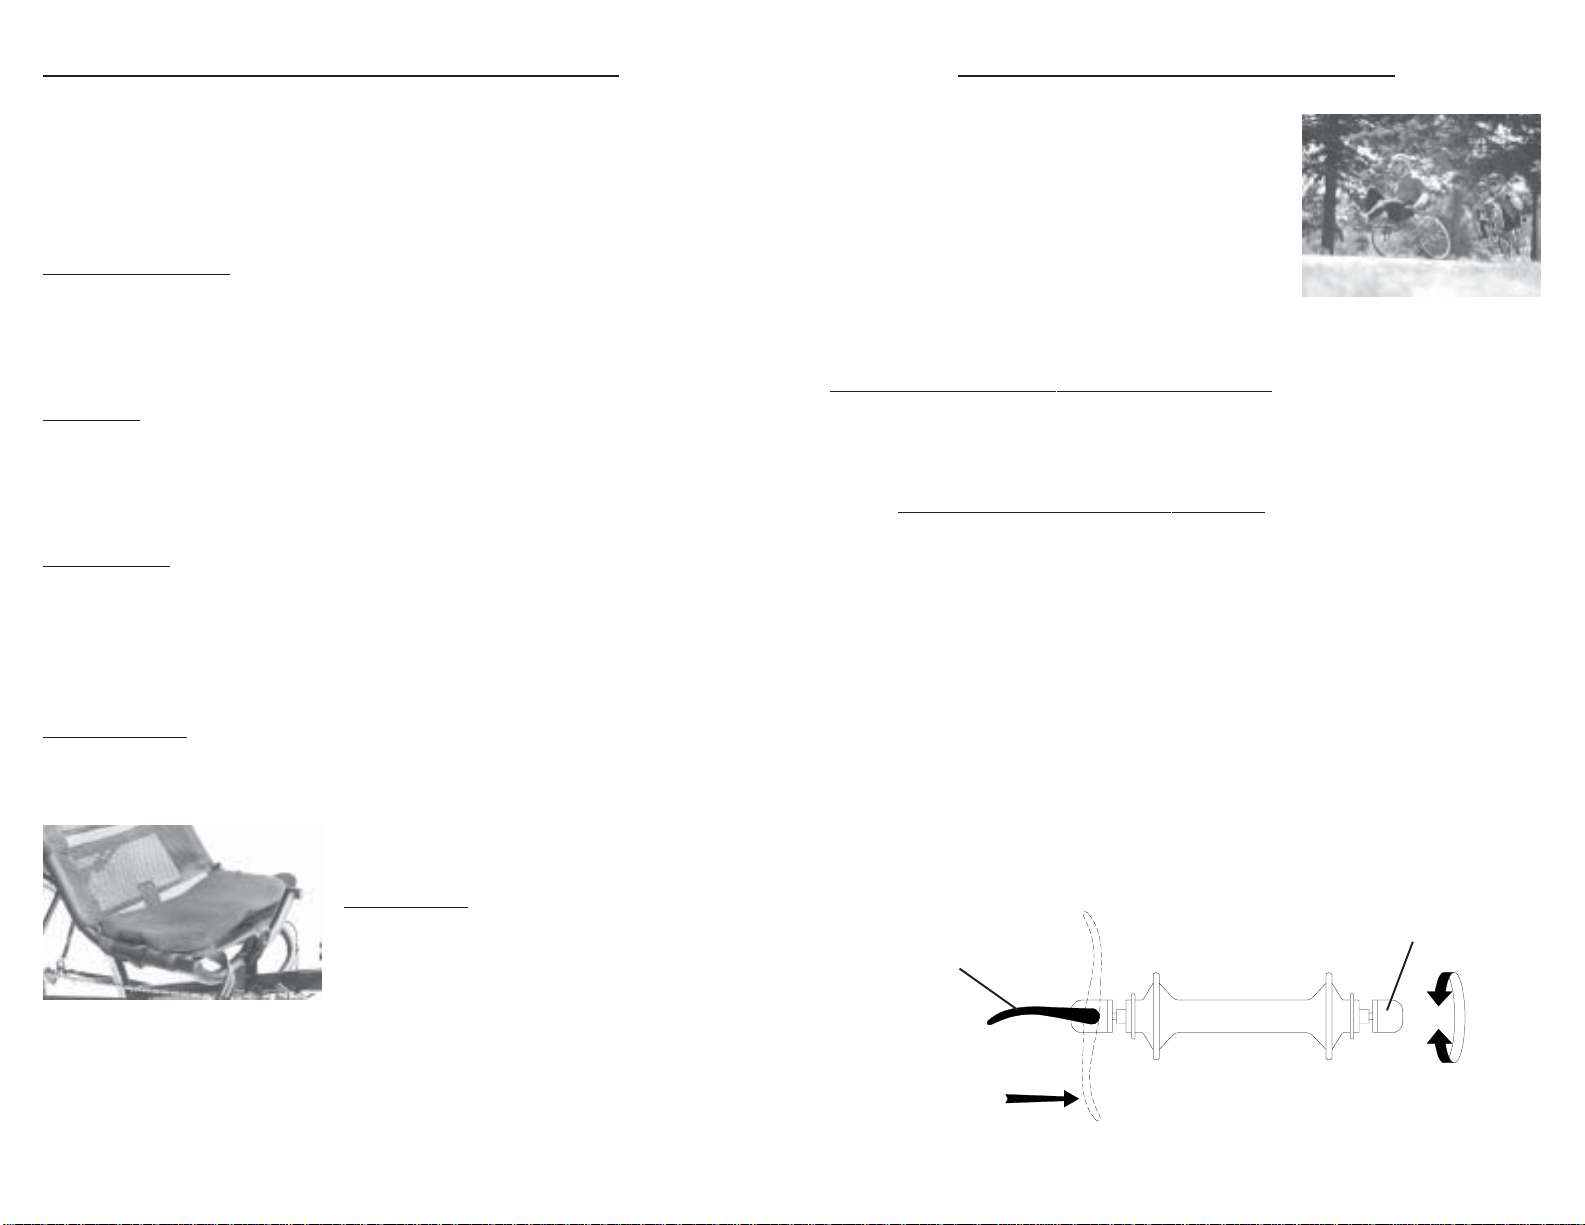
*The wheel quick release skewers should be clamped shut with at least 20 lbs
(14kgf) of force, and a sharp blow to the top of the tire should not knock the
wheel loose. Study the wheel / seat skewer operation diagram - the skewer handle
has a curve in it that will face the tire when properly closed. Open the skewer
handle, tighten the skewer nut slightly, then close the skewer handle ( curve
facing toward the wheel). It should take 20-45 lbs of force to close the handle
as shown, and the skewer should emboss the metal of the wheel dropout.
Skewer Handle
Close here with
20 - 45 lbs force
Open
Closed
Skewer Nut
Rotate here to
tighten/loosen
Wheel / Seat Skewer Operation
3
Page 4

the bars in a light but firm manner. Let your shoulders droop, relax your neck, don’t
“death-clench” your teeth. Once you relax you will have more control over the bike.
Anatomy of a
Seat
Seat
Quick
Release
Skewers
Seat Track
Serial
Number
Next, you should practice using the brakes. Stop and take off a few times, getting a feel
for how much pressure on the lever it takes to slow down or stop the bike. Remember to
always use both brakes together, with gentle pressure at first to stop the bike smoothly.
Drop both your feet to the pavement while giving the brakes the final squeeze to stop the
bike. Lean forward a bit and stand up, while reaching behind you for the seat frame to
steady the bike. Practice stopping and dismounting, then starting off again. You should
also practice stopping by dropping only one leg, typically your non-dominant leg. This
exercise will help you deal with momentary stops, such as at stop signs and traffic lights.
It does take a little practice to balance the bike leaning onto a single leg. Remember to
keep one hand clamped on a brake to prevent the bike from rolling, it really helps. I
usually immediately cock my “crank-bound” leg for the start, and then hold pressure
against the brake until I’m ready to go. You should also carefully investigate what happens to the bike with gradually increasing brake lever pressure, so you will be comfortable with quick decisions on the road.
Don’t fall asleep on me yet, we’re almost done. The last thing you should practice before
hitting the open road is your shifting. You really need to be work on being aware of how
the gears work. Be aware that you must be pedaling to shift the derailleur (if your bike
has one). Both the Nexus seven speed hub and the Sachs 3x7 hub can be shifted when the
bike is stopped, although sometimes you have to kick the pedals backwards a bit to finish
the shift. Shifting either derailleurs or internal gear systems should be done under light
pedaling pressure. Make sure you practice shifting into your start-up gear before you
stop.
dropouts
4
Elastomer
Rear
Swingarm
You shouldn’t feel like you have to do everything in one session. Many novice riders
actually do much better working up to the open road in several short training sessions,
often days apart.
Thank you for buying a
Swing
arm
lock
point
Elastomer
Clamp
Wingnut
17
Page 5

release the brake, and push
forward firmly on the pedal.
As you start moving, lift your
other foot up and keep peddling. At first you probably
will wobble a little, but don’t
panic and tense up! Just relax
and concentrate on making
small corrections with the
handlebars. The most common beginners' error is to
overcontrol the bike, ending
up steering a set of “S” curves
down the lane. If you relax
and let your hands sit lightly
on the handlebars, you will
Foot Starting Postition
probably trying to lean forward, to mimic that "other" type bike you've been riding.
Another common first time mistake is to stare at your feet — after all, you’ve never seen
them before! Look ahead, see the scenery you’ve been missing.
Once you’re riding smoothly in a straight line, it’s time to practice looking around. Now
don’t laugh, I’m not being funny nor condescending. Compared to a traditional bike you
will find yourself looking at the world from a whole new perspective, a comfortable one.
The biggest problem you will face is keeping your mind on the road. Since you are riding
in a relaxing reclined position it’s all too easy to forget about everything except the
scenery in front of you. Looking behind you is not difficult, but it does take practice. A s
you ride in a straight line—and are sure you’re not about to take a long ride on a short
pier—practice swinging your head to the left and right, taking quick glances behind you.
The first time you do this you will inevitably shift your weight and hand position, causing
the bike to swerve. Don’t panic, this is why we are practicing in the park instead of a
congested street. While many riders like to use a helmet or bicycle mounted mirror—and
we sell a beautiful unit that mounts onto the handlebar, see Chapter four of this manual—
it’s important to be able to actually look around behind you. This not only gives you
options on checking out traffic, but practicing this will increase your skills and confidence on the bike.
At this point you should be feeling pretty good about life, zooming along nice and comfortable, relaxed and thinking about how much fun you are going to have on this thing.
Well don’t get too cocky yet. Before you hit the open road there are a some more exercises you should do. Practice circling, both to the right and to the left. Start out with
gentle curves, and progress to tighter and tighter radius “U” turns. You should really try
to master turning slowly in as tight a curve as possible quite a few times, this gets you
ready for the real world of poor directions and detours. If you find yourself wobbling or
jerking the handlebars around, you are probably too tense. Relax, let your hands grasp
find it easier to avoid this syndrome. Lean back! You are
Metro
Brake Lever
Shifter
Stem
Handlebar
Headtube
MainFrame
Front
Fork
Idler
(R30NT only)
Crank &
Chainrings
16
5
Page 6

Check your bike carefully before each ride
* The wheels should be straight and not wobble.
*Squeeze each brake lever to make sure there is no binding and the brake pads
press hard enough on the rims to stop the bike. The brake pads should be adjusted so they are 1/16" (2mm) away from the rim when not applied. The brake
pads should be centered on the rim and not touching the tire itself.
much. The shifters are "twist" type, which are part of the handlebar grip. T wist the inner
section of the grip to change gears. The left hand shifter changes the internal three speed
gears in the hub - this must be done when not pedaling. The right hand shifter changes
the external seven speed derailleur, and can be shifted only when pedaling. In general,
you will set the left shifter to the "2" setting, and use the right hand shifter to change the
gears as you ride. Only when you need to go up steep hills will you need the "1" setting
on the left shifter; you might want the "3" setting on the right shifter going down hills.
For now let's start with the left shifter set on "2" and the right shifter set on "1".
*The seat quick release skewers should be closed with at least 20 lbs (14kgf) of
force (see the skewer diagram).
*Sitting on the bike, swing the handlebars from side to side checking for binding or interference. Check to make sure the attachment bolt is tight.
*If you are unsure of the condition of your V ision™ recumbent, Do Not Ride It
until the problem has been corrected. If you have any questions at all, see your
VISION dealer.
Wear gloves -- with its low center of gravity , you don't fall very far on a recumbent, but
you will touch down with your hand first! A set of bicycling gloves will protect your
skin.
Wear eye protection Riding down the road at speed is no time to get a bug or dirt
stuck in your eye! Goggles, glasses or both can save your sight.
Practice riding your Vision™ -- before you mix it up with traffic, spend enough
time on your recumbent on a parking lot, driveway or other open area to get used to its
unique riding position. Chapter 3 has some important information about riding your new
recumbent.
Never ride at night without a front and rear light!
Experiment with different seat positions, seat angles, and boom lengths during your
practice period -- Your Vision™ recumbent has many adjustments and special features
that fit the bike to you. Try them all!
Be careful when riding in wet conditions- No brakes, whatever their design,
work as effectively in wet weather as they do in dry. Stopping distances and brake
lever pressures all will increase.
Keep your pedal cadence high- You can overstress your knees with the tremendous
leverage you have on a recumbent. We recommend that you pedal in the 80-90 RPM
range. If you experience knee pain, spin faster and check your leg length setting. It is
Now let’s get on the bike. I tend to always mount from the left, like on a horse, but the
important thing is to establish a pattern and do it the same way every time so it becomes
a habit. Standing along side the bike, grab the handlebar grips and apply the brakes. Now
step through the space between the seat and the handlebar with your right leg, and sit
down on the seat. Settle yourself into the seat and get comfortable - something you don't
say to upright cyclists!.
Mounting - Step 1
Sit awhile, rock back and forth and from side to side. Notice how the seat cradles you,
and how comfortably close to the ground you are. Grasp the handlebars and rock the
front wheel from side to side. Squeeze the brake levers. Yodel a few times. Do whatever
it takes to relax. Many first time riders try to sit forward on the seat, not being used to the
relaxed, laid back position. Sit back! Enjoy the comfort!
Now pick a dominant leg. For most people this is your right leg, but go with whatever is
most comfortable for you. Pick your leg up and swing the crank arm around so you can
easily reach the pedal. If you are using toe straps, flip the pedal clip over your foot, but
keep the strap nice and loose to start with. Swing the crank around until your foot is in a
“cocked” position; somewhere close to the top of the pedal stroke. This spot is different
for everyone, the key is to find the spot where you feel best about putting a lot of power
into the pedal. It helps to hold the bike from rolling with either brake. When you’re ready ,
Step 2
6
15
Page 7

Chapter 3: Riding the VISION
Chapter 2: Assembly and Setup
Riding a Vision recumbent is no more difficult than riding a
traditional diamond frame bicycle, just slightly different. If
you are new to cycling, you’ll find it easy to learn to ride on a
Vision. If you are an experienced rider, you’ll have to learn
some new habits, but the benefits of riding a recumbent far
outweigh the small learning curve involved. Either way, it’s
important to spend a little time adjusting to your new bike before riding in traffic or committing to a long ride. In this chapter I’m going to discuss some things that will make the transition to recumbents, or learning to ride on a recumbent, easier.
First of all, be sure to read the previous chapter about set up of the bike. T o ride well you
have to be comfortable, and to be comfortable you need to be sure that your Vision is
adjusted to fit you properly .
If you’re comfortable on your bike, it’s time to go riding. First and foremost, the most
important part of riding any bike is to wear proper safety equipment. W e discussed safety
equipment in Chapter 1, but I will repeat it here. It is essential to wear a helmet, all the
time, anytime you ride. It’s also very important to wear gloves when you ride. If you do
have an accident and fall over, you’ll probably catch yourself with your hands, so save
your palms and wear gloves. You should also wear protective eyewear; road grit and
flying insects do not make for happy eyes. W earing cycling shoes, shorts and jerseys can
help you be more comfortable, but they are not as essential as the helmet, gloves and
glasses.
Now you’re all set to hop on your Vision and pedal away into the sunset, right? Wrong!
The key to riding smoothly and in a controlled fashion on any bicycle, recumbent or not,
is to be comfortable enough to relax. If you are nervous and tense, you will tend to ride in
a jerky , overcontrolling fashion. Not only does this make you more uncomfortable, which
leads to even worse riding, but it doesn’t look cool. So you need to approach the bike as
your friend, someone you’ll enjoy spending the day with. The intent here is to spend
some relaxed time getting to know your bike before you get 20 miles into nowhere, or
involved with city traffic. Pack a lunch and head for the park, relax and enjoy the day for
a bit, and then set yourself up to ride in the parking lot, or any open space with no traffic.
Let's talk about your gears. Both the 21 speed and seven speed Metro's have "click" style
shifters -- there is no danger of getting between gears with these systems (as long as they
are adjusted properly). If you have a seven speed VR30NT model, shifting couldn't be
easier -- Just press either the up or down lever on the handlebar to set the next gear. You
can shift at any time -- while stopped, while pedaling, up hill, down hill, smiling -- simple!
T o begin with, set your shifter to the "1" setting.
For 21 speed metro VR30ST's the system is a little more complicated, but not
Y our Vision™ Recumbent dealer should have put your bike together and set the adjustments for you. Your warranty is void, and you could suffer serious injury unless the
following procedures have been accomplished or checked by a qualified bicycle mechanic. W e will review the assembly instructions here, and also point out some areas that
need continuing inspection. Refer to the "Anatomy of a Metro" section for part names
and locations.
Unpacking the Metro
Your Metro comes shipped from the factory in one large cardboard box, approximately
60" x 22" x 12.5". This box is UPS shippable. We have never had any problem taking
our V ision™ recumbents with us on the airlines - as long as the bike is in its box.
The bike comes packed with all compo-
Idler
SpringSpring
Spring
SpringSpring
Idler
hand thread, and the left pedal has a left hand thread. Grease the threads before installation, then tighten with a 15mm wrench.
Install the chain now. The front idler (used on the 7 speed
R30NT and R30NTX only) is spring loaded -- install it by turning it
counterclockwise to engage the tension spring.
Handlebar
Steerer
T ube
steerer. Make sure the control cables are not tangled, and slide the
handlebar down onto the headset completely. Make sure the handlebars are aligned correctly with the fork, line up the anti-rotate hole by
looking in the nut hole, and insert and tighten the anti-rotate bolt. Tighten
the pinch bolt to the torque specifications in the general information
The Handlebar
The Metro comes packed in the box
with the front fork facing backwards. Turn the wheel around until the arms on the front brake caliper are on the right side of the bike.
Insert the handlebar onto the
nents installed except the handlebars,
crankset, chain, pedals and seat. Remove
your Metro from the box and remove the
packing straps. Install the crankset, using
no grease on the spindle tapers, and tighten
the crank nut. Install the pedals— the right
pedal (as you sit on the bike) has a right
anti-
rotate
bolt
Pinch Bolt
Cable
Housing
FF
rr
ont Brakeont Brake
F
r
ont Brake
FF
rr
ont Brakeont Brake
14
7
Page 8

section. Now insert the front brake cable housing ends
into the cable stops on the handlebar.
The handlebar stem is at the top of the handlebar. The 6mm
bolt at the top of the main handlebar tube can be loosened
to allow the stem to move up or down, allowing you to set
the bars for a comfortable height for you. Re-tighten the
pinch bolt to the listed torque specification.
Stem
Pinch bolt
Upper Handlebar
General Maintenance
It's important to maintain your Metro properly, to keep it in good running condition. A
regular visit to your bike shop is very important to keep your bike running smooth and
safe, but between trips to the shop your Metro will love some simple attention.
Lubricate your chain.
The VISION™ Recumbent Seat
The seat fabric is installed on the seat frame at the factory , and we suggest studying the
front strap attachment carefully before removing it. In case you forget, see the front
tension strap attachment diagram. This strap should be tightened periodically.
For the first few weeks, the seat fabric will stretch a bit and appear loose. Simply tighten
the fabric as needed - the fabric will stabilize after about 100 miles or so. Check the seat
Front Tension Strap Attachment
Step 1. Looking at the front of the seat, with the
seat fabric laying on the seat frame, take the thin
strap and loop it around the frame crosspiece.
Step 2. Loop the strap in front of the small stub
tube but behind the strap.
Step 3. Loop the strap back around the seat frame
crosspiece and strap through the ladder buckle.
Attaching the Seat Fabric Panels to the Seat
The following are instructions for installing the upper seat fabric panel; the other three
panels attach the same way. The view is from above the seat back.
Step 1. Drap the seat fabric over the seat side
rails as shown
Step 2. Stretch (hard!) the long flap toward
the short side pulling the inner short flap toward the long side, and attach together. Rub
the entire attachment area together firmly.
Step 3. Stretch the remaining short flap over
the other two and attach. Again rub the entire
area together firmly.
This is probably the most important regular maintenance item on any bike, and just as
probably the most ignored. You should lube your chain at least every month. More if you
ride a lot and do it every time you get rained on. Simply use an old rag to wipe the chain
and apply a commercial bicycle chain lubricant (NOT WD-40!) to the chain. After the
lube has had a chance to penetrate the links, it's important to wipe off all the excess lube.
This helps to keep the chain free of excess road grit. Do this by repeating the wiping
procedure outlined above. Take care of your chain and it will take care of you.
Pump up your tires.
It is normal for tire pressure to drop
slowly. Check the pressure every week
with a good hand pump. Inflate the tires
to the pressure rating printed on the tire
itself. Don't use pumps at gas stations...
you'll be sorry if you do, your tires might
blow off the rim.
Lubricate your components.
Using your chain lube, or better still, a
drip bottle of general bicycle lubricant
(NOT "3 in 1" oil), carefully apply
drops of lubricant to all the pivot points
of the components. Get the brakes and
the derailleur (if your bike has one) While doing this examine all the cables and casing
pieces for wear and tear. Also examine the components for any damage.
Know your bike.
It's simple—just get to know the feel of your bike. If something feels different, and you
can't figure out what it is, bring your bike to a shop to have it checked out. All of the
components on the Metro are bicycle standards, and any competent shop can service it.
Photo ofPhoto of
Photo of
Photo ofPhoto of
enjoyenjoy
enjoy
enjoyenjoy
8
13
Page 9

before each ride for abrasions, tears and tightness.
T o install the seat on your Metro, first make sure
both quick release skewers are open. Slide the seat rails
onto the main frame track from the front. Slide the seat to
the middle of the track and tighten the quick release skewers
as shown in Chapter 1. Make sure the seat does not slide
back under load.
Seat
Seat Track
Seat Attachment
First Fold Position
Folding your Metro
The first step to folding the Metro is to sit on the bike and reach underneath the seat and
loosen the elastomer clamping wingnut. Undo the nut completely, Fold the swing arm
forward. To keep from misplacing the clamping nut, thread it back onto the bolt it came
off of.. If you want the partially folded position for car top transport, then stop the swingarm
when the hole in the swingarm brace lines up with the partial fold hole on the main frame
of the bike. Capture the chain by looping cable of the chain hanger/locking pin around
the chain, as illustrated. Then insert the pin into the appropriate hole, locking the swingarm
in place. For tighter storage, allow the swingarm to move all the way forward, and align
the swingarm brace hole with the fully folded position hole on the main frame , then
capture the chain and insert the pin.
Adjusting the Brakes
The brakes are set by the factory , and your shop will have checked them. However, you
should examine your brakes before you ride each time. T est the brake levers. They should
operate smoothly, and feel firm when they clamp. The VR30S Metro has caliper brakes
front and rear. As the pads wear out, you can keep proper braking by using the adjusting
barrel on each caliper to tighten the brake. The VR30N Metro has a standard caliper
front brake, but rear wheel braking is handled by the Nexus' own internal brake. Be
careful not to touch any part of the rear hub after using the brake, it can get quite hot.
Final Inspection
Y our V ision™ recumbent is complete! One last thing to do -- and also befor e each ride
-- is to inspect all the nuts and bolts on the bike, looking for any parts that may have
loosened in shipment. Check the alignment of the wheels, and inspect the brakes to make
sure the shoes contact the rims squarely and don't bind. The andlebars should be aligned
and able to turn from side to side without binding or interference. Check that the wheel
skewers are secure, and that a sharp blow on the wheel while you hold the bike off the
ground will not jar the wheel loose. Make sure your seat skewers are tight, and the seat
won't slide back suddenly . See Chapter 1 for more details.
Photo of MetrPhoto of Metr
Photo of Metr
Photo of MetrPhoto of Metr
prpr
oper leg extensionoper leg extension
pr
oper leg extension
prpr
oper leg extensionoper leg extension
Locking Pin Fully Folded
o showingo showing
o showing
o showingo showing
Adjusting the seat for proper leg extension
It is very important to set the seat in the proper position. If
possible, set your Metro on a rear wheel type wind trainer. If
you don't have access to such a trainer, have a friend hold the
bike up behind your seat while you sit and pedal the bike
Setting the Seat Position
will be pedaling with just a slight bend in your knee at
full extension. Get off the seat, loosen the seat quick
release skewers, and slide the seat forward or back
the right spot for you. Tighten both seat quick-release
skewers and sit down again. If you need further adjustment to get the proper leg extension, get off the
seat and try again. Take your time—this is a very important adjustment. Once you have your leg extension set—and confirm this by spending some time
riding the bike—you might want to make a discreet
mark on the seat track. This way you can remove the
seat for transport, and still get it back exactly where you like it.
Adjusting the Gears
Adjusting gear systems can be a complex task, usually best left to experienced mechanics. We include the manufacturer's instruction sheets on the gear systems, if you are
interested in working on the bike they are highly suggested reading. We'll go over a few
of the items here, in case you need some more information. Remember, if the standard
adjustment procedures don't seem to work, something else
is probably wrong, and perhaps you should see your local
mechanic.
normally. When the leg
length is set properly, you
Proper Leg Extension
NEXUS Shifter
12
9
Page 10

Nexus 7 speed Hub - VR30N
This is an internal 7 speed system built by Shimano. It provides a simple to operate,
relatively wide range of gears. We are using the thumb control for the Nexus. To shift
gears simply flick the lever with your thumb. Moving the lever one way shifts to the easier to pedal
gears (lower numbers). Flicking the lever in the
other direction gives you the faster moving (but
harder to pedal) gears. The system requires no
maintenance, and shifts very well under all conditions.
Nexus Hub Adjustment
This has been set by the factory, but if you have shifting problems it is very simple to
adjust. Switch the gear control lever to the "4" position. You will notice that the number
"4" is printed in RED. Now look at the right side rear dropout . Just inside the bike
frame is a control ring that rotates when you move the shift lever. On this ring is a red
mark . There is also a mark on the body of the hub right by the control ring . When the
shift lever is in the "4" position, the red mark on
Pull Rod
Adjuster
Sleeve
Axle Nut
Sachs Hub Adjustments
like a standard front chainring and derailleur system. The external seven speed cassette
and rear derailleur give you seven speed ranges, for a total of 21 speeds.
the control ring should line up with the mark on
the body. If is doesn't, simply adjust the cable adjusting barrel until they do.
Sachs 3x7 — 21 speed System
The Sachs 3x7 system is a unique 21 speed system. It utilizes an internal three speed hub mated
to a standard seven speed cassette. The three internal gears give you three ranges of gearing, just
Adjusting Marks
Adjust Barrel
Sachs Hub Adjustment - VR30S
Disconnect the adjuster sleeve. Set the left twist grip to the "3" position. Lift the rear
wheel and rotate the cranks to be sure the hub is engaged. Slip the adjuster sleeve onto
the pull rod just far enough to lightly tension the cable. Be sure you do not drag the pull
rod out from the hub axle nut. Lift the back of the bike, and while pedaling, twist the left
gear shifter to the "1" position. Make sure hub is engaged. If you don't have smooth
engagement between the internal gears, rotate the adjuster sleeve until the system shifts
smoothly.
10
Rear Derailleur
If your bike uses the Sachs 3X7
system for 21 speeds, you have a
rear derailleur and cluster in addition to the internal 3 speed. The
rear derailleur on your Metro is an
indexed system, shifting up and
down in preset intervals corresponding to "index" clicks of your
shifter. This system requires a little
patience to set up, but once it is it
will give a season of proper
performance.The rear derailleur
has two limit screws (see
manufacturer's instructions for locations), and these must be adjusted properly before the index
system will work. Set the shifter
on the high sprocket end of its travel and adjust the high limit screw so that the derailleur
cage aligns with the high sprocket. Repeat for the low sprocket. Now with the chain on
the high (smallest) rear sprocket, turn the pedals and shift the shifter up three clicks. The
rear derailleur cage should align with the fourth sprocket up from the smallest (see illustration). If the derailleur cage is to the right of the proper sprocket (as seen from the rear
of the bike), turn the adjustment barrel counterclockwise on quarter turn. If the derailleur
cage is to the left of the fourth sprocket, then turn the adjustment barrel clockwise one
quarter turn. Turn the pedals by hand a few turns and then look at the alignment again;
repeat the adjustment steps until the derailleur cage is perfectly aligned with the sprocket,
and the chain shifts effortlessly between sprockets when the shifter is turned between
"clicks".
Rear Index adjustment
Derailleur and cassette as seen from rear of bike
Derailleur to the right of
the sprocket, turn adjustment barrel counterclockwise
Derailleur to the left of
the sprocket, turn adjustment barrel clockwise
Rear Suspension
The VR30 suspension system has more benefits than just the comfort of suspension. Up
until now, it was often dif ficult to transport long wheelbase
recumbents that were longer than typical upright bikes. T andem racks often were needed. The Metro has the ability to
fold itself into two positions; fully folded, with the rear wheel
tucked under the frame for a "minimized" storage size, and
partially folded. When partially folded your metro should
fit standard bike racks.
Swingarm
Wing Nut
System Pre-Load
To have the suspension operate best, you need to set the
"pre-load" on the elastomer to suit you weight. This is very
easy to do. Simply make sure that the elastomer clamping wingnut is loose. If it is not,
then loosen it completely. Then sit on the bike, reach under the seat and turn the wingnut
in until it just starts to tighten up against the elastomer. That's it! Now the suspension preload is correctly set for your weight.
Suspension Wing Nut
11
 Loading...