

Page 1
Important installation information
PARTS INCLUDED:
IMPORTANT!
Keep an eye out for these icons:
Normal Install Time
60 minutes
Tips to assist installation
Helpful Hints
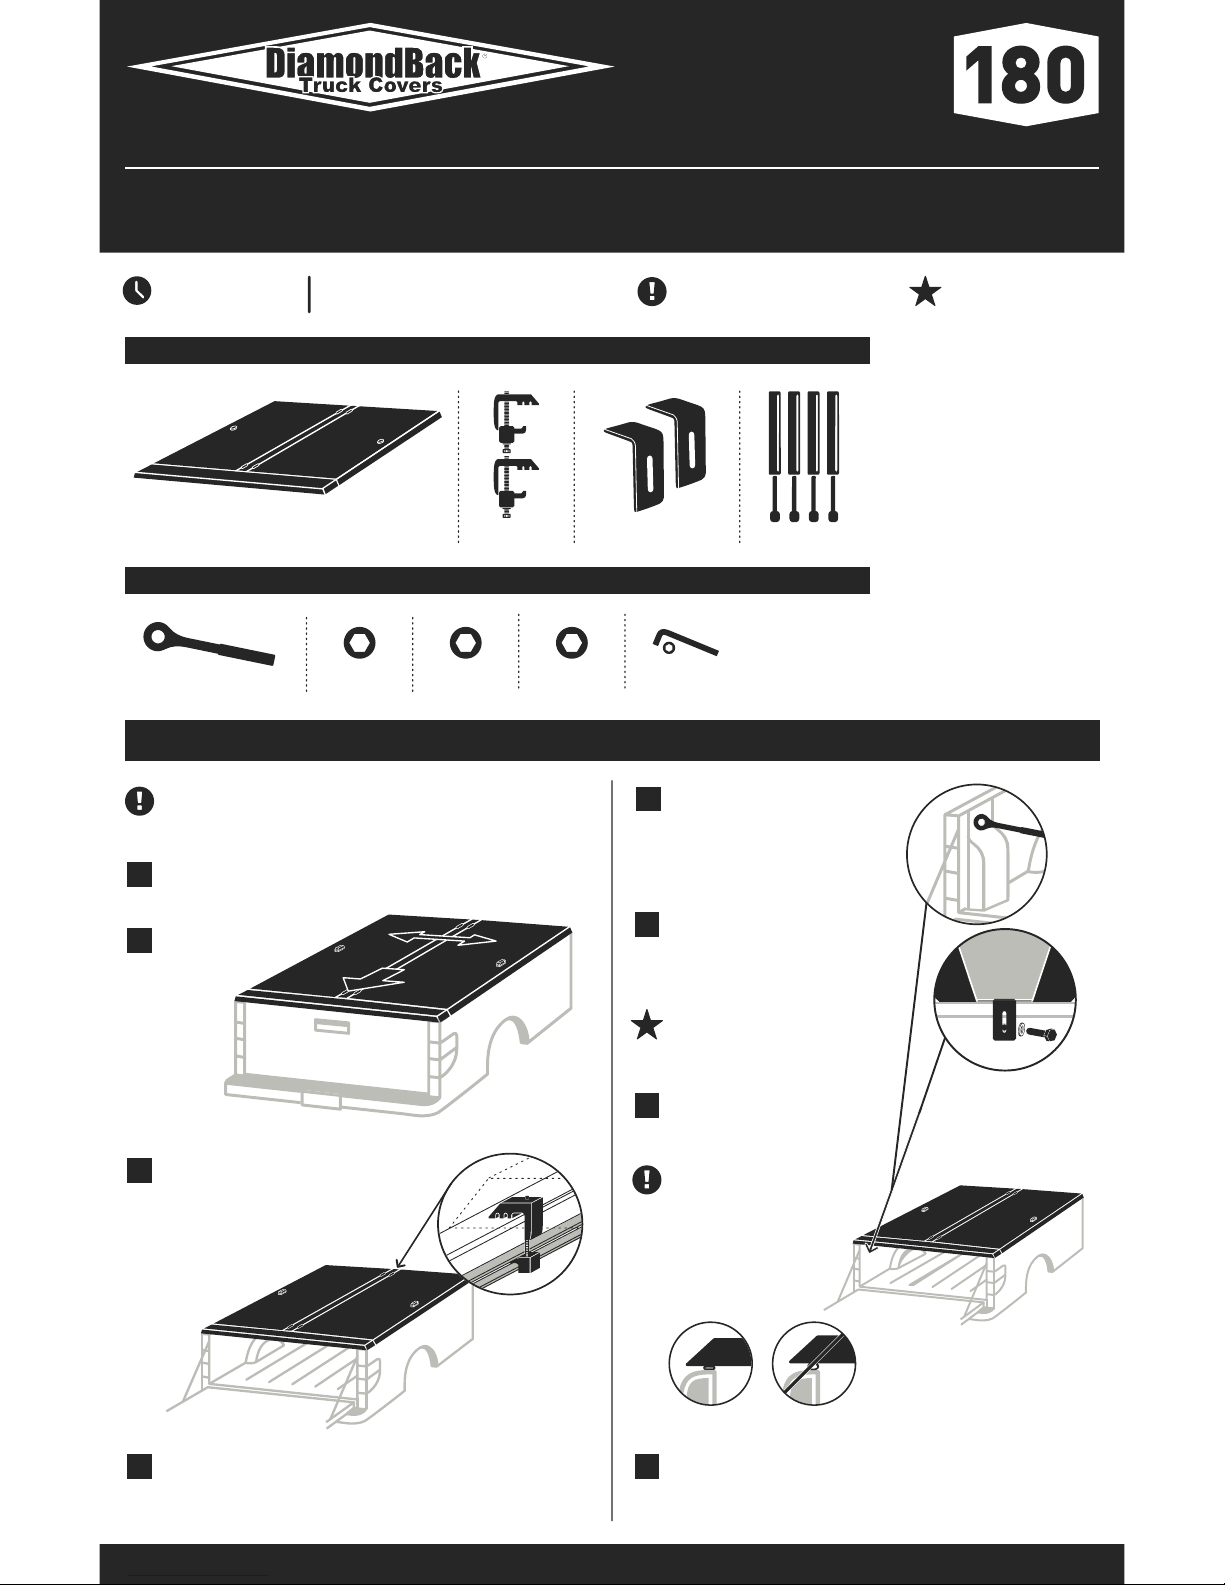
PREPARE THE CARGO BED & MOUNT THE COVER
Close the tailgate. Place the cover onto the cargo bed so that the
weatherstrip along the rear angle is firmly compressed against the
inside edge of the tailgate.
1
Place the cap clamps under the nose of
the T panel, their top halves gripping the
inside flange of the panel and their
bottom halves gripping the square-tube
top rail (‘16-up) or fitting into the deck
rail system (‘05-15). Tighten with a 9/16"
socket.
3
Verify that the cover remains centered side to side and its rear
weatherstrip remains compressed against the tailgate.
4
180 Cover
Gas Spri ngs (4)
TOOLS REQUIRED:
PRE-INSTALLATION
NOTES:
1. You’ll need a second person to
help with this installation.
2. If you have a 2016–up Tacoma,
you should affix the included
rubber gasket to your bulkhead
prior to installing your cover.
Refer to the Bulkhead Prep Kit
Installation Guide for details.
3. If you are installing a Cross
Bin, you should start prior to
installing your cover. Refer to
page 2 of the Cross Bin Installa-
tion Guide for details.
Center the cover
side to side.
2
Use a 10mm socket to remove the
factory bolt and washer that are on
the cargo-bed wall directly below
the hollow section of the driver-side
end of the cover’s T panel. Repeat
on the passenger side.
5
Place a mounting bracket at each
end of the T panel so that the bracket’s top leg overlaps the inside
flange of the panel and its slot aligns
with the factor y bolt hole.
6
Re-insert each bolt through its
washer, through the bracket slot,
and into the factor y hole. Re-tighten.
7
If you have a ‘05–15 Tacoma, you should affix the included bulkhead
weatherstrip at this point. Refer to the Bulkhead Prep Kit Installa-
tion Guide for details.
8
Peel the adhesive backing from the top
leg of the brackets so they’ll stay in
place as you attach them.
Cap Clamps (2) Mounting Brackets (2)
If you have a 2016–up Tacoma, you should affix the included rubber
gasket to your bulkhead prior to installing your cover. Refer to the
Bulkhead Prep Kit Installation Guide for details.
To get the weatherstrip compression
necessar y for its adhesive to cure
and the cover to keep out the
weather, have a second
person press down on
the cover while
you’re reinstalling the
factor y bolts.
INSTALLATION GUIDE
(800) 935-4002 | DIAMONDBACKCOVERS.COM
Ratchet Wrench 9/16" So cket 7/16" Socket 10mm S ocket
2005 –UP TOYOTA TACOMA S
1/8" Hex Key
CONTINUED ON REVERSE →
Page 2
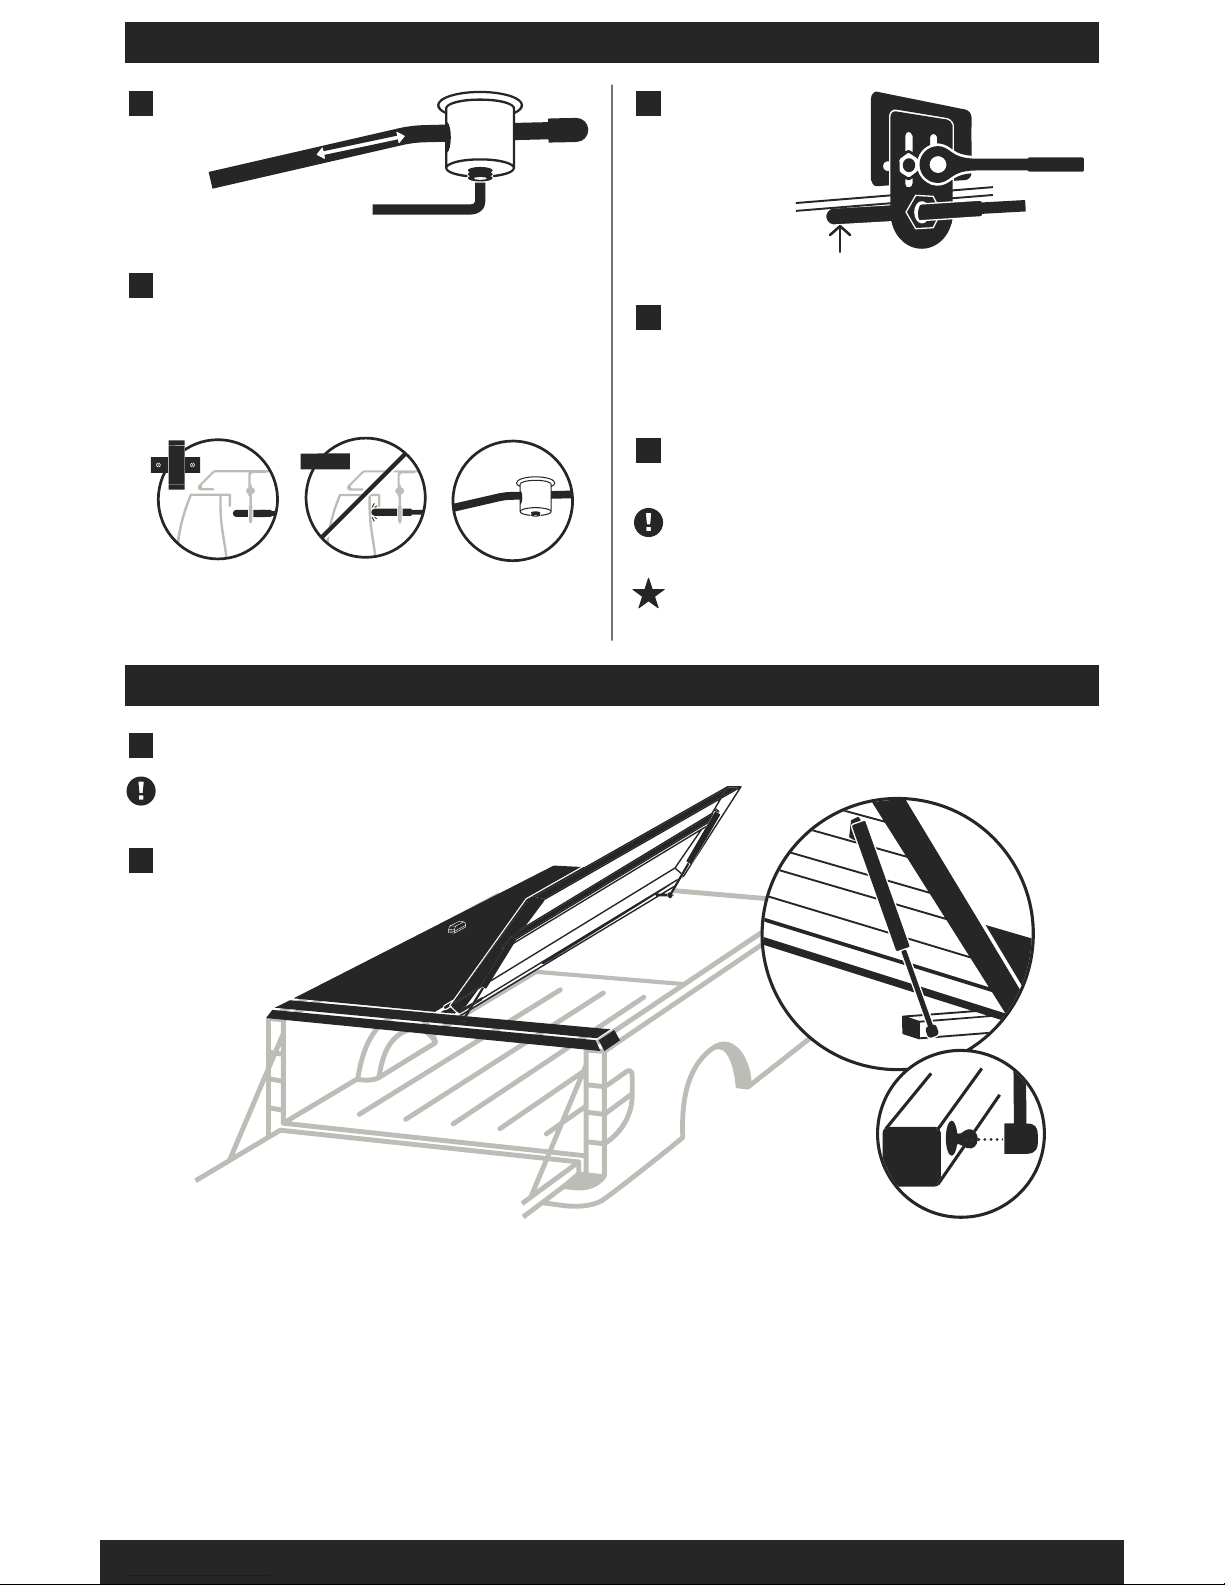
ADJUST THE LOCK RODS
Double-check both panels to ensure they open, close, lock & seal
correctly. If at any point the weatherstrip does not touch the bed rails,
readjust the lock rods and mounting brackets as needed.
13
Use an 1/8" hex key to loosen the
set screws on the linkages of the
forward lock rods.
9
Operating the access panels is easiest when
you press down as you open or close them.
Attach the gas springs to the ball studs.
14
Leave the cover closed and locked for 24
hours to allow the weatherstrip adhesive,
which is pressure-sensitive, to fully cure.
15
To ensure the best weatherstrip adhesion, leave your
cover and tailgate closed for 24 hours after you’ve
made your final adjustments.
Repeat steps 9–11 for the rearward lock rods so that:
A. with the lock handles in the open position, the rod tips clear
the T-panel gutter,
B. the rods point downward, and
C. closing them draws the panels down & compresses the
weatherstrip.
12
To avoid premature failure of your gas
springs, attach them barrel up, shaft down.
ATTACH THE GAS SPRINGS
1/8" Hex Key
Adjust the length of the for ward lock rods and retighten the set screws
so that:
A. with the lock handles in the open position, the rod tips clear the
square-tube top rail or deck rail system,
B. with the handle in the closed position, the rod tips do not strike
the bulkhead, and
C. the rods point downward.
10
11
With the lock handle in the
closed position, position the
lock rods tight against the
underside of the square-tube
top rail or the deck rail system
so that they’ll draw
the panels down
and compress the
weatherstrip.
Tighten the rod guide
brackets with a 7/16"
socket.
7/16" socket
WWW.DIAMONDBACKCOVERS.COM
JANUARY 2016
 Loading...