

Diamond Audio Technology D652, D672, D662 Installation Manual

CONVERTIBLE SPEAKER
INSTALLATION MANUAL
D652
|
D662
|
D672

exercise restraint in its operation in order to preserve your ability to enjoy its fidelity in the future.
Because of their flexible installation possibilities, please consider having your new speakers
professionally installed by an authorized Diamond Audio dealer. This will assure a clean and efficient
2
©2008 Diamond Audio Technologies. All rights reserved.
SPECIAL THANKS
Dear Valued Customer,
Thank you for choosing Diamond Audio D6 speakers. These speakers represent the latest advances in
acoustic technology, and like all Diamond Audio products, are hand built and tested using the highest
grade components and state of the art techniques. When installed properly, they will provide many
years of accurate sound reproduction.
Please keep in mind that prolonged exposure to sound pressure levels in excess of 100 dB can cause
permanent hearing loss. This high performance speaker system can exceed that level, so please
installation, and extend your one year warranty to three years.
At Diamond Audio, we strive to bring honest value and excellent quality to all of the products we
build. By your purchase of this product, you have joined the growing family of discerning listeners who
demand only the best. Welcome!
3
©2008 Diamond Audio Technologies. All rights reserved.
FEATURES
• Hard Annodized Aluminum Cone
• Rubber Surround
• High Density Proprietary Composite Frame
• Flat Progressive Spider
• Inductively Controlled Motor Design
• Rubber Boot Magnet Protector
• Model Specic Crossovers
D6 CONVERTIBLE SPEAKER SYSTEMS
CONVERTIBILITY
Your new D6 speaker system has the unique ability to
be used as either a component or a coaxial speaker.
Depending on your installation requirements, the tweeter
can be installed separately or mounted directly to the
midbass/midrange unit with the supplied kit. This
provides for the most installation exibility possible.
See the drawing below for more details.
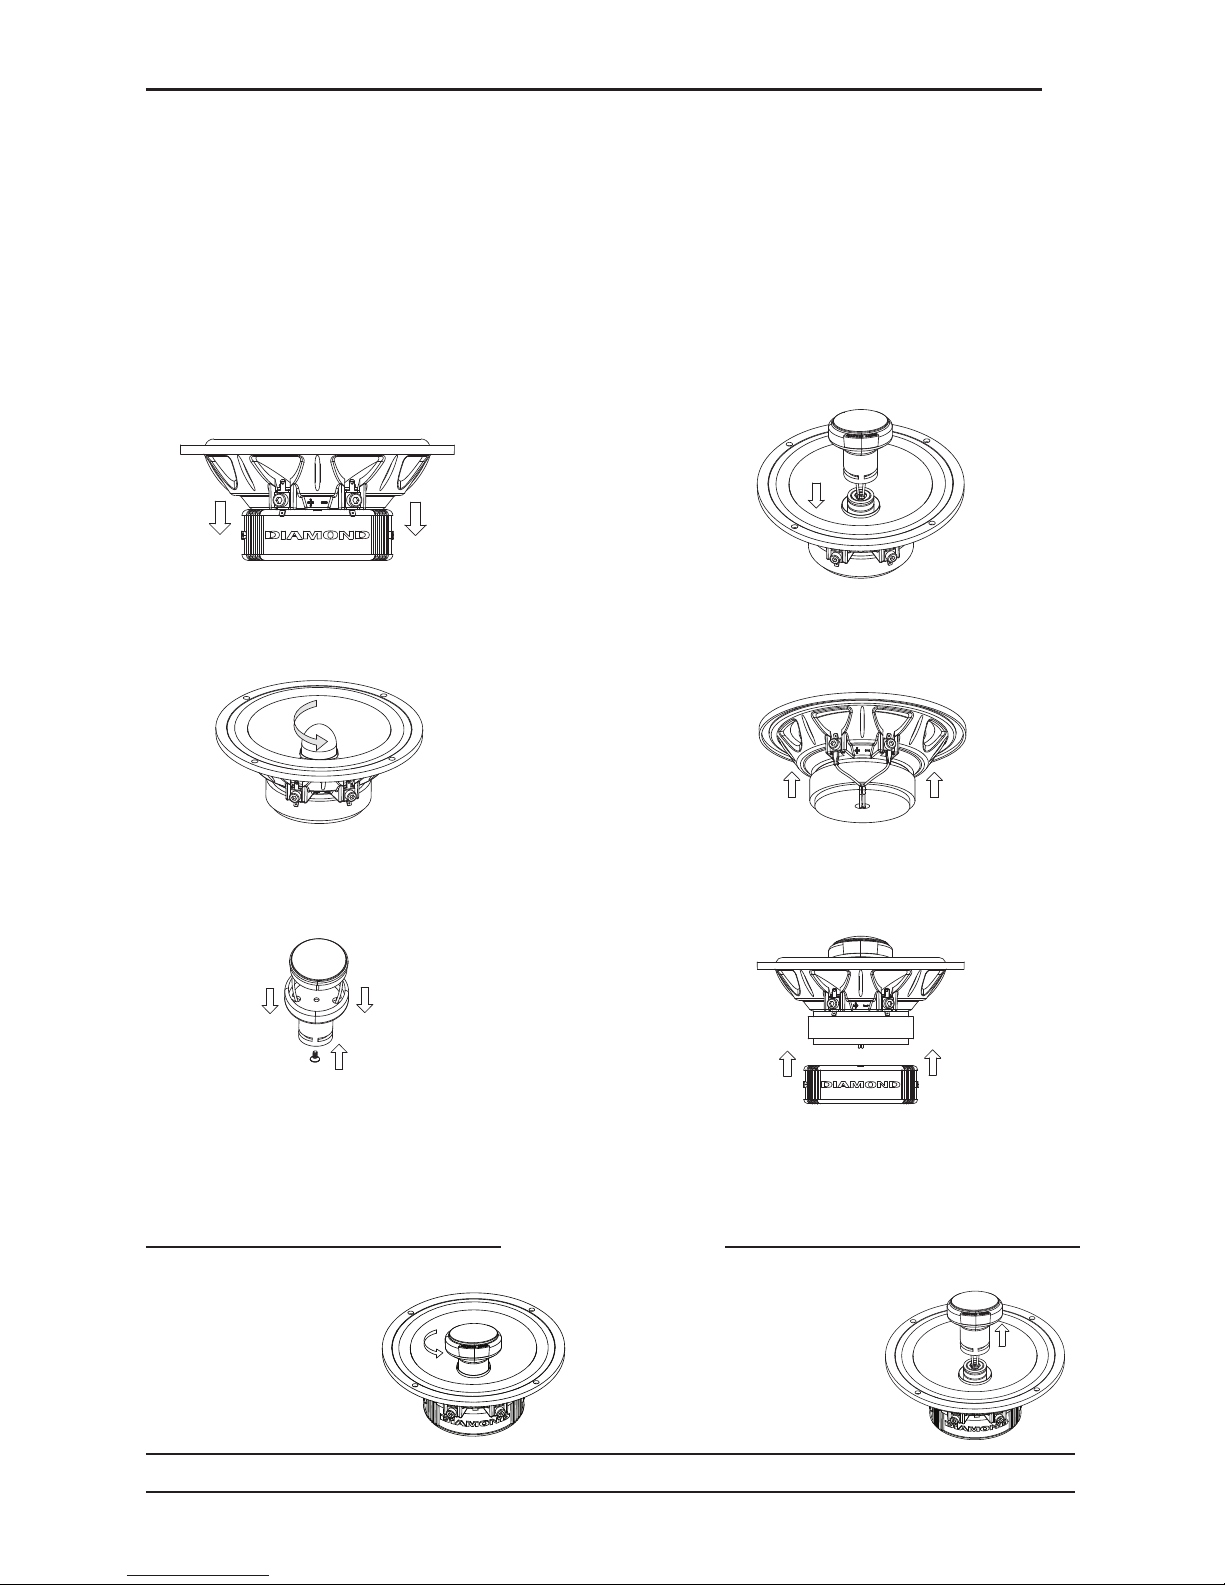
Step 2 - Unscrew Phase Plug
Twist phase plug in a counter-
clockwise direction.
Step 1 - Remove Boot
Carefully remove the rubber
boot from the magnet.
Step 3 - Assemble Tweeter Post
Carefully feed the tweeter wires through
the holes and snap tweeter into place on
top of the post .Secure with screw.
Step 4 - Attach Tweeter
Carefully feed the tweeter wires through
the post and through the magnet.
Step 5 - Attach Tweeter Wires
Attach the tweeter wires to their
proper terminals.
Step 6 - Carefully Replace Boot
Carefully replace the motor boot to
cover and protect the tweeter wires.
Firmly grasp the
tweeter post and turn
to unlock until you
feel a “click”.
After you feel the “click” of
the tweeter post unlocking,
carefully pull the post straight
up from the cone.
Removing the Tweeter
 Loading...