

Diamond SOUND CARD, XS71DDL, XS71, XS51 Quick Start Manual

Quick Start Guide
SOUND CARD MANUAL
©2009 Diamond Multimedia. All rights reserved. p/n: 40042 version 7.0

BLANK
PAGE 1
Please read through the following safety tips to ensure for a safe
and proper installation of this product.
1.
Xtreme Sound PCI Card
2. Installation CD
3. Quick Start Guide
4. Warranty Card
Safety Notices
Please verify your package contains the following items.
Package Contents
1.
System / Motherboard manual (or working knowledge)
2. A philips head screwdriver
3.
Can of compressed air (optional, recommended for upgraders)
Please have the following items available prior to the installation
Before You Begin
Please make sure to read all the instructions
thoroughly before attempting the installation
of this sound card.
•
Do not attempt to install this product during an
electrical storm.
•
Make sure your computer system is connected
to a properly grounded power outlet.
• T
ouching the exposed metal part of your
computer case (on the rear side) will discharge static electricity from your body
.
W
e recommend you perform this step before
touching this product or any part inside
your computer and periodically while working
inside your PC.
•
Internal Boards may contain “Lead” which may
cause cancer
, birth defects and other
reproductive harm. Please wash your hands
thoroughly after handling these products.
This notice is required under California ” proposition 65 “ and
Health & Safety code.
PAGE 2
Sound Card Connectors
Line In Mic Front
Out
Rear
Out
Front
Out
Rear
Out
Center/
Subwoofer
Game/
MIDI
Center/
Subwoofer
ALT
Center
MICInLineInS/PDIF
Out
S/PDIF
In
Front
Out
Rear
Out
Center/
Subwoofer
ALT
Center
MICInLineInS/PDIF
Out
S/PDIF
In
XS 5.1
XS 7.1
XS 7.1DDL
PAGE 3
1. W
ith the computer power turned OFF disconnect the power
cable from the computer
.
2.
Open the computer case following the instructions from your
system manufacturer
.
3.
Locate an available PCI slot on the motherboard.
4.
Insert the Xtreme Sound PCI card into the slot that you
located in step 3.
5.
Screw the metal bracket into place.
6. Close the computer case.
7.
Reconnect any loose cables (Power
, mouse, keyboard, etc.)
8.
Connect your speakers to the sound card.
Refer to the diagram on the previous page.
Please consult your systems user guide for exact instructions
regarding opening the computer case and installing new cards.
Hardware Installation
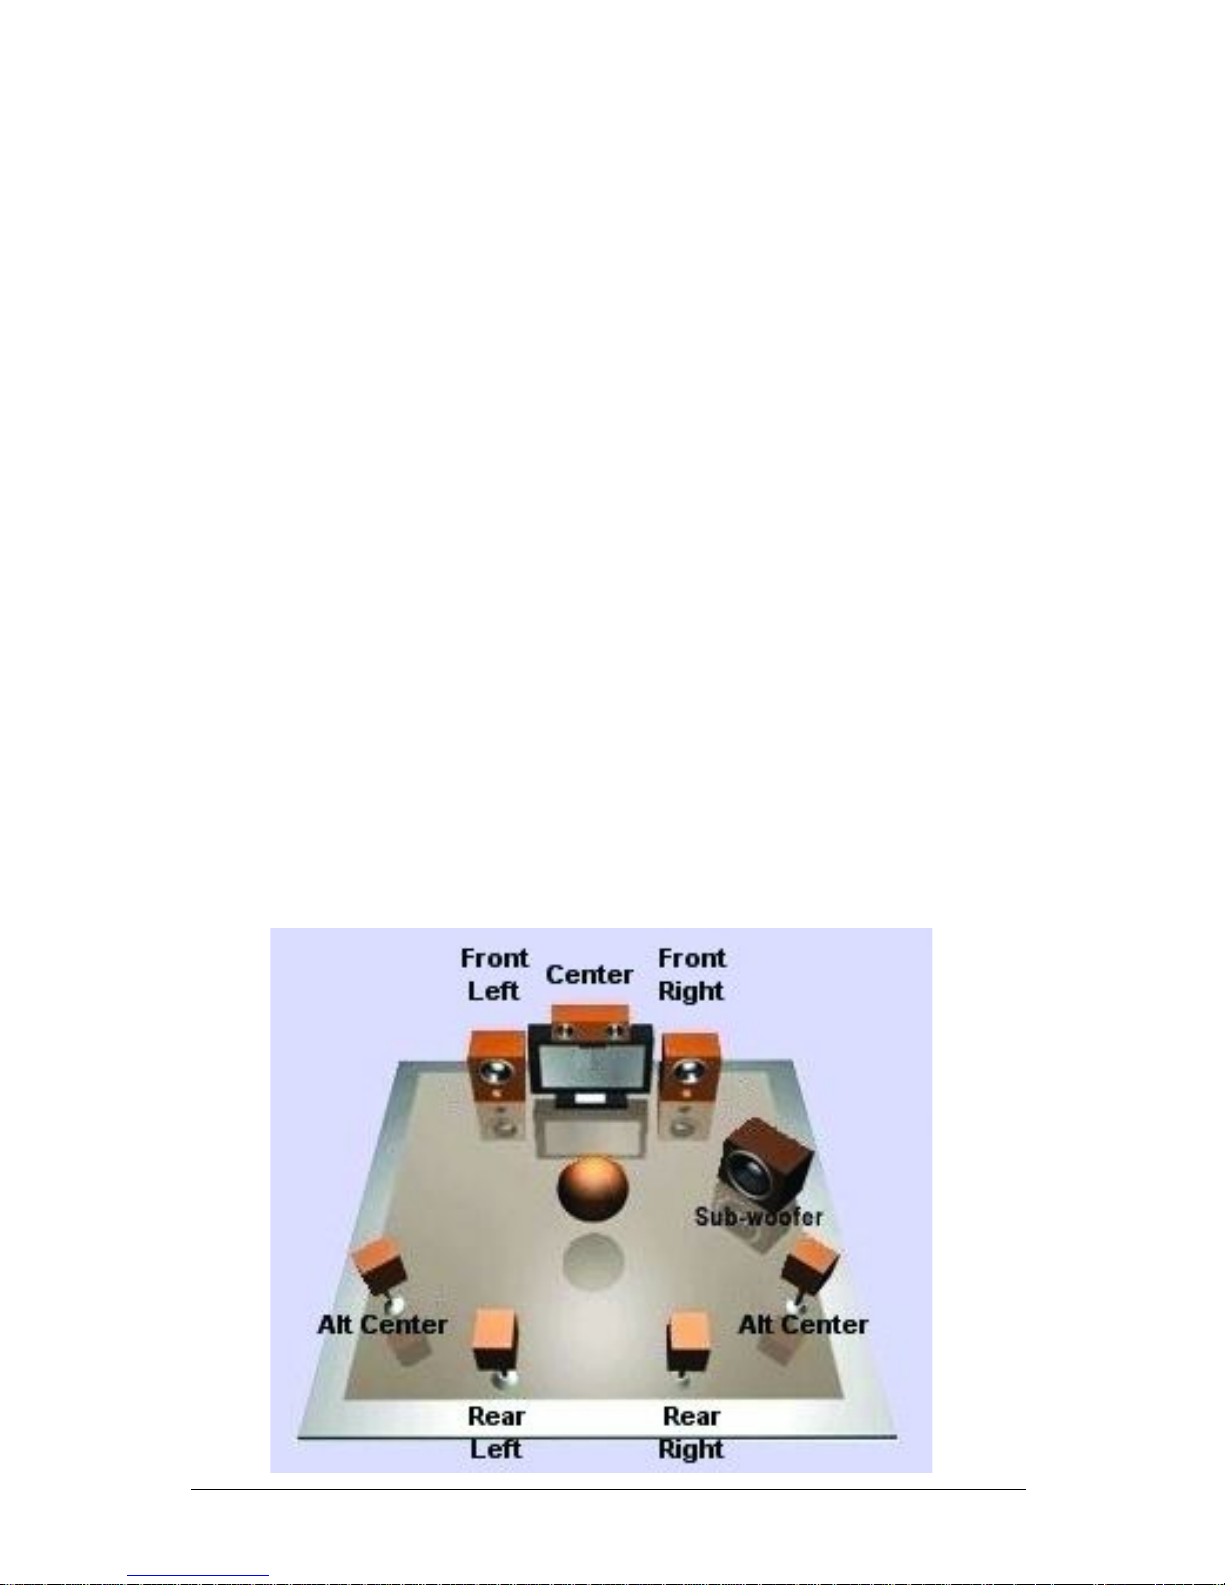
Use the following diagram for a basic guideline to help assist in
arranging the placement of your speakers.
Selecting the placement of your speakers

PAGE 4
1. T
urn on the power to the computer and enter your systems
BIOS setup (CMOS). Please consult your system documentation for exact instructions regarding entering and using your system CMOS.
2. Locate and disable
the previous sound device. Usually this will
be listed within an Integrated Peripherals section.
3. Save and exit from CMOS.
4. Y
our system will reboot at this point. Let the system boot into
Windows and do not
insert the installation CD until requested in
the up and coming steps.
Please complete the following steps before your system boots into
W
indows if your previous sound card was integrated onto your
motherboard.
Prior to booting Into Windows
1. W
indows will detect new hardware upon startup. Click the
CAN-
CEL button on the found new hardware wizard.
2.
Insert the Xtreme Sound installation CD and wait for the CD to
start.
3. Click the Install Sound Driver button.
4. A wizard will appear. Click the NEXT button to continue.
5. Confirm the installation options and click NEXT to continue.
6. Click NEXT to begin the driver installation.
7. Click OK to reboot the system.
8. Remove the installation CD.
Please start your computer and do NOT insert the installation CD
until you are prompted to do so.
Xtreme Sound Driver Installation
 Loading...