

Diamond WR600NSI Quick Start Manual

Portable Wireless-N Repeater
Minimum System Requirements
Any operating system can be used
Web Browser
233MHz processor
Ethernet network adapter
WR600NSI
Quick Start Guide
Package Contents
Any operating system can be used
Web Browser
233MHz processor (or higher)
Ethernet network adapter
Or Wireless network adapter
Wireless router or AP
The Resource CD (documentation only, contains no applications and all configurations are performed
from the WR600NSI’s built in web based configuration page)
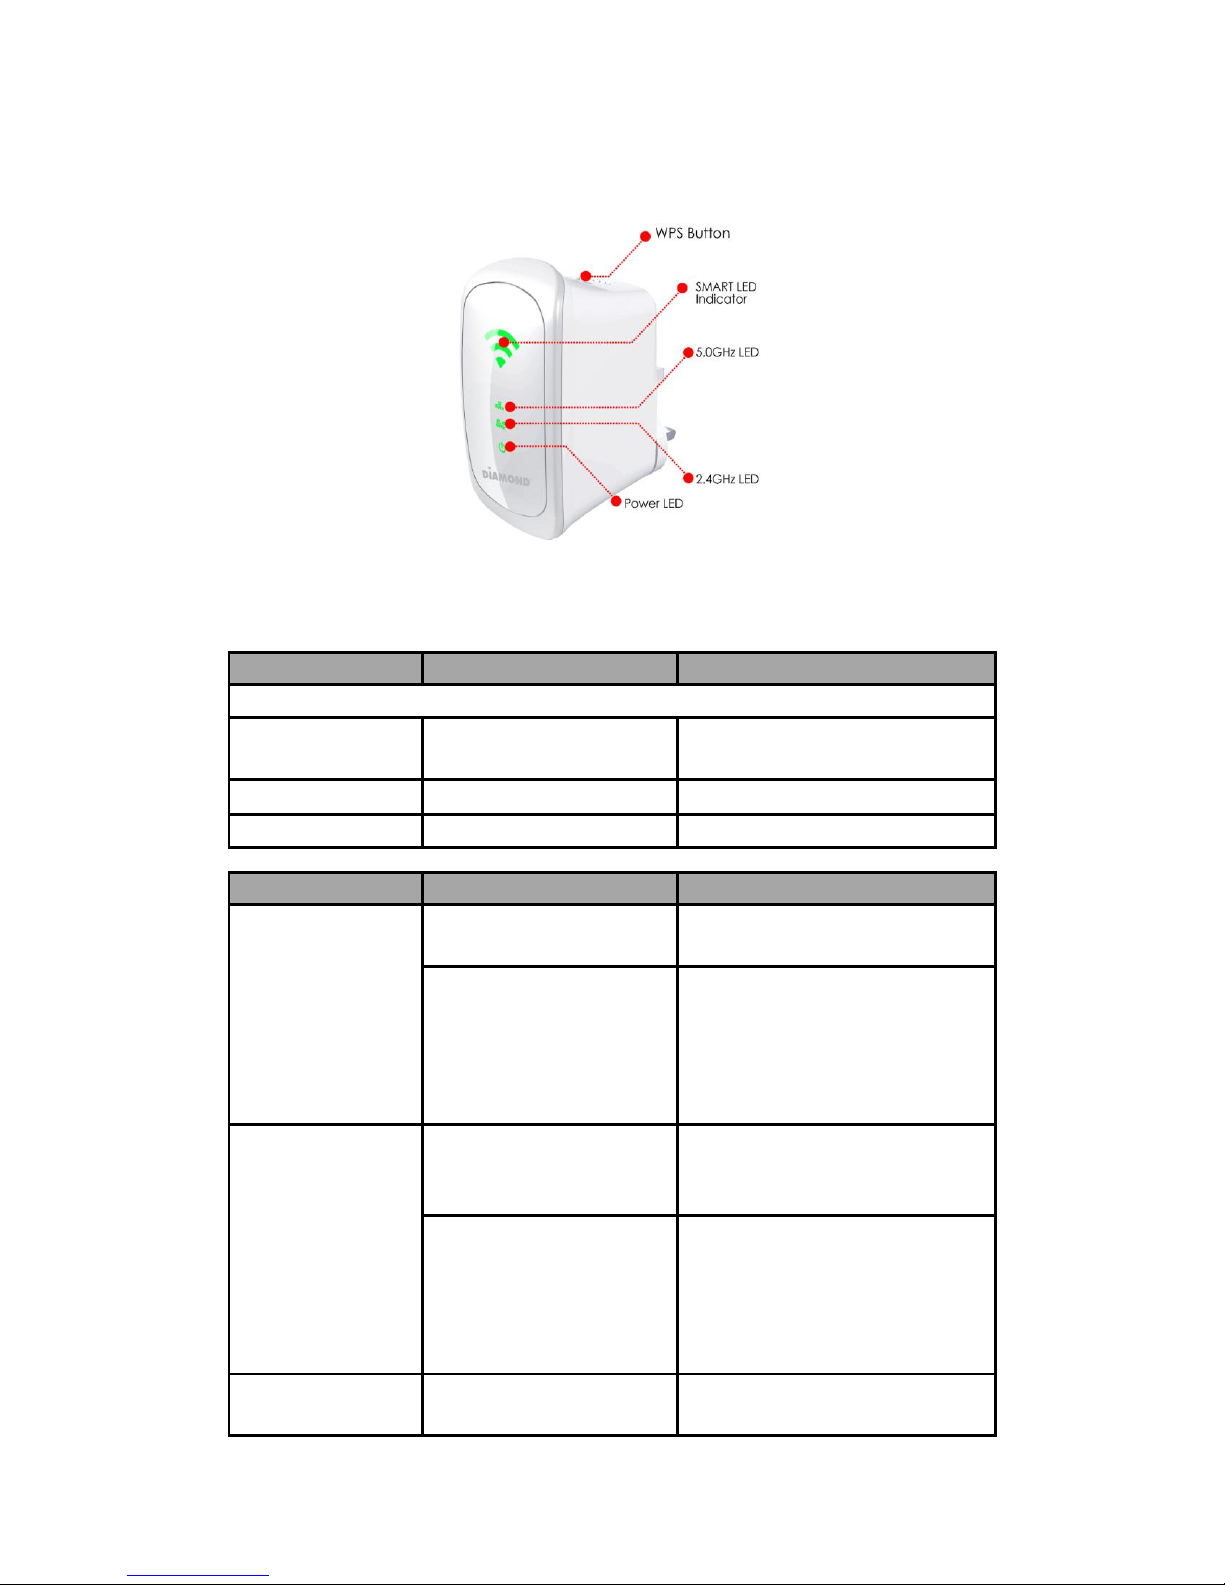
Device Overview
LABEL
STATE
DESCRIPTION
SMART LED Indicator
3 BARS
Connected
95% and above
(Excellent)
2 BARS
Connected
55-94% (Recommended)
1 BAR
Connected
10-54% (Weak)
LABEL
STATE
DESCRIPTION
2.4GHz
OFF
No Wireless Device is
connected.
Blinking
A Wireless Device is
connected and is
actively transmitting /
receiving data
5.0GHz
OFF
No Wireless Device is
connected.
Blinking
A Wireless Device is
connected and is
actively transmitting /
receiving data
Power LED
ON
WR600NSI is Plugged to a
working Power Outlet
Configuring the Repeater
Setting up the device is easy. Follow the steps below to configure the device for your current wireless
router/AP. Ensure to disable the wireless connection on the PC or laptop used for configuring the
WR600NSI. Please note the WR600NSI will automatically detect your existing wireless channel
encryption and security type do not change this
To configure your device via the Web GUI:
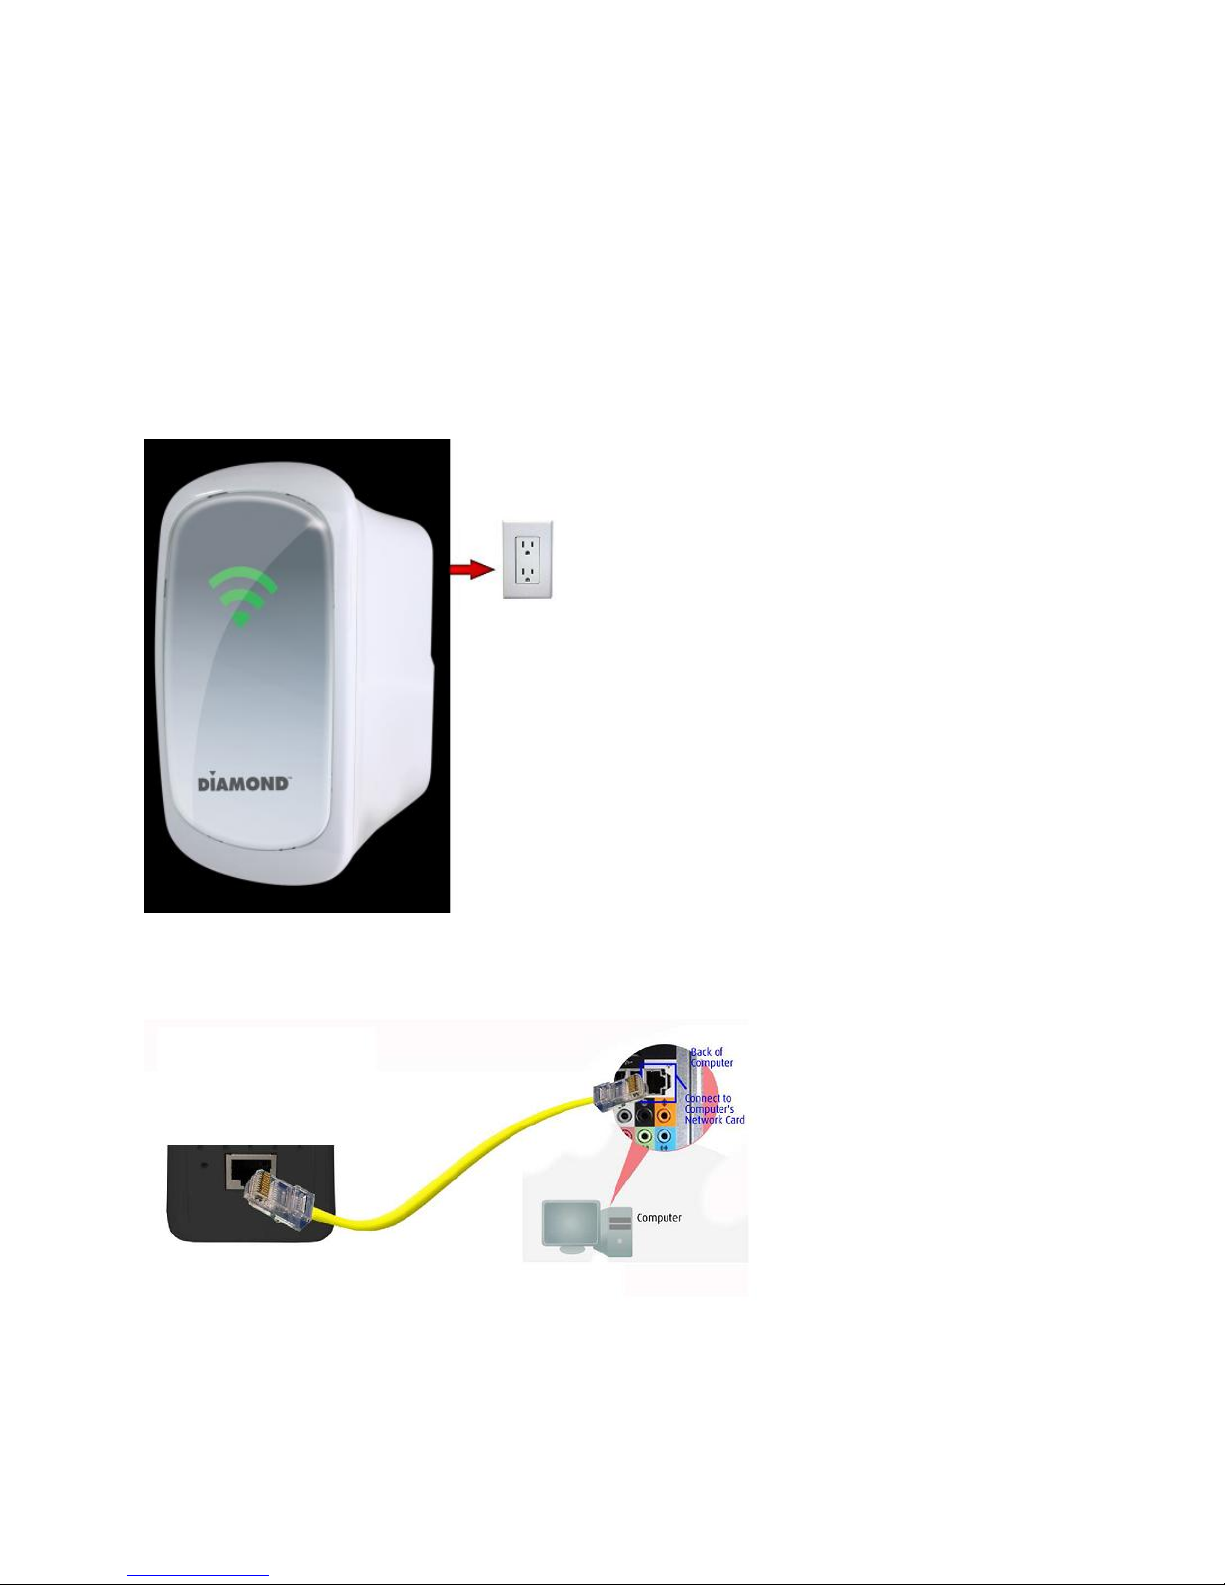
1. Connect the WR600NSI to a power outlet.
2. Connect an Ethernet cable from your PC’s Ethernet port to the Ethernet port at the base of the
WR600NSI.
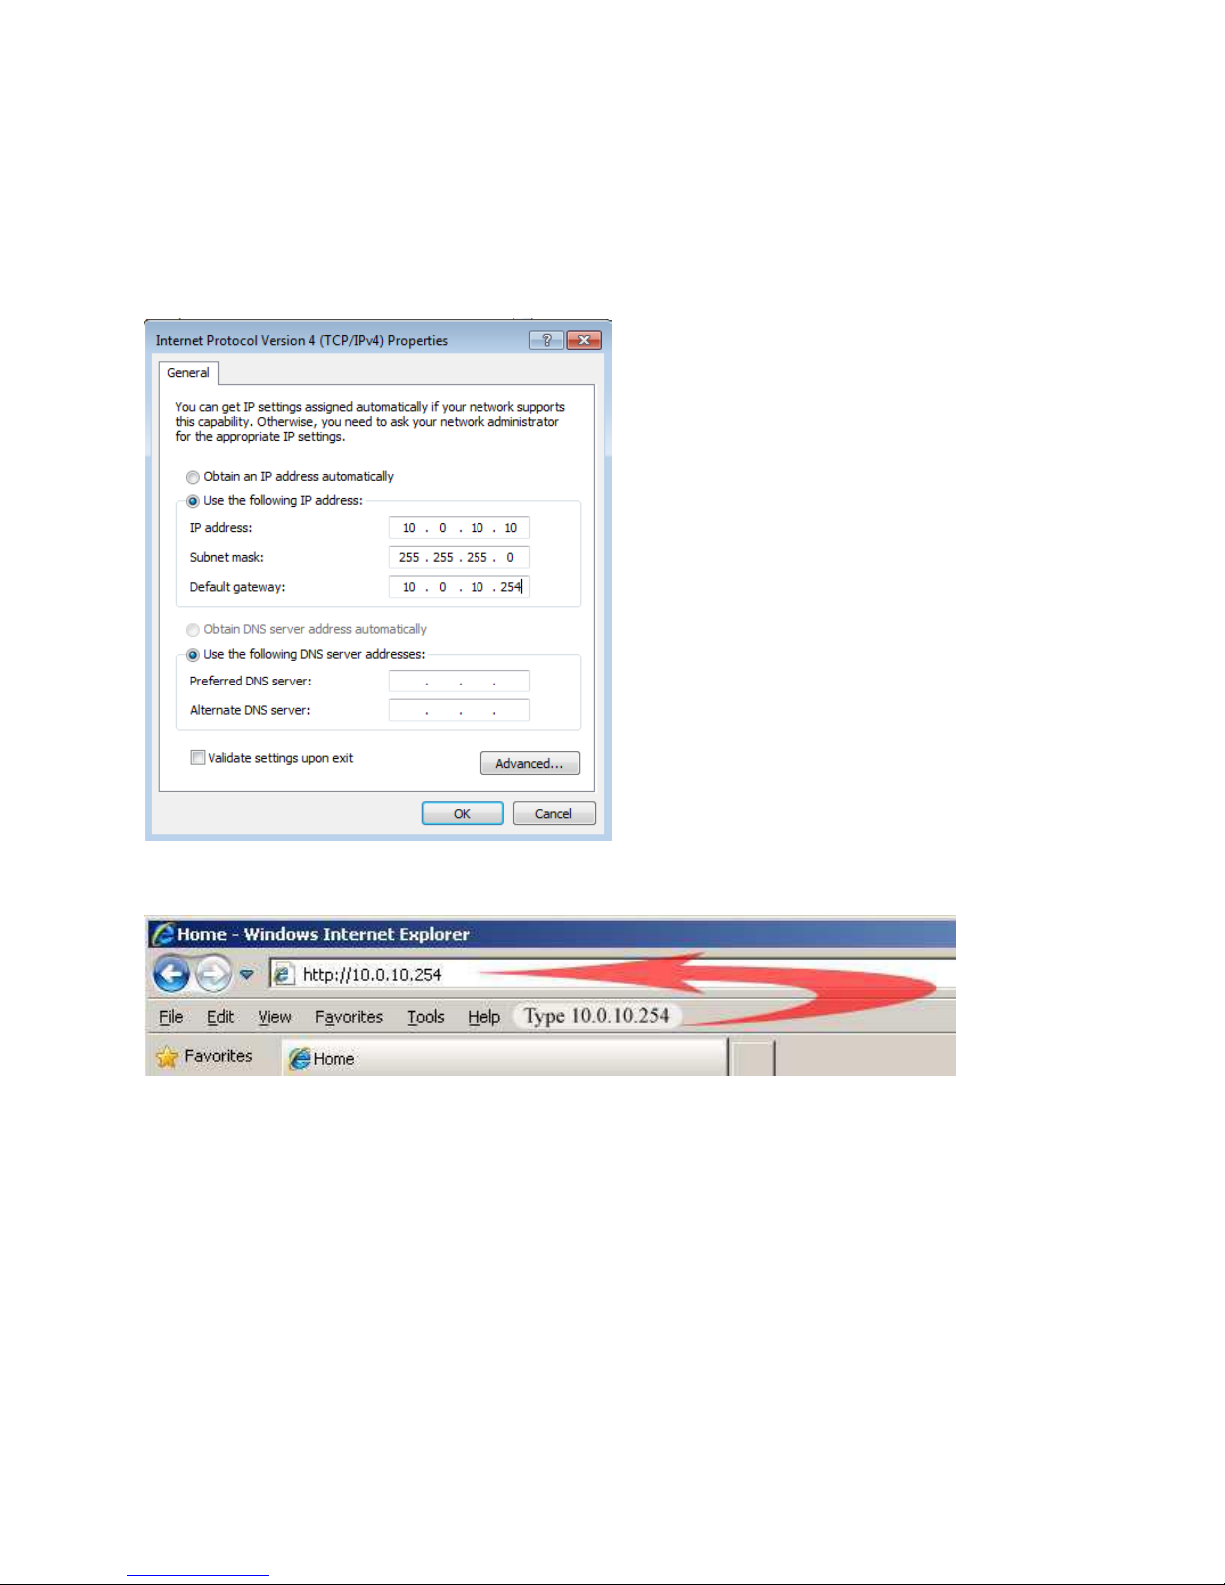
3. Once a connection to the WR600NSI is established, your PC/laptop will receive an IP address
automatically and you will be able to access the configuration page using the web graphical user
interface. Note: if you do not get the web graphic user interface. Please manually set your TCP/IP setting
for your Ethernet network card to 10.0.10.10. Subnet mask 255.255.255.0 and default gateway to
10.0.10.254
4. To access the web GUI, Launch your web browser and input 10.0.10.254 on the address bar.
5. You will now see the following screen below, click on “Quick Connect”
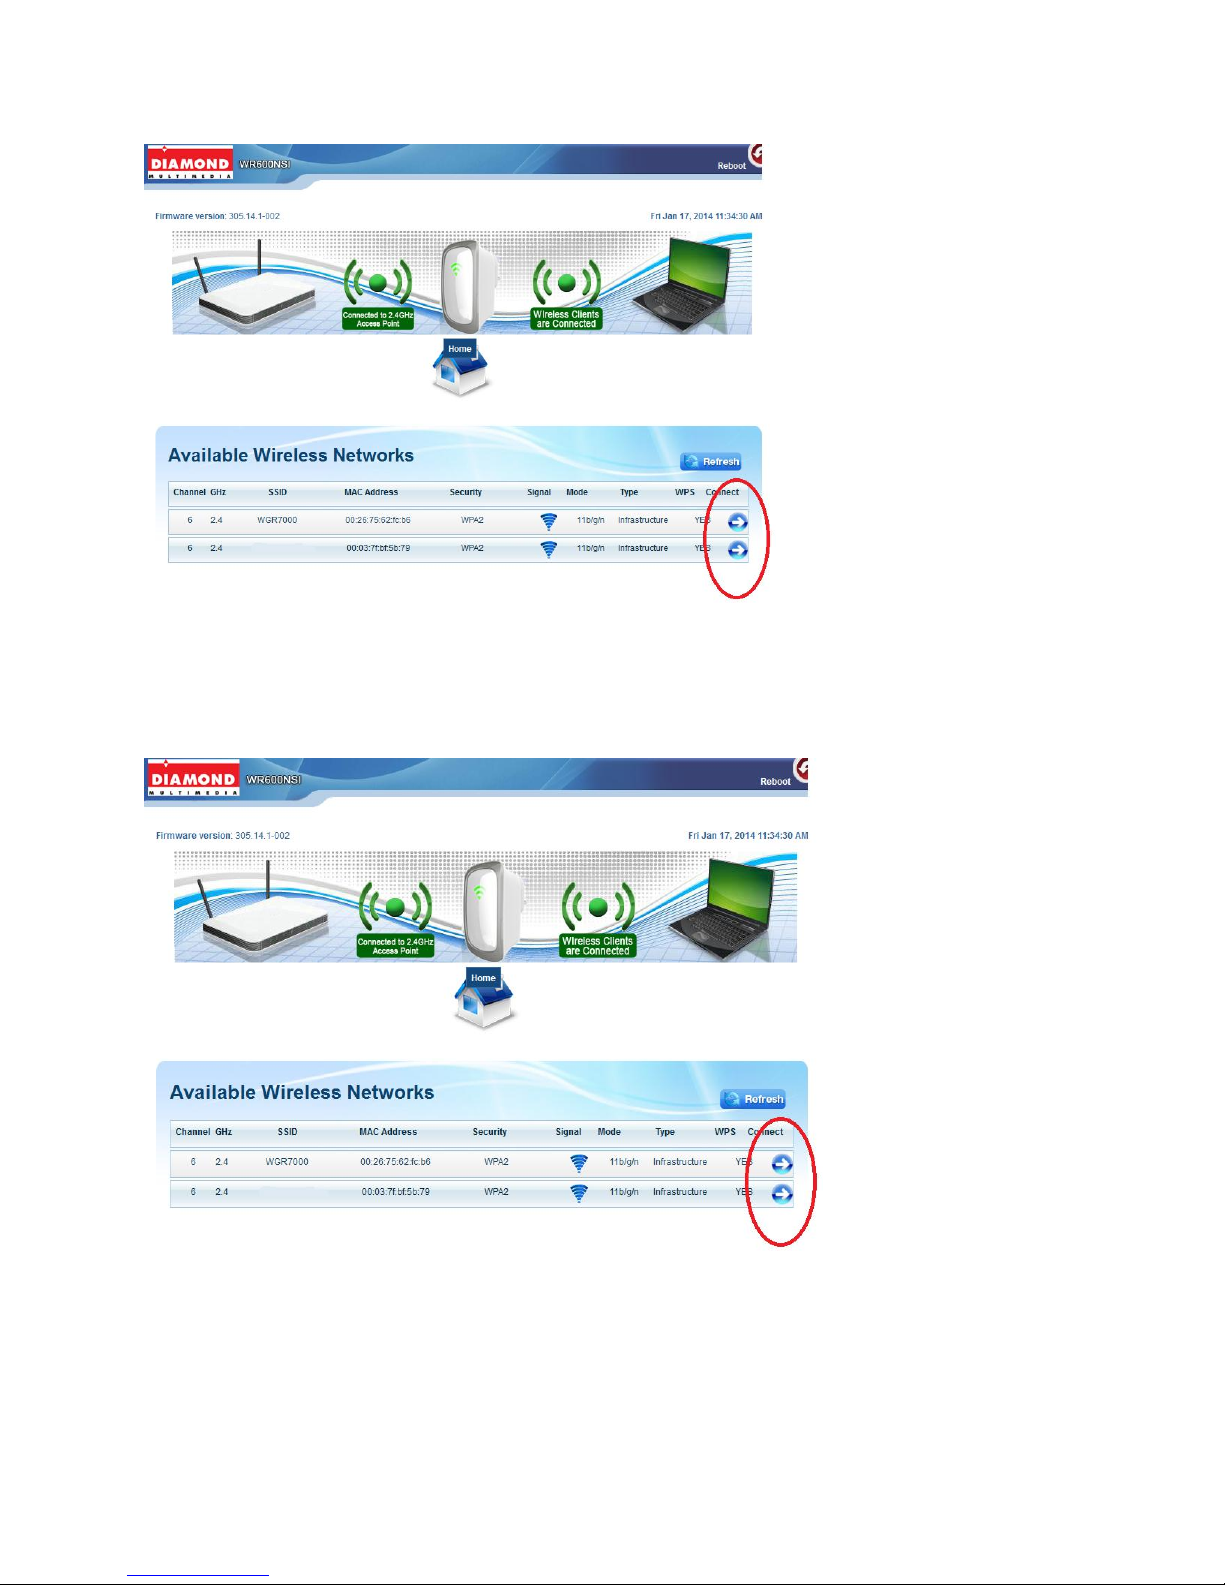
NOTE: If you are connecting to a hidden wireless network, you need to go through the Manual Setup to
key-in the information from your existing wireless router/AP manually
6. Click the connect button that corresponds to the network you want to connect
7. Enter the correct Wireless Password of the preferred network then click the Apply button.
 Loading...