

Diamond vc500 Quick Installation Manual
1
VC500
Quick Installation Guidance
1.1 Features and application
Small size
Use newest USB2.0 chipset which provides high data transmit rate to ensure video and audio work long at
the same time
Powerful functions , installation easily with USB power
Compatible with all laptop, LCD and USB2.0 port
Supply many kinds of capture formats and MPEG models to make VCD, DVD, WMV convenient and easy to
release on internet
Supply multi-video and S-video inputs.
Deluxe User Interface, software make you do film DIY more easily
1.2 Application scope:
Internet video meeting
Video phone
Video-audio animation transcribing and editing
Make VCD, DVD and Website
Enterprise bulletin and advertisement
1.3 System requirement
Inter Pentium4 1.4G CPU, recommended Pentium4 2.0G or higher
Windows 7, 8, 8.1 and 10 support
Memory 128M at least , recommend 256M or higher
A high speed USB2.0 interface
VGA card supports DirectX9.0
CD-ROM (for installation)
300MB HD space(install driver and application ,like EZ Grabber 2), 600MB to 3GB per hour for recording
1.4 Contents
VC500
AV cable (Composite)
Software Install CD
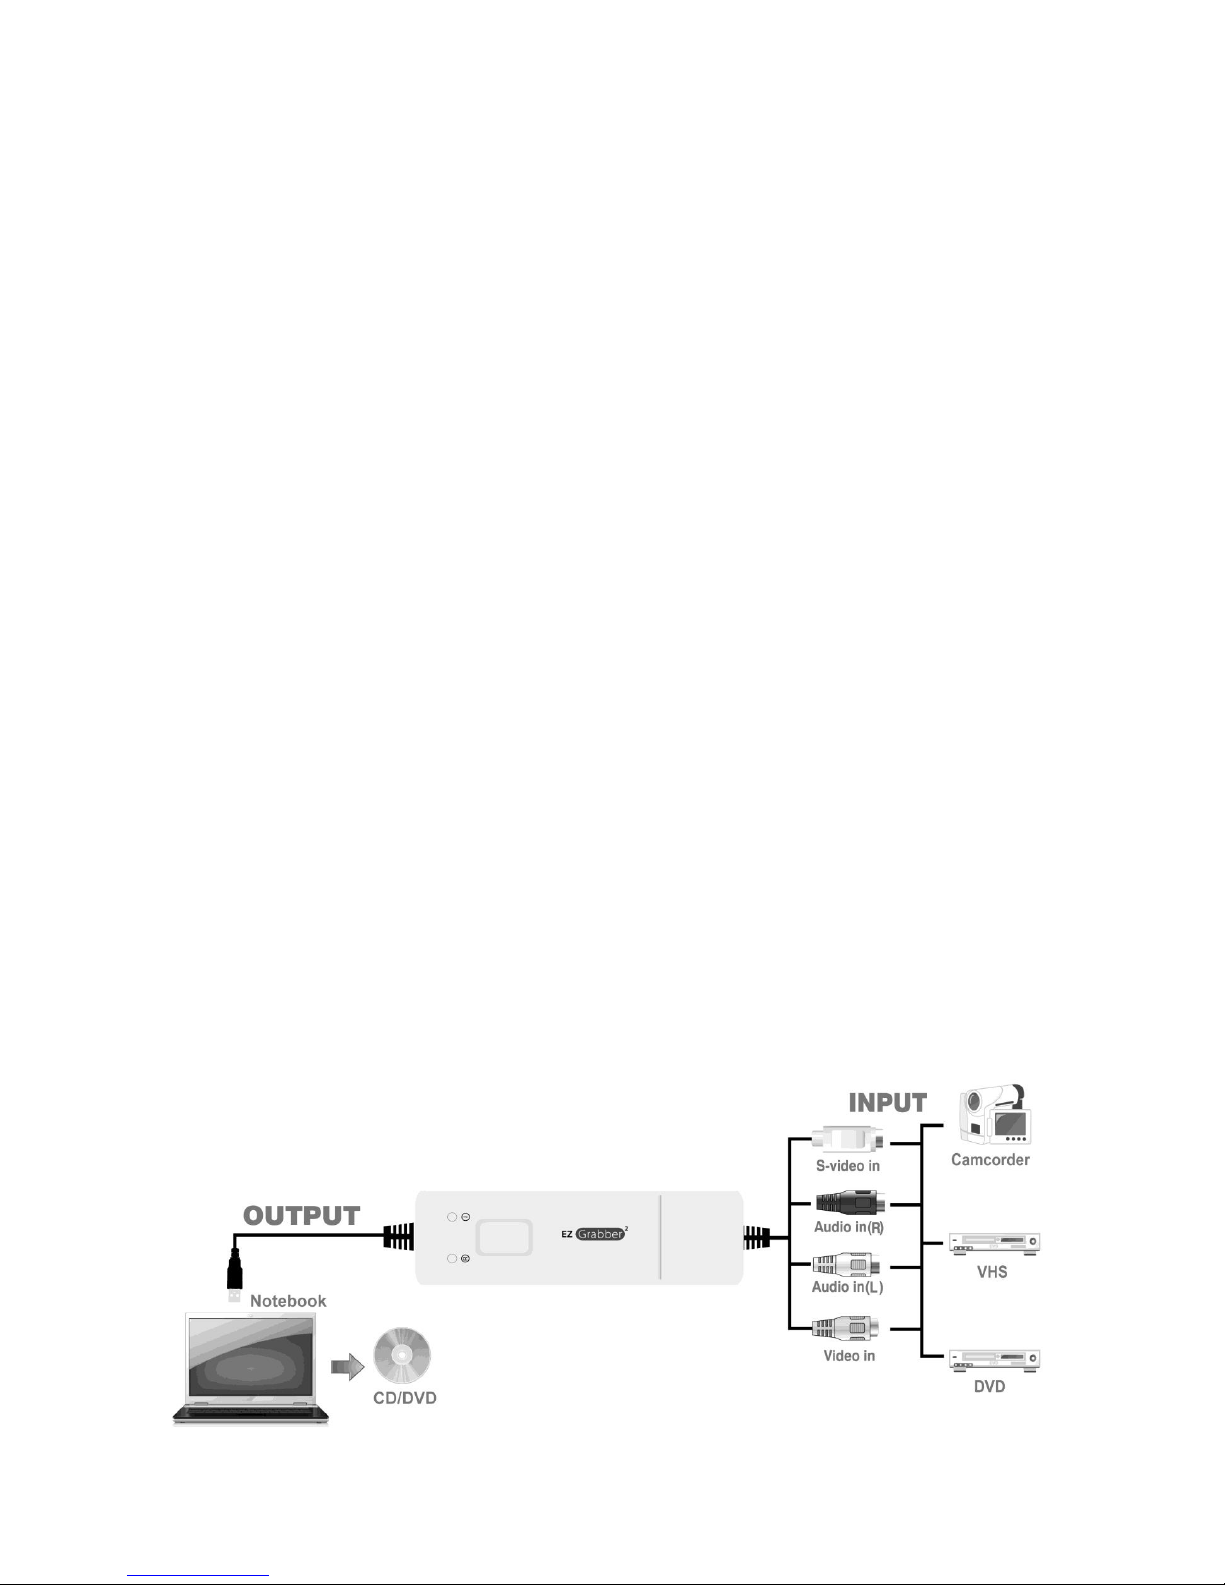
1.5 VC500 Connection Diagram
Note: make sure you connect the V500 to your video source outputs and then to the inputs of the
VC500. The device source example; your VCR will be labeled Video out. Connect the Yellow cable to
the Yellow video out of the source. Connect the Red and White cable to the audio out of the source.
2. Driver and Application Installation
2
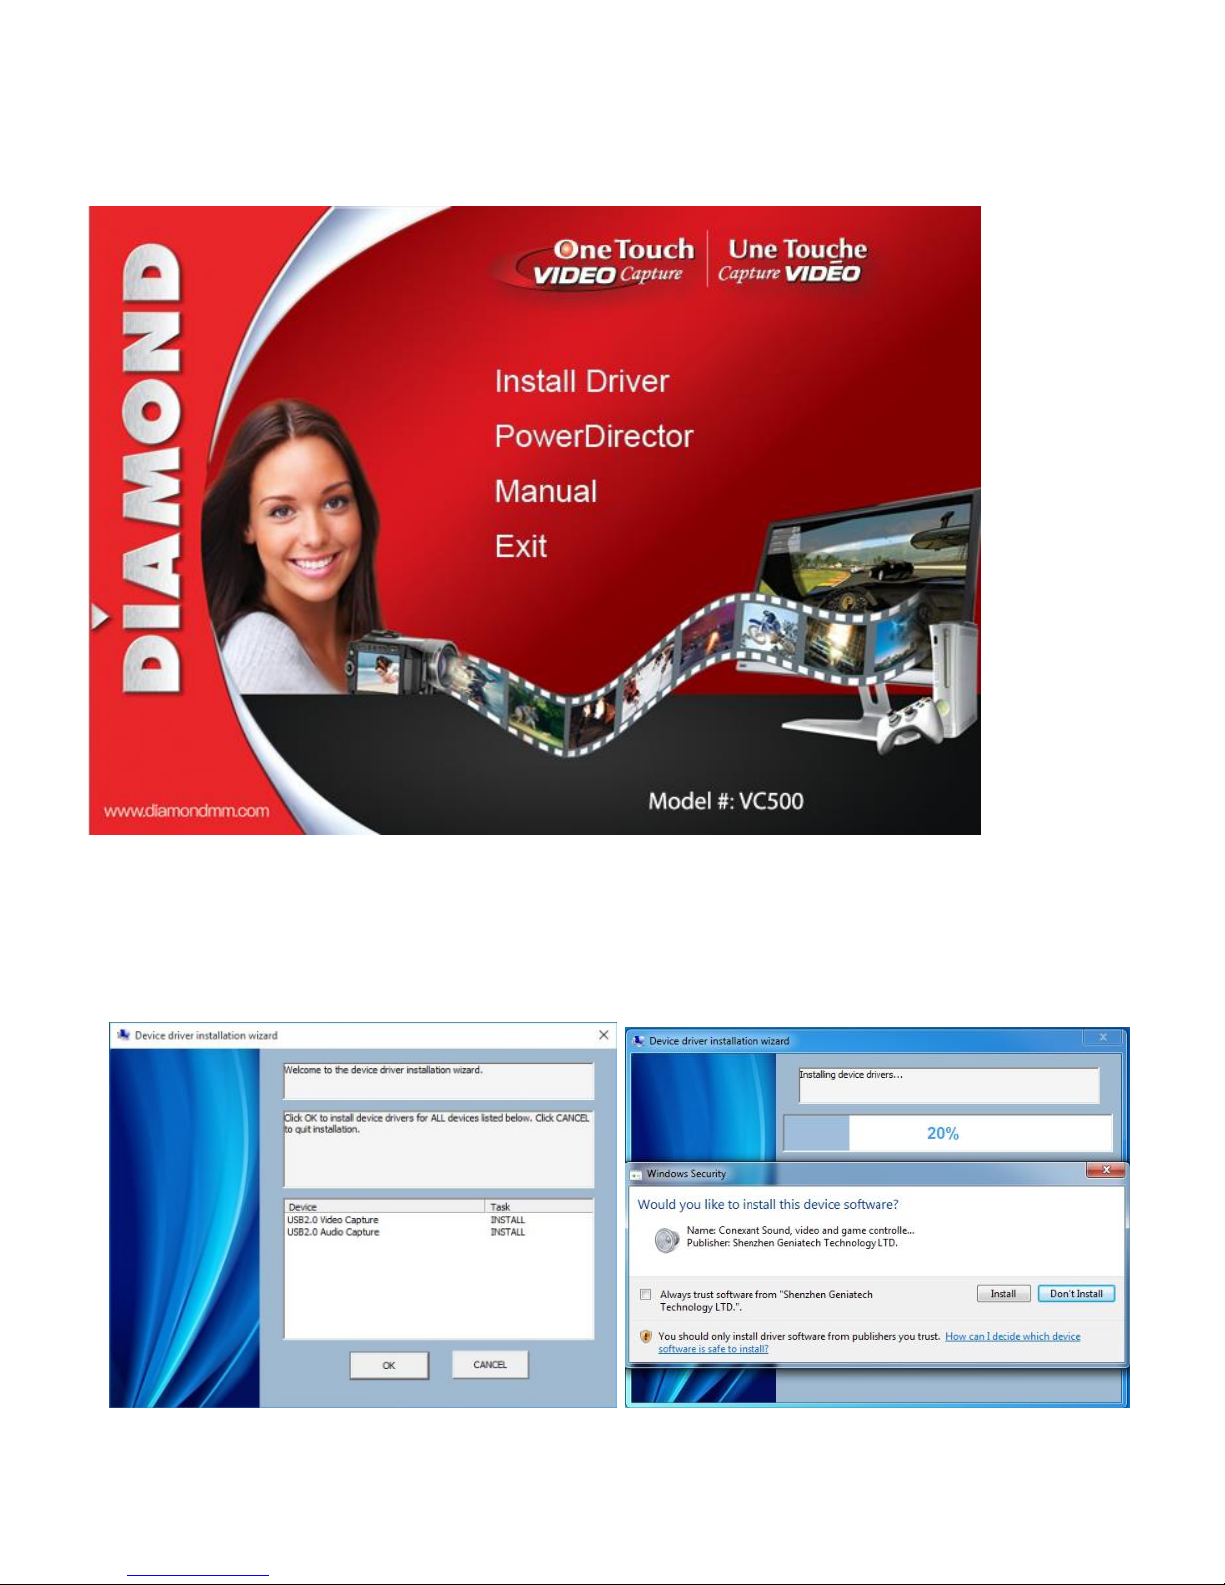
Step1: Windows will display “New Hardware Device” was found. Please choose “Cancel”,
Step2: Insert the installation CD and open up the CD contents. Select and run VC500.EXE. You will see the menu
below.
Step3: Click “next” to continue installation
Step4: Click “Install Driver” to continue installation driver
Step5: OS will promote to install devices,Click “Continue Anyway”(Only Windows XP /7/8.1/10)
Step6: Click “Finish” to completely install the Driver Software
Step7:If you need to verify the installation open the file manager and select "This computer" click the right mouse-button and
select "Manage" and then select "Device Manager" you can see the two new devices "USB2.0 Audio Capture" and "USB2.0

3
Video Capture"
4
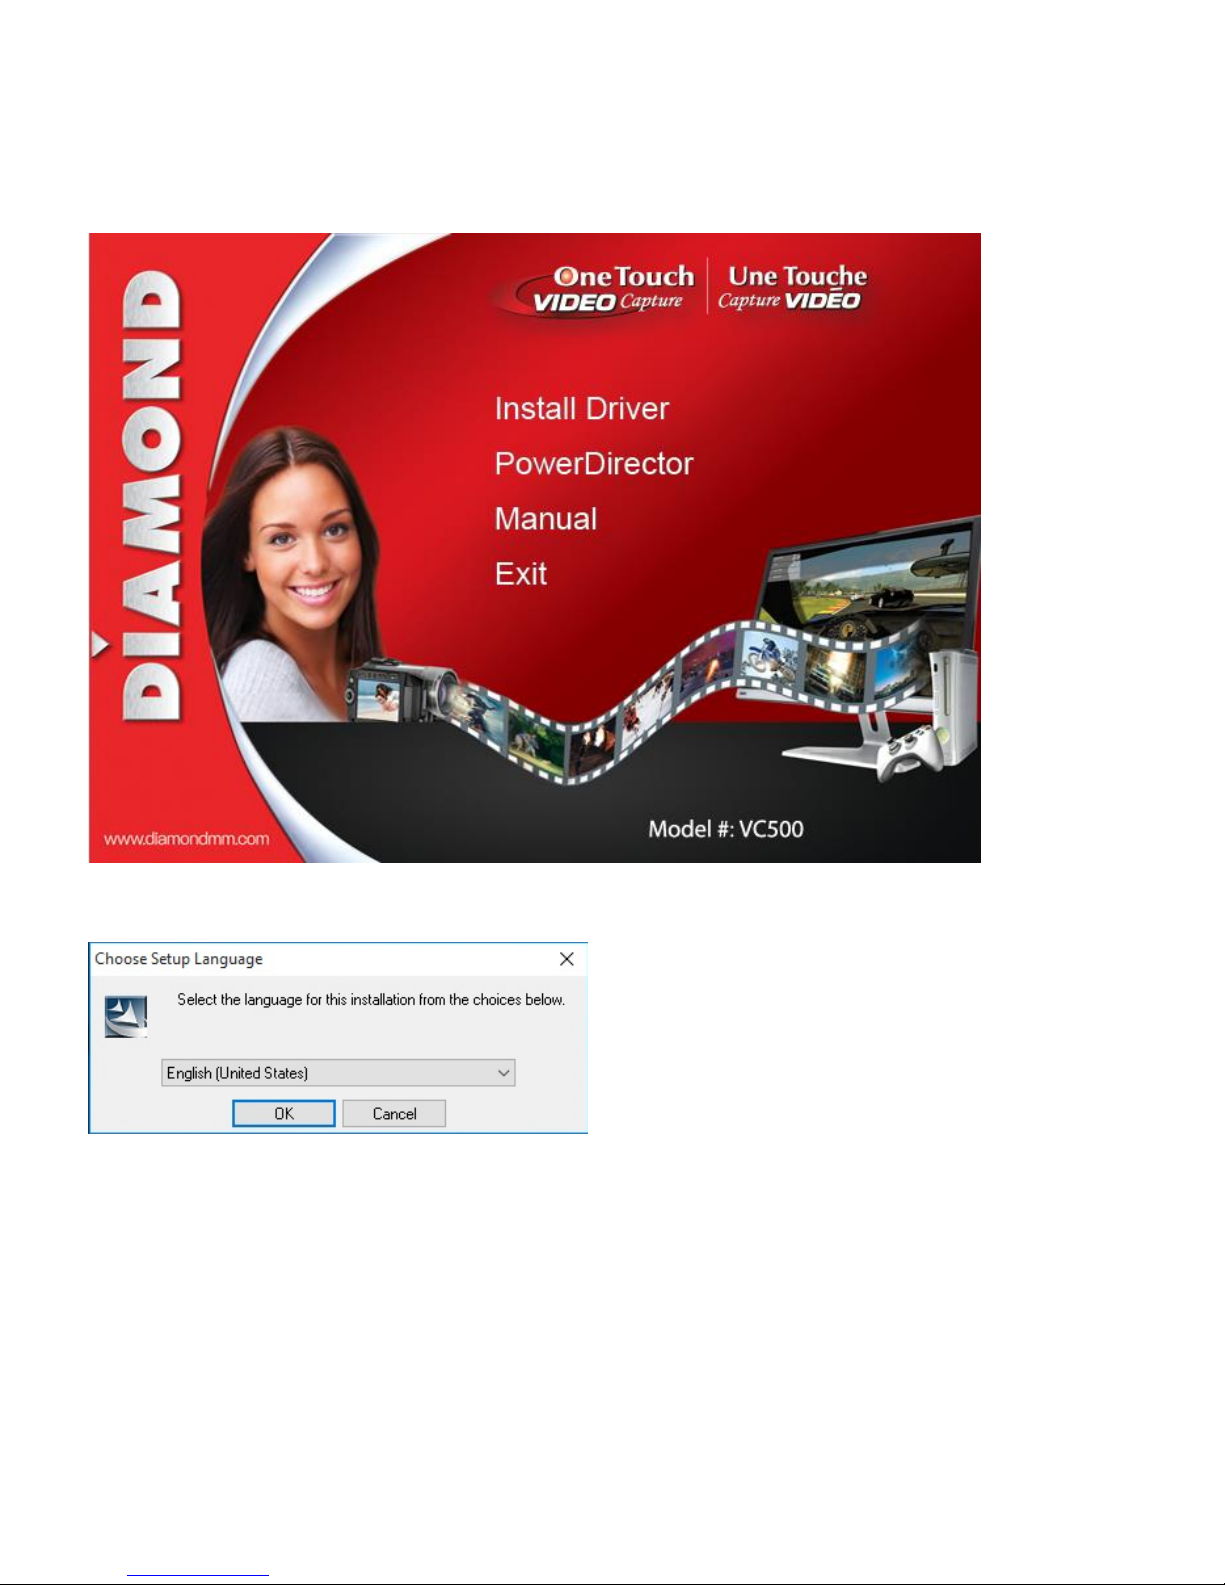
Installing Power Director Capture and Editing Software.
Step8: Click “Power Director”
Step 9: Select your preferred language Click “OK”
Step 10: Click “Yes” to accept the license agreement to continue the “PowerDirector” installation.
 Loading...