

Diamond HEX, HEX H500, HEX H600 Product Owners Manual

DIA.NIOND
TM
Product
COMPONENTS
Owners
Manual
Serial
Date
Number
Of
Purchase
--------------
SPECIAL
THANKS
Dear
Valued
Customer,
Congratulations
on
your
purchase
of
a
Diamond
Audio
Technologies
HEX
Series
speaker
system.
Your
new
HEX
series
system
is
comprised
of
loudspeakers
and
crossovers
that
have
been
precision
engineered
to
produce
the
highest
sound
quality
possible.
For
more
than
a
decade,
Diamond
Audio
has
been
dedicated
to
excellence
in
sound
reproduction
technology.
Our
products
represent
the
latest
advances
in
loudspeaker
technology.
Only
the
very
best
materials
find
their
way
into
Diamond
products
.
Because
of
their
flexible
installation
possibilities,
please
consider
hav
i
ng
your
new
speakers
professionally
installed
by
an
authorized
Diamond
Audio
dealer.
This
will
assure
a
clean
and
efficient
installation,
and
extend
your
one
year
warranty
to
three
years.
Please
keep
in
mind
that
prolonged
exposure
to
sound
pressure
levels
in
excess
of
100
dB
can
cause
permanent
hearing
loss.
This
high
performance
speaker
system
can
exceed
that
leve
l.
Please
exercise
restraint
in
its
operation
in
order
to
preserve
your
ability
to
enjoy
its
fidelity
for
years
to
come.
Sincerely,
The
Diamond
Aud
io
Team
FEATURES
•
Proprietary
Composite
HEX
Cone
Technology
•
Butyl
Rubber
Surrounds
•
Die-Cast
Aluminum
Fr
am
es
•
Fla
t
Progressive
Spider
•
Integrated
Lead
Wires
•
Ferro
Fluid
Cooled
Neodym
i
um
Tweeters
•
Model
Specific
,
Compe
tition
Grade
Crossovers
w/
RAF
Output
Parts
List
-
H500,
&
HSOO
(2)
Hex
Mid-Bass
Speakers
(2)
Hex
Gr
i
lls
w/
Mount
i
ng
Ring
(2)
Mount
i
ng
Gaskets
(2)
Hex
Crossovers
(2)
Hex
Tweeters
in
Flush
Mount
Cups
(2)
Hex
Tweeter
Su
rface
Mounting
Cups
(1)
Mid-Bass
Mo
un
ting
Hardware
Kit
(1)
Tweeter
Mounting
Hardware
Kit
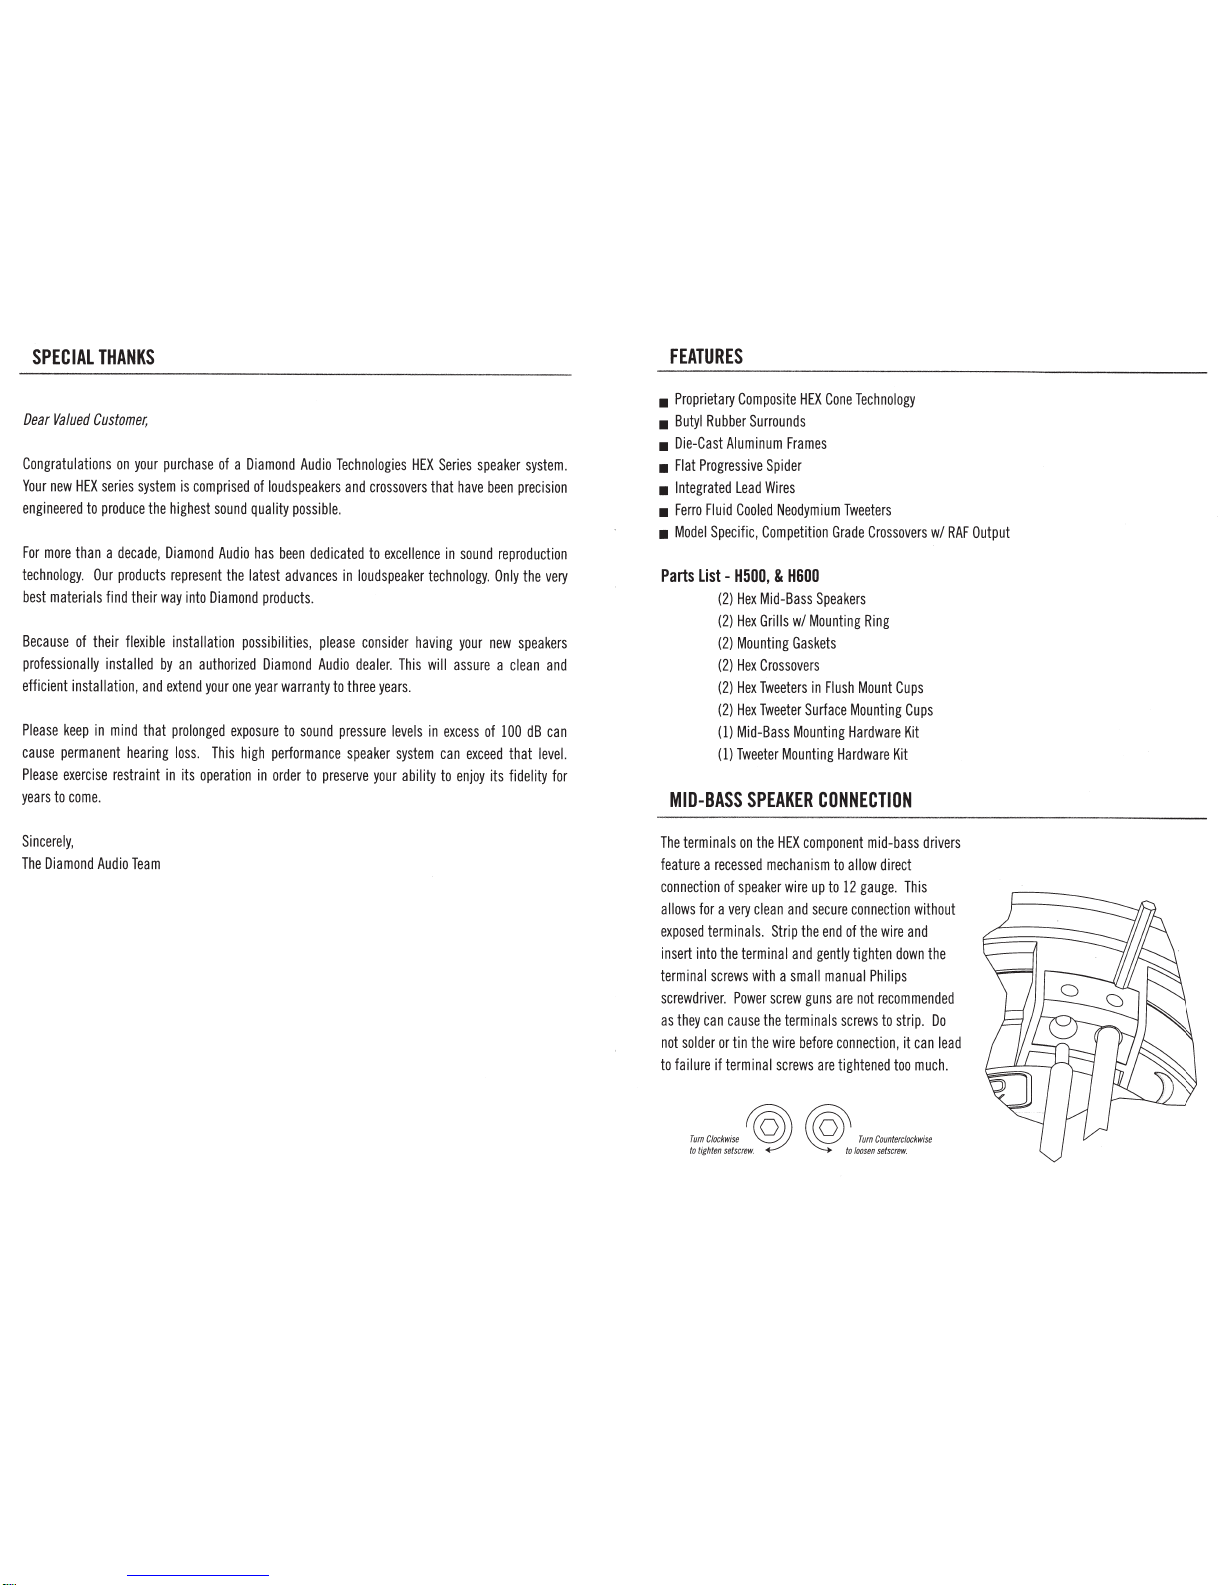
MID-BASS
SPEAKER
CONNECTION
T
he
t
erminals
on
the
HEX
component
mid-bass
dr
ivers
feature
a
recessed
mechanism
to
allow
direct
connection
of
speaker
wire
up
to
12
gauge.
This
allows
for
a
very
clean
and
secure
connectio
n without
exposed
terminals.
St
ri
p
the
end
of
the
wire
and
insert
into
the
terminal
and
gently
tighten
down
the
terminal
screws
with
a
small
manual
Philips
screwdriver.
Power
screw
gu
ns
are
not
recommen
de
d
as
they
can
cause
the
ter
min
als
screws
to
st
rip
.
Do
not
solder
or
tin
the
wire
before
connection
, it
can
l
ead
to
failure
if
terminal
screws
are
tightened
too
much.
T
urn
Clockw
ise
® ®
Turn
Coun
te
rc
loc
kwise
to t
ighte
n
s
e
tscr
ew~
~t
o
lo
o
sen
setsc
rew.
 Loading...