

Diamond HD Media Wonder MP700 Quick Installation Manual

DIAMOND
MP700
HD Media Wonder
®
Mini Multimedia Player
Mini Lecteur Multimedia
Quick Installation Guide
Guide de démarrage rapide
VERSION 1.0 ©2010 Diamond Multimedia.

Preamble
Thank you for purchasing the Diamond HD Media Wonder Mini Media Player
The HD Media Wonder provides you the enjoyment of downloading the MP3, WMA, JPG,
BMP, MP4, VCD, DVD, RM, RMVB and other format via the Internet. The memory cards: SD,
MMC are supported. Mobile U disk drives and USB compatible.
Introduction
Function
Support photo formats: JPEG, M-JPEG, BMP, TIFF, PNG.
Support Audio formats: MP3,WMA
Support Video formats: RM, RMVB, AVI, MPEG1 (VCD), MPEG2(DVD), MP4.
Support cards: SD,MMC and hot-swappable
Connect with U disk, mobile hard disk
Support USB and card insert at the same time, and can switch to each other
With a 15 screen picture browsing
Concise document interface management, cnvenience of users in different regions.
Specifications
Power supply, 100-240V
Dimensions : 190×140×35 mm
Weight: 400g
Working temperature and humidity, 0~40°C, 20%~80%
Storage temperature and humidity, 20~45°C, 10%~90%
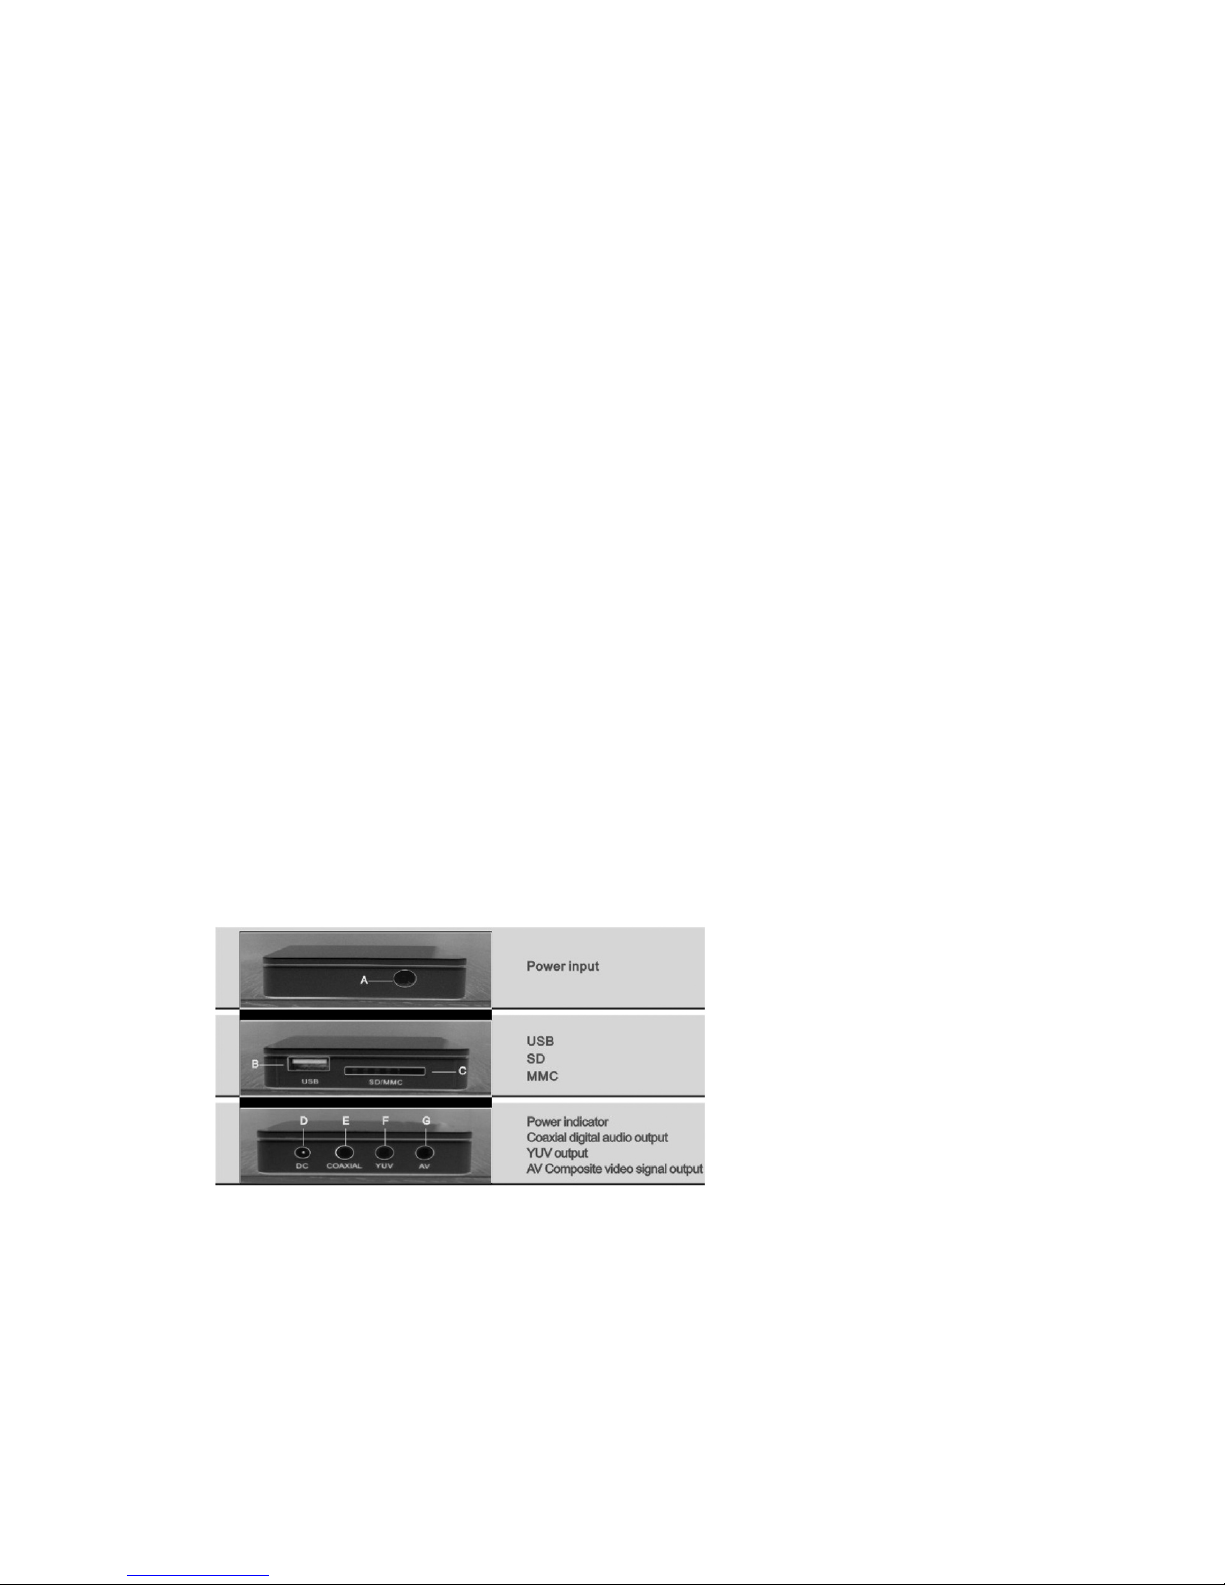
1.3 function Diagram
A. Power input
B. USB interface
C. SD/MMC
D. Power indicator
E. Coaxial digital audio output
F. YUV output
G. AV Composite video signal output
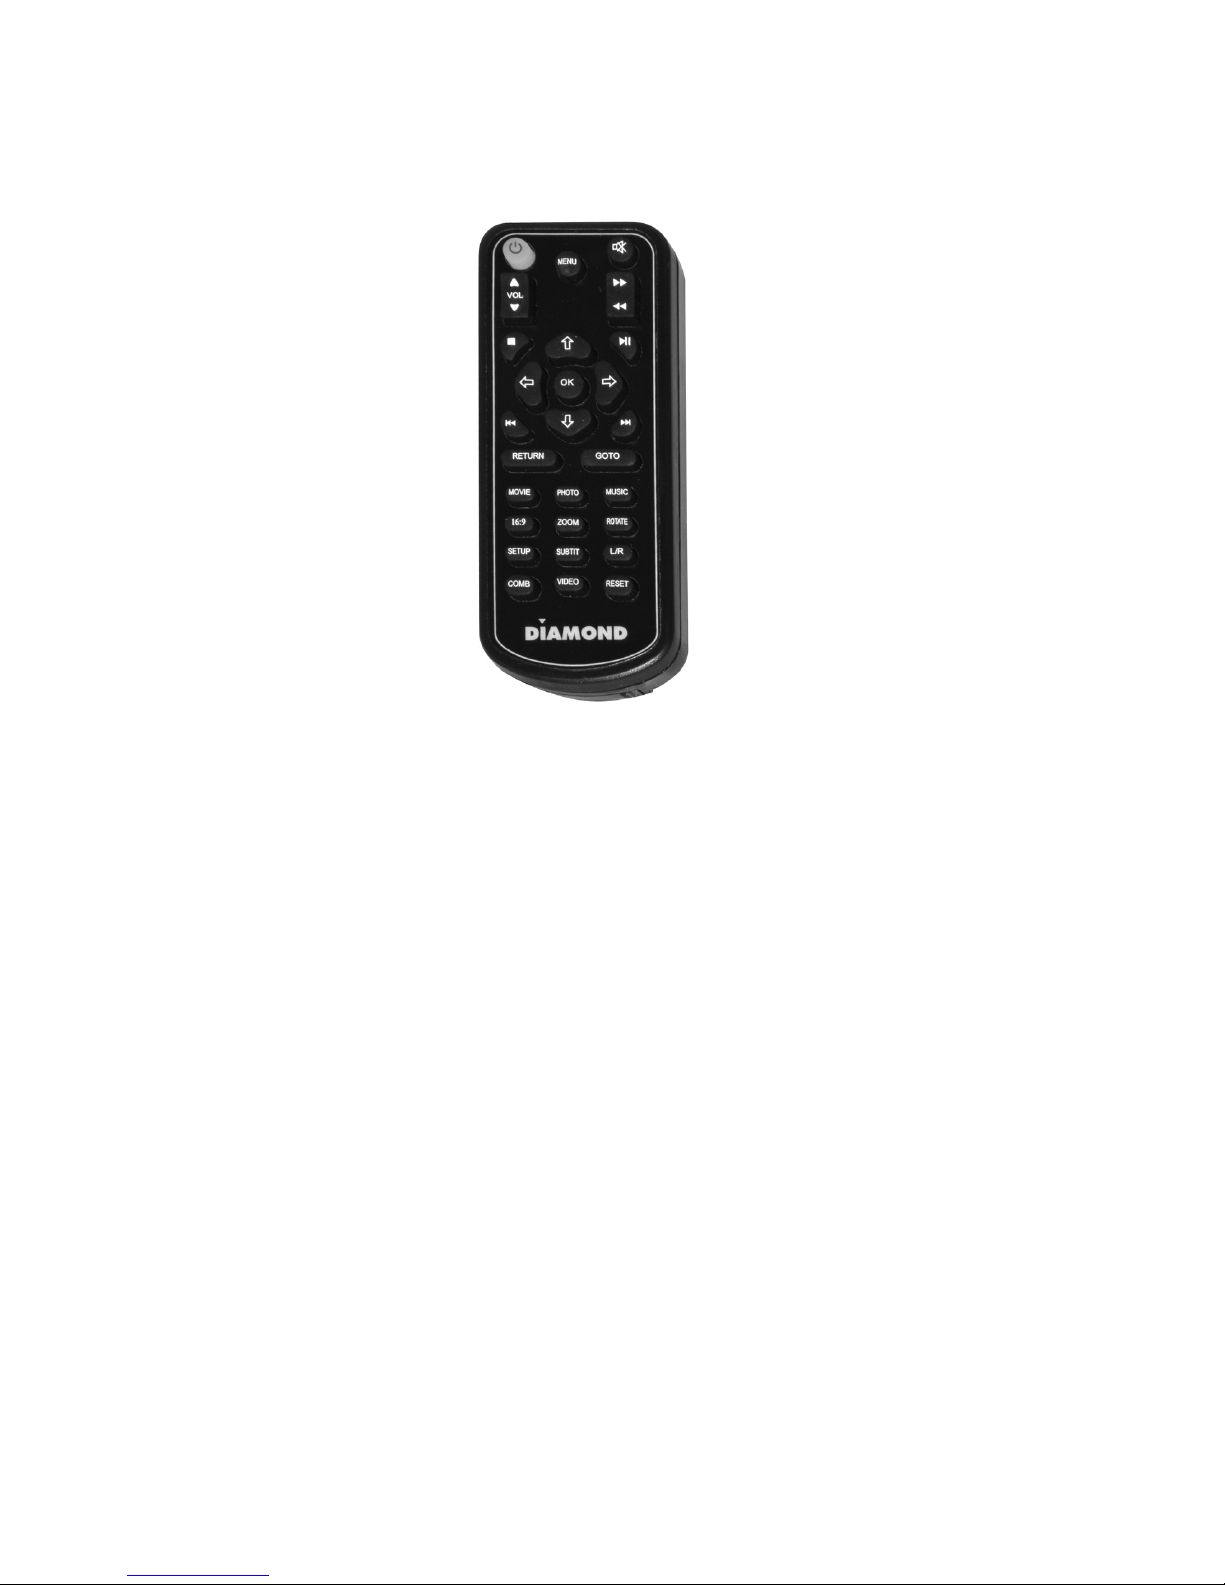
1.4 Schematic Diagram of Remote Control
GOTO: Press the "GOTO" button, the machine pop-up menu automatically , the cursor
location in time. Press the left \ right to choose hours, minutes and seconds. Press up\
down key to add and minus time.
SUBTIT: Press the SUBTIT under the plug-in subtitles situation can open, off, zooming
subtitles, subtitles for the two amplification.
COMB: Press the key to play background music while displaying pictures.
RESET: Click this key, the machine back to factory default settings (output NTSC video
composite video)
VIDEO: The key of video output signal switching. When properly connected with the local
TV but no TV show. Please click this button to switch the output signal, when the output
signal match the television image will be displayed.
RESET: Press this key in the root directory , the machine back to factory default settings
(at this time NTSC video output composite video)
VIDEO: This machine video output signal switch keys. When connected with the television properly but no tv show, please click button to switch the machine's output signal.
When the output signal model of the machine match well with television input signals,
the image will be displayed.
Connect with TV
Connect with TV’s A/V
Plug the A/V cable (red , white ,yellow) into the TV’s CVBS, Left channel, right channel.
Then plug another end of the cable into U2’s A/V socket.
HD (Component) connect
Plug one end of the YUV video line (green blue and red) on the local Y, Pb/Cb, Pr/Cr. The
other side of the green, red, blue connect with the high-definition TV input (green, blue
and red). At the same time connect AV Video red, white Cable to the machine's left channel, right channel (audio output), The other end of the red and white lines connect with
TV audio input.
Notice: after connect with TV, it is necessary to verify your media player connections to
your TV are correct.
Please make sure choose the correct the TV signal source after connected with TV. If
there are no images, please click "VIDEO" on the remote control to switch the output
signal until match the television signal.
When your TV can support high-definition input, we recommend that you choose "HD
MODE" to watch.
Operation and Function
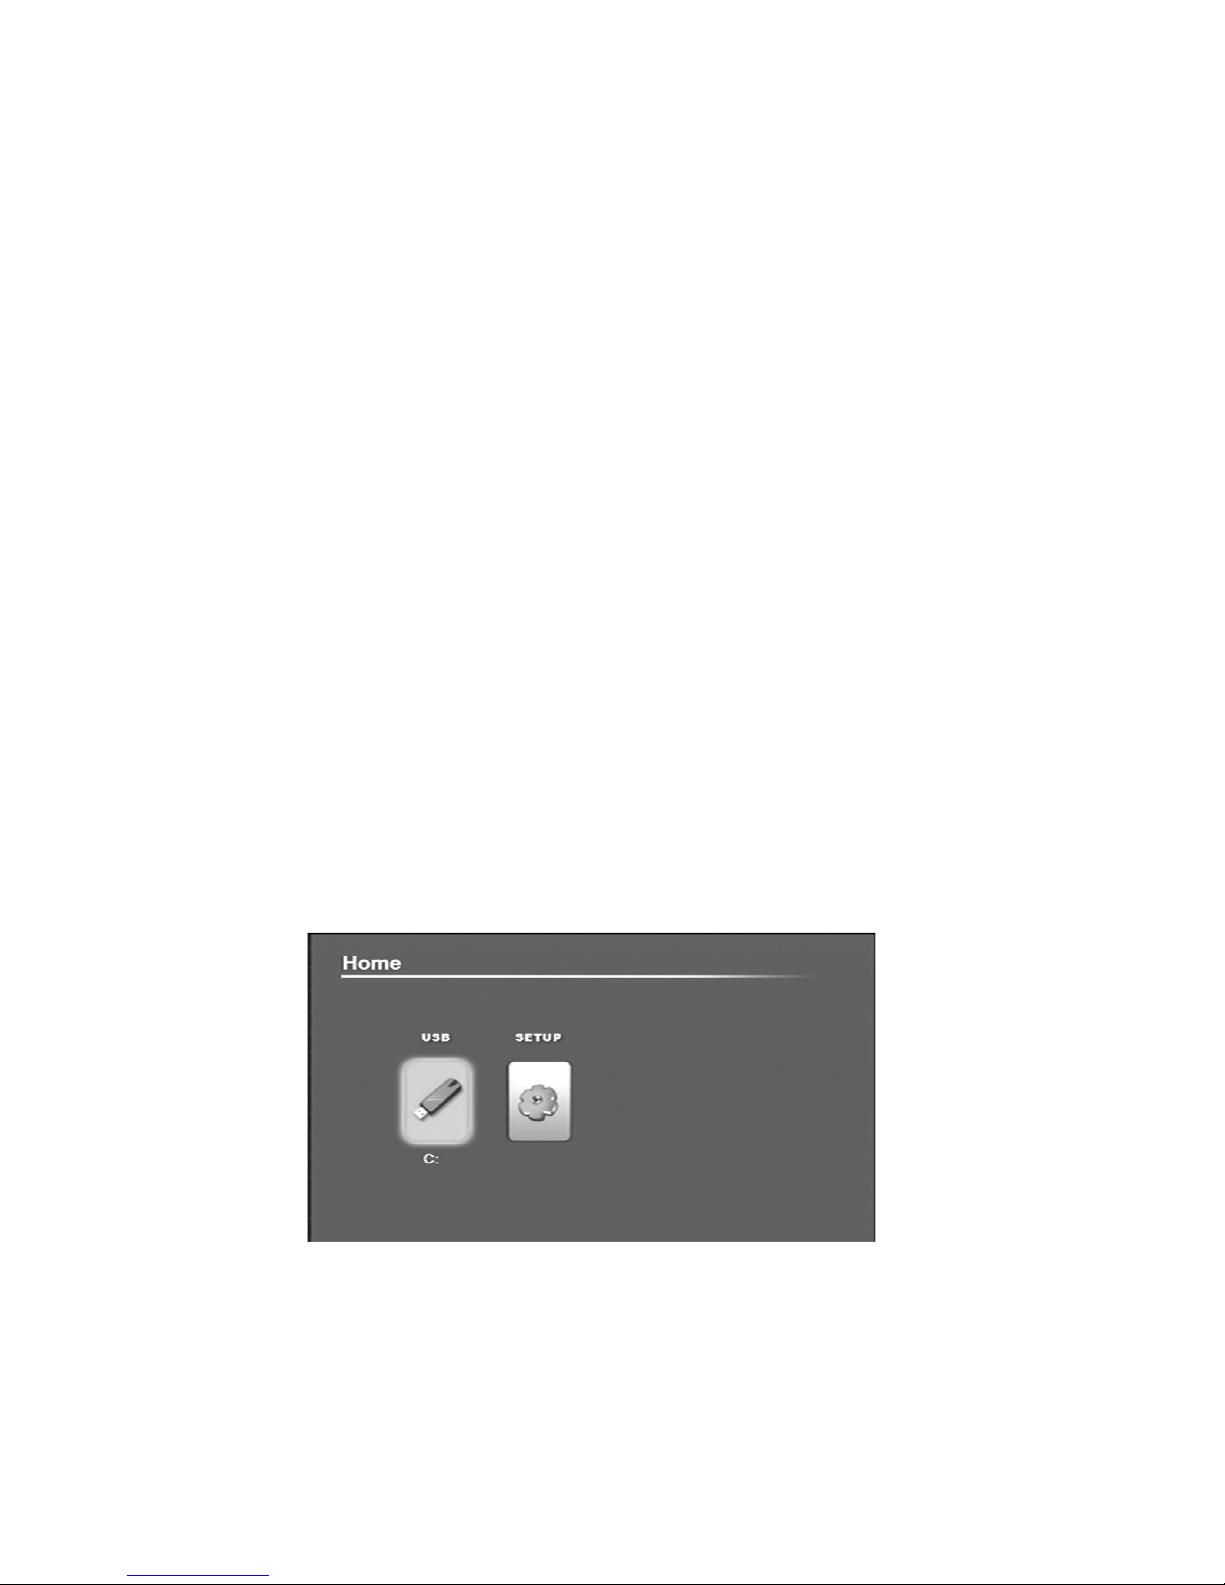
Insert the storage device which including file, screen is as follows:
Screen display connected storage devices and set up menu. If multiple storage devices
are inserted at the same time, it will be displayed separately. Press the arrow keys on the
host or remote Control to select storage devices.
Operation on play files
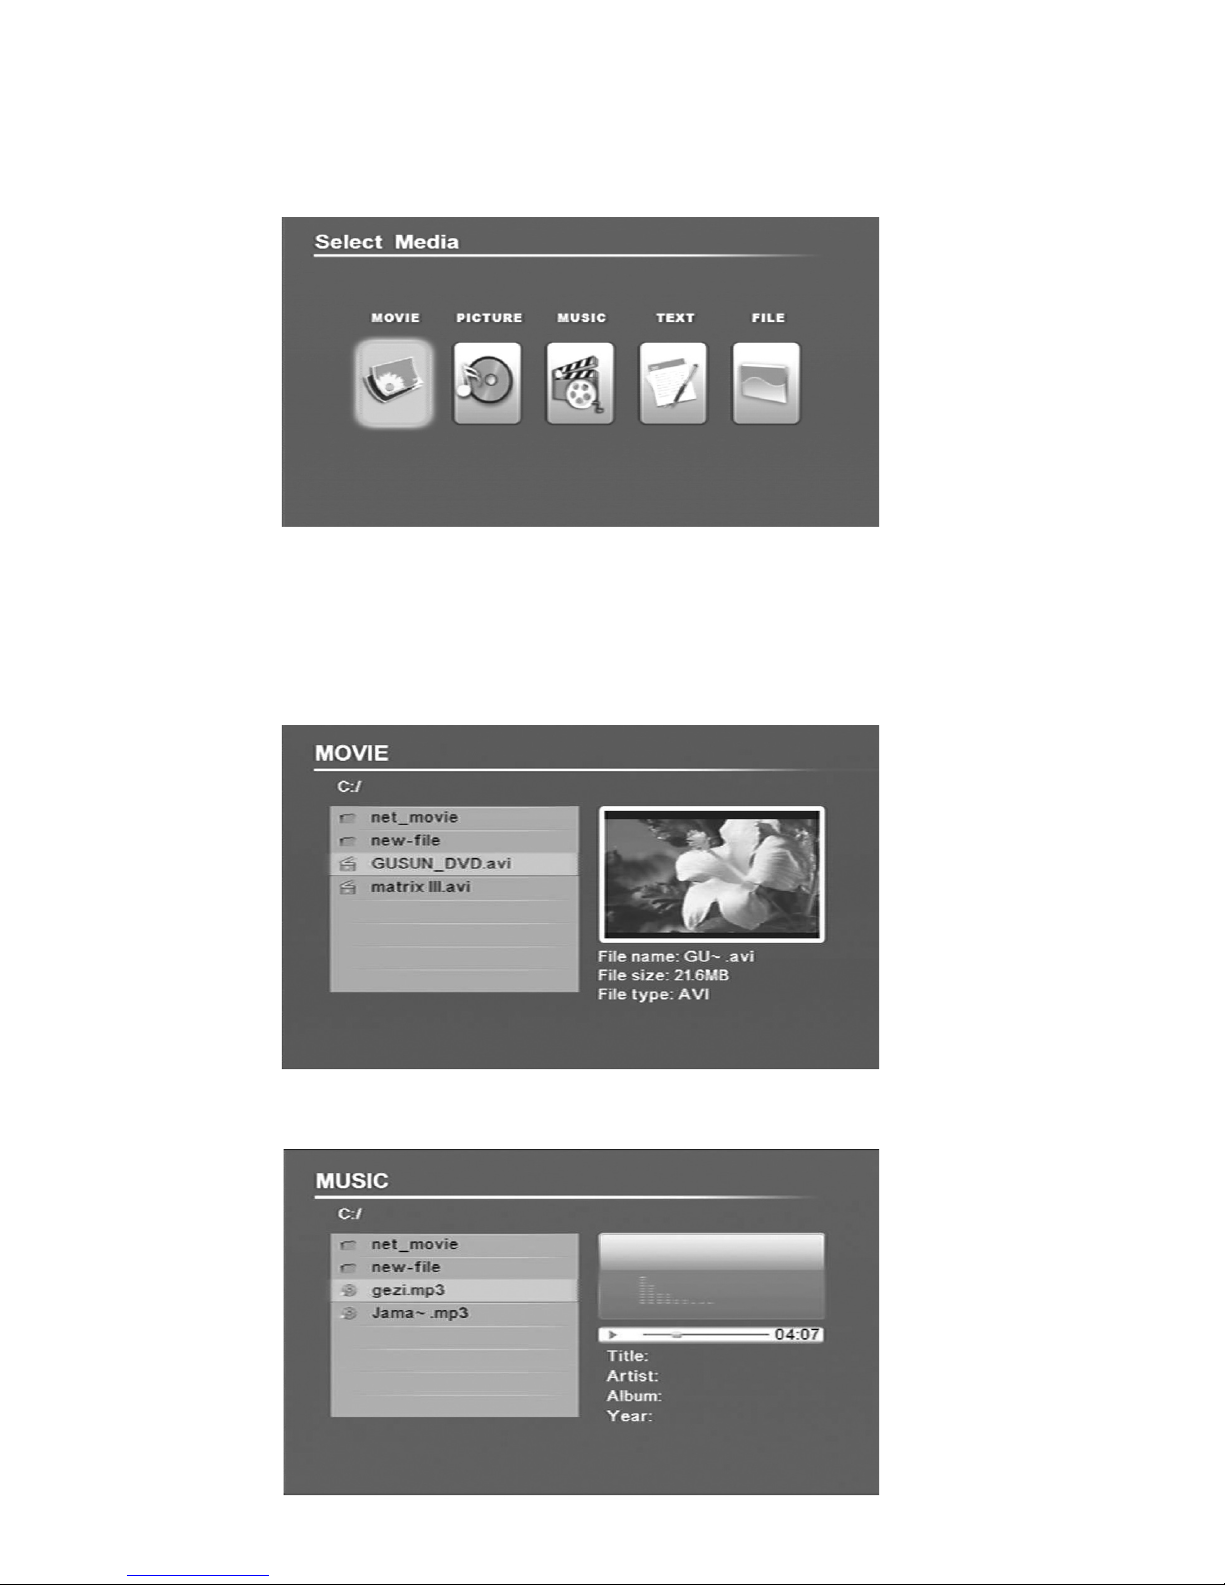
Choose the right storage device, then press “OK ” key on RMBOX or on the remote control to the Select menu as follows. Please select files in the storage device before playing.
Four modes such as “movie”, “music”, “photo”, “file” may show on the screen. press the
“OK ”key on RMBOX or on the remote control to play each mode. The screens in each
Mode show as follow.
Movie
Music
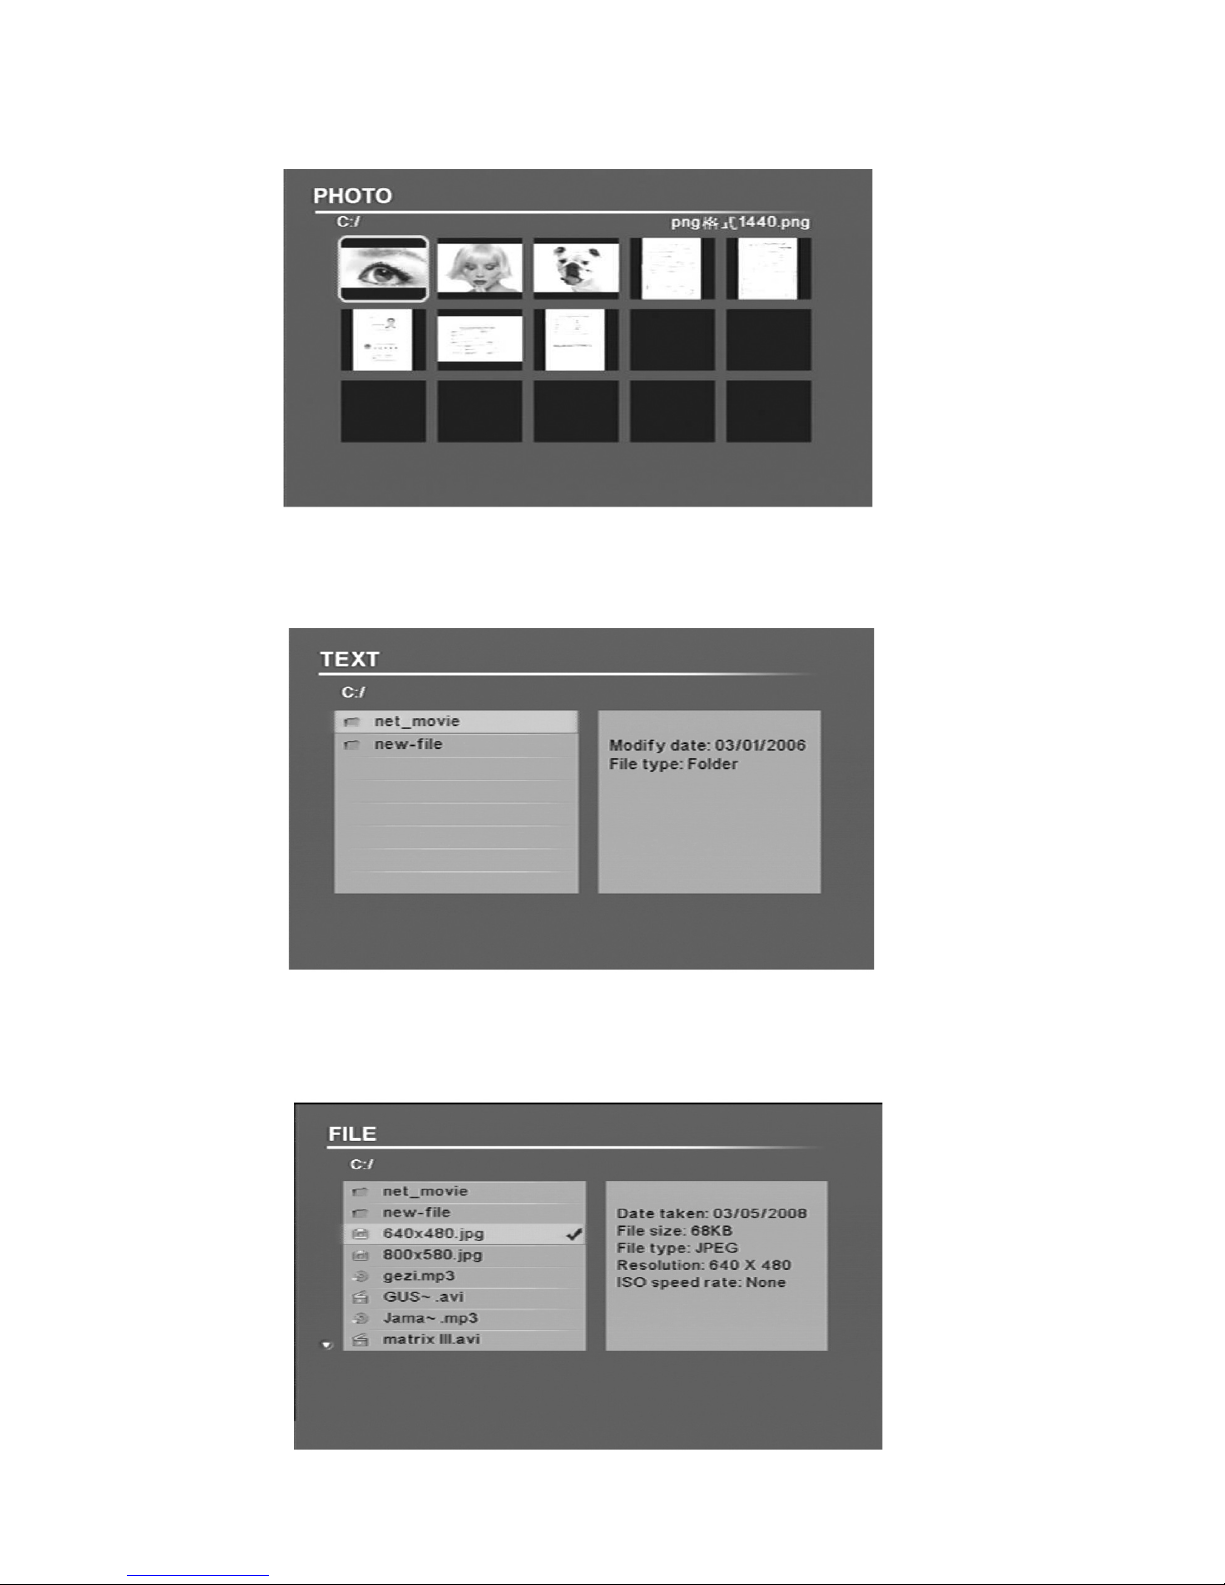
Picture
Text
File
modes “movie”, “music”, “photo” show on the screen is a preview of the corresponding files
in the storage device, while mode “file” lists all documents in the storage device and their
information. Press the directional keys on the remote control to the right file, then press the
“OK ”key or “ENTER” key on the remote control to play.
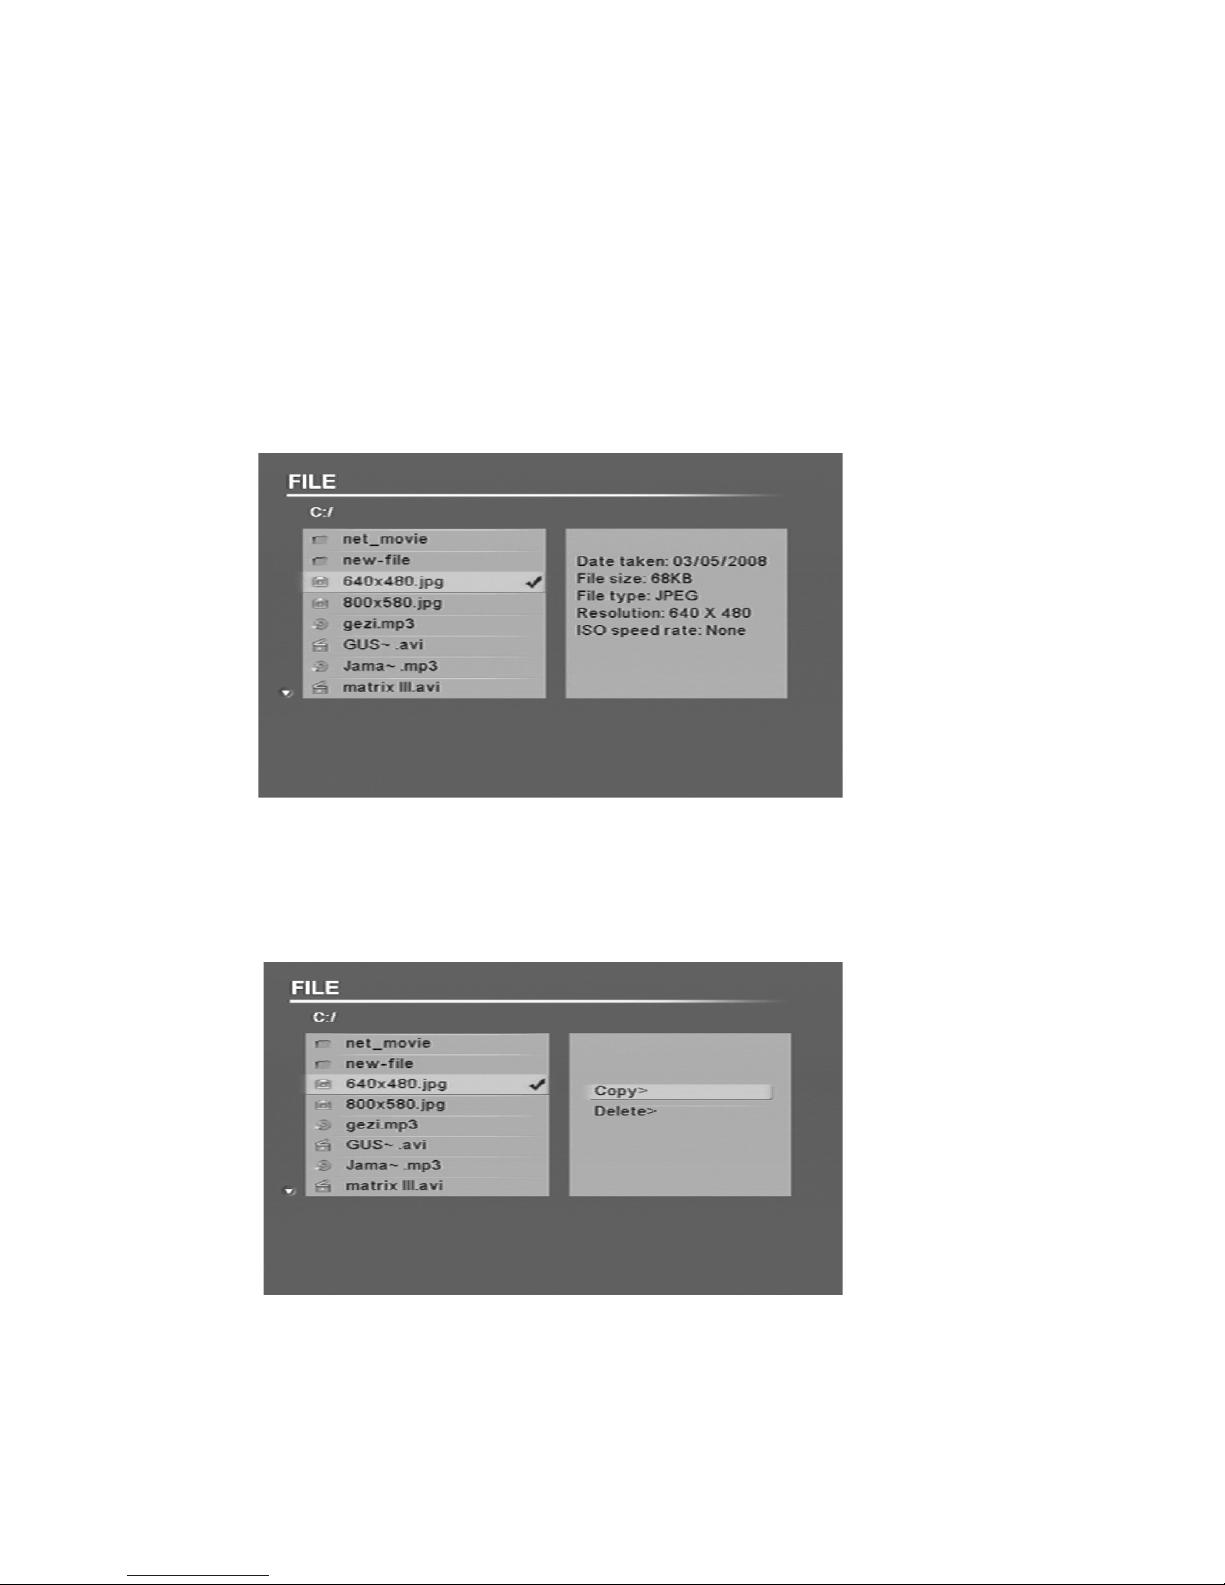
Copying and deleting
Copy or delete any files in “file” mode.
Press the “UP”, “DOWN” key on the remote control to choose any files that you want to
copy or delete, secondly press the “right” key to verify the file , then you may see a “√”
behind the selected file as follows.
Copy or delete several files, please repeat the above operations.
After selecting the files, press the “MENU” key on the remote control to display “copy”,
“delete” dialog box as follows.
Press “up”, “down” to choose the operation which you need; Press “ENTER” key to the
corresponding operation; Press “ MENU ” key to cancel “copy\delete ”.
when pressing the “copy” key, the storage location of the contents that you want to
copy may show on the right of the screen as follows.
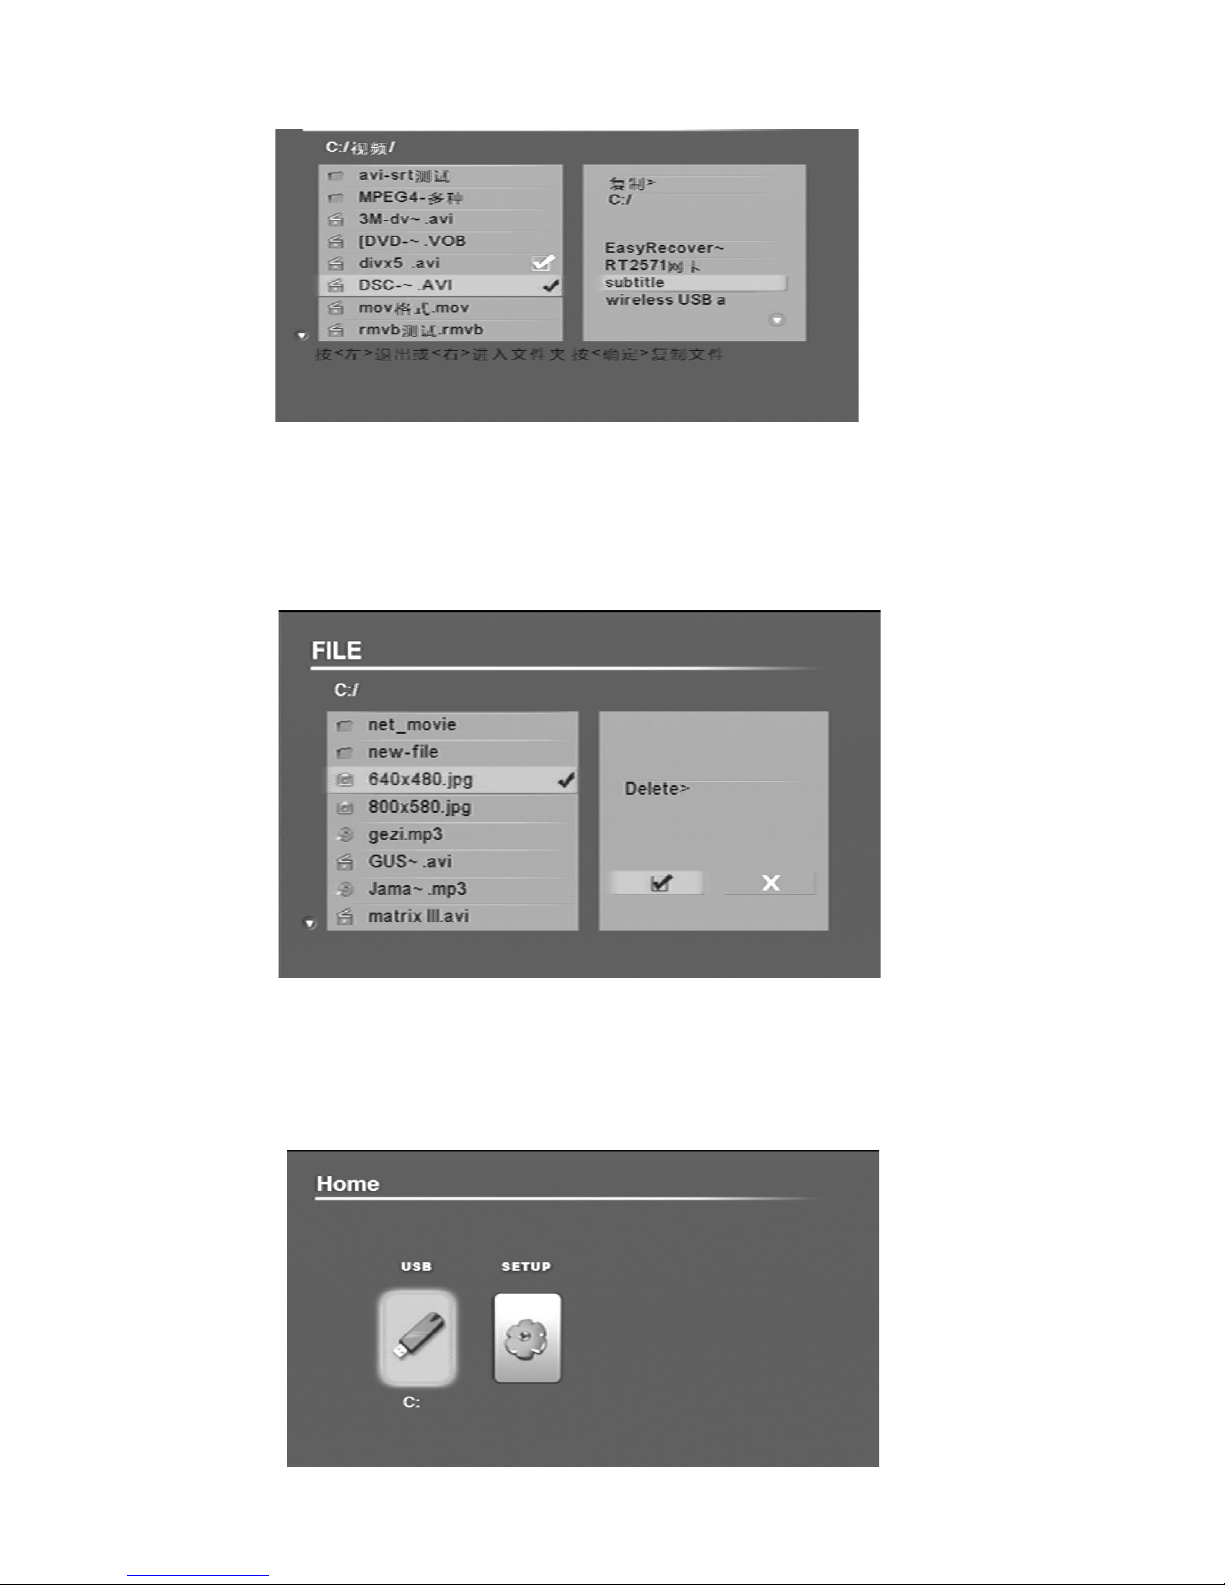
press “up” “down” key to choose file folder; press“ left ”“right” key to exit\enter the file
folder; Press “OK” key to start copying. When pressing “delete” key , a delete dialog box
may display on the screen, choose“√”to delete files, choose“×”to cancel delete operation. Note: can not be copied to format NTFS storage devices)
Settings
when RMBOX is turned on, press the directional keys on RMBOX or on the remote control to
choose “setting” option as follows:
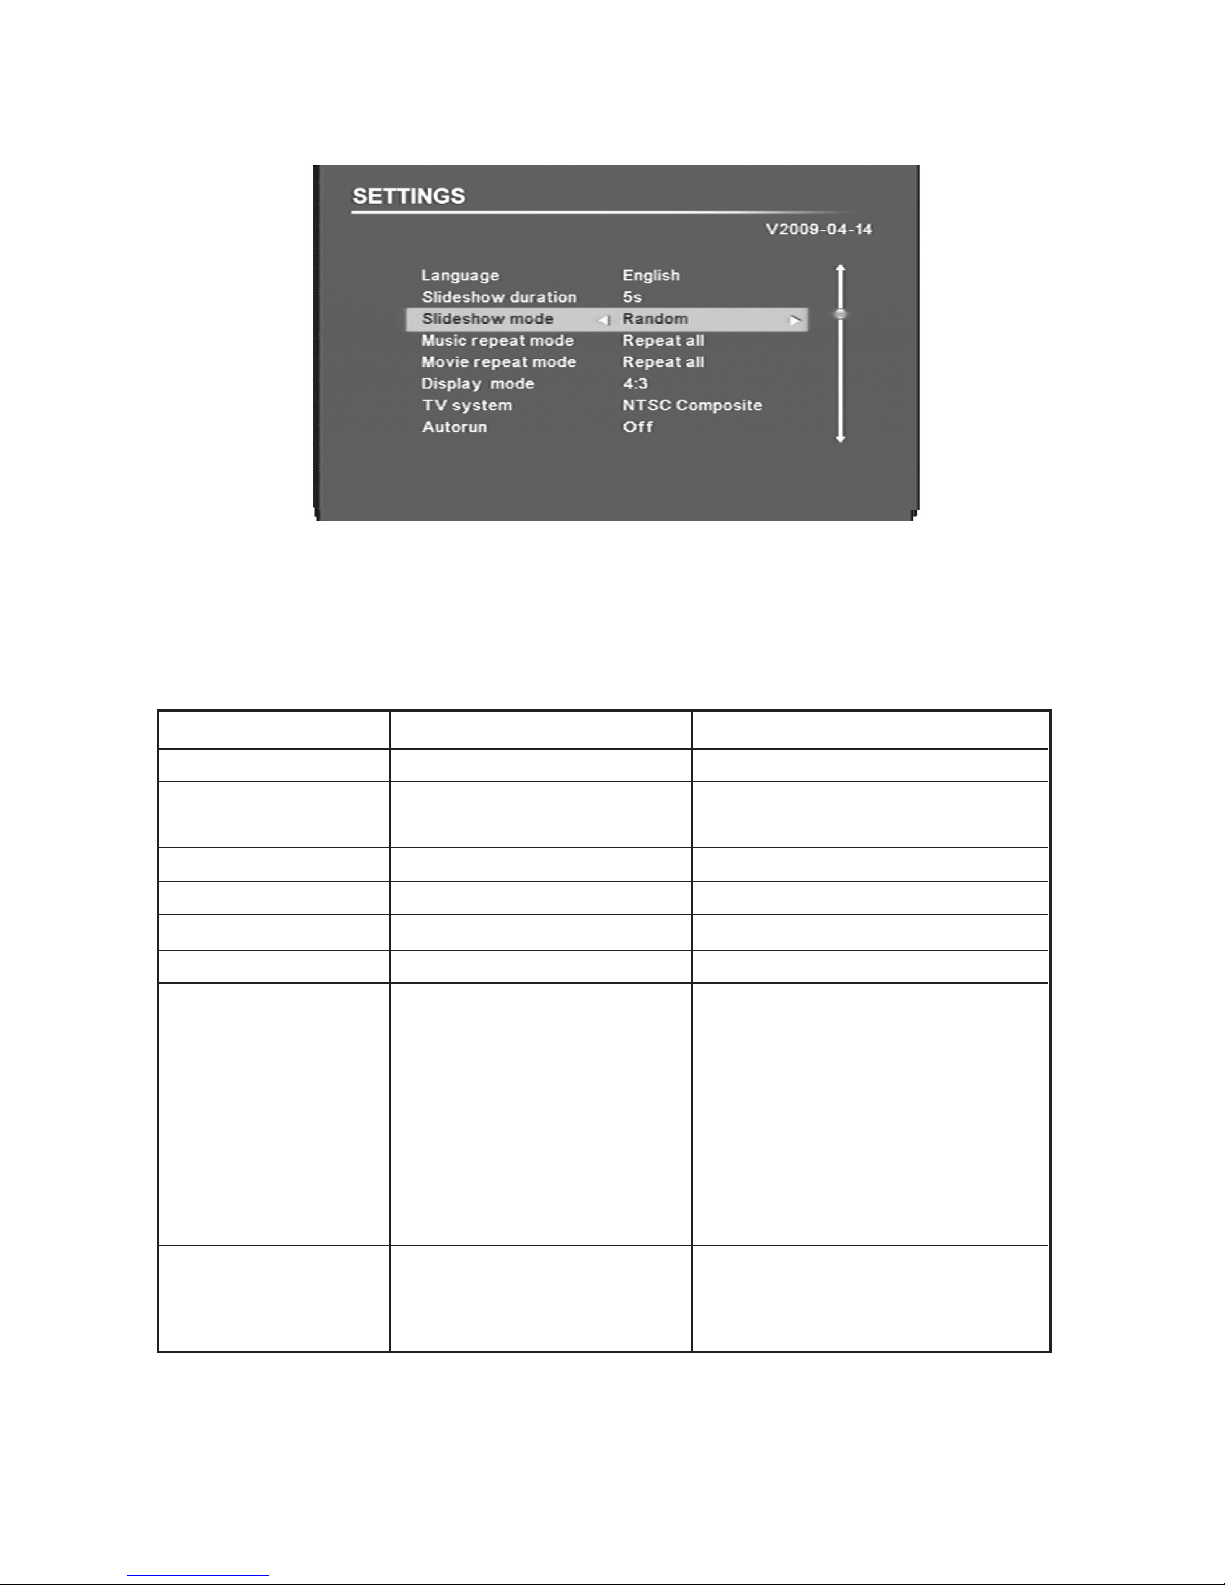
setting items particular setting menu remark
language simplified Chinese, English setting the language
Slideshow duration 3s, 5s, 15s, 1min,
15min, 1hr. Setting the photo display time
Slideshow mode Random ,fading…… Setting the photo display mode
Music repeat mode Repeat one, repeat all Setting the music repeat mode
Movie repeat mode Repeat one, repeat all Setting the movie repeat mode
Display mode 16, 9, 4, 3 Setting the TV’s display proportion
TV system PAL composite
NTSC composite
PAL interlace
PAL progressive
NTSC interlace
NTSC progressive
HD mode Advice: if your TV support HD
mode, please choose this mode,
Auto run on, off Setting the machine’s auto run
function
Press “Play\pause” key or “OK” key on the remote control into the Setting menu as follows.
Press arrow keys on the remote control to move cursor to the option that need to be set
(shown as the table below). Press directional keys on RMBOX or “left” “right” keys on the
remote control to do the setting operation, then press “OK ”key on U2 on the remote control
to verify and save the settings.
 Loading...