

Diamond Drive SE User Manual
Thanks for purchasing a Diamond Drive SE!
We hope you have as much fun playing guitar through this pedal as we did designing
and testing it. Our goal is to provide a new twist on classic drive tone, and to make it
just plain fun to play.
Remember to protect your hearing and wear appropriate hearing protection when playing loud…
Design Features
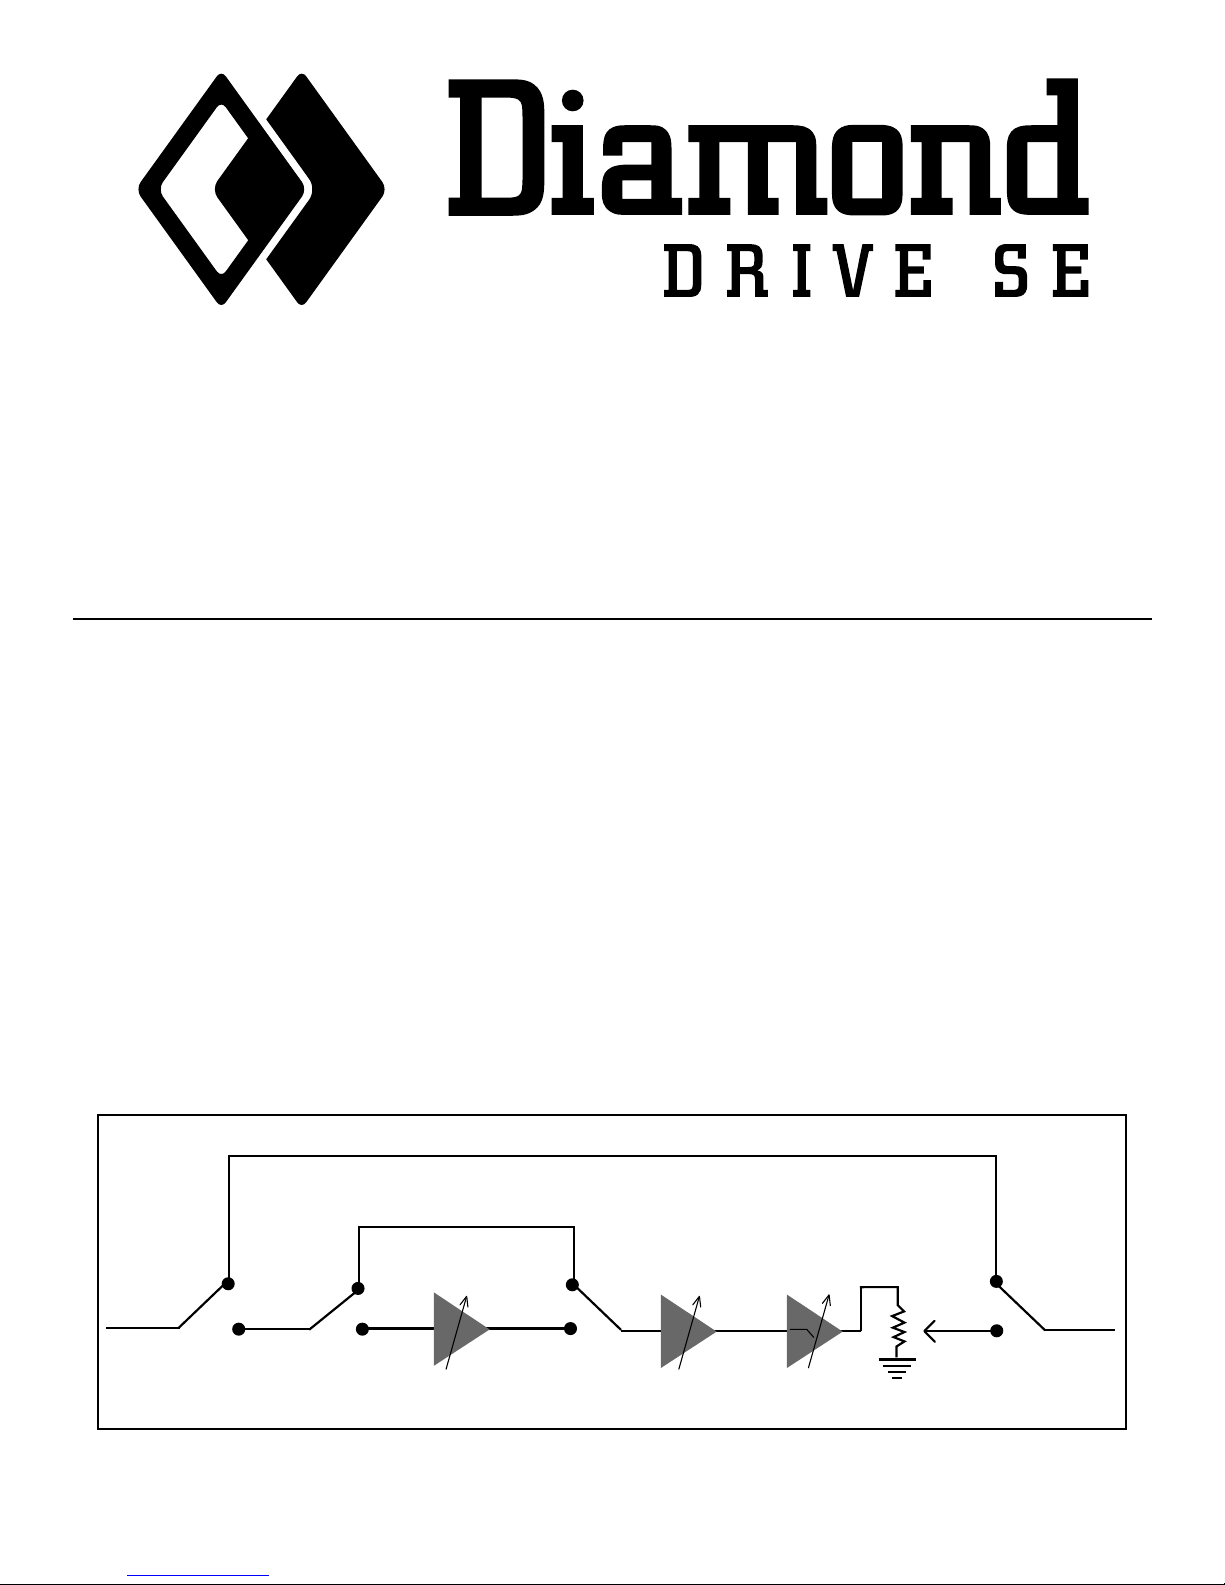
True bypass signal path
Dual stage overdrive / lead circuit
Premium audio components, including 2% polypropylene capacitors and 1% metal film
resistors.
Warmth control – replaces the traditional fixed frequency cut/boost circuit with a variable high-frequency cutoff filter coupled with variable low-frequency gain.
Switchable Diamond Drive signature raw compression or conventional overdrive compression.
Battery or standard negative tip 9V DC adapter operation.
1

Combination 1N34 germanium diode and silicon diodes.
Ohmite Little Demon carbon comp resistors in signal path.
Increased gain range over stock Diamond Drive.
Slight revoicing of tone control for more edge.
Controls
Drive
This controls the basic overdrive level. Backing it off gives a mild and controlled overdrive sound,
while opening it up gives more of a straight ahead distortion. Pickup output levels will also impact the drive level – humbuckers generally will more easily push the drive and your amp into
distortion. It’s important to note that the drive circuit and its control remain part of the signal
path even when switched to lead mode, with overall distortion controlled by a combination of the
drive and lead controls (and the warmth control too!).
Warmth
The tone control, as mentioned previously, is not a typical fixed frequency cut/boost circuit. The
warmth circuit acts as a low-pass filter coupled with gain boost as the cut off frequency drops.
This certainly adds a different flavor to the feel of the overdrive than traditional overdrive circuits. Moving the dial clockwise moves the filter cutoff point lower, darkening the signal, but at
the same time increasing gain, potentially adding more harmonics depending on the signal and
level.
Volume
This adjusts the overall output volume of the box. Once the relative levels of drive and lead are
set, this control can be used to adjust overall clean vs. effect levels.
Lead
This sets the output level of the lead circuit and determines the level of extra gain provided in
addition to the basic drive circuit. In many ways the lead circuit acts like the high gain stage in
a cascaded triode channel switching tube amp. Here, the lead circuit provides a stage of additional transistor amplification before the signal reaches the core op-amp based drive stage. With
the lead set to 12 noon or less, the effect is essentially a louder, more tonally aggressive version
of the basic crunch tone of the drive. Setting the lead past 3 PM pushes the pedal into a unique
combination of liquid sustain with a tinge of fuzz.
There are many different interesting combinations of drive, lead and warmth settings. You’ll get
great tone with everything set to 12 o’clock, but it’s worth taking some time to explore the dif-
ferent settings and interplay between the controls.
Switches
On/Off
This switches the pedal between bypass and in-circuit operation. A green LED indicates that the
pedal is on. The overdrive mode that the pedal switches to when turned on is dependent on the
current position of the lead switch.
2
 Loading...